• Skip to primary navigation
  • Skip to main content
  • Skip to primary sidebar
  • Home
  • Recipes
  • Features
    • Cookbook Reviews
    • Ingredient of the Week
    • Sunday Dinner
    • Fitness Goals
  • Travel
  • About
    • Privacy Policy
    • Cookie Policy
  • Work With Me

Katie at the Kitchen Door

Globally-inspired, seasonal recipes

Blog Page

20 November 11, 2013 Drink

Holiday Cocktails: Burnt-Sugar Hot Buttered Rum

Burnt-Sugar Hot Buttered Rum {Katie at the Kitchen Door}

Burnt-Sugar Hot Buttered Rum {Katie at the Kitchen Door}

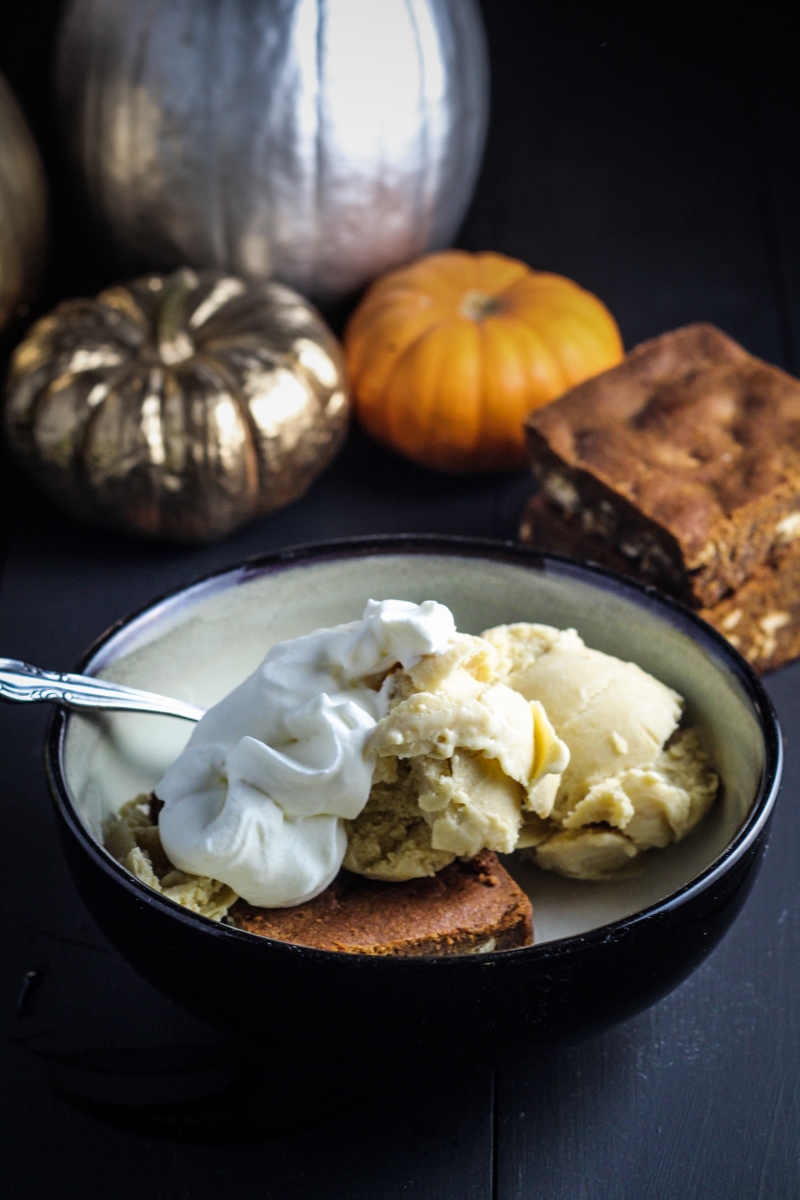
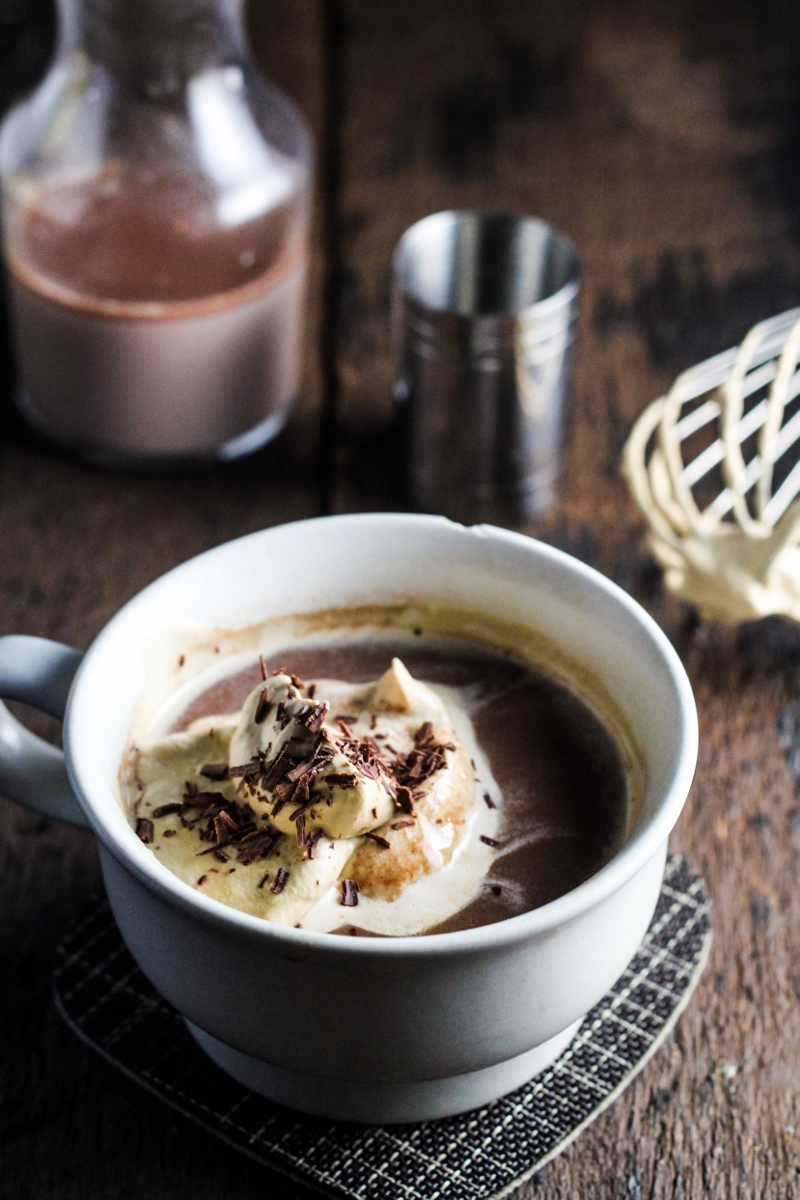
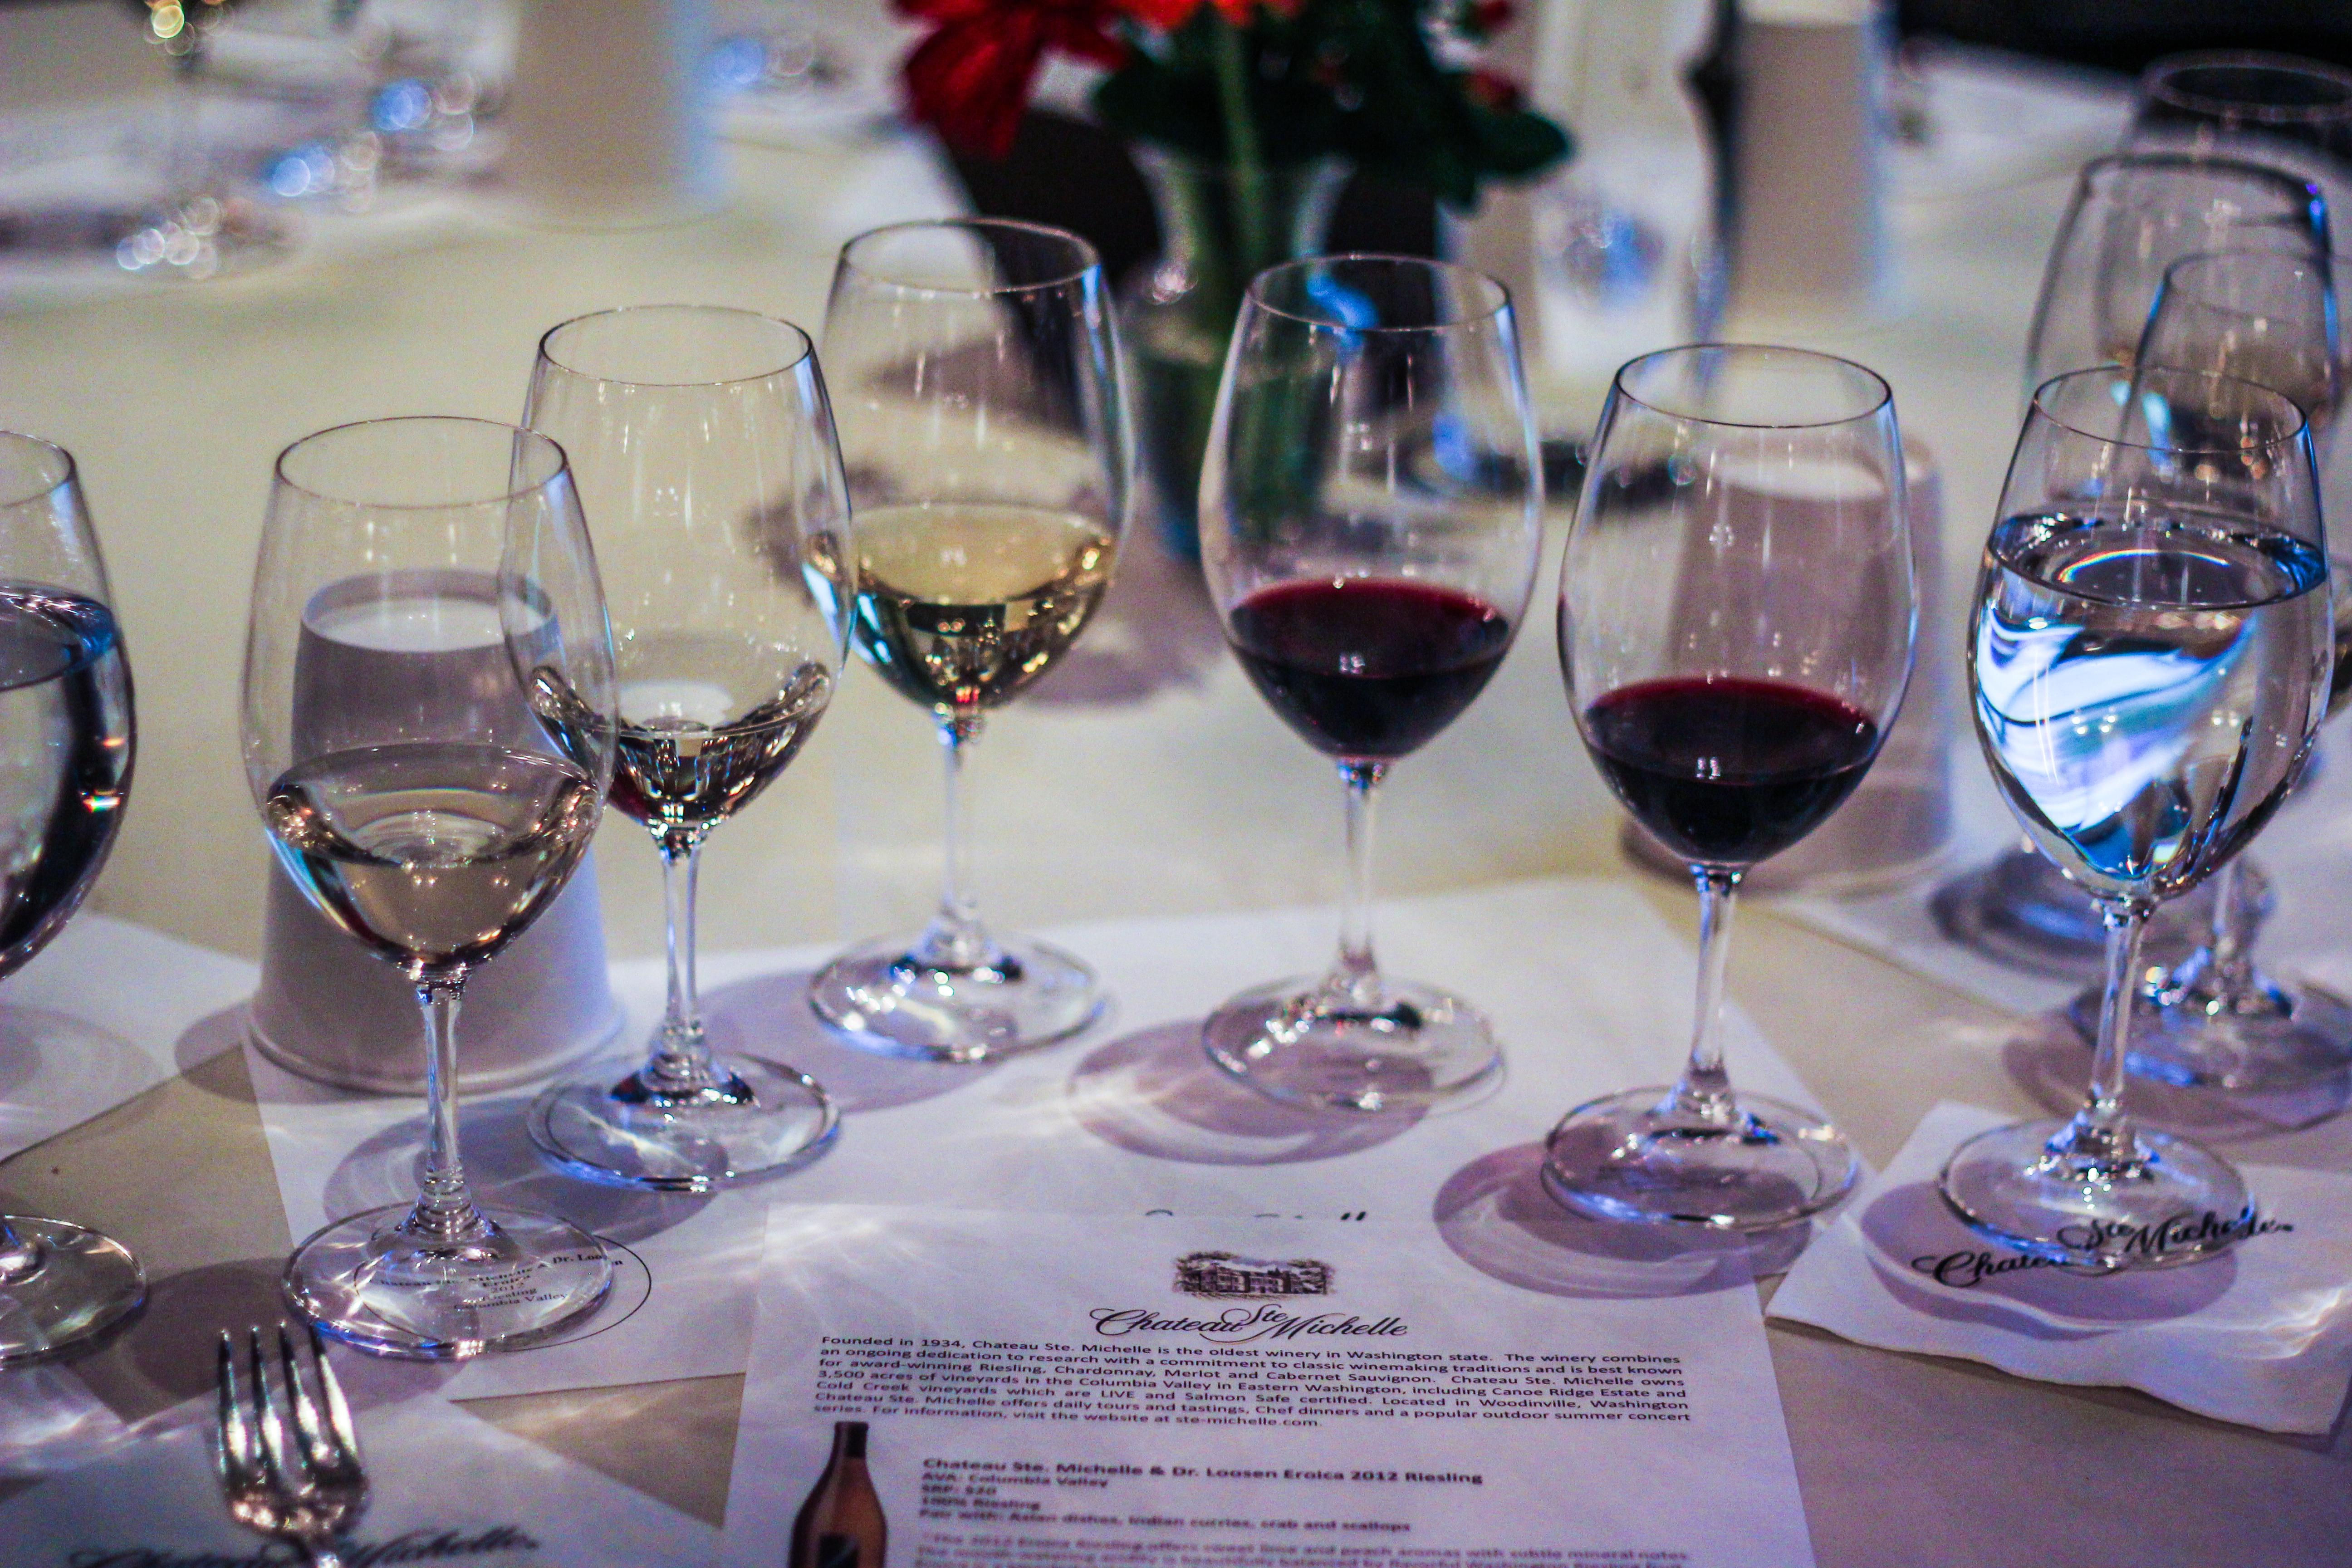
I love a hot drink in the winter. Not just the drink itself, but the anticipation of it as you trudge home in the cold, that first sip sending warmth flooding through your chest. Breathing in the steam, letting the spices and alcohol tickle your nose, even as your fingers are still stiff with cold. When I lived in Prague, a plastic cup filled to the brim with sweet mulled wine from the closest street vendor was a much-anticipated afternoon ritual, with a sleeve full of candied almonds in the other hand when I was feeling indulgent. As we get into the holiday season, with Thanksgiving right around the corner and Christmas following close behind, I want to share a few of my favorite seasonal drinks to help you get in the spirit, whether you’re cozying up to the fire with a good book or throwing the season’s best party.

Burnt-Sugar Hot Buttered Rum {Katie at the Kitchen Door}

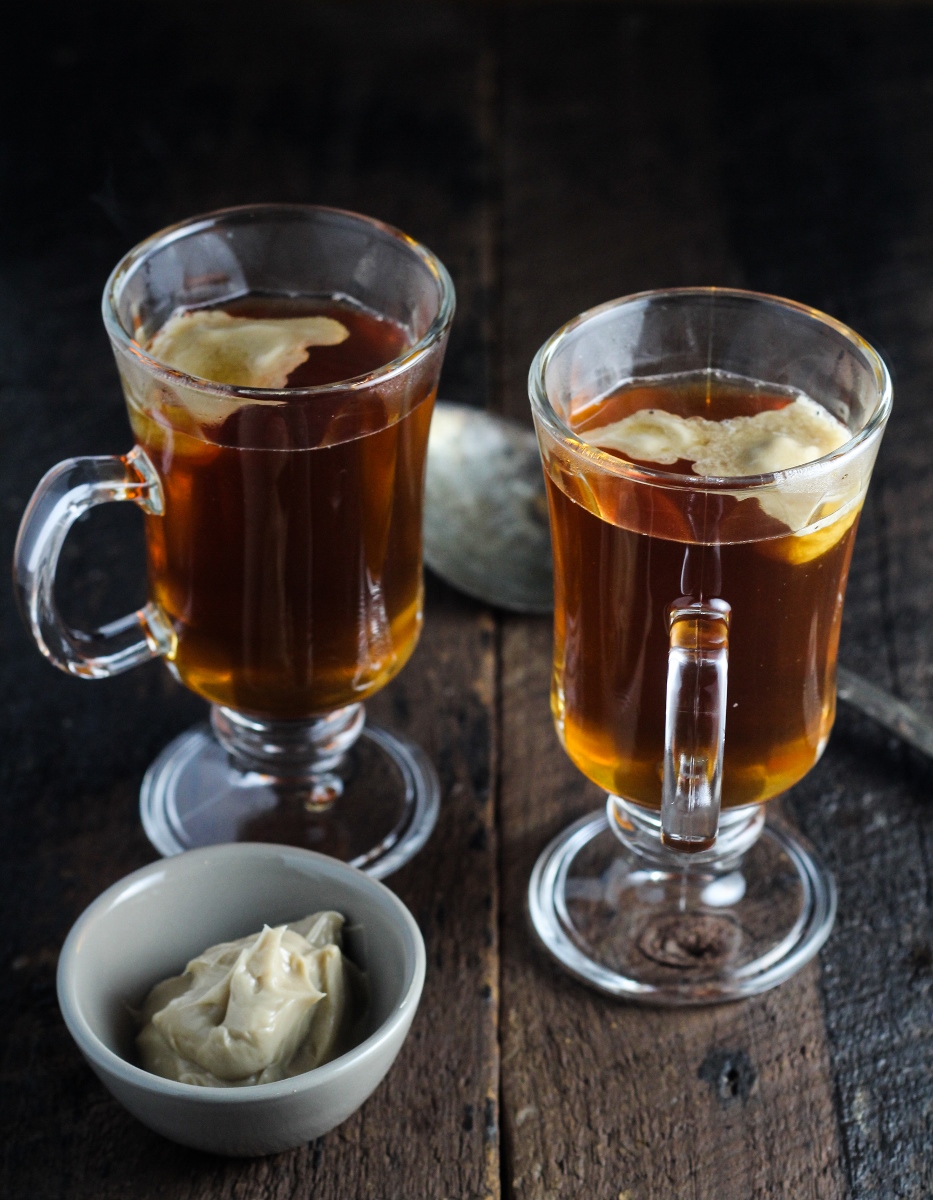
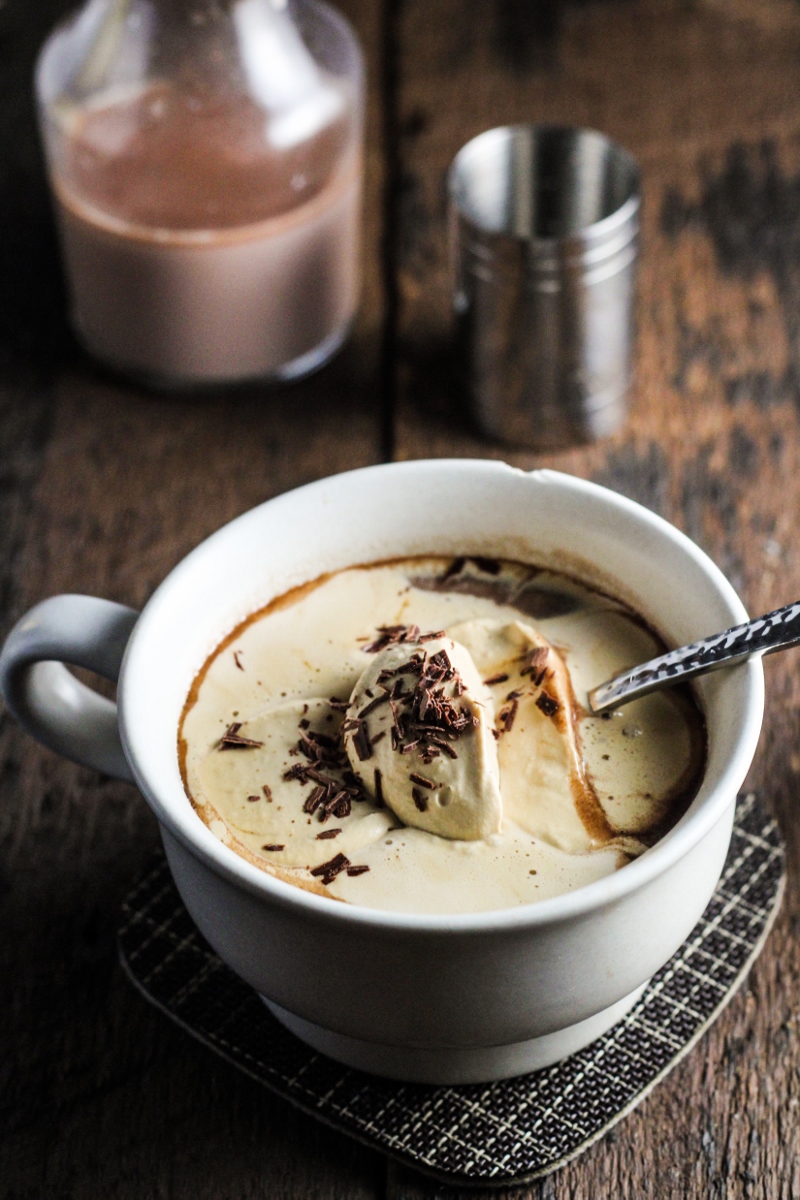
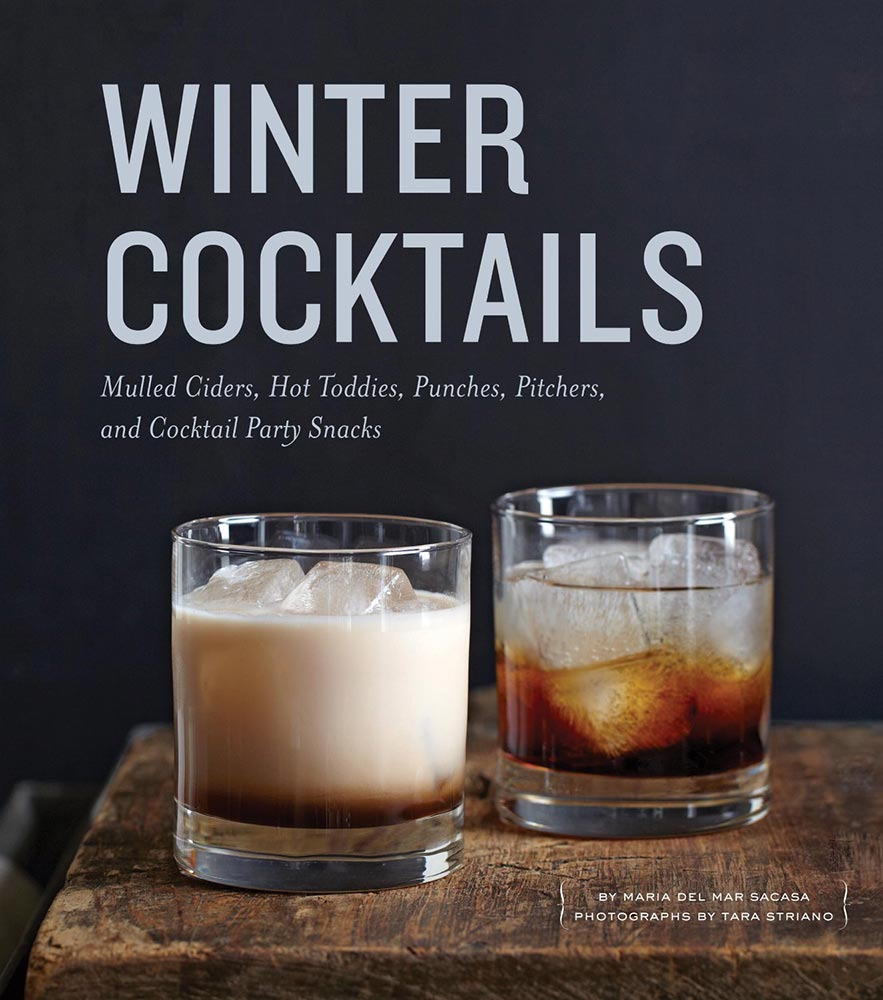
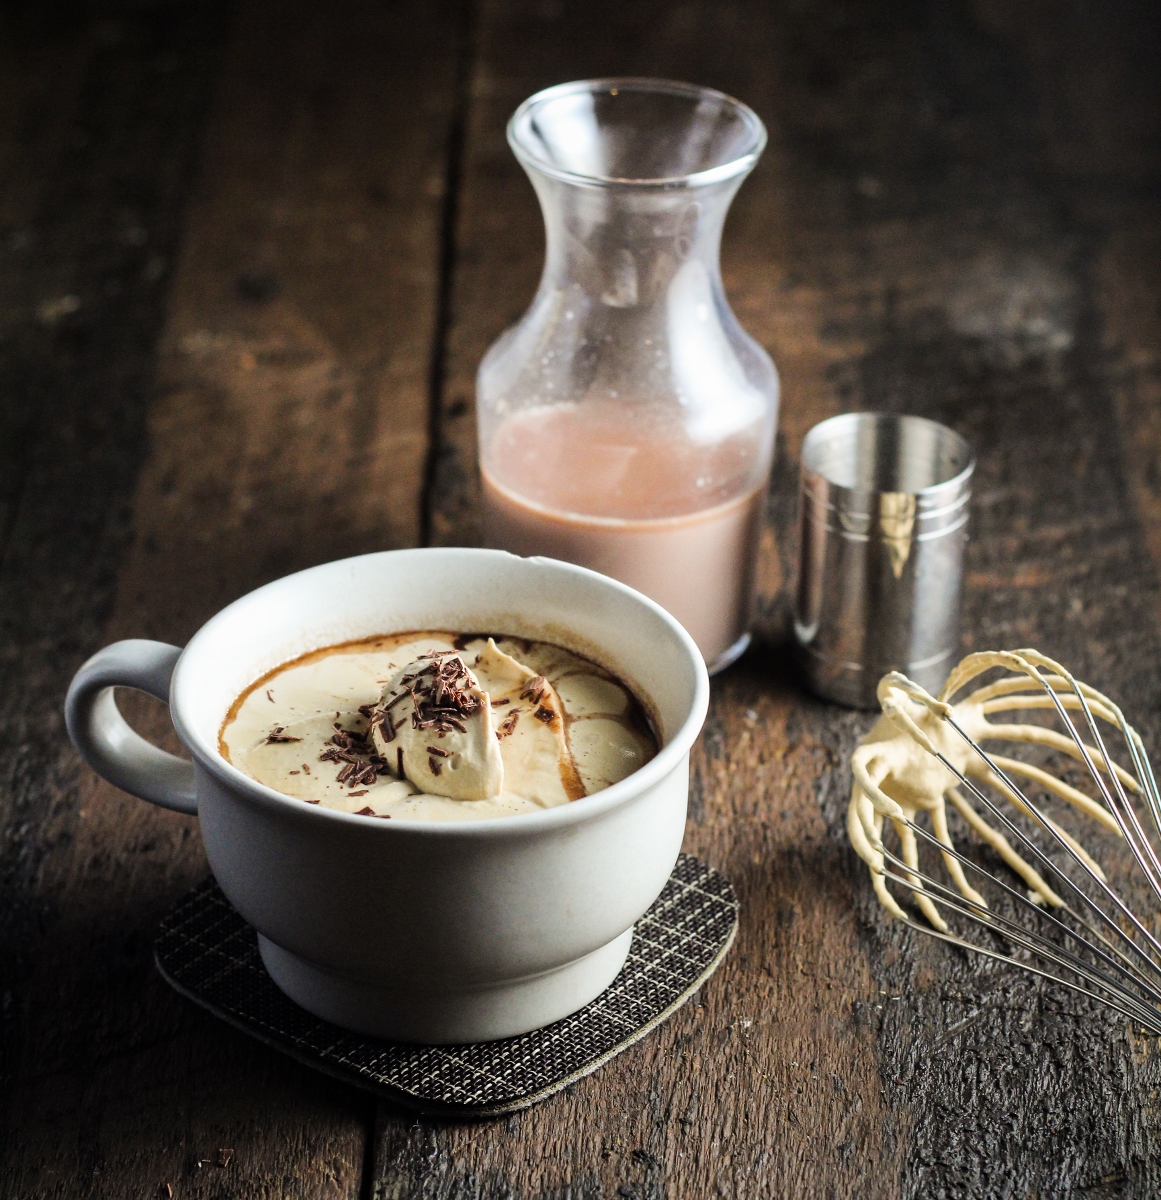
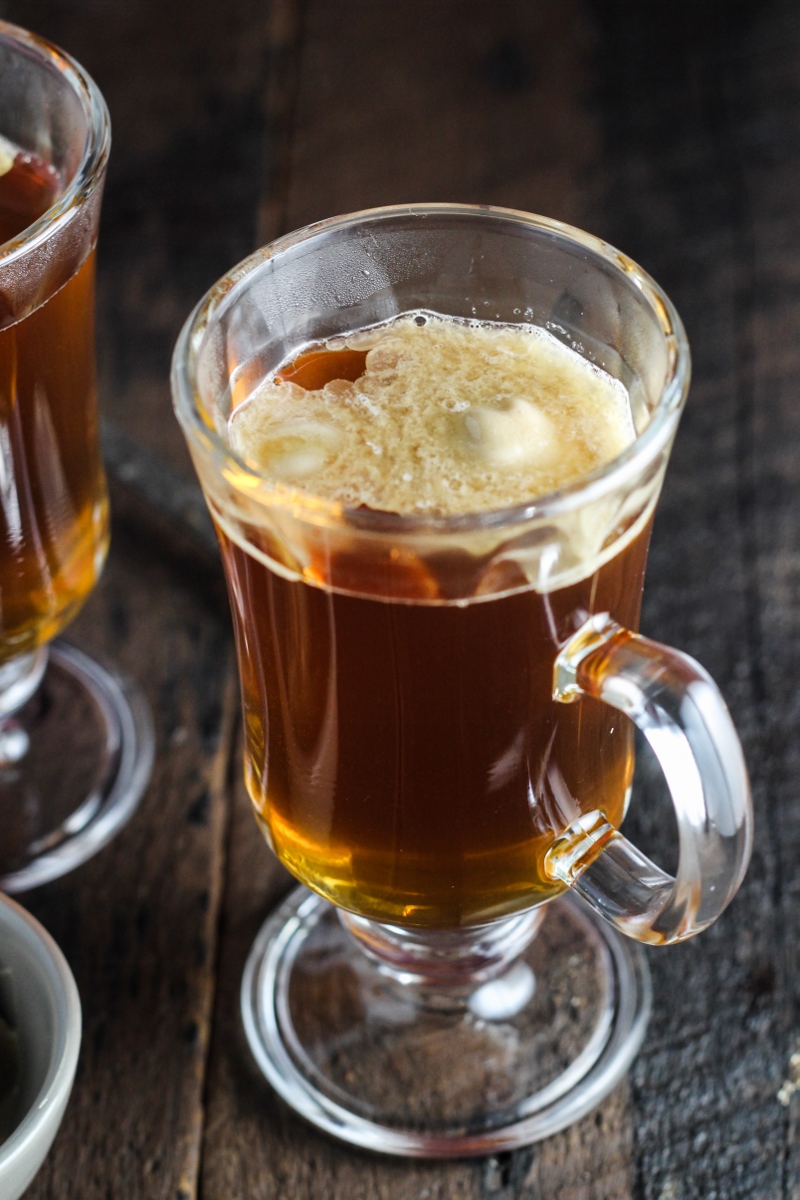
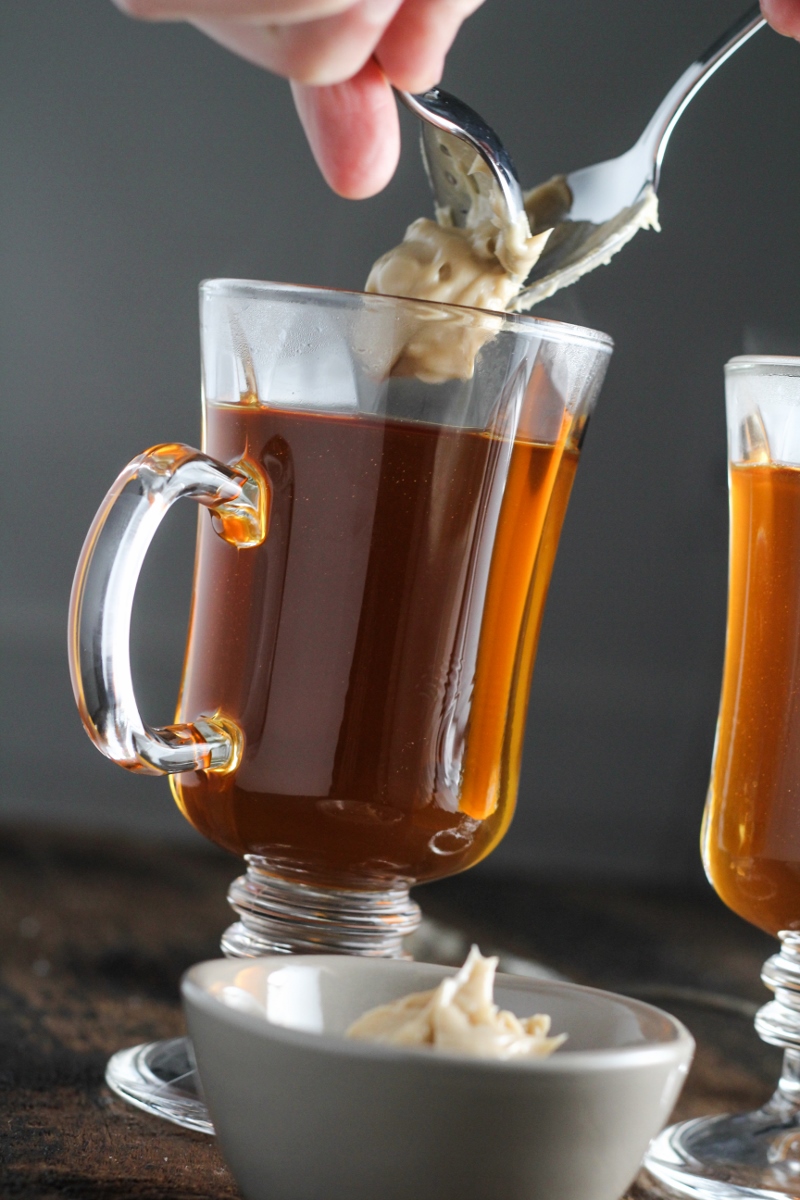
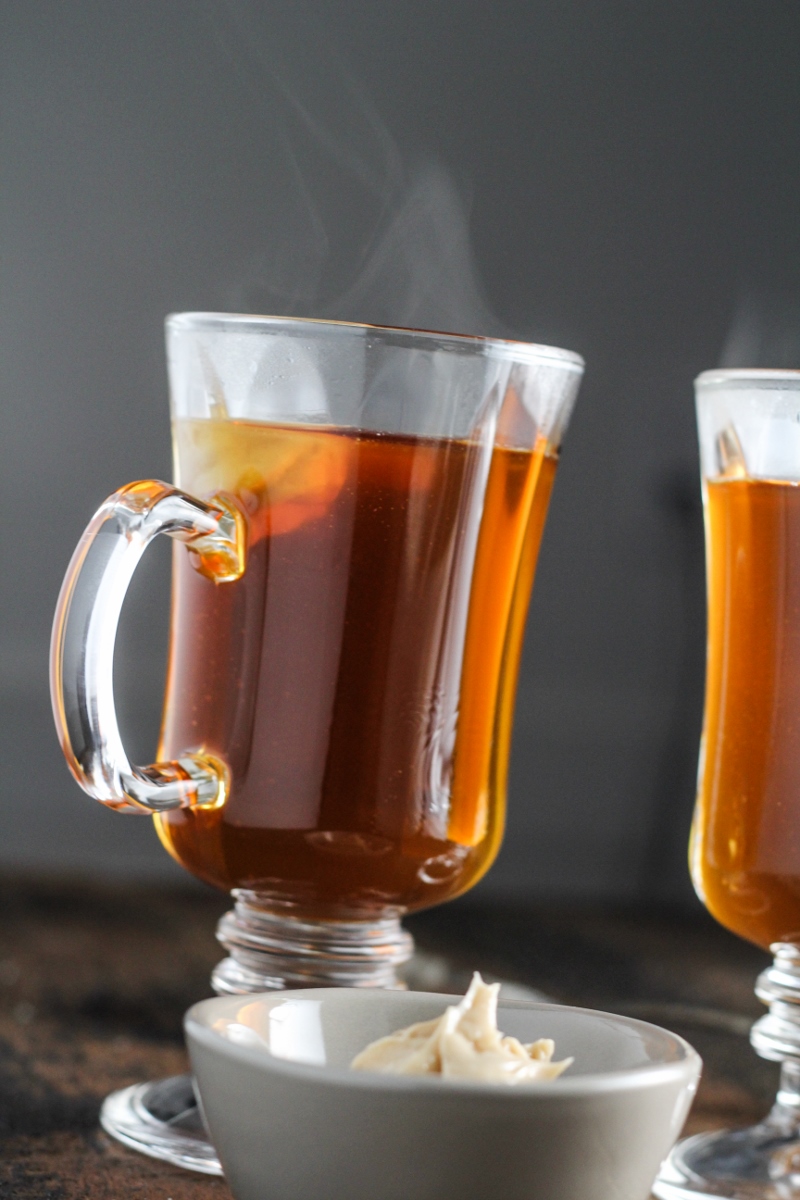
A little while back I reviewed a cookbook called Winter Cocktails, and I mentioned that the recipe we’ve been enjoying the most is Burnt-Sugar Hot Buttered Rum. We tried it a day or two after we received the book, and liked it so much that we whipped up a few big batches for our Halloween party a few weeks later. So far, everyone who has tried it has wanted seconds. It’s made by creating a dark amber caramel, adding a few cups of water to make a thin syrup, and then serving the hot, sweet syrup with an equal part rum and a pat of vanilla-butter melting into the top. It’s rich and over the top and a surefire way to get toasty fast, in both senses of the word. Give it a try the next time you’re feeling chilled.

Burnt-Sugar Hot Buttered Rum {Katie at the Kitchen Door}

Burnt-Sugar Hot Buttered Rum

Recipe adapted slightly from Winter Cocktails. Serves 6.

Note: We like to make these strong, with almost equal volumes of syrup and rum. Start with 1.5 oz of rum per glass, and taste as you go to find the ratio that works for you.

  • 2 TBS softened salted butter
  • 1/2 tsp vanilla extract
  • 2 tsp dark brown sugar
  • 1/8 tsp ground cinnamon
  • 3/4 c. sugar
  • 1/4 c. + 3 c. water, divided
  • 9 to 12 oz. dark rum
  1. Stir together the softened butter, vanilla extract, brown sugar, and cinnamon until smooth. Set aside
  2. Stir together the sugar and 1/4 c. water in a large heavy-bottomed saucepan. Heat over medium-high heat, swirling the pan occasionally, until mixture turns dark amber and just begins to smoke. Carefully add the 3 cups of water – the caramel will bubble violently and seize, so be prepared to stand back. Reduce heat to medium and stir until mixture is smooth. Add 1/2 c. of the hot syrup to each of 6 heatproof glasses, along with 1.5 to 2 oz. dark rum. Add 1 tsp of the vanilla butter to the top of each drink. Serve hot.

3 November 8, 2013 Fall

Soup Season // Ecuadorian Chicken and Rice Stew

Ecuadorian Chicken and Rice Stew {Katie at the Kitchen Door}

Ever since getting back from Russia, I can’t seem to get enough soup. I’ve been daydreaming about it: creamy sweet potato bisques, homemade chicken noodle spiked with chili oil, my mom’s El Cid chili with cornbread (for Sunday afternoon football watching), tangy tomato soup thickened with bread, and hearty bowls of Portuguese-style kale and linguica soup. I’ll take them all. Thankfully, soup is an easy, healthy way to feed yourself, so I can do more than daydream – I can make soup as often as I please. I find that making soup is the most intrinsic, relaxing form of cooking. There’s a rhythm to it, the chopping of onions and garlic, the sauteeing, more chopping, more sauteeing, adding spices, broth, root vegetables, stirring, simmering, smelling, stirring. When people ask me how they can start to learn to cook, I always recommend starting with soup. It’s wonderfully forgiving, and it’s hard to make a bad one. This soup – an Ecuadorian chicken and rice stew spiced with achiote, smoked paprika, and cumin – is no exception.

Ecuadorian Chicken and Rice Stew {Katie at the Kitchen Door}

I really enjoyed making this last Sunday. Trevor had tickets to the Pats game with his coworkers, so I had a long, chilly afternoon to myself. I went running, caught up on reading, swung by the grocery store, and made this stew, all without feeling rushed or stressed. After four frenetic months moving, traveling, and adjusting to a different pace of life, the fact that I’ll get to spend the entire month of November at home, cozying up with Trevor feels like an early Christmas present. Last Sunday afternoon was the first time in months that I really felt slowed-down, and filling my house up with the rich, spicy smell of this soup just cemented that feeling.

As far as taste goes, this stew is a winner. It’s quite hearty, made thick and creamy by the addition of rice and potatoes, and just a bit spicy from a combination of smoked Spanish paprika, achiote paste, and a dash of hot sauce. The recipe, which comes from Jose Garces’ The Latin Road Home (I reviewed it here last year, if you’re interested – it’s a great cookbook), said it serves four, but I think this recipe makes a huge batch, at least 8 filling servings. Which means, not only is it delicious, but also economical for feeding a family. Give this one a try this fall, I think you’ll like it.

Ecuadorian Chicken and Rice Stew

Recipe adapted slightly from The Latin Road Home. Serves 8-10.

  • 3 lb. bone-in, skin-on chicken thighs
  • sea salt and freshly ground black pepper
  • 2 TBS olive oil
  • 1 yellow onion, finely chopped
  • 1 red bell pepper, stem and seeds removed, diced
  • 6 cloves garlic, finely minced
  • 2 TBS whole cumin seeds
  • 2 TBS achiote paste (I used a Latin spice mix with achiote in it that I found at Wholefoods)
  • 1 tsp Spanish smoked hot paprika
  • 2 TBS tomato paste
  • 6 c. chicken stock
  • 2 fresh bay leaves
  • 1 1/2 lb. fresh tomatoes, preferably plum, cored and cubed
  • 1 c. long-grain white rice
  • 2 lb russet potatoes, peeled and diced
  • 3 carrots, peeled and diced
  • 1 lb. frozen peas
  • 1/2 tsp dried oregano
  • 1/4 c. minced fresh flat-leaf parsley
  • 1/4 c. minced fresh cilantro
  • hot sauce to taste
  1. Season the chicken thighs with salt and pepper. Heat the olive oil in a large, heavy-bottomed pot over medium heat, and sear the chicken pieces in batches. Cook thighs until skin is crispy and golden brown on both sides, flipping over once, about 4 minutes per side. Transfer the chicken to a plate.
  2. Lower the heat to medium, and add the onion and red pepper to the pot. Cook until softened and translucent, about 10 minutes. Add the garlic, cumin seeds, achiote paste, and paprika to the pot and cook, stirring, until spices are toasted and fragrant, about 2 minutes. Add the tomato paste, then return the chicken pieces to the pot. Add the chicken stock and bay leaves and bring to a boil. Stir in the tomatoes and cook for about 5 minutes. Add the rice, potatoes, and carrots, return soup to a simmer, then cover, and cook until chicken is falling off the bone and rice is fully cooked, about 40 minutes.
  3. Uncover the soup and stir in the peas, oregano, parsley, and cilantro. Let peas heat through, then season to taste and serve with hot sauce.

1 November 4, 2013 Dessert

Pumpkin and Gingerbread Ice Cream Sundaes

Pumpkin Ice Cream Sundae - Gingerbread Blondie, Pumpkin-Maple Ice Cream, Caramel Sauce, Whipped Cream {Katie at the Kitchen Door}

I’ve been thinking about this recipe for over a year now. The phrase “pumpkin ice cream sundae” popped into my head one day, and since then, I’ve been considering how to get this just right. I knew it had to have all of the components of a brownie sundae, but tweaked for fall. Some sort of gingerbready brownie. Super creamy pumpkin ice cream. Caramel sauce and whipped cream. I tinkered with the brownie base last year, but never hit on the right combination of brownie consistency and gingerbread taste, so I put it to rest until this fall. And now, I think I have it.

The key to getting the gingerbread base right was making the mental switch from “brownie” to “blondie.” A quick google search revealed that someone else had already perfected the recipe for me, so I made Pink Parsley’s White Chocolate and Gingerbread Blondies pretty much as written. For the ice cream, I used the Pumpkin-Maple Ice Cream from the new book Jenny McCoy’s Desserts for Every Season (I just reviewed it a few weeks ago, if you want to know more). It has 7 egg yolks in it, so I knew there wasn’t going to be a problem with creaminess. Topped off with a caramel sauce runny enough to drizzle and some fresh whipped cream, it was just what I was imagining – spicy, chewy blondie, sweet pumpkin ice cream, and rich and salty caramel sauce blending together in every bite.

Pumpkin Ice Cream Sundae - Gingerbread Blondie, Pumpkin-Maple Ice Cream, Caramel Sauce, Whipped Cream {Katie at the Kitchen Door}

But, as I was finally assembling this perfect fall dessert, I knocked my camera off the chair. Total klutz. Several minutes of panic ensued as I tried to get my relatively new, fairly expensive camera to turn back on while simultaneously wanting to smack myself repeatedly in the forehead. Thankfully, I switched out the lenses and realized that the camera works fine but the front of the lens had popped apart on impact. I still feel like an idiot, but it’s one of my cheaper lenses, so if I can’t get it repaired it won’t devastate my bank account to replace it. Speaking of, does anyone know of any good camera repair shops in Boston? Or should I just send it straight to Canon? Anyway, if this sundae looks a little melty/panic-tinged, that’s the reason. On the other hand, I really needed an ice cream sundae after all that camera-stress, and a perfect one was sitting right in front of me.

Pumpkin Ice Cream Sundae - Gingerbread Blondie, Pumpkin-Maple Ice Cream, Caramel Sauce, Whipped Cream {Katie at the Kitchen Door}

Pumpkin and Gingerbread Ice Cream Sundaes

Serves 1.

  • 1 gingerbread blondie, recipe below
  • 2 scoops pumpkin-maple ice cream, recipe below
  • 3 TBS caramel sauce, recipe below
  • 1/4 c. heavy cream, beat into soft peaks, OR canned whipped cream
  • chopped nuts for topping
  1. Assemble, serve, be happy.

White Chocolate Gingerbread Blondies

Recipe adapted slightly from Pink Parsley. Makes one 9×13 inch pan.

  • cooking spray
  • 2 3/4 c. flour
  • 1 1/2 tsp baking soda
  • 1/2 tsp salt
  • 1 1/2 tsp ground cinnamon
  • 1 tsp ground ginger
  • 1/2 tsp ground nutmeg
  • 1/4 tsp ground cloves
  • 2 sticks salted butter, softened
  • 1 1/4 c. packed brown sugar
  • 1/2 c. white sugar
  • 2 large eggs plus 1 large egg yolk
  • 1 1/2 tsp vanilla extract
  • 1/3 c. molasses
  • 12 oz. (1 bag) high-quality white chocolate chips
  1. Preheat the oven to 350°F. Spray a 9×13 inch baking dish with cooking spray.
  2. In a medium bowl, whisk together the flour, baking soda, salt, cinnamon, ginger, nutmeg, and cloves, until evenly mixed. In a separate, large bowl, beat the softened butter until light and creamy. Add the sugars and beat to incorporate fully. Add the eggs/egg yolk one at a time, beating well between each addition. Beat in the molasses and vanilla, then add the flour mixture 1/3 at a time, incorporating fully between additions.
  3. The batter will be very thick at this point. Stir the white chocolate chips in to the batter to distribute evenly throughout. Spoon the batter into the prepared baking pan, and smooth the top with the back of a wooden spoon. Bake for 35-45 minutes, or until the top is golden brown and a toothpick poked into the center of the pan comes out clean. Let cool completely in the pan before cutting and serving.

Pumpkin Ice Cream Sundae - Gingerbread Blondie, Pumpkin-Maple Ice Cream, Caramel Sauce, Whipped Cream {Katie at the Kitchen Door}

Pumpkin-Maple Ice Cream

Recipe from Jenny McCoy’s Desserts for Every Season. Makes 1 quart.

  • 7 large egg yolks
  • 1 cup grade B maple syrup
  • 1 1/2 c. whole milk
  • 1 1/2 c. heavy cream
  • 1/4 tsp fine sea salt
  • 1/4 tsp ground cinnamon
  • generous pinch ground ginger
  • generous pinch ground nutmeg
  • 3/4 c. roasted sugar pumpkin and kabocha squash
  1. Prepare a large bowl of ice water and set aside. In a separate, large bowl, whisk the egg yolks together, then set aside.
  2. In a medium saucepan, simmer the maple syrup over medium heat until the volume is reduced by half. Add the milk, cream, salt, cinnamon, ginger, nutmeg, and pumpkin puree, and bring to a boil. Slowly pour the hot cream over the egg yolks, whisking the eggs vigorously as you do so, until the mixture is fully combined.
  3. Strain the mixture through a fine-mesh sieve into a large, heatproof bowl. Place this bowl over the ice water and stir until cool. Refrigerate the ice cream base until thoroughly chilled, then churn according to your ice cream maker’s instructions. It will have a soft-serve like consistency when done – freeze for 4 hours to set before serving.

Caramel Sauce

Makes about 1 1/4 cups.

  • 1 c. sugar
  • 4 TBS butter
  • 1 c. heavy cream
  1. Pour the sugar into the bottom of a heavy-bottomed saucepan in an even layer. Place over medium heat, and melt sugar, whisking frequently. As you whisk, the sugar will clump up, but once melted, all the clumps should dissolve. As soon as all the sugar is melted, stop whisking but swirl slightly. Watch the sugar closely as it begins to darken. As soon as it reaches a golden caramel color, add the butter all at once. Be careful, the caramel will bubble violently when you do this. Whisk the butter in until melted.
  2. Once the butter is melted, add the heavy cream. Again, be careful. The caramel may seize up in the middle, but keep whisking it and it will dissolve into the heavy cream eventually. Once dissolved, let bubble gently, still whisking, for about 2-3 minutes, then remove from heat and let cool slightly. Serve warm.

5 November 2, 2013 Cookbook

Book Club: Winter Cocktails // Nutella Melt with Frangelico

Winter Cocktails

Winter Cocktails

The Book: I have been having so much fun with Winter Cocktails, the new cocktail book from the extremely talented ladies behind Cookin’ and Shootin’. Too much fun, probably, given the fact that based on current trends it looks like I’m going to be drinking my way through the changing seasons. The drinks that Maria and Tara have included here are perfect for cooler weather and cozy evenings at home – some are served hot, others are rich and creamy, and festively-spiced punches and chilled drinks round out the mix. There’s lots of tea, chocolate, cider, and whiskey to be found in these pages. As someone who until recently considered making a drink to be pouring a shot of tequila into whatever I was already drinking, the flavor combinations that are incorporated into these drinks – like kumquat-and-thyme-infused gin, English breakfast tea with cherry bitters and whiskey, and lemongrass-spiked coconut milk with rum – are stepping up my cocktail game quite a bit. I also found the introduction, with info on types of glasses, basic bar-tending techniques, and the liquors that any well-stocked bar should have, to be very useful.

Frangelico-Spiked Nutella Melt with Espresso Whipped Cream {Katie at the Kitchen Door}

Beyond the drinks themselves, there are also serving tips, party notes, and recipes for accompanying party snacks like Cheese-Crusted Olives and “Pigs on Cushions.” Like other Quirk books, the book is in a nice, small format (I love smaller cookbooks, I read them on the subway like a total food dork), with high quality paper and integrated design. Drinks and glassware are really challenging to photograph, so I especially appreciate the quality and variety of images that Tara has created. One word of caution: some of the drinks are a bit more complicated than shaking and pouring, so expect to set aside 15-20 minutes to prepare most of the drinks in this book. Longer than it takes to open a beer, yes, but so worth it. 

P.S. Check out the cute book trailer Maria and Tara made

Frangelico-Spiked Nutella Melt with Espresso Whipped Cream {Katie at the Kitchen Door}

The Drinks: One nice thing about drink cookbooks – it’s easy to test a lot of recipes, which is exactly what we’ve been doing. The first thing we tried was the Red Riding Hood, a spiced mulled cider mixed with red wine. We actually found it a little too dry, so we added a shot of Grand Marnier to each glass and then it was pretty much perfect. One of our favorites so far is the Burnt-Sugar Hot Buttered Rum, which we served en-masse at our Halloween party last night. It’s syrupy sweet and boozy, a quick and decadent way to imbibe. And the recipe pictured here, also no stranger to decadence, is a Frangelico-spiked Nutella Melt, served with espresso-flavored whipped cream. It’s a lot like hot chocolate, but with more nuanced flavors and the added benefit of being able to lick the Nutella spoon after you make it. It would be the perfect thing to sip on by the fire after a day playing in the snow. I might secretly stock my parents liquor cabinet with the ingredients so that we can have it there this winter (no fireplace at my house…). Definitely don’t skip the espresso-whipped cream – it’s easy and it really ties the drink together!

Recipe Short-List: Applejack Hot Toddy (with maple syrup, applejack, and cinnamon tea); Liquid Gold (mulled pineapple juice and rum); Pumpkin Bourbon Eggnog; Cherry-Vanilla Hot Chocolate; Chocolate Stout Affogato; Orchard Fête (maple syrup, apple cider, applejack, and rosemary)

Disclaimer: I received a review copy of Winter Cocktails free of charge from Quirk, but was not otherwise compensated for writing this review.

Frangelico-Spiked Nutella Melt with Espresso Whipped Cream {Katie at the Kitchen Door}

Nutella Melt

Recipe from Winter Cocktails. Serves 4.

Note: to toast both the hazelnuts and coconut flakes, you can spread them (do one ingredient at a time) in a dry frying pan over medium heat, and toast, stirring frequently, until golden brown. Alternatively, you can top your drink with chocolate curls, like I did.

  • 4 c. whole milk
  • 1/4 c. Nutella, or other chocolate-hazelnut spread
  • pinch salt
  • 6 oz. Frangelico, or other hazelnut liqueur
  • 1 c. heavy cream, chilled
  • 1/4 c. confectioner’s sugar
  • 2 tsp instant espresso powder
  • 1/4 c. toasted hazelnuts, chopped, for garnish
  • toasted coconut flakes, for garnish
  1. Bring the milk, Nutella, and salt to a simmer in a medium saucepan over medium heat, stirring until Nutella is completely dissolved. Taste for chocolate flavor and body, and add more Nutella if desired. Stir in hazelnut liqueur, and remove from heat.
  2. Whip the heavy cream together with the confectioner’s sugar and espresso powder until soft peaks have formed. Ladle the drink into warmed cups, and top with a big spoonful of whipped cream. Garnish with the chopped hazelnuts and toasted coconut flakes.

26 October 28, 2013 Fall

Sunday Dinner // Braised Lamb Shanks with Fresh Corn and Blue Cheese Polenta, Brussels Sprouts, and Classic Apple Pie

Sunday Dinner: Braised Lamb Shanks with Blue Cheese Polenta {Katie at the Kitchen Door}

I’ve been wanting to do another Sunday Dinner post since the last one I wrote in July, but, as I’ve probably mentioned one too many times, the second half of this year has turned out kind of nutty. So, before my most recent trip to Russia, I made it a priority to do a real Sunday dinner menu. I had gone a little crazy at the farmer’s market that Friday, walking home with 4 pounds of apples, 4 pounds of beets, fresh sweet corn, and brussels sprouts still on the stalk. I sometimes forget that there’s still plenty of late summer produce mingling with all the fall favorites at the farmer’s market in October – the corn is still wonderfully sweet, the last big, juicy tomatoes tempt everyone, and ripe melons sit side-by-side with pumpkins. Combined with the root vegetables, cabbages, brussels sprouts, squashes, apples, and pears that are so plentiful, these veggies make the middle of fall one of the most abundant times of year.

Sunday Dinner: Braised Lamb Shanks with Blue Cheese Polenta {Katie at the Kitchen Door}

Since we had two lamb shanks in the freezer that needed to be put to good use, we decided to make a slow-braised lamb in a rich tomato sauce, served over polenta jazzed up with fresh corn and blue cheese, and a side of roasted brussels sprouts. With a few glasses of a nice red wine and a classic apple pie for dessert, it was a delicious summer-meets-fall dinner (and then I flew off to St. Petersburg where there was more of a fall-meets-winter thing going on). In all honesty, this is one of the best meals I’ve had in recent memory – fall-off-the-bone tender lamb in a tangy sauce and rich and cheesy polenta with bursts of sweet fresh corn make a really excellent pairing, perfect for a lazy, chilly, Sunday afternoon.

Sunday Dinner: Apple Hand Pies {Katie at the Kitchen Door}

The Menu

Braised Lamb Shanks with Gremolata (adapted from Bon Appetit) – see recipe below
Creamy Polenta with Fresh Corn and Blue Cheese – see recipe below
Roasted Brussels Sprouts
Classic Apple Pie

Past Sunday Dinners:

May 26, 2013: Coffee-and-Chile Rubbed Strip Steaks with Chimichurri Sauce; Charred and Smoky Belgian Endives; Oven-Roasted Potatoes; Strawberry-Sour Cream Ice Cream

July 1, 2013: Strawberry-Lime Agua Fresca; Smashed Pea, Dill, and Feta Crostini; Chilled Asparagus Soup with Meyer Lemon Yogurt; Mustard Spaetzle with Mushrooms; Ricotta Bavarese with Red-Wine Poached Rhubarb

Sunday Dinner: Braised Lamb Shanks with Blue Cheese Polenta {Katie at the Kitchen Door}

Braised Lamb Shanks with Gremolata

Recipe adapted slightly from Bon Appetit. Serves 4.

  • 4 lamb shanks (about 3 lbs.), trimmed
  • 1 TBS kosher salt
  • 1 tsp. freshly ground black pepper
  • 2 tsp. minced fresh rosemary
  • 1 tsp coarsely ground fennel seeds
  • 4 garlic cloves, 1 grated, 3 minced
  • 2 TBS olive oil
  • 1 large onion, minced
  • 1 TBS flour
  • 1 tsp paprika
  • 1/2 tsp crushed red pepper flakes
  • 1 cup canned diced tomatoes
  • 1/4 c. dry white wine
  • 2-3 c. chicken broth

For the gremolata:

  • 3/4 c. flat leaf parsley, minced
  • 2 cloves garlic, minced
  • 1 TBS finely grated lemon zest
  • 1 tsp minced fresh rosemary
  1. Place the lamb shanks on a rimmed baking sheet. Stir salt, black pepper, minced rosemary, ground fennel seeds, and grated garlic together in a small bowl, then massage into lamb. Cover and let sit at room temperature for 1 hour, or refrigerate overnight.
  2. Preheat the oven to 350°F. Heat the olive oil in a large dutch oven over medium heat, add onions and saute until golden, about 10 minutes. Add minced garlic, flour, paprika, and red pepper flakes and stir vigorously to distribute flour. Cook until mixture becomes dry, about 1 minute, then add tomatoes and wine. Simmer, stirring frequently, until mixture begins to thicken and tomatoes are breaking down, about 10 minutes. Stir in 2 cups of the chicken broth and simmer for about 5 minutes. Season to taste with salt and pepper. Add lamb shanks to pot in a single layer, pushing them down into the sauce. If necessary, add additional chicken broth so that the shanks are about 3/4 submerged
  3. Roast, uncovered, for 30 minutes, then use tongs to flip the shanks over and roast for another 30 minutes. Then, cover the pot and cook, turning the shanks occasionally, until the meat is falling off the bone, about 45-90 minutes. Remove from oven and skim fat off the surface. Let shanks rest in liquid for 20 minutes before serving.
  4. Stir the gremolata ingredients together and let sit for 30 minutes. Serve on top of the lamb shanks.

Creamy Polenta with Fresh Corn and Blue Cheese

Serves 4-6.

  • 2 c. water
  • 2 c. milk
  • 2 TBS butter
  • 1/2 tsp salt
  • 1 c. polenta
  • kernels from 3 ears fresh corn (about 3 cups)
  • 1/2 c. crumbled blue cheese
  1. Bring the water, milk, butter, and salt to a boil in a medium saucepan. Gradually add the polenta to the boiling liquid, whisking as you do so. Once all the polenta has been added, lower the heat to low, and cook, stirring continuously, until the polenta is thick and creamy, about 10-15 minutes. Add the fresh corn kernels, and cook 2 minutes longer. Season to taste with salt and pepper, and remove from heat. Serve hot, with blue cheese crumbled over each bowl.

Sunday Dinner: Apple Hand Pies {Katie at the Kitchen Door}

3 October 25, 2013 Cookbook

Book Club: Jenny McCoy’s Desserts for Every Season

Jenny McCoy’s Desserts for Every Season

Jenny McCoy's Desserts for Every Season

The Book: If you’re looking to update your go-to dessert recipes to something more elegant, modern, and seasonal, you are going to want to pick up a copy of Jenny McCoy’s Desserts for Every Season. There’s nothing run of the mill here – the recipes are unique and impressive but still uncomplicated. I love the emphasis on produce and seasonality – every recipe is firmly anchored to a time of year, which is something I’m glad to see, given that there seems to have been less emphasis on this in pastry than in main courses during the whole farm-to-table/seasonal/local movement. Although, I will say that Jenny’s “spring” recipes are definitely more like late July recipes for New England, given the inclusion of blueberries and lavender. As far as design goes, the whole book has a classy, subdued aesthetic that I very much like, with muted tones, botanical prints, and sedate, full-page pictures for most recipes. This will definitely be a book that I turn to for every future dinner party I plan.

Pumpkin and Milk-Chocolate Pie with a Gingersnap Crust {Katie at the Kitchen Door}

The Food: The fact that some of the pages are already stuck together with sugar spills is a good sign, right? I tested this book out by making two pumpkin desserts  to celebrate October – a Pumpkin-Maple Ice Cream, and this Pumpkin Pie with a Gingersnap Crust and Milk Chocolate Ganache. I actually haven’t tried the ice cream yet (I made it right before I left on this trip and stuck it straight in the freezer as a treat for when I get back), but the base tasted delicious. This pie, however, I did taste, and it’s quite good. The pumpkin custard is a fairly typical pumpkin pie filling, although I love that it’s made with fresh pumpkin puree. But the two twists – a spicy, buttery gingersnap crust and a rich chocolate ganache – make this pie something special. If my mom gives up her pie-making rights, maybe I’ll bring it to Thanksgiving this year.

Recipe Shortlist: Honey-Roasted Pear Sorbet; Chestnut-Chocolate Layer Cake; Butterscotch Budino with Creme Fraiche; Cocoa-Lavender Cream Puffs; Peach and Sweet Corn Ice Cream Cake; Plum-Poppy Seed Kolache

Disclaimer: I received a review copy of Jenny McCoy’s Desserts for Every Season free of charge from Rizzoli, but was not otherwise compensated for writing this review.

Pumpkin and Milk-Chocolate Pie with a Gingersnap Crust {Katie at the Kitchen Door}

Pumpkin Milk Chocolate Pie with a Gingersnap Crust

Recipe from Jenny McCoy’s Desserts for Every Season. Serves 8-10.

  • nonstick cooking spray
  • 1 1/2 c. (about 6 oz.) gingersnap cookie crumbs
  • 2 TBS plus 1/2 cup light brown sugar, divided
  • 3/4 tsp fine sea salt, divided
  • 5 TBS unsalted butter, melted
  • 1 1/2 c. Roasted Sugar Pumpkin and Kabocha Squash (recipe below)
  • 4 large eggs
  • 1 large egg yolk
  • 3/4 c. plus 3 TBS heavy cream, divided
  • 1 TBS molasses
  • 1 tsp pure vanilla extract
  • 1/2 tsp ground cinnamon
  • 1/4 tsp ground ginger
  • 1/4 tsp ground nutmeg
  • 1/2 c. (3 oz.) milk chocolate chips
  • 1 TBS light corn syrup
  1. Preheat the oven to 350ºF. Spray a 9-inch pie plate with nonstick cooking spray and set aside.
  2. Stir together the gingersnap crumbs, 2 TBS of the brown sugar, 1/4 tsp of the sea salt, and the melted butter. (If you are using whole gingersnaps, you can crush them and combine with the other ingredients by blending everything in a food processor.) Stir until the mixture has the consistency of wet sand, then pour into the pie plate and pack very firmly and evenly against the bottom and sides of the pan. Bake for about 8 minutes, or until the crust is slightly puffed and a bit darker in color. Let cool at room temperature for 5 minutes, then freeze until ready to use.
  3. Change the oven temperature to 325°F. In a large bowl, whisk together the remaining 1/2 c. brown sugar, the remaining 1/2 tsp salt, the roasted pumpkin, the whole eggs, the egg yolk, 3/4 c. of the heavy cream, molasses, vanilla, cinnamon, ginger and nutmeg until completely smooth. Pour the custard into the pre-baked pie crust. Carefully transfer to oven, and bake until custard is set in the center when the pie is slightly jiggled, about 50 to 60 minutes. Let cool to room temperature, then refrigerate for at least 30 minutes to set.
  4. About 25 minutes before you are ready to serve the pie, prepare the milk chocolate ganache. Place the chocolate chips in a large heatproof bowl and set aside. Place the remaining 3 TBS of heavy cream and the corn syrup in a small saucepan and bring to a boil. Pour over the chocolate, let stand for 2 minutes, then gently whisk the ganache until smooth. Spread the ganache over the center of the pie, leaving a slight gap between the crust and the chocolate. Refrigerate for 20 minutes to set the ganache. Serve chilled, with whipped cream.

Roasted Sugar Pumpkin and Kabocha Squash

Recipe from Jenny McCoy’s Desserts for Every Season. Makes 8 cups of puree.

  • One 4-lb sugar pumpkin
  • One 4-lb kabocha squash
  1. Preheat the oven to 350°F. Cut the pumpkin and squash into eighths, then remove and discard the seeds. Place the pumpkin and squash pieces in a large baking dish, fill with about 1/4 inch of water, and cover with aluminum foil. Roast for 1 hour to 1 hour and 15 minutes, until the flesh is fork tender.
  2. When the pumpkin and squash pieces are cool enough to handle, use a large spoon to scrape the flesh out of the skins, discarding the skins. Puree the pumpkin and squash flesh in a food processor or blender until totally smooth (don’t skip this! It makes a big difference in the consistency of your baked goods). Let cool to room temperature before using in a recipe. You can freeze any leftover puree for up to 3 months.

6 October 23, 2013 Beef

Stuffed Peppers with Black Beans, Quinoa, Beef, and Chipotle Sauce

Quinoa, Black Bean, and Ground Beef Stuffed Peppers {Katie at the Kitchen Door}

I have two more days in Russia, and although it’s been a good trip, I’m looking forward to going home. Mostly because I miss Trevor. I know, I’m a huge sap, but he’s the best (he had brownies sent up to my hotel room! From 4,000 miles away!) Also, I kind of miss my parents, freezing rain is not my favorite type of weather, so… yeah, I will be happy when we land in Boston. But I promise to enjoy my last two nights.

Quinoa, Black Bean, and Ground Beef Stuffed Peppers {Katie at the Kitchen Door}

Since we eat out for every meal here, I try to be especially conscious of the choices I’m making at restaurants and of maintaining a healthy lifestyle in general. I have some things working in my favor – a free gym which I can use without leaving the building, about 8-gillion bottles of water dropped off in my room every day, and limited mindless snacking options. But other things, like the propensity to serve sour cream with everything here, and the temptation to order a glass of wine every night, are working against me. Luckily, many traditional Russian dishes are pretty vegetable heavy. At breakfast, I’ve been having roasted mushrooms and boiled carrots with my eggs every morning, lunch always starts off with a vegetable soup, and there’s plenty of vegetable-centric mains to choose from on most menus – like pumpkin ragu, mushroom pie, and stuffed peppers.

Quinoa, Black Bean, and Ground Beef Stuffed Peppers {Katie at the Kitchen Door}

Stuffed peppers, while certainly not unique to Eastern European cuisine, are a particular favorite of mine recently (in fact, I had them for lunch yesterday). This stuffed-pepper phase of mine was kick-started by the Mexican-style peppers that they serve for lunch at Bacco’s, which are filled with quinoa and black beans, and topped with cheese and enchilada sauce. Then, after having the meat-and-rice-stuffed version a few times at our cafeteria in Russia, I wanted to make them myself. I combined the two ideas, but kept a Mexican twist in there – the end result was peppers filled with a deliciously savory beef, quinoa, and black bean mix and topped with a smoky-spicy chipotle sauce and plenty of cheese. This is a meal that I feel good about.

Like what you just read? Subscribe to Katie at the Kitchen Door on Feedly or Bloglovin‘, or follow along on Facebook, Twitter, Pinterest, Instagram, or Google+. Thanks for reading!

Quinoa, Black Bean, and Ground Beef Stuffed Peppers {Katie at the Kitchen Door}

Stuffed Peppers with Black Beans, Quinoa, Beef, and Chipotle Sauce

Serves 4.

  • 4 large bell peppers, tops cut off, seeds and veins removed
  • 1 c. quinoa
  • 2 c. water
  • 2 TBS olive oil
  • 1 large onion, minced
  • 1 lb. ground beef
  • 5 tsp chili powder
  • 2 tsp chipotle liquid (from canned chipotle peppers in adobo sauce)
  • 1 c. cooked black beans
  • 1 TBS tomato paste
  • 1 1/4 c. canned crushed tomatoes, divided
  • 1/2 c. shredded cheddar or monterey jack cheese
  • 1/3 c. crumbled cotija cheese
  1. Preheat oven to 350°F. Bring a large pot of salted water to a boil, and then add the stemmed and seeded peppers. Boil for 3-5 minutes, just to blanch the peppers, then remove with tongs or a slotted spoon and set aside. Once cool, place in a casserole dish.
  2. Rinse the quinoa, drain, then add to a medium pot with the 2 cups of water. Bring to a boil over medium-high heat. Once boiling, lower heat, cover pot, and cook for 15 minutes, or until “tails” of quinoa have unfurled and the quinoa is tender. Fluff up with a fork and set aside.
  3. Heat the olive oil in a large frying pan over medium heat. Add the minced onion and saute until translucent, about 5 minutes. Add the ground beef and break up with the back of a wooden spoon, and brown thoroughly, which will take about 5-8 minutes. Add the chili powder and chipotle liquid to the pan, and stir to evenly mix. Taste for seasoning, adjusting with more chili powder or chipotle if desired. Add the black beans, tomato paste, and 3/4 c. crushed tomatoes. Cook for about 5 minutes, allowing the sauce to thicken, stir in the quinoa, then season to taste with salt and pepper.
  4. Spoon the beef filling into the peppers, filling to the top, and arrange the peppers in the pan. Mix the remaining 1/2 c. of crushed tomatoes with 1/4 c. of water and pour into the bottom of the pan. Sprinkle the peppers with the cheddar or monterey jack cheese, then cover the pan with foil. Bake for 40-50 minutes, then remove the foil, and broil the peppers on high for 5 minutes to brown the cheese. Serve with the crumbled cotija cheese.

4 October 18, 2013 Breakfast

15 Favorite Fall Recipes

Although in Russia it definitely feels like winter (the forecast tells me there’s a chance of snow tomorrow and I’m not in the least surprised), I’m hoping for a few more weeks of fall weather when I get home. So far, New England has had one of the most beautiful falls I can remember, with lots of warm, sunny, colorful days in a row. Fall is easily my favorite time of year for a lot of reasons, and being able to cook lots of delicious soups, roasts, and pies is not the least of them. In the spirit of the season, I wanted to put together a list of some of my favorite fall recipes that I’ve published here over the past few years. Enjoy!

Soups and Stews

15 Favorite Fall Recipes - Roasted Chestnut and Potato Soup with Goat Cheese

Roasted Chestnut and Potato Soup with Goat Cheese

I really love soup, but this one might be my all time favorite. (Or at least tied with Portuguese Kale Soup and Corn and Potato Chowder). I only get to make this once or twice a year because fresh chestnuts can be hard to come by in Boston, but when I do make it, I savor every smooth, comforting spoonful.

15 Favorite Fall Recipes - Mushroom and Farro Soup

Mushroom and Farro Soup

Here’s a light and healthy soup that’s perfect for fall. It’s very quick to put together (think, 30 minutes, total, with only 10 of that involving being in the kitchen), and satisfying without being too rich.

15 Favorite Fall Recipes - Roasted Carrot and Tahini Soup with Spiced Chickpeas

Roasted Carrot and Tahini Soup with Spiced Chickpeas

It took me a long time to find a carrot soup that I really loved, but this one is a winner. Roasting the carrots makes them sweeter as well as making it easier to achieve a super smooth puree. A few spoonfuls of tahini gives this soup an intense, nutty depth. Topped off with a handful of crunchy, spicy chickpeas, it’s a slightly exotic-tasting but extremely comforting meal.

15 Favorite Fall Recipes - French Beef Stew with Red Wine

French Beef Stew with Red Wine

This beef stew, adapted from Home Made Winter, is the most popular recipe I’ve ever posted on this blog, by a long-shot. Beef stew is a favorite meal for many, and adding a sophisticated French twist in the form of red wine, oranges, and olives elevates this to a company-worthy dinner. Serve over super-smooth garlicky mashed potatoes with a nice bottle of red wine and everyone will be satisfied.

15 Favorite Fall Recipes - White Bean, Pesto, and Kale Soup

White Bean, Kale, and Pesto Soup

This is another quick-and-easy favorite for me. If I have any leftover pesto on hand, I’ll almost always make this soup. I love how decadent the pesto and grated pecorino make it taste, when really, I’m mostly eating vegetables. This soup is not too heavy, but is filling enough to make a meal on its own.

Salads and Mains

15 Favorite Fall Recipes - Curried Apple Couscous

Curried Apple Couscous

This is a favorite quick meal for me – I love the contrast of the curry butter, the sweet apples, and the crunchy almonds. It’s great on a busy Saturday when you only have a few minutes for lunch but want a real meal.

15 Favorite Fall Recipes - Pear and Pomegranate Salad

Pear and Pomegranate Salad

This pretty salad is sweet and crunchy, which are my two requirements for salads that don’t contain bacon. Of course you probably could add bacon to this – it would be delicious.

15 Favorite Fall Recipes - Sage Pesto, Apple, and Goat Cheese Flatbreads

Sage Pesto, Apple, and Goat Cheese Flatbreads

When the basil plants finally give in to the cold, I like to make a nutty pesto from hardier sage leaves instead. Mixed with sliced apples and goat cheese as a flatbread topping, it’s a pleasantly different combination of flavors.

15 Favorite Fall Recipes - Pumpkin and Sweet Potato Moussaka

Pumpkin and Sweet Potato Moussaka

While this autumnal re-interpretation of the Greek classic is admittedly labor intensive, it’s worth the effort at least once a season. Adapted from The Country Cooking of Greece, the sweetness of the potatoes and pumpkin are a great counterpoint to the salty meat and the rich bechamel sauce.

15 Favorite Fall Recipes - Brussels Sprout, Sweet Potato, and Chorizo Hash

Brussels Sprout, Sweet Potato, and Chorizo Hash

This recipe has three of my favorite fall foods – brussels sprouts, sweet potatoes, and chestnuts. Topped with a runny fried egg and a sprinkle of goat cheese, it’s super satisfying at breakfast, lunch, or dinner.

Baking

15 Favorite Fall Recipes - Pumpkin Cheddar Muffins

Pumpkin and Cheddar Muffins

Pumpkin and cheddar may seem like an unusual combination, but these muffins, from the genius guys at Baked, prove that pumpkin can successfully straddle the sweet-savory divide. A twist of black pepper really ties these together, and I think they’re perfect for breakfast or an afternoon snack.

15 Favorite Fall Recipes - Fig and Almond Custard Tart

Fig and Almond Custard Tart

Figs are one of fall’s fleeting treasures (and the few we picked from our new tree this year were so perfect). I made this tart for Trevor since figs are one of his favorites, and he devoured every bite. It’s a little bit fancy, but great for company or a special occasion.

15 Favorite Fall Recipes - Quinoa Apple Cake

Quinoa Apple Cake

I love this recipe, another one from Home Made Winter, because it really tastes like a cake (you know, sweet, and moist and all that) but I know it’s healthy so I don’t feel bad having a big slice. It’s also quite filling, and I love the fall spices in it.

15 Favorite Fall Recipes - Overnight Cinnamon-Pumpkin Rolls

Overnight Cinnamon-Pumpkin Rolls

Cinnamon rolls get a fall makeover with a pumpkin-based dough in this recipe, which is actually fairly simple to put together. Made the night before, everyone will love you (or you’ll seriously love yourself) in the morning when you pop them in the oven and the house starts to smell amazing.

15 Favorite Fall Recipes - Cider Doughnut Cake

Cider Doughnut Cake

Once October starts, I pretty much lose the ability to turn down any cider doughnut that is offered to me (or that I purposefully walk by at the farmer’s market). I love this cake because it allows me to consume cider doughnuts en masse without breaking out a fryer or a doughnut pan. It’s also a great one to bring to parties or brunches because it’s made to serve a crowd.

5 October 16, 2013 Fall

Back to Russia // Russian Mushroom and Rabbit Pie

Russian Rabbit and Mushroom Pie {Katie at the Kitchen Door}I’m back in Russia for a week and a half, and while this time it will be a little bit darker and a lot colder, I’m still looking forward to exploring St. Petersburg some more, this time with my friend and coworker Veronika. We splurged and bought tickets to see Giselle at the Mariinsky next week, which I’m so excited about, and we’ll also have some time this weekend to wander about, visit the Hermitage, and maybe hit up the spa (because that’s something you should do when it’s 35°F in October).

Roasted Rabbit for Rabbit and Mushroom Pie {Katie at the Kitchen Door}

At some point I do plan to share some general travel tips for St. Petersburg – I’ve eaten at dozens of restaurants, stayed in four hotels, and made it to a good number of the biggest attractions, and I feel like I can’t let all that experience go to waste! I still have to get my act together and assemble that info, but I do have a really delicious Russian recipe for you right now. So far, my favorite place to eat in Russia is a popular chain called Shtolle (штолле), that serves sweet and savory pies. Russian pie dough is much more like a dinner roll than an American pie crust – it is a yeasted dough with sour cream and butter worked in, making it rich and airy at the same time. To get the good pies at Shtolle you have to go earlier in the day, as they’re often out of the best ones by dinnertime. I’ve tried the cabbage pie, meat pie, green onion and egg pie, and apricot pie, but my favorite by far is the mushroom and rabbit pie. I talked it up so much to Trevor that I knew we’d have to recreate it – so recreate it we did, and pretty successfully as well.

Russian Rabbit and Mushroom Pie Filling {Katie at the Kitchen Door}

I fully expected to struggle to find a good dough recipe, but I quickly found this recipe and it sounded like just what I was looking for. In fact, the hardest part of this whole process was finding reasonably priced rabbit in Boston. It’s around $13 a pound at Savenor’s, which feels like a lot, and we found one semi-local farm that sells whole rabbits for $6 a pound, but they weren’t going to have any available for the next few weeks. We had almost caved and bought the pricey Savenor’s rabbit, when we found it by chance for $7 a pound at Market Basket in Andover. We stocked up of course, so now we have plenty of rabbit for experimentation. As for the rest of the filling, I made it up based on memory – I knew it should have shredded braised rabbit, finely chopped mushrooms and onion, lots of dill, and a mild, light white sauce, which most likely was made from sour cream. Memory served me well, and the pie came out just like I remembered. I’m happy that I was able to leave Trevor a little taste of Russia while I’m away.

Russian Rabbit and Mushroom Pie {Katie at the Kitchen Door}

Russian Mushroom and Rabbit Pie

Inspired by Shtolle. Serves 6-8. This recipe makes extra filling, which can be frozen for later use.

  • One 2.5 pound rabbit, broken into pieces
  • salt and pepper to taste
  • 2 TBS canola oil
  • 1 1/2 c. chicken stock, divided (1 c. rabbit, 1/2 c. for filling)
  • 2 TBS butter
  • 1 large white onion, finely chopped
  • 12 oz. wild mushrooms, finely chopped
  • 1/2 c. fresh dill fronds, finely chopped
  • 1/2 c. white wine
  • 1/2 c. sour cream
  • 1 recipe kulebyaka dough (below)
  • 1 egg yolk mixed with 2 TBS water
  1. Preheat the oven to 350°F. Break the rabbit down into pieces (see tutorial here), removing the organs (to be discarded or cooked otherwise – we dredged the livers in flour and fried them up and they were surprisingly tasty). Season the rabbit pieces with salt and pepper.
  2. Heat the canola oil in a large frying pan over medium heat. Add the rabbit pieces and brown on all sides. Place the browned rabbit pieces in a 9×13 casserole dish. Add 1 cup of the chicken stock to the bottom of the dish. Bake for 90 minutes, basting with the roasting liquid every 30 minutes.
  3. Remove the rabbit from the oven and let cool until it is comfortable to handle. Shred the rabbit meat into pieces using your fingers or two forks. Set aside in a large bowl.
  4. Melt the butter in a large frying pan over medium heat. Add the chopped onion and saute until soft and translucent, about 5-8 minutes. Add the chopped mushroom and saute until soft, another 5-8 minutes. Add the rabbit pieces and the dill, and cook to warm the rabbit through, about 3 minutes. Add the white wine and let simmer for 5 minutes, until reduced by half. Remove from heat and stir in the sour cream. Season to taste with salt and pepper.
  5. Roll out the kulebyaka dough into two large rectangles, about 8 by 12 inches. Place one rectangle on a parchment-paper lined baking sheet. Pile the rabbit filling into the center of the dough, leaving about one inch of space around all four edges. Pile the filling about 2 inches thick, using about half the rabbit filling – freeze the rest for a later use. Drape the second piece of dough on top of the filling and pinch the edges closed with your fingers. Trim any excess dough with a knife and use to make designs on the top of your pie. Increase the oven temperature to 375°F and let the pie sit at room temperature for 15 minutes. Before putting in the oven, brush the top and sides of the pie with the egg yolk wash and slice a few slits in the top crust to allow steam to vent. Bake the pie for 25 minutes, until dough is golden brown. Let pie cool for 10 minutes before slicing and serving.

Kulebyaka Dough

Recipe from It’s Sooo Good. Makes 1 large pie

  • 1 tsp active dry yeast
  • 1 tsp sugar
  • 2 TBS warm water
  • 2 c. AP flour
  • 1/2 tsp salt
  • 3 TBS butter, cut into 1 cm cubes
  • 3/4 c. sour cream
  • 1 whole egg
  1. In a small bowl, stir together the yeast, sugar, and warm water. Let sit for 10 minutes for yeast to proof – it should get frothy on top.
  2. In a large bowl, whisk together the flour and the salt. Add the butter cubes, and use your fingers to crumble them into the flour until there are no large chunks of butter remaining. Stir in the yeast mixture, the sour cream, and the egg until you have an even, soft dough. Form the dough into a disk, wrap in plastic wrap, and refrigerate for at least 2 and up to 12 hours.
  3. Bring the dough out and let come to room temperature. On a floured work surface, knead the dough until it is smooth and elastic, taking care not to add too much additional flour. This may take from 5-20 minutes, depending on your dough. Once the dough is smooth, place in a greased bowl, cover with a clean dishtowel, and let rise in a warm place for 1 1/2 hours, or until doubled in size. At this point, proceed with the recipe above to roll out and fill the dough.

0 October 14, 2013 Blogging

IFBC 2013: 8 Tips for Attending a Food Blog Conference

Seattle Views

This year’s International Food Blogger Conference in Seattle was the first major blogging conference I’ve attended. I’d gone to some smaller, local events, but when I saw the price (only $95 for active bloggers) and location (new home of my little brother) of this year’s IFBC, I decided it was time to give it a try. Events like this can be overwhelming, so I thought I’d share some thoughts on how to make the most of your experience:

  1. Be friendly. I would not be particularly surprised if someone did a study that said that the majority or bloggers are introverts – I mean, we write things on the internet in our free time. But even if you’re super outgoing, walking into a room full of strangers can be daunting. Just remember, you and everyone else in this room have at least one thing in common, and it’s an easy conversation starter. Be friendly and introduce yourself to lots of different people. Ask about them, their blogs, the conference, or whatever hot food or blogging news is on your mind. But be genuine – don’t introduce yourself only to sell your blog for 5 minutes and walk away.
  2. If you’re not naturally friendly, go to the wine events. Or really, go to the wine events whether or not you’re outgoing; they’re always the most fun. But seriously, there’s nothing like putting yourself in a smaller group full of people drinking wine to loosen you up. Case in point: on the bus ride to Ste Michelle Winery this year, I didn’t say a word for the whole 30 minutes and began to dread the upcoming weekend. On the way back, I chatted with almost everyone on the bus, and left with lunch plans for the following day.
  3. Wine Tasting at Chateau Ste Michelle - IFBC 2013Don’t be cliquey. Once you have all these great new friends, don’t decide that you’re done meeting people. There’s nothing worse than the groups of bloggers who meet three other people in the first hour and spend the rest of the weekend glued at the hip. Spend time with the people you know and like, but do yourself a favor and branch out.
  4. Only do as much as you want to. You don’t have to do everything. Yes, you should try and get out of your comfort zone, and yes, you should get as much value as you can out of your hard-earned money, but if you’re going to be miserably tired in a session or just aren’t interested in any of the topics? Skip it. And don’t feel bad about it.Andrew Scrivani talks at IFBC 2013
  5. Be smart when you talk to brands. When you approach a brand representative, know what you want out of the conversation, and ask them why they are here and how they are hoping to work with bloggers. Surprisingly, I found some brands that weren’t really prepared to answer this question, while others had specific reasons for wanting to build relationships with food bloggers. If you can, segue into a real conversation for at least a few minutes, and don’t forget to follow-up a few days later so you’re more memorable.
  6. Take time out. If you’re getting tired or not having fun, take a break. Go for a run. Explore the city. Head out to take photos on your own. Or just wash TV in bed for a while. You’ll come back to the sessions rejuvenated and actually wanting to talk to people again.IFBC Amazon Grocery Swag
  7. Don’t go swag crazy. Especially if you’re flying. It can be easy to get greedy when faced with a room full of goodies, but are you really going to be able to fit 8 bags of chia seeds into your luggage? And do you really want 8 bags of chia seeds, or are you just taking them because everyone else is? I let this situation get away from me a little bit and ended up leaving 90% of my swag with my little brother. Certainly, take what you’re interested in, but try not to be too aggressive about it, and leave enough for other bloggers.
  8. Follow-up. Whether it’s with brands or with new-found blogger friends, send an email within a few weeks of the conference to follow-up. A twitter follow is nice in the moment, but distinctly forgettable. Especially if you’re hoping to work with someone, an email allows you to set up your future relationship, even if you won’t end up working together for a few years.

I enjoyed my time at IFBC this year, but I don’t think I’ll be returning next year. Between the flight, the hotel, and the conference itself, it ended up being a pretty expensive weekend. It’s always fun to meet and talk shop with other bloggers, and some of the sessions (particularly Andrew Scrivani’s session on food photography) were really educational, but overall, I wish I had learned more. That said, I may still try out some other conferences – I’ve heard great things about BlogHerFood – and seek out opportunities to make in-person connections with other bloggers.

Note: In order to received the discounted active blogger rate at IFBC, all participating bloggers were required to write three posts about their experience at the conference.

  • « Go to Previous Page
  • Go to page 1
  • Interim pages omitted …
  • Go to page 25
  • Go to page 26
  • Go to page 27
  • Go to page 28
  • Go to page 29
  • Interim pages omitted …
  • Go to page 57
  • Go to Next Page »

Primary Sidebar

Subscribe!

Get creative recipes and menu ideas delivered straight to your inbox.

Most Popular

A House // Sweet Potato and Coconut Milk Soup with Brown Rice and Lentils

Monthly Fitness Goals: July // Homemade Spinach Wraps with Chopped Greek Salad

A New Job // Classic Seven-Layer Bars

Butternut Squash Carbonara with Fried Sage and Caramelized Onions

Happy Birthday, Trevor! // Peanut Butter Fudge

Cookbook Review and Giveaway: Home Made Winter

Drizly

Please note!

Full disclosure: if you purchase anything at Amazon using the above links or any other links to Amazon on this site, I will receive a small commission. Just so you know!

Copyright© 2025 · Cookd Pro Theme by Shay Bocks

This site uses cookies: Find out more.