• Skip to primary navigation
  • Skip to main content
  • Skip to primary sidebar
  • Home
  • Recipes
  • Features
    • Cookbook Reviews
    • Ingredient of the Week
    • Sunday Dinner
    • Fitness Goals
  • Travel
  • About
    • Privacy Policy
    • Cookie Policy
  • Work With Me

Katie at the Kitchen Door

Globally-inspired, seasonal recipes

Blog Page

9 March 12, 2012 Breakfast

Healthified Carrot and Apple Muffins


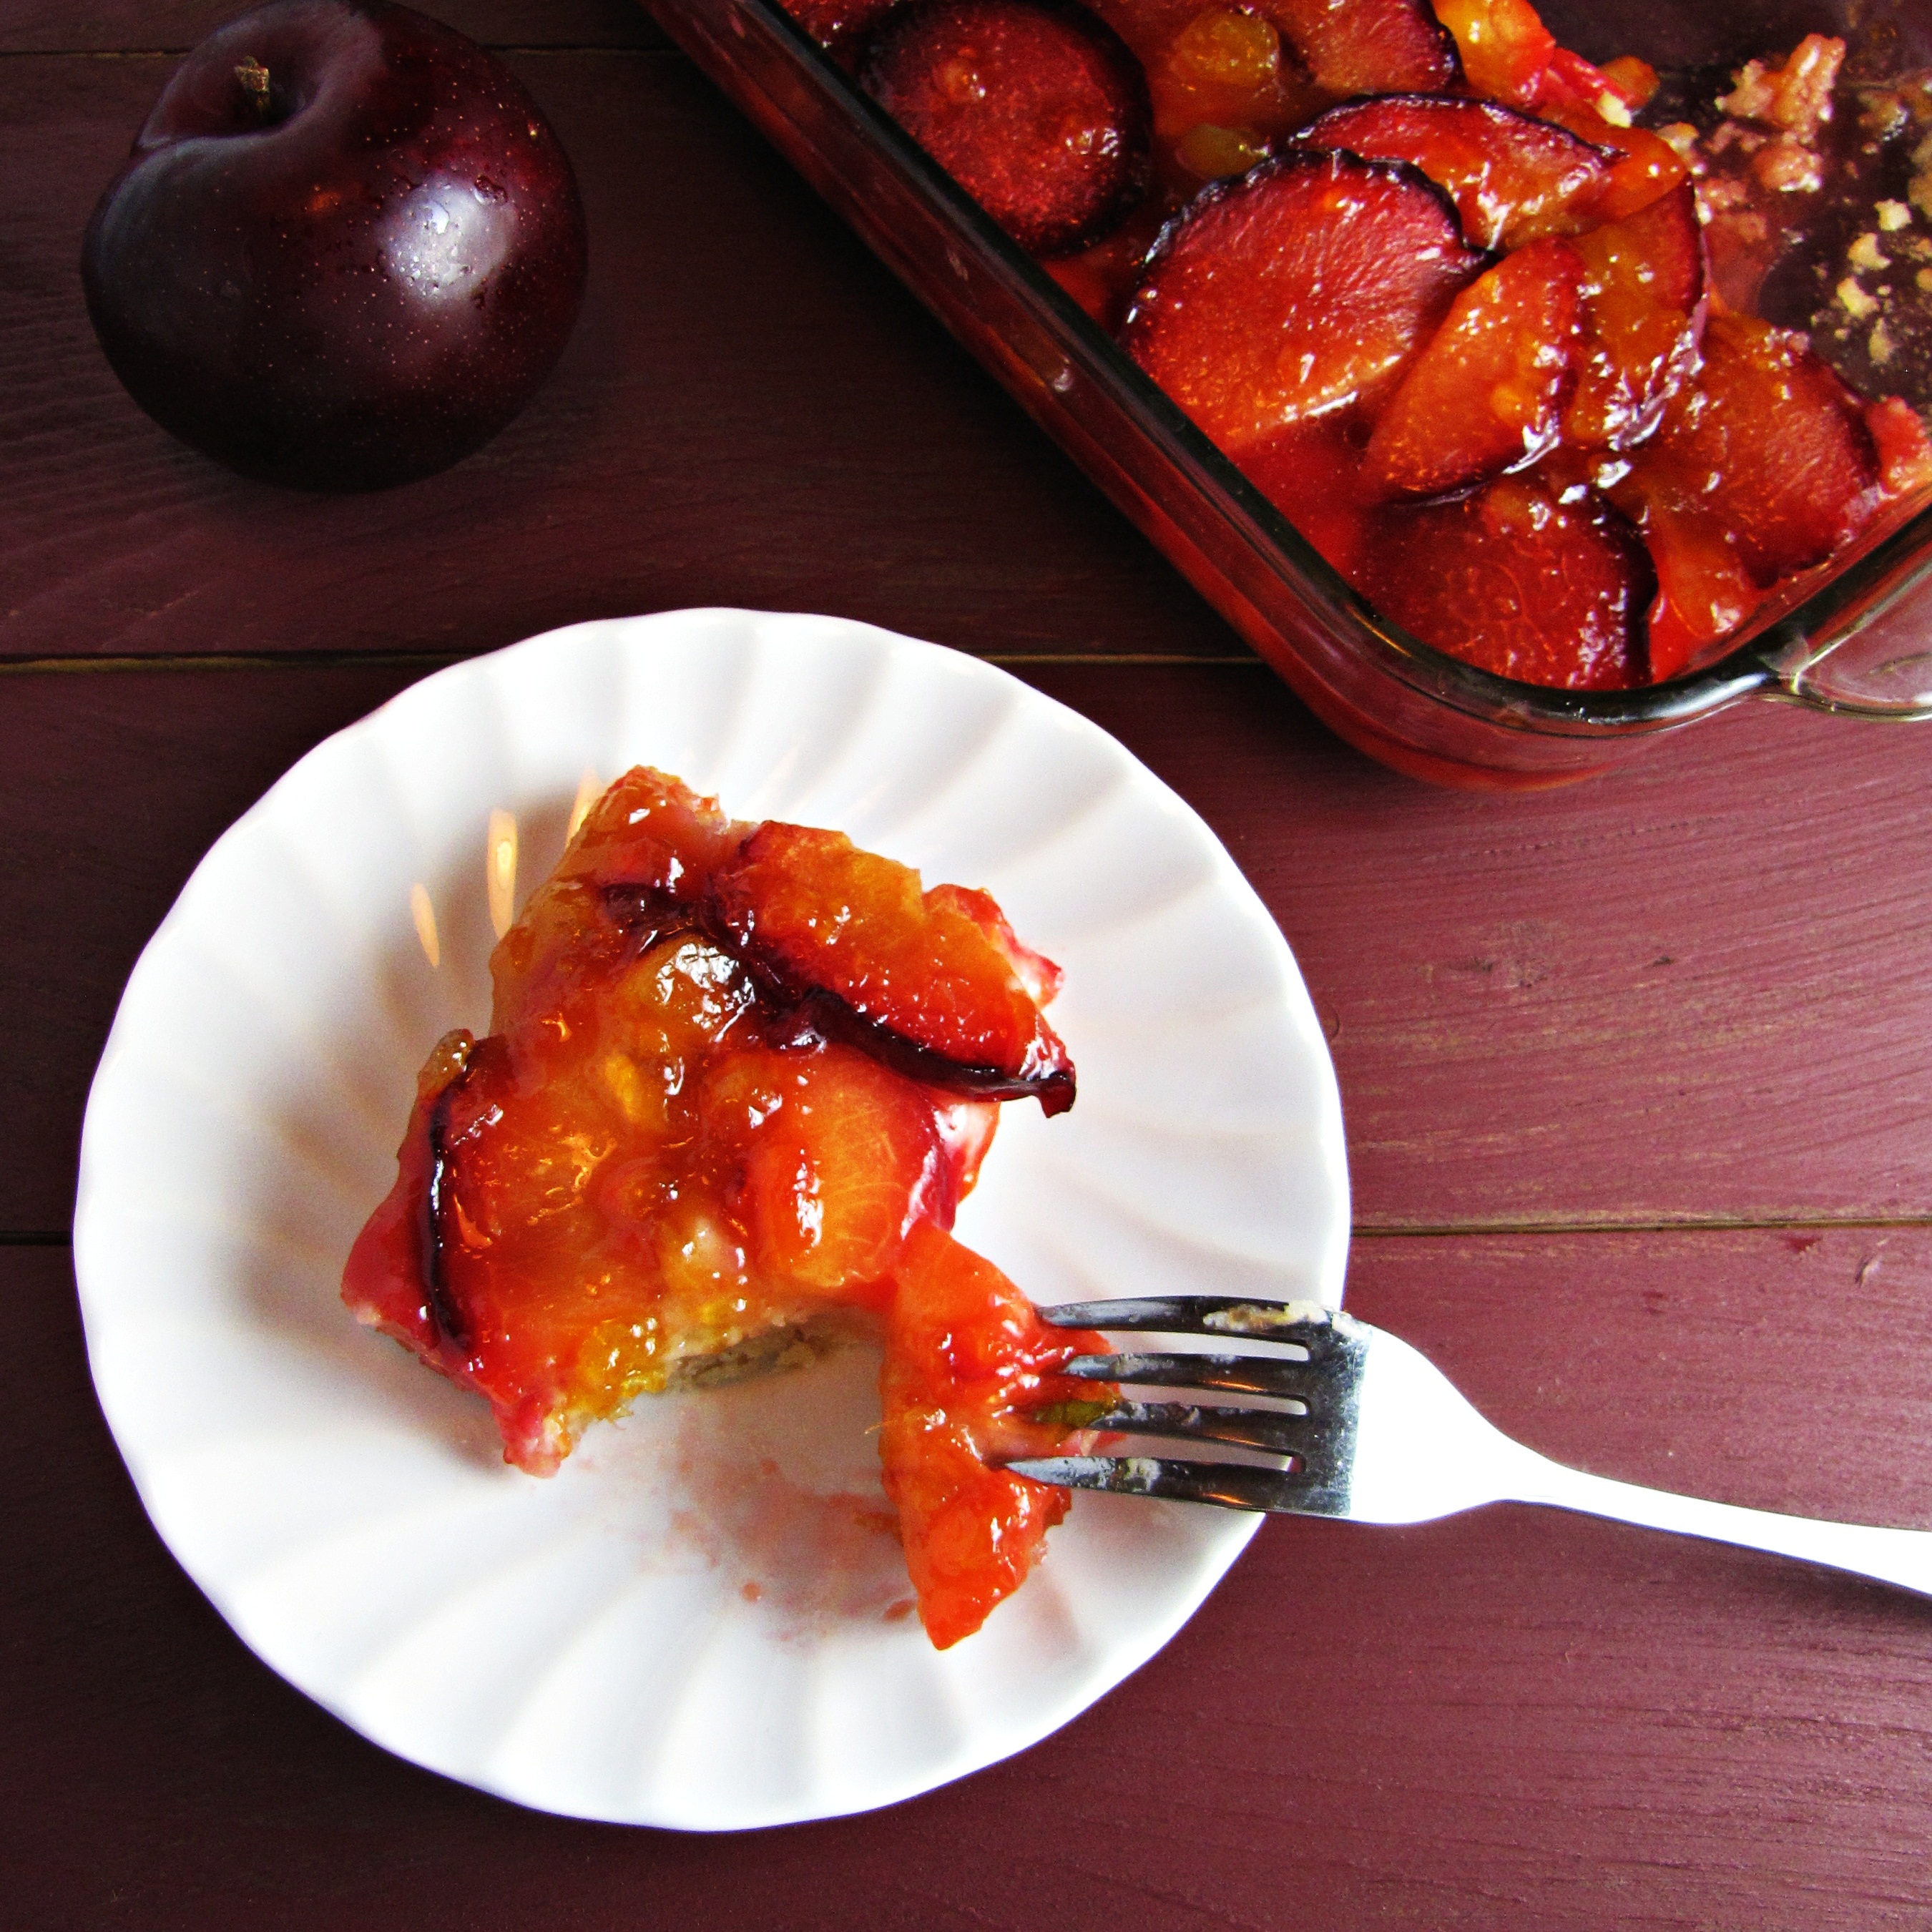
I haven’t shared a ton of baking recipes recently.  Not much since Christmas anyway.  I think the last two baked goods I wrote about here were these plum squares and these cinnamon pumpkin rolls (way back in the beginning of December!).  This is partly because I haven’t been baking a ton (much to my coworkers’ chagrin), and partly because I’ve been trying to focus on healthy recipes of the sort you might be inspired to whip up for dinner on a weeknight.  Come to think of it, I was also out of town for 11 days in February, including most of the weekend days, which certainly cut into time I might otherwise have spent enabling my cookie habit.  But I truly love to bake – particularly on a sunny weekend morning like this past Sunday – and so I am here with these healthy carrot and apple muffins from Anja’s Food 4 Thought.

If you’re into healthy but interesting food and you haven’t checked out Anja’s blog, I highly recommend it.  Whenever I visit, I find myself bookmarking another handful of recipes to try – like broccoli, almond and tahini salad, quinoa-granola bars, or  zucchini-chickpea-feta fritters.  Maybe we just like the same foods, but I think almost everything she posts sounds totally delicious and intriguing – and there are a lot of foods out there that don’t hold a ton of appeal for me.  Anyway, check it out.

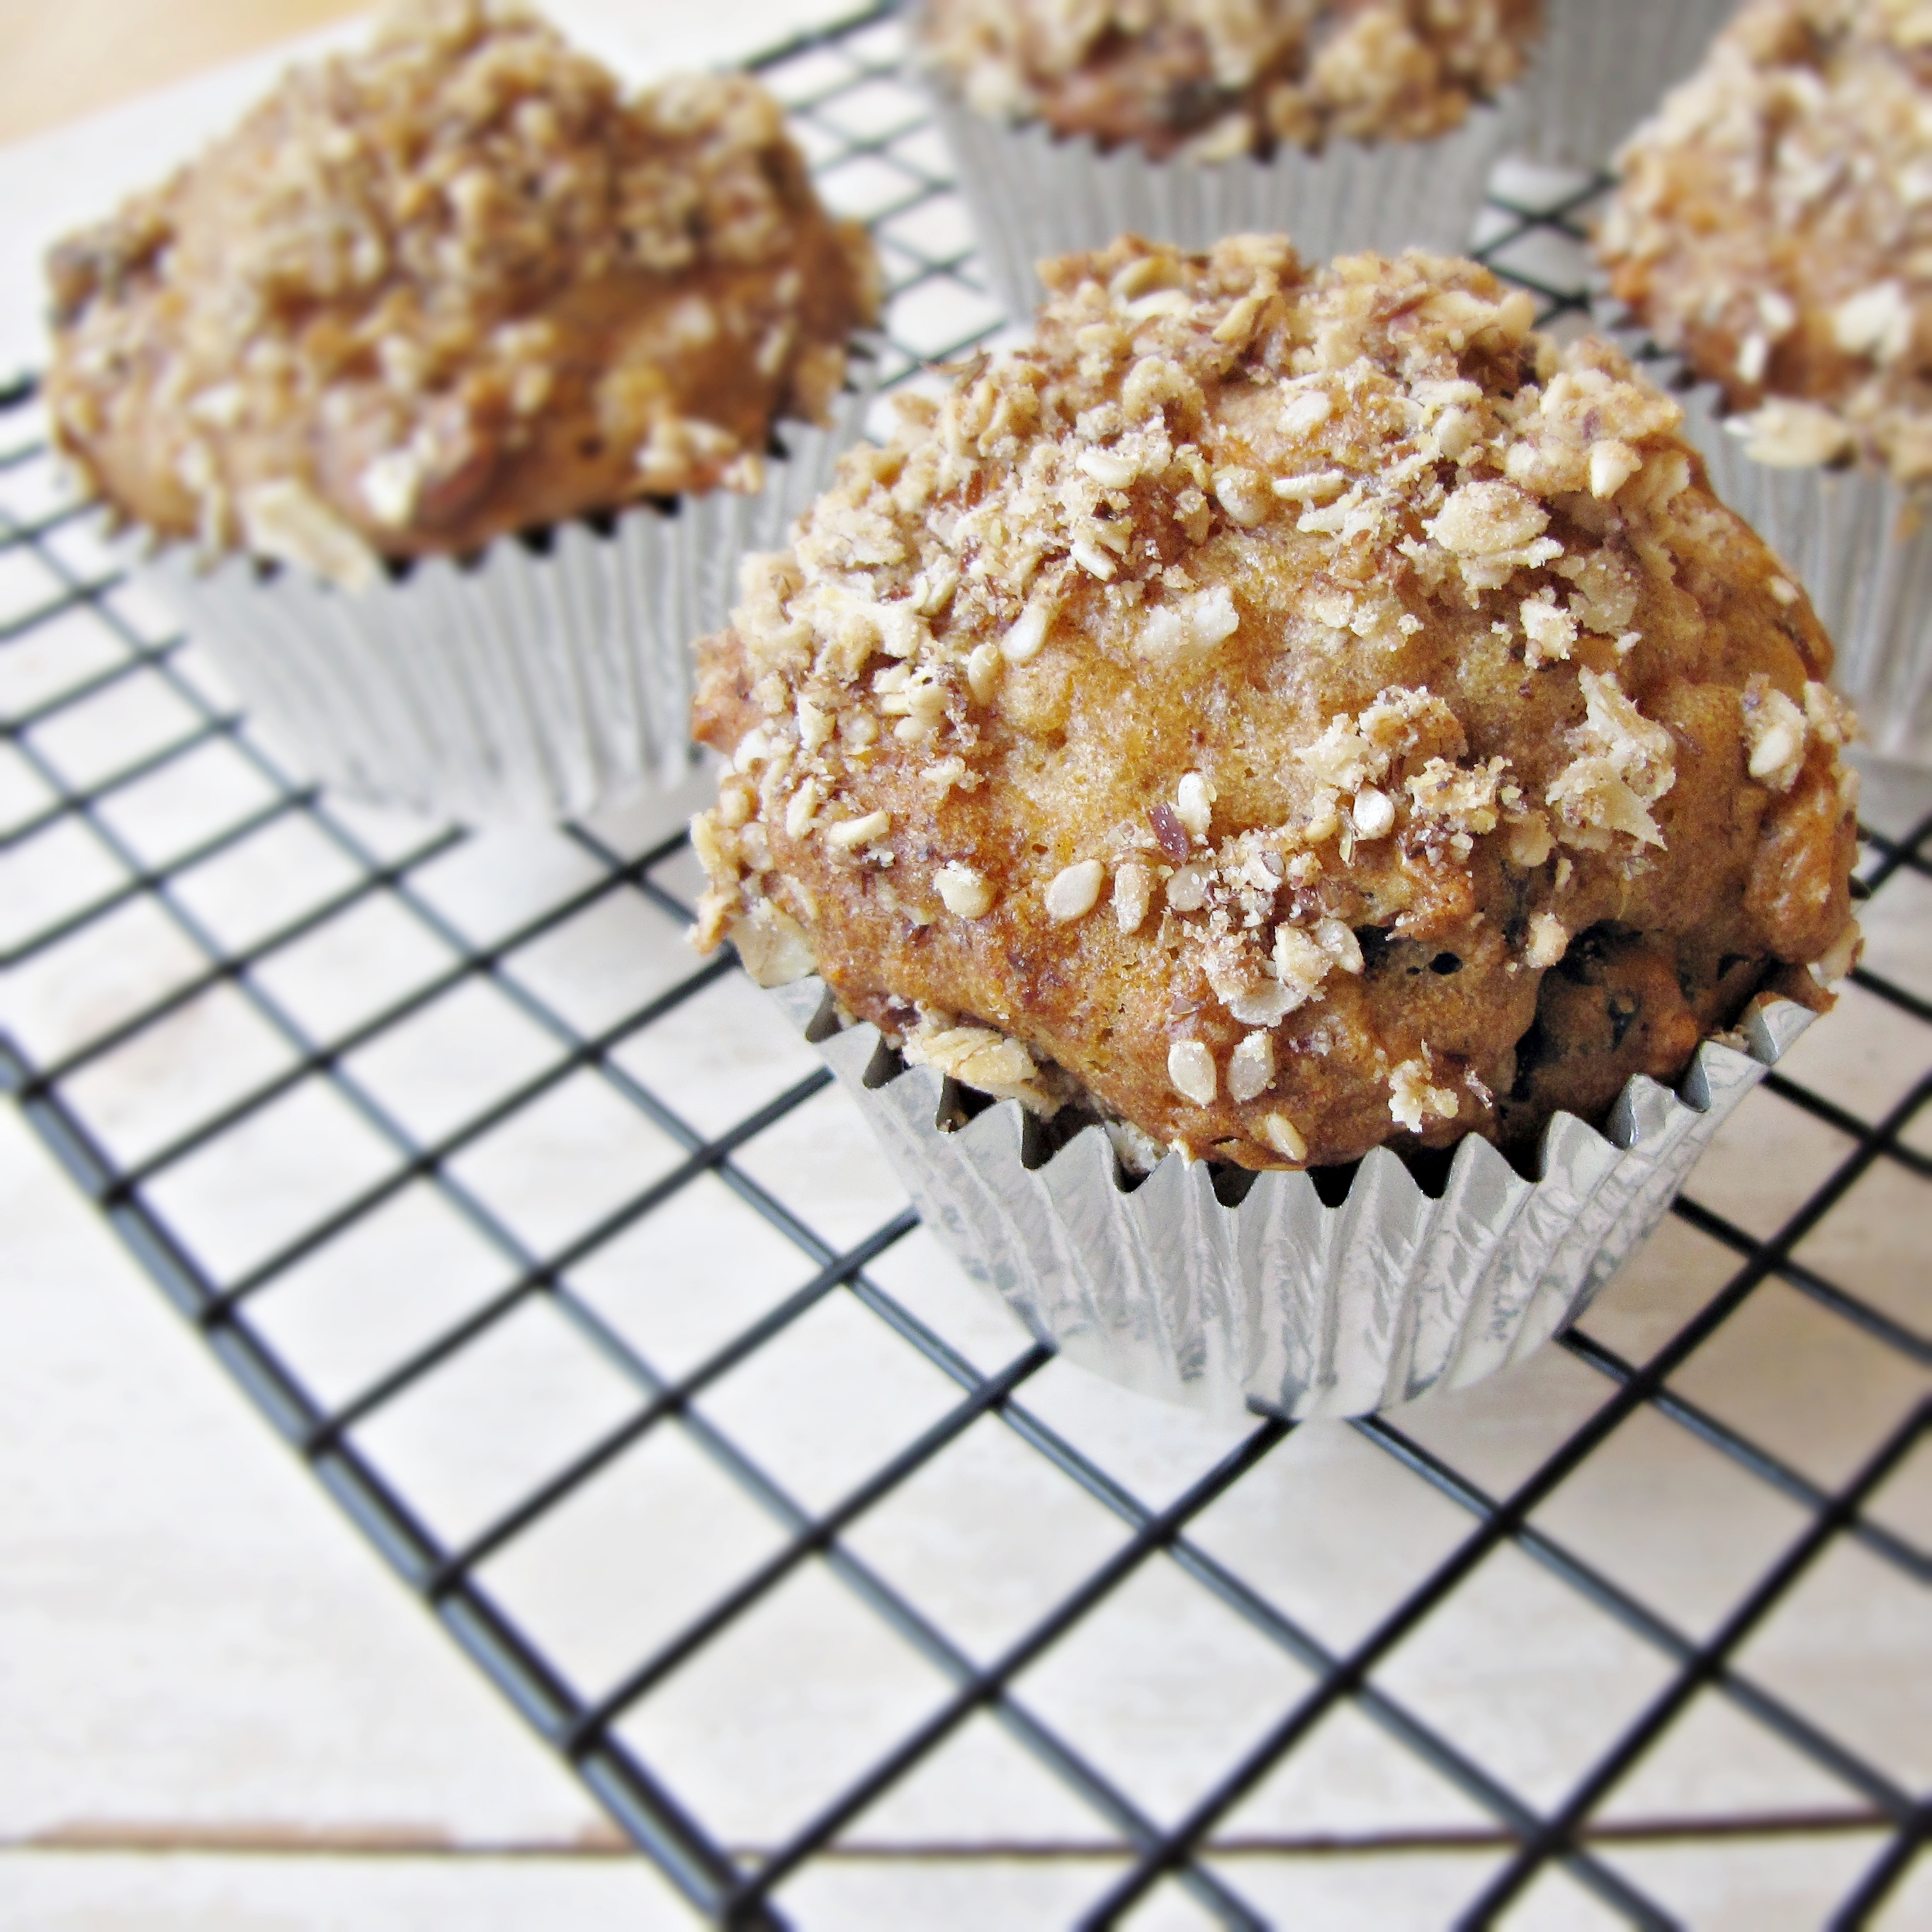
These muffins, which have only 230 calories per pop with a good amount of vitamins (and decent protein and fiber), surprised me with their moist, light, sweet flavor.  I mean, I’ve never made healthy muffins that really tasted good before.  Like, think the opposite of bran muffins.  (Not a big fan of bran).  These are full of good-for-you ingredients, like apples, carrots, dried fruit, greek yogurt, sesame seeds, and oats, and use olive oil and maple syrup to replace the more typical butter and sugar.   It’s a little bit time consuming to prepare all the parts, but I think they would just be good without the nutty-crumble topping, if you’re feeling lazy.  One of these muffins and a cafe au lait was an excellent, and almost guilt-free start to my week.

Carrot and Apple Muffins

Makes 15 standard muffins.  Adapted from Anja’s Food 4 Thought.

For the muffins:

  • 2 eggs
  • 1/2 c. maple syrup
  • 1/2 c. olive oil
  • 6 oz. greek yogurt
  • 2 tsp vanilla
  • 3 medium carrots, peeled and grated
  • 2 medium apples, peeled and grated
  • 1/2 c. dried fruit (raisins, cranberries, cherries)
  • 1/2 c. quick cooking oats
  • 2 c. whole wheat flour (I subbed AP with fine results)
  • 2 tsp baking soda
  • 1/4 tsp ground nutmeg
  • 1/2 tsp ground cinnamon
  • 1 tsp ground ginger
  • 1/2 tsp salt
For the topping (I adjusted to use what I had in the cupboard):
  • 1 TBS cold butter
  • 1 TBS brown sugar
  • 1 TBS flour
  • 2 TBS oats
  • 2 TBS sesame seeds
  • 1 TBS ground flaxseed
  1. Preheat oven to 375°F, and line standard-sized muffin pan with muffin cups.  In a medium bowl, whisk together eggs, maple syrup, olive oil, yogurt, and vanilla.  Set aside.  In a large bowl, stir together all dry ingredients (oats through salt) until thoroughly mixed.  Pour wet ingredients into dry and mix until all ingredients are evenly moistened.  Stir in grated carrots, grated apples, and dried fruit.
  2. In a small bowl, use a pastry cutter or fork to press together butter, sugar, and flour until crumbly.  Add oats, sesame seeds, and flaxseed, and press together until they form a uniform crumbly mixture.
  3. Fill each muffin cup almost to the top with batter.  Sprinkle a spoonful of the topping over each muffin.  Bake for 20-22 minutes, until domed and golden, and a toothpick inserted into the center of a muffin comes out clean.

13 March 5, 2012 Fall

Corn and Potato Chowder

There aren’t many recipes that I make regularly.  I could totally love a recipe and only make it once just because there are so many other recipes out there that I want to try.  Even when it comes to the basics – pancakes, muffins, spaghetti sauce – I’m always trying new variations on a theme, because a part of me is always looking for that perfect recipe (although I’m pretty sure I’ve found my perfect fruit-muffin recipe).  However, there are a few notable exceptions to my tendency to always cook something new, including my mom’s kale soup, this simple spaghetti in lemon cream sauce, smitten kitchen’s totally pancetta-y spaghetti with chickpeas, Joanne’s incredible pork and black-eyed-pea chili, and this chowder. (Notice a theme here?  Not too many salads…)

This chowder is one of my all-time childhood favorites.  My mom used to make it regularly during the fall and winter, and I always had at least two bowls and two thick slices of fresh-out-of-the-oven anadama bread and went to bed very, very full.  It was one of the first recipes I requested from her after moving into my own apartment, and while I don’t indulge in chowder all winter, I do make it a couple of times a year.  My parents also use to serve this at our annual cross-country dinner, and it was a huge crowd-pleaser.  On Friday nights before races, my team would all gather at someone’s house for carbo-loading and camaraderie, and my family was typically the only one to buck the spaghetti and garlic bread trend and serve something different.  We’d pile 18 or so girls around a bunch of tables stuck together the long way, and eat bowl after bowl of soup with fresh bread and laugh and sing our cross-country songs and talk about beating Exeter and who was cute on the boys’ team and we’d finish the night up with bowlfuls of my dad’s famous apple crisp.  Just the scent of this chowder makes me think of cold, dark nights filled with laughter, be it with my parents and brothers or my teammates, and of going to bed warm and exhausted.

As I was going through my fridge this weekend, trying to figure out a way to use up all the bits and bobs that seem to have accumulated over the past few months, I realized that I had everything I needed to make this chowder (and that it would clear up a significant amount of space in the fridge).  Although it doesn’t traditionally call for kale, I had a few leaves hanging around so I decided to throw them in to up the nutritional value of this soup a bit.  I also used a random assortment of cheeses – a bit of monterey jack, some of that weird orange Mexican shredded cheese mix, half a cup of freshly grated pecorino – and a mixture of skim milk and heavy cream, and the soup still turned out just as perfect as always.  The distinctive flavor in this soup comes from the whole cumin seeds that get added at the beginning – if I didn’t know what was in it, I might not be able to identify the flavor as cumin, but somehow it works perfectly.  Make this the next time you need a satisfying, warming break, and share it with family or friends to ensure an adequate amount of conversation and laughter accompanies it.  It’s that kind of meal.

More like this…

Harissa-Butter Roasted Corn Soup with Chorizo

Harissa-Butter Roasted Corn Soup with Chorizo

Corn Chowder with Paprika-Grilled Shrimp

Corn Chowder with Paprika-Grilled Shrimp

Vegetarian Chili

Vegetarian Chili


Like what you just read? Subscribe to Katie at the Kitchen Door in the box on the right, on Feedly or Bloglovin‘, or follow along on Facebook, Twitter, Pinterest, Instagram, or Google+. Thanks for reading!

Corn and Potato Chowder

Serves 4-6.  Adapted from Horn of the Moon.

  • 1 onion, diced
  • 1 TBS cumin seed
  • 2 TBS butter
  • 3 large yukon gold potatoes, scrubbed and diced
  • 4 c. chicken stock
  • 2 bay leaves
  • 1 bunch of kale, stems removed and leaves chopped (optional)
  • 2 c. frozen corn
  • 2 c. shredded cheese (a mix of whatever you have on hand is fine – we typically use monterey jack and cheddar)
  • 1 c. milk (use skim milk for a lighter chowder, or a mix of half milk and half cream for a heavier chowder)
  • 1 tsp. flour
  • freshly ground black pepper
  1. In a large stockpot, saute onion in butter over medium heat until onion turns translucent, about 3-4 minutes.  Add cumin seed and cook, stirring, for another 1-2 minutes, until cumin is fragrant.  Add potatoes, stock, bay leaves and kale if using and bring to a boil.  Reduce to a simmer and simmer, covered, for 20 minutes, or until potatoes are tender when pierced with a fork.
  2. Stir in frozen corn and cook for 3 minutes.  In the meantime, mix milk or cream with flour until mixture is smooth, then add to the soup, stirring constantly.  Remove from the heat and stir in the shredded cheese, stirring until melted.  Ladle into bowls and garnish with freshly cracked black pepper.

0 March 2, 2012 Recipe

Greatist Collaboration: Mushroom and Olive Veggie Burgers

For my second Greatist post, I bring  you veggie burgers.  Don’t groan.  Veggie burgers have a reputation for being dry, flavorless, and generally awful, but homemade veggie burgers can be really delicious, and quite easy to boot.  These patties are very moist and very tasty, with kalamata olives (salty), sauteed mushrooms (earthy), lentils (meaty), and ricotta cheese (sweet) all adding their unique flavor to the mix.

If you missed my first post for Greatist, click on over here to check out what we’re doing.  The gist of it is this – every other Friday I’ll post a fast (3o minutes or less of active time), simple (8 or fewer ingredients), and healthy (they are a health and fitness site after all!) recipe over there, and write about it here.  I’m totally into this collaboration, in part because it challenges me to come up with easy, accessible recipes – something that I know a lot of people out there are looking for.  Since I’ll be continuing this collaboration for a while, definitely let me know of any suggestions or requests on recipes to remake as quick and healthy, and I’ll do my best to fit them into the parameters!  In the meantime, click here for the recipe.  And sorry for the short post today!  I’ll be back with more soon, and I just purchased a waffle iron this week so …. waffles.  Just saying.

P.s. See that oozy melted cheese on top?  That’s our edam.  We made it.  And it melts like real cheese.  We also made the feta (it was as mild and creamy as ricotta) that I used in the burger itself.  NBD.

1 February 28, 2012 Cookbook

Cookbook of the Month: Roast Figs Sugar Snow

February’s cookbook of the month is Roast Figs Sugar Snow, a book that focuses mainly on the foods that those of us in Northern climes crave during the winter months.  While we haven’t exactly had a fierce winter this year, I wanted to review this book before another year went by – I don’t find myself wanting to roast a pheasant or gorge on cheesy pumpkin tarts in the middle of summer.  The collection of recipes in this book is one of the most intriguing I’ve found, bringing me back to the book again and again – there’s Russian cheese pancakes, French pumpkin matefaims, Northern Italian farro and smoked duck salad, Austrian plum squares, and Scandinavian cookies.  Most countries that experience a true winter are represented in the book, and it makes for a great cross-section of flavors and cultural influences.  The downside of a cookbook focusing on winter foods?  Most of the recipes are extremely rich – there’s a lot of butter, cream, and cheese going on in this book.  Now, this isn’t a bad thing in and of itself, because, really, who doesn’t love butter, cream, and cheese?  But, say you wanted to plan a winter-themed menu from this book – perhaps Onion and Cider Soup with Melting Camembert, followed by Poulet Suissesse, with a plate of Plum Squares to finish it off – you’re guests might be leaving less-than-well.

I’ve only tried a handful of recipes from this book – I think 5 in total – but the ones I have tried have varied a bit in quality.  Nothing has been bad, but only 2 of the recipes have been truly special, and both of them happen to be desserts.  The Cafe Sperl Plum Squares I made last week were the perfect balance of sweet and tangy, and the recipe pictured here – Port and Cranberry Jellies with Port Syllabub and Frosted Cranberries – was exquisite.  However, the Poulet Suissesse – a chicken dish cooked in a rich sauce of creme fraiche, parmesan and gruyere – was too rich without the flavor payoff I was looking for, and both the Red Cabbage with Cranberries and the Roast Squash and Lentil Salad with Goat Cheese were about what I was expecting – good, but nothing particularly new or interesting.  This is not a book I’m going to give up on though – most of the recipes are too alluring.  High on my list are the Melting Leg of Lamb with Juniper Berries, the Toasted Ginger Cake with Wine-Poached Cranberries, and the Roast Pheasant with Quince, Blackberries, and Honey.  That is, if I ever find pheasant or quince anywhere near me.

A bit more on the Cranberry-Port Jellies featured here: think of these as the most elegant, grown-up, and subtle jello shots you’ll ever eat.  Or, if you’re not a jello shot person (how could you not be a jello shot person?!), think of them as your favorite sore-throat treat but boozy and sophisticated.  Both the jellies and the syllabub – basically a loose whipped cream – contain port, giving the whole dessert a heady, musky, flavor, which contrasts perfectly with the fresh bursts of the sweet-sour frosted cranberries (use way more than pictured here, they really bring the dish together).  This dish takes planning ahead – 6 hours for the jellies to set, 1-2 hours for the cranberries to dry – but it’s well worth it.  The actual work that goes into making and assembling these is minimal.  And with only 1/2 c. of sugar added to the jellies, they’re a relatively light dessert, especially for this  book.  Worth trying.  And, overall, the book is worth checking out, especially if you’re in a cozy-cooking sort of mood.


Port and Cranberry Jellies with Frosted Cranberries

Recipe from Roast Figs Sugar Snow, by Diana Henry.  Serves 8

For the jellies:

  • 2 c. cranberry juice
  • 1 3/4 c. ruby port
  • peel of 1 orange (white pith removed to the best of your ability)
  • juice of 1 orange
  • 1 stick cinnamon
  • 1/2 c. sugar
  • 2 TBS powdered gelatin (about 2 of the packets they sell in most US grocery stores)

For the berries:

  • 2 c. fresh cranberries
  • 1 egg white
  • 1-2 c. sugar (you won’t use it all but need volume for process to work)

For the syllabub:

  • 2/3 c. heavy whipping cream
  • pinch cream of tartar
  • 1 TBS confectioner’s sugar
  • 2 TBS ruby port
  1. Make the jellies: combine the cranberry juice, port, orange peel, orange juice, cinnamon, and sugar in a saucepan and heat over medium heat until it comes to a boil, stirring to dissolve the sugar.  Reduce heat to low, and simmer for 5-10 minutes to infuse flavors.  While juice is simmering, sprinkle gelatin over 1/4 c. cold water in a small bowl, and leave for a minute to firm up.  Add 1/2 c. of warm (not too hot! let it cool for a minute out of the pot before adding) juice mixture to the gelatin, and stir to dissolve, then pour whole mixture back into pot and stir well.  Remove from heat, and pour into 8 glasses.  Cover and refrigerate for 6 hours, or until firm.
  2. 1-2 hours before serving, briefly whisk the egg white in a medium bowl, until slightly frothy.  Add the cranberries and stir gently to coat with egg white.  Let cranberries drip over bowl for a minute, then transfer in batches to a plate with the sugar.  If the cranberries are too wet when moved or there is not enough sugar on the plate, the sugar will simply dissolve.  Roll the cranberries in the sugar until well coated, then set aside on a plate or tray to dry for 1 to 2 hours.
  3. Just before serving, whip heavy cream until beginning to grow in volume, then sprinkle with cream of tartar and sugar, and whip until it is thick and very slightly holds it’s shape.  It should not be too stiff, but should fall in folds when poured from spoon.  Gently whisk in port.  Spoon syllabub over jellies, then sprinkle with frosted cranberries.  Leftovers will keep refrigerated for a few days, although syllabub will lose some of it’s structure.

0 February 20, 2012 Cookbook

Plums in February

I know.  It’s 100% not plum season.  At least, not in Boston or anywhere else north of the equator.  But in flipping through Roast Figs Sugar Snow (isn’t that just the best cookbook name?) I kept seeing all these tantalizing plum recipes.  Like roast plums and figs in vodka with cardamom cream.  And Russian cheese pancakes with plum compote.  And plum squares.  So the other day when I walked into Wholefoods and found it to be a veritable dream of produce, I couldn’t resist.  I mean, not only did they have beautiful stacks of winter citrus and root vegetables, they also had plums and gorgeous blackberries and mangoes and apricots.  Apricots.  And in a kind of dreary month like February, the temptation of all that succulent, summery, sweet fruit was too much for me – I caved.  Hey, it’s plum season in Chile.

And even though local plums are months and months away, I am getting excited for spring.  Peas, baby beets, tiny strawberries, scapes, fava beans.  In North Carolina, spring is more like New England’s summer – everything bursts into life and warmth and color in the middle of March and the days become long and hot and wonderful.  The moment that defined spring for me every year was getting off the plane in North Carolina after spring break and being overwhelmed by the green after a week in still-gray Boston.  And I loved that.  New England spring is a very different animal but I find that I’m looking forward to it with the same intensity that I look forward to the dramatic bursting forth in the South.  New England spring is a gray and gritty time, full of cold mud and rain and what feels like eternal waiting, but it holds so much promise, and each imperceptible change in the weather and the plants and the air brings a little more life to the world.  I may be jumping the gun a little bit with my enthusiasm (did anyone else start their herbs inside last weekend?  No?  Because I did.  And I’m really excited about it.) but can you blame me, really?

Personally, I thought these plum squares were amazing.  Like, way-better-than-I-was-expecting-them-to-be amazing.  They were super juicy and a little tangy and not overly sweet in a very refreshing way.  They are an ideal late afternoon or post-breakfast snack.  Or an ideal breakfast.  And I can definitely see remaking this recipe into a plum pie next summer.  Lastly, these squares are gorgeous.  All that purple richness really gets me.  So if you’re looking for a little escape from February and don’t mind cheating just this once on your Locavore commitments, try these.  You’ll be glad.  Alternatively, you can be a more earth-friendly person than I and bookmark this until next August.

“Cafe Sperl” Plum Squares

Recipe adapted from Roast Figs Sugar Snow by Diana Henry.  Makes 9 squares.

  • 2 c. flour
  • 1 stick cold butter, cut into small pieces
  • 3/4 c. sugar
  • 1/2 tsp salt
  • 1 egg yolk
  • 1 tsp vanilla
  • 3-6 TBS ice cold water
  • 3-4 medium, ripe plums
  • 2 TBS turbinado sugar
  • 2/3 c. apricot jelly
  1. Combine flour and cold butter in a food processor and pulse until mixture is coarse with pea sized chunks.  Add sugar and salt and pulse a few more times.  Add egg yolk and vanilla and pulse until dough begins to come together.  If dough will not come together, add ice cold water 1 TBS at a time, pulsing in between additions, until dough stays loosely together when pinched.  Alternatively, this entire process can be done without a food processor, using a large bowl and a pastry cutter to mix the dry ingredients with the cold butter.  If no food processor is used, you will likely need more cold water to get the dough to come together.  Form the dough into a ball, wrap tightly in plastic wrap, and refrigerate for 30 minutes.
  2. Preheat the oven to 350°F.  Press dough into a 8×12 inch baking pan.  Halve plums and remove pits, then slice into 1/2-inch thick slices.  Layer plum slices over dough, then sprinkle with the turbinado sugar.  Bake for 40-45 minutes, until plum juices are bubbly.  Allow to cool.
  3. Heat apricot jelly in a small saucepan over low heat, until jelly is thin enough to pour.  If jelly is not thinning, add 1-2 TBS water.  Spoon warm jelly over plums, then allow to set.  Serve chilled.  Store in the refrigerator.

0 February 17, 2012 Food

Greatist Collaboration: Feta and Lentil Tabbouleh

Today marks the first week of my new collaboration with Greatist, a fun, relatively new to the scene website focusing on all things health and fitness.  A few weeks ago a classmate of mine from  Andover (who is now the health editor at Greatist) contacted me with the idea of doing a regular guest feature over there – obviously, I was more than willing to sign on!  Every other week I’ll be posting a healthy, easy, and simple recipe over there, and sharing photos and stories with you here, so I hope you’ll continue to come by and check out what we’re doing/cooking/eating!

Since Greatist is geared towards health-focused, active, and busy people, not just food-lovers (i.e., not necessarily the kind of people who might dedicate an entire weekend to making cheese or keep a fully stocked cabinet of Indian spices), all of the recipes I post for them will take less than 30 minutes of active cooking time and have fewer than 8 ingredients (olive oil, salt, and pepper don’t count!).  This actually lines up really well with one of the areas I want my blog to focus on more – accessible cooking.  A few weeks back, some girlfriends of mine requested that I put together a section on this blog for recipes that they might  actually cook – recipes that took a reasonable amount of time, used simple techniques, and involved ingredients that they might already have lying around.  Personally, I find cooking and baking to be therapeutic, and I’m more than happy to spend a few hours a day mincing and stirring and whipping, but I know that a lot of people, especially in my generation, think of cooking solely as a process to get to the end result – nourishment.  And although I will always enjoy the process of cooking, the idea of fast and healthy cooking resonates with me more and more as my work schedule ramps up.  In light of that, keep your eye out for a new “fast and healthy” section on here soon.

The 8 ingredient cap for this recipe did prove to be a bit of a challenge for me.  Given that I have a very well stocked (sometimes I think it might be overstocked) kitchen, I had to totally switch mindsets to think about using a few simple, readily accessible ingredients to provide maximum flavor and nutritional value.  In the end, I went with what I knew – pulse-heavy vegetarian cooking, with a flavorful twist.  I’m very pleased with the recipe I ended up choosing – the feta and lentil tabbouleh pictured here.  In terms of health benefits, it packs a serious punch.  The combination of the lentils and bulghur provides a complete source of protein and a ton of fiber.  The parsley and tomatoes contribute many vitamins and minerals (mainly Vitamin K, Vitamin C, and Vitamin A, as well as lycopene), while the cinnamon, lemon juice, and feta, provide a big dose of warm, Middle-Eastern flavor.  Want the numbers?  One serving of this tabbouleh provides around 350 calories, is filling enough to be a full meal, and provides around 11g of protein (20% of your daily need for a 150 pound person) and 7g of fiber (25% of the daily need of a 20 year-old woman).  Need even more convincing to try this?  The only dishes you’ll dirty are one pot and your cutting board, and it will be ready to eat 45 minutes after you put the water on to boil.

Head on over to Greatist for the full recipe!  And thanks to everyone arriving from Greatist for coming by to check out this space – come back soon!

Note:  All caloric and nutritional data is from Spark People and The World’s Healthiest Foods.

0 February 9, 2012 Fall

Adventures in Cheesemaking

In the spirit of daydreaming about farming and all things homemade, Trevor and I have been dabbling in cheesemaking recently.  I’d love to say that it’s as simple as following a recipe and that we were pretty much ready to run out and buy a cow, but making cheese is hard.  It’s more science than cooking.  Very precise science.  Like, whip out your digital thermometer and pH-meter precise science.  Still, despite a few less-than-delicious final products, it’s been really cool to watch a pot of milk turn into something very closely resembling cheese, and hopefully we’ll only get better at it.

The first time we attempted to make cheese was actually almost two years ago, while living in Durham.  We’d seen a bunch of recipes for “easy” mozzarella – no cultures, just junket tablets and lemon juice.  We grabbed a thermometer from Kroger and gave it a shot.  The result was not mozzarella cheese.  It was sort of a crumbly, lemony, curdy mass resembling cottage cheese.  It did not stretch.  It did not melt.  It did not look, taste, or smell like mozzarella cheese.  Apparently, there are plenty of people around the internet that managed to get this recipe to work, but we were not those people.  In hindsight, the recipe used so many shortcuts that it surprises me it even changed from it’s original milky state to anything else.

These days we’re a little bit more high tech, but still not quite ready to turn into full time fromagiers.  We now work from recipes in a book called Artisan Cheese Making at Home, which is a fantastic book.  It’s the perfect balance of technical and descriptive – with charts of cultures, troubleshooting tips, and mold types, and detailed instructions for all the cheeses you find regularly (cheddars, chevre, jack, parmesan, mozzarella) and a few more exotic cheeses (crescenza, brie, o’banon, and many more).  There are also tips and sidebars for variations on cheeses, like a cocoa-rubbed jack cheese and a brew-curds cheddar.  The instructions are long, and we typically have to read each recipe several times both before and during the process to get it all down.  Thankfully, whenever we come up with a question part way through a recipe – like: how do we actually wax a cheese?  What exactly is annatto and why does it say optional? How does one prepare a grape leaf so that it’s suitable for cheese-wrapping? – there’s always a section devoted to answering that specific question.  Of minimal importance when it comes to cheesemaking (but a nice bonus), the book is beautifully presented, with great photographs and clear prose.  I highly recommend it if you’re looking to getting into the whole cheesemaking thing.

So far, we’ve made 5 cheeses from the book.  Our first cheese was a soft cheese called a crescenza.  Neither of us have ever had crescenza from a store, so we didn’t have a lot to compare it too, but ours was a quick, soft cheese, with a spongy texture similar to a feta.  I thought it was a little bit too salty, but we ate it and considered it a decent success.  Next up came an aged gouda, a bit of a risk considering we wouldn’t be able to taste it until 3 months after making it.  The gouda has actually been our most successful cheese so far – after taking the first bite of it and finding it smooth, a little bit creamy, and definitively cheesy tasting, we jumped up and down a little bit we were so excited.  So it didn’t taste exactly like your typical gouda – but it tasted and acted like cheese!  And it was good!  Third, we tried mozzarella again.  Maybe mozzarella just isn’t our thing, because we can’t seem to get it to stretch right.  It’s tricky.  Dilled havarti was our fourth cheese, which ended up being kind of a waste, because, well… I forgot to take care of it.  And therefore it grew an immense amount of mold and we had to toss it.  Sorry, Trev.  We didn’t really have high hopes for it anyway, given that our pre-aging taste test of it revealed something unpleasantly sour.  Last, we have two boules of edam sitting in the basement for another month or so – and so far they seem pretty promising.  All in all, a mixed bag, with failures outweighing success… but the successes were sweet enough that we’re not giving up yet.

Interested in trying one of these out?  We definitely think you should.  The processes for making these cheeses are really too detailed to share in blog form (without many links and culture tables and resources) but maybe in the future after we’ve really got it down we’ll pick one or two to highlight.  What we can leave you with are some tips we’ve come up with through experience, and some of the resources we’ve found the most helpful:

  • Start your cheese early.  Unless you want to practice parenthood and wake up four times a night to flip and rinse your cheeses, getting them to their final resting state before bedtime is highly recommended.  Many of the recipes take 5-8 hours total (about a third of that is active time), so read the recipe carefully before hand and mark out a timeline, and plan to make a day of it.
  • Get a big pot (or two!).  We typically use a gallon of milk per recipe and it almost fills my Cuisinart stock pot (I think it’s 5 qts…. that would be the logical size at least).  This works, but it would be great to have more room to work with.
  • Sources for cultures and other additives: ordering cultures from either New England Cheesemaking Supply or The Beverage People is fast and relatively inexpensive.  Those in major cities should also be able to find basic cultures at local cheesemaking or brewmaking stores.

And if you don’t think you’ll ever have any desire to make your own cheese but do like to eat cheese, I can leave you with something as well – this recipe for mushroom and lentil pot pies with a buttermilk-biscuit and gouda crust.  Delicious.  It’s hearty, as satisfying as the more classic chicken version, and really healthy (well, aside from the gouda crust…) to boot.  I halved the crust recipe and froze the second half of the filling to make just enough for two servings now, and two servings later.  Enjoy!  And look forward to more cheesy successes soon.

Mushroom and Lentil Pot Pies

Recipe adapted from Pink Parsley.  Serves 4.

For the filling:

  • 1/2 c. lentils
  • salt
  • 1/3 c. dried wild mushrooms (I used Oyster mushrooms)
  • 1 TBS butter
  • 1 TBS olive oil
  • 8 oz. fresh button mushrooms, sliced
  • 1 medium onion, diced
  • 2 carrots, peeled and diced
  • 1 1/2 tsp dried sage
  • 1 tsp fresh thyme leaves
  • 2 large garlic cloves, minced
  • 2 TBS flour
  • 2 small yukon gold potatoes, washed and cut into 1/2 inch cubes
  • 1 TBS soy sauce
  • 2 TBS tomato paste

For the crust:

  • 1 c. flour
  • 6 TBS cornmeal
  • 1 1/2 tsp baking powder
  • 1/2 tsp salt
  • 4 TBS chilled butter, cut into cubes
  • 1/2 c. buttermilk
  • 3/4 c. shredded gouda cheese
  1. Cover lentils with water and add a pinch of salt.  Bring to a boil, then lower heat, and simmer, covered, for about 20-25 minutes, until lentils are soft.
  2. Pour 3 cups of boiling water over the dried mushrooms, and let steep for 20 minutes.
  3. Meanwhile, heat butter in large saucepan over medium heat, and saute mushrooms in butter until golden brown, about 4 minutes.  Add olive oil, onion, carrot, sage, and thyme, and cook for 5 minutes, stirring occasionally.  Add garlic, and cook for 1 minute, stirring, then add flour, and stir to coat vegetables, cooking for about 1 minute.   Add potatoes, soy sauce, tomato paste, and the warm soaking liquid from the dried mushrooms – reserve the rehydrated mushrooms, chop them into small pieces, and then add to the mushroom-potato mixture.  Bring the mixture to a boil, then reduce heat, and simmer, covered, for 12-15 minutes, until potatoes are firm-tender.  (They will soften more in the oven).  When you cover the potatoes, begin preheating your oven to 400°F.
  4. Make the crust: whisk the flour, cornmeal, baking powder, and salt together in a small bowl.  Mix in cold butter pieces with a fork or pastry cutter, mashing the butter pieces into the flour mixture, until the dough has a coarse, crumbly texture.  Add the buttermilk and stir until the dough comes together.  Knead dough briefly, about 1 minute, then stretch into a piece large enough to cover your baking dish.
  5. Add the lentils to the cooked potato-mushroom mixture and stir to combine.  Remove from heat and spoon into baking dish.   Cover lentil-mushroom-potato mixture with prepared dough, stretching to cover edges of dish, then top with shredded gouda.  Bake for 25 minutes, or until potatoes are fully tender and crust is golden brown.  You may want to place a baking sheet under your baking dish to catch any of the mixture that bubbles over the edges of the pan.  Serve hot.  Reheats well!

0 January 31, 2012 Cookbook

Cookbook of the Month – Lucid Food

Here I am, January 31st, squeezing in the cookbook of the month post!  It’s been a busy, but good month.  It only seems appropriate that the cookbook of the month be Louisa Shafia’s “Lucid Food: Cooking for an Eco-Conscious Life,” as so many of the recipes from my cleanse (which pretty much consumed the first two weeks of my January) came from it.  In fact, this is probably the single cookbook that I own that I’ve cooked the most recipes from, coming in at a total of 12 I’ve tried in the year that I’ve owned the book.  For someone who usually bookmarks 20 recipes per cookbook and then makes one, maybe two of those 20, this feels like quite an accomplishment.  Maybe it’s because it’s lightweight and paperback and easy to tote back and forth to the kitchen, or maybe it’s because the recipes are consistently healthy and intriguing, but for whatever reason I keep coming back to this book.

That’s not to say that this book has the best recipes I’ve encountered – in fact, I would say that in general the recipes in Lucid Food are solid but not mind-blowing.  Which is a little disappointing, as I really want to love this book.  This is one of two cookbooks I ordered as a present for myself to celebrate accepting my job offer last spring (I know, I really live it up, right?)  I had flipped through this in a bookstore and was intrigued by both the recipes (all of which were unique and fresh) and the theme that ties the book together – that living and eating eco-consciously can be easy and delicious, while still helping the environment.  Truth be told, I’m not one of the “greenest” people out there, and I don’t think I’ll ever be an extremist of any sort, but I do think that there are great benefits to eating in season as much as possible, even if only because it makes our food taste better.  So I like this book a lot in theory, and am repeatedly drawn to the style of eating – hearty grains, roasted veggies, interesting and flavorful sauces – but in practice the quality of the recipes is inconsistent.  Examples?  I’ve tried the raw kale and avocado salad and absolutely loved it, but the roasted fennel with cranberries and chestnuts didn’t do it for me.  Also good were the indian spiced scrambled eggs with cilantro-jalapeno sauce, and gold beet barley risotto, but the indonesian corn fritters and grape and ginger chicken were mediocre.  I’ve also tried the apple pomegranate sangria, the nutty banana shake, the green smoothie, and the rhubarb and pistachio yogurt, with mixed results.  Still, I’ve found a few favorites in this book, and I still have a dozen or so recipes I’ve bookmarked to try, so it’s definitely a book that I consider worth having – it’s just not perfect.

One recipe from this book that truly is a gem is this recipe for new potato, egg, and green olive pesto salad.  I actually had this on my list of posts for this past summer, as it’s perfect picnic food, but I kept making it and eating it all before I got a chance to take pictures.  The fact that my friends with whom I shared this on my summer picnics loved it so much that I never had leftovers to bring home didn’t help the photo-taking aspect either.  When I was flipping through Lucid Food the other day though, noting which recipes I’d tried and which ones were on my short list, I realized that this recipe really doesn’t have any ingredients that are particularly seasonal – olives, potatoes, eggs, walnuts, celery… they’re all either available year round or you really can’t get them locally in the Northeast, so I figured I’d share my favorite recipe from the book even though it’s lighter, summery fare and we’re in the middle of the winter.  It’s been a mild winter anyway – I got a sunburn visiting DC last weekend.  Maybe I’ll even take this on a winter picnic.

Eggs and New Potatoes with Green Olive Pesto

Adapted slightly from Lucid Food.  Serves 3.

  • 6 eggs
  • 1 TBS white vinegar
  • salt and pepper
  • 1 1/2 c. cubed new potatoes
  • 1/4 c. packed fresh parsley leaves
  • 3 anchovy filets
  • 6-10 green olives, pitted
  • 1/4 c. walnuts
  • 1 TBS lemon juice
  • 3 TBS olive oil
  • 1 large celery stalks, trimmed and cut into small cubes
  1. Make the pesto: combine parsley, anchovies, olives, walnuts, and lemon juice in a food processor and pulse until coarsely chopped.  Add olive oil (in a drizzle while food processor is running if you have a food processor that does that, otherwise all at once) and process until pesto is uniform in texture but not completely smooth.
  2. In a small saucepan, cover eggs with cold water, add vinegar and a generous dash of salt, and bring to a boil over medium-high heat.  Cover pot, reduce to a simmer, and simmer for 1 minute, then turn heat off and let pot sit, covered, for 15 minutes.  Drain hot water off eggs and rinse under cold water until cool enough to handle, then peel, discarding shells, and chop hard-boiled eggs into small pieces.  Add to a large bowl.
  3. Cover the potato cubes with cold water and add a dash of salt, then bring to a boil over medium heat.  Reduce heat to a simmer, cover, and simmer for 3-4 minutes, until potatoes are tender.  Drain and toss with eggs.  Add celery pieces and pesto to bowl and toss together.  Serve at room temperature or cold.  Keeps for 2-3 days in fridge.

1 January 23, 2012 Recipe

Broccoli and Edamame Soup

I bet you thought that now that I’m done with my cleanse, I’d go straight back to posting recipes for things that included a lot of cheese, cream, flour, and or/chocolate.  Well… that was the plan, it’s just that things don’t always go according to plan.  This post was supposed to be about a chocolate stout layer cake with boozy peanut butter frosting, which I made yesterday for Trevor to celebrate his newfound employment.  It was going to be delicious and towering and gorgeous.  And, well… it was delicious, but let’s just say I’ve added “learning to make attractive layer cakes” to my 2012 kitchen to-do list.  The recipe is decadent and definitely worth sharing, so I might have to try again soon, but if you see the below you’ll understand whyI’m holding off for now… not too pretty.

And so, we have my unexpectedly delicious and healthy dinner instead!  This soup was super fast to throw together, very flavorful, filling, and packed with good nutritious stuff.  It does have cheese and cream, so it’s not exactly cleanse-worthy, but it’s a good extension of my healthy eating plan.  I was originally following this recipe on Lucullian delights, but then thought of this amazing roasted broccoli recipe (which I like with toasted almonds in place of the pine nuts), and decided to add the flavor-profile of that dish to the soup.  I also added leeks, for depth, and served the soup with a few raw broccoli florets on top, which added a great textural contrast.  This one’s definitely going in the books for when I need a quick dose of good green stuff, or even for an easy and fairly elegant first course soup.  You probably have most of the ingredients on hand, so give it a try sometime!

Broccoli and Edamame Soup with Almonds and Parmesan

Inspired by this and this.  Serves 3-4.

  • 2 or 3 medium heads broccoli
  • 1 leek
  • 3 scallions
  • 2 TBS olive oil
  • 1 c. frozen, shelled edamame
  • 4 c. chicken stock
  • 1 TBS lemon juice
  • 3 TBS heavy cream
  • 1/3 c. grated parmesan
  • 1/4 c. toasted almonds for garnish
  • freshly ground black pepper
  1. Remove the stalks from the broccoli and the green parts and roots from the leeks and scallions, and rinse all vegetables, being sure to rinse inside the leek.  (How to clean leeks.)  Slice the leeks and onions into thin rounds, and roughly chop the broccoli into florets – reserve a few florets for garnishing the soup.  Heat the olive oil over medium heat in a large stockpot, then add leek and scallion and sautee for 3-4 minutes, until soft.  Add broccoli and edamame and cook for another 3-4 minutes, until broccoli is fragrant and beginning to soften, then add chicken stock.  Bring to a boil, then simmer gently for 15 minutes.
  2. Puree soup with an immersion or regular blender.  Stir in lemon juice, cream, and parmesan, and taste for seasoning.  Add freshly ground black pepper to taste, then garnish with toasted almonds, broccoli florets, and an extra sprinkle of parmesan.

0 January 17, 2012 Recipe

Winter Cleanse: Week 2 – Menu and Recipes

Week 2 did not go so hot.  I just … got tired.  I stopped for a sandwich one night on the way home from work because going to the grocery store sounded unbearable.  I had a muffin at our staff meeting.  I went out for lunch to celebrate the arrival of some new coworkers, and the departure of two others.  I may or may not have had a glass of wine while making the golden beet and barley risotto.  It happens.  But, what I did not do was beat myself up over it.  Or give up entirely.  Yes, I let my standards slide a little.  But I also made some excellent new healthy dishes, like roasted fennel stuffed with cranberries, chestnuts, and mushrooms.  And meyer lemon pesto.  And toasted quinoa and kalamata salad.  So all in all, it was worth it.

The menu below does not reflect exactly what I ate last week, but it’s pretty close, and I have tried and tested all of the recipes on it.  I did let a small amount of cheese and bread sneak onto my plate, and I’ve decided to leave that reflected below, because everyone needs a treat sometimes.  I also apologize for the minimal number of pictures, (I know, I know, bad blogger move after bad blogger move!), but I’m feeling a little bit rejuvenated after taking a photography break, so hopefully I’ll have some more recipes with better pictures up soon.  I hope you find the menu useful in generating your own ideas for healthy eating!

Additional “Cleanse” Posts:

  • Winter cleanse, week 1
  • Cleanse preview post

The Menu – Week 2

Day 8: Breakfast – Greek Yogurt w/ Fresh Strawberries and Granola; Lunch – leftover Chicken-Chili Stew and green salad (from my work cafeteria); Dinner – Roasted Fennel with Cranberries, Chestnuts, and Mushrooms (scaled down for 1 or 2 servings)

Day 9: Breakfast – leftover Indian Potatoes with (fresh) Scrambled Eggs; Lunch – leftover Fried Chickpeas and green salad (from my work cafeteria); Dinner – Lemony Gold Beet Barley Risotto (omit the cheese)

Day 10: Breakfast – Mango-Grapefruit-Berry Smoothie (juice from 1 grapefruit, 1/2 c. frozen mango, 1/2 c. frozen berries, 1 c. soymilk) plus 1 slice whole wheat toast w/ peanut butter; Lunch – leftover Gold Beet Risotto; Dinner – Peanut-buttery Carrot and Butternut Squash Soup (double the tomato paste and don’t be shy with the cayenne!)

Day 11: Breakfast – Oatmeal w/ 1/2 c. berries and 1 TBS maple syrup; Lunch – Leftover carrot and squash soup; Dinner – Quinoa, Kalamata Olive, and Lemon Cakes (mine didn’t form cakes at all, so I just toasted the mixture for about 5 minutes, stirring once, and ate as a salad) plus green salad

Day 12: Breakfast – 2 scrambled eggs w/ 1 slice whole wheat toast; Lunch – Leftover quinoa/olive/lemon cakes; Dinner – Large green salad w/ 1 pear, 1/4 c. dried cherries, and 1/4 c. pecans

Day 13: Breakfast – Greek Yogurt with Rhubarb and Pistachios; Lunch – Fried egg on english muffin w/ Meyer Lemon Pesto and spinach; Dinner – Avocado-Mango Chicken w/ Spinach Salad

Day 14: Brunch – Pumpkin Oatmeal Pancakes; Dinner – Chickpea Dumplings in Tomato-Yogurt Sauce (one of my favorite recipes of all time)

Disclaimer: I am not a dietician, nutritionist, doctor, or medical professional of any sort.  I simply wanted to share my personal menu and goals for the past week, so please realize that I have tapered this plan to what I feel my own nutritional needs are, and carefully consider your own health needs and consult your doctor before following any diet, cleanse, or detox plan! 

  • « Go to Previous Page
  • Go to page 1
  • Interim pages omitted …
  • Go to page 43
  • Go to page 44
  • Go to page 45
  • Go to page 46
  • Go to page 47
  • Interim pages omitted …
  • Go to page 57
  • Go to Next Page »

Primary Sidebar

Subscribe!

Get creative recipes and menu ideas delivered straight to your inbox.

Most Popular

A House // Sweet Potato and Coconut Milk Soup with Brown Rice and Lentils

Monthly Fitness Goals: July // Homemade Spinach Wraps with Chopped Greek Salad

A New Job // Classic Seven-Layer Bars

Butternut Squash Carbonara with Fried Sage and Caramelized Onions

Happy Birthday, Trevor! // Peanut Butter Fudge

Cookbook Review and Giveaway: Home Made Winter

Drizly

Please note!

Full disclosure: if you purchase anything at Amazon using the above links or any other links to Amazon on this site, I will receive a small commission. Just so you know!

Copyright© 2025 · Cookd Pro Theme by Shay Bocks

This site uses cookies: Find out more.