• Skip to primary navigation
  • Skip to main content
  • Skip to primary sidebar
  • Home
  • Recipes
  • Features
    • Cookbook Reviews
    • Ingredient of the Week
    • Sunday Dinner
    • Fitness Goals
  • Travel
  • About
    • Privacy Policy
    • Cookie Policy
  • Work With Me

Katie at the Kitchen Door

Globally-inspired, seasonal recipes

Blog Page

0 August 3, 2010 Poultry

Rhapsody in Blueberries

Maine is a pretty cool place.  It’s cool because the other morning I was having tea on the dock, and a bald eagle flew ten feet in front of my face with another bird… in it’s talons.  It was enormous.  And awe inspiring.  Even though I’ll admit it made me feel a little bit shaky.  It’s also cool because I spent yesterday morning hiking up a ravine with rickety wooden ladders in Acadia and suddenly found myself looking out over a perfectly calm and sparkling bay.  And then four hours later I was sitting in the corner of an old wooden tavern, eating the best restaurant meal I’ve had in years.

It’s cool because when you look up at the sky at night it’s so thick with stars that it looks like someone brushed them on with a paintbrush.  And because every afternoon at four the sun falls on the hammock and I fall asleep listening to the grasshoppers chirp.  On foggy mornings packs of loons float silently along the shore, and on sunny ones kingfishers relentlessly dive by the dock.

It’s cool because Maine is where camp is, and when I went to visit this morning I received more hugs at once than I have in years, from both old friends and small children.  I watched a six year old’s face light up as she barreled toward me and latched around my waist, and while sitting on the deck a four year old I don’t even know climbed into my lap.  When Dalton told me he couldn’t remember when his birthday was, and I asked whether it was in the wintertime or the summertime, he told me “Oh, I know, it’s in moose-hunting season.”  And later, Robbie pulled a cheese stick from his lunchbox and announced to me, “It’s a cheese-stick.  It’s like a stick … but it’s cheese.”  You can learn a lot from five year olds.

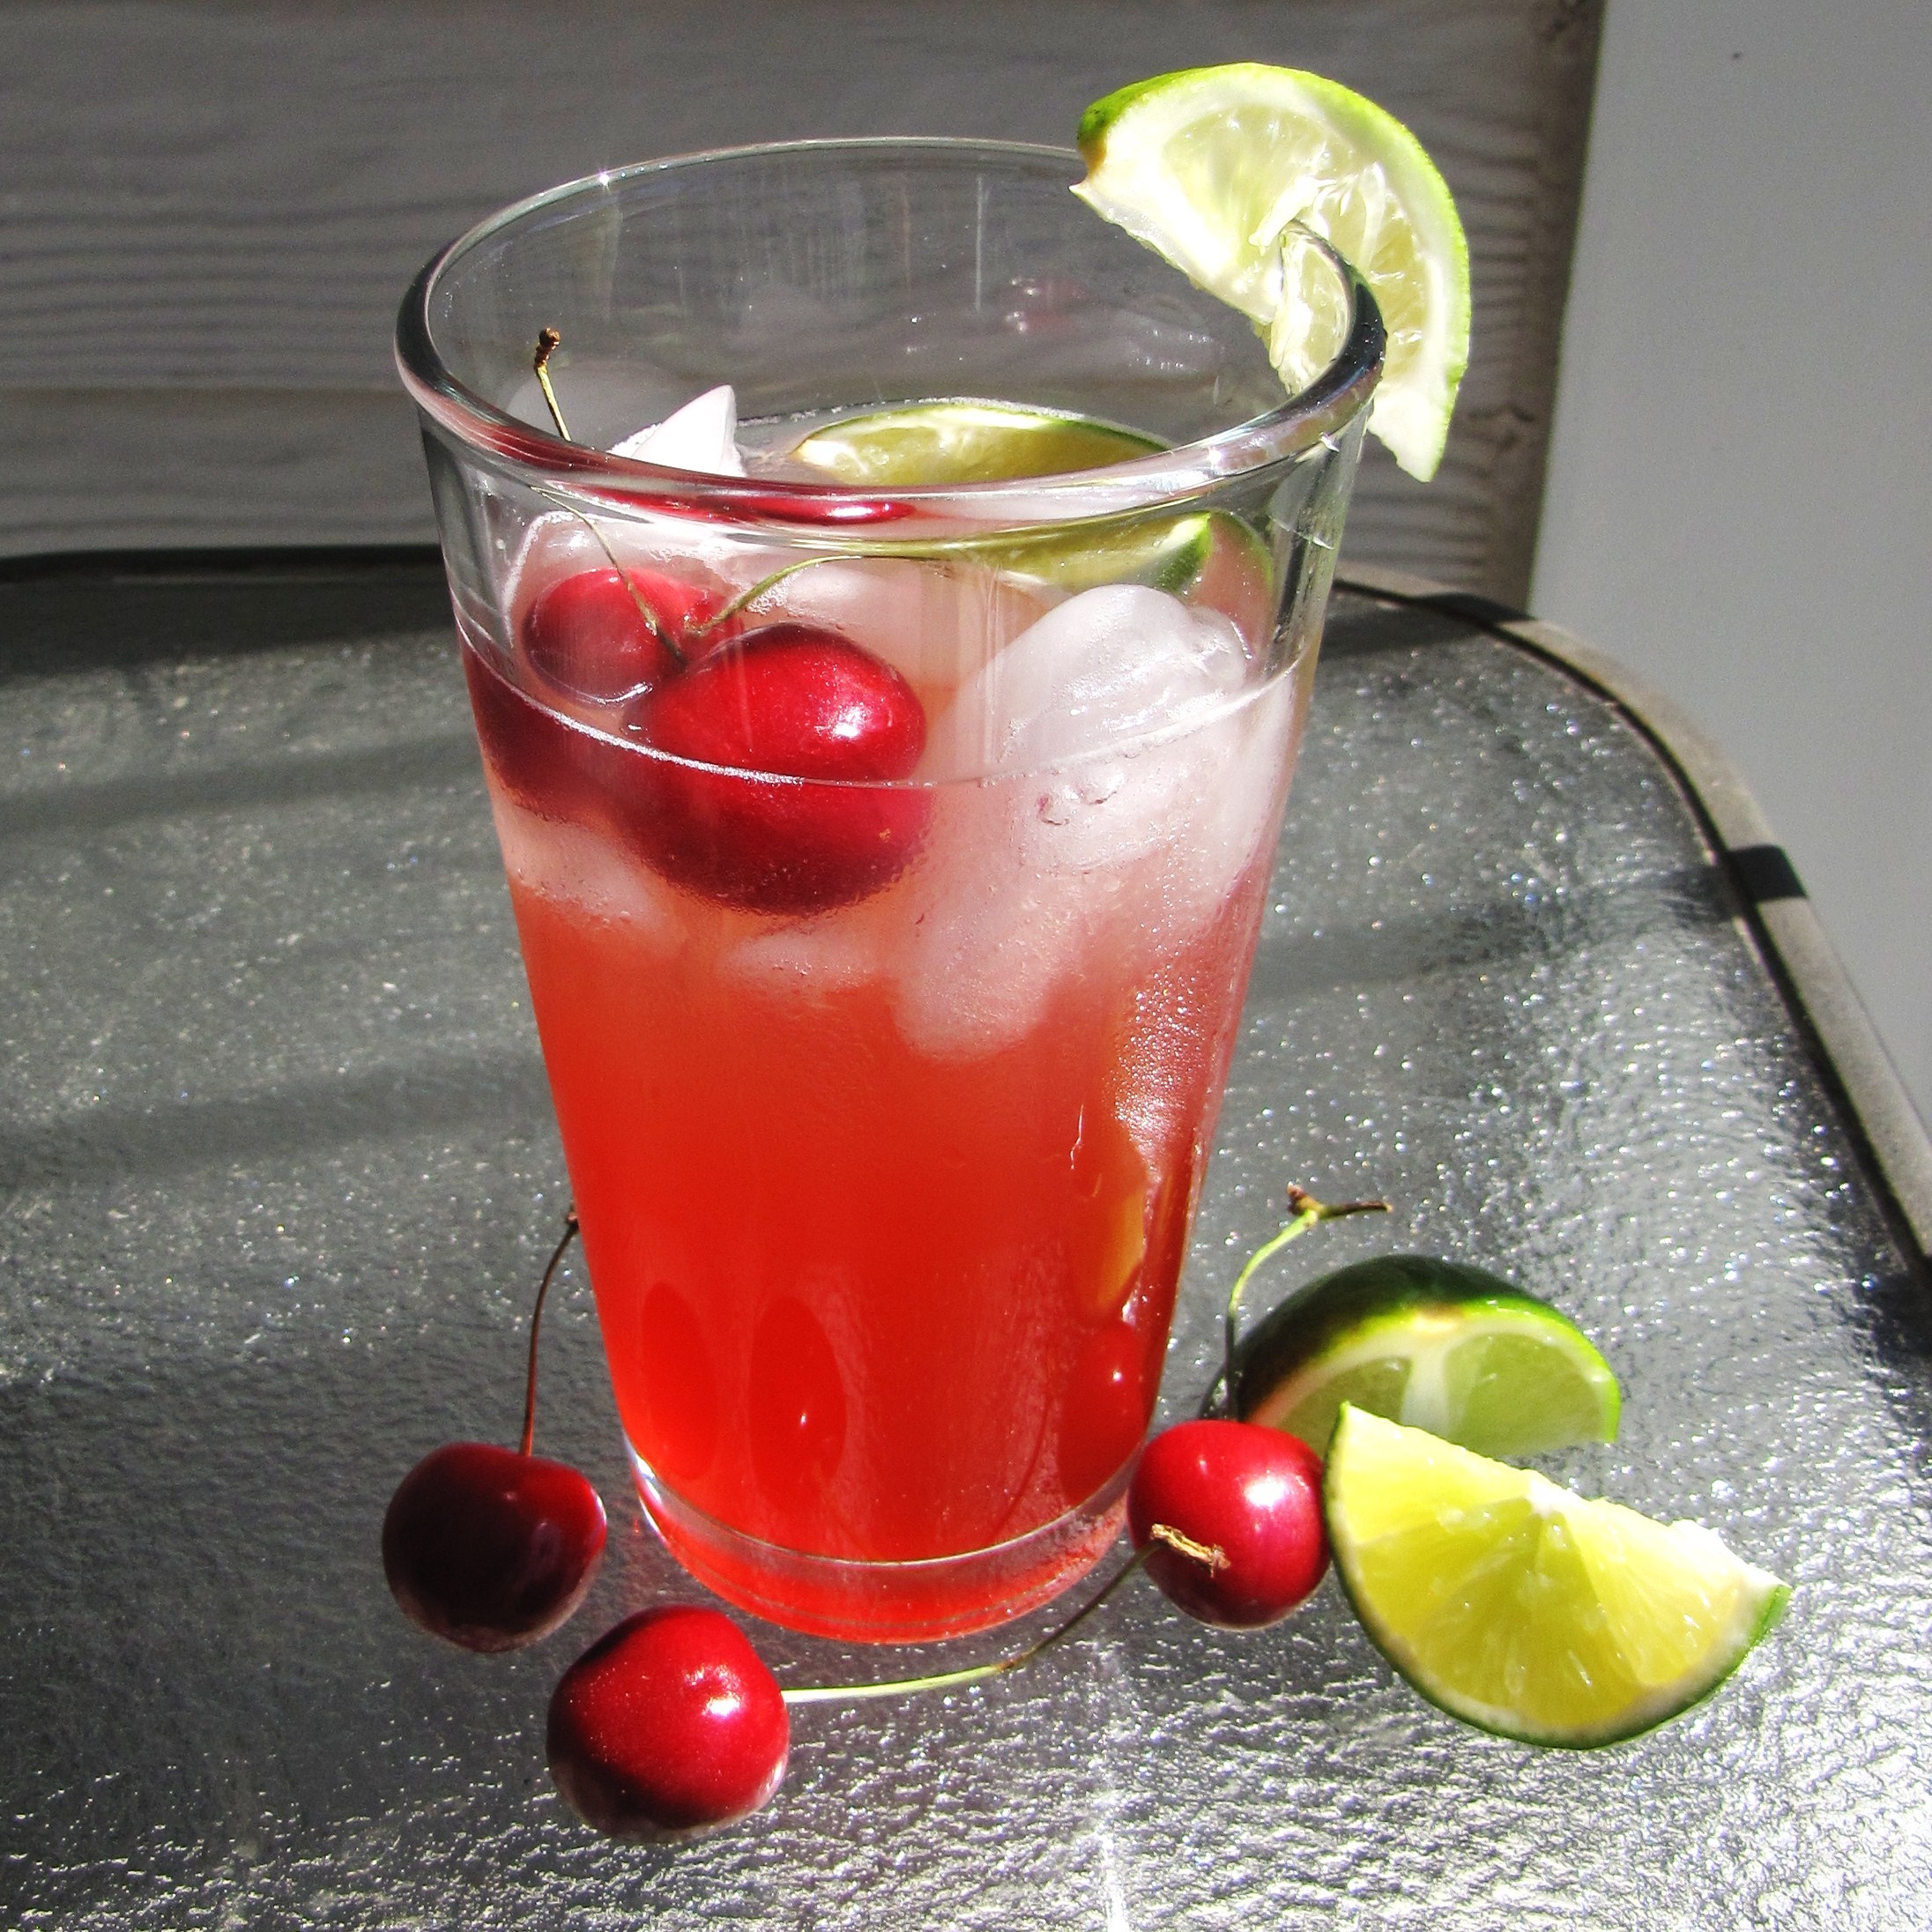
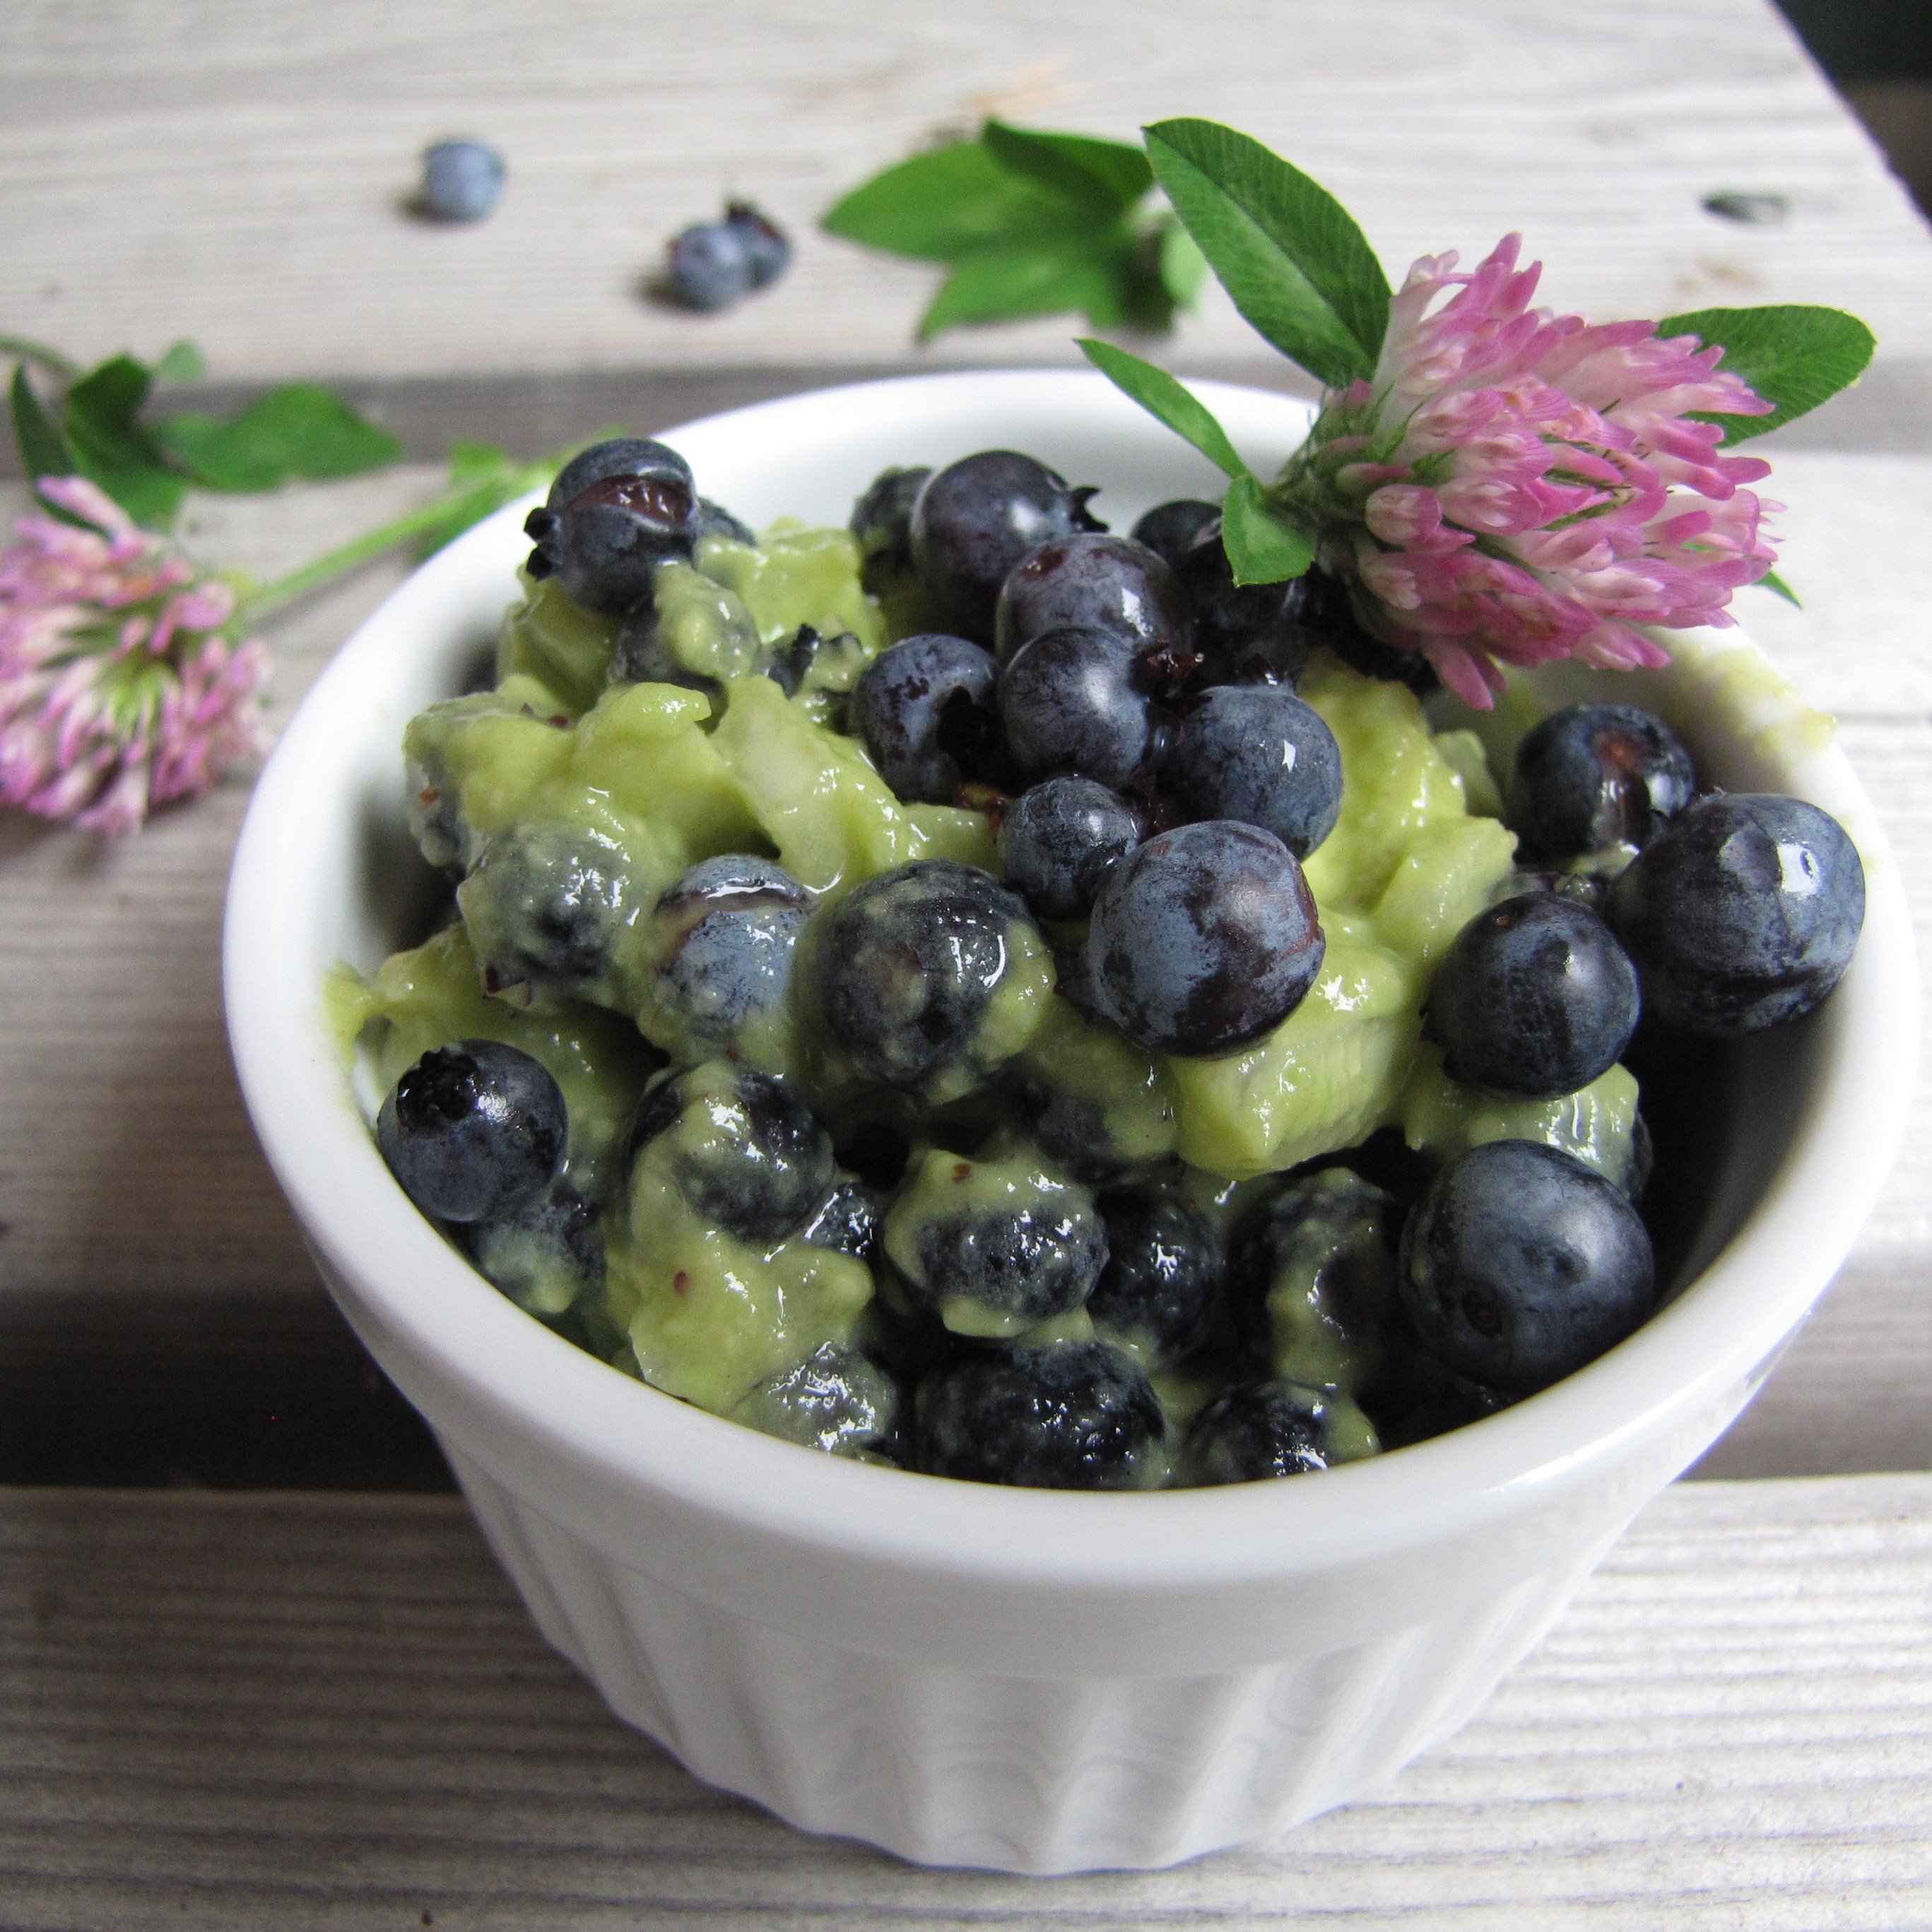
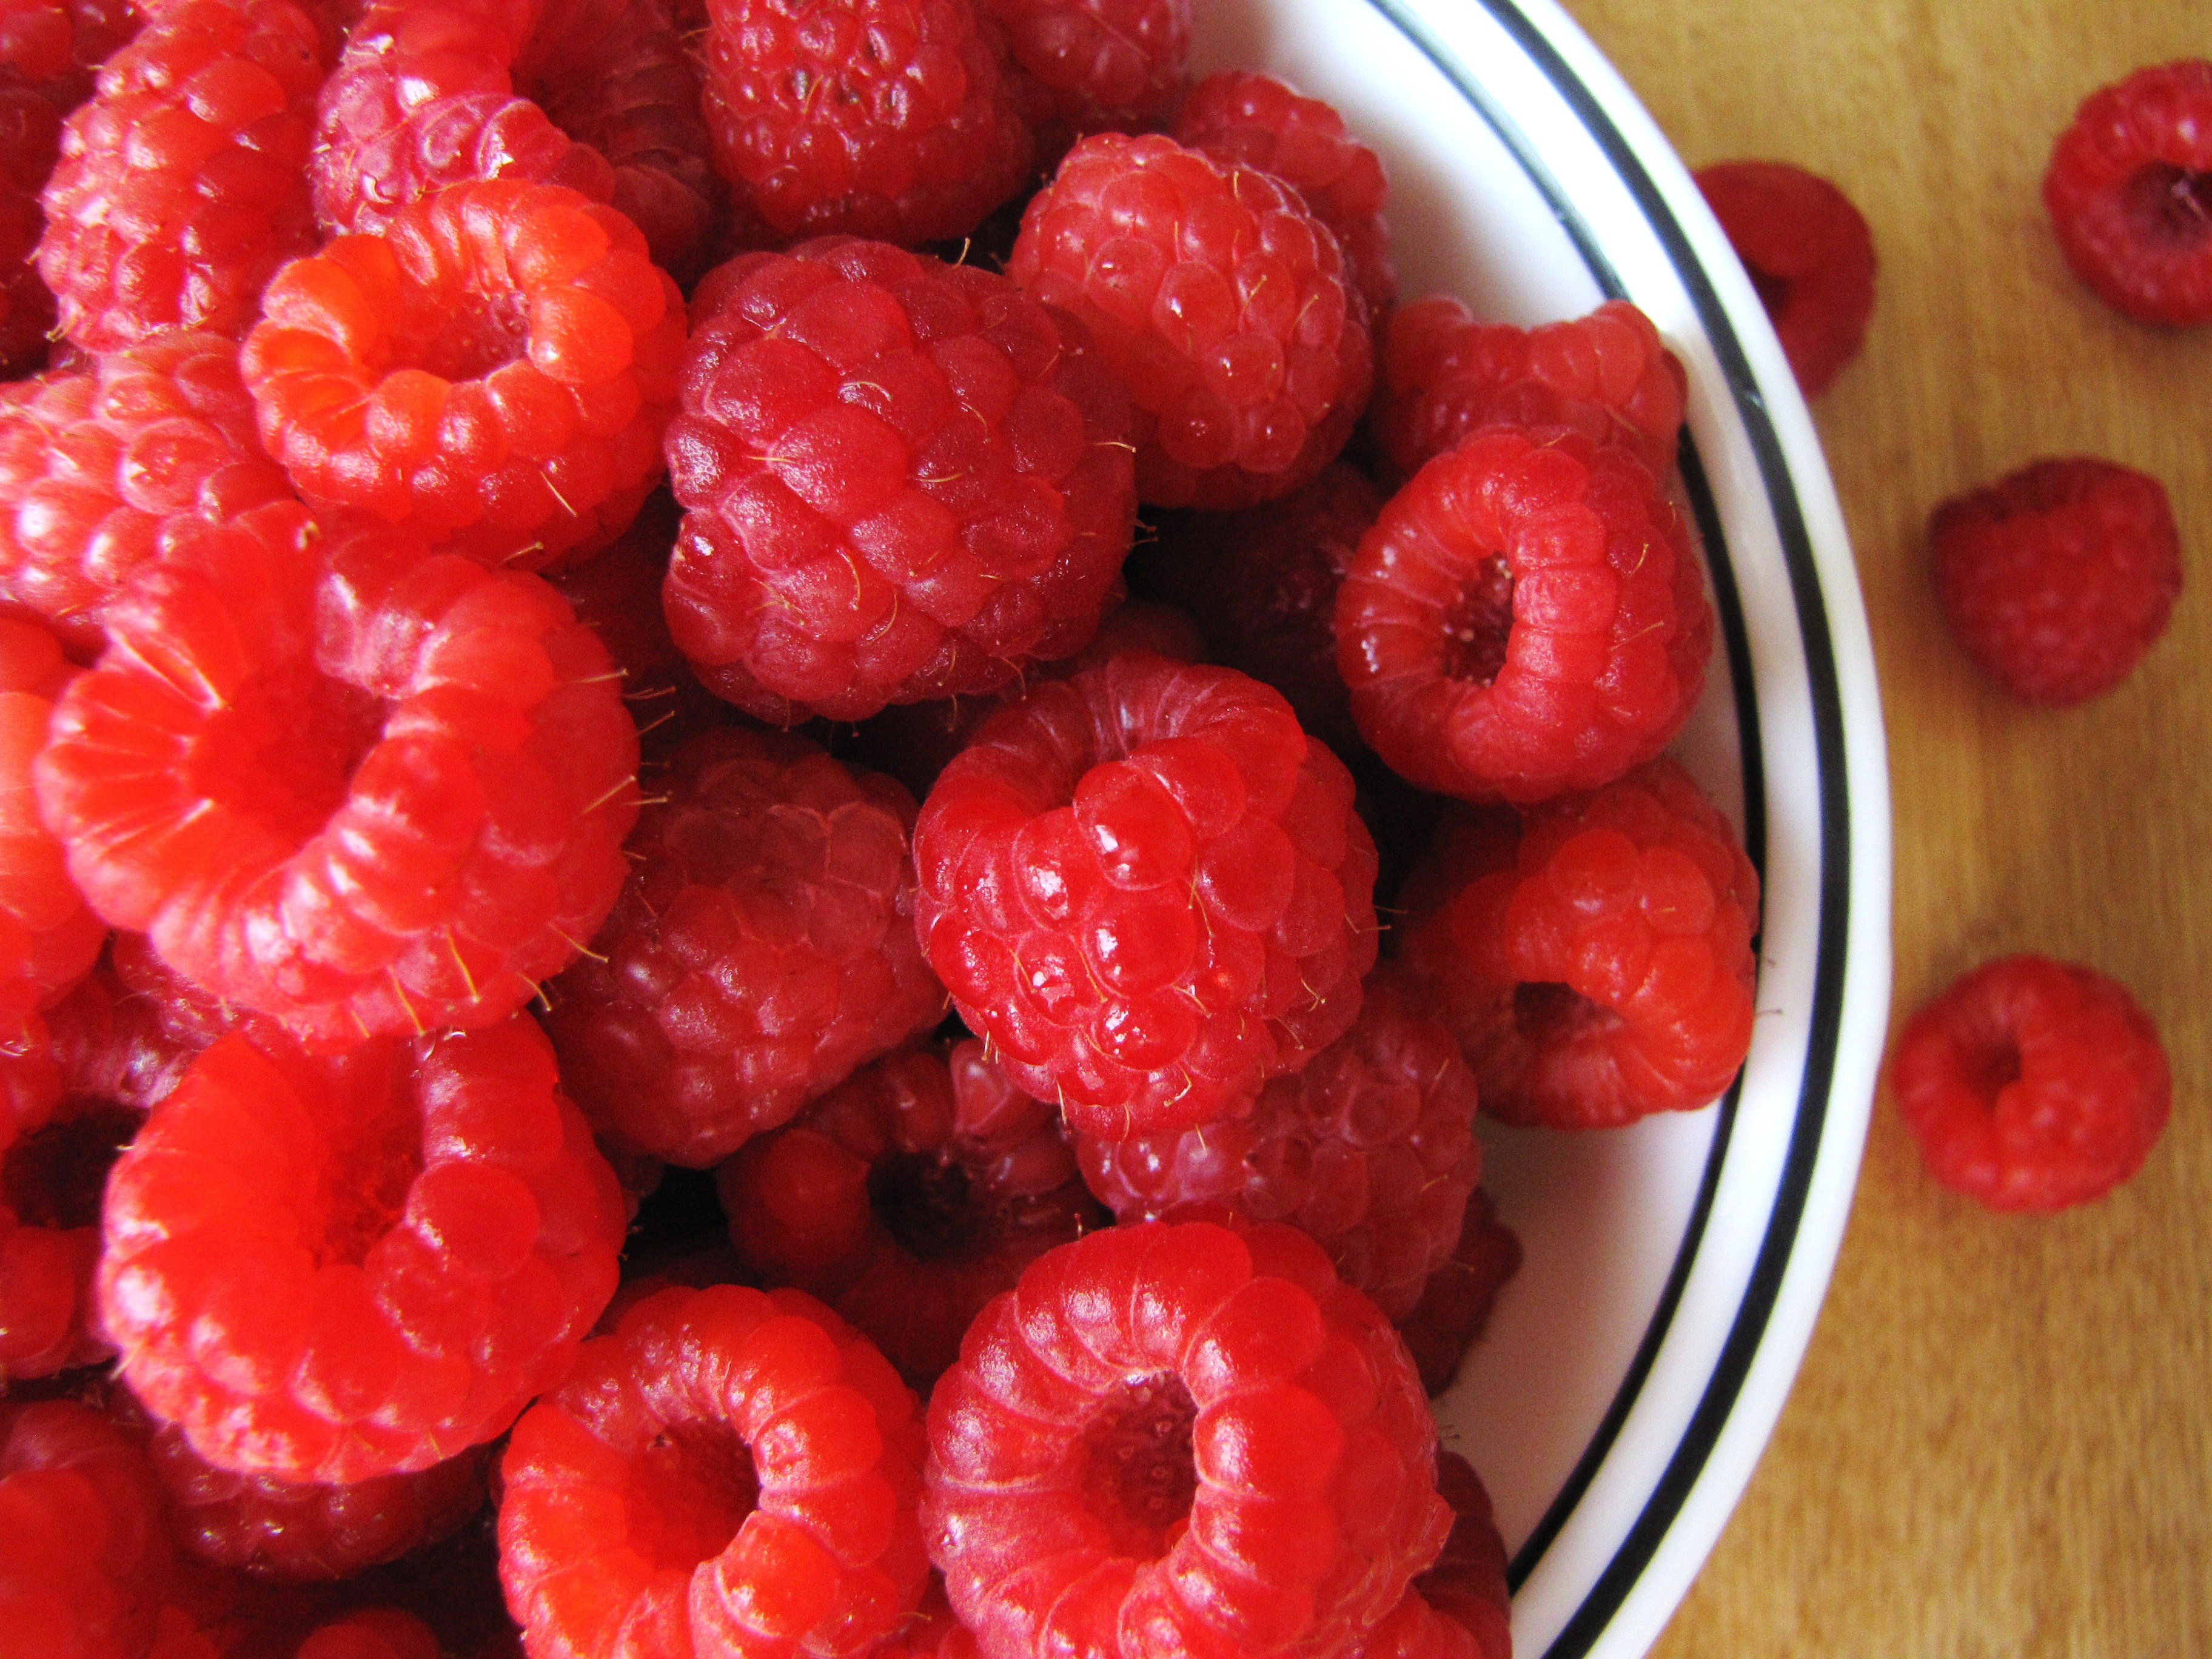
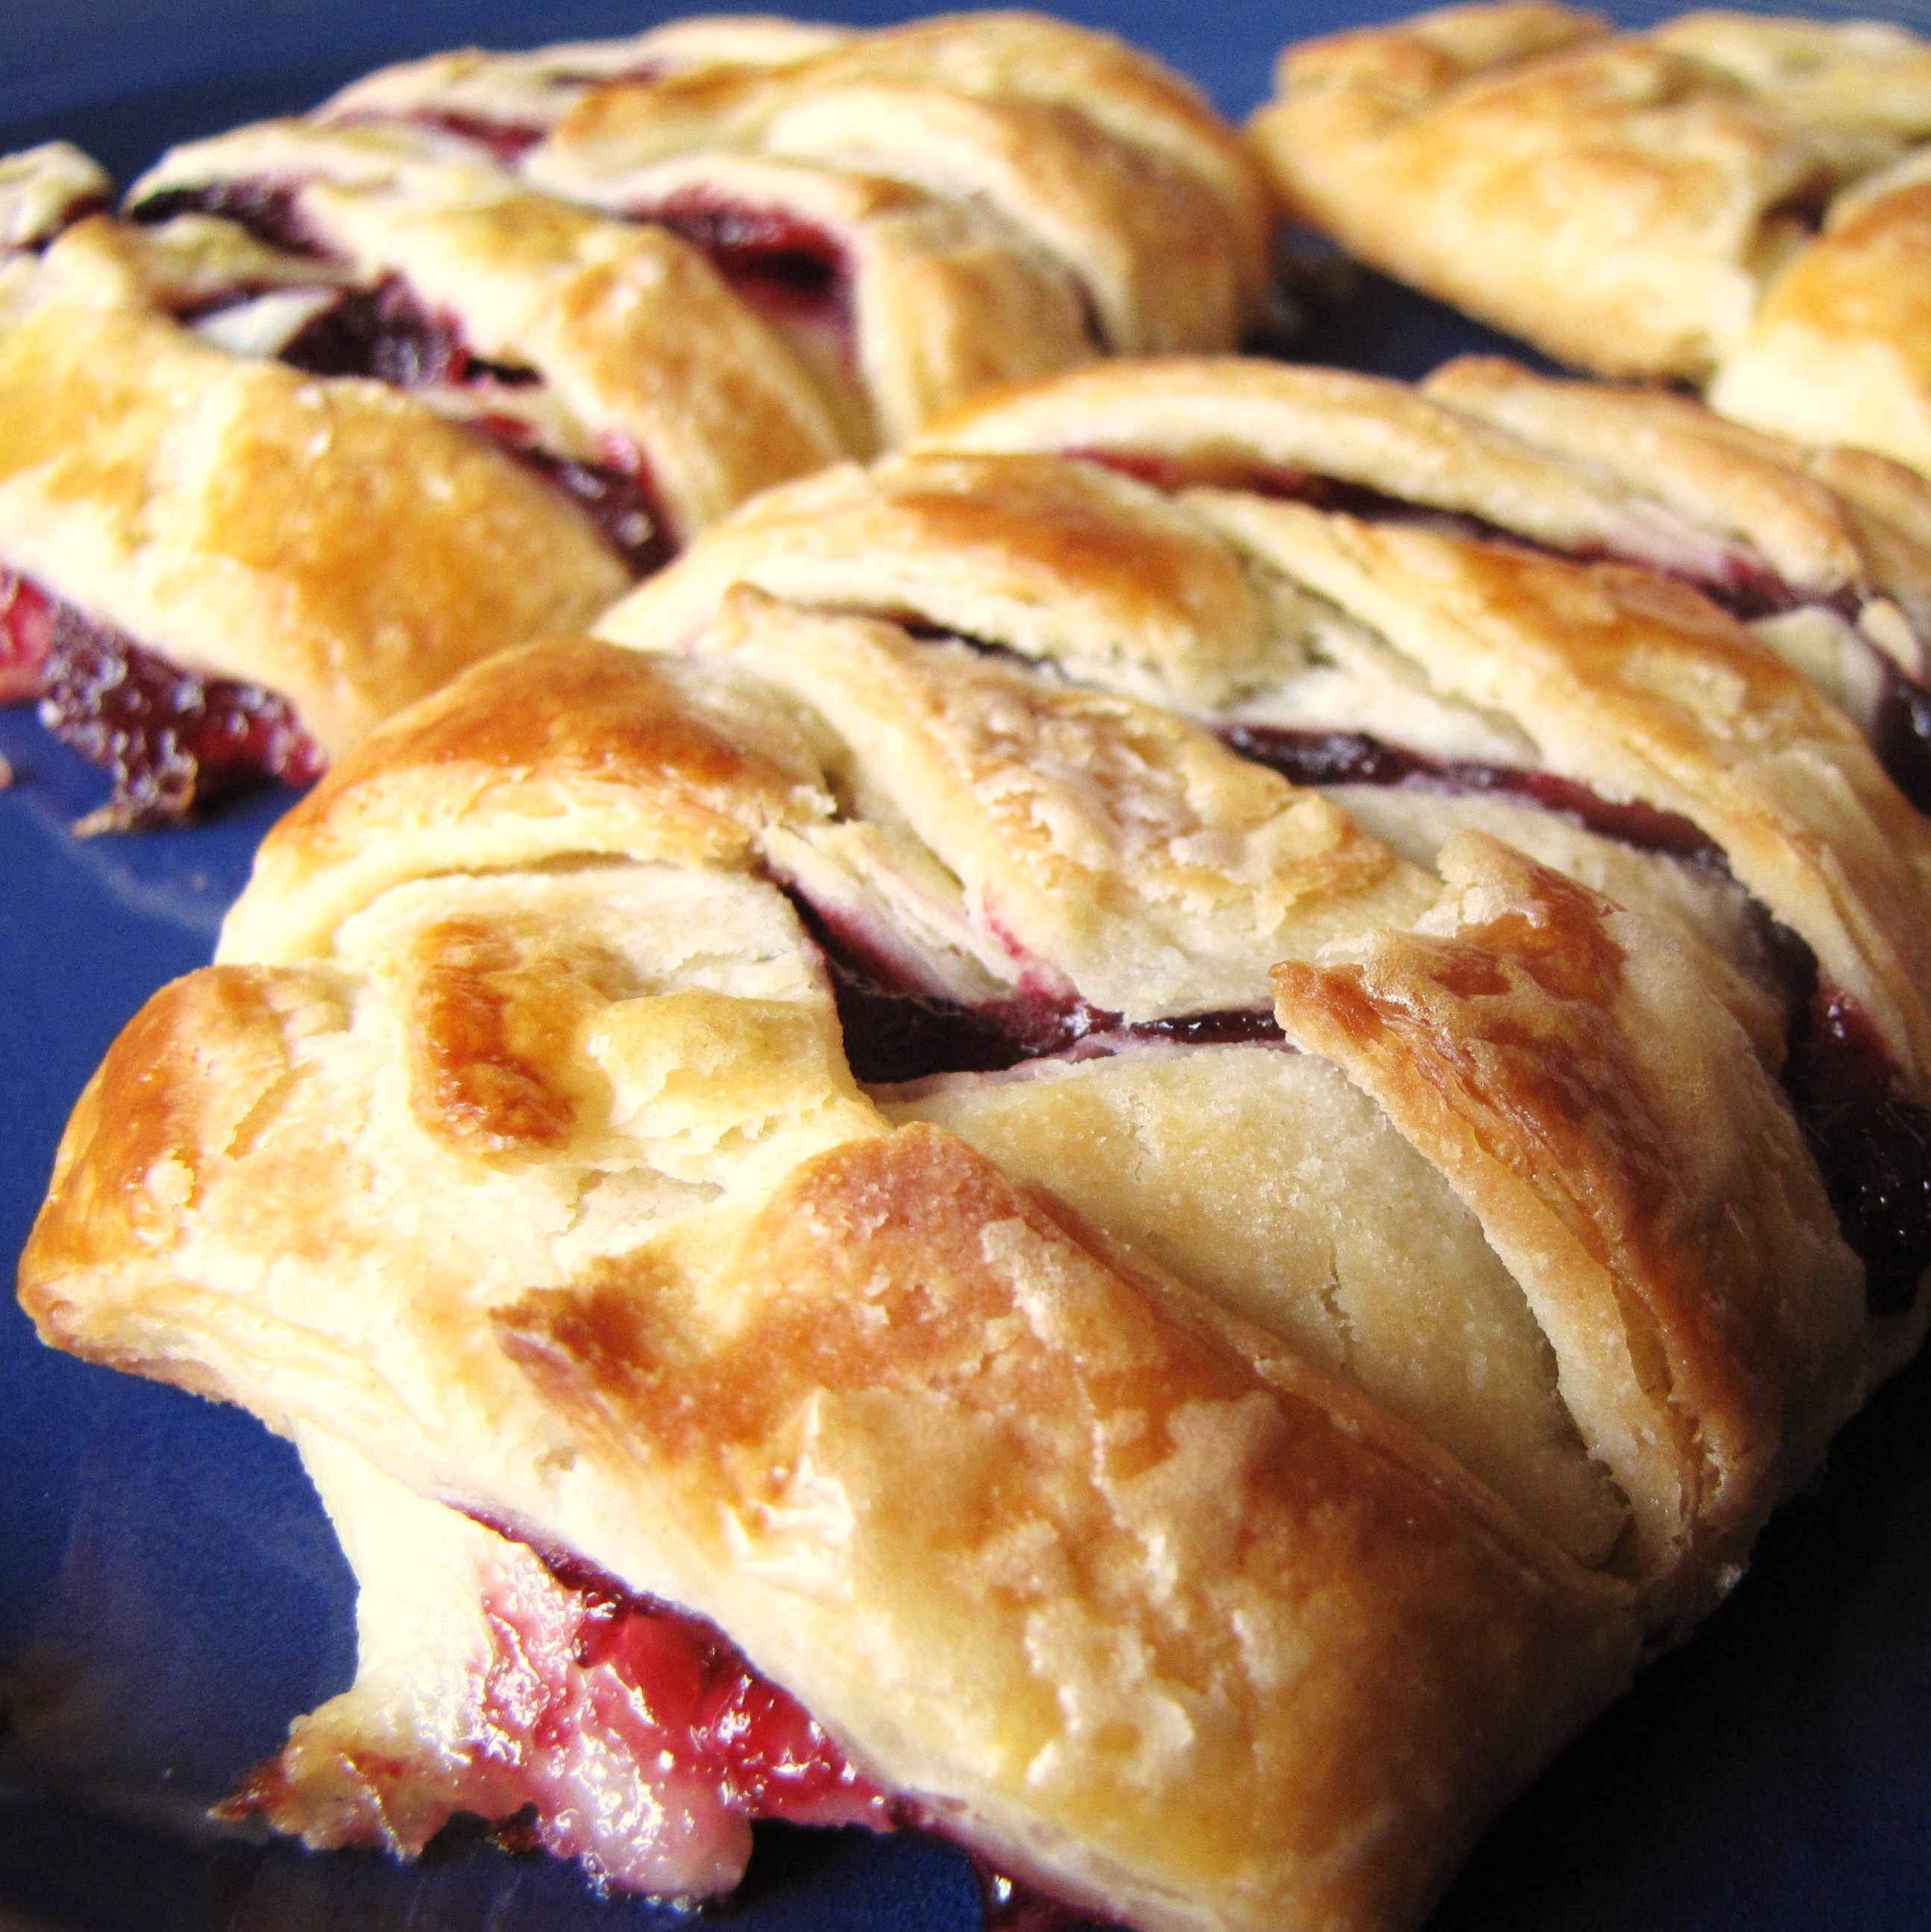
And lastly, it’s cool because I can walk across the street and pick as many wild blueberries as I want.  As many times as I want.  And make as many different blueberry treats as I want.  For free.

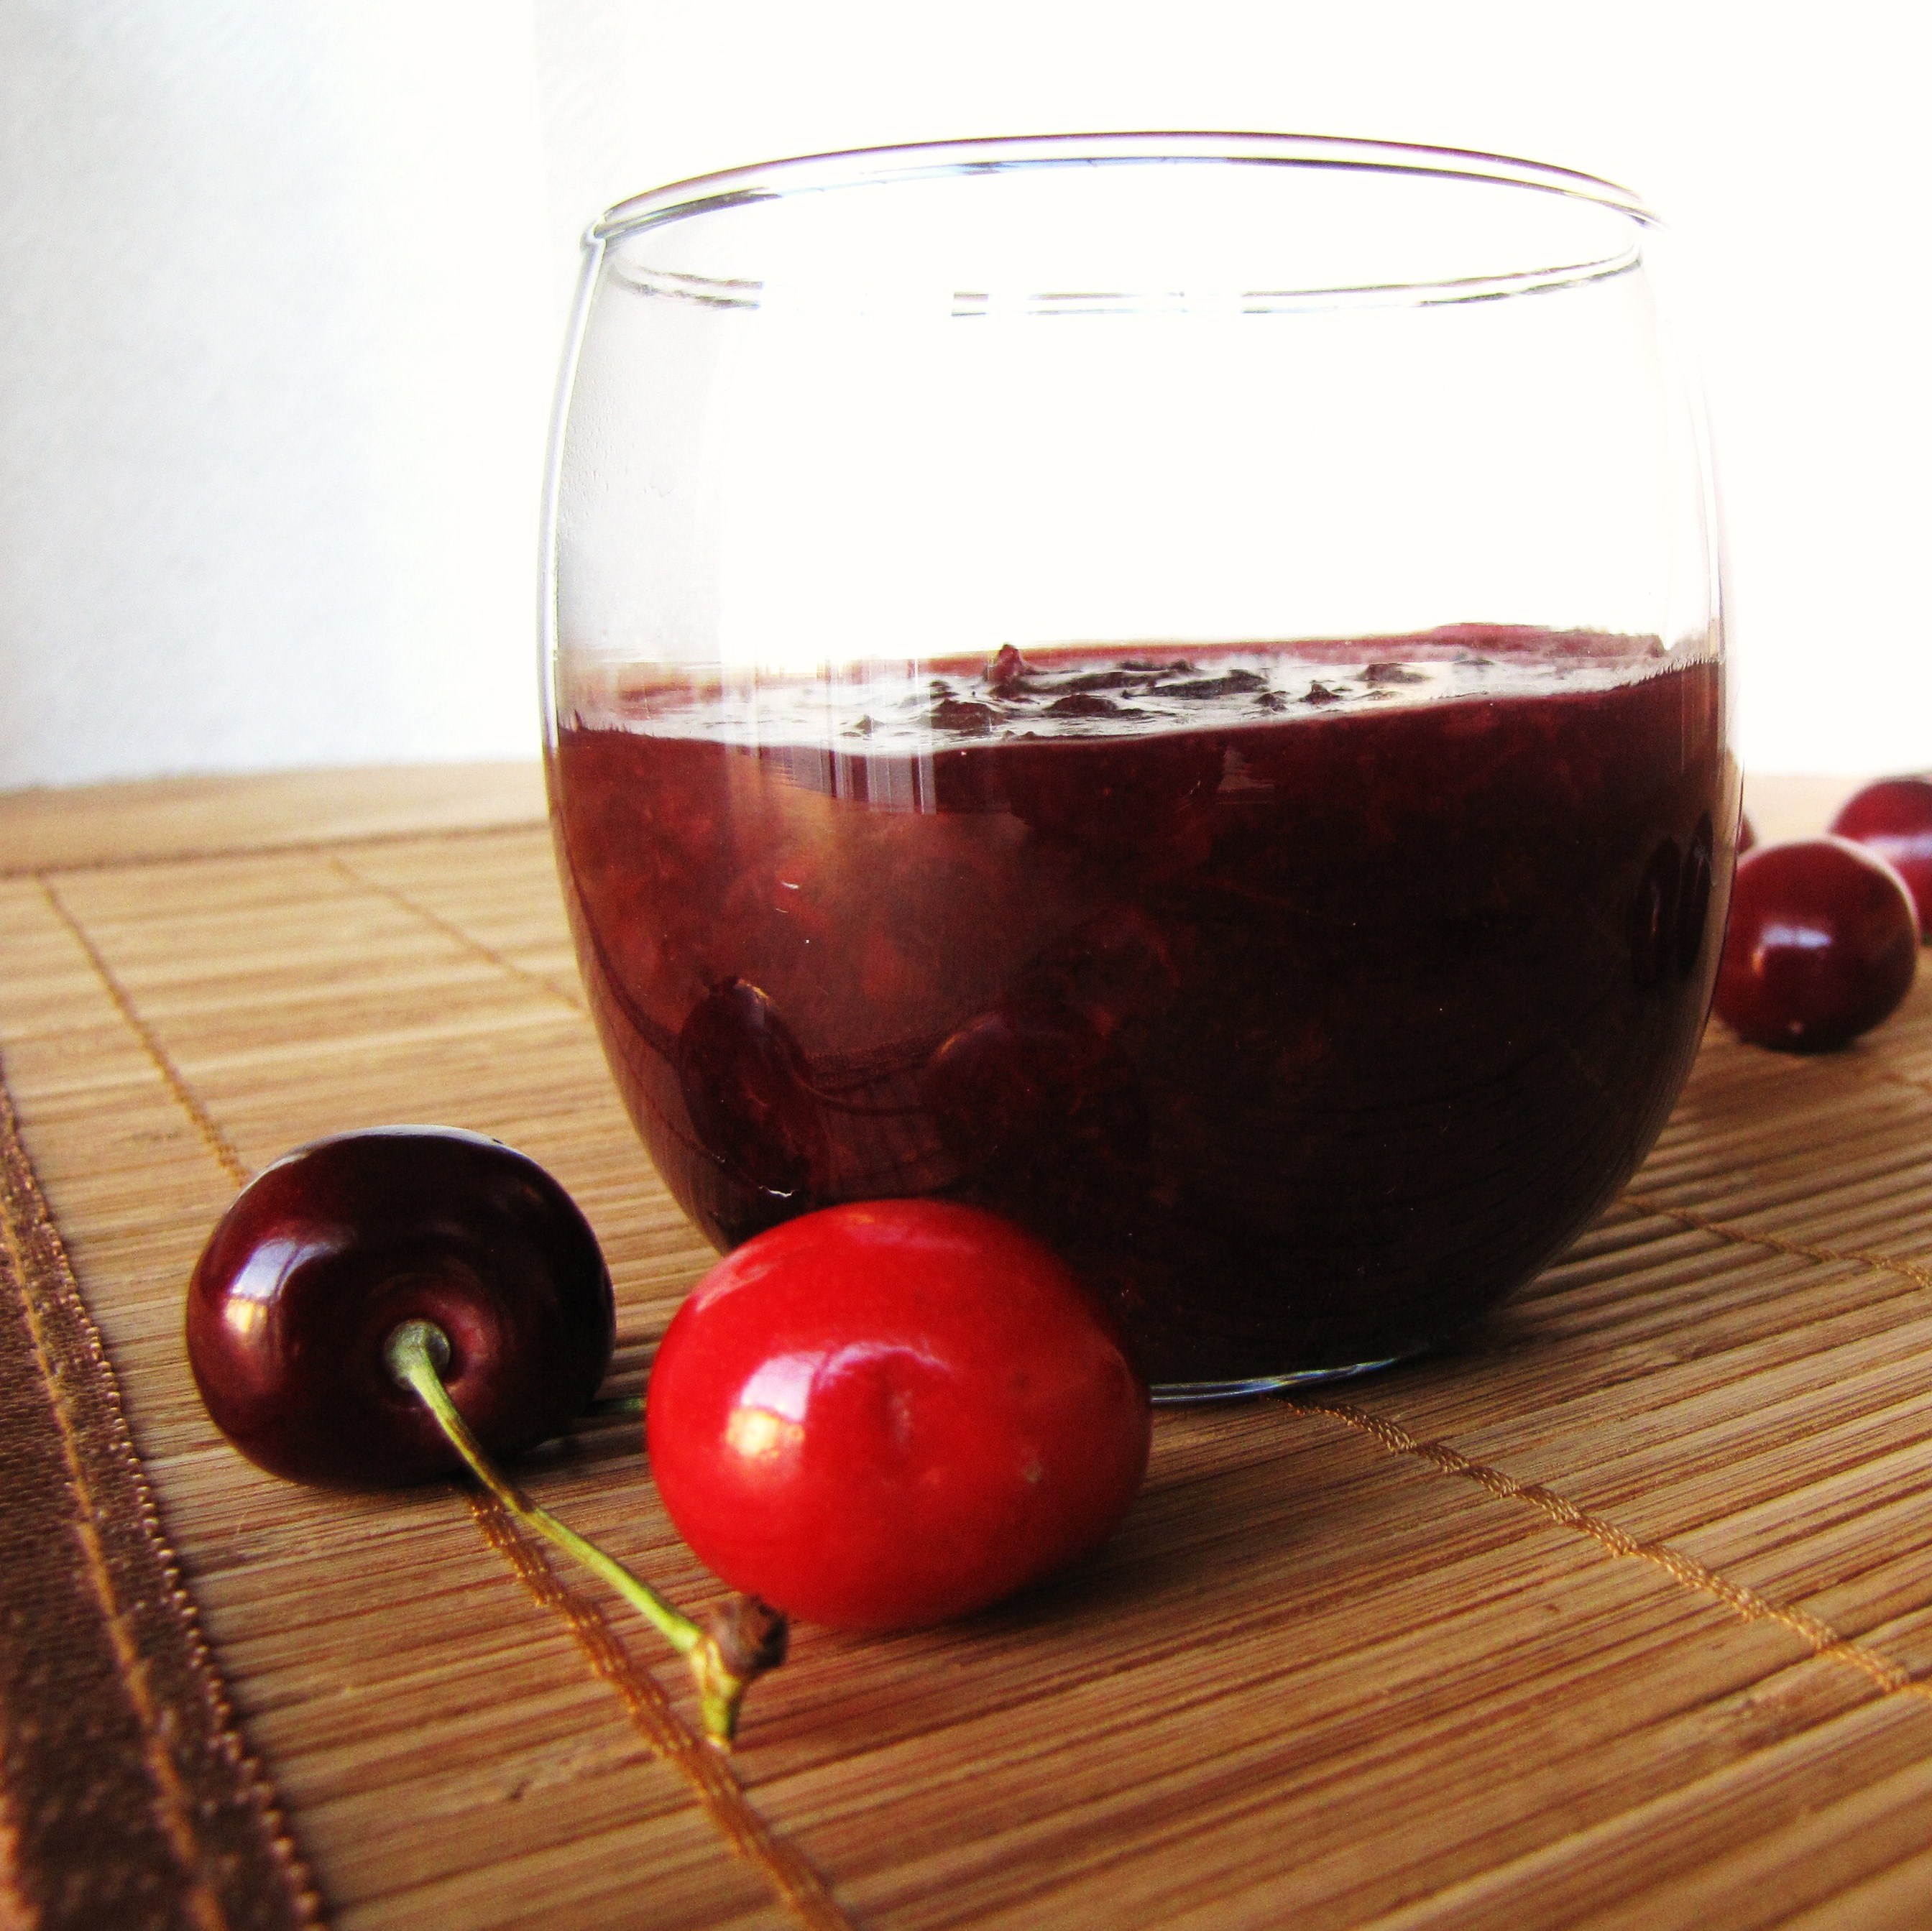
Although it’s almost the end of the blueberry season and I haven’t made any scrumptious blueberry baked goods, I’m sticking to my healthy promise and using my first batch of blueberries in a savory recipe – blueberry guacamole.  Actually, it’s really good for you – just think about the incredible amount of antioxidants in blueberries, the heart-healthy fat in avocados, and the metabolism raising properties of the capsaicin in jalapenos.

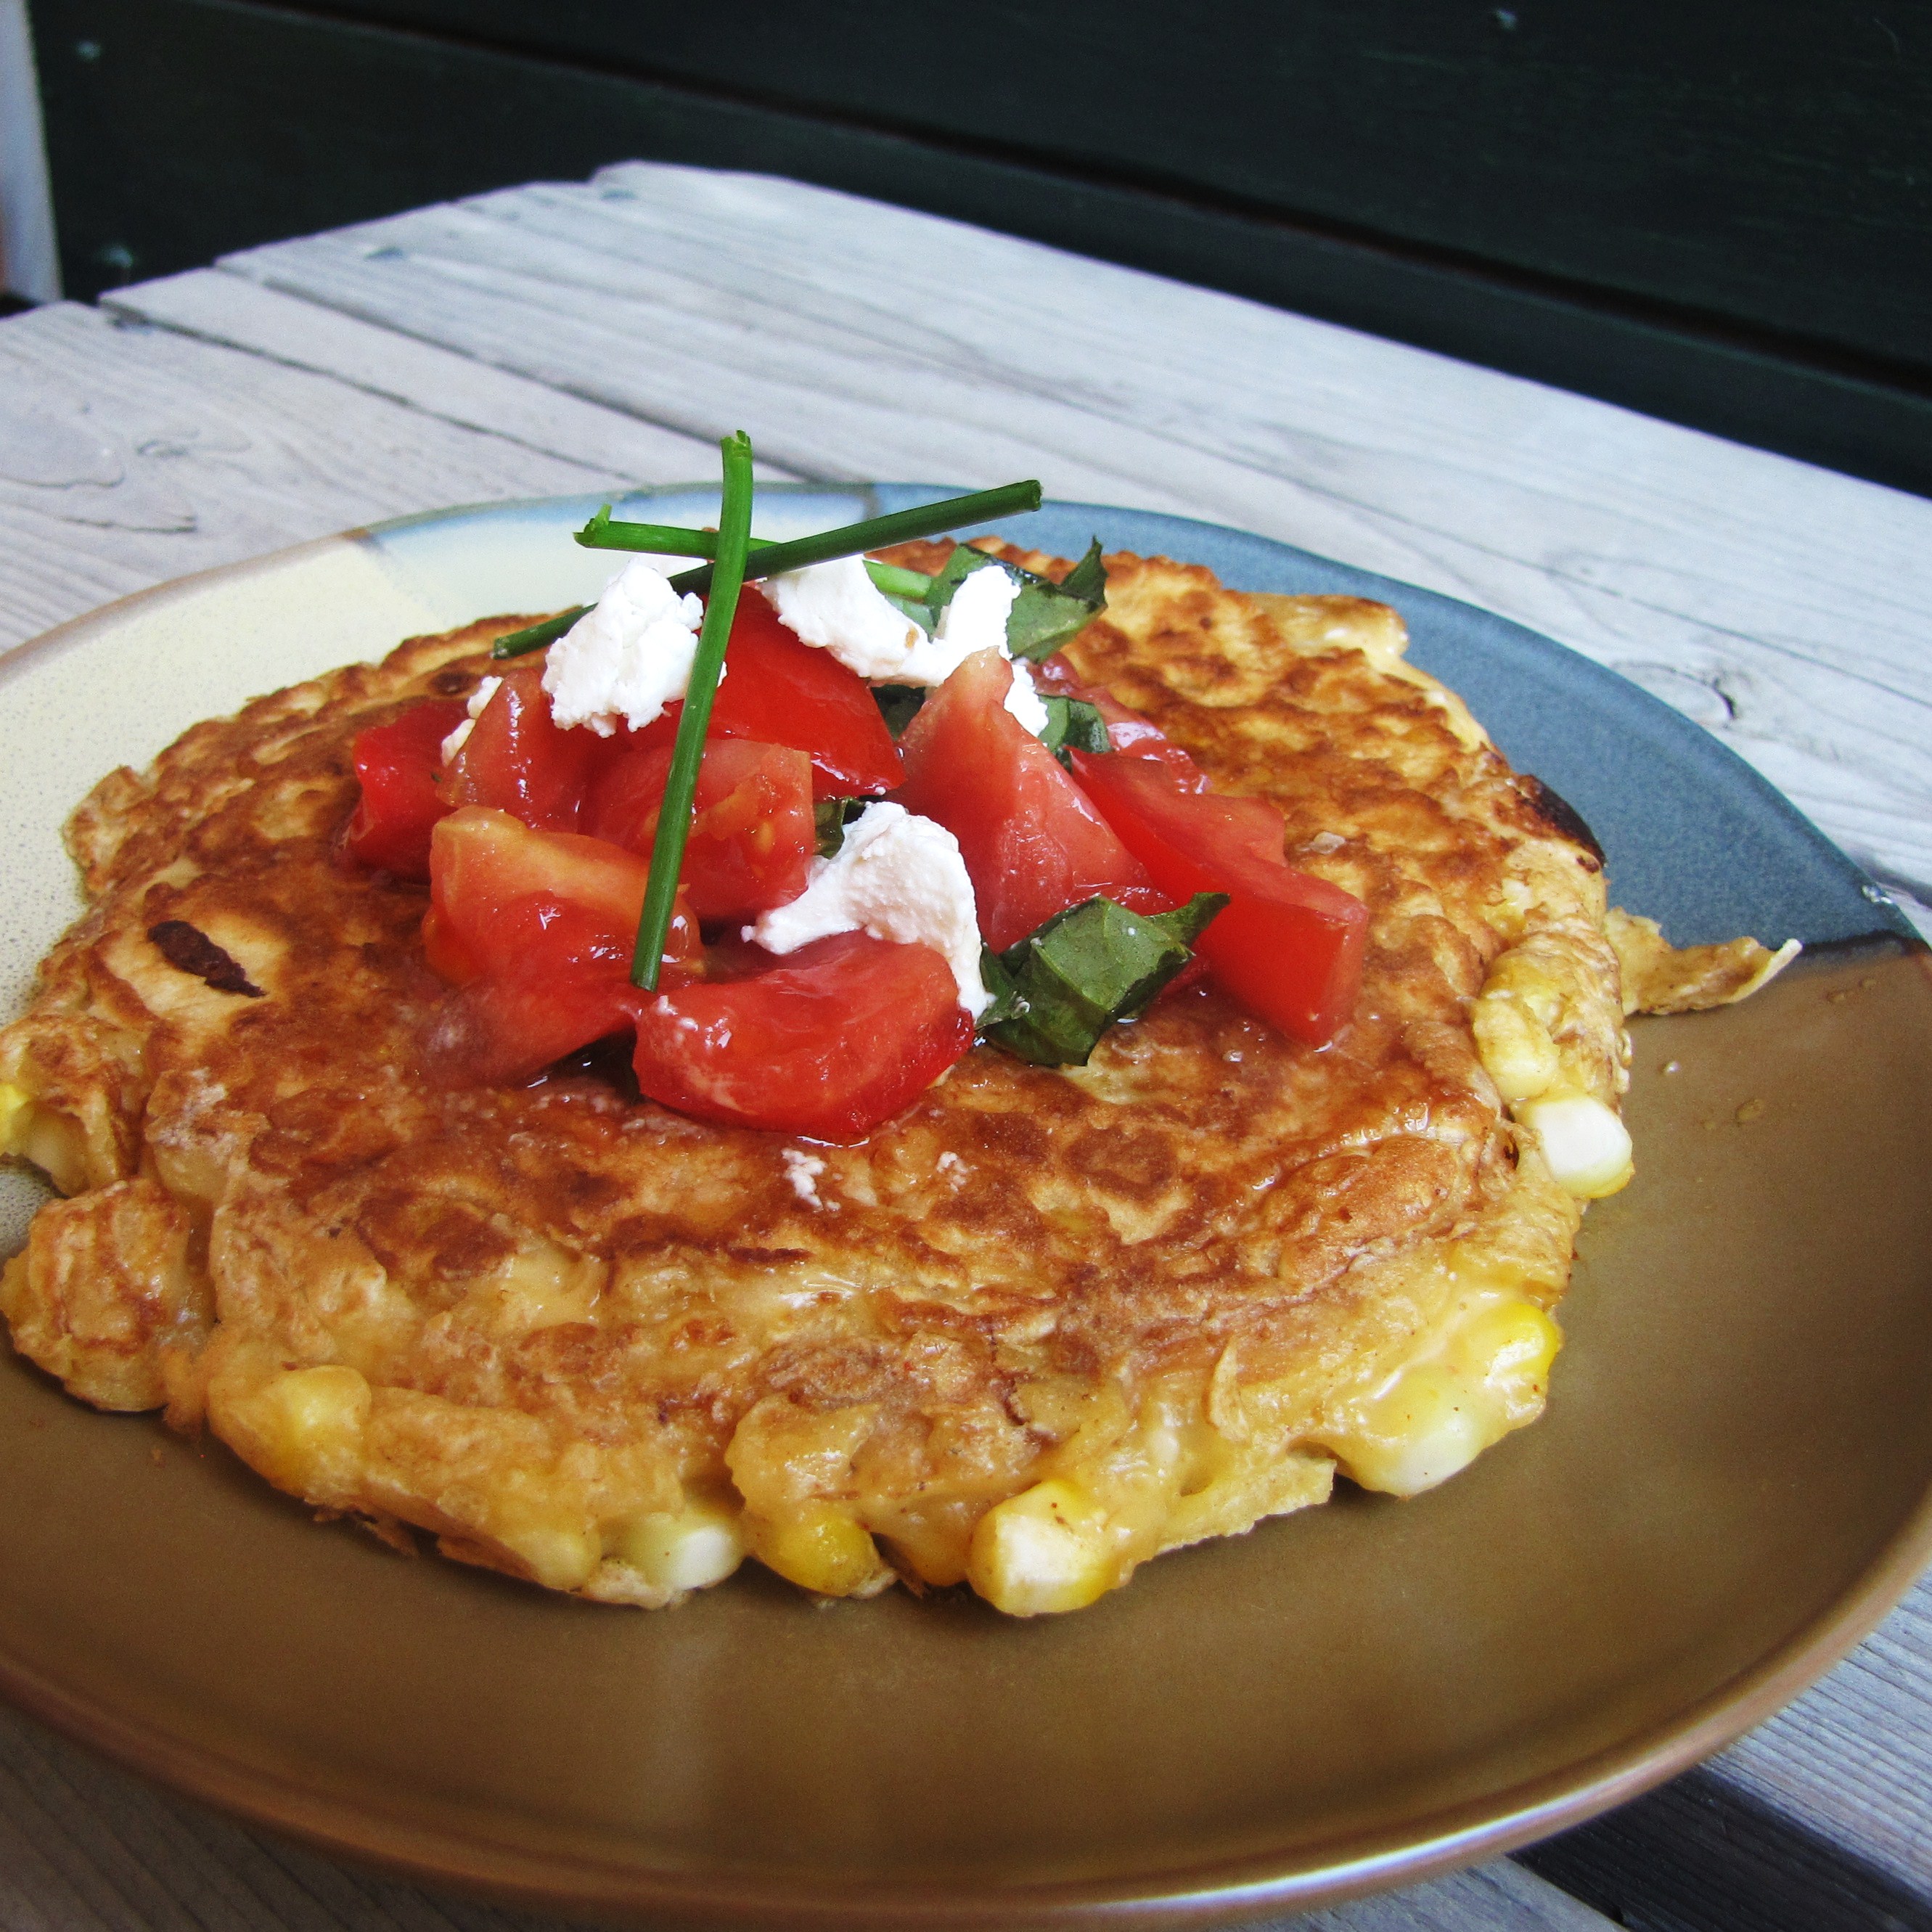
If you’re looking for a fresh twist on your classic mexican dip, try this recipe – it’s well-balanced, sweet, creamy, and spicy.  To make it a meal I put a few tablespoons in a tortilla with smoked turkey and goat cheese, and it was given a firm stamp of approval by all family members involved in taste-testing.

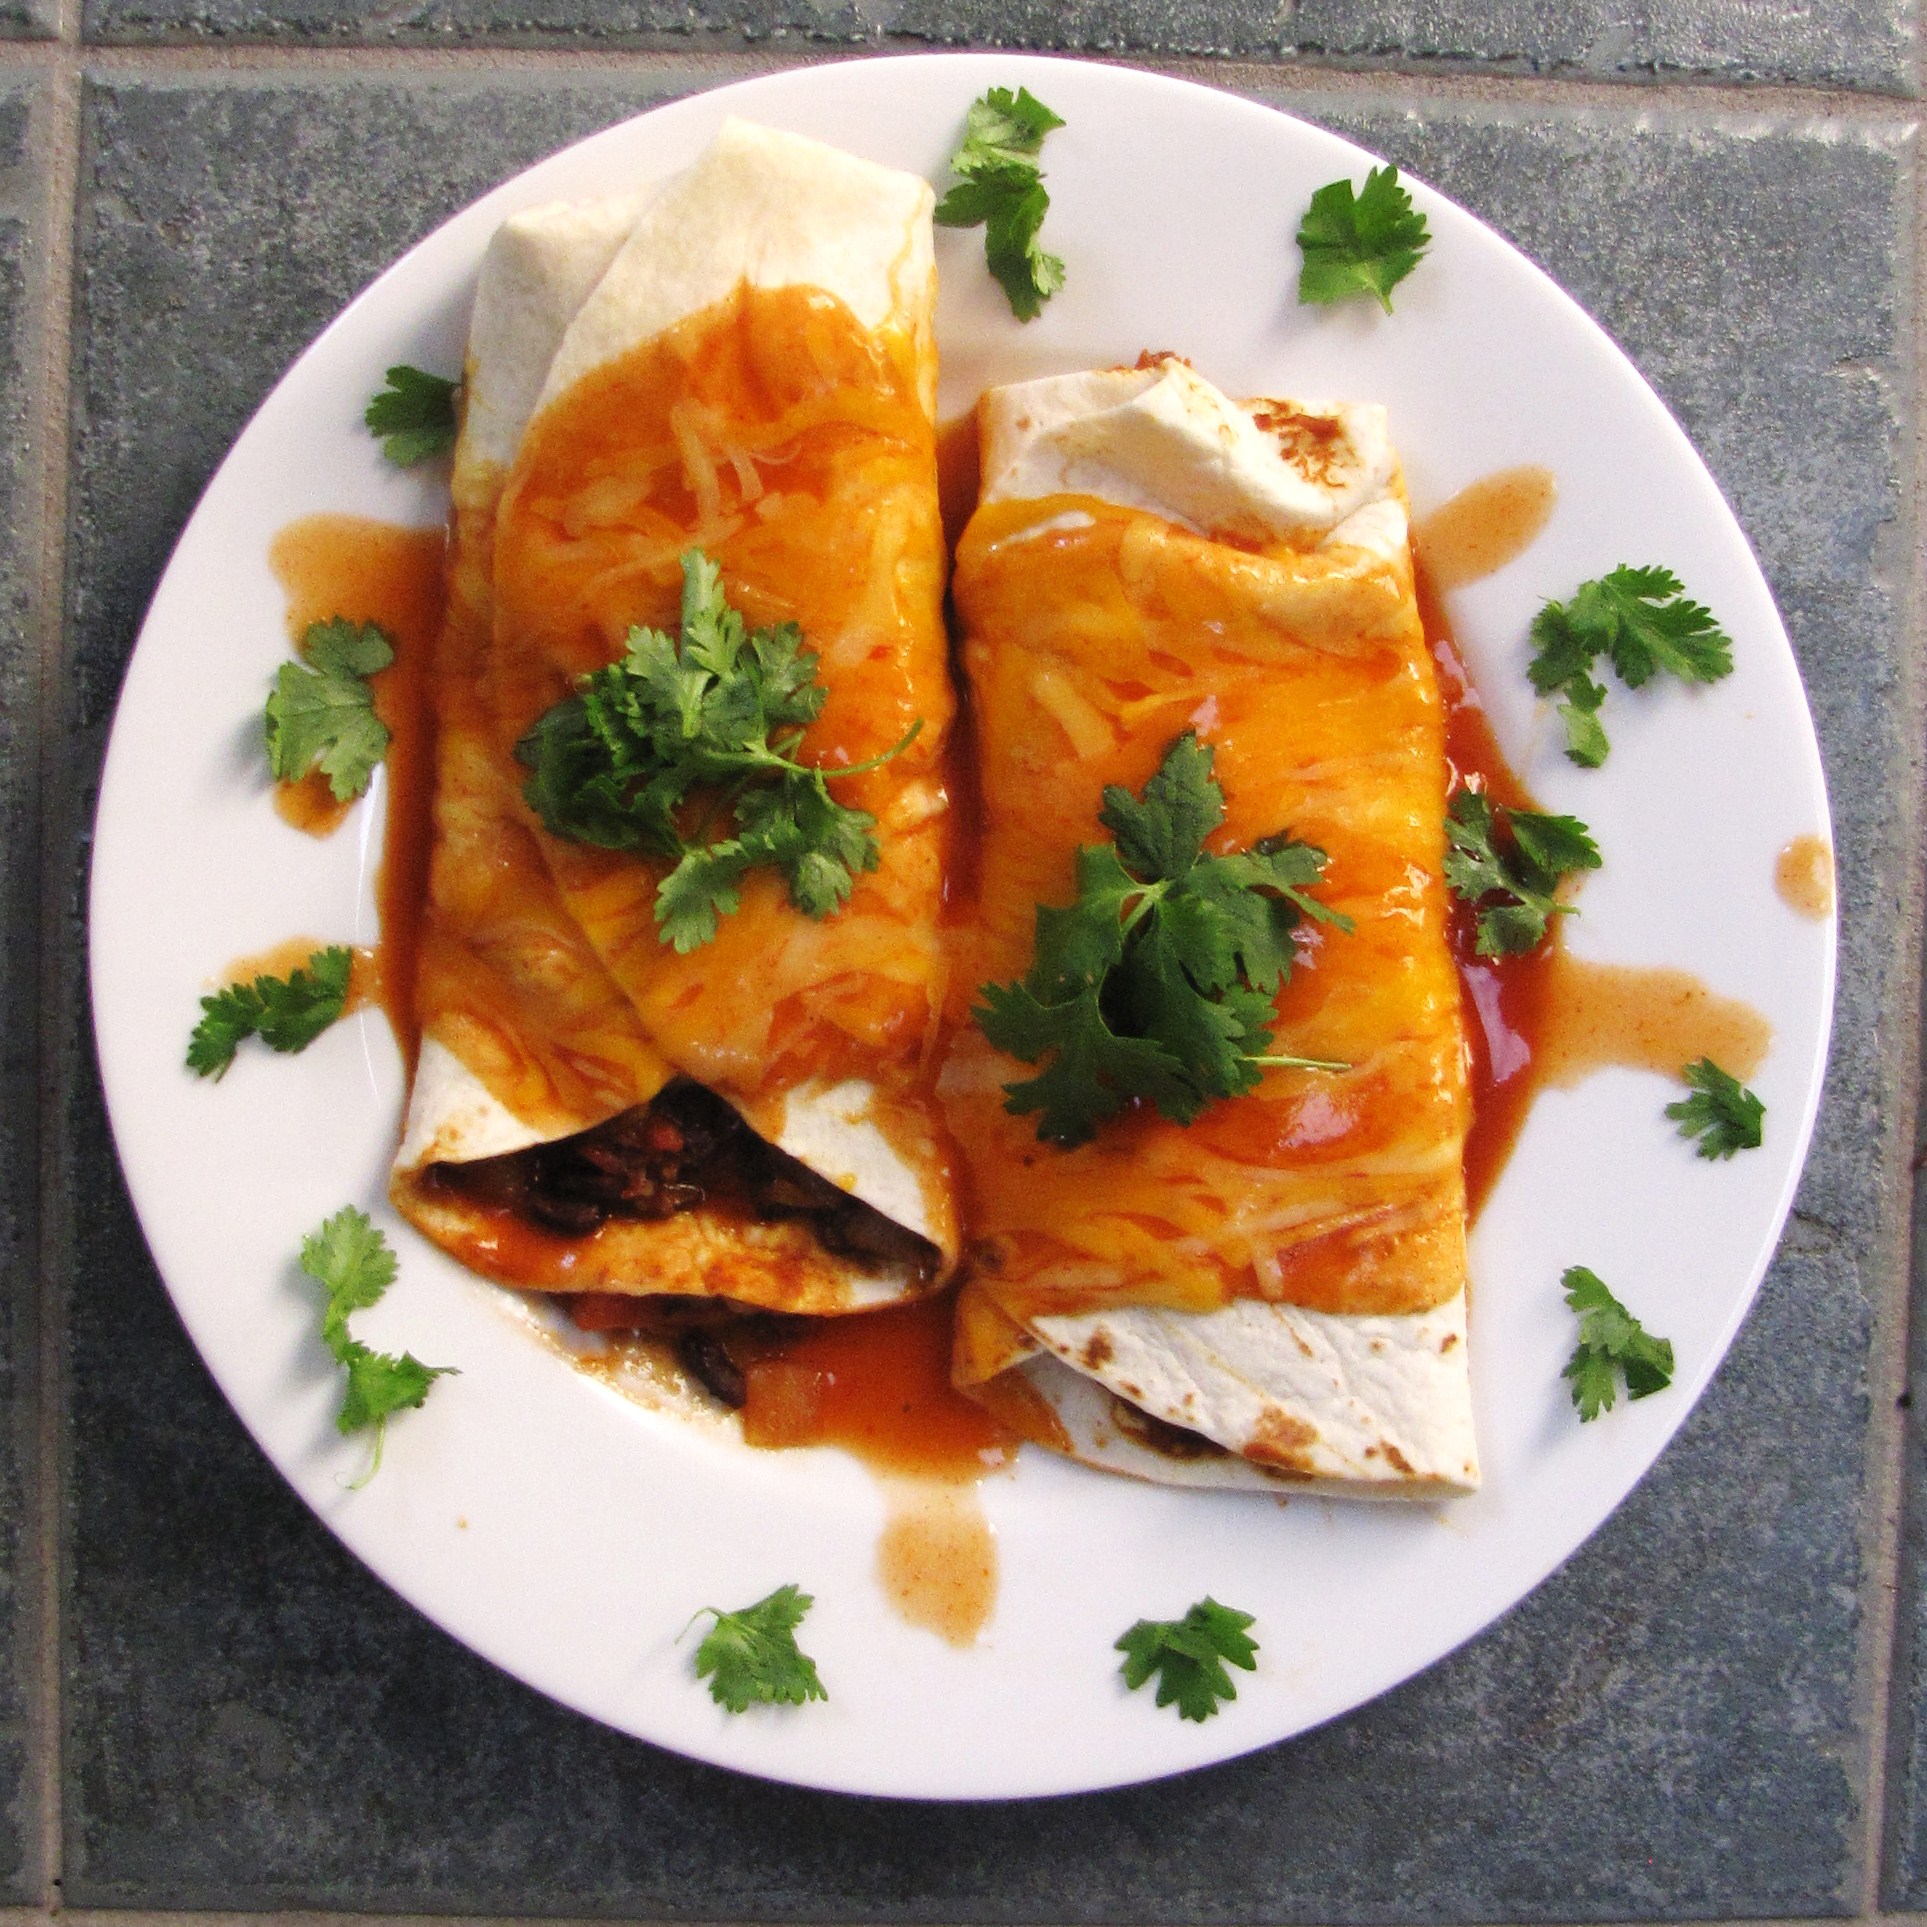
Blueberry Guacamole and Turkey Wrap

Inspired by Manifest Vegan and SELF

For guacamole (makes 3 cups):

  • 1 large avocado
  • 1/2 medium onion, very finely diced
  • 2 c. fresh wild blueberries
  • 2 TBS fresh lime juice
  • 1/2 jalapeno pepper, seeded and finely diced
  • kosher salt

For wraps (makes 1):

  • 1/4 cup blueberry guacamole
  • 1 flour tortilla
  • 2 oz. sliced, smoked turkey
  • 1 oz. (approx. 1 TBS) goat cheese
  1. Slice avocado in half lengthwise, working in a circle around pit, and pull halves apart.  Remove pit and discard.  Scrape avocado flesh into a medium bowl and mash with lime juice.  Stir in very finely chopped onion and jalapeno, and blueberries.  If you can’t get small wild blueberries, you may want to puree or mash half of the larger berries before mixing in.  Season to taste with kosher salt.
  2. Place a tortilla open on counter.  Spread with a thin layer of goat cheese, top with turkey slices, and spread guacamole over center of turkey.  Roll up and enjoy!

NutritionalAnalysis (Nutrtition estimated using SparkPeople’s recipe calculator):

Nutrition: Guacamole: 80.7 calories, 4.5 g fat, 3.5 g fiber, and 1.0 g protein per half cup serving.  Sandwich: 333 calories, 12.7 g fat, 3.6 g fiber, 19.7 g protein in 1 sandwich.

1 August 1, 2010 Recipe

New Englander

On my first night back in New England after spending the summer in the South, the thing I noticed most was the smell.  It was the first time I’d slept with the window open in 3 months, and even though I wasn’t at my own home, the smell made me feel like I was.  It was like a promise – a cool, moist, reminder that soon it would be fall, that tomorrow would be warm but at the end of the day you could count on snuggling into bed and sleeping peacefully and dreaming of crisp leaves and apple picking and cold, dewy mornings.

I moved to the South convinced that I hated New England.  I only applied to one school, 712 miles south of Andover, sure that if I had to live through one more gray, slushy winter I would never be truly happy again.  And it certainly is nice to go out without a coat in January, to go swimming in early May and late October, and to be tan by the end of finals.  But while spending so much time disconnecting myself from New England, I forgot to take into account the fact that New England is my home.  That the people I get along with best are also from New England.  That my childhood memories are filled with New England – pumpkin picking, cutting our Christmas tree down in the snow, hot chocolate parties on Valentine’s Day, the joy of the first weak sun of March, foggy mornings spent collecting sea glass on the Cape.

Now, after three hot North Carolina months, I’m pretty sure that the South is not for me.  Of course there are things that I have come to love about the South.  I love that there is always something flowering.  I love the tropical, wild feel of a humid morning in the forest.  I love being called “Miss” and “child” and “baby,” and calling others “Sir” and “Ma’am.”  I love driving for 4 hours and not being cut off one single time.  I love pulled pork and sweet tea.  I think that if I had grown up in the South, it would be just as much a part of me as I’ve come to realize New England is, but I didn’t, and I don’t feel truly connected there.  I’m not sure where I’ll end up ultimately, but it’s good to understand these things about yourself, and the places you love.

In honor of New England, and of my promise to share healthy recipes with you, I have an incredible, fresh, easy summer-into-fall recipe to share with you that primarily uses corn and tomatoes, two vegetables just coming into season.  This is one of the best things that I’ve made all summer, and one of the best recipes I’ve posted on this blog.  It has so many textures and flavors that retain their individuality at the same time that they meld perfectly.  The smooth, tangy goat cheese compliments the sweet, juicy corn and tart tomatoes so well.  It’s cheap, so healthy, local, fresh… everything you could ask for in a recipe.  Try it, really.

Roasted Corncakes with Goat Cheese and Tomatoes

Serves 5; Adapted from The Greenmarket Cookbook

  • 6 ears of fresh corn
  • 3 TBS butter + more for frying
  • 1 tsp salt
  • 1/2 tsp pepper
  • 1 1/2 tsp paprika
  • 1 c. flour
  • 1 tsp baking soda
  • 1/2 c. milk
  • 4 eggs
  • 8 oz. goat cheese
  • 3 TBS minced fresh chives
  • 2 medium tomatoes
  • 10 leaves fresh basil
  • 1 tsp balsamic vinegar
  • 1 tsp olive oil
  • 1/2 tsp kosher salt
  1. In a small bowl, melt butter in microwave.  Add salt, pepper, and paprika and mix.  Shuck corn and use a pastry brush to spread paprika butter evenly over ears.
  2. Roast corn for 10 minutes, either under the broiler (on high) or on the grill.  Rotate halfway through to ensure that it cooks evenly.  Allow to cool, and then scrape or cut kernels into a bowl.  Drizzle extra paprika butter from roasting pan into bowl as well.
  3. In a large bowl, whisk together flour and baking soda.  Add milk and eggs, and whisk until smooth.  Add corn kernels, stir to incorporate, and allow to rest for at least 15 minutes.
  4. Place goat cheese in a medium bowl.  Microwave for 10-15 seconds, just to soften.  Add chives to goat cheese and mix.  Set aside.
  5. Core and dice tomatoes.  Chiffonade basil.  Mix basil, tomatoes, vinegar, olive oil, and kosher salt in a medium bowl.  Set aside.
  6. Heat medium-sized non-stick frying pan over medium-low heat.  Add a small pat of butter, then scoop 1/2 cup of corncake batter into pan.  Top with a heaping spoonful of goat cheese mixture.  Spread goat cheese as best you can over surface of corncake.  Top with another 1/4 cup of batter to cover goat cheese.  Allow to fry for 1-2 minutes, then flip, and fry for another minute on the other side.  Repeat with remaining batter and goat cheese, keeping finished corncakes warm in an oven at a low temperature.
  7. To serve, place several spoonfuls of tomato-basil mixture on top of each corncake, as well as any remaining goat cheese.  One corncake is sufficiently filling for a meal.

.

.

Nutritional and Cost Analysis (Nutrtition estimated using SparkPeople’s recipe calculator):

Nutrition: 494 calories per serving (5 servings per recipe), 27.4 g fat, 4.2 g fiber, 20.8 g protein.
Cost: Estimated $11.70 per batch (corn at .35 each, tomatoes at $1 each, sundries at $2 total, chives at $1, goat cheese at $4, eggs at .15 each), $2.34 per serving.

0 July 28, 2010 Latin and Mexican

Healthify Yo’self – Black Bean Enchiladas

I’ve imposed a ten day baking ban on myself.  And the next three things I post on this blog will be healthy, energy-inducing, balanced meals.

That’s a promise.

These drastic measures are a direct result of the evils of facebook.  Because maybe Trevor and I were indulging in a little trip down memory lane via backwards facebook stalking.  And maybe around 6 months ago a disturbing presence began to make itself known.  And maybe that presence was the gradual rounding of my face.  And arms.  And legs.  But mostly face.  And you know, this really isn’t that surprising (see danishes, brownies, tapioca), or truly that alarming (yet), but it still needs to be remedied.  Gotta nip it in the bud before I get too old to do anything about it.  Actually I’m just depressed by the fact that when I get to Maine (tomorrow!) my skinny little brothers and marathon running mom and five soccer games a week dad are all going to be able to run a 5k faster than me.  We’re competitive.  (Once, I took my best friend Steph along to a family picnic, after which my entire family started competing in races – running, cartwheeling, hopping on one foot.  She was completely baffled.)

So, the three sticks of butter recipes are going to have to be put on hold for a while, and we are going to focus on minimal butter consumption, healthy activities.  Like running.  Let’s talk about running.  Let’s talk about how much the first two runs suck when you decide it’s time to get in shape after a 2 month hiatus (I know, two whole months, but it’s just been too hot here to focus on exercise.  And there’s been more exciting stuff to do.  See drinking in the pool.)

Well, there it is – deciding to start running again sucks.  Especially when it’s still 90 degrees out at 8pm.  But there are some things that you can think about to make it bearable, like all the reasons you’re running.  Like, for example, I’m running so that my family won’t laugh at me.  Or, I’m running so that I won’t die before I’m supposed to.  I’m running because I can’t afford to buy new shorts, again.  I’m running because I like to feel strong.  I’m running because I want to want to run again.  I’m running because I know how good it can feel.  I’m running so I won’t feel guilty eating chocolate.  (Who am I kidding, I think I can count the times I’ve felt guilty about eating anything at all on one hand.)  I’m running because I promised to buy myself a slinky dress if I get skinny again.  I’m running because someone once told me “once a runner, always a runner” and I believe it.

So there, that was my little motivating moment for myself.  And maybe for you, too.  Because really what inspired all those thoughts was this thought, that I huffed and puffed to Trevor on the first run in a while: “How much would it suck if you’d never done this before and you didn’t know how good it could get? That running could be something beyond pain?  That it could be empowering, enjoyable?”  (Well, maybe I only said the first of those sentences out loud.)  And I kinda wanted someone out there struggling with all the initial suck to know that it’s totally worth it.

Now that that’s out there, let’s move on to the grub.  In my mind, this is the perfect black bean recipe – saucy, spicy, and a little bit sweet.  I know a lot of people aren’t huge bean fans, but I could eat these for days.  They fit all of my criteria – cheap, healthy, and delicious.  This particular recipe is the creation of Rebecca from Foodie with Family, which she has graciously allowed me to share.  The bean recipe itself is very healthy, coming in at 265 calories, 10 grams of fiber, and 10 grams of protein per serving.  (See bottom for rough nutritional and cost analysis.)  I’ve turned them into enchiladas which are less healthy but more satisfying when you want a full meal, and that still have all the nutritional benefits of the beans, tomatoes, and herbs.  These beans are also killer over couscous if you’re looking for a happy medium recipe – a full, balanced meal, without the not-exactly-diet-friendly tortillas and cheese.

So that kicks off our healthy streak.  Try these, let me know what you think, and get excited for the next healthy recipe – it’s the perfect late summer meal and one of the best recipes I’ve tried all year.  Happy healthiness.

Saucy Black Bean Enchiladas

(Serves 3)

Bean recipe adapted slightly from Foodie with Family

  • 1 medium onion, diced
  • 2 TBS olive oil
  • 2 TBS minced garlic
  • 1 can black beans, drained and rinsed
  • 1/2 small can petite diced tomatoes
  • 1/3 c. orange juice
  • 1/8 – 1/4 tsp. red pepper flakes
  • 1 TBS ground cumin
  • 2 tsp chili powder
  • 2 tsp oregano
  • kosher salt to taste
  • 4-6 flour tortillas
  • 2/3 c. shredded cheddar or monterey jack cheese
  • 1 can enchilada sauce, or half of this recipe
  • fresh, chopped cilantro, to garnish
  1. In a large saucepan, heat olive oil over medium heat.  Add onion and sautee until translucent.  Add garlic, red pepper flakes, cumin, chili powder and oregano, and sautee for 1 minute.
  2. Add beans, tomatoes, and orange juice to onion and spice mixture.  Cook over medium heat, stirring occasionally, until beans are bubbly and thickened, about 8-10 minutes.  Remove from heat.
  3. If making enchiladas, preheat oven to 400 °F.  Line casserole dish with tortillas, overlapping slightly.  Scoop some of bean mixture into tortillas one at a time, rolling the tortilla up and flipping over so that seal is on the bottom of the pan.  Pour enchilada sauce over, and sprinkle with cheese.  Bake for 15 minutes, or until cheese is melted and gooey.  Garnish with fresh cilantro.

.

.

Nutritional and Cost Analysis (Nutrtition estimated using SparkPeople’s recipe calculator):

Nutrition: Beans only – 265 calories per serving (3 servings per recipe), 10.2g fat, 10.5 g fiber, 10.7 g protein.  Enchiladas – 645 calories per serving, 24.3 g fat, 13.8 g fiber, 23.4 g protein
Cost: Beans only – $3.59 per pot, $1.20 per serving.  Enchiladas – $4.99 for pan, $1.66 per serving.

0 July 22, 2010 Breakfast

Raspberries.

I wasn’t planning on writing anything for a while.  I felt a little bit guilty about abandoning this blog just like that, but I’ve been adjusting to some fairly major changes in … my plans? my life in general? my world view? my sense of self?  Wherever the changes really are, they’ve left me feeling uninspired, and not energetic enough to do more than try and sort myself out.  Certainly not enough to create.

So I was planning on letting this blog rest, at least until I got to Maine, where everything always seems fresh and calm.  But then a really good friend who knew I was dealing with some blah stuff dropped off a package that included cream soda, key lime pie, fresh mozzarella, and three beautiful, beautiful pints of raspberries.  (How did he know???)  And when I saw these raspberries, I was so suddenly and forcefully relieved and inspired, that I just started to smile.  And I knew that I had to use them and share them and maintain the part of myself that loves to do that.

Ironically, I already had a blog post written and ready to go when said major changes occurred, and that blog post promised you two things: one, that I was imposing a ten day baking ban on myself, due to the overload of delicious but highly fattening recipes I seem to have been making lately, and two, that the next three recipes I posted would be healthy.  Errrrrm… I made muffins with the raspberries.  I swear, I searched and searched for savory raspberry recipes but didn’t really want to write about something as mundane as a salad dressing and didn’t want to go out and buy meat to go under a raspberry sauce.  So I told myself that muffins were an OK compromise – they’re not really dessert, and they don’t have that much sugar, and they have lots and lots of healthy berries.  And I actually had gone exactly ten days without baking, I just hadn’t ever made it official.  And muffins are just good to have around when you’re at risk of waking up sorta sad and discombobulated.  Or really any day, actually.

These muffins were yum.  But, they were not sweet.  At all.  In fact, they’re very tart, which actually makes them feel healthier and, I dunno, more muffin-y, less cupcake-y.  However, if like me, you like most food that you consume to be noticeably sweet, I have three options for you in terms of these muffins.  1.  Do not make them.  Adhere to your own personal baking ban instead.  2.  Add 1/4 cup of sugar to the recipe as it’s posted below.  3. Add chocolate chips to the batter.

I made half of them with chocolate chips.  It was the right choice.  It made them perfect.  It made them just like my favorite muffins in the world, the raspberry chocolate chip muffins at Perfecto’s.  If you’re ever in Massachusetts, and you drive by a Perfecto’s, you should really stop.  Their muffins are epic.  Anyway, I’m glad I made these.  I’m glad I’m writing.  And I’d like to thank you, Marco, and really all my friends, for being around and being supportive … and for bringing me raspberries!  Friends rule.

Raspberry Buttermilk Muffins

Adapted from a combination of the recipes from Joy of Baking and “The Berry Bible”

Makes 12 muffins

  • 2 c. all-purpose flour
  • 1/2 c. sugar
  • 2 tsp baking powder
  • zest of one lemon
  • 1 egg
  • 1 c. buttermilk
  • 2/3 c. canola oil
  • 2 c. raspberries, fresh or frozen
  • 1 c. dark chocolate chips (optional)
  • turbinado sugar for sprinkling
  1. Preheat oven to 400°F.  Line muffin pan with liners, or grease muffin cups well.
  2. In a large bowl, sift together flour, sugar, baking powder, and lemon zest. [Note: I was out of AP flour and used 1 cup of cake flour mixed with 1 cup of bread flour – the results were very good, the texture was slightly denser than a regular muffin but not too much so.]
  3. In a small bowl, whisk together buttermilk, egg, and canola oil until well blended.  Pour buttermilk mixture over flour mixture and stir just to combine.
  4. Add raspberries, and chocolate chips if desired. Stir to incorporate.  If you stir vigorously, the raspberries may break up, giving the muffins a lovely pink tint, but losing the concentrated raspberry flavor in a single bite.
  5. Fill muffin cups full with batter.  Place one whole raspberry in the center of each muffin and sprinkle turbinado sugar on top.  Bake for 20 minutes.

0 July 11, 2010 Breakfast

Cherries for Grown-Ups, Part Two

Remember this?

Yeah, I’m still really excited about it.  And I’ve had my heart set on those danishes all week.  It’s just taken me a while to get to them, because, you see, I’ve been really busy acting like a college student.  Which is actually something of a rarity for me.  I had a wild and crazy freshman year, and then, I retreated.  I like being with people, I like going on adventures, I like dinner parties, and girl’s night in.  I like drinking wine and giggling, I like drinking beer and eating burgers, and I like taking tequila shots with my mother.  Yes, my mother.  But the whole “boot’n’rally” mentality of freshman year has sort of turned me off the party-hard scene.  I go out, sometimes.  But I’m kind of tame.  And for the most part, I consider this a good thing.  A really, really good thing.

However, this past week, a new dimension has been added to the college student life – a pool.  A pool with no rules about alcohol, in a state that averages a high of 98° around this time of year.  This pool is very different from the kid-friendly campus pool we frequented before this pool opened.  That pool is crowded, noisy, splashy, multicultural, and kind of awesome.  I get to play like a little kid there, there’s no shortage of cute baby sightings, and I occasionally brush up on my Czech or Russian because I swear, no one on a research university campus in the summer speaks English.  The new pool is quiet, lethargic, boozy, and kind of awesome.  Bros arrive on the scene as early as 9am with their cases of Busch light, and they sit, and flex their pecs, and concentrate on looking tan, muscular, and uninterested in any life forms that are smaller than them.  Occasionally the bros get in the pool and throw something around, then they return to their babe-watching perches on the side.  The babes, on the other hand, lie draped, completely motionless, over the sunchairs, glistening, skinny, coozie within reach.  It’s kind of disturbing, but it’s kind of the sweet life too.

So all this pool talk is relevant for the following reason: I was going to make pastry dough Wednesday afternoon, but then Trevor got a case of beer and we went to a Kooley High concert and then had to sit in the pool and drink the beer… to cool off from the concert.  Then I was going to make pastry dough Thursday afternoon, but we had to go eat Lo-Yo with Max and then … drink beer in the pool, to warm up from the Lo-Yo.  Then Friday I was definitely, definitely going to make pastry dough, because I really, really wanted danishes Saturday morning, but then we had to go to a BBQ and drink just a little bit more beer.  And then Marc dropped the burgers in the trash accidentally so we had to go back to his apartment.  And then he had a box of Franzia in his fridge so we had to bring it to the pool.  And then we had to spend 4 hours in the pool having chicken fights and slapping the bag and polishing off the entire box, because Trevor and Marc made a pact.  And pacts are very important.  I’m allowed to tell you all this because I’m 21 now, and these activities are entirely legal and responsible.

So Saturday morning, danishless, completely dehydrated, I dragged myself to the grocery store, stumbled through my shopping, literally whimpering the entire time (ohhhh, this is why I stopped acting like a college student) and got everything I needed for the stupid danishes.  Then I went back and I made that dough, damn-it, spending the entire 3 hours it requires inside, not in the pool, and not drinking beer.  Thank God.

And so, now that it is Sunday, I have my danishes.  They are delicious.  They are worth the mental strife I suffered while I was not making them.  And the physical strife I suffered while I was making them.  But really, it’s been a good week.  Time for another one.

[Note:  The pastry dough recipe I used was the “Danish Pastry Dough” from “The Fundamental Techniques of Classic Pastry Arts.”  Previews of the book are not available online, so I decided against posting the exact recipe – I do recommend the book if you’re interested in really learning the basics of pastry baking.  The link included below has an almost identical recipe to the one in the book.  Suggestions to make it more authentic would be to use half cake flour and half bread flour, as well as to add a pinch of ground cardamom, which makes a huge difference in the flavor!  To save time, you could also use frozen puff pastry with equally good results!]

Cherry-Cream Cheese Danishes

Makes 8 danishes

  • 1 recipe Danish Pastry Dough (add a pinch of cardamom!), or 1 sheet frozen puff pastry, see headnote.
  • 1/2 package Neufchatel cheese or cream cheese
  • 1/4 c. sugar
  • 1 egg yolk
  • 1 tsp. almond extract
  • 1 cup Grown-up Cherry Puree
  • 1 egg yolk mixed with 2 tsp water
  1. Preheat oven to 375°F.  Line two baking trays with parchment paper.  Lightly flour a counter and rolling pin.
  2. In a small bowl, whisk together cream cheese, sugar, egg yolk, and almond extract until smooth.  Set aside.
  3. Take half of the pastry dough out of the fridge (leave the other half in the fridge until you finish the first 4 pastries so that the dough does not get too soft).  Roll out into an 8×16 inch rectangle, or to about an eighth of an inch thickness.  Cut pastry rectangle lengthwise four times, so that you have four 4×8 inch rectangles.  Cut 4-5 inch long strips on either side of each rectangle.  See this website for a great photo tutorial on making crossovers.  Place two tablespoons of cream cheese filling in center of danish.  Top with two tablespoons of cherry puree.  Cross bottom right strip over filling, then bottom left strip over that, continuing this pattern until you have used all of the strips.  Press top of pastry gently with your rolling pin and transfer to baking sheet.  Brush with egg yolk wash.
  4. Continue with second half of dough when first batch of danishes is formed.  Bake for 20 minutes, until golden brown on the top.  These are best straight out of the oven!


1 July 7, 2010 Dessert

Cherries for Grown-Ups

I read recently that cherries are one of the only foods that are hard to enhance beyond their natural form.  Specifically, the comment was that  “nothing captures the essence of a cherry like a cherry.”  (See Ideas in Food, one of the coolest, most inspirational sites I’ve found.)  And it’s so true, isn’t it?  Their texture and flavor are really best when eaten straight out of the fridge, and when I think of cherries, that’s what I think of – how refreshing a cold cherry is in the middle of the summer.  For weeks I’ve been thinking about this and eyeing the piles of beautiful red cherries, and last week, when I saw the $1.99/lb sign, I finally bought some.  (Although they initially rang up at $7 a pound.  Seven dollars?  Per pound?!  Thank you very much but I’d rather have two pounds of steak at that price.)  And as I ran through things I might do with them in my mind, they slowly disappeared, one after the other, into my mouth.  I mean, come on, they’re fun to eat – you get to daintily pluck them off the stems with your teeth and roll them around in your mouth before fully biting into them.  Then your mouth is full of sweet juice, and you get to undecorously spit out the pits.  And your lips and fingers get all stained with cherry juice.  And maybe it’s a little bit sexual.  I digress.

So the cherries remained in their perfect, natural form for several days.  But two pounds is a lot of cherries for one person to eat alone, and those beautiful, perfect cherries were beginning to get soft.  They needed to be used, and so I began to think.  Key to my musing was the fact that I wanted to share the goodness of cherries with Trevor, who, although he continues to eat them rebelliously, is allergic to most fruits with pits unless they’re cooked.  So I wanted to go against my better judgment and achieve the impossible – to cook the cherries while maintaining their integrity, and also enhancing their flavor.

As I browsed through cherry recipes, I found that I kept clicking recipes with titles like “Boozy Cherry Molasses,” “Red Wine and Cherry Soup,” and “Kirsch-Soaked Cherry Sauce.”  Hmmm.  There was a trend.  And just like that, I knew what I wanted. I closed all of those recipes, and I just started inventing.  Into a saucepan went stemmed and pitted cherries, then some rum, some red wine, some lemon juice, sugar, corn-starch.  I almost added black pepper but I didn’t want to push it.  I think it might work though.  I’m trying it soon.  Then the cherries, robbed of their integrity despite my best efforts, went into the blender, and back into the pan.  I tasted it – the flavor had been enhanced, decidedly.  It was one of those rare times when tinkering in the kitchen goes completely right.

Now I had a pot full of delicious, boozy, fragrant cherry puree, and it needed a stage.  What I really wanted was danish.  Cherry, cream cheese, and almond danish, but grown-up, elegant, subtle.  I was all ready to go, cherries simmering, cream cheese softening, philo sheets defrosting on the counter, when Trevor reminded me, again, that philo and puff pastry are not the same thing.  Having never used either, I get confused.  Frequently.  So the philo went back in the freezer, the cream cheese went back in the fridge, and the cherries continued to simmer.  Now what?

The answer came to me quickly – brownies.  Ever since I saw these brownies on 101 cookbooks, I’ve been continuously craving a cherry-chocolate brownie.  My original plan was to wait until I got around to getting some dried cherries and kirsch, and do the whole soaking thing, but I decided that this puree would have exactly the effect I wanted.  So brownies, tinged with almond flavor and swirled with cherry puree, were created.  And they were chewy, moist, chocolatey, nutty, fruity, boozy, goodness.  Things in the kitchen are going right.

P.S. I haven’t given up on the idea of the cherry danish.  As soon as I get the time to make some puff pastry it will be here.  Hopefully on Friday.  Stay tuned.


Grown-Up Cherry Puree

Makes 1 1/2 cups

  • 1 lb cherries, washed and pitted (yields around 3 cups)
  • 1/3 c. sugar
  • 6 TBS red wine
  • 4 TBS rum
  • 1 1/2 tsp lemon juice
  • 4 tsp cornstarch
  • 4 tsp water
  1. In a medium pot, combine cherries, sugar, wine, rum, and lemon juice.  Bring to a boil, then reduce to a simmer and cook for 5 minutes, stirring and pressing the cherries apart with the back of the spoon.
  2. Remove the cherries from the heat and carefully pour into blender.  Pulse 3 or 4 times, just enough to break the cherries up into small pieces.  (You want the puree to have some texture, and the fruit will break down more as it continues to cook).
  3. Return the cherries to the stove, and continue cooking over medium heat.  In a small bowl, whisk together cornstarch and water until cornstarch is fully dissolved.  Slowly pour the cornstarch into the hot cherries, stirring constantly.  Cook the cherries for another 5-10 minutes, stirring continuously, until they have started to thicken.  Depending on the desired consistency of the cherries, you may need to use more or less cornstarch.
  4. Remove from heat and allow to cool.  Keep cherry puree in airtight container in fridge.

Grown-up Cherry Brownies

  • 3/4 c. + 2 TBS cake flour
  • 1/2 tsp baking powder
  • 1/4 tsp salt
  • 4 oz. bittersweet chocolate (2/3 c. chocolate chips)
  • 1 stick butter
  • 1 1/2 c. sugar
  • 2 eggs
  • 1/2 tsp almond extract
  • 1/3 c. grown-up cherry puree
  1. Preheat oven to 350°F.  Butter and flour an 8×8 baking pan.
  2. In a small bowl, whisk together cake flour, salt, and baking powder, set aside.
  3. In a large bowl, combine butter and chocolate.  Microwave for 15 second intervals, stirring vigorously in between, until chocolate and butter form a thick, completely smooth, mixture.  Do not over-microwave or you will burn the chocolate.  This step can also be done in a double boiler.
  4. Whisk sugar into chocolate mixture.  Incorporate eggs one at a time.  Whisk in almond extract.
  5. Add flour mixture to chocolate mixture in 3 batches, gently stirring with a spatula in between additions.  When flour is fully incorporated and batter is smooth, pour into prepared pan and smooth top with spatula.  Spoon cherry puree on top of brownies and drag your spatula through the puree and brownies, swirling in large motions, as you would to marble a batter.  Smooth top as best you can.  Bake for 40-50 minutes.

0 July 4, 2010 Drink

Thank you, Canada.

The weather patterns in North Carolina have been pretty consistent so far this summer: sunny, 97°, humid, with an occasional switch to sunny, 100°, and humid.  I don’t mind that much – we have air conditioning, and there’s a rumor that the apartment complex I live in might actually open the pool now that it’s July.  However, the past few days have been a beautiful gift: it’s kinda cold.  I sat outside the other day and got goosebumps on my arms.  It’s 73°, clear, and dry, with a breeze that is so cool and strong and refreshing it must have come all the way from Canada.  So thank you, Canada.  I want to bathe in this weather.  I want to roll around outside and revel in the fact that not a single part of me is sweating.  That I don’t have to bury myself in a corner of the library next to an AC vent.  That I don’t have to unstick my pants from my legs when I get home.  I’m so, so pleased.

This weather doesn’t really make me want to eat anything in particular.  Well, except maybe a bowl of fresh cherries and seven ears of corn on the cob.  Mostly what it makes me want to do is skip.  Explore.  Swim.  Go on adventures.  Dance.  And take on huge kitchen projects like making my own mozzarella cheese.  Which is what I was going to write about… but then it didn’t really work.  I mean, the final product is definitely something more than milk, but I’m not sure as I would go so far as to call it cheese.  We’re gonna try again though, so once we find the secret, get ready for some delicious homemade cheese recipes.  Until then, I have something far simpler to share.

This is my absolute favorite summer drink.  I invented it myself and it’s infinitely refreshing.  I’ve been wanting to share it for a while, but was waiting for the perfect weather, and this is totally the perfect weather.  It’s limeade and grenadine and flavored seltzer.  Vanilla seltzer is the best, peach seltzer a close second.  Simple, bright, refreshing, beautiful.  Also, Happy Fourth of July!  I hope you’re doing something wonderful.  We’re going on a bruschetta picnic at my new favorite place in North Carolina (more on that soon…) and then to the drive-in to watch Toy Story 3 and Twilight.  Too good.  Anyway, enjoy this drink, enjoy today!

Sparkling Cherry Limeade

  • 1 1/2 c. limeade, homemade or store bought
  • 2-3 TBS grenadine
  • 1/3 c. vanilla seltzer
  • limes and cherries for garnish

Pour into a glass in the order listed for best appearance.  Drink. :-)

8 July 2, 2010 Recipe

Longing

Two Sundays ago we went to the NC Museum of Art, and it was very nice.  But I’ve found that even in the huge, incredible national galleries of Europe, my tolerance for looking at art is about 1 hour and 45 minutes.  No, exactly 1 hour and 45 minutes.  And then I just can’t look anymore.  Trevor, on the other hand, is an artiste, so after 1 hour and 45 minutes of deep artistic pondering I found myself sitting outside in the very beautiful, but rather warm Rodin garden, being the impatient child that you don’t want to take to art museums.  I’m a big girl though, so I decided to pass the time by calling my father to wish him a happy Father’s Day.

And then I realized, oh my goodness, they’re in Maine.  Already.  Without me.  In my Maine.  I’ll have to call him there.  Why am I not in Maine?  I bet it’s nice and cool and perfect in Maine.  I bet there’s a car with working air conditioning in Maine.  Sigh.  I’ll just call.

And so I called.  And with each ring, a different, utopian scene from Maine flashed before my eyes.  Ring.  Laying out on the swim dock with a pitcher of lemonade and my John Steinbeck anthology.  Ring.  Walking up the gravel path to camp with my little brother every morning, inhaling the scent of pine and watching the yellow sunbeams slant across the road.  Ring.  Sitting at the picnic table drinking red wine and eating cheese and playing badminton with my brothers.  Ring.  Sea spray blowing into my face as we race across the bay to Pond Island.  Ring.  Picking blueberries so ripe that they roll off the plants into your hand.  Hello, you’ve reached the Morris family, we’re unavailable at the moment but please leave a message …

Wait a minute, I know where they are.  Ha.  Hahahahaha.  They are putting the docks in.  I am not there.  Ahahahaha.  They are in their wet suits, lugging enormous metal frames and wood panels down the hill into the lake, shivering and searching for dropped bolts in the mucky water as they simultaneously support tons and tons of weight above their shoulders.  And when I arrive, I will simply walk out the back door, skip down the hill, and step gracefully onto the beautifully constructed, perfectly leveled dock.  Life is not so bad.

But to be honest, I would have gladly suffered through the yearly dock ordeal if it meant that I could spend the next four weeks in Maine.  Because Maine is tied with the city of Prague for the superlative of best place in the world.  And I can’t wait to join my family there for the last three weeks of summer.  I mean, spending the summer in North Carolina is kinda cool – there’s something old-fashioned and feminine about summer in the south.  Things really do seem to move slower, and the air is heavy with heat and the fragrance of honeysuckle and magnolia.  But there’s nothing quite like summer in Maine, at least for me.  And so I wanted to share my love for Maine with you, through food of course.

Now, Maine has two signature foods – blueberries, and lobster.  I love blueberries, but I kind of want to wait until I’m actually in Maine and can show you the tiny wild blueberries that are so sweet and perfect to write about blueberry food.  And I don’t eat seafood, so sorry, no lobster.  (Can you even get lobster in North Carolina?) Instead, I made something that really channels the experience of Maine for me. It’s not something I eat frequently in Maine, or something that is specific to Maine.  It’s just something that feels like Maine – gingerbread.  Warm gingerbread with whipped cream.

Gingerbread is the sort of thing you should eat in the morning with your tea, while you sit at the old wooden table and watch the dusty morning sunlight stream through the skylights.  It’s the sort of thing you should eat by the wood stove, while it’s on in the morning before the house has heated up.  It’s the sort of thing your mother makes while you’re still asleep, so that you wake up to a house full of spice.  It’s comforting and hearty, sweet, but not too sweet.  It’s simple and rustic, yet wonderful.  It’s a lot like Maine.  So the next time you’re craving comfort and tranquility, the calm of an early morning in a house with no internet and no cell phone reception, the relaxation of a morning by yourself with nothing to do… try this.

Gingerbread Cake

Adapted from AllRecipes

  • 1 stick butter, softened
  • 1/2 c. brown sugar
  • 1 egg
  • 3/4 c. molasses
  • 1/2 c. applesauce
  • 2 1/2 c. flour
  • 1 1/2 tsp baking soda
  • 2 1/2 tsp cinnamon
  • 2 1/2 tsp ground ginger
  • 1 tsp ground cloves
  • 1/2 tsp salt
  • 1 c. hot water
  1. Preheat oven to 350°F.  Grease and flour a large loaf pan.
  2. In a large bowl, cream together brown sugar and butter.  Beat in egg, molasses, and applesauce.  It helps to swirl a little vegetable oil in your measuring cup before pouring the molasses in – this allows the molasses to dribble out freely.
  3. In a medium bowl, whisk together dry ingredients – flour, baking soda, cinnamon, ginger, ground cloves, and salt.
  4. Add dry ingredients to wet ingredients 1 cup at a time, stirring gently between additions, until all of the dry mixture has been incorporated into the wet mixture.  At this point, add the cup of hot water and stir to incorporate.
  5. Bake for 50-60 minutes.  A toothpick inserted into the center of the loaf should come out with a few moist crumbs attached.

0 June 29, 2010 Dessert

Puddin’

Tapioca reminds me of my dad.  I’m not really sure why, as it’s been years since I’ve had it other than the sort-of-questionable snack pack version.  But I have this extremely hazy but pleasant memory of sitting in my kitchen when I was really little, about four or five, before we’d remodeled our house, watching my dad make tapioca, and then sitting on his lap and eating it.  I think I remember eating it a lot, asking for it all the time, it being my special treat, but then again, I’m not really sure.  And I don’t know whether he made it from scratch or from a box.  In any case, it’s a warm and fuzzy sorta thing.

I’ve been meaning to make homemade tapioca for a while, but I can never find the pearls anywhere.  Then, last week, Trev and I went on an adventure to the Asian market, and shelved somewhere amongst the dried mushrooms and packages of vermicelli and bottles of sesame oil I found stacks of tapioca pearls.  I bought a pack for 99 cents, and now I have tapioca, and the key to the warm, comforting custard I remember so fondly.

Since yesterday was National Tapioca Day, I thought I’d finally make some pudding in celebration.  However, I got lazy, so today we’re celebrating day after National Tapioca Day.  Close enough.  In searching for a recipe I found a huge variety of ways to cook it, most of them with intimidating instructions like “cook, stirring constantly, for two hours.”  Two hours is not an amount of time I want to spend stirring tapioca.  Or anything else for that matter.  So I cobbled together my own recipe, and it ended up taking less than an hour to make.  I was surprised at how quickly the milk and tapioca mixture became custardy – it only took about 15 minutes, whereas I’d read reviews on recipes complaining that the tapioca had never thickened, even after hours of cooking.  I’m guessing that how quickly the pudding comes together depends largely on the type of tapioca used – how fresh it is, how long it takes to dissolve, etc.  Mine began to dissolve even in the pre-soak, which is apparently a good thing.

I’m feeling a little under the weather, and the end result made me feel a little better, placing this recipe solidly in the “keeper” category.  A few notes: most people prefer tapioca cold, but I like to have mine warm, straight out of the pan.  It’s good either way.  Also, this recipe contains raw egg whites, which are only heated slightly during the cooking process.  Personally, I’ve eaten enough cookie dough in my life to be OK with raw egg (and I hate recipes with unequal numbers of whites and yolks), but if this makes you uncomfortable, you could replace the egg whites with half a cup of heavy cream, whipped, and then folded into the pudding in place of the egg. Enjoy!

Cinnamon-Vanilla Tapioca Pudding

  • 1/2 c. large pearl tapioca
  • 3 c. whole milk
  • 1/4 tsp. salt
  • 3 whole cinnamon sticks
  • 2 egg yolks
  • 2 egg whites (or 1/2 c. whipping cream, see note above)
  • 1/2 c. + 3 TBS sugar
  • 2 tsp. vanilla extract
  1. Soak tapioca pearls in 2 cups cold water for at least 2 hours.  Drain, but do not rinse.
  2. Bring milk, salt, and cinnamon sticks to a gentle boil in a medium, heavy bottomed sauce pan.  Reduce heat and add tapioca pearls.  Cook, stirring constantly, over medium heat until tapioca pearls are translucent and milk has thickened into a custard.  This may take anywhere from half an hour to an hour, depending on the type of tapioca you are using.
  3. Separate eggs.  In a medium bowl, whisk together yolks and 1/2 cup of sugar.
  4. In a different, medium bowl, whisk whites until beginning to stiffen.  Add remaining 3 tablespoons of sugar 1 tablespoon at a time, whisking in between additions.  Beat whites until fairly stiff.
  5. Temper egg yolks: when tapioca has thickened, slowly pour a thin stream of custard into egg yolks, whisking yolks vigorously at the same time.  Continuing pouring custard and whisking until you have poured about a cup of custard into yolks.  Then, still whisking, pour the yolks and custard back into the main custard pot.  Continue to cook pudding for about ten minutes, stirring frequently.
  6. When pudding is done cooking, remove from heat and stir in vanilla.  Then, gently fold in egg whites until fully incorporated.  Pour into serving dish and refrigerate until serving time.  Garnish with cinnamon and turbinado sugar.

1 June 26, 2010 Poultry

Rotisserie Chicken Chronicles #1

I just discovered rotisserie chicken, and it has solved all of the world’s (my) problems.  I’ve been flirting with these golden birds for a while.  When I was in Paris last year I was completely set on getting a chicken and pulling it apart with my fingers while sitting along the Seine and drinking cheap wine out of the bottle – I literally couldn’t imagine anything better.  But there are so many things to do in Paris and with only 5 days I never got my chicken on the Seine.  Now I have to go back.  Bummer.  Then over fall break my friends and I visited Vienna, and in the Naschmarkt they actually had a rotisserie chicken truck.  It was tantalizing.  And I had just eaten a plateful of curry.  Sigh.

But recently I bit the bullet, and I grabbed the last chicken in my ordinary old Kroger.  No Seine.  No blue chicken truck.  I’ll admit, I wasn’t thrilled.  But then I opened the bag, and realized that this was the greatest invention ever.  All I had to do to have my protein was pull the meat off with my fingers and mix it with whatever I wanted.  I didn’t have to cut through bones.  I didn’t have to worry about overcooking the breasts.  I could use the carcass to make like an entire gallon of homemade low cost low sodium chicken stock.  And the 8 bazillion meals I was going to get out of this chicken were only going to cost me $5.  VALUE ATTACK.  Sorry.

So basically, rotisserie chicken is the best.  And since it’s definitely going to become part of my regular grocery routine, I decided to start featuring some of the delicious ways you can eat a rotisserie chicken.  Probably a lot of you have known about this for years, but I’m a newbie, and I’m thrilled, and I’m going to share.  And the first thing I’m going to share is this Asian Pesto Chicken Salad from Ming Tsai.

For those of you who aren’t familiar with Ming Tsai, let me introduce you.  Ming Tsai is the owner/chef of Blue Ginger restaurant in Boston, as well as a Food Network personality.  More importantly, however, he attended my high school, Phillips Andover, then went on to study mechanical engineering at Yale, took a summer to study at Le Cordon Bleu, and now is an incredibly talented chef.  I could do that people – I’ve already got the high school and the engineering down.  Someone just needs to send me back to Paris.

Anyway, in addition to being a source of personal inspiration for yours truly, Ming Tsai has created some truly exceptional recipes.  Like, truly.  Everything I’ve ever made of his is bursting with flavor.  And this recipe was no exception.  The pesto was spicy, sweet, tangy, and herby all at once.  Mixed with the other salad ingredients, it was sublime.  Literally, I can’t explain to you how good this is.  And how easy.  And how GOOD.

So grab a chicken and some basil and make this.  Now.  Please?

* Note:  I’m posting this recipe as I made it, which was based on what I had on hand and my personal heat tolerance.  It’s fairly close to the original, and it was very good, as I’ve said, but I’m sure the original recipe is incredible for those people who can tolerate a lot of jalapeno and have a healthier mint plant than I do.
Asian Pesto Chicken Salad
Adapted from Ming Tsai
Asian Pesto:
  • 1 jalapeno chili, stemmed and seeded
  • 5 cloves garlic
  • 1 TBS sugar
  • 1 inch piece peeled fresh ginger
  • 1 c. roasted, salted macadamia nuts
  • zest and juice of 1 lemon
  • 1 c. fresh basil leaves, packed
  • 1 c. fresh cilantro leaves, packed
  • 1/3 c. fresh mint leaves, packed
  • 1/2 – 1 c. canola oil
  • salt and pepper, to taste
In a food processor, pulse jalapeno, garlic,sugar,  ginger, macadamia nuts, lemon zest, lemon juice, and some (approx 1/3 c.) canola oil until a smooth paste is formed.  In batches, add basil, cilantro, and mint, and pulse to puree.  Add canola oil, pulsing, until desired consistency is reached.  Season with salt and pepper.
Asian Pesto Chicken Salad:
  • 1 package (8 0z.) orzo, cooked according to package directions
  • meat from1 rotisserie chicken
  • 1 c. asian pesto
  • 1 pint cherry tomatoes, halved
  • 2 c. fresh spinach leaves, packed
  • 1-3 TBS lemon juice
  • kosher salt and pepper

Mix orzo, chicken, pesto, cherry tomatoes, and spinach in large bowl.  Add lemon juice, salt and pepper to taste.  Serve slightly warm or cold.


  • « Go to Previous Page
  • Go to page 1
  • Interim pages omitted …
  • Go to page 52
  • Go to page 53
  • Go to page 54
  • Go to page 55
  • Go to page 56
  • Go to page 57
  • Go to Next Page »

Primary Sidebar

Subscribe!

Get creative recipes and menu ideas delivered straight to your inbox.

Most Popular

A House // Sweet Potato and Coconut Milk Soup with Brown Rice and Lentils

Monthly Fitness Goals: July // Homemade Spinach Wraps with Chopped Greek Salad

A New Job // Classic Seven-Layer Bars

Butternut Squash Carbonara with Fried Sage and Caramelized Onions

Happy Birthday, Trevor! // Peanut Butter Fudge

Cookbook Review and Giveaway: Home Made Winter

Drizly

Please note!

Full disclosure: if you purchase anything at Amazon using the above links or any other links to Amazon on this site, I will receive a small commission. Just so you know!

Copyright© 2025 · Cookd Pro Theme by Shay Bocks

This site uses cookies: Find out more.