• Skip to primary navigation
  • Skip to main content
  • Skip to primary sidebar
  • Home
  • Recipes
  • Features
    • Cookbook Reviews
    • Ingredient of the Week
    • Sunday Dinner
    • Fitness Goals
  • Travel
  • About
    • Privacy Policy
    • Cookie Policy
  • Work With Me

Katie at the Kitchen Door

Globally-inspired, seasonal recipes

Blog Page

0 September 11, 2011 Recipe

Asparagus, Smoked Gouda, and Serrano Ham Salad

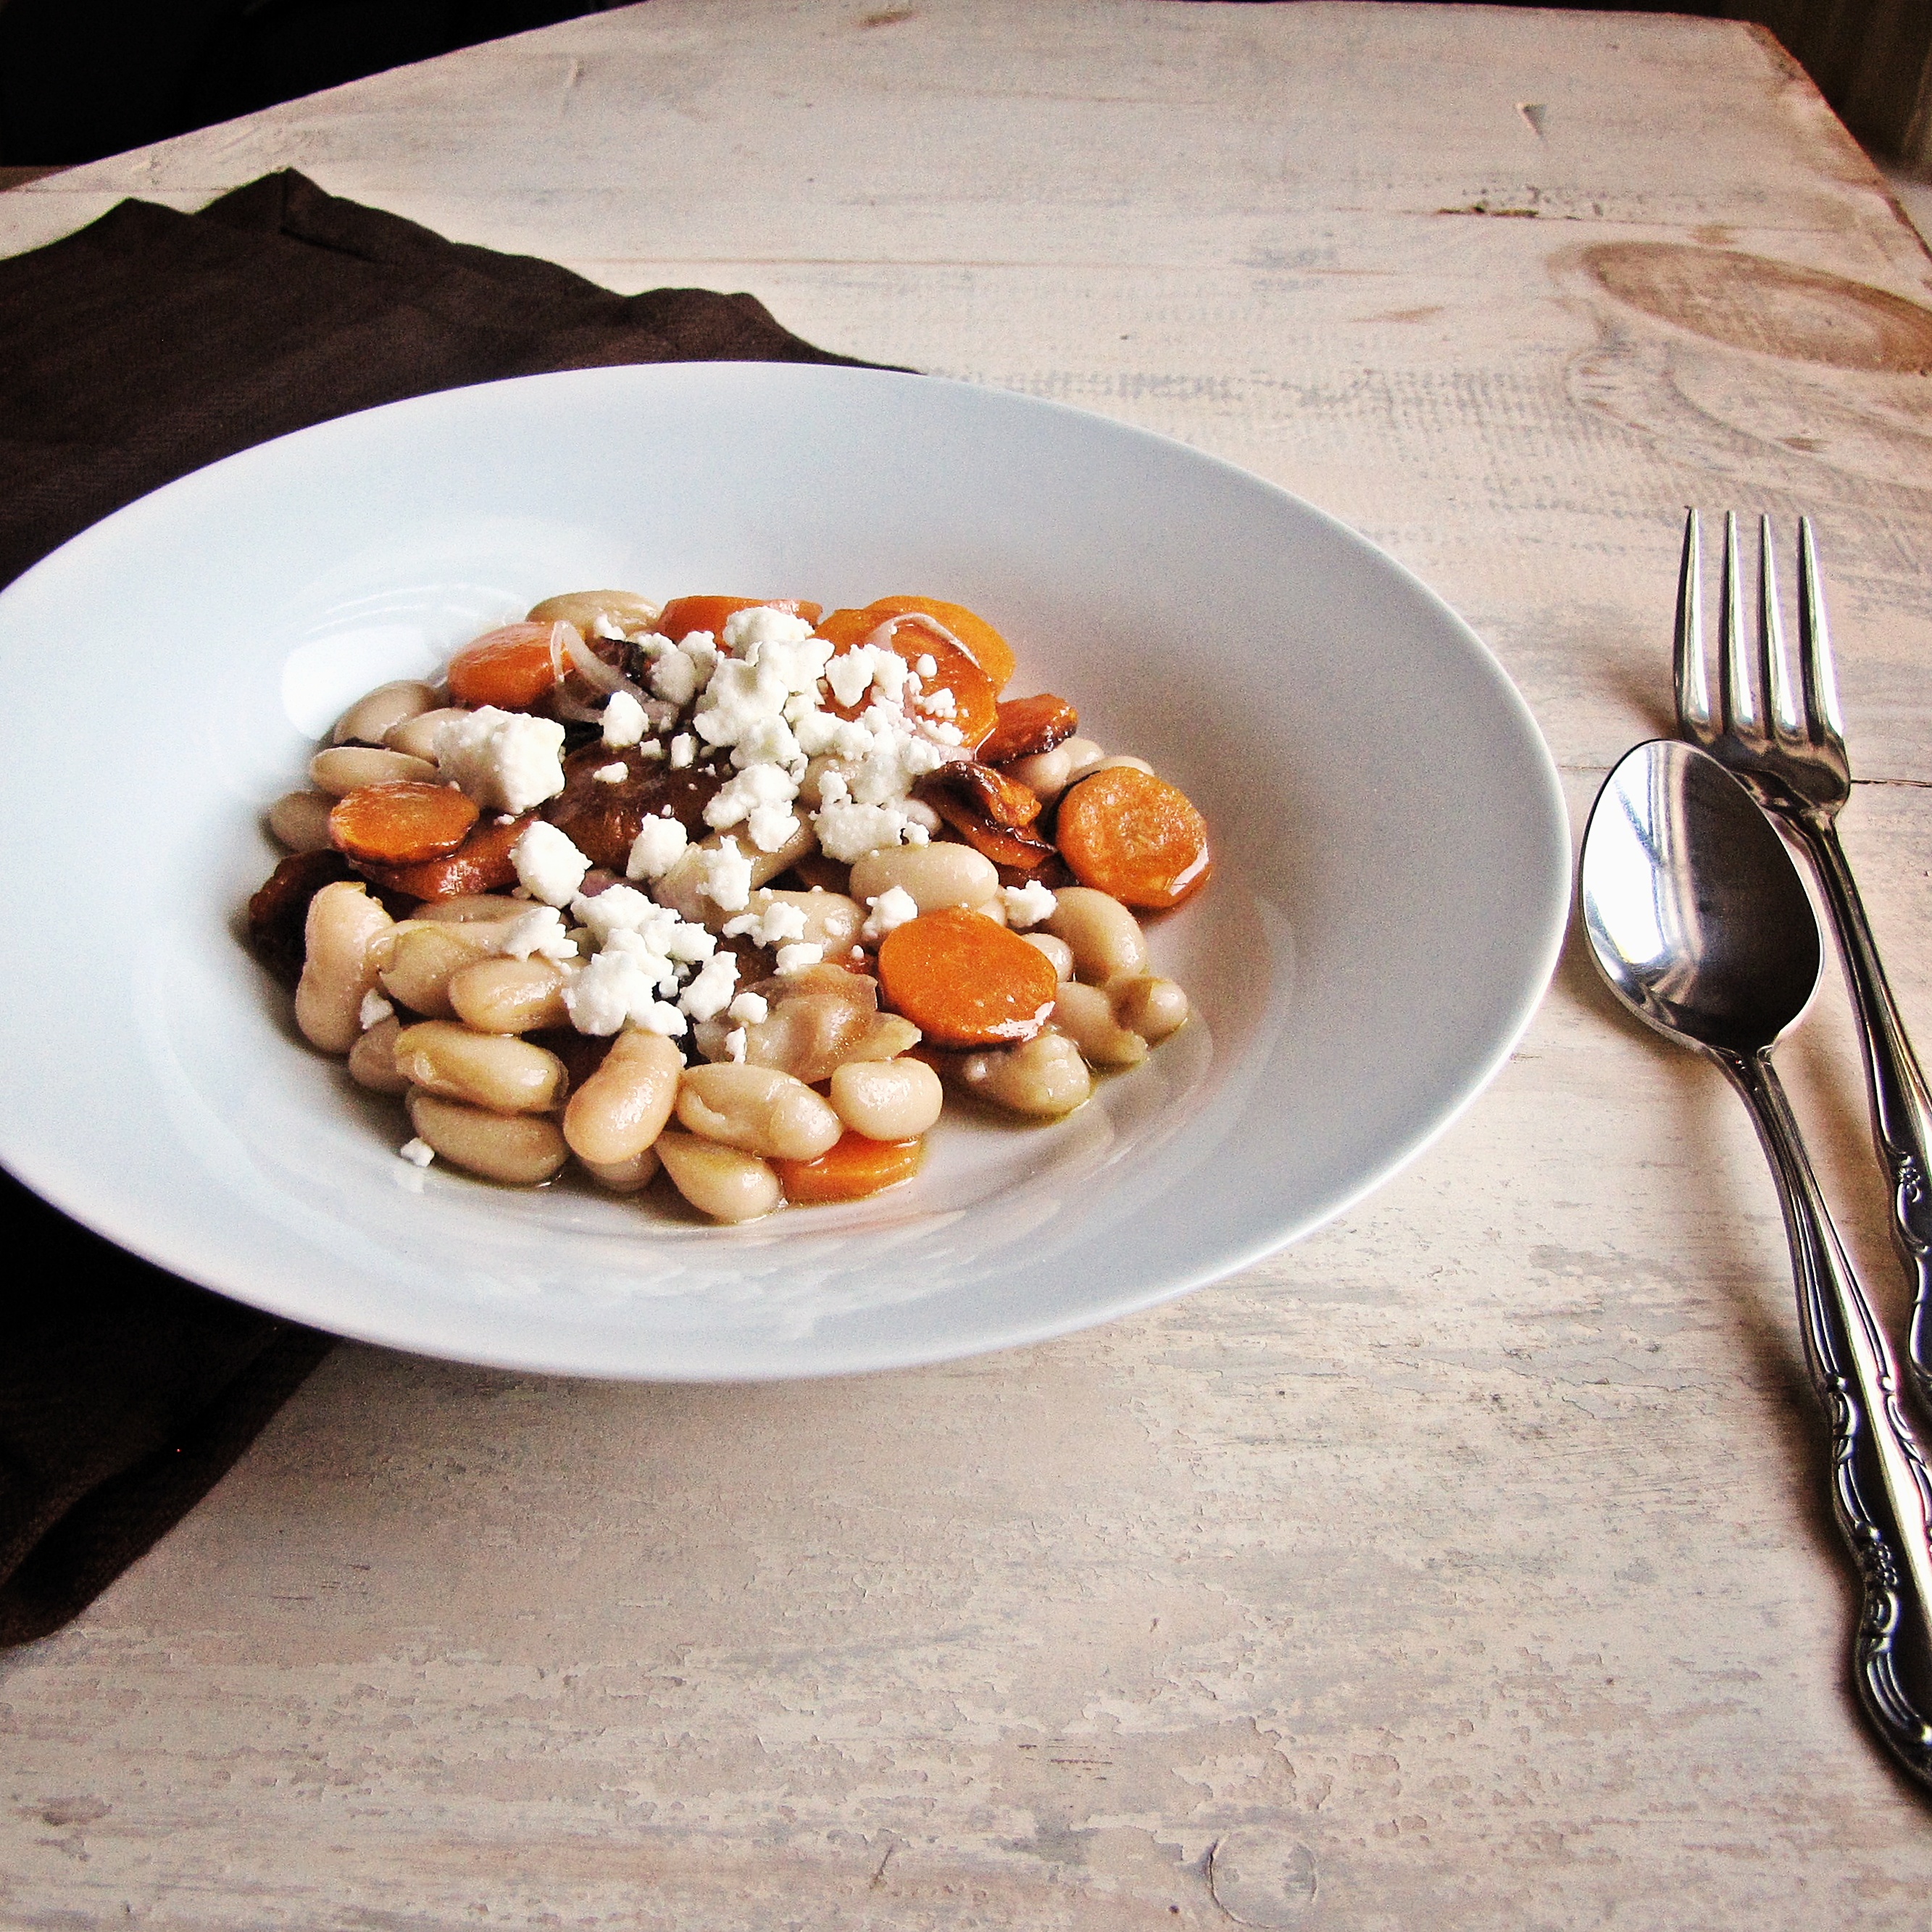
Starting work has come with some unexpected changes – during the week, time is more structured than it was while I was in school, and I feel like I barely have any free time on weeknights.  On the weekend, however, time is wide open – no homework, or meetings, or school events, just picnics and long runs and parties and catching up on sleep.  Overall, I probably have more free time than I ever did in college, it’s just allocated differently, and it’s taking me a while to get used to it.  One of the effects of this time crunch is that I’ve barely eaten at home in the past few weeks.  OK, to be honest, it’s also partly because it’s the first time I have a real income and because I’m suddenly living in a place where restaurant food is super accessible and delicious and varied.  And also because my job seems to provide me with at least 3 utterly delicious, fully compensated meals a week.  All told, the kitchen and I are a bit estranged.

Hopefully I’ll fall back into a more balanced cooking pattern soon, especially because I can imagine my healthfulness deteriorating quite quickly if I stay on a restaurant-centric diet, but for now I’m kind of enjoying all the new dishes I’ve tried.  Some have been less than memorable, like the delicious-sounding but not-that great blue-cheese and steak dim sum I had in Orlando, or the mediocre sandwiches I’ve had in transit.  Others, however, have been truly delicious, and my two favorites in the past few week were some garlic-crusted soft pretzels with spicy queso dip, and this asparagus, edamame, smoked gouda, and serrano ham salad, which I liked so much that I decided to recreate it for one of my rare at home meals.

I ordered this salad at a get-to-know you lunch with one of my managers, thinking it would be light, not too messy, and easy to eat while talking.  I wasn’t expecting anything special, but oh-man did I enjoy this.  It definitely is very light, but substantial at the same time, and the simple dressing of olive oil and salt allows the flavors of each ingredient to shine through.  At the restaurant it was served with fava beans, but I have only seen fresh fava beans once in my life, and wasn’t keen on spending a whole day searching for them, so I substituted edamame.  I think the favas were a little bit better, as their distinctive almost-bitter flavor played off the salty flavors well, but the edamame was a decent substitution.  In any case, this salad was just as fresh and delicious when I had it at home, and very easy to throw together to boot.  If you’re looking for a change in your salad routine, I’d definitely recommend this one.

Asparagus, Gouda, Serrano Ham, and Edamame Salad

Serves 1.

  • 1/2 lb. asparagus
  • olive oil
  • coarse sea salt
  • 1 1/2 c. mixed greens with dill
  • 1/2 c. frozen edamame, cooked according to package directions
  • 3 oz. smoked gouda, cubed
  • 1 oz. serrano ham, pulled into thin slices
  1. Preheat the oven to 400°F.  Rinse asparagus and trim thick ends by about an inch.  Place on baking sheet and drizzle generously with olive oil and sea salt.  The oil and salt from the asparagus will be used to dress the entire salad.  Roast for 8 mins, until tips are beginning to brown and spears are crisp-tender, then remove and cut spears in half.
  2. Toss greens, asparagus, gouda cubes, and cooked edamame together.  Top with slices of serrano ham.  Drizzle with additional olive oil if necessary.  Serve while asparagus is still warm.

0 September 5, 2011 Latin and Mexican

Chile Contest – Adobo and Sweet Corn Frittata

UPDATE: Vote for me here!

When I sat down to write this post I was in a bad mood.  Bad moods tend to give me writer’s block, except for the negative things, which seem to get through just fine.  This was my original draft of this post:

“I hate food.  I don’t like chiles.  I quit this contest.  Corn sucks.  Also stop reading food blogs it’s making you fat.  It’s making me fat too.  This is my last blog post ever.  Peace.  If you ever ate meat you are basically responsible for killing bambi’s mom.  Traffic sucks.  Trains suck.  Goodbye.  Blog blog blog blah blah blog blog. [This is what Trevor says when I’m writing blog posts.]”

None of these things are actually true, except that writing a food blog actually does make you a little bit fatter than you’d like to be, unless you have the self-control of some animal that seems strong-willed and regal that is not a human.  Like a cougar, or an iguana.  And anyway, the reason that I was in a foul mood while writing is that I was sitting on a train for an hour immediately after sitting in a car for five and a half hours in Labor Day traffic immediately before riding the subway for 45 minutes.  So really, I just don’t like traveling, people who wave at you when you’re stuck in traffic, and sticky train seats.  I actually like chiles and contests and corn quite a bit, which is why I signed up for this contest in the first place.  Also, because when I saw the announcement for this contest I was basically only cooking things that contained various ratios of fruit, sugar, and butter, and I thought chiles would provide a little bit of inspiration.

At this point I am going to back up to the point at which I would have started had I been in a good mood while writing this, and inform you that I am participating in a contest hosted by Marx Foods to develop an original recipe using a sample of their dried chiles.  I really like participating in their contests because a. they have great products that I get to use in the recipe development process, b. they have great prizes even though I don’t usually win, and c. the contests push me to think outside of the box.  Also, they come up with really original, delicious sounding recipes on their blog, which you should check out if you haven’t.

Anyways, they sent a sample of six types of dried chiles – aji amarillo, mulatto, habanero, puya, cascabel, and japones.  We were required to use at least one of the chiles in an original recipe, and after reading the descriptions on the chile samples, I decided that I had to use the mulatto chiles, as they were described as having mild heat, with a hint of molasses and chocolate.  Um, yum.  By far the best dish I made this summer was the “market corn” from Antojitos (which I described here,) so I decided to use that recipe as my inspiration for this contest.  The Flavor Bible informed me that eggs and dried chiles were a good match, and there was my spark – a sweet corn and adobo frittata.  I started by making an adobo sauce from the mulatto and puya chiles, sweetened with a bit of brown sugar and a tablespoon of molasses.  Then I mixed it into some eggs with some cheddar cheese (although I think I’d prefer something sharper, like parmesan) and fresh sweet corn, fried then broiled it, and topped with diced avocado.  I had mixed expectations for this creation – would it really go together as well as I hoped it would? – which were actually far exceeded by the result.  It was scrumptious.  And easy.  And the adobo sauce itself was super flavorful, and I had it the next day on top of a hamburger and that was almost more delicious.  Almost.

So, if you think this sounds good, or you like these lovely pictures, or you think it’s funny when I’m grouchy, or you feel bad for killing bambi’s mom, or you are enjoying this picture of Trevor using the cascabel chiles as maracas, or think that winning a sausage medley would cheer me up, keep your eye out for me to post the link to Marx Foods to vote for me to win this contest.  Cool?  Cool.

Adobo and Sweet Corn Frittata

Serves 3.  Adobo sauce recipe adapted from Emeril Lagasse.

Adobo Sauce – Makes 1 1/2 cups.

  • 3 mulato chiles
  • 4 puya or guajillo chiles
  • 1/2 small onion, diced
  • 1 TBS minced garlic
  • 1 TBS brown sugar
  • 1 TBS molasses
  • 1/2 tsp oregano
  • 1/2 tsp thyme
  • 1/2 tsp cinnamon
  • 1/4 tsp cumin
  • dash allspice
  • dash cloves
  • 3 TBS cider vinegar
  • salt to taste
  1. Toast the chiles in a dry pan over medium-high heat, turning every 30 seconds or so and pressing down with tongs until chiles begin to soften.  Do not allow to char.  Remove chiles from heat with tongs, and remove stem and seeds from chiles.  Discard stem and seeds and place chile flesh in a small saucepan.  Cover chiles with just enough hot water to submerge, then bring to a boil.  Remove from heat, cover pan, and allow chiles to steep for 20 minutes.  Remove chiles from pot and add to blender, reserving soaking water separately.
  2. Add vinegar, onion, garlic, sugar, molasses, and spices, and pulse to blend fully.  Add salt, and taste for seasoning, adjusting as necessary.  Store in an airtight container in the fridge.

For the frittata:

  • 4 eggs
  • 2 TBS adobo sauce
  • 1/2 tsp dried thyme
  • 1/2 tsp salt
  • 1 TBS butter
  • 1 ear corn, boiled briefly and kernels removed
  • 1/3 c. parmesan or cheddar cheese
  • 1 avocado, diced, for topping
  1. Beat together eggs, cheese, adobo sauce, salt, and thyme.  Over medium heat in an oven-safe pan, melt butter and saute corn for a minute or two.  Add eggs and allow to sit undisturbed for 1 minute, then pull edges gently from side of pan to let uncooked egg fall through.  Allow to cook undisturbed for 3 minutes, until mostly set, and then transfer to the oven and broil on high for 2 minutes, until top is cooked through.  Top with avocado, and serve warm.

1 August 30, 2011 Recipe

Sweet-tox

A lot has happened since I last wrote – I’ve moved into a new house, started my first real job, weathered a hurricane, and learned my way around a new kitchen, meaning I have no shortage of writing material.  Actually, I’m a little overwhelmed by all of the things I could say, and the sudden extreme drop in the amount of free time I have.  I’m sure I’ll get used to the new schedule, but for now it still takes me three separate occasions to finish folding a basket of laundry.  So, at least for today, I’m gonna bypass the hurricane and my new kitchen and working life and stick with something I’ve really been meaning to get to – being less fat.  (Mostly figuratively, but a little bit literally too.)

You may have noticed that things have tended heavily toward the sweet side around here this summer.  First there was plum butter and chocolate crepes, then blackberry financiers, then lemon pound cake, and then blueberry and coconut pie.  All of these things were utterly delicious and worthy of blogging about.  (Except the financiers, which actually were just OK in my book, even though I still managed to eat them all in less than 24 hours.)  I made even more sweet things than I blogged about – reeses pieces cookies, frozen lemon meringue pie for Robbie’s birthday, and two other blueberry pies.  The number of times I had pie for breakfast in the 10 days before I left Maine was greater than or equal to 4, decidedly greater than if you extend “pie” to include “freshly picked wild blackberry crumble.”  It was a delicious summer for me, but even though I’ve been doing my best to keep up with running, vacation caught up with me, as well as with my very satisfied but slightly larger than desired middle.

But vacation is over. Literally. Because I just started my job. And not just like a summer job, like a career job.  I AM SO OLD.  But it’s exciting.  So it’s time for a little bit less pie (at least until apple season), and a little more filling, portable, “I can have you for dinner and still not mind taking you to work the next day” food.  Like this carrot, white bean, and feta salad, which has been a favorite for me this summer.  It’s a recipe that I’d had bookmarked since before I started blogging, and when I finally got around to trying it at the beginning of the summer, I thought it was just OK.  Warm, filling, tasty, but missing something.  Then, the next day when I was rummaging around for lunch, I reheated it until it was piping hot and added feta cheese, and was totally sold, and I’ve made at 4 or 5 times since then.  It’s also exceedingly easy, so easy that I can throw the carrots on the stove and leave them to caramelize while I get ready for work, then come back 10 minutes later, toss them with the rest of the ingredients, and be ready to go.  Sweet-tox, commence.


Caramelized Carrot, Cannelini Bean, and Feta Salad

Makes 2 servings.  Adapted from 101 Cookbooks.

  • 3 TBS olive oil
  • 5-6 large carrots
  • 1 can cannelini beans, rinsed well
  • 2 TBS chopped fresh dill, optional
  • crumbled feta cheese, to taste
  • 1 TBS lemon juice
  • 2 shallots, thinly sliced
  • sea salt, to taste
  • 2 TBS brown sugar
  1. Heat 1 TBS of the oil in a large pan over medium-high heat.  Peel carrots and cut thinly on the bias, then add to pan in a single layer.  Let cook about 5 minutes, then stir/flip, and continue cooking until carrots are caramelized all over.  If using, add chopped dill about 8 minutes after starting the carrots.  If serving salad immediately, turn down heat to low and let pan cool off slightly then add the beans and heat through – adding beans to the sizzling pan will make a huge mess.  If reheating later, just add the rinsed beans to a large bowl and add the hot carrots to the beans.
  2. In a small bowl, whisk the remaining 2 TBS olive oil with the lemon juice and sea salt, and add sliced shallots.  Let sit 5 minutes, then toss with salad.  Stir in the brown sugar, and serve hot (not just warm!), sprinkled with crumbled feta cheese.

5 August 15, 2011 Cookbook

Good ol’ Blueberry-and-Coconut Pie

I feel like a “Maine is awesome and relaxing and beautiful and look there are wild blueberries!” post is acceptable, possibly even required, at least once a year.  Especially since this is probably the last summer for a while that I’ll have as much free time as I’ve had to just hang out there.  (Although, to counteract that negative point, there’s the fact that it’s also the first time that I’ll ever be able to go up for long weekends in the fall and spring.)  Plus, not coming up with blueberry recipes when you have free access to a full-sized ex-commercial blueberry field seems a little bit like a crime.  So, here goes:

Maine is awesome!  It has nature!  And mountains!  And lakes!  And blueberries!  Yay yay yay yay yay!  But seriously, even the rainiest, darkest, most boring day in Maine is significantly better than the same day would be anywhere else.  Commitments feel less pressing, time slows down, and days run easily together into a long summery memory.  On sunny days, we wake up early and refreshed and drink our tea on the back porch, watching the lake come to life and letting the sun slowly warm us out of sleep.  We float in the just-warm-enough lake, or read on the dock, stopping occasionally to watch the loons shake out their wings, or traipse through the blueberry barrens popping sun-sweetened berries into our mouths with every step, or zip across the harbor for an island picnic.   On rainy days, we all sit around the woodstove and read, or play cards, drinking hot chocolate and munching on cookies.  Every night, rain or shine, we sit down around the long wooden table for a hot meal together.  So yes, I’m condensing the experience into the best parts – we still have to do things like get groceries and clean the house and we still irritate each other as families are wont to do – but the average Maine day is better just because of the opportunity to do more than we might otherwise.  To step outside and find something new.  To gather the family for a quick boat trip.  Being in Maine is more spontaneous than being elsewhere, and much of it still feels wild and untouched, and I love it.

I made this pie the other night because I was actually tired of having so many blueberries sitting around in the fridge, and I wanted to use them up.  I briefly considered blogging about it, but by the time it came out of the oven it was too dark for pictures, and I knew it wouldn’t make it to the morning with 8 people in the house, so I just served it up and abandoned the blog prospect.  But then, it was just so good that I knew I had to make it again to share with you all.  It didn’t hurt that the recipe left me with extra crust dough and extra topping, so making another one was a breeze.  My mom had sort of wrinkled her nose when I told her there was coconut in my blueberry pie, and both my brother and my cousin almost refused to have any on the grounds that they didn’t like coconut, but all were converted after the first bite.  It’s melt-in-your-mouth delicious, with the hint of lemon and coconut bringing out the sweetness of the blueberries and giving it an almost tropical feeling, even though it’s from a book of Italian desserts.  It’s not particularly easy or quick, and with all that butter it’s not exactly healthy, but despite all that, I have a feeling it will become a regular during blueberry season.  It’s too good not to have.

Blueberry and Coconut Pie

Adapted from Dolce Italiano: Desserts from the Babbo Kitchen.  Serves 8-12.

A note about this recipe: the sweet tart crust recipe makes enough dough for two full 9-inch pie crusts, with a little room for error.  I decided not to halve the recipe here due to the awkwardness of trying to use half an egg yolk and the prevalence of measurements that are in thirds.  Once you have rolled out the dough and transferred it to the pan, cut the extra off with a knife, roll the scraps back into a ball, and double wrap it in plastic to be stored in the freezer.  Then, the next time you want a pie, it will take half as much time!

For the sweet tart crust:

  • 2 1/3 c. flour
  • 1/3 c. sugar
  • 1/2 tsp salt
  • 1/2 tsp baking powder
  • zest of 1 lemon
  • 3/4 c. (1 1/2 sticks) butter, cut into small cubes, then chilled well
  • 1 egg
  • 1 egg yolk
  • 1/2 tsp vanilla
  • 1/4 c. heavy cream
  • a few drops ice water, if necessary

For the filling and topping:

  • 6 TBS salted butter, divided
  • 1/3 c. flour
  • 1/4 c. sugar
  • 1 c. unsweetened shredded coconut, divided
  • 1/2 tsp vanilla
  • 1/2 c. confectioner’s sugar
  • 2 egg yolks
  • 1/2 tsp. lemon extract or zest of 1 lemon
  • 3 c. blueberries
  • juice from 1 lemon
  • 1/4 c. sugar
  • 1 TBS cornstarch

For the crust:

  1. In a food processor, pulse flour, sugar, salt, baking powder, and lemon zest until combined.  Add cold, cubed butter and pulse until mixture has a sandy texture, with pieces of butter no bigger than a pea.  In a small bowl, whisk together egg, egg yolk, heavy cream, and vanilla.  Add wet ingredients and pulse just until dough comes together when you pinch it.  Remove dough from bowl and work into a ball.  If mixture is still too dry/crumbly, add a few drops of ice cold water as necessary.  Knead the dough just until it is even in consistency and moisture.  Flatten into a disk, wrap in plastic, and chill for at least half an hour before using.

For the topping and filling:

  1. Preheat oven to 350°F.  Melt 2 TBS of the butter and cool slightly.  Add 1/2 tsp vanilla to melted butter.  In a medium bowl, whisk together the 1/3 c. flour, 1/4 c. sugar, and 1/4 c. of the coconut.  Add the melted butter mixture and combine well.  Transfer mixture to freezer for half an hour to set.
  2. Soften the remaining 4 TBS of butter, and mix with the confectioner’s sugar until smooth and creamy.  Beat in the egg yolks one at a time, until incorporated, and then add the lemon extract and remaining 3/4 c. of coconut.  Set aside.  In a large bowl, toss blueberries, lemon juice, sugar, and cornstarch, and let sit 5 minutes.
  3. While berries are macerating, roll out chilled dough on a floured counter into a 10-inch circle about 1/8 inch thick.  Roll the dough loosely over the rolling pin to transfer to the 9-inch pie tin, and drape over the tin.  Press the crust into the bottom and edges of the pan, then use a knife to cut the excess from the rim.  Roll together the scraps and freeze for a later pie.
  4. Spread the coconut filling evenly across the bottom of the pie.  Top with the blueberries and their juices.  Remove the topping from the freezer and use a fork to break it into small pieces.  Scatter these pieces over the top of the pie.  Bake the pie for 40-45 minutes, until crust and topping is golden-brown and berries are bubbling.

0 August 5, 2011 Breakfast

Blackberries

I mean, I have a post called strawberries and one called raspberries… I need to complete the trend, don’t I?  Next berry season I’ll have to get more creative with my post titling abilities – strawberries #2! – but until then, we’re golden.

I think the thing I like best about blackberries may be that they grow in the backyard and I can walk up the hill with my little berry basket swinging and pluck the beautiful little berries from the far-too-thorny bushes and feel all earthy and wholesome.  As well as like I’m cheating the grocery store out of all that money they charge for fresh berries.  But then, a basket full of berries picked and washed and set aside, I’m not sure what I want to do with them.  Mostly, I feel like they should be photographed, because they’re gorgeous, and nature created them, and they were free, and I felt picturesque when I picked them.  Partly, I just want to eat them, because it’s easy and summery, but I’m not sure that posting a recipe that goes “Pick blackberries.  Wash blackberries.  Eat blackberries.” would be all that pertinent on a food blog.  So I feel like I have to make something with them.  And lately, I’ve been having this problem where the first thing I want to do with fruit is boil it with a bunch of sugar and then mash it up.  I’ve been doing it with rhubarb.  I just did it with plums.  I’m considering doing it with wild Maine blueberries.  It’s a useful thing, because then you can just drizzle your sugary-fruity syrup-butter on ice cream, or yogurt, or pancakes, or mix it with tequila and call it a day.  It concentrates the flavors and colors of these fruits, lasts a long time in the fridge, and takes up less space.  But making so much fruit syrup is starting to make me feel boring.

Which is why you are not looking at pictures of blackberry syrup.  Nor are you looking at pictures of blackberry pie, or blackberry muffins, because, while perfectly delicious and viable options for fresh summer fruit, I JUST WANT TO BE ORIGINAL.  Therefore, you are looking at pictures of Blackberry Brown-Butter Financiers.  Sounds good, right?  Trendy, even?  Well they were pretty good.  I only use the modifier “pretty” because I’ve never had a financier before, so I’m not sure how these compare to other financiers, but I liked them – they were moist but eggy, nutty smelling, not too sweet, and the blackberry in the middle gave them a sweet juicy bite that was just right.  They’re so cute and easy to pop into your mouth that they disappeared within 12 hours of coming into existence.  I would definitely categorize them as more of a tea-cake or snack then a dessert, and I think that the perfect place for them would be on a tray of other bite-sized goodies at an afternoon party.  But if you don’t feel like throwing a tea party, you could probably just eat them for breakfast.  I did.

Blackberry Brown-Butter Financiers

From Gale Gand’s Just a Bite.  Makes 24.

  • 9 TBS salted butter
  • 1/2 c. almond flour or finely ground almonds
  • 1 c. confectioner’s sugar
  • 6 TBS flour
  • 4 egg whites
  • 1 tsp applesauce
  • 24 small blackberries, or 12 large blackberries
  1. Preheat oven to 375°F.  Brown the butter – heat butter in a saucepan over medium heat until fully melted.  As milk solids start to separate from the butter, use a wooden spoon to scrape them from the bottom and prevent them from burning.  Continue to cook, stirring occasionally, until butter is golden brown and has a nutty aroma.  Remove from heat and pour through a metal strainer.  Discard solids and reserve the clarified butter.
  2. Sift together the almond flour, confectioner’s sugar, flour, and sugar.  Whisk to combine.  Add the egg whites, applesauce, and butter, and mix to combine.  Batter will be thin and pourable.  Pour or spoon into non-stick mini-muffin tins, or buttered financier molds.  Fill only about halfway – financiers will rise quite a bit.  Place a blackberry (or half a blackberry, depending on berry size, but in my opinion the more berry the better) into the center of each tin.  Bake for 10-12 minutes, until the edges are golden brown.  The cakes should spring back gently when pushed, and a toothpick inserted into the center will come out clean.  Remove from molds and dust with powdered sugar to serve.

0 July 29, 2011 Breakfast

Plum Butter and Chocolate Crepes

When I saw plums for $1 a pound last week, I immediately grabbed a bunch with this recipe for plum-apple butter in mind.  I made this on a whim last fall, and it was one of the most memorable recipes of the year.  With the warm, wintery spices – nutmeg, cloves, and cinnamon – it’s definitely a summer-into-fall type of recipe, but I’m enjoying it even though it’s the height of summer here.  Served cold on pretty much anything, from muffins to a spoon, or warm over vanilla ice cream, it’s incredible.  But my favorite way to eat it?  On a stack of chocolate pancakes, topped with fresh whipped cream.  Funny thing is, when I woke up this morning, I just couldn’t bring myself to make pancakes.  I didn’t want them.  It was weird, but something about them seemed … too much.  Too filling.  I knew I wanted something chocolatey, and preferably breakfast friendly, to go with the plum butter, but I couldn’t decide.  Chocolate muffins?  Chocolate cake with a plum filling?  Plum buttercream for chocolate cupcakes?  It all seemed delicious, but not quite right, when it hit me – why not pancakes’ skinny cousin, the crepe?  Perfect.

In theory, crepes are one of the simplest things you can make.  The classic recipe, as taught to me be my high school French teacher, calls for only three ingredients, combined in a simple ratio – 2 parts milk, 2 parts egg, and 1 part flour.  But then you start adding things like butter, sugar, oil, flavoring agents, liquers, and cocoa powder, and experimenting with pan temperature and refrigeration time, and the simplicity quickly gets lost.  I’ve tried lots of recipes in the past few years, never finding the perfect one, and never able to find an explanation for why one recipe might work better than another.  I was happy, then, to stumble across this explanation about crepe texture and flavor, complete with 8 different recipes categorized by egg content and fat content.  Enlightening.  I decided to go for the medium egg, medium butter formula, because the middle seemed like a good place to start.  The verdict?  The texture was perfect – tender, but not so delicate that they fell apart.  The flavor was good, but a bit milder than I’d hoped – I wanted them to be both more chocolatey and sweeter.  The addition of some espresso powder, to bring out the chocolate flavor, or the replacement of a few tablespoons of water with a chocolate liquer would probably fix that.  But when filled with the tart, aromatic, oh-so-delicious plum butter and mascarpone cheese?  Pretty good as they were.

Now that I’ve satisfied my plum and chocolate craving, other plum recipes keep popping out at me.  Plum and red wine sorbet.  Baked plums with blueberries and mascarpone.  Plum tarte tatin.  In fact, I’m feeling kind of pressured to keep up with all the summer fruits that are at their peak right now.  The fact that there’s only a month or two when currants, blackberries, raspberries, watermelon, blueberries, peaches, nectarines, cherries, and plums are in their prime is both glorious and daunting.  All those recipes bookmarked in the dead of winter when nothing sounded as appealing as a juicy plum on a hot day are begging to be made, shared, photographed.  Currently, I have plenty of time – I could bake and cook all day, every day for the next three weeks and not have anyone say a thing about it.  The problem is, I don’t have the eating power necessary to consume all of the food I want to make.  Alas.  I will just have to pace myself, round up some hungry friends, and learn to freeze summer fruits.  Either way, expect at least a few more glorious, fruity, summery recipes from me before I’m claimed by Corporate America in three weeks time.

Plum Butter

Adapted from Kitchen Simplicity. Makes about 1 1/2 cups.

  • 4 medium, ripe plums
  • 1 tart apple
  • 1/3 c. water
  • 3/4 c. sugar
  • 3/4 tsp cinnamon
  • scant 1/4 tsp nutmeg
  • scant 1/8 tsp cloves
  1. Pit and quarter the plums.  Core and dice the apple into 1 inch chunks.  Place fruit in a medium saucepan with water and bring to a boil.  Reduce heat, and simmer fruit, covered, for about 15 minutes, until apple is tender.  Puree completely in a blender or food processor.  Return fruit puree to pan, add sugar and spices, and simmer, stirring occasionally, for 30 minutes to an hour, until the butter is the desired consistency.  A thick, spreadable consistency may take some time.

Chocolate Crepes

Adapted from Luna Cafe. Makes 10, 6-inch crepes.

  • 1 c. milk
  • 3/4 c. water
  • 2 eggs
  • 3 TBS butter, melted
  • 1 c. flour
  • 1/4 c. cocoa powder
  • 1/4 c. sugar
  • 1/4 tsp salt
  1. In a medium bowl, sift together flour, cocoa, sugar, and salt.  Whisk to combine.  In a large bowl, beat milk, water, eggs, and melted butter until fully incorporated.  Add dry ingredients to wet and stir to combine.  Batter should have consistency of heavy cream.  Refrigerate for at least 1 hour.
  2. Heat a large frying pan over medium-high heat.  Add a pat of butter – you only need to add butter for the first crepe.  When butter is fully melted, spoon or ladle about 1/4 c. batter into pan, and quickly swirl pan or smooth batter gently with ladle to create a circle.  (Think the motion that crepe makers on the street do to quickly pull batter out into a circle.)  Cook for 20 seconds, until color begins to change on exposed side, then flip, and cook for another 20 seconds.  Remove to a plate (or serve!), then repeat with remaining batter.  Stuff crepes with plum butter and mascarpone cheese or whipped cream.  Extra crepes may be stored flat, wrapped on a plate or in a plastic bag, in the fridge.

1 July 26, 2011 Cookbook

Cookbook of the Month: Antojitos

I have a cookbook problem.  I’m sure many of you can relate.  I add them to my Amazon cart compulsively.  I read the ones I own as bedtime stories.  I take 10 at a time out from the library and imbibe them, writing down every single recipe I want to try.  I have scans of recipes.  I have pictures of recipes.  I have scribbles of recipes.  I have 20 page word documents full of recipes.  And this isn’t even including the 200+ recipes I have bookmarked online.  I have too many recipes.  I need to stop collecting and start making.  In this vein, I have decided that before I open another cookbook, I must make at least three recipes from each of the books I own, or have photocopied, or have consumed/memorized/retained in any other way.  Hopefully this will go better than the time I banned myself from baking.  Which was only ten days long.  And I couldn’t do it.  Woe.  (By the way the enchiladas in that link are really delicious.)

However, there’s a perk – using cookbooks as intended (i.e. to make and consume food) allows for discovery of exceptional recipes.  And occasionally, a single book may be filled with exceptional recipes.  In which case, it should be highlighted.  On the other hands, some cookbooks have mouthwatering photos and intriguing flavor combinations and all the food turns out super blah/boring/crappy.  These books should also be highlighted, although hopefully with less frequency then the exceptional variety.  Thus, as I go through the 20-odd cookbooks I have collected and 300-plus recipes from them, I will highlight one book per month, for however many months I continue to feel like doing this.

For July, I’m cheating a little and using a cookbook I already wrote about this month – Antojitos.  But it’s one of the good variety, in fact, one of the really good variety, and since I’ve cooked more than 3 recipes from it this month, I think it deserves the spot.  Plus, these mango-grapefruit palomas might be the best drink I’ve ever tasted.  Which may not be that convincing, coming from someone who has just graduated from Franzia, Busch Light, and Pink Panty Punch, but my parents agreed that it was great, and they have considerably more experience.  I couldn’t find the mezcal (a single-distilled tequila) that the recipe calls for, but regular tequila works just fine.  It’s simple enough to put together – frozen mango pureed with citrusy Italian soda, and mixed with Tequila and cilantro (optional) – and the end result is sublime: fizzy, refreshing, not too sweet, fruity, and, duh, there’s tequila in it.  Just this recipe itself might make snagging a copy of this cookbook worthwhile, but there’s a whole lot more to recommend it.  You can see my earlier comments here, but in a nutshell, this book is full of unique and authentic Mexican recipes that are fairly simple to put together and pack a whole lot of flavor.  You won’t find overdone Tex-Mex recipes here, but I can almost guarantee you’ll find something you’ve never heard of before (and that sounds/is delicious), which is pretty much the number 1 thing I look for in a good cookbook.  Now that I sound a little like I’m obsessed with this book, I will lay it to rest, and leave you to get your tequila on.

Mango-Grapefruit Palomas

Adapted from Antojitos.  Serves 4.

  • 2 c. frozen mango cubes
  • 1 1-liter bottle grapefruit or blood orange italian soda
  • 8 oz. tequila
  • 4 tsp chopped fresh cilantro (optional)
  • ice cubes
  • 1 lime
  • margarita salt, or 2 TBS kosher salt mixed with 1/2 tsp chile powder for chile salt!

Note: this is more of a flavor as you go sort of recipe, so the quantities used here are approximately what I used to get a drink with the flavor, consistency, and strength that I like.  Feel free to adjust to your taste!

  1. In a blender, puree the mango cubes and 2 cups of the grapefruit soda until smooth.  The consistency should be that of a thick applesauce.  Add more soda as needed.
  2. Quarter the lime and rim the edge of each glass with its juice.  Roll the glasses on a plate full of margarita salt or chile salt to coat the rim of each glass.  To each glass, add 3 to 4 ice cubes, 2/3 c. mango puree, and 2 oz. (1/4 c.) tequila.  Top off with grapefruit soda, and stir to mix.  Add a tsp of fresh cilantro if desired.  Serve cold and enjoy!

1 July 19, 2011 Pasta

Mint Ravioli

Thyme, small and delicate.  Mint, robust and refreshing.  Sage, soft and lingering.  Rosemary, lavender, parsley, cilantro, basil – summer is a time of herbal abundance.  One of summer’s tiny joys is being able to step out into the garden and snip off a sprig of thyme here, a handful of basil there.  For one, it certainly beats paying $2 per ridiculously tiny package at the store.  More importantly, it allows for constant inspiration in the kitchen, as the summer herbs lend freshness and subtle aroma to everything from salad to bread to cocktails.

Recently, I’ve been trying to incorporate more fresh herbs in my cooking, both to ensure that our herb garden doesn’t go to waste, and to push the boundaries of simple recipes.  Basil in lemon sorbet added a subtle undertone of elegance.  Sage provided a lovely counterpoint to strawberries in these muffins.  And now, fresh pasta gets a delicate makeover with tiny flecks of mint worked in.  Thinking of one of my favorite treats in Prague, sweet pea and mint soup, and a delicious sweet pea and goat cheese ravioli I made with Trevor a few years ago, I combined the two.  And voila, these lovely, subtle, sweet ravioli.  The filling is really delicious – petite peas, cream, mascarpone, goat cheese, and garlic for a hint of bite – and the mint gently enhances the flavors.  Personally, I love making fresh pasta – I find kneading therapeutic and it’s so rewarding when you pull a long, impossibly thin sheet of pasta from the roller.  However, if you’re in a hurry or not feeling up to the homemade pasta thing, these are still worth making with frozen pasta sheets or wonton wrappers – just add a bit of fresh chopped mint to the filling.

Mint Ravioli with Sweet Pea and Goat Cheese Filling

Adapted from here and here.  Makes about 20 ravioli – serves 2 or 3.

  • 1 1/4 c. frozen petite pois (baby peas)
  • 1/4 c. heavy cream
  • 1 tsp sugar
  • 1 garlic clove, smashed
  • 3 oz. fresh goat cheese
  • 2 TBS mascarpone
  • salt and pepper to taste
  • 1 c. fresh mint leaves
  • 2/3 c. flour
  • pinch salt
  • 1 egg
  • 2 tsp. olive oil
  1. Prepare the filling:  In a medium saucepan, combine the peas, cream, sugar, and garlic.  Bring to a gentle boil, and cook, stirring constantly, for 3 minutes, until peas are tender and warm.  Remove from heat, and process or blend to desired consistency – it’s OK to have large pea pieces if you don’t want your filling smooth, but make sure you fully blend the garlic.  Mix with the mascarpone and goat cheese, and season with salt and pepper.  Cover and refrigerate for at least an hour.
  2. Prepare the pasta dough: Bring a small pot of water to a boil.  Blanch the mint leaves – drop in boiling water for 30-60 seconds, and remove with a slotted spoon, transferring directly to a bowl of cold or ice water.  Squeeze water from leaves, and finely chop.  In a small bowl, beat the egg with a pinch of salt and the chopped mint leaves.  Mound the flour on your work surface, making a deep well in the center.  Pour the egg mixture and olive oil into the well.  Working from the outside in, pull the flour into the center with your hands, trying to keep the well from breaking as long as possible.  Then, knead the dough with your hands until it comes together.  Once it comes together, knead for 10 minutes.  It should be beginning to develop elasticity, smooth, and not sticky.  Lightly oil a piece of plastic wrap and wrap the dough in it.  Allow to rest for 45 minutes to an hour.
  3. Fill the ravioli: Work the pasta dough into thin, square pieces.  Run through a pasta machine, starting on the largest setting and moving down.  (My pasta machine goes from 7 to 1, with seven being the largest, and I found that the thickness of this dough was best at level 4.)  Place a teaspoon of the filling half an inch from the end of the pasta sheet, and cut the sheet about 2 inches from the end.  Fold the dough over and crimp the edges with your fingers to seal the filling.  This dough was wet enough that I did not need water to seal the edges, but if you are having a tough time crimping, run a wet finger along the edge of the dough before attempting to seal.  Continue until all filling and dough has been used.  If cooking immediately, bring a large pot of salted water to a gentle boil, and gently lower the ravioli in batches into the water.  Cook for two minutes, and remove with a slotted spoon.  If freezing, lightly dust the ravioli with cornstarch and place flat in a freezer bag.  Press air out of bag, seal, and freeze on a level surface.  Boil straight from freezing.  Serve with melted butter, mint sprigs, lemon zest, and fresh parm.

2 July 13, 2011 Breakfast

Strawberry-Sage Muffins

It’s been hot.  Really hot.  I don’t like it.  All I want to do is lie spread-eagled on the floor so as to sweat as little as possible and occasionally eat a handful of cherries.  Seeing as how I currently have no worldly commitments, I could probably actually spend the entire day doing this, but I think it might make me feel pathetic.  Instead, I have been inventing errands that involve driving in the air-conditioned car to air-conditioned buildings.  Yesterday, I went shopping so as to be in the air conditioning.  Today, I am going to the movies so as to be in the air conditioning.  I’m thinking that going to the movies for air conditioning is going to be much more cost effective than shopping.  Whoops.  Cute and broke is what I aim for. Now, you might be wondering why, if it’s so bloody hot, there are pictures of muffins in this post.  Don’t you need to use the oven to make muffins?  Isn’t the oven hot?  Why, yes, the oven does generate quite a bit of heat.  But I bought strawberries.  Strawberries for muffins.  I had a plan, and I am into plans.  The blog must go on.  Besides, once the muffins are baked, it is really easy to eat them at any point over the next three days.  Minimal motion, thought, and heat required.  Therefore, I am not a nutcase. Actually, when I baked these this morning, it was really quite pleasant.  There was still a bit of morning breeze, and, bonus, it only took the butter 2 minutes to come to room temperature.  In fact, it was so pleasant that I decided to make 2 different batches of muffins, because I really like knowing the absolute best way to make something.  And also eating in the name of science.  The first batch was adapted from The New Best Recipe‘s recipe for blueberry muffins.  I generally trust this book because they seem to have made at least 30 versions of every recipe possible and taste tested them, side by side.  Man would I love that job.  The second recipe is from the blog A Recipe a Day, which had received rave reviews from more than 50 other bloggers/bakers/internet fiends like myself.  The recipes were quite similar, there being only three significant differences between them: 1. The New Best Recipe uses sour cream and A Recipe a Day uses milk, 2. The New Best Recipe uses a quick bread method and A Recipe a Day uses the creamed butter method, 3. The New Best Recipe uses a longer baking time at 350, and A Recipe a Day uses a shorter baking time at 400.  Let the science begin. After thoughtfully alternating bites of the two muffins, I came to a conclusion: they were both really, really good.  However, I thought the New Best Recipe muffin had a slight edge over the other – it had a moister, more delicate crumb, held the delicate flavors of sage and strawberry better, and had more of a melt-in-your mouth texture.  Out of curiosity, I quickly calculated the calories per each type of muffin based on my yields (17 for the New Best Recipe, 15 for A Recipe a Day), and found that, despite varying amounts of butter, sugar, and the type of dairy in each recipe, they had exactly the same caloric value.  One further point of interest – the muffins that baked at 400 degrees for a few minutes less, which included a few of both types, puffed up significantly higher and had a more golden brown crust, making them more attractive overall.  However, I preferred the “crustless-ness” of the slow-baked muffins.  My final verdict – both recipes make a really delicious muffin, but personally, I’m sticking with the folks over at America’s Test Kitchen.  I think they know what they’re doing.

Strawberry-Sage Muffins

Adapted from The New Best Recipe.  Inspired by these biscuits.  Makes about 18 muffins.

  • 2 c. AP flour
  • 1 TBS baking powder
  • 1/2 tsp. salt
  • 1 egg
  • 1 c. sugar
  • 4 TBS butter, melted and cooled slightly
  • 1 1/4 c. sour cream
  • 1 1/2 c. diced fresh strawberries
  • 6-8 large leaves of fresh sage, finely minced
  1. Preheat oven to 350.  Line muffin tins with paper muffin cups.  In a medium bowl, whisk together flour, baking powder, and salt.  Set aside.  In a large bowl, briefly whisk egg until pale yellow.  Whisk in sugar until slightly cream.  Whisk in melted butter in 2 additions.  Whisk in sour cream in 3 additions, until batter is just uniform in color and texture.  Try not to overmix.
  2. Add diced strawberries and sage to the flour mixture, and toss gently to incorporate.  Now add flour/strawberries to wet ingredients, and gently fold together until just combined.  Some remaining clumps of flour are OK, and the batter will be quite thick.  Spoon batter into muffin cups, filling almost to the top, and bake for 25 to 30 minutes, until they are a light golden color and a toothpick comes out clean.

0 July 7, 2011 Latin and Mexican

Salsas!

On the Fourth of July, I celebrated Cinco de Mayo.  So I’m a bit behind – that just means I’ll get to go to the fireworks on the Third of September, right?  My excuse: for the past month I’ve been mulling over the recipes in Antojitos: Festive and Flavorful Mexican Appetizers, a cookbook I received last year in a giveaway, but hadn’t given any serious perusal time.  Once I started looking, I couldn’t stop bookmarking recipes.  Soon I had a plan for a whole dinner party – I just needed someone to eat it.  That’s where the Fourth of July came in: everyone around and in the mood to celebrate, a whole day to cook in Maine (not that I’m particularly pressed for time on all the other days of the summer…), and permission to open up the tequila.

So while the rest of the country had hamburgers, potato salad, and red white and blue angel food cake, we had a fiesta.  The menu consisted of hibiscus margaritas; jicama, melon, and pineapple salad; grilled corn on the cob dipped in lime juice and chile-laced parmesan cheese; corn masa chalupas filled with guajillo spiced chorizo; and three dips to top everything off – charred serrano salsa, tomatillo guacasalsa, and chipotle crema.  Everything.  Was.  Delicious.  Seriously, this cookbook has recipes for some of the most flavorful and original food I’ve ever eaten.  My favorite was the corn – juicy sweet with a burst of hot from the chipotle and tangy saltiness from the lime and cheese, I couldn’t stop eating it.  The cooling jicama fruit salad was a close second, and both of these recipes may appear on this site sometime soon, but for now, the only thing I had time to take pictures of before everything was gobbled up were the salsas, which really tied all the food together.  The charred serrano salsa was both vinegary and hot with a beautiful color, the tomatillo and avocado guacasalsa was tangy and creamy with just a hint of heat, and the chipotle crema was just straight up delicious.  Since, in my opinion, the chipotle crema was the easiest, the tastiest, and the most versatile, I’ve chosen to include that recipe.  If you like it, or are intrigued by any of the other recipes mentioned here, I’d definitely recommend checking out Antojitos – it’s one of the best cookbooks I’ve used in a long time.

Chipotle Crema

Recipe adapted slightly from Antojitos: Festive and Flavorful Mexican Appetizers.  Makes about 2 cups.

  • 1 c. sour cream
  • 1/2 c. heavy cream
  • 3 chipotles in adobo
  • 1 tsp lime juice
  • 1/4 tsp cumin
  • 1/4 c. chopped fresh cilantro, optional
  • kosher salt
  1. In a blender or food processor, pulse chipotles and lime juice until a smooth puree.  In a medium, non-reactive bowl, whisk together sour cream and heavy cream until smooth.  Add in the chipotle paste, using a spatula to scrape the sides of the processor.  Whisk until smooth and uniform in color.  Whisk in cumin and cilantro, if using.  Season to taste with the kosher salt.  Refrigerate for several hours before serving to allow flavors to blend.
  • « Go to Previous Page
  • Go to page 1
  • Interim pages omitted …
  • Go to page 47
  • Go to page 48
  • Go to page 49
  • Go to page 50
  • Go to page 51
  • Interim pages omitted …
  • Go to page 57
  • Go to Next Page »

Primary Sidebar

Subscribe!

Get creative recipes and menu ideas delivered straight to your inbox.

Most Popular

A House // Sweet Potato and Coconut Milk Soup with Brown Rice and Lentils

Monthly Fitness Goals: July // Homemade Spinach Wraps with Chopped Greek Salad

A New Job // Classic Seven-Layer Bars

Butternut Squash Carbonara with Fried Sage and Caramelized Onions

Happy Birthday, Trevor! // Peanut Butter Fudge

Cookbook Review and Giveaway: Home Made Winter

Drizly

Please note!

Full disclosure: if you purchase anything at Amazon using the above links or any other links to Amazon on this site, I will receive a small commission. Just so you know!

Copyright© 2025 · Cookd Pro Theme by Shay Bocks

This site uses cookies: Find out more.