• Skip to primary navigation
  • Skip to main content
  • Skip to primary sidebar
  • Home
  • Recipes
  • Features
    • Cookbook Reviews
    • Ingredient of the Week
    • Sunday Dinner
    • Fitness Goals
  • Travel
  • About
    • Privacy Policy
    • Cookie Policy
  • Work With Me

Katie at the Kitchen Door

Globally-inspired, seasonal recipes

Blog Page

3 November 12, 2012 Dessert

Monday Morning Resolutions & A Cranberry-Pear Crisp

Every new situation in life comes with potential pitfalls to your health habits. Going away to college? Erratic sleep schedules and frequent hangover binges. Summer vacation with the family? Your dad handing you a margarita every night at 5 on the dot. Breakup with your boyfriend?  Pity pints of Ben & Jerry’s and many bottles of Merlot. First job? That dratted chocolate box, free “bonding” dinners, and sitting in one spot all day.

The result? Pounds creep on. Crash diets are picked up, then dropped. We try to make sweeping changes to our lifestyles and it’s hard, even unrealistic. Changing a bunch of habits at once is a real mental challenge, which is why I’m trying something new. Smaller. Make one resolution each week and write it down – a specific, easy to follow resolution with no loopholes or room to argue with yourself. Stick to it all week. The next week, if you were successful, add one more resolution, and try to keep the old one, too. If you were unsuccessful, try the first one again. And try not to worry about everything else! If you said “no chocolate” this week, don’t eat chocolate, but don’t also try to give up everything sweet or indulgent – it’ll be so much easier to defeat yourself if you try for too much all at once! Taking small steps towards forming the best habits will eventually add up.

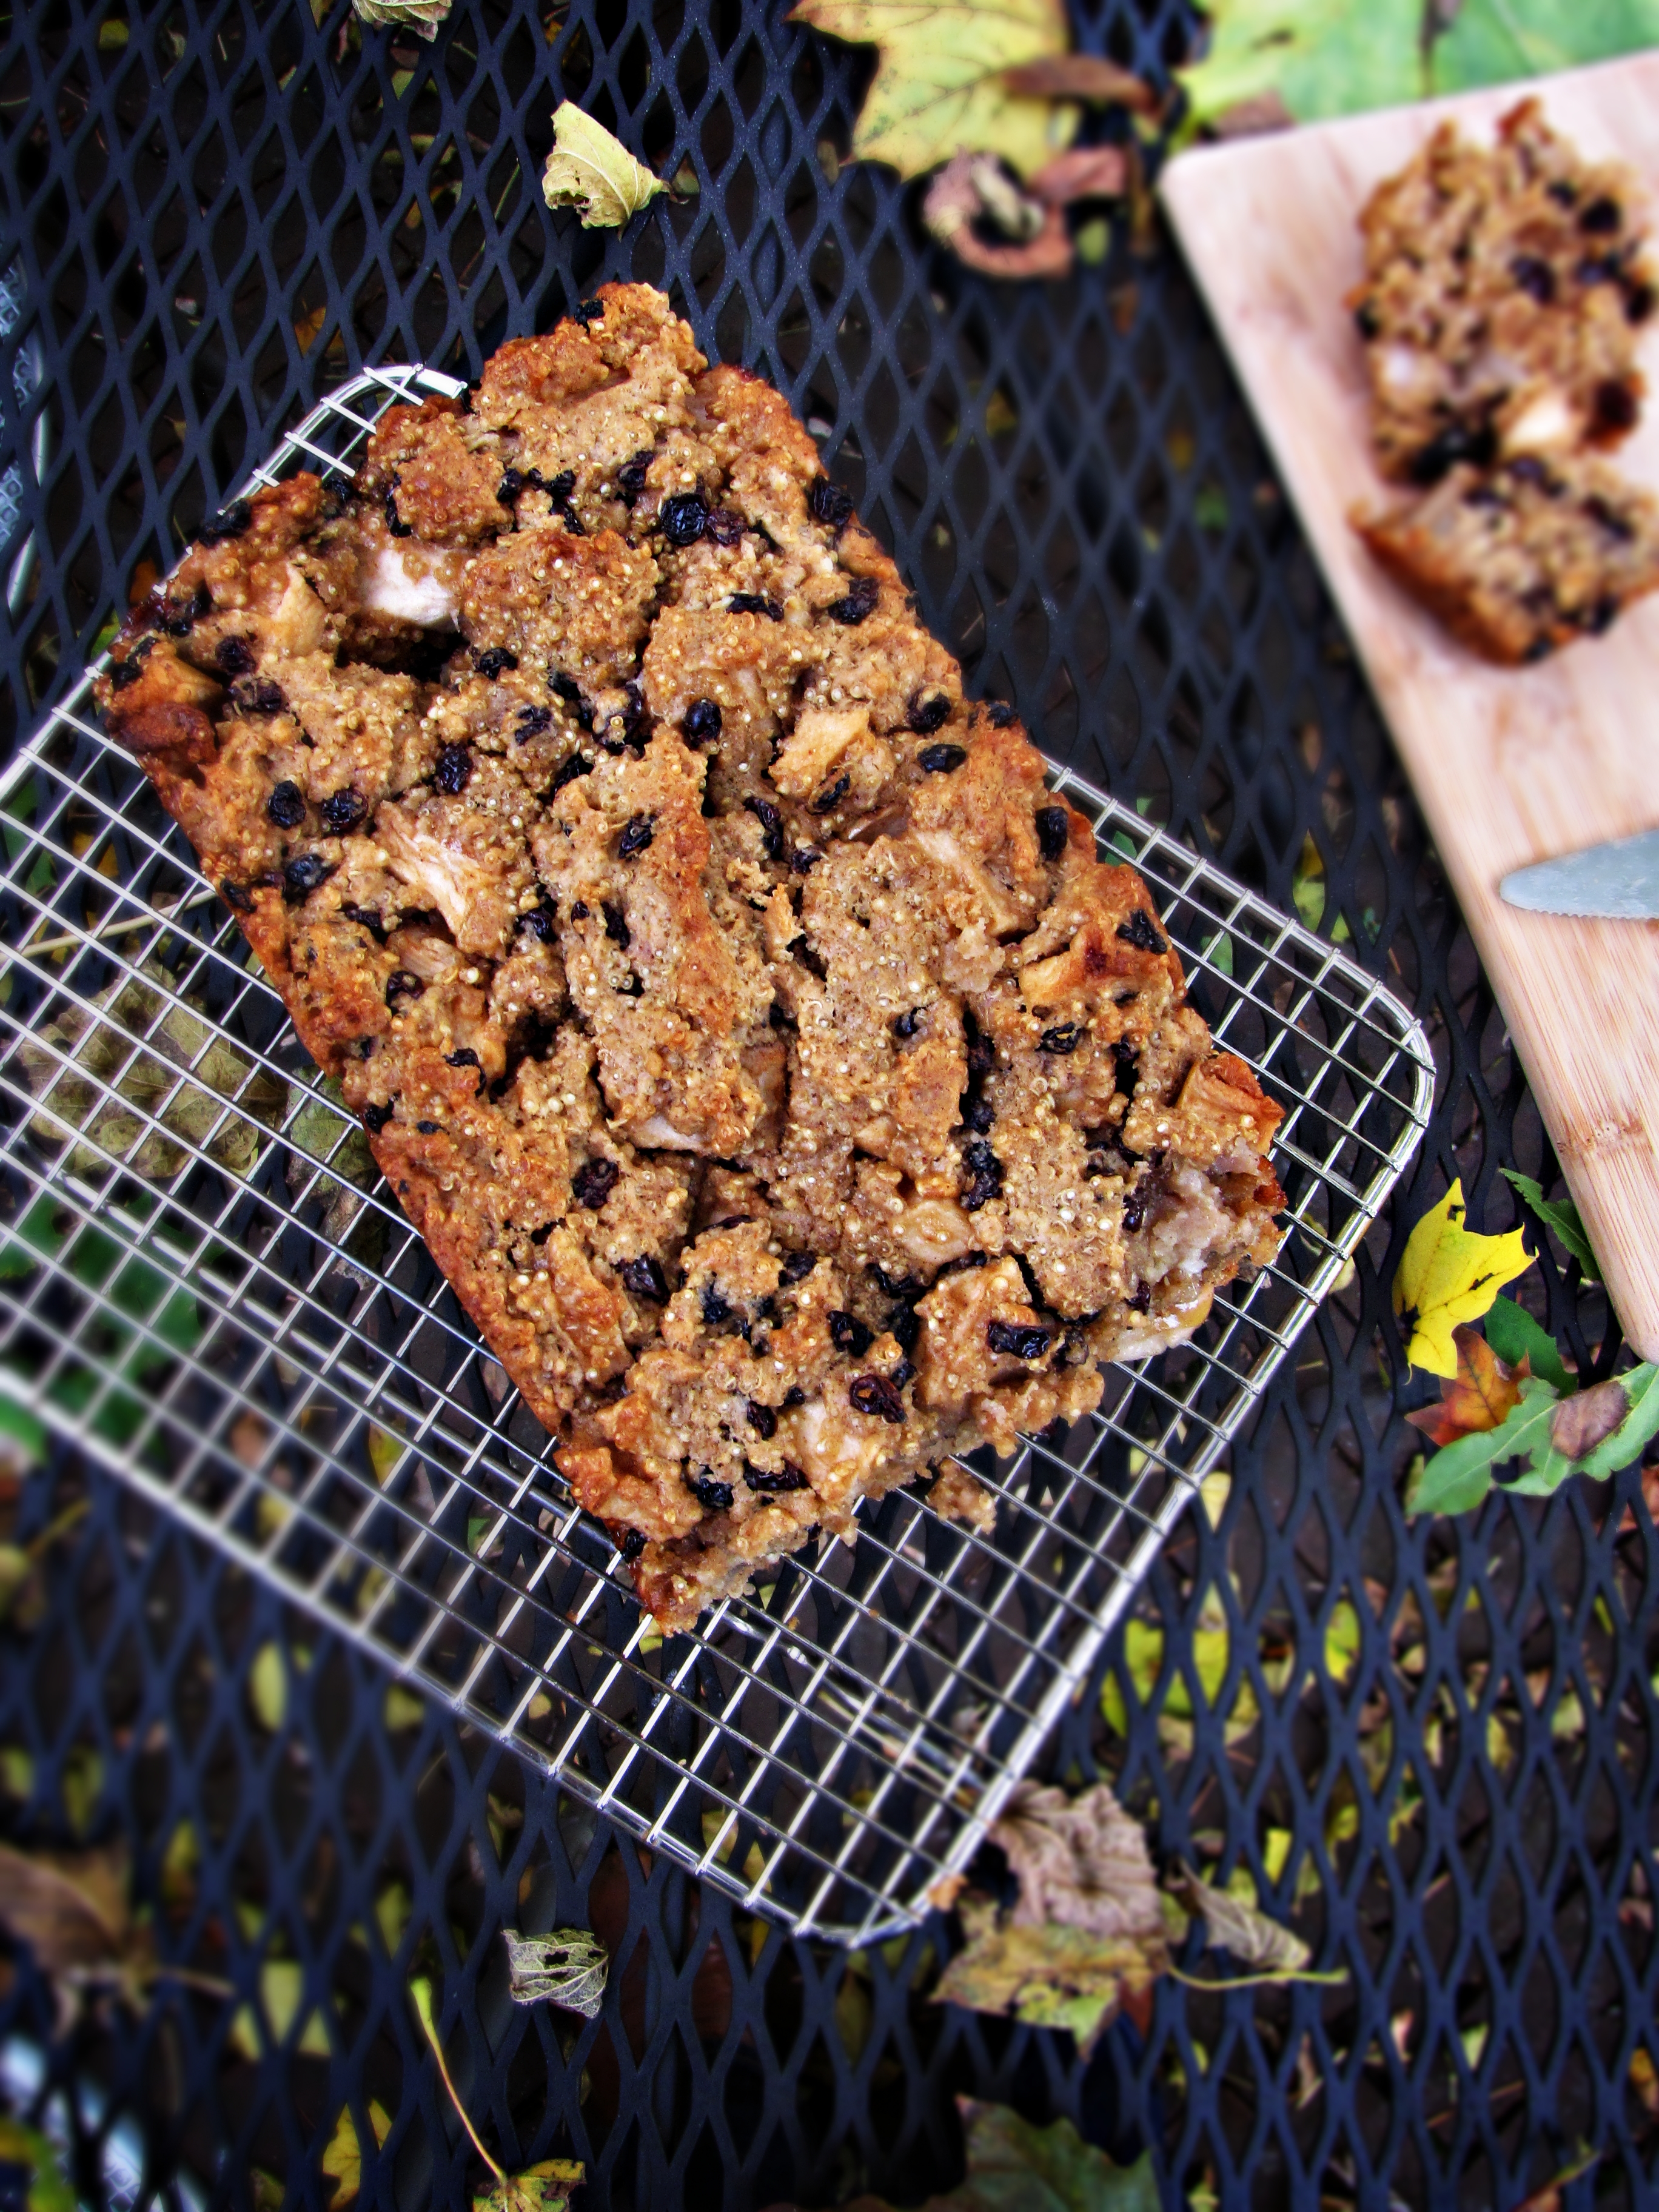
I started this out last week with the most troubling problem in my health-at-work life – the chocolate box. Now, I’m not ever going to give up chocolate. But the constantly full chocolate box located approximately 5 feet from my desk is a real self-control issue for me. I hear everyone open and close the box, unwrap their chocolate, and it’s like a little bomb goes off in my brain, exclaiming “chocolate time!” And once I’ve had the first piece, I go back maybe 4, 5, 6 times before stopping. Something about the combination of there being an unlimited supply and being constantly reminded that it’s there by everyone else really does a number on my willpower. And 6 pieces of chocolate a day is no laughing matter!

So week one’s resolution was “no chocolate from the chocolate box at work.” And I was successful! Wednesday afternoon was hard, but I managed to power through and stick it out for the whole week. I’m going to try and stick with it this week, and add a resolution for week two – walking the extra mile to the red line at least once per day. To recap:

  1. Week one: No chocolate from the chocolate box at work – Success!
  2. Week two: Walk to or from Park St. to work at least once each day

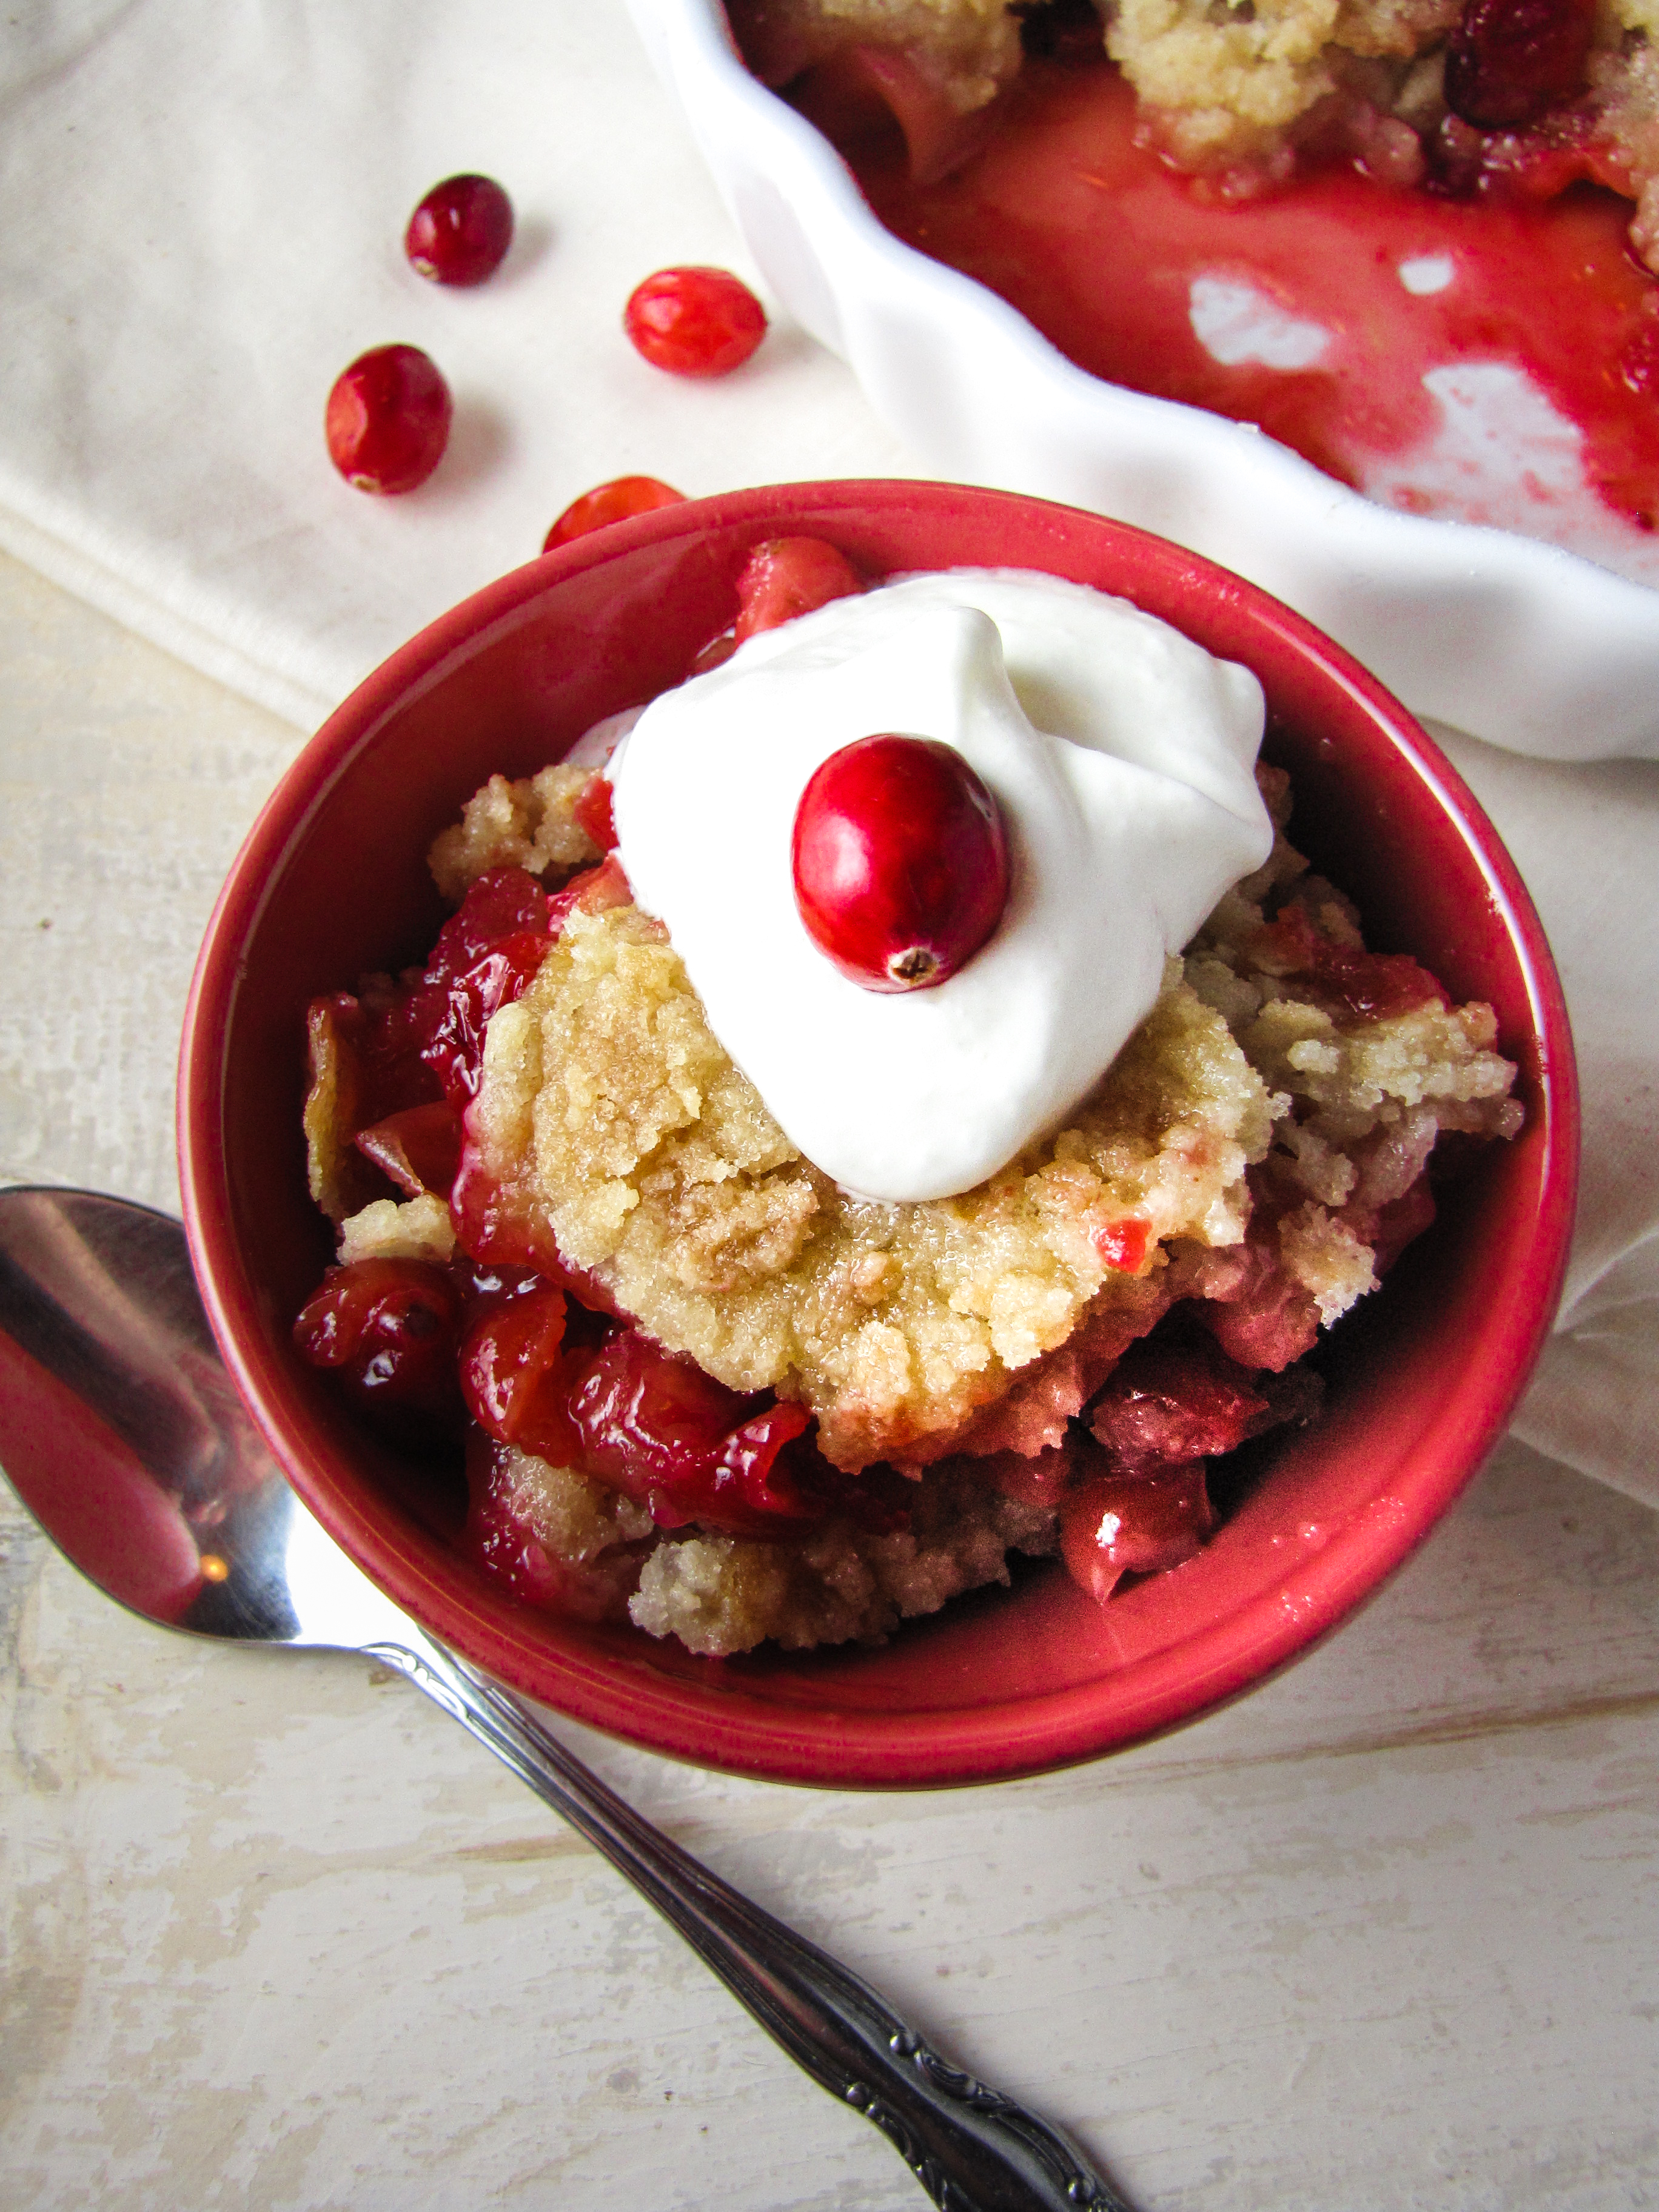
Anyone want to join me and make a small resolution for this week? The more the merrier! And, if you get through the whole week without lapsing, you should then join me in a little homemade celebratory indulgence – like this cranberry-pear crisp. The not-too-sweet cranberry filling and crispy sugary crust made a pretty good reward for going all week without chocolate. It might also be the perfect dessert for Thanksgiving, if you’re looking for alternatives to the classics – festive and bright, palate-cleansing and not too heavy, any Thanksgiving table would benefit from the addition of this crisp!

Cranberry-Pear Crisp

Adapted from The Preservation Kitchen. Serves 4-6. If you’re making for a crowd, double the recipe and the pan size!

  • 2 pears, peeled and thinly sliced
  • 2 1/2 c. cranberries, washed and picked over
  • 3/4 c. plus 1/3 c. sugar, divided
  • 3/4 c. flour
  • 6 TBS cold salted butter, cut into small pieces
  • 1/2 tsp ground ginger
  1. Preheat the oven to 350°F. Layer half of the pear slices on the bottom of a 9-inch pie pan. Cover with the cranberries, and sprinkle 1/3 c. sugar over the berries. Layer the remaining pear slices on top of the cranberries.
  2. In a mixing bowl, whisk together the flour, the remaining 3/4 c. sugar, and the ground ginger. Use a pastry cutter or a fork to cut the cold butter into the flour, until a crumbly mixture with chunks no larger than a pea is formed. Sprinkle the crumble mixture on top of the fruit.
  3. Place the pie pan on a baking sheet to catch any drips, and place in the preheated oven. Bake for 45-55 minutes, until the top of the crisp is golden brown and the fruit is bubbly. Serve warm or at room temperature, topped with fresh whipped cream or vanilla ice cream.

3 November 10, 2012 Beef

The Country Cooking of Greece: Greek-Style Baked Sausages

I have a good friend at work who is Bulgarian, and who argues staunchly that every food attributed to Greece is actually Bulgarian in origin. This moussaka I brought in last week? Bulgarian. Those yummy little Greek cookies? Bulgarian.  Greek yogurt is her biggest pet peeve, and my coworkers and I kinda enjoy getting her riled up about it (although I will say, her argument that the back of Greek yogurt lists “Bulgarsko culture” as an ingredient is pretty convincing). I had a lot of fun running some of the potential recipes for this post by her and listening to her stories of how her mother makes the best version of each of the dishes I mentioned.

Whatever the true origin, Greek food is delicious, so I was excited to snag a review copy of The Country Cooking of Greece. If you’re an avid cookbook collector/nerd, you may remember that The Country Cooking of Ireland won the James Beard cookbook of the year award in 2010. I didn’t know it until recently, but there are two other books in this “series” – The Country Cooking of Italy and The Country Cooking of France. Such a fun collection! Here’s hoping they do somewhere dear to my heart, like the Czech Republic (or Russia!) next. But back to Greece.

This book is a beautiful compendium of traditional Greek recipes.  Although a Greek grandmother will probably always be your best bet for learning the secrets of Greek cuisine, this book – with 200 recipes, full-page photographs for the majority of the recipes, and dozens of sidebars on Greek ingredients, traditions, and cooking techniques – makes a suitable substitute.  I actually learned quite a bit from the sidebars, like that ouzo may be distilled from grain, grapes, potatoes, or a combination, or that there are 3 techniques for making avgolemono but the ratio is always the same – 2 eggs, 1 lemon, 1 quart of hot liquid.

The recipes in this book are a cut above the dishes you’ll find at your favorite Greek diner.  Classic pastitsio gets updated to include a citrus and fennel scented shrimp sauce, moussaka goes vegetarian and is made with artichokes and caramelized onions, and saganaki gets rolled in pistachios before being fried.  However, while I’m excited to have added a whole slew of totally new recipes to my to-try list, I’m a little disappointed that this book doesn’t have definitive recipes for some of my favorite Greek-American staples, like souvlaki, falafel, and baklava – I’ll have to keep looking for those.

Like other rustic agricultural cuisines, vegetables get plenty of attention from traditional Greek recipes. In fact, I was just reading an article about the incredible longevity of Greeks on the island of Ikaria, due in part to their vegetable and olive-oil heavy diets.  Intrigued?  There are recipes for Ikarian Zucchini, Chard, and Herb Pie, Ikarian Zucchini Fritters with Fresh Oregano and Mint, and Smothered Summer Vegetables from Ikaria included in this book – you, too, can live forever.  Much like Japanese Farm Food, gardeners and CSA-members will find plenty of new ways to use up their eggplant, zucchini, tomatoes, and greens.

So far, I’ve tried two recipes from this book – the Pupmkin and Sweet Potato Moussaka I made last weekend (which I admit to adapting significantly) and these Smyrna-Style Baked Sausages.  (I seem to be choosing recipes without the signature Greek food health benefits, huh?)  Both recipes were scrumptious – flavorful, interesting, and comforting.  These sausages reminded me of the gently-spiced sausages my mom makes on Christmas morning.  Together with the tangy tomato sauce, I tried them both on plain rice and whole wheat pasta with parmesan cheese – the pasta won hands down and was the most satisfying thing I’ve eaten all week.  I will say that both the recipes I tried took a bit of time – they weren’t complex, but both required making and then combining multiple components, which resulted in great flavor… but lots of dishes.  Other recipes on my shortlist that you may see around here in the future include Braised Lamb with Chickpeas and Tomato Sauce, Santorini Tomato Fritters, and Pan-Fried Semolina Cake.

The bottom line: The Country Cooking of Greece is a well-researched and beautiful book that will take you beyond the popular Greek-American classics to the food that’s been cooked in home kitchens for centuries.  Although recipes for some well-known classics are missing, the range and variety of recipes that are included more than makes up for it.  You’re sure to find at least one or two completely new ideas, and if you’re looking to recreate the meal you had in that tiny village restaurant in Greece… this might just be the place to start looking.

Disclaimer: Chronicle Books provided me with a review copy of this book free of charge, but as usual, all opinions are my own!

Smyrna-Style Baked Sausages

Recipe from The Country Cooking of Greece by Diane Kochilas. Makes 10 small sausages.

Note: Diane suggests serving this over rice or bulghur, but I liked it best over whole wheat spaghetti with a little bit of parmesan. If you plan to use it as a pasta sauce rather than a side dish, you should double the sauce quantities that are written below.

For the sausages:

  • 1 1/2 lb ground beef
  • 1/3 c. coarsely chopped white onion
  • 1 garlic clove, minced
  • 1/4 tsp ground allspice
  • 1/4 tsp ground nutmeg
  • 1 1/2 tsp paprkia
  • 1/2 tsp cinnamon
  • 2 1/2 tsp cumin
  • salt and pepper to taste
  • 1 egg
  • 2 TBS dry white wine
  • 1/4 to 1/2 c. dry bread crumbs (making your own is best!)
  • 2 TBS olive oil + some for frying
  • flour for dredging

For the sauce:

  • 2 TBS olive oil
  • 1/2 small red onion, finely chopped
  • 1 garlic clove, minced
  • 1/4 c. dry red wine
  • 1 28 oz. can whole plum tomatoes, roughly chopped and their juice
  • 1 tsp sugar
  • 1/2 tsp red pepper flakes
  • 1 tsp butter
  • salt and pepper to taste
  1. Make the sausages: In a large mixing bowl, stir together the onions, garlic, and spices. Add the ground beef and use your hands to mix together. Add the egg and wine and knead well to combine. Add just enough of the bread crumbs so that if you form a ball with your hands it stays together. Mix in the olive oil, then cover and refrigerate for 30 minutes.
  2. While the sausages are chilling, make the sauce. Heat the olive oil in a large saucepan over medium heat. Add the onion and cook until soft, about 3-4 minutes. Add the garlic and cook for 1 minute longer. Add the wine, chopped tomatoes, sugar, and red pepper flakes, and stir. Bring to a boil, then reduce heat and simmer, uncovered, until slightly thickened, about 10-15 minutes. Remove from heat and stir in butter, then season to taste with salt and pepper. Set aside.
  3. Preheat the oven to 350°F. Heat a thin layer of olive oil in a large saucepan over medium-low heat. Form the chilled sausage mixture into small sausages about 3 inches long and 1 inch thick. Place some flour on a plate and roll the sausages in the flour, then fry the sausages in batches, turning over gently part way through cooking to brown on all sides. Once cooked, place the sausages in a single layer in a baking pan, then cover with the tomato sauce. Cover tightly with foil and bake for 40 minutes. Serve hot, with starch of your choice.

0 November 7, 2012 Food

Greatist Collaboration: Quinoa Salad with Broccoli and Avocado Pesto

Trevor gets mad when I post this sort of recipe.  “Haven’t you already posted a variation of that, like, 20 times?” he asks.  And he would be right on that front.  But I never get tired of eating my favorite green things blended up with cheese in various combinations, and it’s my blog, so I’m sharing another non-traditional pesto dish.  Because it’s easy, healthy, and I love it. Also, I was really needing to get some green in me.

As some of you may know, I ran my second-ever half-marathon this past Sunday.  I was kind of dreading it.  In September, I ran my first half-marathon with Trevor in Chicago.  I had only trained for 6 weeks, and I showed up at the start line excited and pumped full of adrenaline, with no idea what to expect.  The first seven miles passed in a blur, with the two of us keeping a lively pace of 9:15.  Then Trevor pulled ahead and the last 6 miles felt like I was slowly dying.  You know that feeling of pure exhaustion, when you’re just barely holding off defeat, but not out of any rational part of your brain?  That feeling as you push yourself through the last 1/2 mile of a really competitive 5k, lungs burning, brain protesting with every stride?  That’s what the last 6 miles of that first race felt like.  I started crying tears of relief when I crossed the finish line.

This time around, with the memory of that last, painful finish burned into my mind, I was not looking forward to running.  Despite my increased training, and the fact that I now knew I was capable of finishing, I didn’t want to do it again.  I sometimes fantasized about tripping during my long runs, and I was mildly excited when I felt feverish the day before the race.  But I woke up Sunday morning feeling refreshed, focused, and energetic.  I called my mom (my running-mate this time around) and told her I wasn’t wimping out after all.

My goal in training between the two races was to find a way to feel strong for the last few miles.  I put myself into situations where I felt shitty and still had to run 2-3 miles before calling it quits, and I upped my distance runs to 11+ miles.  And I’m happy to say… it worked!  It was a beautiful fall afternoon in Newburyport, the air was crisp and the views of rolling farmland, frolicking horses, and sparkling lakes were peaceful.  The course had just enough small hills to keep me awake, and although I kept prepping myself for feeling bad and allowing myself to take a break at mile 8, mile 9, mile 10, I entered mile 12 feeling about as good as I had at mile 5!  I finished in 2:05, 2 minutes slower than in Chicago (and 3 minutes slower than my mom – you go momma! I hope I’m as fast and awesome as you are when I’m 50), but feeling infinitely better and stronger than I had at the finish in Chicago.  So maybe I won’t be giving up on half marathons like I thought…

Still, running that kind of race takes it’s toll on you.  Sunday night I popped a few ibuprofen to appease my complaining muscles and fell asleep at 9.  Monday, I was still totally exhausted, and I came home craving something green and filling and easy – which is where this recipe came into play.  With only a few minutes of prep, this meal managed to satisfy all my cravings at once – rich avocado, starchy quinoa, salty cheese, and nutritious broccoli.  I think I must have really needed all those nutrients!  If you’re inspired, head on over to Greatist for the full recipe.

2 November 3, 2012 Beef

Pumpkin & Sweet Potato Moussaka

Does it feel like pumpkin has been all the rage a little bit more than usual this fall?  It does to me – I’ve even seen complaints about the internet overdose of pumpkin: “Find a new darling ingredient!” and “What about cranberries, guys??”  So, yes, I know some of you are over pumpkin.  And frankly, it’s not my favorite ingredient of all time (although who doesn’t love the occasional pumpkin muffin?).  But when I saw this recipe for Pumpkin and Sweet Potato Moussaka, I knew I had to try it out anyway.  It’s so… different.  In the best sort of way.

The first time I had moussaka I was in Budapest.  While I was studying abroad in Prague, we had a 10 day fall break during which we could travel independently.  Most people in the program took off on a city-hopping tour of Europe, trying to hit as many major cities as possible in the short time.  My roommates and I took the opposite approach, visiting only two cities, both accessible by train – Vienna, and Budapest.

I have never felt more out of place than I did in Budapest.  Don’t get me wrong – I loved the city.  Beautiful, old-world, twisty-turny, and a little bit hipster.  But I could not say a single word in the language – not even “thank you.”  I’ve never had that experience before, and I felt completely helpless.  We managed to get by for the most part, but it was embarrassing!  The next time I’m there I’ll be prepared.

Anyway, one night we decided to go out to a Greek restaurant near our apartment (we’d already had plenty of chicken paprikash).  It was like being transported – whitewashed walls with bright blue murals, two brightly lit lofts with stone arches, waiters with Greek accents, etc.  It was one of the stranger dining experiences I’ve ever had – they actually used a dust-buster to vacuum off the table between courses!  But the food was delicious, and moussaka will always remind me of that little place in Budapest, and of the whole lovey trip, for that matter.

Originally, this post was meant to double as a review of The Country Cooking of Greece.  But as I began writing my grocery list and assembling ingredients, I made too many changes to the original recipe to really make it a fair “review” recipe.  You can’t judge a cookbook on a recipe you’ve changed!  The original recipe was vegetarian, but I couldn’t imagine having moussaka without ground beef – the salty, meatiness of it is the perfect counterpoint to the creamy bechamel and the sweetness of the roasted veggies.  Then, the grocery store didn’t have any eating pumpkins, so I used sweet potatoes and butternut squash instead of all three orange veggies.  I also had to play with the ratios a bit – I had way too much squash/sweet potato for the amount of bechamel I had made.  By the end, it wasn’t really a fair representation of the original recipe – but it was super delicious.  So you’ll have to hold out for the cookbook review, but you should try this adapted recipe in the meantime.

Pumpkin and Sweet Potato Moussaka

Adapted from The Country Cooking of Greece.  Serves 6-8.

For the bechamel:

  • 4 TBS salted butter
  • 1/4 c. flour
  • 4 c. milk, slightly warmed (on the stove or in the microwave)
  • 2 eggs, beaten
  • 1 c. crumbled feta cheese
  • 1/2 c. grated parmesan cheese
  • pepper to taste
  • 1/2 tsp nutmeg

For the filling:

  • olive oil
  • 3 large red onions, peeled and diced
  • 1 1/2 lbs ground beef
  • 2 large sweet potatoes (about 2 lbs), peeled and sliced lengthwise into 1/4 inch thick slices
  • 1 medium winter squash or pumpkin (about 2 lbs), peeled and sliced lengthwise into 1/4 inch thick slices
  • flour, for dusting
  • 1/2 c. chopped fresh mint
  • 1/2 c. chopped fresh parsley
  • salt and pepper, to taste
  1. Make the bechamel: Melt the butter in a large pot over medium heat.  Add the flour and whisk to combine so there are no lumps.  Cook for 1 minute, until lightly browned.  Slowly pour in warm milk, whisking continuously.  Whisk the mixture non-stop until it thickens, about 10-12 minutes.  (Note, to save a bechamel that’s not thickening, melt a little extra butter (2 TBS) in the microwave and mix with an equal amount of flour – add to the bechamel to restart the thickening process).  Once thickened, pour a ladleful of the hot mixture over the beaten eggs, whisking the eggs vigorously, to temper the eggs.  Pour the egg mixture back into the bechamel, whisking the whole time, and remove from the heat.  Stir in the cheeses, and season with pepper and the nutmeg.  Set aside.
  2. Prepare the filling: heat 2 TBS of olive oil in a large frying pan over medium heat and cook diced onions in it for 10 minutes, until soft.  Add ground beef and brown thoroughly.  Remove from heat, and use a slotted spoon to scoop beef and onion mixture into a bowl.  Season with salt and pepper, and set aside.
  3. Heat enough olive oil to rise a 1/4 inch up the side of the pan in a large frying pan.  Use medium heat, and let oil heat fully before beginning frying.  Test the temperature by dipping a piece of squash in the oil – if it sizzles immediately, the oil is ready.  Dredge the squash slices lightly in flour, then fry in the oil until lightly browned on both sides.  Remove to a paper-towel lined sheet pan to drain.  You will need to do this in batches.  Once the squash is done, lightly fry the sweet potato slices (you do not need to flour these) until golden brown.
  4. Preheat the oven to 350°F and assemble the moussaka: In a 9×13 roasting pan, place a single layer of sweet potatoes along the bottom such that they overlap slightly.  Sprinkle with half the mint and half the parsley, then top with half of the beef and onion mixture and half of the bechamel.  Cover these layers with a layer of the squash, then sprinkle remaining mint and parsley on top, as well as remaining beef and onion mixture.  Spread the rest of the bechamel on top, spreading out to the edges of the pan if possible.
  5. Bake for 40-50 minutes, until bechamel is puffed and golden.  If the top is not browning, broil it on low for 2-3 minutes and then remove.  Let rest for 10 minutes before slicing.  Serve warm.

2 October 28, 2012 Asian and Indian

Cookbook Review and Giveaway: Japanese Farm Food

Update: Giveaway now closed! Congrats to Andrea on winning the book (sorry, Mom, maybe next time!). Thanks to everyone for entering and leaving your favorite dishes – I have so many great Japanese recipes to try now – sounds like katsu curry and okonimyaki are must tries.

I don’t cook a lot of Asian food.  Sure, your occasional super-Americanized stir-fried rice, or a little chicken cooked in soy sauce, but rarely anything traditional.  It’s out of my comfort zone.  I have a lot of friends who are enamored with various Asian cultures, or who are part of an Asian culture and still very much tied to their family’s traditions and roots, but I’ve always been more drawn to Western food cultures – Italian, French, Irish, Polish, Czech.  It’s more accessible to me – closer to home.

This is precisely why Nancy Hachisu’s beautiful new cookbook “Japanese Farm Food” was such a wonderfully eye-opening book for me.  Just the introduction is full of new information – the best type of miso to buy for everyday use, how to grind tofu, and what, exactly, a suribashi is (it’s basically a grooved mortar and pestle for grinding seeds and nuts, if you’re wondering).  In fact, there were so many new words and ingredients and techniques in the opening chapter that I was almost a little intimidated.

I shouldn’t have worried – simplicity turned out not to be a problem.  Many of the recipes are simple, some shockingly so – like “edamame and sea salt,” or “raw egg on hot rice,” both of which are exactly what they sound like.  This level of simplicity is typically not my cup of tea in cookbooks – as someone who spends a lot of time cooking and thinking about cooking, I don’t need a book to instruct me in truly simple preparations.  However, in this book it seems appropriate.  Japanese food is simple by nature, and it is in preparing the simplest meals that technique truly counts.  There are also plenty of recipes a bit more complicated, like Chicken and Miso Meatballs or Egg Custard Squares with Crab and Spinach.  Some ingredients, such as yuzu, miso, and fresh wasabi, may be hard to find, but once you’ve sourced them, they’re used over and over again.

For anyone who grows their own vegetables or frequently finds themselves with an abundance of produce, you will find many new ways to prepare them in this book – a major plus.  Between Fried Eggplant Halves with Sweet Miso, Smashed Cucumber Pickles with Garlic, and Zucchini Coins with Roasted Sesame, I’ve taken plenty of notes on what to do with next year’s end-of-summer produce.  I should also note that the recipes in this book are intrinsically healthy, as much of traditional Japanese cuisine is.  Very few recipes call for dairy or wheat, the majority are vegetable based, and the techniques are such that the ingredients maintain most of their nutritious qualities.  If you’re looking to change your diet and lifestyle (and you like Japanese food, of course), this book may be a great source of inspiration.

But this book is not just about the food.  A big part of its charm are the short vignettes, little glimpses into Nancy and Tadaaki’s life in their Japanese farmhouse.  At first it seemed strange to me that the stories were somewhat disconnected, and not a continuous tale of Nancy’s integration into Japanese life, but I think they ended up being my favorite part.  The wannabe farmer buried inside me loved imagining the first taste of a fresh pecan grown from seed 20 years earlier, or of midsummer edamame just pulled from the bush, served hot and salty with a cold beer, the way Americans might enjoy corn on the cob.  I think any armchair traveler with the slightest interest in Japan will revel in this book.

This is a book that was very clearly assembled with a lot of thought and love.  It is not haphazardly thrown together, nor is it repeating material and recipes that those of us who consume food literature at a rapid pace have seen a hundred times.  But before I can truly condone any cookbook, I have to test out a few recipes to see if they’re worthwhile.  In this case, I started with the homemade ramen.  Ramen is a food so steeped in mystique and tradition, I was curious to see how it would turn out at home.  The answer?  Worth every minute of the 3-hour preparation.  The long-simmered chicken broth is clear and nourishing, the home rolled noodles puffy and tender, the half-boiled egg creamy and full of the broth’s flavor.  It is exactly what I want to be slurping on any cold and dreary afternoon. It definitely takes some planning ahead, and the noodles were a little bit tricky to work with, but I would absolutely make it again on a lazy Saturday.  I still have a few more recipes to test, but so far, this book passes the recipe test.

The bottom line: Japanese Farm Food is a ground-up introduction to traditional Japanese food, packed with simple, technique-focused recipes.  Nancy’s voice is strong and her stories intimate – resulting in a beautiful book that is clearly a labor of love.  I’d strongly recommend it to anyone looking to expand their repertoire of healthful (or vegetarian) recipes, learn new methods for cooking fresh produce, or to anyone with any interest in the culture and food of Japan.

Giveaway:  Thanks to the folks over at Andrews McMeel Publishing, I’m giving away one copy of Japanese Farm Food.  To enter, leave a comment below, answering the question: What is your favorite Japanese (or generally Asian, if you’ve never had Japanese food) dish?  Have you ever made Japanese food at home?  (P.s. I loved hearing your answers about your favorite winter dish – seems a lot of you love beef stew and chicken pot pie!)  For one additional entry, you can subscribe to Katie at the Kitchen Door via email or RSS, and leave a separate comment letting me know you have (you can also do this if you’re already a subscriber).  One winner will be picked at random at midnight on Friday, November 2nd.  Be sure to include your email in the comment form so I can get in touch with you!  If the winner doesn’t respond to me within 48 hours, they forfeit their winnings and I will pick a second winner.  US only, apologies to my international readers! Giveaway now closed!

Disclaimer: I was sent a free review copy of Japanese Farm Food by the publisher, Andrews McMeel, but all thoughts and opinions shared here are honest and my own.

Ramen at Home

Recipe from Japanese Farm Food, by Nancy Hachisu.  Serves 4.

For the broth:

  • 2 carrots, cut into 1 inch lengths
  • 2 small Japanese leeks, or 4 scallions, trimmed and cut into 1 inch lengths
  • 1 inch fresh ginger, peeled and thinly sliced
  • 4 bone-in chicken thighs (or 8 wings)
  • 1 tsp sea salt
  • 2 TBS rapeseed or sesame oil

For the noodles:

  • 2 TBS sesame oil
  • 2 c. flour
  • 2 eggs, at room temperature
  • 2 egg yolks, at room temperature

For the toppings:

  • 4 eggs
  • 1 small bunch chopped bitter greens, such as bok choy or kale
  • 3 TBS finely chopped Japanese leeks or scallions
  • 1 sheet nori, cut into eights
  • Soy sauce, miso, or sea salt (to taste)
  1. Make the broth.  Preheat the oven to 450°F.  Place carrots, leeks/scallions, ginger, and chicken thighs in a roasting pan, and toss with salt and oil.  Roast for 40 minutes.  Pour chicken, veggies, and all the juices into a large stockpot, and cover with 16 cups of cold water.  Bring to a boil, then lower heat and simmer, covered, for 1 hour.  After 1 hour, remove the lid.  Take out 2 of the chicken thighs and place in a small bowl.  Cover the thighs with hot broth and let cool to room temperature, then shred.  Continue simmering the remaining broth for another 30-60 minutes, until it is reduced to about 8 cups.  Strain broth into a clean pot and keep warm over low heat.  Discard vegetables and remaining chicken thighs.
  2. Make the noodles: mix 2 TBS of the sesame oil into the flour with your fingers until it is crumbly.  Add eggs and egg yolks and stir with your hand until incorporated, then knead on a flat, clean surface for 5 minutes until the dough is pliable but stiff.  The dough takes some force to really work it into a pliable piece.  Let dough rest 10 minutes.
  3. Roll out the noodle dough to a thickness of about 1/8 inch using a pasta machine or a heavy rolling pin.  Cut into noodles by hand or using pasta machine.  Nancy recommends skinny linguine-shaped noodles, but we made thick ones because the dough wasn’t workable enough to make the smaller noodles – the thick ones worked great for us!
  4. Prepare the toppings: bring a large pot of water to a boil over high-heat.  Add the eggs and boil for exactly 7 minutes, then remove with a strainer and place directly into a bowl of ice-cold water.  Let cool, then peel.  In the boiling water, blanch the bitter greens until just tender, then add to the cold water with the eggs.  Keep the water boiling – you will use it to cook your noodles just before serving.
  5. Once the broth, noodles, and toppings are ready, prepare the bowls: add a small amount of miso, soy sauce, or salt to each bowl (according to diner’s preference) and pour a ladelful of hot broth over the seasoning.  Stir the broth into the seasoning.  Divide the shredded chicken amongst the bowls.  Drop the noodles into the boiling water and cook for 2 minutes – they will float up to the top when they are done.  Remove the noodles with a strainer and divide among the bowls.  Top off each bowl with a few more ladlefuls of hot broth, 1 egg cut into halves, a handful of the cooked grens, some of the nori pieces, and a sprinkling of scallions.  Serve very hot, with extra seasoning as desired.

1 October 24, 2012 Breakfast

Greatist Collaboration: Quinoa Apple Cake

Just a quick hello to share this cake that I made for Greatist with you.  When I saw this cake in Home Made Winter (p.s., you still have until midnight tonight to win a copy!), I was immediately intrigued.  Cooked whole quinoa to replace some of the flour?  Sounded like a good idea for a nutritious cake, and I didn’t need any fancy flours to make it.  Add to this the fact that I had a bunch of apples leftover from apple-picking slowly softening on the counter, and that it was full of fall spices, and I was sold on trying it.

Still, I’m always a little bit skeptical of “healthy” cakes, and this one was no exception.  Granted, it’s not über-healthy – it still has butter and sugar in it – but it’s no chocolate-peanut butter health monster.  So I was pleasantly surprised by how much I genuinely liked the flavor of this cake – enough to immediately crave (but resist!) another slice.  It’s very moist, very apple-y, and just cinnamon/ginger/nutmeg-y enough.  It’s a little bit loose in its texture and so falls apart pretty easily, but I think this could be combatted by adding an egg.  I’m planning on making this cake again next week to have as a snack before my half-marathon, so I’ll try the egg thing then and report back!  Speaking of half-marathons… I’m so tired of training for them.  But I did my last long run on Saturday, and I’m almost ready to taper.  Then I’m taking two weeks off – and I can’t wait!  I take my hat off to those of you who run them regularly, and those of you who go for twice (or three, or four times!) as long.  Training for these two halfs this fall has made me realize that I will never be running a full marathon, but I will make this cake for everyone I know who does.  The rest of you lazy-like-me people should make it for yourselves – head on over to Greatist for the recipe!

Also, I have to give a shout out to my little brother, who turns 22 today!  Happy Birthday, Rynie, I love you :-).  Last year I made him these Dark and Stormy Brownies, and they quickly became my most popular post of all time by a long shot (like, 6 times more popular than the 2nd most popular post on this site).  So Ryan, maybe you’re my lucky charm!  Have a great day, bro.

0 October 22, 2012 Cookbook

White Chocolate Latte

Time for another week.  Translation: time for coffee to get us through Monday morning.  If you’re me, preferably some milky, sugary coffee, maybe with a little whipped cream.  And chocolate.  It is Monday after all, and Mondays are hard.  Especially after you’ve spent the weekend meeting great people at a great food blogger conference at Stonewall Kitchen and you’re not quite ready to be thinking about your day job, which is not food blogging.  I’ll probably talk more about the conference soon, but for now, let me just thank Alana and Amy of Blog Better Boston for putting it together!

I was never a big coffee drinker until this year (and at 3-4 cups a week, I guess most of you still wouldn’t say I qualify as a big coffee drinker).  I’ve always liked coffee – the flavor, warmth, etc. (again, since by coffee I mean lattes with three packs of sugar, some of you might judge me – I’m OK with that), but I’m super sensitive to caffeine.  One cup of Starbucks coffee and I’m shaking, my heart is racing, and I can’t focus on anything.  Not exactly the desired effect.  But when I’m really dragging, one warm latte is just the thing to get me going.

This is another recipe from Home Made Winter, which I reviewed last week.  Doesn’t it just look like the perfect thing to warm you up on a cold day?  I adapted the recipe a little bit to use espresso instead of coffee, since I don’t have a regular coffee pot (in fact, I don’t have any coffee-making equipment – I had to borrow Trevor’s bialetti for this one!  A great little tool, by the way.)  I also used skim milk, instead of whole, since I wasn’t feeling that indulgent.  Because the recipe has you melt white chocolate into the warm milk, and slightly sweeten the whipped cream, I didn’t even need any extra sugar – I know, I’m a hero right?

Hope everyone enjoyed their weekends, and have a great Monday!

White Chocolate Lattes

Recipe adapted from Home Made Winter.  Serves 2.

Note: Original recipe calls for a smaller volume of whole milk and a larger volume of regular coffee (1 c. milk, 3/4 c. coffee for 2 servings).  Since I wanted to use espresso and have this be more like a latte, I increased the amount of milk and used a shot of espresso per glass, but I’m sure either way would be delicious.  I also don’t love the flavor of cardamom, so I made it optional, but include it if you like the flavor!

  • 1 1/2 c. skim milk
  • 1 1/2 oz. white chocolate, chopped finely, plus extra for garnish
  • 3 oz. (6 TBS) of hot espresso
  • 1/4 c. heavy cream
  • 1/4 tsp cream of tartar (optional, but I always use it to stiffen my cream)
  • 1 tsp sugar
  • 1/4 tsp vanilla
  • 1/4 tsp freshly ground cardamom (optional)
  1. Heat the milk over low heat in a medium saucepan, stirring with a wooden spoon.  As soon as it begins to simmer.  Remove from heat and add the chopped chocolate.  Let sit for 5 minutes, then stir again.  If the chocolate is not fully melted, heat gently for 1-2 minutes over low heat, stirring.
  2. In a small bowl, whisk cream until it begins to foam.  Sprinkle cream of tartar over the top, then whisk vigorously until soft peaks form.  Add sugar and vanilla, and whisk to incorporate.
  3. Divide hot espresso between two glasses.  Top each glass off with the warm milk and chocolate mixture, and stir to mix.  Top with whipped cream, any extra white chocolate shavings, and ground cardamom, if using.  Enjoy while hot!

86 October 17, 2012 Beef

Cookbook Review and Giveaway: Home Made Winter

Update: Congratulations to Amanda of Something Savory on winning the giveaway!  Please contact me with your information so I can send the book.

There are a lot of great cookbooks coming out this fall.  And I mean a lot.  Like, so many that Eater had to split up their fall cookbook preview into two parts due to post size restrictions.  As an avid cookbook devourer, blogger, and all around food dork, this is pretty exciting to me.  Even more exciting?  The fact that I have a stack of these cookbooks on my bedside table to review – and a few to giveaway to you.  I hope you don’t mind a bit of a cookbook and recipe frenzy here for the next few weeks!

First up is Home Made Winter, released as a follow-up to Yvette Van Boven’s wildly popular cookbook, Home Made.  Full of warming Irish, French, and Dutch recipes, this book has arrived just in time for what seems like it may be a long, cold winter – at least here in New England.  It’s a whimsical, playful tribute to the sorts of hearty, made-with-love foods that get those of us that live in colder, darker, Northern climes through the winter.  This playful spirit is set as early as possible – on the copyright page, which is covered with doodles and a “welcome cocktail” to draw you into the book.  Throughout the book various recipes are drawn out and illustrated rather than typed and photographed, which I think is cute – and a good way to remember to not take cooking too seriously.

Recipe-wise, I like this book.  There is a pretty broad range of time commitments, levels of difficulty, healthiness, and flavors represented here.  Some examples: homemade apple cider made in your food processor (time consuming), quinoa apple cake (healthy), rarebits with pear and blue cheese (easy, bad for you).  But even the time-consuming recipes are un-fussy, which appeals to me – home cooking never needs to be pretentious (even if sometimes it’s fun to be a little pretentious about it).  I’m also a fan of the comforting Irish classics Yvette included – dishes I’ve read about but never had the opportunity to try, like steak and kidney pie, bannock bread with devonshire cream, and colcannon.  Yvette’s French and Dutch roots are represented too (tartiflette, gevulde speculaas), but the Irish recipes stuck out to me the most.

Design-wise, I both like and dislike this book.  The thing I love about it is the fun – the sketches, notes, paper cut-outs, and overall friendliness of the design.  What I’m not so crazy about is the photographic style, which is not really my speed.  The photographs are a bit too, well, wintry and realistic for me – many are shot indoors with that characteristic yellow overhead light glow, some are fuzzy and blurred, others are of dark, gray, wintry landscapes – no pristine snowscapes here.  On the one hand, it’s appropriate – it truly brings to life the feeling of winter, being stuck inside, wishing it wasn’t so grey for so long, and finding comfort around the warm light of the kitchen table.  I’m sure this was deliberate, and it’s done well.  But I find that whole aesthetic kind of depressing – I typically want opening a cookbook to be an escape to somewhere beautiful and inspiring and filled with light, not a reminder of where I already am.  Now, this is not a comment on the skill of the photographer (who is also Yvette’s husband) – there are many photographs in the book that are beautifully shot and lit – it’s just a stylistic choice that doesn’t draw me in.

The first recipe I tested from this book was the Daube Provençale – a French beef stew simmered long and slow in red wine, citrus, and olives.  I served it over super-creamy garlic mashed potatoes, and it was as scrumptious as it sounds.  The beef was fall-apart tender and packed with flavor, and the wine-y notes and salty olives made it stand out from other traditional beef stew recipes.  It was also easy (although it takes some planning ahead), so I’ll for sure be making it again!

The bottom line:  Home Made Winter is a fun, accessible cookbook packed with comforting, cold-weather recipes.  The recipes are a mix of traditional and innovative – I think there’s probably a little something for everyone in here.

Giveaway:  Thanks to the folks over at Abrams Books, I’m giving away one copy of Home Made Winter.  To enter, leave a comment below, answering the question: What is your very favorite winter weather recipe?  For one additional entry, you can subscribe to Katie at the Kitchen Door via email or RSS, and leave a separate comment letting me know you have (you can also do this if you’re already a subscriber).  One winner will be picked at random on Wednesday, October 24th.  Be sure to include your email in the comment form so I can get in touch with you!  If the winner doesn’t respond to me within 48 hours, they forfeit their winnings and I will pick a second winner.  US only, apologies to my international readers! Giveaway is now closed!

A final note – lucky for us, (spoiler alert!), we haven’t seen the last of Yvette – she tells us in the introduction to Winter that Home Made Summer will be released sometime in the not too distant future.  In the meantime, enjoy this delicious French beef stew, enter the giveaway, and look out for two more recipes from the book to be posted here over the next week!

Like what you just read? Subscribe to Katie at the Kitchen Door on Feedly or Bloglovin‘, or follow along on Facebook, Twitter, Pinterest, Instagram, or Google+. Thanks for reading!

Disclaimer: A review copy of Home Made Winter was provided to me free of charge by Abrams Books.  I was not compensated for writing this review, and all thoughts and opinions are honest and my own!

More like this…

Pomegranate-Glazed Lamb Chops

Pomegranate-Glazed Lamb Chops

Beef, Mushroom, and Ale Pot Pie

Beef, Mushroom, and Ale Pot Pie

Braised Beef Short Ribs with Potato Gnocchi

Braised Beef Short Ribs with Potato Gnocchi

Daube Provençale (French Beef Stew with Red Wine)

Recipe from Home Made Winter, by Yvette van Boven.  Serves 8.

A note on the orange/grapefruit: Several people have been disappointed in the orange flavor that leaving the rind in the stew gives – if you are concerned, consider omitting it. I found that, when using a grapefruit, leaving the entire grapefruit in the stew gave it a slightly bitter aftertaste (a reader using grapefruit as well found the same thing). Although not mentioned in Yvette’s original recipe, I’d recommend separately adding the zest of the grapefruit and the fruit of the grapefruit to the stew, avoiding the bitter pith. 

  • 3 lb stew beef, cut into 1 inch cubes
  • 1 (750-ml) bottle Cote du Rhone [I used Bordeaux and it was fine, but Yvette recommends Cote du Rhone, Vacqueyras, Gigondas, or Minervois]
  • salt and freshly ground black pepper
  • 3 sprigs fresh thyme
  • 2 bay leaves
  • 3 carrots, peeled and cut into 1/2 inch slices
  • 1 orange, washed well and cut into 8 wedges [I substituted grapefruit]
  • 1 large onion, peeled and cut into rings
  • 2 cloves garlic, peeled and sliced
  • olive oil
  • 1 6-oz can tomato paste
  • 3 1/2 oz. pitted black olives
  1. Season meat with salt and pepper on all sides.  Place meat in a big bowl with wine, thyme, bay leaves, carrots, orange, onion, and garlic.  Cover and marinate in the fridge for at least 12 hours, and preferably 24 hours.
  2. Heat some olive oil over medium heat in a large stockpot.  Remove the meat from the marinade and brown the pieces in the oil on all sides.  Pour the marinade (including the oranges, bay leaves, etc.) over the meat and bring to a boil.  Boil for 5 minutes, skimming any foam from the surface.  Lower the heat to a simmer, stir in the tomato paste, and add 4 1/2 c. water.  Cover, and let stew on low heat for 2-3 hours, stirring occasionally.
  3. 15 minutes before the stew is ready, add the pitted olives.  Let cook for 15 minutes on medium heat without the lid to thicken the stew.
  4. Serve over mashed potatoes, rice, or pasta.

Garlic Mashed Potatoes

Serves 6-8.

  • 6 russet potatoes, peeled and cut into 1/2 inch cubes
  • salt
  • 8 cloves garlic, cut in quarters
  • 1/2 c. heavy cream
  1. Place cubed potatoes in a large saucepan.  Cover with cold water, salt liberally, and bring to a boil over medium heat.  Boil for 10-15 minutes until potatoes are easily pierced with a fork, skimming starch foam from top occasionally and checking to keep from boiling over – lower heat if necessary.  Drain potatoes and place in a blender.
  2. Return saucepan to heat, lower heat to low, and add garlic and heavy cream.  Heat until garlic is fragrant and cream begins to simmer, then add to blender.  Blend until potatoes are a totally smooth puree.  Add water or skim milk as necessary to even out texture.

0 October 14, 2012 Food

Homemade Pork and Apple Potstickers

Dumplings.  They seem to be one of the few foods that appear in almost every global cuisine in some form: pierogi in Poland, vareniki/piroshki in Russia, gyoza in Japan, samosas in India, ravioli in Italy, etc.  There’s even a cookbook on it, called  World of Dumplings (which I haven’t read, but showed up when I googled “dumplings worldwide” and it looks interesting!).  And why wouldn’t they be ubiquitous?   They’re delicious, addictive, bite-sized, finger food, filled with pretty much anything you want.

When I got back from my weekly long run yesterday, Trevor was just finishing making a batch of these dumplings.  He made the wrappers from scratch, rolled them out, filled them, steamed them, fried them, and even took some of these pictures.  He’s pretty good, right?  I walked in the door, thirsty and starving and cold and absolutely did work on a plate of dumplings.  As in, I ate 15.  In one go, barely taking a breath.  (And this is why you should never skip breakfast…).  It reminded me of potsticker night at Andover, when we used to have competitions over who could eat the most potstickers.  I think the record was 52 – hey, we were young and athletic then.

The filling in these, another Ming Tsai combination, is a mix of ground pork and the ginger-apple chutney I made last week.  Ming wins again.  If you aren’t as ambitious/awesome as Trevor, you can buy the wrappers pre-made and these will be pretty quick to make.  But the homemade wrappers were delicious – tender and soft and not at all rubbery – so if you have the time I’d recommend giving them a try with this great tutorial from La Fuji Mama.  We also watched this video for tips on folding them.

Hope everyone had a great weekend!

Pork and Ginger-Apple Chutney Potstickers

Recipe from Ming Tsai.  Makes about 40 potstickers.

  • 40-50 potsticker wrappers (store-bought or use this recipe – I think we got 30 wrappers out of it)
  • 1 lb. ground pork
  • 2 TBS soy sauce
  • 1/2 c. sliced scallions
  • 1 c. ginger apple chutney
  • salt and pepper
  • 1 egg
  • 2 TBS canola oil
  1. In a medium bowl, mix together pork, soy sauce, scallions, and chutney with a spoon.  Season with salt and pepper.  Refrigerate until ready to use.
  2. Mix together egg and 2 TBS of water to make an egg wash.
  3. Lay out 6 of your potsticker wrappers on a cutting board.  Place 1 tsp of filling in the center of each wrapper.  Use your finger to rub egg wash around the edge of the wrapper, then fold over into a half-moon shape and tightly pinch all along the edges to seal the potsticker.  Press the straight side of the wrapper down gently on the board to allow the dumpling to stand up.  Repeat until all wrappers have been filled.
  4. Heat the oil in a large pan with a lid over medium heat.  Stand the potstickers sealed side-up in the pan and cook without disturbing for 3-4 minutes.  Then, CAREFULLY add 1/2 c. water to the pan and quickly cover the pan to avoid splattering.  Once splattering has subsided, uncover pan to check that there is about a 1/4 inch of water in the pan – if not, add a little more.  Cover pan and steam for 8-10 minutes.  If the water evaporates before the potstickers are cooked (they should be puffy yet firm), add a little more.  If they seem done but there is still water in the pan, drain water from pan.  Once potstickers are cooked, recrisp in the pan without any water for 2 minutes, being careful not to let them burn.  Remove them to a platter and serve with your favorite dipping sauce.

5 October 10, 2012 Fall

Greatist Collaboration: Mushroom and Farro Soup

Last Tuesday, when it was rainy and gray and I wanted nothing more than to snuggle up in bed with a bowl of soup, well, that’s what I did.  Mushroom and farro soup, to be specific.  And as I was making the soup, which only dragged me away from Up All Night for 10 minutes, including dish-washing, I thought “Why haven’t I done more soups for Greatist?”  Seriously, soup is the perfect quick, healthy food.  It can taste amazing with only a handful of ingredients, and after making a few batches while following a recipe, you’ll likely have it figured out to the point where you can take whatever you have in the fridge and throw together a comforting, veggie-centric dinner.

Speaking of veggies, mushrooms are one of the vegetables I find myself wanting all of a sudden once the cool weather hits.  I have a feeling this soup – which, by the way, is maybe one of the best-smelling soups I’ve made in years (it also tastes great, but the smell really got to me) – is just the tip of the iceberg when it comes to the mushroom recipes I’ll be making this season.  Since mushrooms are a pretty healthy choice, what with their immune system benefits, cardiovascular protection, and low-calorie-but-fill-you-up benefits (come on, you know what I mean…), this is good news for my taste buds and my skinny jeans.  While it’s on my mind, I thought I’d do a quick round-up of mushroom recipes – both those I’ve featured here in the past, and those from elsewhere that I hope to be making in the near future!

Check out the recipe for this soup over at Greatist, and get inspired for more mushroomy meals below!

More mushroom recipes from here…

  • Mushroom and Olive Veggie Burgers
  • Ricotta Gnocchi with Mushrooms, Corn, and Sage Butter
  • Mushroom and Lentil Pot Pies
  • Hungarian Mushroom Soup
  • Chicken and Mushroom Fettucine in Mustard-Cream Sauce

…and around the blogosphere:

  • Crusty Chicken Thighs with Mushroom Sauce – from Ezra Pound Cake
  • Lemony Mushroom and Pine Nut Stuffing Muffins – from Bon Appetit
  • Mushroom Lasagna – from Picture Perfect Meals
  • Mushroom Biryani – from Ami’s Vegetarian Delicacies
  • Creamy Prosciutto and Porcini Penne – from Every Day with Rachel Ray
  • Mushroom Pierogi – from Sabrina: A Food Blog
  • « Go to Previous Page
  • Go to page 1
  • Interim pages omitted …
  • Go to page 37
  • Go to page 38
  • Go to page 39
  • Go to page 40
  • Go to page 41
  • Interim pages omitted …
  • Go to page 57
  • Go to Next Page »

Primary Sidebar

Subscribe!

Get creative recipes and menu ideas delivered straight to your inbox.

Most Popular

A House // Sweet Potato and Coconut Milk Soup with Brown Rice and Lentils

Monthly Fitness Goals: July // Homemade Spinach Wraps with Chopped Greek Salad

A New Job // Classic Seven-Layer Bars

Butternut Squash Carbonara with Fried Sage and Caramelized Onions

Happy Birthday, Trevor! // Peanut Butter Fudge

Cookbook Review and Giveaway: Home Made Winter

Drizly

Please note!

Full disclosure: if you purchase anything at Amazon using the above links or any other links to Amazon on this site, I will receive a small commission. Just so you know!

Copyright© 2025 · Cookd Pro Theme by Shay Bocks

This site uses cookies: Find out more.