• Skip to primary navigation
  • Skip to main content
  • Skip to primary sidebar
  • Home
  • Recipes
  • Features
    • Cookbook Reviews
    • Ingredient of the Week
    • Sunday Dinner
    • Fitness Goals
  • Travel
  • About
    • Privacy Policy
    • Cookie Policy
  • Work With Me

Katie at the Kitchen Door

Globally-inspired, seasonal recipes

Blog Page

1 December 13, 2014 Dessert

Gingerbread Thumbprints with Cherry Jam

Gingerbread Thumbprints with Cherry Jam {Katie at the Kitchen Door}

I have to admit to you all, I’m having a hard time getting into the Christmas spirit. I feel as though I’ve said this before, and when I look back at posts from past years, I see similar sentiments. It’s a busy time of year, and I’m struggling to be excited and engaged instead of just feeling kind of run down. I think the underlying problem is that so much of what I do every day feels like another item on my checklist, and not enough is spontaneous or just for fun. I’m hoping that this feeling starts to go away once I get some major things off my plate: my economics final next week, and a few big client deadlines coming up. And starting now, I’m going to try and focus on building more relaxation and spontaneity into my day-to-day.

European-Style Hot Chocolate {Katie at the Kitchen Door}

Gingerbread Thumbprints {Katie at the Kitchen Door}

I am trying to get in the spirit, though – to be thoughtful, and joyous, and rested. We’ve been cranking up the Christmas carols when we’re cooking, we put up and decorated our tree this week, I made the first batch of Christmas cookies and shared them at work, and I tried to go to Mass last weekend (it turned out that it was not actually Mass but a caroling concert put on by the Harvard Catholic choir – I still get credit for that, right?). I’m also sitting by the tree to write this post, hoping maybe it’s sweet smell and calming lights will wear off on me (it’s kind of working, too). So with two weeks to go, I think there’s still hope for me and Christmas this year.

Gingerbread Thumbprints with Cherry Jam {Katie at the Kitchen Door}

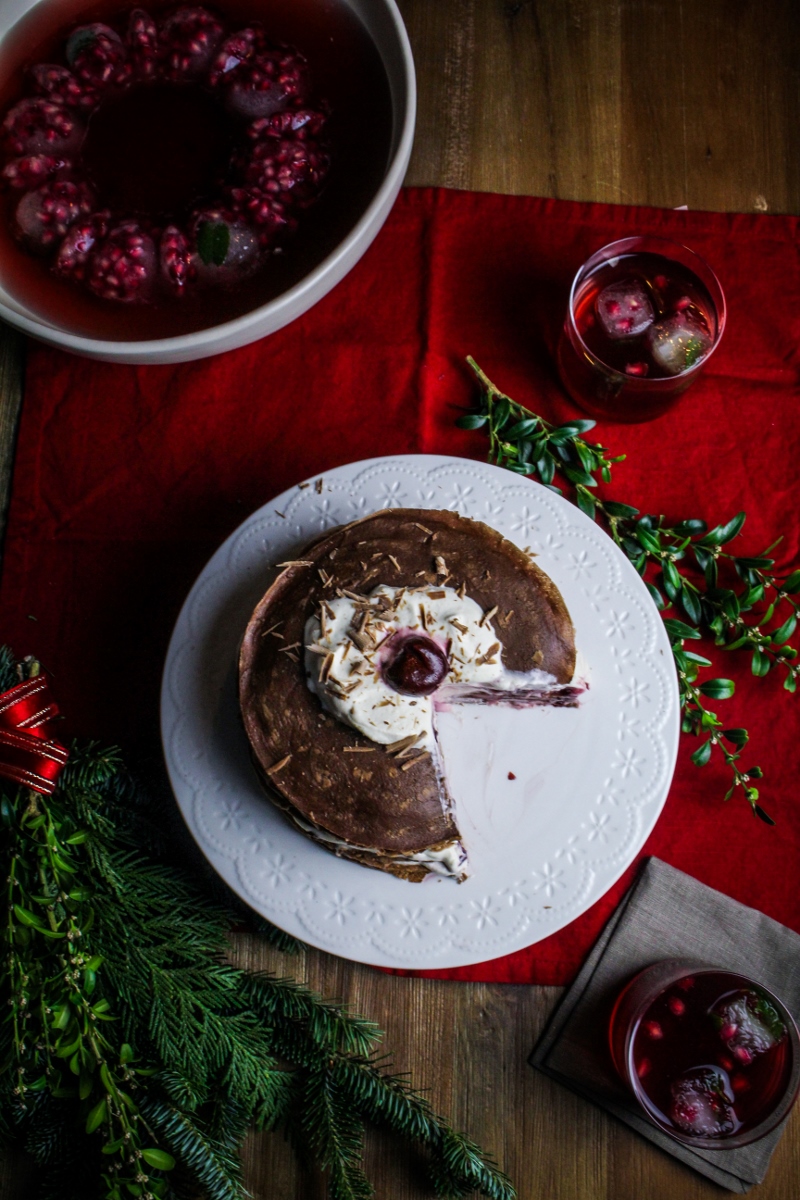
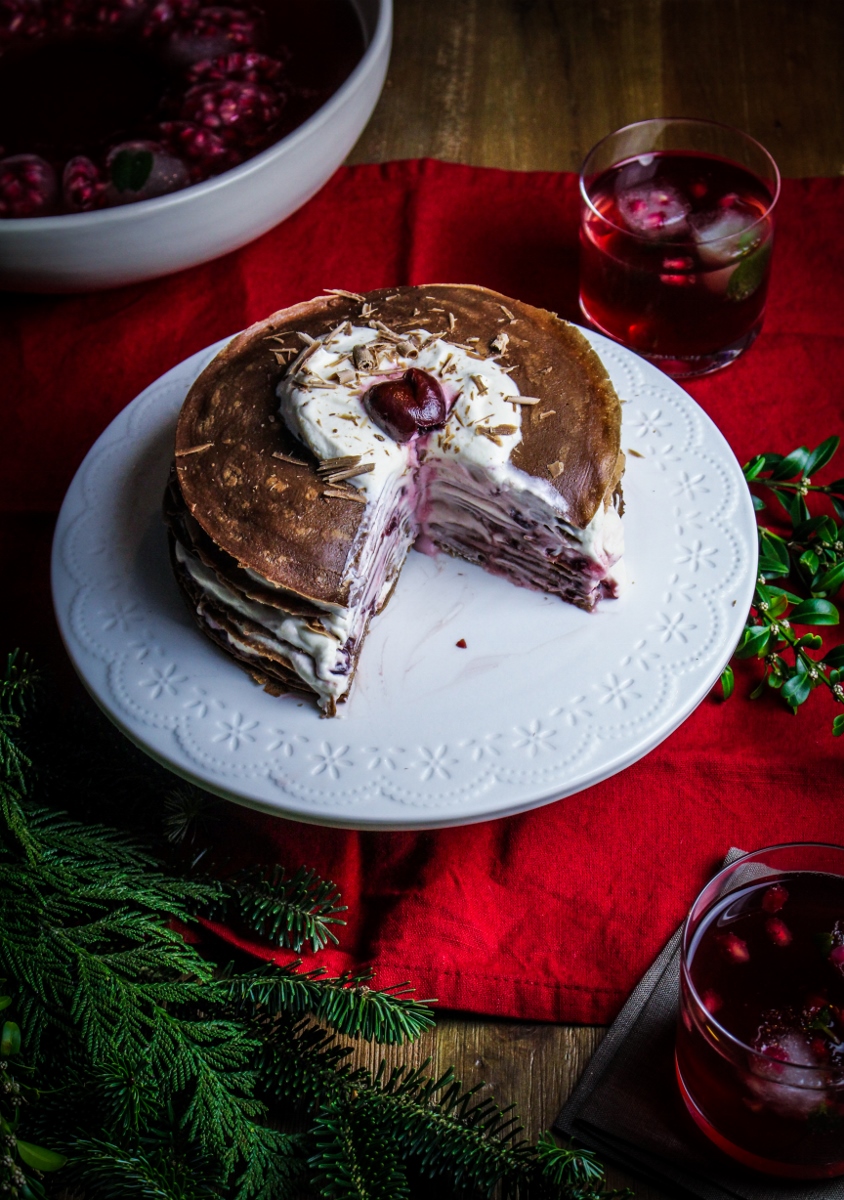
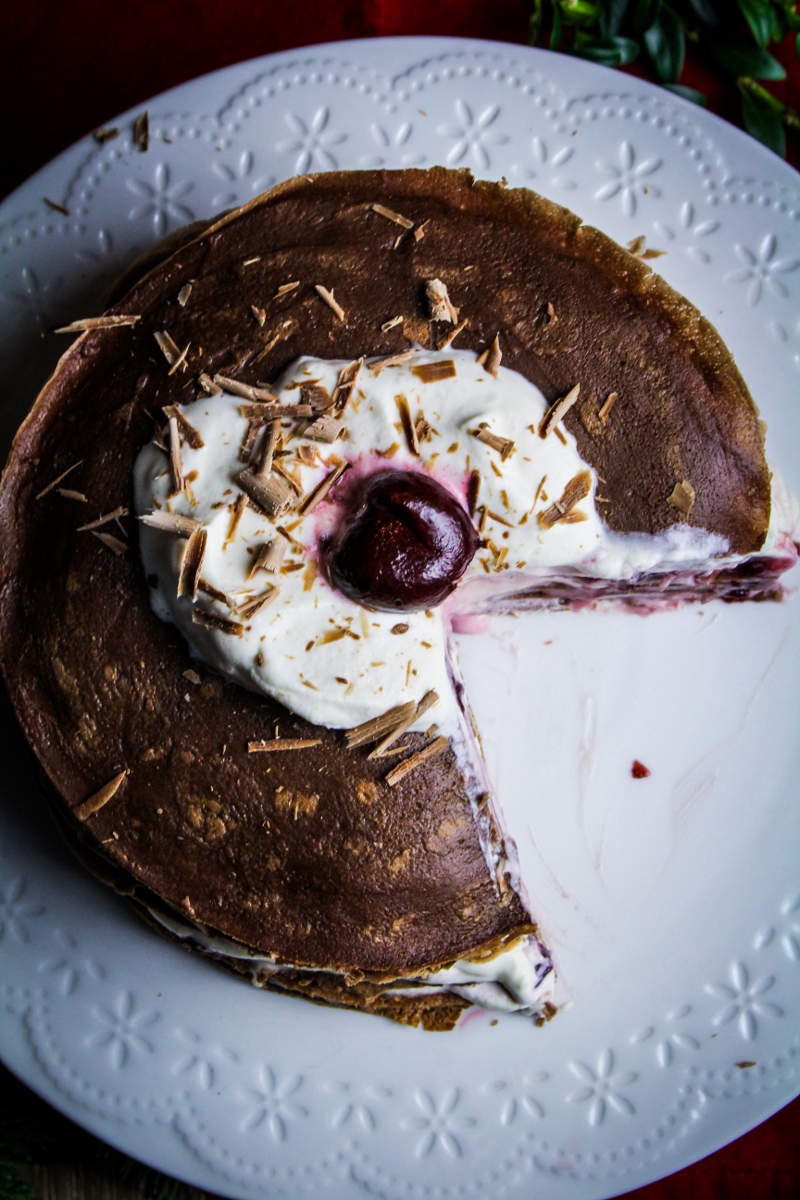
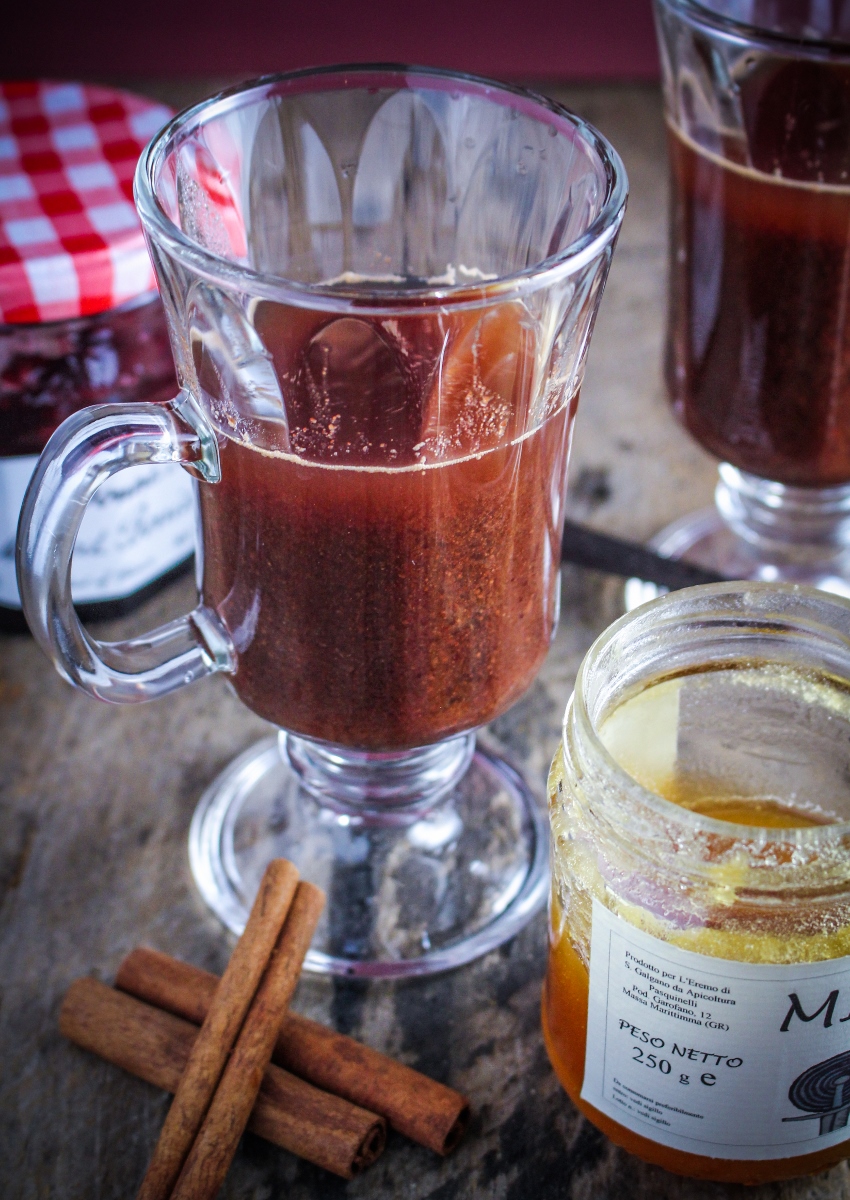
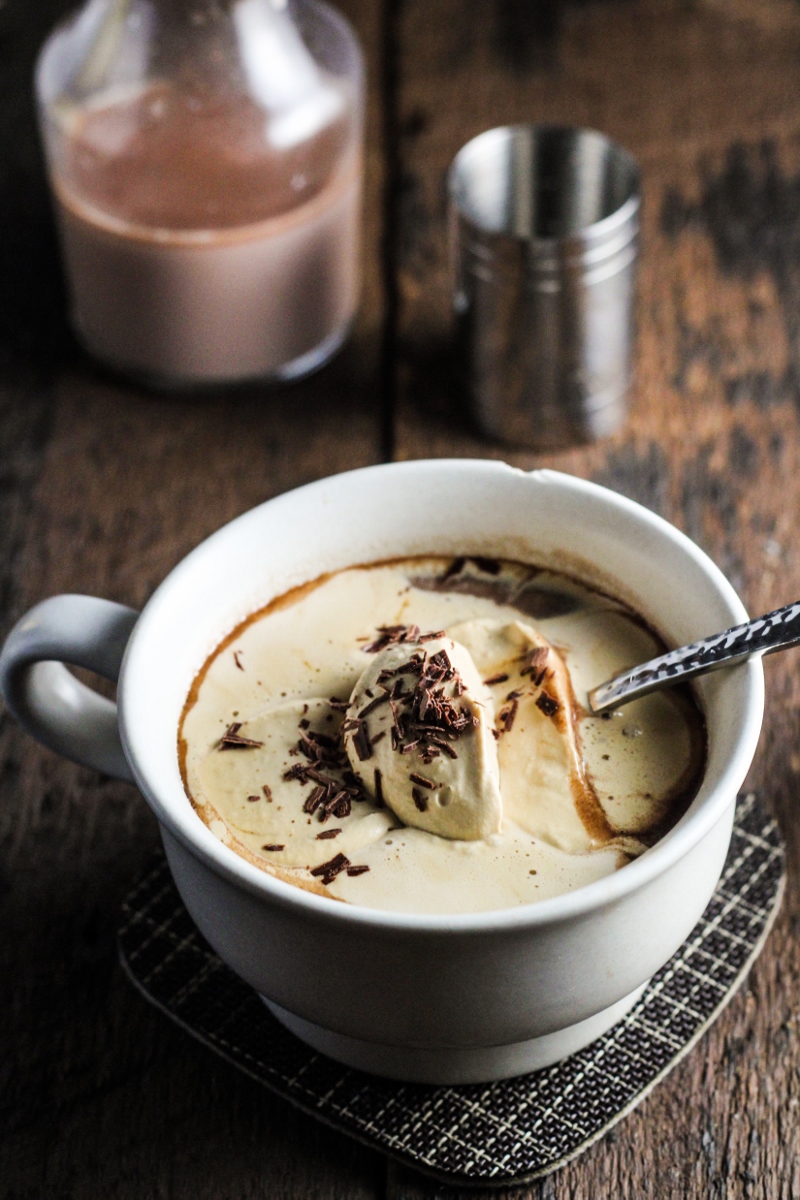
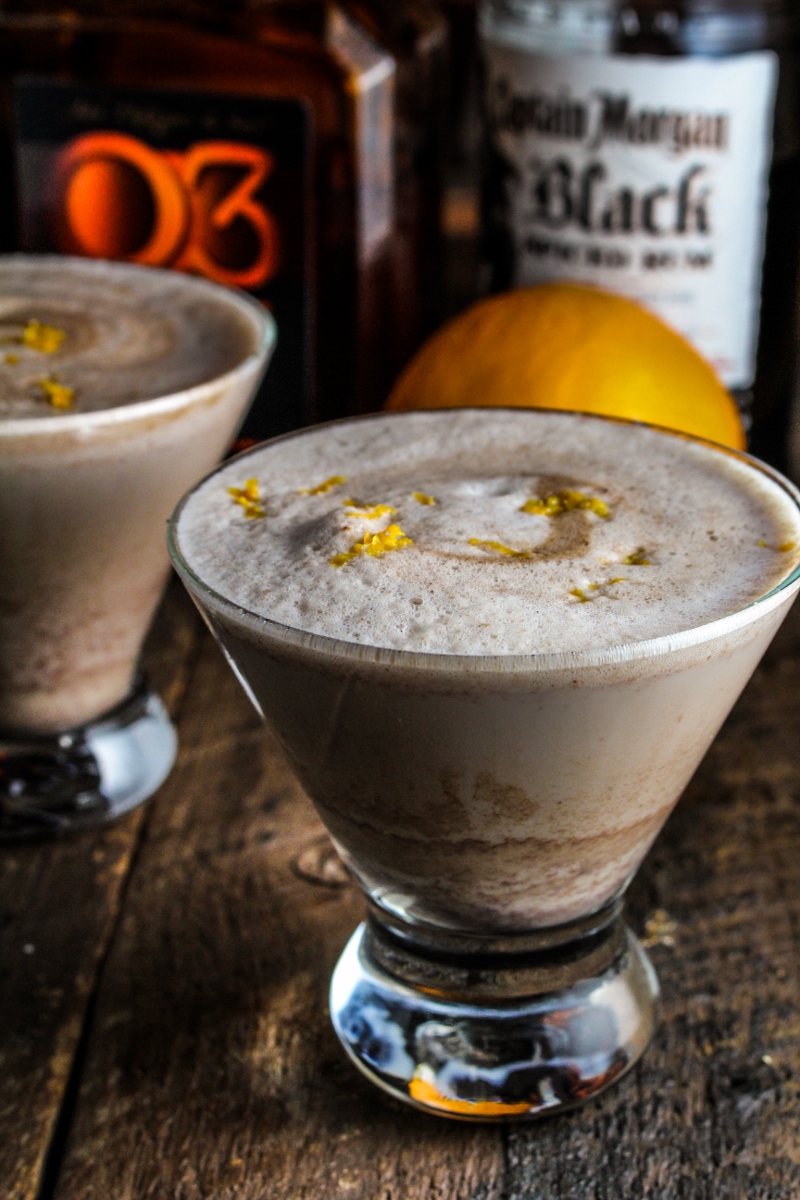
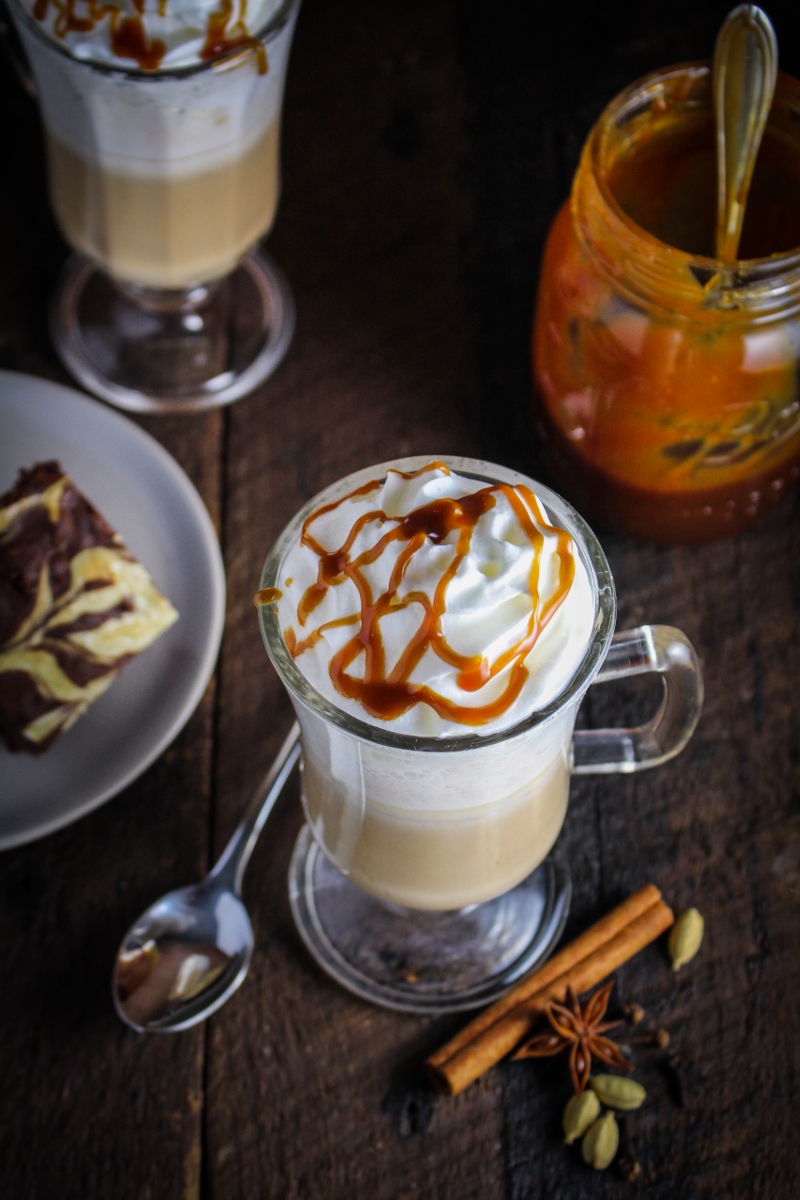
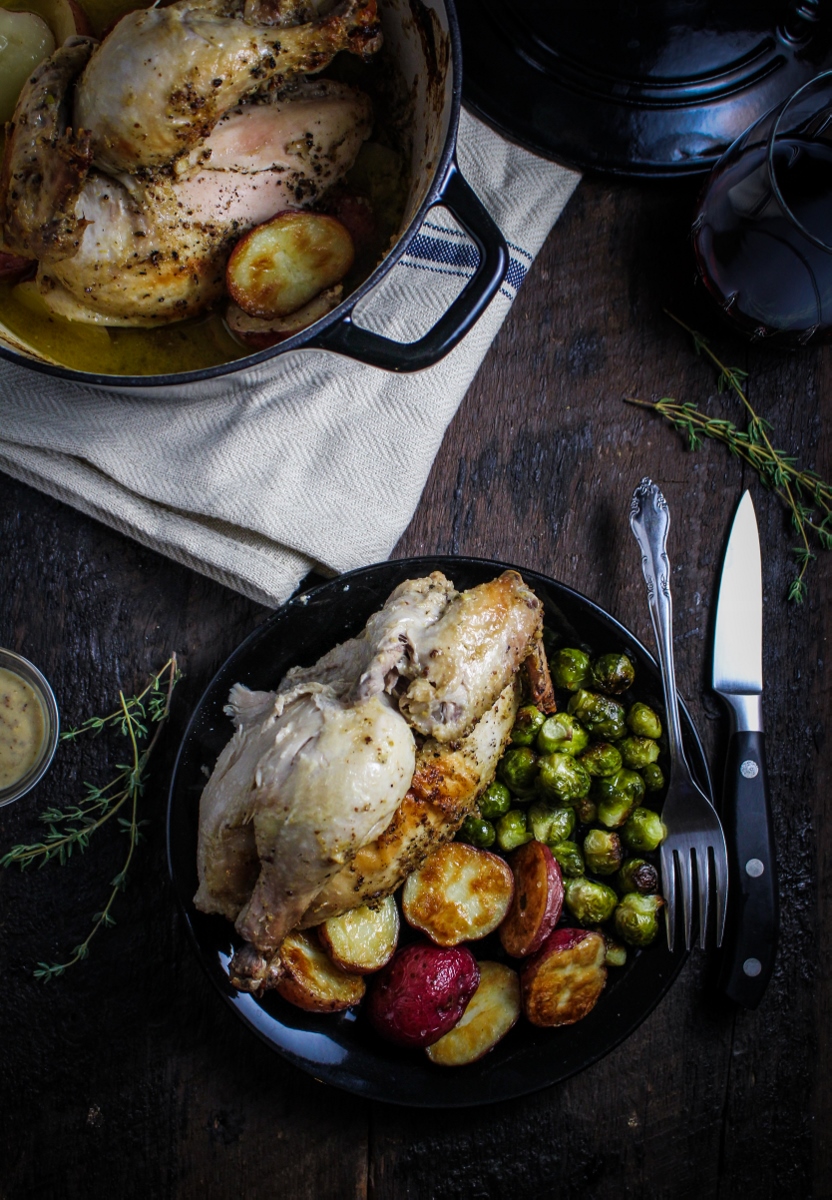
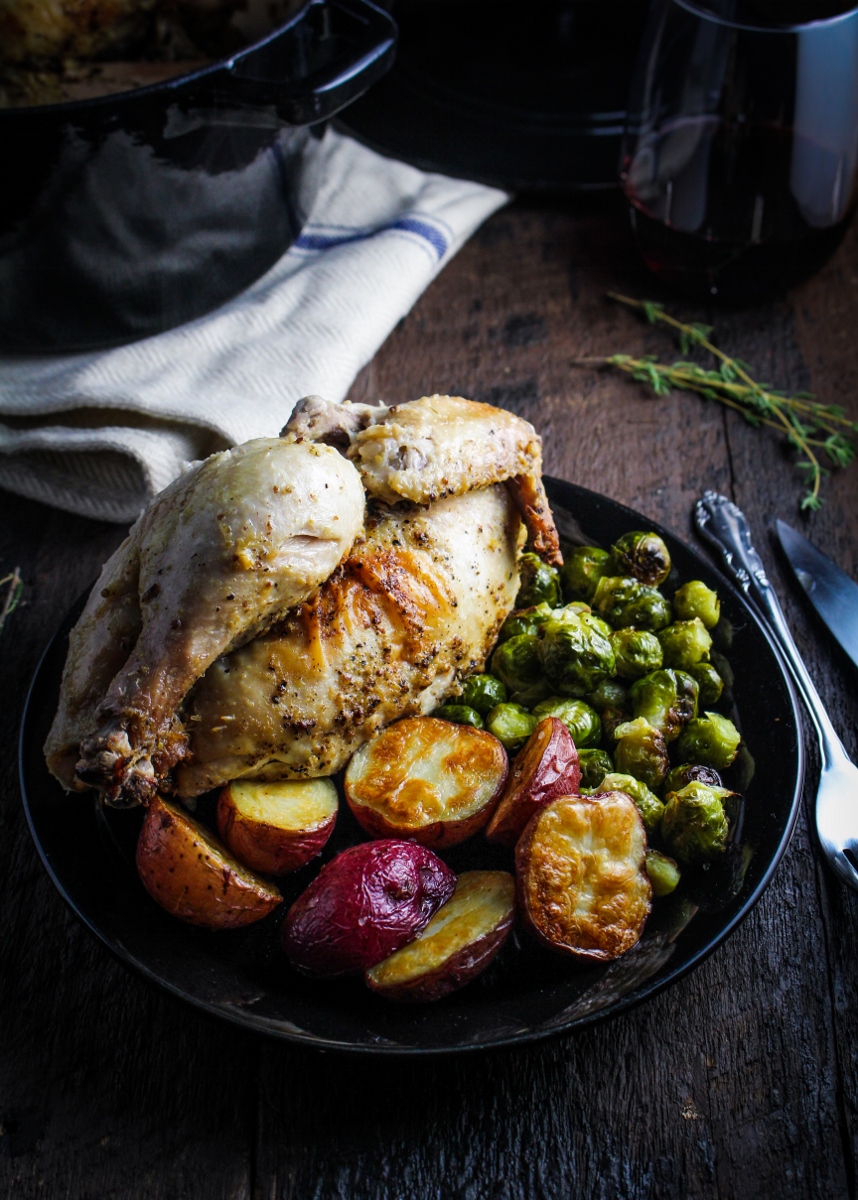
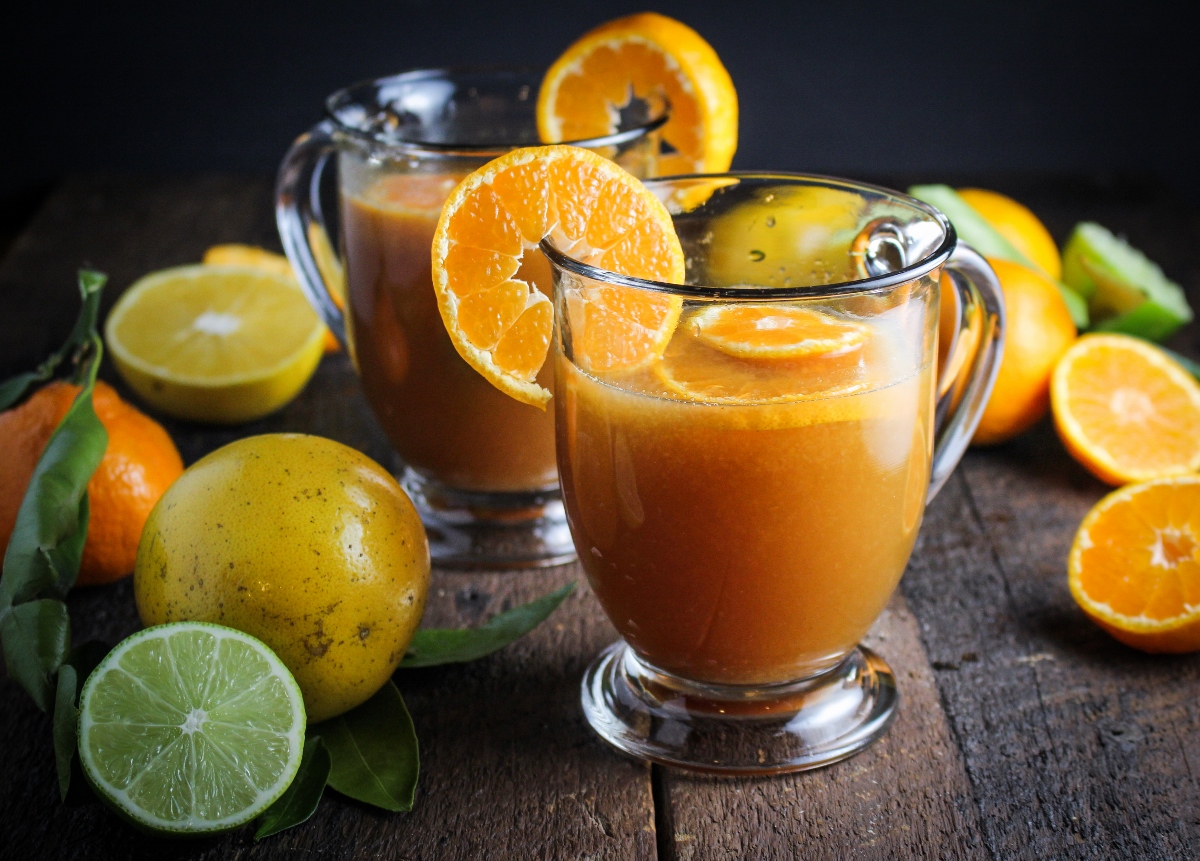
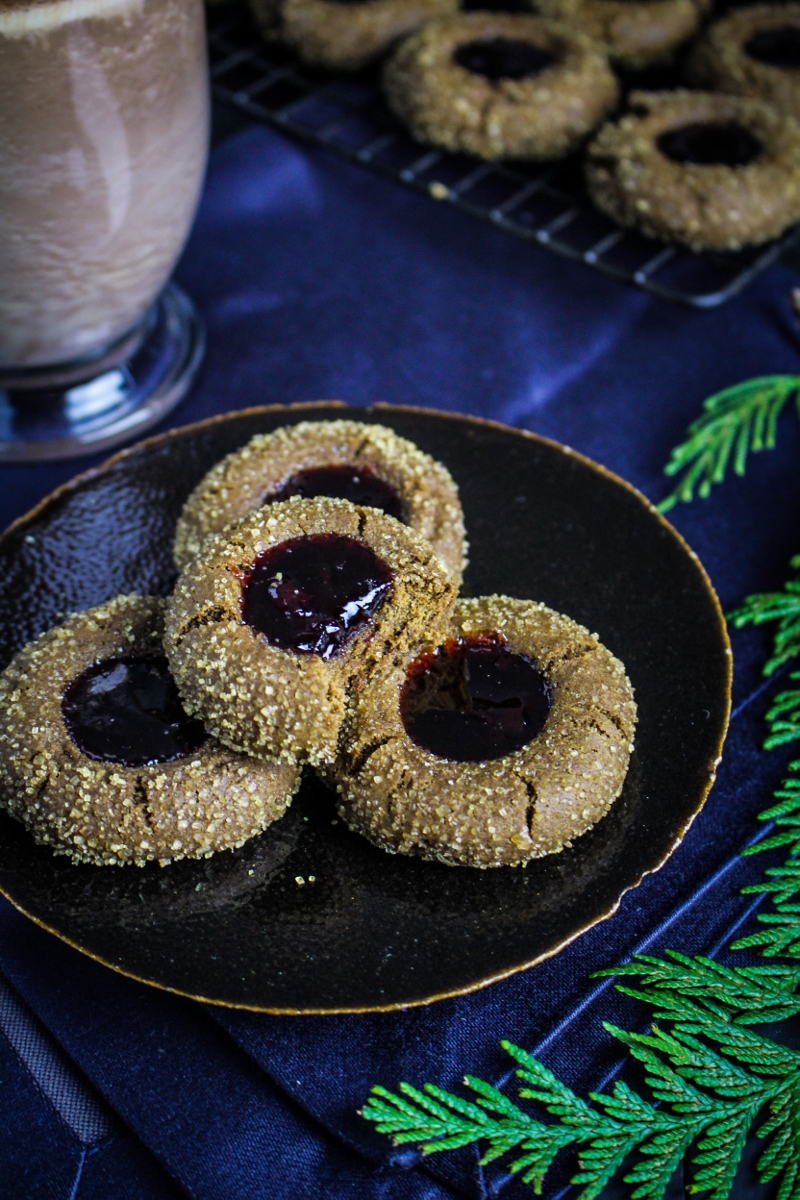
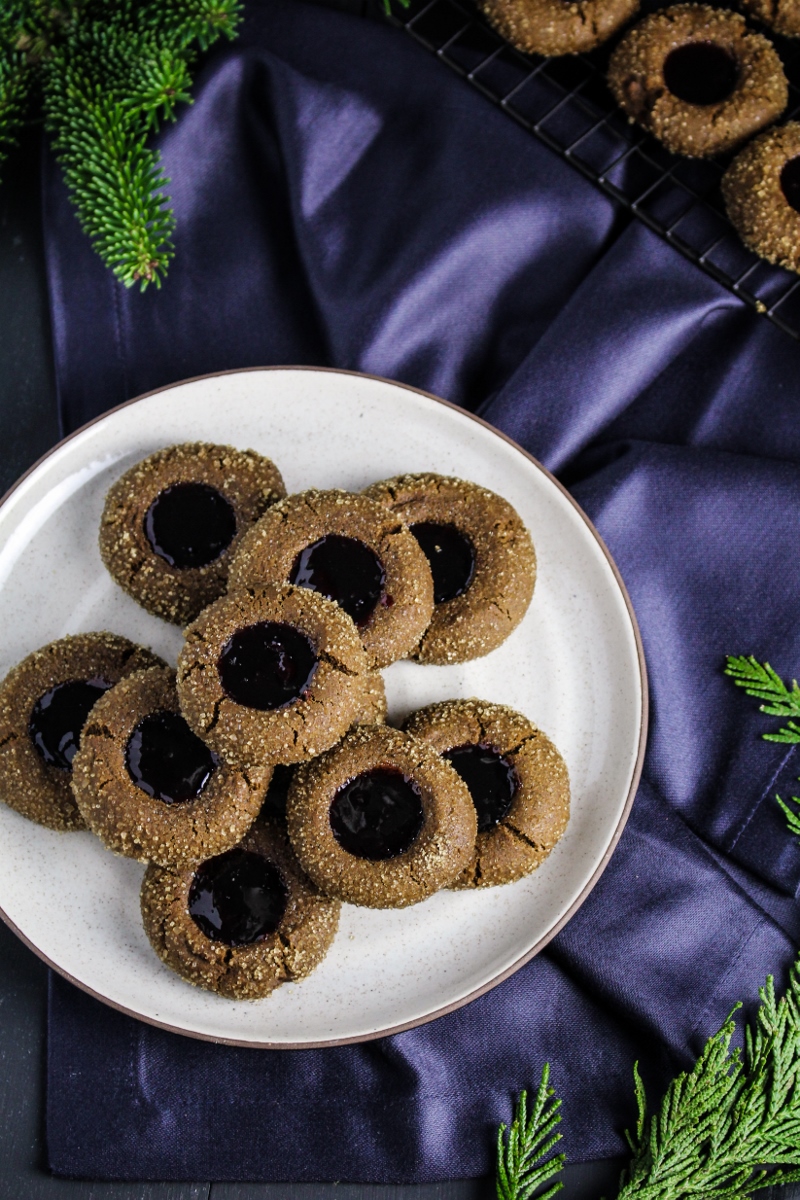
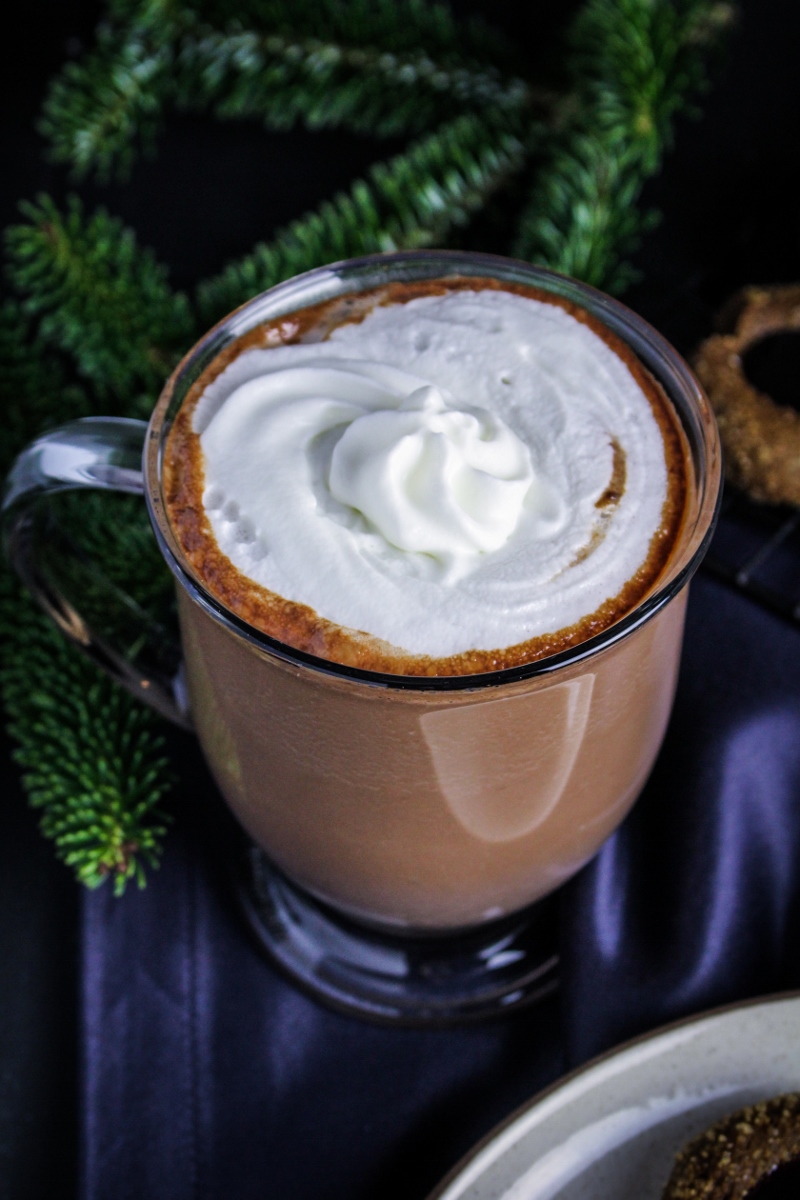
Although this post itself may not be very Christmasy, I assure you that these cookies will make up for it. The cookie is dark, soft, and a little spicy, based more on a molasses chew than traditional gingerbread men. I chose cherry jam because I’ve been a little bit obsessed with the Bonne Maman cherry preserves we bought for this Chocolate Cherry Crepe Cake, and I’ve been putting it on pretty much everything, but other jams or jellies would work well too. Most thumbprint cookie recipes have you bake the thumbprints with the jam already in them, but since these cookies will rise and flatten quite a bit, I chose to repeat the indentation process immediately after taking them out of the oven, and then fill them with hot jam. The jam will dry thick and shiny, and these will still be very transportable. Plus they’ll look much neater than if you filled them pre-baking. I also thought these pictures needed a little oomph, so I whipped up a batch of one of my very favorite holiday indulgences – European-style hot chocolate – and spiked it with Cointreau for good measure. If anything will help put you in the Christmas spirit, it’s thick and boozy melted chocolate served steaming hot. In fact, maybe I better go make another batch right now and get this weekend started off right.

Like what you just read? Subscribe to Katie at the Kitchen Door on Feedly or Bloglovin‘, or follow along on Facebook, Twitter, Pinterest, Instagram, or Google+. Thanks for reading!

Gingerbread Thumbprints with Cherry Jam {Katie at the Kitchen Door}

Gingerbread Thumbprints with Cherry Jam

Cookie base adapted loosely from Bon Appetit and America’s Test Kitchen. Makes ~30 cookies.

  • 2 c. flour
  • 1 1/2 tsp baking soda
  • 1 1/2 tsp ground cinnamon
  • 1 1/2 tsp ground ginger
  • 1/2 tsp ground cloves
  • 1/4 tsp salt
  • 1 egg plus 1 egg yolk
  • 1/3 c. brown sugar
  • 1/2 c. dark molasses
  • 10 TBS butter, melted
  • 1/2 c turbinado sugar, for rolling
  • 1/2 c. cherry jam
  1. Preheat oven to 375°F. In a large bowl, whisk together flour, baking soda, cinnamon, ginger, cloves, and salt until evenly combined. In a separate bowl, whisk together egg, egg yolk, and brown sugar until smooth. Add the molasses and melted butter and whisk until smooth. Add the wet ingredients to the dry ingredients and stir together just until combined. Chill the dough for 20 minutes.
  2. Line a baking sheet with parchment paper. Pour the turbinado sugar onto a plate or small bowl. Break off ping pong ball sized pieces of the cookie dough and roll into balls. Roll the balls through the turbinado sugar and place on the baking sheet. Use your thumb or forefinger to make a deep imprint in the center of each cookie. Bake the cookies for 7-8 minutes. When you take them out, immediately reinforce the imprints (which will have risen slightly) by using the back of a teaspoon to press the circle back into them.
  3. Heat the cherry jam in a small saucepan over medium heat until it is simmering gently. Simmer for 1 minutes, then remove from heat and spoon 1 teaspoon of the hot jam into the center of each cookie. Let cookies cool completely.

3 December 10, 2014 Cookbook

Book Club: Mexico: The Cookbook // Slow-Cooked Pork in Tequila, and a Giveaway!

Mexico - The Cookbook

The Book: Mexico: The Cookbook is the latest in Phaidon’s line of beautiful, country-specific recipe compendiums. I reviewed Thailand: The Cookbook earlier this year, and was excited to see that a Peruvian book will be released in the spring. All of these books offer a very different experience than most of the cookbooks being released today. They’re short on prose – no recipe headnotes or historical sidebars – and while the pictures that are included are lovely, they’re not the focus of the books. What these books lack in personality, however, they make up for with sheer thoroughness – Mexico clocks in at over 600 recipes. That volume of recipes means that there will definitely be something new and different to try for everyone who picks up this book. Besides the comprehensiveness, the biggest draw of these books for me is the authenticity – each recipe is tied to a specific region of the country and uses very traditional ingredients and techniques. In the kitchen, that translates to authentic home-style dishes and a deeper understanding of how different cooking techniques can truly open up new flavors. I was a little frustrated with the quality of editing in this book. While I’m sure it’s a massive project to edit a book with 600+ recipes in it, I tried four different recipes for this post and all of them had issues with clarity of instruction and ingredients, to the point of listing ingredients that are never used, and, the opposite, calling for ingredients that aren’t listed. Confident cooks will be fine adapting as they go, but just a warning to those who get frustrated by a lack of clarity in recipes. Other than that, I’m excited to have added this book to my shelf, and I’m sure it will be one of my primary references for Mexican home-cooking.

Slow-Cooked Pork in Tequila with Rice, Beans, and Avocado Salsa {Katie at the Kitchen Door}

Casa Noble Tequila {Katie at the Kitchen Door}

The Food: The team behind Mexico: The Cookbook, has joined forces with the folks at Casa Noble tequila to promote a great cookbook and a great tequila in one shot (no pun intended). Casa Noble offers crystal, anejo, and reposado tequilas, in addition to single-barrel versions of their anejo and reposado. All the tequilas are produced using traditional methods, and aged in French white oak to create a complexity of flavor that elevates the drink above most lower-end brands. Since tequila is my drink of choice most any night, I was eager to try a new brand and do a little boozy cooking. Although tequila tasting is definitely not an art I’ve mastered, I did take a few little sips (not shots, I promise!) of the reposado without anything to distract from the tequila itself – it’s very smooth, and I picked up a certain fruitiness while Trevor got mostly vanilla. The tasting notes also mention chocolate, citrus, and butter, but I don’t think my tequila palate is advanced enough to pick up on those.

Casa Noble Tequila {Katie at the Kitchen Door}

There are about a dozen recipes in this book that call for tequila, including an amazing-sounding recipe for shrimp marinated in sangria and tequila then served in mole sauce, and a tequila-based drink I’d never heard of before, the lagartija. But the recipe that was calling my name the strongest last weekend was the Slow-Cooked Pork in Tequila. It’s a fairly simple recipe, calling for pork butt and ribs to be cooked slowly on the stove-top in a chili sauce, then finished up with a quick simmer in tequila. The book recommends serving it with “Pot Beans” and rice, so I made both those recipes as well. And even though it may not be traditional, I decided to make a Michoacan Avocado Salsa to serve with the pork and rice and beans, for a little punch of brightness and color. The combination of the four dishes? Phenomenal. I’m not exaggerating. It was everything I crave in good Mexican food – a little heat, a rich sauce, a certain heartiness, and brightness from the salsa. It tasted like something I could have eaten for dinner in a hole-in-the-wall family restaurant, cooked by a little old abuela. I was particularly enamored with the beans, which could not have been simpler but were incredibly creamy and flavorful. This meal left me so excited to keep cooking from this book – loving four out of four recipes is a pretty good hit rate.

Slow-Cooked Pork in Tequila with Rice, Beans, and Avocado Salsa {Katie at the Kitchen Door}

The Giveaway: Casa Noble and Phaidon have generously offered to give away an additional copy of Mexico: The Cookbook, to one Katie at the Kitchen Door reader. To enter the giveaway, please leave a comment below, telling me about your favorite cooking/eating experience involving either tequila or authentic Mexican cuisine (or both!). By entering the giveaway, you are agreeing to the official rules:

  • No purchase necessary
  • Void where prohibited
  • One entry per household, and only entries addressing the question above will be considered!
  • The sponsors of this giveaway are Phaidon and Casa Noble.
  • The estimated retail value of the book is $50
  • The odds of winning will depend on the number of entries received
  • This contest is only open to U.S. Citizens over the age of 18
  • The contest will open today, December 10th, 2014 at posting time, and will close at 11PM EST on Friday, December 19th, 2014
  • One winner will be selected randomly and contacted via email (so please leave an accurate email address!). If I do not hear from the winner within 48 hours, the winner forfeits their prize and an alternate winner will be chosen.
  • I will post the winner here by Friday, January 2nd, 2015

Recipe Shortlist: Duck in Green Pumpkin Seed Sauce; Short Ribs in Chili and Coffee Sauce; Lamb in Cider Sauce; Goat Stew; Green Chile Soup with Corn; Divorced Eggs; Tuna with Chipotle Crust; Plantain-Stuffed Chiles; Corn Cake with Eggnog Sauce; Mexican Bloody Mary; Caramel Gelatin with Drunken Sauce

Disclaimer: I received a copy of Mexico: The Cookbook, a bottle of tequila, and reimbursement for ingredients from Casa Noble and Phaidon. I was not otherwise compensated for this review and all opinions are honest and my own.

Like what you just read? Subscribe to Katie at the Kitchen Door on Feedly or Bloglovin‘, or follow along on Facebook, Twitter, Pinterest, Instagram, or Google+. Thanks for reading!

Slow-Cooked Pork in Tequila with Rice, Beans, and Avocado Salsa {Katie at the Kitchen Door}

Slow-Cooked Pork in Tequila

Recipe adapted from Mexico: The Cookbook. Serves 6.

Note: I’ve written the recipe as we’ve made it, which used significantly less chiles than the original, which called for 200g. I’ve also included some other notes and clarifications that aren’t in the original.

  • 50g mixed dried chiles (preferably a mix of cascabel, ancho, and jalapeno)
  • 3 TBS of canola oil, duck fat, or lard
  • 1 1/2 lb. pork butt, diced into 1 inch cubes
  • 1 1/2 lb. pork ribs, meat cut from bones and diced into 1 inch cubes
  • sea salt, to taste
  • 1/2 tsp cumin seeds
  • 1/2 tsp dried oregano
  • 3 cloves garlic, peeled
  • 1 large white onion, cut into chunks
  • 4 TBS tequila
  • white rice, to serve
  • prepared pinto beans, to serve
  • Michoacan Avocado Salsa, to serve (recipe below)
  1. Boil a pot of water and pour about 3 cups of boiling water over the chiles in a heatproof bowl. Let steep until chiles are soft and water is a deep red, about 15 minutes.
  2. Heat the oil or fat in a large saucepan. Add the pork butt and pork rib meat and cook over medium-high heat, stirring and turning frequently until evenly browned. Season with salt.
  3. Place the chiles, the chile soaking water, the cumin seeds, oregano, garlic, and onion into a blender and blend on high until smooth. Strain into a bowl, then add the sauce to the pork. Reduce heat to low, cover the pan, and cook, stirring occasionally, for 1 hour, or until the meat is tender and has absorbed most of the sauce. If the sauce begins to look dry at any point, add water.
  4. Add the tequila to the pan and continue to simmer, without the lid, for another 10 minutes. Remove from heat and serve with rice, beans, and avocado salsa.

Michoacan Avocado Salsa

Recipe adapted from Mexico: The Cookbook. Makes about 1 cup.

  • 3 tomatillos, papery husks and stems removed
  • 3 serrano chiles
  • 3 cloves garlic, peeled
  • 1 large avocado, peeled and pitted
  • 2 TBS finely chopped cilantro
  • sea salt, to taste
  1. Remove the seeds from 2 of the chiles and the stems from all 3. Put the tomatillos and chiles into a small saucepan and cover with water. Bring to a boil and boil for 5 minutes. Remove the pan from the heat and use a slotted spoon to transfer the tomatillos and the chiles to a food processor. Add the garlic to the food processor and process until combined. Add the avocado flesh to the food processor and process until smooth. Stir in the cilantro and season to taste with salt.

0 December 7, 2014 Fall

Monthly Fitness Goals: December // White Bean and Parsnip Soup with Guanciale and Fried Sage

Roasted Parsnip and White Bean Soup with Guanciale and Fried Sage {Katie at the Kitchen Door}

November’s fitness goal turned out to be such a fun one! Dance almost never fails to lift my mood and energize my body. I tried a new class, BollyX, a bit like Zumba or Cardio Dance in that it’s a hybrid between actual dance and an aerobics class. It’s got great upbeat Bollywood music and was packed with other young women. The nature of Bollywood dance – big movements, lots of jumping – made it easy to follow along and dance big without feeling self-conscious. I also stuck with ballet, although I’m going to a new class early Sunday mornings and it is so hard to do ballet first thing in the morning. My range of motion is about half what it is at the end of the day. In the interest of total honesty, I have to admit that I didn’t quite make it to 6 classes during November. But I did go this week and trying something totally new was a big win for me, so I’m giving myself a slight pass.

Roasted Parsnip and White Bean Soup with Guanciale and Fried Sage {Katie at the Kitchen Door}

I’m going to make December’s goal about something that I’ve been explicitly avoiding all year: weight. In part, I’ve avoided making a weight-focused goal because I truly believe that these goals are about health and fitness, not a number on a scale. And I stand by that. But there’s also a part of me that’s a little bit afraid of that number, because I know that whatever I may tell myself, it’s a pretty good representation of the progress I’ve made. Of course, I could lose a ton of weight and be extremely unhealthy, both physically and mentally, or I could gain a ton of weight and attribute it all to muscle mass. But, at least for my body and personality, neither of those scenarios is very realistic. Although it kind of scares me to write numbers down here, I’m going to. I started the year at a weight of 145 pounds, which is easily an all time high for me. It’s hard to admit, but it’s a weight that’s decidedly too high for my 5’3″ frame, and looking back at pictures from last January does not make me feel good. Over the year I’ve slowly worked my way down to a weight that’s closer to a healthy weight for my build, hitting 132 at my lowest. Now I’m hovering around 136, a weight that’s healthy but a bit too close to backsliding for my taste. I’d like to start 2015 feeling really good about my health and fitness, so I’m aiming for the 130-133 range. If I can accomplish that during the biggest eating month of the year, I’ll be very proud.

Roasted Parsnip and White Bean Soup with Guanciale and Fried Sage {Katie at the Kitchen Door}

In a way, this goal represents all the things I’ve learned about what does and doesn’t work for me over the course of this year. Some rules I’m living by to make this happen:

  • No alcohol on Mondays, Tuesdays, or Wednesdays. This should be easy, but I’ve definitely slipped into a habit where a glass of wine after work is the norm, not the exception, and I don’t want that habit to go too far. In a season when holiday parties, happy hours, and hot toddies seem to be around every corner, it’s easier to have a simple rule – so I don’t end the week wondering why I’m completely dragging and then realize that I had a drink every night.
  • No sweets for breakfast. Starting the day out with something savory and protein-rich may take a little extra effort, but so much of the “easy” breakfast food is packed with sugar. I’m curious to see how much of an impact this has on my energy levels (and how long I can stick with it!)
  • Target 5 workouts a week. 4 workouts a week seems to be my magic number for maintaining my weight, 3 is a little too light, and 5 is the max that’s doable if I want to maintain the sanity of my schedule. I want to make the most of the dry streets and relative warmth before we slip into three months of ice and cold (e.g. no running).
  • Remember vegetables! When they’re not staring me in the face from the excess of our garden, it’s easy to forget about them. I’m trying to sneak as much spinach and broccoli into my diet as I can this month.

Roasted Parsnip and White Bean Soup with Guanciale and Fried Sage {Katie at the Kitchen Door}

I’m not planning on continuing these monthly goal posts in 2015. While they’ve been a helpful tool for me to hold myself accountable, I’ve actually been thinking about how to make my life less list and goal oriented and more relaxed next year. For the most part, I’ve accomplished what I set out to do – get myself back in shape (from a point of absolute zero), and make regular exercise and conscious eating a natural part of my routine. But, that doesn’t mean I’m going to stop sharing healthy recipes and thoughts on health here! This month’s recipe is a Roasted Parsnip and White Bean soup, topped with Guanciale and Fried Sage (arguably counteracting the health benefits of a vegetable-based soup, but oh well). It’s a recipe I came up with while walking home from work one day, playing around with different ideas for our parsnip harvest. The sweetness of the roasted parsnips is complemented beautifully by the creaminess of the white beans and the salty, fattiness of the guanciale topping. It’s a thick soup, almost more of a puree, but a swirl of cream added at the end lightens it and gives it a luxurious mouthfeel. This recipe used up the last of our parsnips, otherwise I’d be making more of this ASAP and freezing it for later.

Past Fitness Challenges

January: 10 Visits to the YMCA; Recipe: Gluten-Free Olive-and-Feta Corn Muffins
February: One vegan meal every day; Recipe: Pakistani Chickpea Pulao with Sweet-Hot Date-Onion Chutney
March: Run 40  miles in 20 days; Recipe: Chocolate-Dipped Almond Butter Cookie Bites
April: Walk 8,000 steps a day; Recipe: Herb-Flecked Spring Couscous
May: 180 minutes of Nike Training Club; Recipe: Warm Arugula Salad with Maple Mustard Dressing
June: Fresh fruit/veggies at every meal; Recipe: Chickpea Crepes with Grilled Curried Chicken and Mango Salsa
July: 8 different types of exercise; Recipe: Homemade Spinach Wraps with Chopped Greek Salad Filling
August: Relax; Recipe: Green Tea and Zucchini Noodles with Honey Ginger Sauce
September: Average mile pace below 8’10″; Recipe: Potato, Poblano, and Chard Enchiladas with Salsa Verde

Like what you just read? Subscribe to Katie at the Kitchen Door on Feedly or Bloglovin‘, or follow along on Facebook, Twitter, Pinterest, Instagram, or Google+. Thanks for reading!

Roasted Parsnip and White Bean Soup with Guanciale and Fried Sage {Katie at the Kitchen Door}

Roasted Parsnip and White Bean Soup with Guanciale and Fried Sage

A Katie at the Kitchen Door original recipe. Serves 4.

  • 6 medium parsnips, peeled and cut into 1 inch chunks
  • 3 TBS olive oil, divided
  • coarse sea salt and freshly ground black pepper, to taste
  • 2 oz. guanciale, cut into 1/4 inch cubes (about 1/3 cup)
  • 1 onion, peeled and thinly sliced
  • 4 cloves garlic, peeled and minced
  • 12 leaves sage, divided
  • 1 large yukon gold potato, cut into 1 inch cubes
  • 4 c. chicken or vegetable stock
  • 1 can (15 oz.) cannellini beans, drained and rinsed
  • 2 TBS salted butter
  • 1/2 c. heavy cream (optional)
  1. Preheat oven to 375°F. Toss parsnips with 2 TBS of the olive oil, then spread out on a roasting pan. Sprinkle with sea salt and black pepper. Roast parsnips until tender, about 30 minutes, flipping halfway through. Remove from the oven and set aside.
  2. In a large non-stick saucepan, heat the remaining 1 TBS olive oil over medium heat. Add the guanciale and cook, stirring frequently, until browned on all sides, about 5-7 minutes. Use a slotted spoon to remove the cooked guanciale and set aside. Chop 4 of the 12 sage leaves finely. Add the onion, garlic, and chopped sage to the saucepan and saute, stirring frequently, until translucent, about 5 minutes. Add the potatoes and cook 2 minutes longer, then add the roasted parsnips and the stock.
  3. Bring soup to a simmer and cook until potatoes are tender, about 15 minutes. Add the rinsed cannellini beans, and cook until heated through, another 5 minutes. Transfer the soup to a blender and blend on high until very smooth. Return to the pot and keep warm over low heat. Season to taste with salt and pepper.
  4. Before serving, melt 2 TBS butter in a frying pan over medium-high heat. Once fully melted and bubbling, add remaining 8 sage leaves to melted butter and cook until crisp, about 30 seconds. Remove to a paper-towel lined plate and sprinkle with coarse sea salt.
  5. Ladle the soup into bowls and top with the cooked guanciale cubes and the fried sage leaves. If desired, drizzle 2 TBS of heavy cream on top of each bowl. Serve with toasted sourdough bread.

0 December 4, 2014 Dessert

Stacy’s Salted Caramel Pita Chips with Cinnamon-Apple and Whipped Greek Yogurt Dip

Cinnamon-Apple and Whipped Greek Yogurt Dip with #StacysSaltedCaramel Pita Chips #sponsored {Katie at the Kitchen Door} @stacyssnacks

Cinnamon-Apple and Whipped Greek Yogurt Dip with #StacysSaltedCaramel Pita Chips #sponsored {Katie at the Kitchen Door} @stacyssnacks

Although I’d be hard-pressed to argue with you if you told me that the combination of pita chips and a really good hummus couldn’t be beat, some situations just call for something a little sweeter. Stacy’s, long known for making tasty, extra crunchy pita chips, has released a limited edition flavor that meets just this need: Stacy’s Salted Caramel Pita Chips. When the team at Stacy’s challenged me to come up with a dip that would pair well with their latest flavor, I readily agreed. I’ve been a fan of Stacy’s pita chips since I was a kid – they make a great snack, and are one of the best vehicles for scooping up hummus, muhamarra, and other Middle Eastern dips.

Cinnamon-Apple and Whipped Greek Yogurt Dip with #StacysSaltedCaramel Pita Chips #sponsored {Katie at the Kitchen Door} @stacyssnacks

I knew I wanted to put together a dessert dip, but I really didn’t want it to be cloyingly sweet or overly rich. I initially intended to use whipped mascarpone as the base, but at the last minute decided that a whipped Greek yogurt would add some much needed tang, as well as reduce the caloric implications of indulging in this dip. I think it was the right choice – the dip is light and airy, with a hint of sourness from the yogurt balanced by the sweetness of the apple mixture. It definitely has an apple pie flavor – the slightly salty, buttery chips serving as the crispy crust, the apple mixture a similar consistency and flavor to pie, and the sweet whipped yogurt like a very generous portion of whipped cream (or melted ice cream, if that’s more your style). If you’re looking for an appetizer or dessert to add to your holiday party menus this year, consider whipping up some of this. Check out Stacy’s Pinterest board for more fun dip ideas, too.

Disclaimer: This post is sponsored by Stacy’s Pita Chips. All opinions are honest and my own.

Like what you just read? Subscribe to Katie at the Kitchen Door on Feedly or Bloglovin‘, or follow along on Facebook, Twitter, Pinterest, Instagram, or Google+. Thanks for reading!

Cinnamon-Apple and Whipped Greek Yogurt Dip with #StacysSaltedCaramel Pita Chips #sponsored {Katie at the Kitchen Door} @stacyssnacks

Cinnamon-Apple and Whipped Greek Yogurt Dip

A Katie at the Kitchen Door original recipe. Makes about 1 1/2 cups.

  • 1 large Macintosh apple, peeled
  • 1 TBS salted butter
  • 2 TBS brown sugar
  • 1/2 tsp cinnamon
  • 1/8 tsp allspice
  • 1/4 c. apple cider
  • 1/8 tsp sea salt
  • 1/3 c. heavy cream
  • One 6 oz. container of Greek yogurt, vanilla or maple flavored
  • 3 TBS powdered sugar
  • Stacy’s Salted Caramel Pita Chips, for serving
  1. Core the apple and slice into pieces about 1/4 inch thick, then dice slices into small cubes. Add the butter to a wide frying pan and melt over medium heat. Add the brown sugar, cinnamon and allspice and stir until sugar is melted and spices are evenly mixed in. Add the diced apples, then add the apple cider. Cook until apples are tender but not mushy and cider is mostly evaporated, about 4 minutes. Stir in salt. Remove from heat and set aside.
  2. Beat the heavy cream on high with a stand mixer or hand-held mixer until the cream has formed soft peaks. Add the yogurt and beat until incorporated. Sift the powdered sugar through a fine mesh strainer into the yogurt mixture, and beat until the mixture has a light consistency and the sugar is completely incorporated. Note that the final consistency will not be as light as whipped cream is on its own, but it should be significantly airier than yogurt.
  3. Place the whipped yogurt into a bowl, and top with a swirl of the apple mixture. Alternatively, mix the two together to thoroughly combine. Serve the dip with Stacy’s Salted Caramel Pita Chips or other sweet dipper.

3 December 3, 2014 Cookbook

Book Club: Heritage // Rabbit Stew with Black Pepper Dumplings

Heritage Cookbook

The Book: As I’ve told you in the past, I’m a sucker for good Southern food. Although I’m a New England girl through and through in most other aspects, the four years I spent in North Carolina were very formative for me in terms of learning to truly appreciate good food. Because of this, new Southern cookbooks get pride of place on my cookbook radar, and Heritage, the new cookbook from Sean Brock, was no exception. Hailing from “the part of Western Virginia that should have been Kentucky,” but receiving his culinary education in South Carolina, Brock makes food that has Southern roots both deep and wide. There’s a strong sense of purpose in the pages of Heritage – to embrace local food not only for its ethics and flavor, but for its history and story. I love how much narrative Brock has included in this book; it really helps me feel engrossed in the food’s history and culture. A strong emphasis on understanding your ingredients, where they came from, and how they can vary – for example, chicken is not just chicken, but poussin, broiler, fryer, roaster, or stew hen, depending on its age, and a different preparation is appropriate for each bird – completes the local, ethical, Southern vibe. The recipes skew more toward restaurant food than home-cooking, with multiple components and appliances required for many (the carefully composed plating of the photographed dishes will tip you off to this right off the bat). This isn’t a negative for an adventurous cook, but I do wish there were a few more homestyle dishes that would be easy to make and serve on a casual weeknight. Organized by source of food – the garden, the mill, the creek, the pasture- there is a great variety of recipe type, with a whole chapter dedicated to preserving (The Larder) and another one to cocktails and bar snacks (The Public House). Between the extensive narrative and the diverse recipes, most readers will find plenty to hold their interest in Heritage.

Rabbit Stew with Black Pepper Dumplings {Katie at the Kitchen Door}

Rabbit Stew with Black Pepper Dumplings {Katie at the Kitchen Door}

The Food: Trevor and I are big fans of cooking with rabbit, but we’ve had trouble finding recipes that really allow it to shine. This Russian Rabbit and Mushroom Pie is our favorite, but we were less impressed with the Rabbit Cacciatore from Pickles, Pigs & Whiskey. Sean includes a couple of rabbit recipes in Heritage, so we decided to give the Rabbit Stew with Black Pepper Dumplings a go. It’s similar to a rabbit stew we enjoyed at Alden & Harlow a few weeks back, and also one of the more straightforward recipes in the book. The stew is made by making a broth from the rabbit, then removing and shredding the rabbit meat, while thickening the broth with a roux. The dumplings (which are really biscuits) are formed and baked separately, then tossed in the stew for the last few minutes of cooking, which gives you more control over their size, shape and level of doneness. I have mixed feelings about the end result – the stew was certainly tasty, and even more so as leftovers the next day, but I’m not sure it was tasty enough to warrant the use of a rabbit in place of a less pricey chicken. This could have something to do with the quality of our rabbit, of course – there’s not a ton of choice for rabbit meat near us. I think it’s a recipe that I’d like to try again with some of my own tweaks, but a good starting point.

Recipe Shortlist: Low Country Hoppin’ John; Corn Goat Cheese Soup with Shrimp and Brown-Butter Chanterelles; Green Garlic Bisque with Herbed Buttermilk and Fried Green Tomato Croutons; Cracklin’ Cornbread; Charred Beef Short Ribs with Glazed Carrots and Black Truffle Puree; Rabbit Andouille with Braised Peppers and Lady Pea Gravy; Rhubarb Buckle with Poppy-Seed Buttermilk Ice Cream

Like what you just read? Subscribe to Katie at the Kitchen Door on Feedly or Bloglovin‘, or follow along on Facebook, Twitter, Pinterest, Instagram, or Google+. Thanks for reading!

Disclaimer: I received a review copy of Heritage free of charge from Artisan, but I was not otherwise compensated and all thought and opinions are my own.

Rabbit Stew with Black Pepper Dumplings {Katie at the Kitchen Door}

Rabbit Stew with Black Pepper Dumplings

Recipe adapted slightly from Heritage. Serves 6.

For the dumplings:

  • 1 lb. (3 1/3 c.) pastry flour, sifted and chilled in freezer
  • 1 1/2 tsp baking powder
  • 1/2 tsp kosher salt
  • 1 TBS freshly ground black pepper
  • 8 TBS unsalted butter, frozen
  • 1 1/2 c. ice cold whole-milk buttermilk

For the stew:

  • 1 large rabbit (2-3 pounds)
  • 4 c. small dice white onions
  • 2 c. medium dice celery
  • 2 c. medium dice carrots
  • 2 thyme sprigs
  • 1 bay leaf
  • 2 TBS unsalted butter
  • 1/4 c. flour
  • 1 TBS soy sauce
  • 1 TBS hot sauce
  • sea salt and freshly ground black pepper
  1. To make the dumplings: Preheat the oven to 375°F. Lightly butter a baking sheet. In a large bowl, combine the chilled flour, baking powder, salt, and black pepper. Whisk to combine. Grate the frozen butter over the medium holes of a box grater, and immediately place the cold grated butter into the flour mixture. Use the tips of your fingers to toss the butter with the flour and incorporate just until the texture resembles coarse sand (a few bigger “pebbles” are fine). Turn the dough out onto a lightly floured work surface and knead until smooth, about 2 minutes. Roll the dough out into a circle about 1/2 inch thick, and use a very small pastry cutter to cut small round dumplings (about 1/2 inch to 1 inch in diameter – we used the bottom of an espresso cup as a cutter). Place the dumplings on the baking sheet and bake just until they start to dry, about 9-10 minutes. You don’t want the dumplings to brown at all, as they should finish baking in the stew. Set the dumplings aside at room temperature.
  2. To prepare the stew: Remove the giblets from the rabbit. Place the rabbit in a large pot and cover with cold water. Bring to a simmer over high heat, skimming any scum from the top of the pot. Once simmering vigorously, add half of the onions, half of the celery, half of the carrots, the thyme, and the bay leaf. Reduce the heat to low, cover the pot, and simmer until broth is golden and rabbit meat pulls away easily from bone, about 1 hour to 90 minutes.
  3. Remove the rabbit from the pot and let cool slightly. Strain the broth through a fine mesh strainer into a large bowl, discarding the solids left behind. Rinse the pot and return to the stove. Add the butter and melt over medium heat, then add the other half of the onions. Saute, stirring, until translucent, about 4 minutes. Add the celery and saute another 2 minutes, then add the carrots and saute until tender, another 8 minutes. Add the flour to the pot and stir so it absorbs the fat. Continue to stir the roux constantly until the flour coating the vegetables is no longer white but a light golden color, about 5-10 minutes. Stir in the reserved broth 1 cup at a time, allowing to thicken slightly between additions. Once all the broth is added, bring to a simmer and simmer for 25-30 minutes.
  4. While the broth is simmering, remove the rabbit meat from the rabbit and shred into bite-sized pieces, discarding the bones, skin, and tendons. 5 minutes before serving, add the shredded rabbit, hot sauce, soy sauce, and dumplings to the stew and simmer until the dumplings are soft and the rabbit is warmed through, about 5 minutes. Serve immediately.

5 November 30, 2014 Dessert

A Holiday Party on a Budget with Albertsons

Holiday Party on a Budget - Recipes and Tips {Katie at the Kitchen Door}

Chocolate Cherry Crepe Cake {Katie at the Kitchen Door}

With Thanksgiving so late in the month and the early onset of wintry weather in much of the US, it feels like we’re hurtling into the Christmas season even faster than we usually do. December begins tomorrow and with it a flurry of excitement – holiday parties, decorating, baking, shopping, spending time with family and friends, and otherwise celebrating the season. While it may seem overwhelming to stick to a budget at this time of year, it’s not impossible, and even entertaining can be done in a way that’s frugal without feeling cheap. When Albertsons tasked me with coming up with a few recipes for throwing a holiday party on a budget, I was up for the challenge. Although my days of scrimping on every purchase (read: college) are getting further behind me, I still tend to entertain with a close eye on my wallet. But that doesn’t mean that the parties I throw can’t still be fun and elegant! When planning a party, I tend to rely on a few tips for keeping both my stress levels and my total expenses low:

  • Choose recipes that can serve a crowd. Much of the cost for shopping for a recipe is in the ingredients that you only need a small amount of. If you’re doubling or tripling a recipe to serve a large group, you’re less likely to waste money in the form of lots of little bits and bobs that will be difficult to use up later. Besides, it’s much easier for you as the host to set out a large casserole or serving platter than to concern yourself with lots of small plated dishes!
  • Look for ways to extend fancy ingredients. You don’t need to completely avoid luxurious ingredients to stick to a budget, just look for recipes that extend the main ingredient. Dying to serve steak? Slice it thin and serve steak sandwiches with blue cheese and caramelized onions. Want to serve candied nuts but worried about how many you’ll need for a large group? Toss them with homemade popcorn and there’s more for everyone (see below!).
  • Cook from scratch. Wherever possible, make recipes from scratch to save money and keep things healthy. An example: making your own pizza dough is easy and requires only a little flour and water – much cheaper than buying one pre-made. Of course, there’s a trade-off here for how much of your time you’re willing to spend doing prep work, so don’t try to do everything by yourself.

With these tips in mind, I came up with the following four recipes. The ingredients would be easy to find at your local Albertsons or Shaws, and for a party of 8 should come in well under $100.

Pomegranate-Mint Ice Cubes {Katie at the Kitchen Door}

Pomegranate Mojito Punch {Katie at the Kitchen Door}

Pomegranate Mojito Punch: Punch is one of my favorite things to serve at a party, especially during the holidays. It’s the easiest way to serve a crowd a festive cocktail, and allows guests to serve themselves quickly and easily throughout the night. Adding a pomegranate and mint leaf studded ice ring to the punch bowl ups the elegance factor, with the added benefit of keeping the punch cool for longer than single ice cubes. Plus, if there will be kids at your party, they’ll love the non-alcoholic version of this, and you only have to make one recipe to please all ages!

Popcorn with Rosemary Butter and Honey-Chipotle Almonds {Katie at the Kitchen Door}

Popcorn with Rosemary Butter and Honey-Chipotle Almonds: Candied or spiced nuts are always a hit at holiday parties, but they can be hard hitting on both your waistline and your wallet if you rely on them as an appetizer. Extend them by mixing with freshly popped popcorn, seasoned with fresh rosemary butter. Individual newspaper cones make for a cute presentation, and also allow your guests to help themselves, wandering around with their own personal appetizer without worrying about making a mess or finding a place to put their plate when they’re done. The almonds themselves are glazed with a honey and chipotle sauce – just slightly sweet with a deep savoriness from the chipotle powder, they are completely addictive.

Blue Cheese, Fig Jam, and Ham Stromboli {Katie at the Kitchen Door}

Blue Cheese, Ham, and Fig Jam Stromboli: Similar to a calzone, a stromboli is like the jelly-roll of pizza. It feels slightly fancier than just serving a pizza, but is just as economical when you need to serve a crowd. It also allows easy and mess-free serving, and can be customized to use whatever fillings you have on hand. This one combines fig jam, blue cheese, and ham for a sophisticated and rich flavor combination.

Chocolate Cherry Crepe Cake {Katie at the Kitchen Door}

Chocolate-Cherry Crepe Cake: Crepe cakes are similar in concept to a layer cake, except the layers are made from crepes instead of cake – good for those who are intimidated by baking cake from scratch. Assembling this neatly takes a bit of patience, but overall I find it easier than baking and decorating a layer cake. Plus, you get a much better ratio of whipped cream to “cake” then you do with a traditional cake. This crepe cake uses chocolate crepes, espresso whipped cream, and cherry jam.

More like this…

Homemade Eggnog

Homemade Eggnog

Rum-and-Pomegranate Glazed Duck

Rum-and-Pomegranate Glazed Duck

Peppermint Mocha Ice Cream Sundae

Peppermint Mocha Ice Cream Sundae


Like what you just read? Subscribe to Katie at the Kitchen Door on Feedly or Bloglovin‘, or follow along on Facebook, Twitter, Pinterest, Instagram, or Google+. Thanks for reading!

Disclaimer: This post is sponsored by Albertsons. All opinions are honest and my own.

Pomegranate Mojito Punch {Katie at the Kitchen Door}

Pomegranate Mojito Punch

Serves 8-10. A Katie at the Kitchen Door original recipe.

  • 1 pomegranate
  • 1 bunch mint, divided
  • Ice cubes
  • 1 c. sugar
  • 2 ½ c. pomegranate juice
  • ½ c. lime juice, preferably freshly squeezed (from 4-5 limes)
  • 2 c. white rum (optional)
  • 2 c. lime seltzer, chilled
  1. To make the ice ring: remove the arils from the pomegranate. One way to do this is to cut the pomegranate in quarters and peel away as much of the white skin as possible, then gently rub the seeds to release. Place the pomegranate arils in the bottom of a bundt pan. Place 10-12 fresh mint leaves on top of the pomegranate, then cover with a handful of ice cubes (the ice cubes will keep the pomegranate from floating when you add water). Cover the pomegranate arils with water – you should have water about 1 inch deep in the bundt pan. Place in the freezer and freeze until solid, at least 6 hours.
  2. Roughly chop the remaining mint leaves. Add to a small saucepan along with the sugar and 1 cup of water. Bring to a simmer over medium heat, and simmer for 5 minutes. Remove from the heat and let sit for 10 minutes, allowing the mint leaves to further flavor the syrup. Strain the syrup through a fine-mesh strainer into a bowl and set aside, discarding the mint leaves.
  3. Pour the mint syrup, pomegranate juice, lime juice, and rum, if using, into a large bowl. Stir, then cover and chill until very cold, at least 1 hour. Just before serving, take the punch out of the fridge and add the seltzer. Remove the ice ring from the freezer and briefly run the outside under hot water to loosen the ring from the pan, then invert the ice ring to remove from the pan and carefully add to the punch bowl. Serve immediately.

Popcorn with Rosemary Butter and Honey-Chipotle Almonds {Katie at the Kitchen Door}

Popcorn with Rosemary Butter and Honey-Chipotle Almonds

Serves 8 as an appetizer. A Katie at the Kitchen Door original recipe.

  • 3 TBS canola oil
  • ½ c. unpopped plain popcorn
  • 4 TBS salted butter, divided
  • 2 sprigs fresh rosemary, leaves removed and finely chopped (about 1 ½ tsp chopped)
  • 1 ¼ tsp coarse sea salt, divided
  • 2 TBS honey
  • ¼ tsp chipotle powder
  • 1 c. whole unblanched almonds
  1. Place the canola oil in a large, heavy-bottomed stockpot with a lid. Heat over medium heat until shimmering, then pour the popcorn kernels on the bottom of the pot in an even layer. Cover with the lid and place over heat until you start to hear the kernels pop. Wearing oven mitts, shake the pot gently from side to side over the heat as the popcorn pops (to prevent kernels from sticking to the bottom and burning). Do this until the pops slow to 1 or 2 per second, then remove from the heat, and shake for another 30 seconds. Once the pops have completely subsided, remove the lid and give the popcorn a few stirs, then cover and set aside.
  2. Preheat the oven to 300° In a small saucepan, place 3 TBS of the butter and the chopped rosemary. Melt over low heat, then pour over the popcorn and stir. Sprinkle 1 tsp of the sea salt over the popcorn and stir.
  3. Place the remaining 1 TBS of butter, ¼ tsp of salt, the honey, and the chipotle powder in the small saucepan. Melt over medium heat, then add the almonds and stir to coat. Cook until the honey sauce has thickened and is bubbling, about 3-4 minutes, then spread the almonds out on a parchment paper lined baking sheet. Bake for 12 minutes, then remove from heat and let cool. Use a fork to break apart any clusters, then stir into the popcorn. Serve the popcorn in individual paper cones for guests to pick up and carry around with themselves.

Blue Cheese, Fig Jam, and Ham Stromboli {Katie at the Kitchen Door}

Blue Cheese, Ham, and Fig Jam Stromboli

Serves 8-10. A Katie at the Kitchen Door original recipe.

  • 1 large pizza dough, room temperature (store bought or homemade)
  • ½ c. of fig jam
  • 2 TBS balsamic vinegar
  • ½ lb. ham, thinly sliced
  • 2 c. shredded mozzarella
  • ¾ c. crumbled blue cheese (about 3 oz.)
  • 2 c. baby spinach
  • 1 egg
  1. Preheat the oven to 400°F. Combine the fig jam and balsamic vinegar in a medium bowl. Whisk until smooth.
  2. Roll the pizza dough out into a large rectangle, about 14 inches wide by 20 inches long. Carefully lift the dough and transfer to a large square of parchment paper placed on a rimmed baking sheet (dough will hang over the edges before you stuff it). Spread the jam in a thin layer over the middle of the dough, leaving 1-2 inches of space from all four edges. Place the ham slices over the jam in an even layer. Sprinkle the mozzarella and the blue cheese evenly over the ham, then top with a layer of spinach.
  3. Prepare an egg wash by whisking the egg vigorously with 1 teaspoon of water. Set aside. Fold the short sides of the dough over by about 1 inch, just to cover the edge of the filling. Brush the top of the folded edge with egg wash. Fold one of the long edges over the filling to cover it by one third. Brush the remaining exposed edge with egg wash (to create a better seal when you fold it). Fold the other long edge so that it covers the previously folded portion, pinching along all edges to seal – you should have a long loaf with three layers inside, folded as you would fold a letter. Brush the entire top and sides with egg wash. Using a sharp knife, make a series of diagonal slits on the top to act as steam vents. Bake for 30-40 minutes, until the top is golden brown. Let rest 5 minutes before slicing and serving.

Chocolate Cherry Crepe Cake {Katie at the Kitchen Door}

Chocolate-Cherry Crepe Cake

Serves 8. A Katie at the Kitchen Door original recipe.

  • 4 large eggs
  • 1 c. whole milk
  • 1 TBS butter, plus extra for cooking the crepes
  • 1 oz. dark chocolate chips
  • ¾ c. flour, sifted
  • 3 TBS cocoa powder, sifted
  • ¼ tsp salt
  • 1 ½ c. heavy cream
  • 2 TBS sugar
  • 2 TBS freshly brewed espresso or 2 tsp espresso powder
  • 6 TBS cherry jam
  • 1 TBS kirsch, grand marnier, or other fruity liqueur
  1. Put the eggs and milk in a blender and blend on high until smooth, about 30 seconds. Melt the chocolate chips and the butter together, either in a small saucepan over low heat or in the microwave (heat on half power for 15 seconds at a time, stirring in between, to avoid scorching the chocolate). Turn the blender back on and carefully drizzle the melted chocolate mixture into the batter, just until incorporated. Turn off the blender. In a large bowl, whisk together the flour, cocoa powder, and salt. Add to the batter and blend until smooth, another 30-60 seconds. Refrigerate the batter for at least 1 hour.
  2. In a medium frying pan, heat a small pat of butter over medium heat. Once the butter has melted. Pour about ¼ cup of the crepe batter into the pan and swirl the pan so that the batter evenly fills the bottom of the pan. Cook until the visible side of the crepe begins to look tacky, about 60-90 seconds, then flip and cook the other side of the crepe for 30 seconds. Remove to a pan to cool. Repeat until you have used all the batter. Depending on the size of your pan, you should have 12-18 crepes. Chill the crepes until cool to the touch, about 30 minutes.
  3. Add the heavy cream to a large bowl and beat on high until soft peaks have formed. Add the sugar and espresso or espresso powder and beat until stiff peaks have formed, then chill the whipped cream until you are ready to assemble the cake.
  4. When you are ready to assemble the cake, place the cherry jam and the fruit liqueur in a small saucepan and bring to a gentle simmer (you are just trying to thin the jam to a consistency where it is easily spreadable). Remove from the heat. Place a small dollop of whipped cream on your serving platter or cake stand, then place a crepe on the whipped cream to stabilize the cake. Brush a small amount (about 2 teaspoons) of the cherry jam mixture on top of the crepe, then spread a thin layer of the espresso whipped cream evenly on top of the jam. Top with another crepe, pressing very gently. Repeat the process with another layer of jam and whipped cream. Do this until you have used all of your crepes. Chill the cake for at least 45 minutes before serving – this will make it much easier to cut into the layers neatly. Serve chilled.

1 November 26, 2014 Fall

Montreal Travelogue: Cabane A Sucre Au Pied de Cochon // Baked Sweet Potatoes with Maple-Meringue Topping

Montreal Travelogue: Cabane a Sucre au Pied de Cochon {Katie at the Kitchen Door}

Sugaring Season, Montreal {Katie at the Kitchen Door}

Last April, Trevor and I made the drive up to Montreal just to partake in the sugar shack dinner at Au Pied de Cochon, Martin Picard’s infamous and lively, pork-loving restaurant. We’d been waiting for over two years to go – reservations open December 1st at midnight, and over 2,000 people submitted requests in the first five minutes – and it 100% lived up to our (very high) expectations. I wanted to write about it right away, but by the time we were back and I’d processed what I wanted to say, we were well into May, and it just seemed like an inappropriate time to share maple-syrup laden pork and duck dishes. So I waited until now, when heavy winter dishes are once again on the menu (and now this post can serve as a more timely reminder to those of you who might want to snag a reservation!).

Montreal Travelogue: Cabane a Sucre au Pied de Cochon {Katie at the Kitchen Door}

Baked Sweet Potatoes with Maple Meringue Topping {Katie at the Kitchen Door}

As I flip through the pictures from that trip, I’m wishing now that I took better notes for you. I’m left mostly with a memory of warm yellow light filling a crowded cabin-style room, anticipation and excitement building with every course. A loud and convivial atmosphere of friends and strangers enjoying food that is completely over-the-top in more ways than one. A giant block of cheddar cheese being wheeled around the room on a trolley cart, the servers tossing steaming hot blood-and-ink fettucine in the hollowed out center to coat the noodles with  melted cheese. A cognac-doused duck-stuffed-duck being placed in front of Trevor and me, flaming, the whole duck just for the two of us. Sitting at the bar, watching the waitresses pour mug after mug of maple beer. Walking through the still-cold, still-muddy woods at twilight, enjoying the contrast between the still woods and the jolly feast inside. It was a wonderful experience: lively and joyful and a bit otherwordly, like something out of a book or a play. I’d go back in a heartbeat.

Flaming Cracklings at Montreal's Cabane a Sucre au Pied de Cochon {Katie at the Kitchen Door}

Maple Desserts at Montreal's Cabane a Sucre au Pied de Cochon {Katie at the Kitchen Door}

Sugaring Season, Montreal {Katie at the Kitchen Door}

I do have a good list of what we were served, course by course. First, the drinks: a hefty mug of maple beer for Trevor, and a series of just-sweet-enough maple daiquiris for me. The appetizer course had three meal-sized components: a huge piece of maple foie-gras served with duck fat toast; a “sushi cake,” made with layers of rice, salmon tartare, and wasabi avocado mash; and pork cracklings served with little pots of maple-soaked scrambled eggs and maple baked beans. Next up was sturgeon in mussel and bacon sauce, followed quickly by an omelet of sorts, baked into a skillet with potato, beef, tomato, and a parmesan bread crust. Then one of my favorites, a make-it-yourself sandwich with duck fat fried dough as the bread, mustard, and inch-thick slices of juicy ham unlike any ham I’d every had before. Perhaps the most impressive course was the afore-mentioned duck, fed on maple syrup then stuffed, drenched, doused with cognac, and flambeed. This was served with baked sweet potatoes topped with maple-meringue, a dish I’ve recreated for you here. The last savory course was the blood and ink fettucine with blood sausage and cheddar cheese, and then we moved on to the desserts. Served all together, the desserts were a banana cream pie with maple meringue, maple taffy on ice, a mocha maple cake, and a maple frozen yogurt with maple sugar and whiskey.

Flambeed Duck-Stuffed-Duck at Montreal's Cabane a Sucre au Pied de Cochon {Katie at the Kitchen Door}

Montreal Travelogue: Cabane a Sucre au Pied de Cochon {Katie at the Kitchen Door}

Baked Sweet Potatoes with Maple Meringue Topping {Katie at the Kitchen Door}

There was an absurd amount of food served, and all of it was incredibly rich and delicious – easily the most lavish meal I’ve ever been a part of. The standouts for me were the maple daiquiris, the ham sandwich, and the maple frozen yogurt, which had an incredible tang to it. We may try to recreate all of these dishes at home at some point, but the easiest, and the most appropriate for this month, were the simple but clever baked sweet potatoes with maple meringue topping. Although I know that realistically, anyone who is cooking Thanksgiving dinner tomorrow has had their menu set for weeks and is not looking for last minute additions to their very long to-do list, these baked sweet potatoes would theoretically be a great addition to a Thanksgiving menu. They are super easy – just bake the potatoes, whip the egg whites, and broil just before serving – and they capture the much-loved flavors of sweet potato casserole without as much added sugar or fat.


Whatever you’re serving tomorrow, I hope that all of you have a lovely, relaxing, and delicious Thanksgiving! Ours will be small and non-traditional this year – we’re having steak tips and stuffing and raspberry pie – but I’m looking forward to the long weekend, spending downtime with my family, and eating whatever turkey leftovers Trevor manages to salvage from his family’s dinner. Plus going to the movies at least twice. Have a great holiday!

Like what you just read? Subscribe to Katie at the Kitchen Door on Feedly or Bloglovin‘, or follow along on Facebook, Twitter, Pinterest, Instagram, or Google+. Thanks for reading!

Baked Sweet Potatoes with Maple Meringue Topping {Katie at the Kitchen Door}

Baked Sweet Potatoes with Maple-Meringue Topping

Inspired by dinner at Au Pied de Cochon. Serves 4.

  • 4 small sweet potatoes
  • 2 egg whites
  • pinch cream of tartar
  • 1/2 c. maple syrup
  1. Preheat the oven to 375°F. Wash the potatoes and poke all over with a fork. Place on a foil-lined baking sheet and bake until tender, about 40 minutes to 1 hour depending on the size of the potato. Flip the potatoes halfway through, at about 25 minutes.
  2. Remove the potatoes from the oven and let cool slightly. Cut a lengthwise slit into the tops of the potatoes, and scoop out a small amount of the potato flesh so that there is a shallow, circular hollow on top of each potato.
  3. To prepare the meringue, beat the egg whites and the cream of tartar on high until soft peaks form. Set whites aside. Place the maple syrup in a small saucepan, and heat over medium heat until just simmering and the temperature is 235°F. While beating the egg whites on high, slowly drizzle the hot maple syrup into the whites, until the meringue is shiny and holds stiff peaks. Spoon or pipe the meringue on top of the sweet potatoes. Broil on high until meringue is golden brown, about 3-5 minutes, or use a pastry torch to cook the meringue only. Serve immediately.

3 November 22, 2014 Drink

12 Festive Winter Cocktails

12 Festive Winter Cocktails - Cranberry-Ginger Sparkling Rum Cider #CaptainsTable #Thanksgiving {Katie at the Kitchen Door}

I’ve said it before: the best part of cold weather is warm drinks when you finally get inside. With or without booze (although personally I tend to choose with), they are comforting and festive and a great excuse for sitting around the fire with friends and family. Over the past two years I’ve built up a small repertoire of festive winter cocktails, many inspired by this lovely book, so as we gear up for the holidays and you all are looking for creative drinks to welcome your guests with, I’ve rounded my favorites up in one place. Cheers!

Hot and Mulled

12 Festive Winter Cocktails - Burnt-Sugar Hot Buttered Rum {Katie at the Kitchen Door}

Burnt Sugar Hot Buttered Rum

Hot buttered rum is an old-fashioned drink, but it’s just as delicious today as it was 200 years ago. This version uses a dark caramel as the base for the drink, giving it a deep, caramely sweetness.

12 Festive Winter Cocktails  - Meyer Lemon and Sage Hot Toddy #CaptainsTable {Katie at the Kitchen Door}

Meyer Lemon and Sage Hot Toddy

A mixture of honey, lemon, and rum or whiskey, hot toddies are great when you’re feeling under the weather – the honey and lemon soothes a sore throat while the warm alcohol helps put you to sleep (although if you’re actually sick and not just feeling low, I’d skip the booze and just stick with the honey and lemon). This version uses a sage-infused honey syrup and bright meyer lemons for a twist on the classic.

12 Festive Winter Cocktails  - Sbiten: Russian Mulled Rum with Honey and Jam {Katie at the Kitchen Door}

Sbiten

Sbiten is a Russian mulled cocktail that’s based on a mixture of jam, honey, and winter spices. Although I never actually had one of these while I was in Russia, the thick and sweet drink is just as appropriate during cold New England weather.

12 Festive Winter Cocktails  - Mulled Pear Sangria {Katie at the Kitchen Door}

Mulled Pear Sangria

Sangria doesn’t have to be saved for spring evenings and summer BBQs – if you serve it warm, it’s equally appropriate in winter. With a pear and cinnamon syrup and a hit of maple liqueur, this drink is full of fall flavors and a great use for white wine on days when a chilled glass of Chardonnay doesn’t sound that appealing.

12 Festive Winter Cocktails  - Ecuadorian Canelazo - Cinnamon Syrup, Citrus Juice, and Aguardiente, served warm {Katie at the Kitchen Door}

Ecuadorian Canelazo

Canelazo is a traditional Ecuadorian drink made from naranjilla, a sweet-sour fruit similar to citrus, aguardiente, a sugar-cane based liquor, and cinnamon syrup. It was one of my favorite culinary discoveries in Ecuador, so I came up with this version to have at home.

Warm and Creamy

12 Festive Winter Cocktails  - Frangelico-Spiked Nutella Melt with Espresso Whipped Cream {Katie at the Kitchen Door}

Nutella Melt

It’s hard to go wrong with nutella, and this nutella-laden and frangelico-spiked version of hot chocolate is no exception. Serve it without the frangelico for an equally appealing kids’ drink.

12 Festive Winter Cocktails  - Chocolate-Orange Tom & Jerry #CaptainsTable #ChristmasCocktails

Chocolate Orange Tom & Jerry

Another old-timey drink, a Tom & Jerry is similar to eggnog in that it’s made from whole eggs and cream, but it’s served warm. In the US it’s most popular in Wisconsin and Minnesota, but I promise this chocolate and orange version will go down well in the rest of the country (and world!), too.

12 Festive Winter Cocktails  - 1,001 Kentucky Nights - Dates, Coconut Milk, Bourbon, and Rum {Katie at the Kitchen Door}

1,001 Kentucky Nights

This drink is decidedly not a classic. Combining coconut milk, dates, cinnamon, bourbon, and rum, it’s a drink with its roots in the Middle East but a profoundly American accent. Sweet and rich but with smoky, woodsy flavors from the bourbon, it’s a great study in contrast.

12 Festive Winter Cocktails  - Salted Caramel Chai Lattte {Katie at the Kitchen Door}

Salted Caramel Chai Latte

This chai latte sweetened with salted caramel wasn’t designed as a cocktail, but turning it into an Irish coffee with a shot of Bailey’s or whiskey sounds like a pretty good idea to me.

Cold and Bubbly

12 Festive Winter Cocktails  - Cranberry-Ginger Sparkling Rum Cider #CaptainsTable #Thanksgiving {Katie at the Kitchen Door}

Cranberry-Ginger Sparkling Rum Cider

Cranberry-ginger syrup, sparkling cider, and dark rum make a pretty addition to any holiday table. As a side note, this drink and the accompanying sweet potato souffle recipe won Captain Morgan’s Thanksgiving challenge last year – it was judged by Hugh Acheson, so you have someone’s word other than mine to go by when I say these are delicious.

12 Festive Winter Cocktails  - Pomegranate Mimosas for Christmas Morning {Katie at the Kitchen Door}

Pomegranate Mimosas

These pomegranate mimosas are a standard part of my family’s Christmas brunch, which is slowly replacing opening presents as my favorite part of Christmas. Just looking at them reminds me of bright Christmas mornings spent eating cranberry and vanilla coffee cake and gruyere-baked eggs.

12 Festive Winter Cocktails  - Raspberry Sherbet Champagne Floats | Happy New Year! {Katie at the Kitchen Door}

Raspberry Sherbet Champagne Floats

Although these floats could arguably be served at any time of year, I think they’re just right for New Year’s Eve. Festive and pink, they’re a fun way to celebrate a special evening.

Like what you just read? Subscribe to Katie at the Kitchen Door on Feedly or Bloglovin‘, or follow along on Facebook, Twitter, Pinterest, Instagram, or Google+. Thanks for reading!

1 November 18, 2014 Cookbook

Book Club: A Kitchen in France // Mustard-Roasted Poussins

Review of A Kitchen in France

The Book: In some ways, blogger Mimi Thorisson’s life is incredibly frustrating to observe from afar – a country house in France, seven beautiful children, days spent foraging for mushrooms in the woods or shopping at open air markets and then cooking veritable feasts in a giant old kitchen. Add to that a chateau to be renovated as an inn and restaurant, a TV show, a lovely new cookbook, and you would think that more people would envy her to the point of hatred – but I think it must be impossible to hate Mimi, whose writing and stories clearly show that she is a smart, loving woman who has worked quite hard to be where she is. All this is a long-winded way of saying that when I opened her new book, A Kitchen in France, it was not with jealousy but with joy at her success and excitement at discovering more lovely little glimpses into her countryside life.

Mustard and Creme Fraiche Roast Chicken {Katie at the Kitchen Door} @kitchendoor

The book is very much an extension of the blog, with the same look and feel and type of food (although I do wish that more of Mimi’s thoughtful long-form prose would have made it into the book). All her recipes and stories have a bit of a fairytale aura about them: long treks through the woods, basket on her arm, searching for cepes and late nights around old wooden tables with winemakers discussing the day’s harvest. You will find some recipe repeats from her blog, but the newly included dishes are more than enough reason to pick up a copy. I would love to have Mimi cook for me one day – she cooks big, unapologetic meals that celebrate flavor and richness and decadence. They are not meals for a single person or a quick workday lunch eaten at your desk, they are meals that are meant to be shared with family, friends, and strangers, meals that are meant to be cooked slowly and lingered over at the table. Even her “summer” dishes have a wonderfully cozy, homey feel to them – dishes like duck breasts grilled over grape vines and the mustard-roasted poussins featured here. It makes me think that Médoc must be a little bit like Maine, where a warm and hearty dinner at the end of a long day spent outdoors feels appropriate no matter what the season. It’s a particularly good book to have on hand as we head into the holiday season, when the focus on eating and sharing good food is strongest. And I very much agree with Mimi’s representation of “good” food. Her recipes are refreshingly free of modern food and health classifications – no gluten-free, vegan, or low-fat designations to be found. And yet, every recipe feels wholesome and nourishing, simply because it is made from ingredients found just down the road, or in the woods, and cooked lovingly at home. Mimi’s food – and this book – is all about flavor, nourishment, and gathering around the table, as it should be.

Mustard and Creme Fraiche Roast Chicken {Katie at the Kitchen Door} @kitchendoor

Mustard and Creme Fraiche Roast Chicken {Katie at the Kitchen Door} @kitchendoor

The Food: Something about the luxurious presentation of Mimi’s food had me imagining that it would be fairly complicated to prepare. But as I flipped through the recipes trying to choose one for this post, I realized that most of the recipes are actually quite simple – I could cook many of them without even making a trip to the grocery store. This recipe for mustard-roasted poussins is no exception, as the only additions I made to my list were creme fraiche and the chicken itself.

I have a confession to make at this point: this was the first time I’ve ever roasted a chicken. I know. Five years as a food blogger, making things like rabbit pie and homemade parathas and venison ragu, but I’ve never done a simple roast chicken. We did roast a duck last year as part of the Captain Morgan challenge, but I think Trevor did most of the duck handling while I focused on the stuffing. To be honest, I still get a little squeamish working with big pieces of meat. I don’t know if it comes from my long past vegetarian childhood or just being out of my comfort zone. With a bit of guidance from Mimi, however, I turned out a succulent chicken, flavored with a generous amount of mustard and creme fraiche, a handful of baby potatoes tucked neatly underneath to catch the goodness of the drippings. Although it only took 15 minutes of effort to prepare, lifting the lid to reveal the chicken to Trevor was quite satisfying, in a very domestic way. The reward to effort ratio on this recipe is high, making it an easy decision to add it to our dinner rotation.

Mustard and Creme Fraiche Roast Chicken {Katie at the Kitchen Door} @kitchendoor

Recipe Shortlist: Fava Bean Soup with Pancetta and Croutons; Langoustines with Armagnac; Pistachio Sabayon with Strawberries and Meringues; Squab Pie with Foie Gras and Armagnac; Pork Cheek Ravioli with Cepes; Calvados and Creme Fraiche Apple Tart; Roquefort and Walnut Gougeres; Roasted Sausages with Red Wine and Fennel; Butternut Squash Gratin; Oxtail-Macaroni Gratin

Like what you just read? Subscribe to Katie at the Kitchen Door on Feedly or Bloglovin‘, or follow along on Facebook, Twitter, Pinterest, Instagram, or Google+. Thanks for reading!

Disclaimer: I received a review copy of A Kitchen in France from Clarkson Potter, but I was not otherwise compensated and all thought and opinions are my own.

Mustard and Creme Fraiche Roast Chicken {Katie at the Kitchen Door} @kitchendoor

Mustard Roasted Poussins

Recipe from A Kitchen in France. Serves 4.

Note: Poussins as small as 1 1/2 pounds can be tricky to find in the US. We used a young, Kosher chicken that was 3 pounds with great results. A 3-pound chicken provided a generous meal for 2 of us.

  • 1/2 cup Dijon mustard
  • 1/4 c. creme fraiche
  • 4 TBS unsalted butter, at room temperature
  • juice of 1/2 lemon
  • 2 garlic cloves, minced
  • 1/4 tsp ground nutmeg
  • Four 1 1/2 pound poussins or guinea hens
  • Fine sea salt and freshly ground black pepper
  • Olive oil for drizzling
  • 2 lbs. small new potatoes, scrubbed and halved
  1. In a medium bowl, combine the mustard, creme fraiche, butter, lemon, garlic, and nutmeg and mix until thoroughly combined. Wash the poussins (chickens) inside and out and pat dry. Rub the mustard mixture on the chickens inside and out, then season generously with salt and pepper. Place in a dish or bowl and let marinate for at least 2 hours or overnight.
  2. When you are ready to cook the chicken, preheat the oven to 350°F. Put the halved new potatoes in a saucepan, cover with cold water, season generously with salt, and bring to a boil over medium heat. Reduce the heat and simmer for 10 minutes, until potatoes are partially tender but still hold their shape firmly. Drain the potatoes.
  3. Put the poussins in individual baking dishes or one large roasting pan. Scatter the potatoes around the poussins, then drizzle everything with olive oil. Roast until the poussins are golden and cooked through (the juices should run clear, not pink, when pricked with a knife, and the internal temperature of the thickest part of the thigh and breast should be greater than 165°F). If the birds are getting too dark, cover with foil.
  4. Serve 1 poussin per chicken with a side of potatoes.

45 November 15, 2014 Drink

Ecuadorian Canelazo

Ecuadorian Canelazo - Cinnamon Syrup, Citrus Juice, and Aguardiente, served warm {Katie at the Kitchen Door}

Ecuadorian Canelazo - Cinnamon Syrup, Citrus Juice, and Aguardiente, served warm {Katie at the Kitchen Door}

Here in Boston, we’ve reached that point in the year where the warm, crisp fall days have given way to truly frosty, windy mornings when even the brightest sun can’t entice you to stay outside. I’m sure we still have a few nice days left, but we’ve already had snow flurries twice, the winter coats are out on our coat rack, and I’m guessing that this is the last week for those leaves still clinging to the trees. I’m not exactly thrilled at the prospect of hunkering down for the next four months, but one thing I do love about cold weather is the chance to invent and enjoy warm cocktails. On a cold day, there’s little that I find more enticing than the thought of a steaming mug of sweet, boozy cider or a honey-sweetened hot toddy.

Ecuadorian Canelazo - Cinnamon Syrup, Citrus Juice, and Aguardiente, served warm {Katie at the Kitchen Door}

Ecuadorian Canelazo - Cinnamon Syrup, Citrus Juice, and Aguardiente, served warm {Katie at the Kitchen Door}

I think my love for warm drinks (at least for the alcoholic sort) must have been born during the four months I lived in Prague – I have a very vivid memory of sipping from a glass of piping hot mead at the top of a snow-covered mountain, the steam from the hot drinks and food condensing on the windows of the small wooden cabin. It was a completely blissful experience, at least in my memory. Since then, I’ve been collecting drink recipes from all the cold countries I’ve been to, and I’ve been waiting to share a new one with you since our trip to Ecuador in March. I was first served canelazo, a mixture of cinnamon, naranjilla juice, and aguardiente, when we arrived at our hacienda near Cotopaxi. The altitude in Cotopaxi means that it’s appropriate to serve hot drinks at pretty much any time of day/year. I loved the sweet-and-sour mixture (and perhaps the quick effect it had at altitude), and finished not only my own glass but the extra one on the tray. When I returned to Quito later in the year for work, a co-worker took us up to El Panecillo, a hilltop with a giant statue of a winged angel and a beautiful view of the city. At several of the stands near the statue, they were selling cups of canelazo, and at a price of $0.50, I couldn’t resist ordering one before dinner.

Ecuadorian Canelazo - Cinnamon Syrup, Citrus Juice, and Aguardiente, served warm {Katie at the Kitchen Door}

The ingredients for canelazo are a bit tricky to find in New England. Naranjilla, which I mistakenly described as a clementine in my first mention of it, and as a sour orange in my second mention of it, is actually a herbaceous nightshade shrub – not a citrus at all. It does have a sweet-sour citrusy flavor and a bright orange exterior, hence the name “little orange.” Although I read that you can find its pulp in the frozen section of many Latin groceries, and I’m sure I could scrounge some up somewhere in Somerville, I wasn’t in the mood for a grocery store scavenger hunt today, so I used a mix of freshly squeezed orange, tangerine, and lime juice instead. I know that using those fruits may not make for a very authentic representation of the drink, and I’ve also used a much higher ratio of juice to cinnamon water than seems to be typical, but it’s still a bright, warming combination that’s worth giving a try. I did find the traditional aguardiente, a spirit distilled from sugar-cane and sometimes flavored with anise. If you can’t find it near you, either rum or cachaça would be a fine substitute. Now that I have the ingredients, plus a healthy supply of cinnamon sticks, I’m all set to make these babies throughout the winter.

Like what you just read? Subscribe to Katie at the Kitchen Door on Feedly or Bloglovin‘, or follow along on Facebook, Twitter, Pinterest, Instagram, or Google+. Thanks for reading!

Ecuadorian Canelazo - Cinnamon Syrup, Citrus Juice, and Aguardiente, served warm {Katie at the Kitchen Door}

Ecuadorian Canelazo

Adapted from Laylita and Food.com. Serves 4.

  • 3 c. water
  • 3/4 c. brown sugar
  • 5 cinnamon sticks
  • 2 c. freshly squeezed orange juice, divided
  • 1 c. freshly squeezed tangerine juice
  • 2 limes
  • 4 to 8 oz. aguardiente or white rum
  • tangerine slices for garnish
  1. Place the water, brown sugar, cinnamon sticks, and 1 cup of the orange juice in a large saucepan. Bring to a boil over medium heat, then lower the heat slightly and simmer the syrup for 30 minutes. The syrup should be heavily perfumed with cinnamon and a dark brown color. Add the remaining orange and tangerine juice to the pot and heat just until steaming, then remove from heat. Ladle the cinnamon-orange mixture into four heat-proof glasses. Pour 1 or 2 oz. of aguardiente into each glass depending on taste. Squeeze juice from half a lime into each glass, then briefly stir. Garnish with tangerine slices if desired, and serve immediately.
  • « Go to Previous Page
  • Go to page 1
  • Interim pages omitted …
  • Go to page 14
  • Go to page 15
  • Go to page 16
  • Go to page 17
  • Go to page 18
  • Interim pages omitted …
  • Go to page 57
  • Go to Next Page »

Primary Sidebar

Subscribe!

Get creative recipes and menu ideas delivered straight to your inbox.

Most Popular

A House // Sweet Potato and Coconut Milk Soup with Brown Rice and Lentils

Monthly Fitness Goals: July // Homemade Spinach Wraps with Chopped Greek Salad

A New Job // Classic Seven-Layer Bars

Butternut Squash Carbonara with Fried Sage and Caramelized Onions

Happy Birthday, Trevor! // Peanut Butter Fudge

Cookbook Review and Giveaway: Home Made Winter

Drizly

Please note!

Full disclosure: if you purchase anything at Amazon using the above links or any other links to Amazon on this site, I will receive a small commission. Just so you know!

Copyright© 2026 · Cookd Pro Theme by Shay Bocks

This site uses cookies: Find out more.