• Skip to primary navigation
  • Skip to main content
  • Skip to primary sidebar
  • Home
  • Recipes
  • Features
    • Cookbook Reviews
    • Ingredient of the Week
    • Sunday Dinner
    • Fitness Goals
  • Travel
  • About
    • Privacy Policy
    • Cookie Policy
  • Work With Me

Katie at the Kitchen Door

Globally-inspired, seasonal recipes

Blog Page

3 January 9, 2012 Recipe

Winter Cleanse: Week 1 – Menu and Recipes

Here it is.  The big one.  The one that’s been occupying an unreasonable amount of my attention all week.  The “first week of the cleanse” post.

There’s going to be a lot of information packed in here, so I’ll make my introduction brief (there’s a little more info in my preview post here).  I decided to embark on two weeks of healthier-than-regular eating for a few reasons – 1. it’s January, and everyone seems to be doing that kind of thing; and 2. I was inspired by the BA food-lover’s cleanse, as well as the “Clean” program my parents did (and liked) for a whole month last year.  I really liked the idea of dieting through discovery of new, creative, healthy meals, rather than through repetition and restriction, and I wanted to create a program tailored to my own likes, dislikes, and schedule.  I do hesitate to call this a cleanse, as it really is more of a … “health plan,” and words like diet and detox and cleanse are fairly loaded.  But, one of my goals was to get some of the junk out of my system – alcohol, caffeine, and massive amounts of gluten and dairy (not necessarily bad in and of themselves, but considering the portion of my diet they make up… probably not the best) so I stuck with the word cleanse.  This menu is very much tapered to my own life – most of the meals are scaled back to two servings, one for dinner and one for lunch the next day, and there is very little meat in the menu, as I rarely eat it at home (in fact, the two chicken recipes in this week’s menu are two of the three total recipes with meat I’ve made since moving here in August).  Some of my favorite foods show up a lot – chickpeas in particular – and on the weekends I generally only eat two full meals a day, so that’s what I included in my plan.  I was pretty flexible with myself – for example, when I discovered how shitty gluten withdrawal feels I quickly worked it back into the plan, in small amounts – and I definitely allowed myself the occasional piece of chocolate to get through the week.  No cookies though, I drew the line at baked goods :-).  I also tried to keep the recipes seasonal, as that’s how I tend to cook, and am even thinking of creating a similar plan for the other seasons.  Why be health conscious only in December?

I think the most valuable component of this cleanse for me was planning every meal out in advance.  I usually plan my dinners for the week, but not which days they go on, and never breakfasts and lunches.  It was useful when temptation had me about to run out to get pizza to have a plan to look at and know what I needed to d0/eat next.  I have been seriously craving pasta carbonara (and hamburgers, and grilled cheese, and pizza) all week, but all in all, I’m pleased with how it’s going.  Plus, I did lose two pounds, so that’s a bonus.  I hope you find the menu and recipes below useful, even if they just give you a few new ideas for dinnertime this week!

My Rules, and Why

1. No coffee (one cup of black tea a day allowed) – I don’t drink a ton of coffee, but since starting a real-person job it’s definitely gone up to about 4 cups a week.  It’s not the worst thing for you, but it’s also not the best, and I prefer to feel energized and alert on my own terms when possible.  It’s easy to feel dependent on something like coffee when you don’t really need it.  Plus, my coffee usually comes in the form of a creamy, extra-sweet latte, so avoiding those extra calories when possible has its benefits too.

2. No alcohol – Another one that isn’t too hard for me, although I do love a glass of wine now and then.  Alcohol is one of those things that can be great and fun in moderation, but you can kinda tell just from the way your body reacts that it can’t be good for you, even if you haven’t been bombarded with alcohol safety information for your whole life.  Just think about it – you live in an isolated village where no one’s ever heard of booze, you discover some fermented something or other and have a rager one night, and you wake up the next morning feeling considerably worse than you usually do.  Are you going to throw another rager that night?  Maybe, but it’s not going to be because you feel like it was good for you the first time.

3. Limited gluten – Now this one is difficult for me.  At first, I was going to go totally gluten-free, but that’s before I started feeling awful part of the way through day 2 and learned about gluten withdrawal.  That changed my mind fast.  Gluten is a natural part of our diets, and has lots of health benefits, but we do tend to eat an awful lot of gluten in an extremely processed form in this day and age.  Replacing pastas, breads, and baked goods with whole grains like quinoa and brown rice is easy and unarguably good for you.

4. Limited dairy – I love, love, love all things dairy.  Glasses of milk, cheese, yogurt, butter, cream, buttermilk, etc.  This is a good thing as a young woman – my doctor always asks me if I’m getting enough calcium to protect my bones and I can always say yes.  However, dairy is also an enormous source of fat, as well as inflammatory.  My thought was that limiting it for a few weeks could both help my system recover as well as help me kick the habit of putting cheese on most of my meals.  Note: Where recipes call for milk, I just replaced it with soymilk!

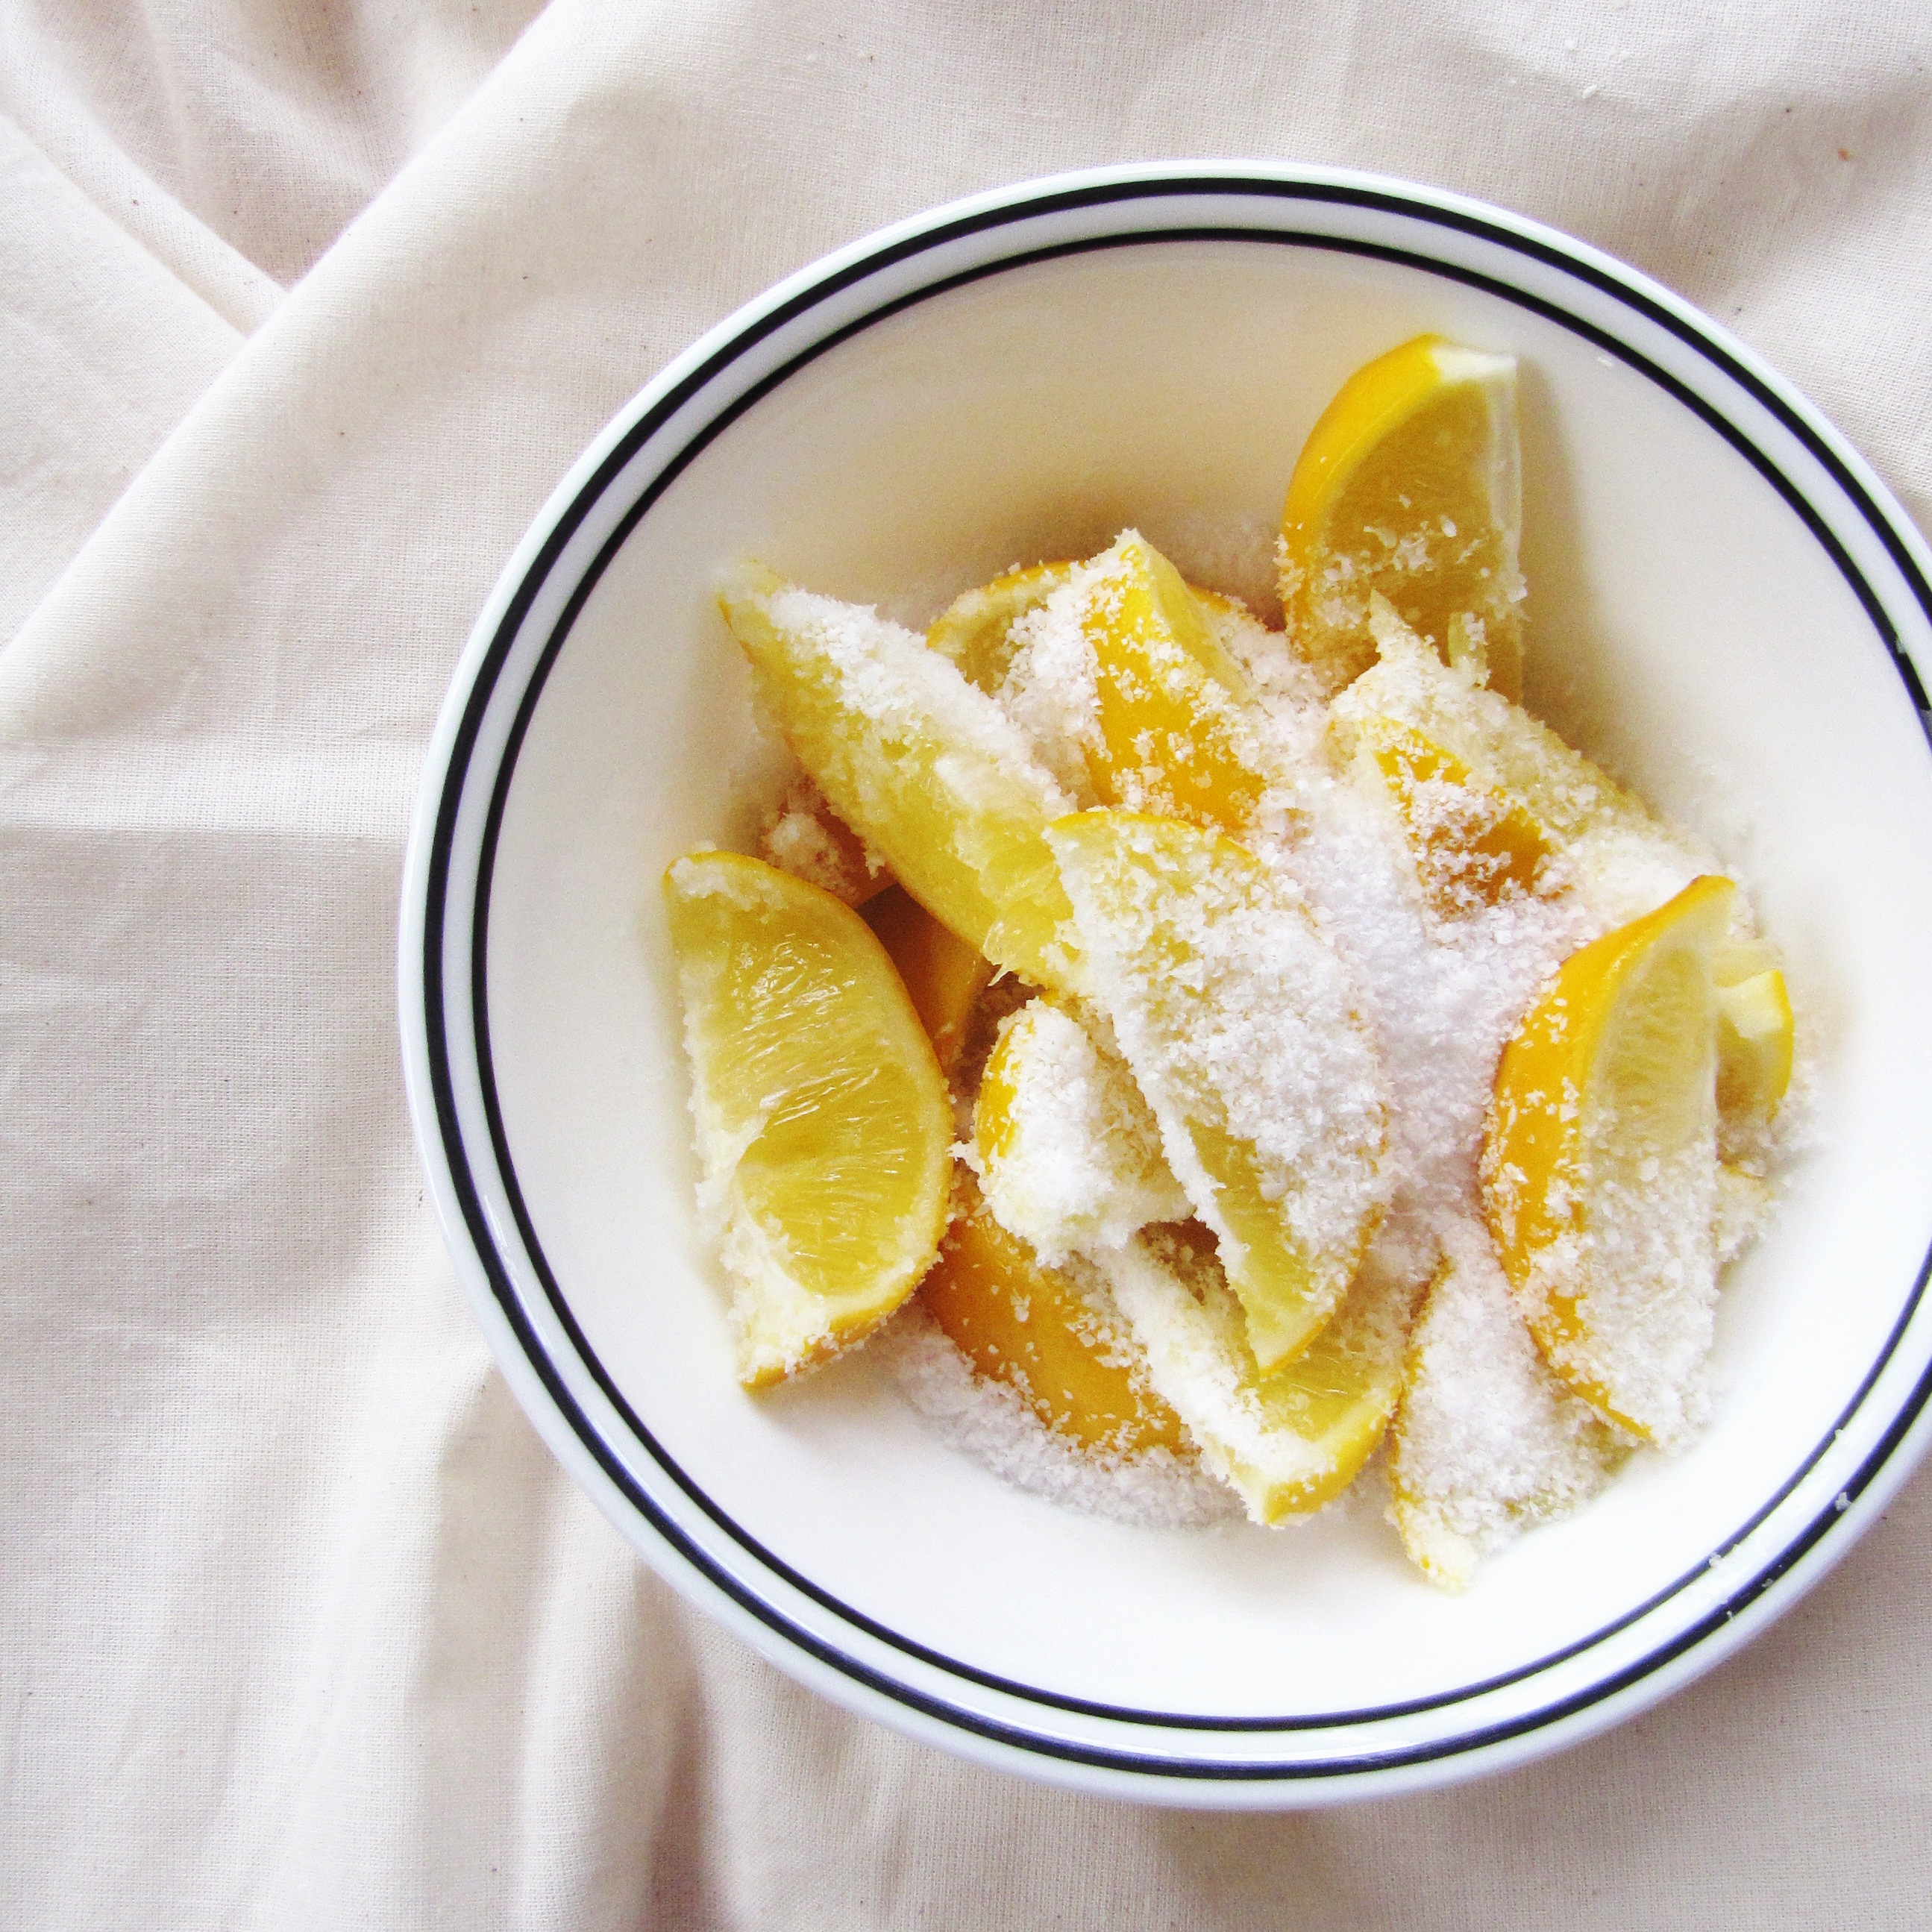
5. Limited added salt and sugar – I typically put way too much salt and sugar on my food – I always have.  And it’s a really bad habit.  Trevor says he actually worries about how much salt I sometimes add to things, and it’s just not good for you to have too much of, well, anything, but salt and sugar in particular.  My blood pressure will thank me.

6. Eat one green salad a day – I like salads, but the salads I choose typically have one of the following ingredients: blue cheese, hard-boiled eggs, bacon, or massive amounts of fruit and nuts.  And sometimes I skip the greens part.  Dark leafy vegetables are super good for you, as we all know, so having at least one serving a day in a raw form is a great way to boost your consumption of healthy vitamins and minerals.  I’ve been pretty good about sticking to this, but not perfect.

The Menu

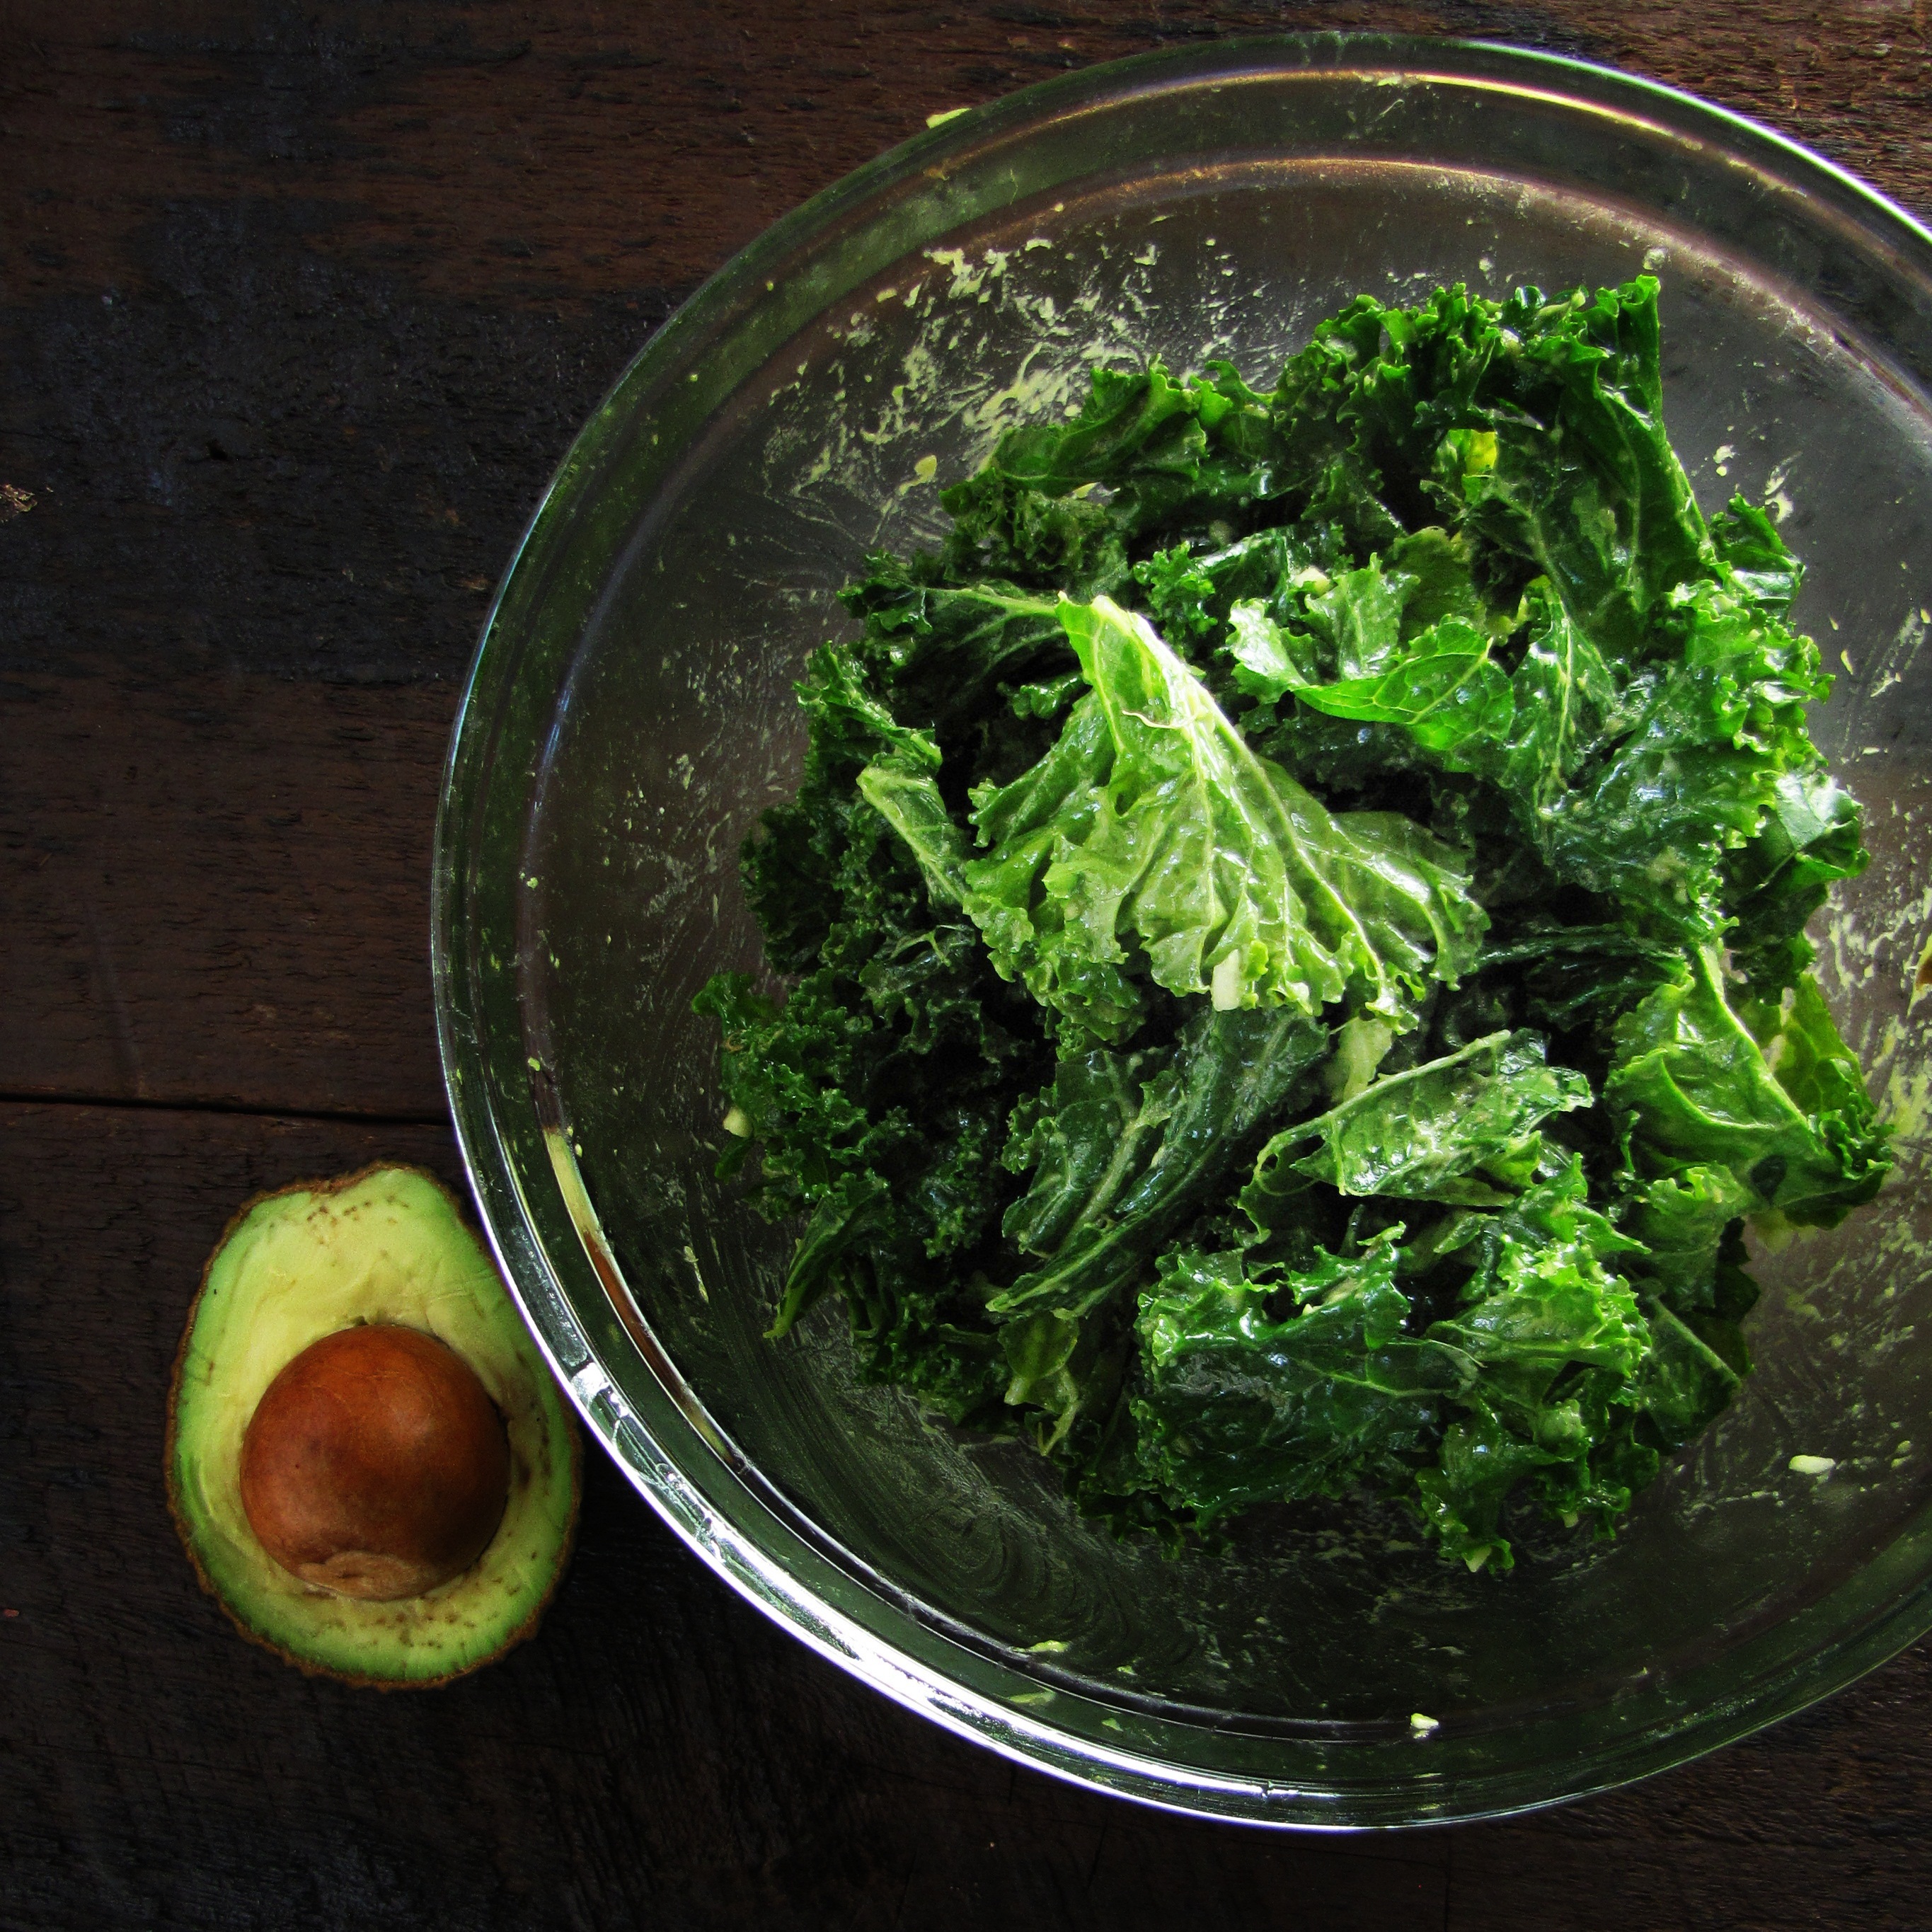
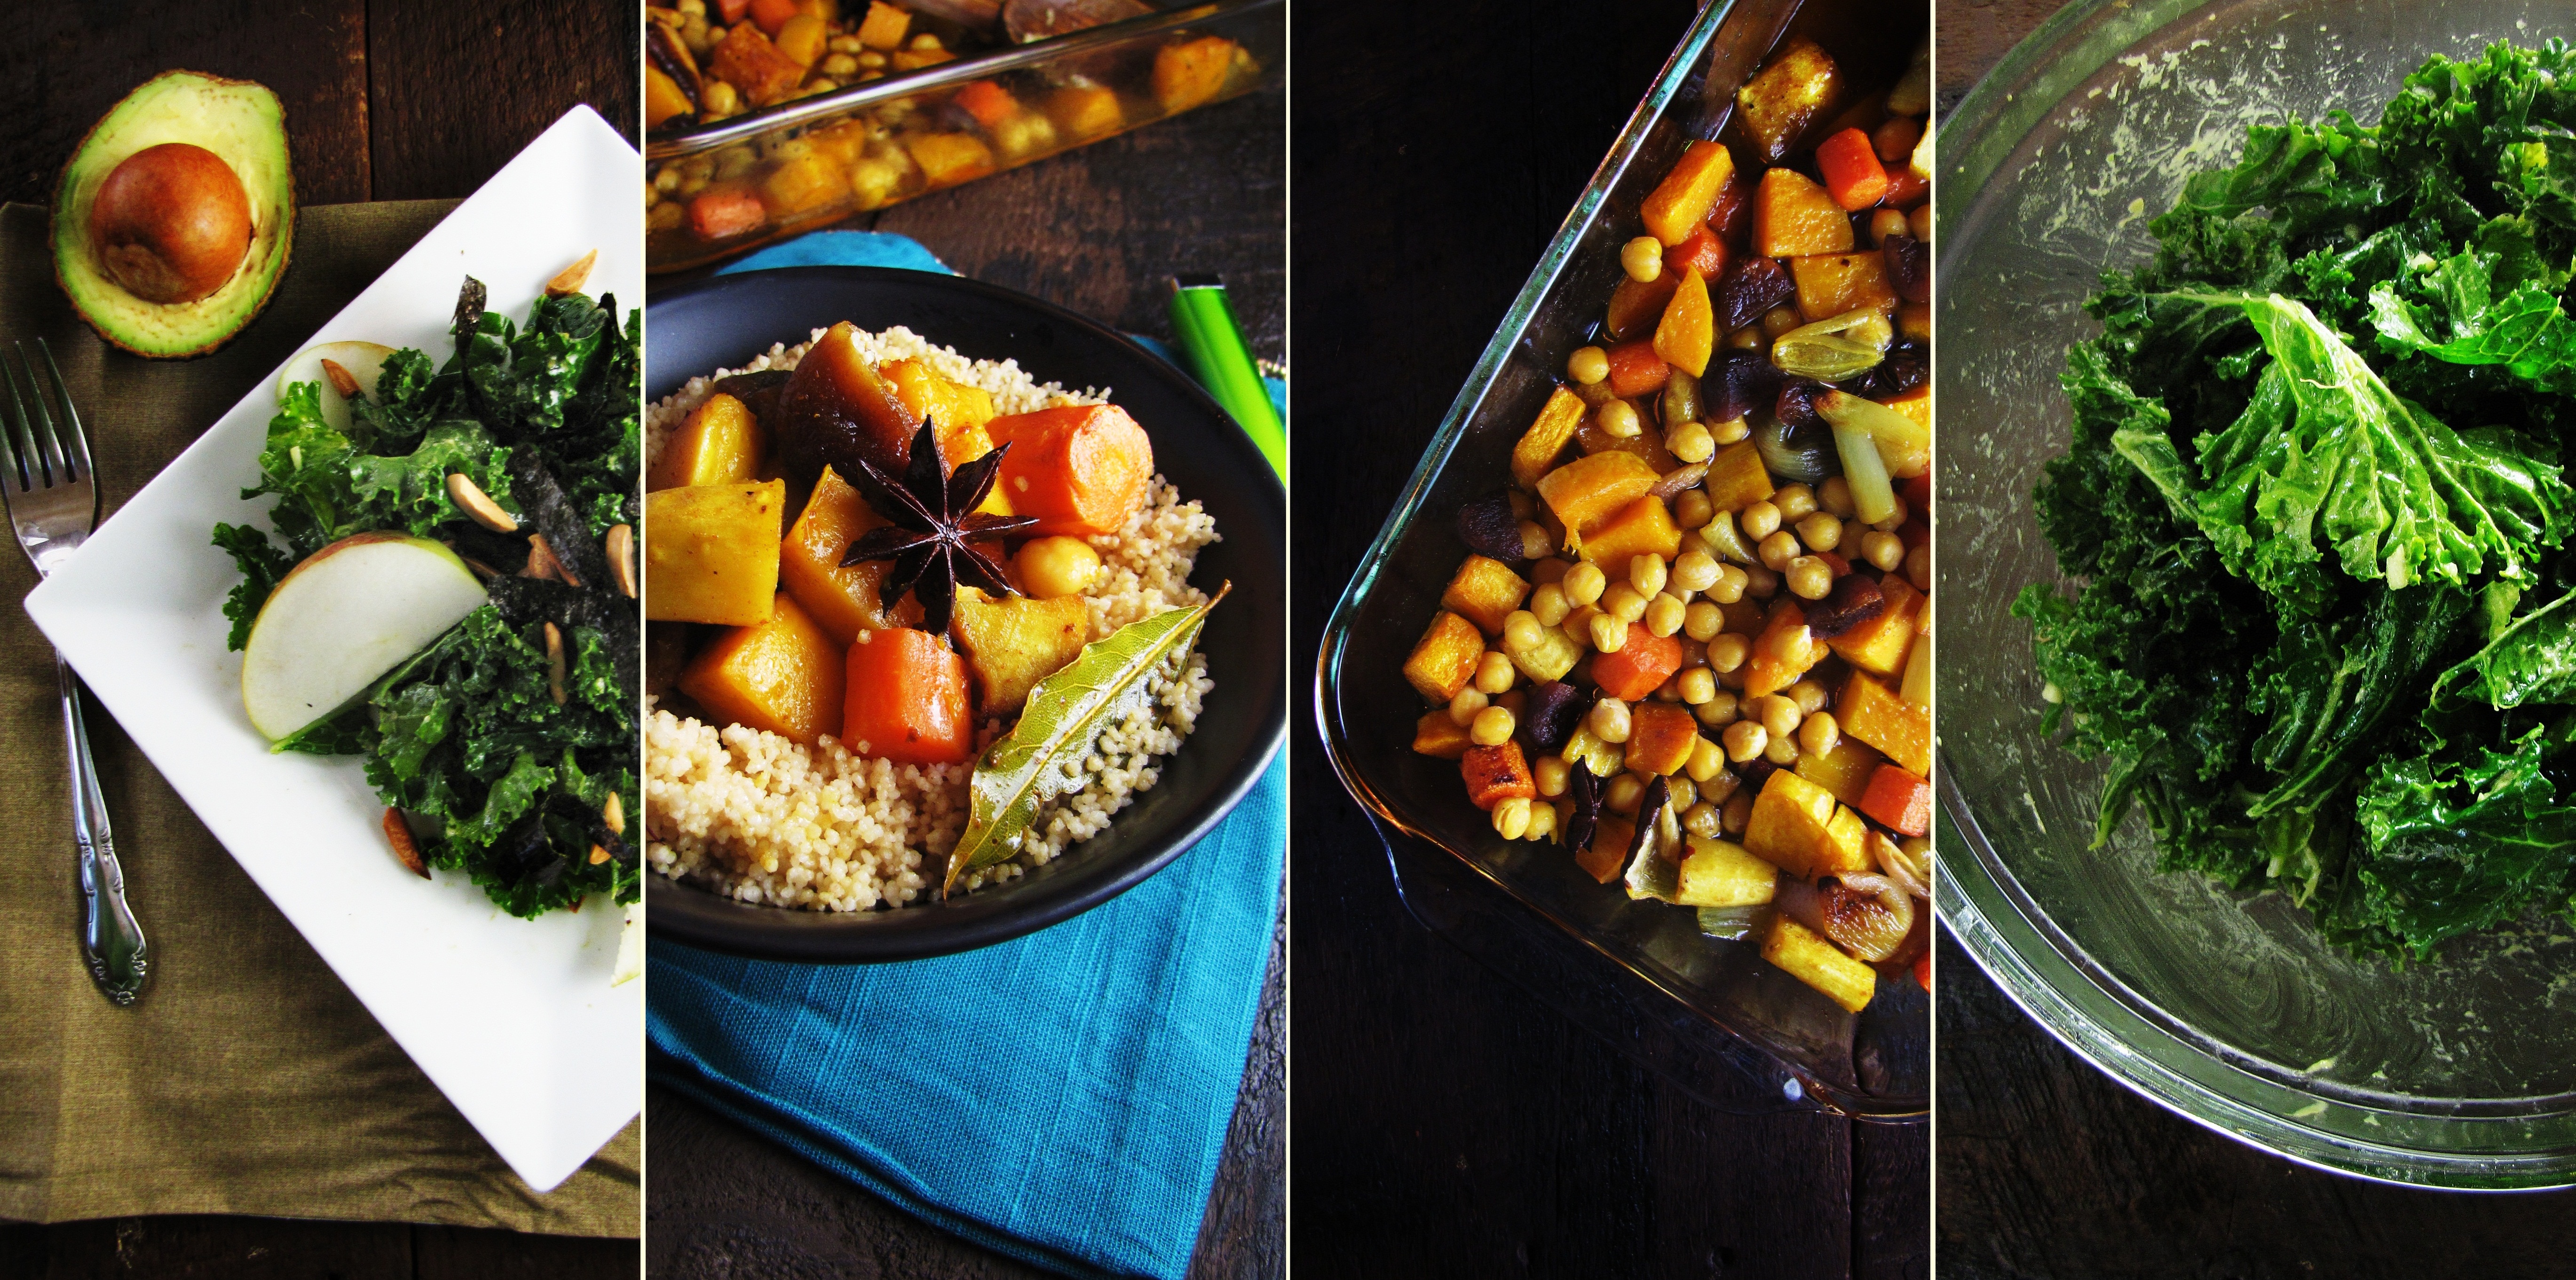
Day 1: Breakfast – Baked Eggs with Garlicky Kale; Lunch – Kale salad with avocado, almonds and nori; Dinner – Grape and Ginger Glazed Chicken w/ Arugula Mashed Potatoes

Day 2: Breakfast – Breakfast Quinoa w/ Cinnamon, Pecans, and Berries; Lunch – Leftover Chicken and Potatoes; Dinner – Udupi Dal and Leftover Kale Salad

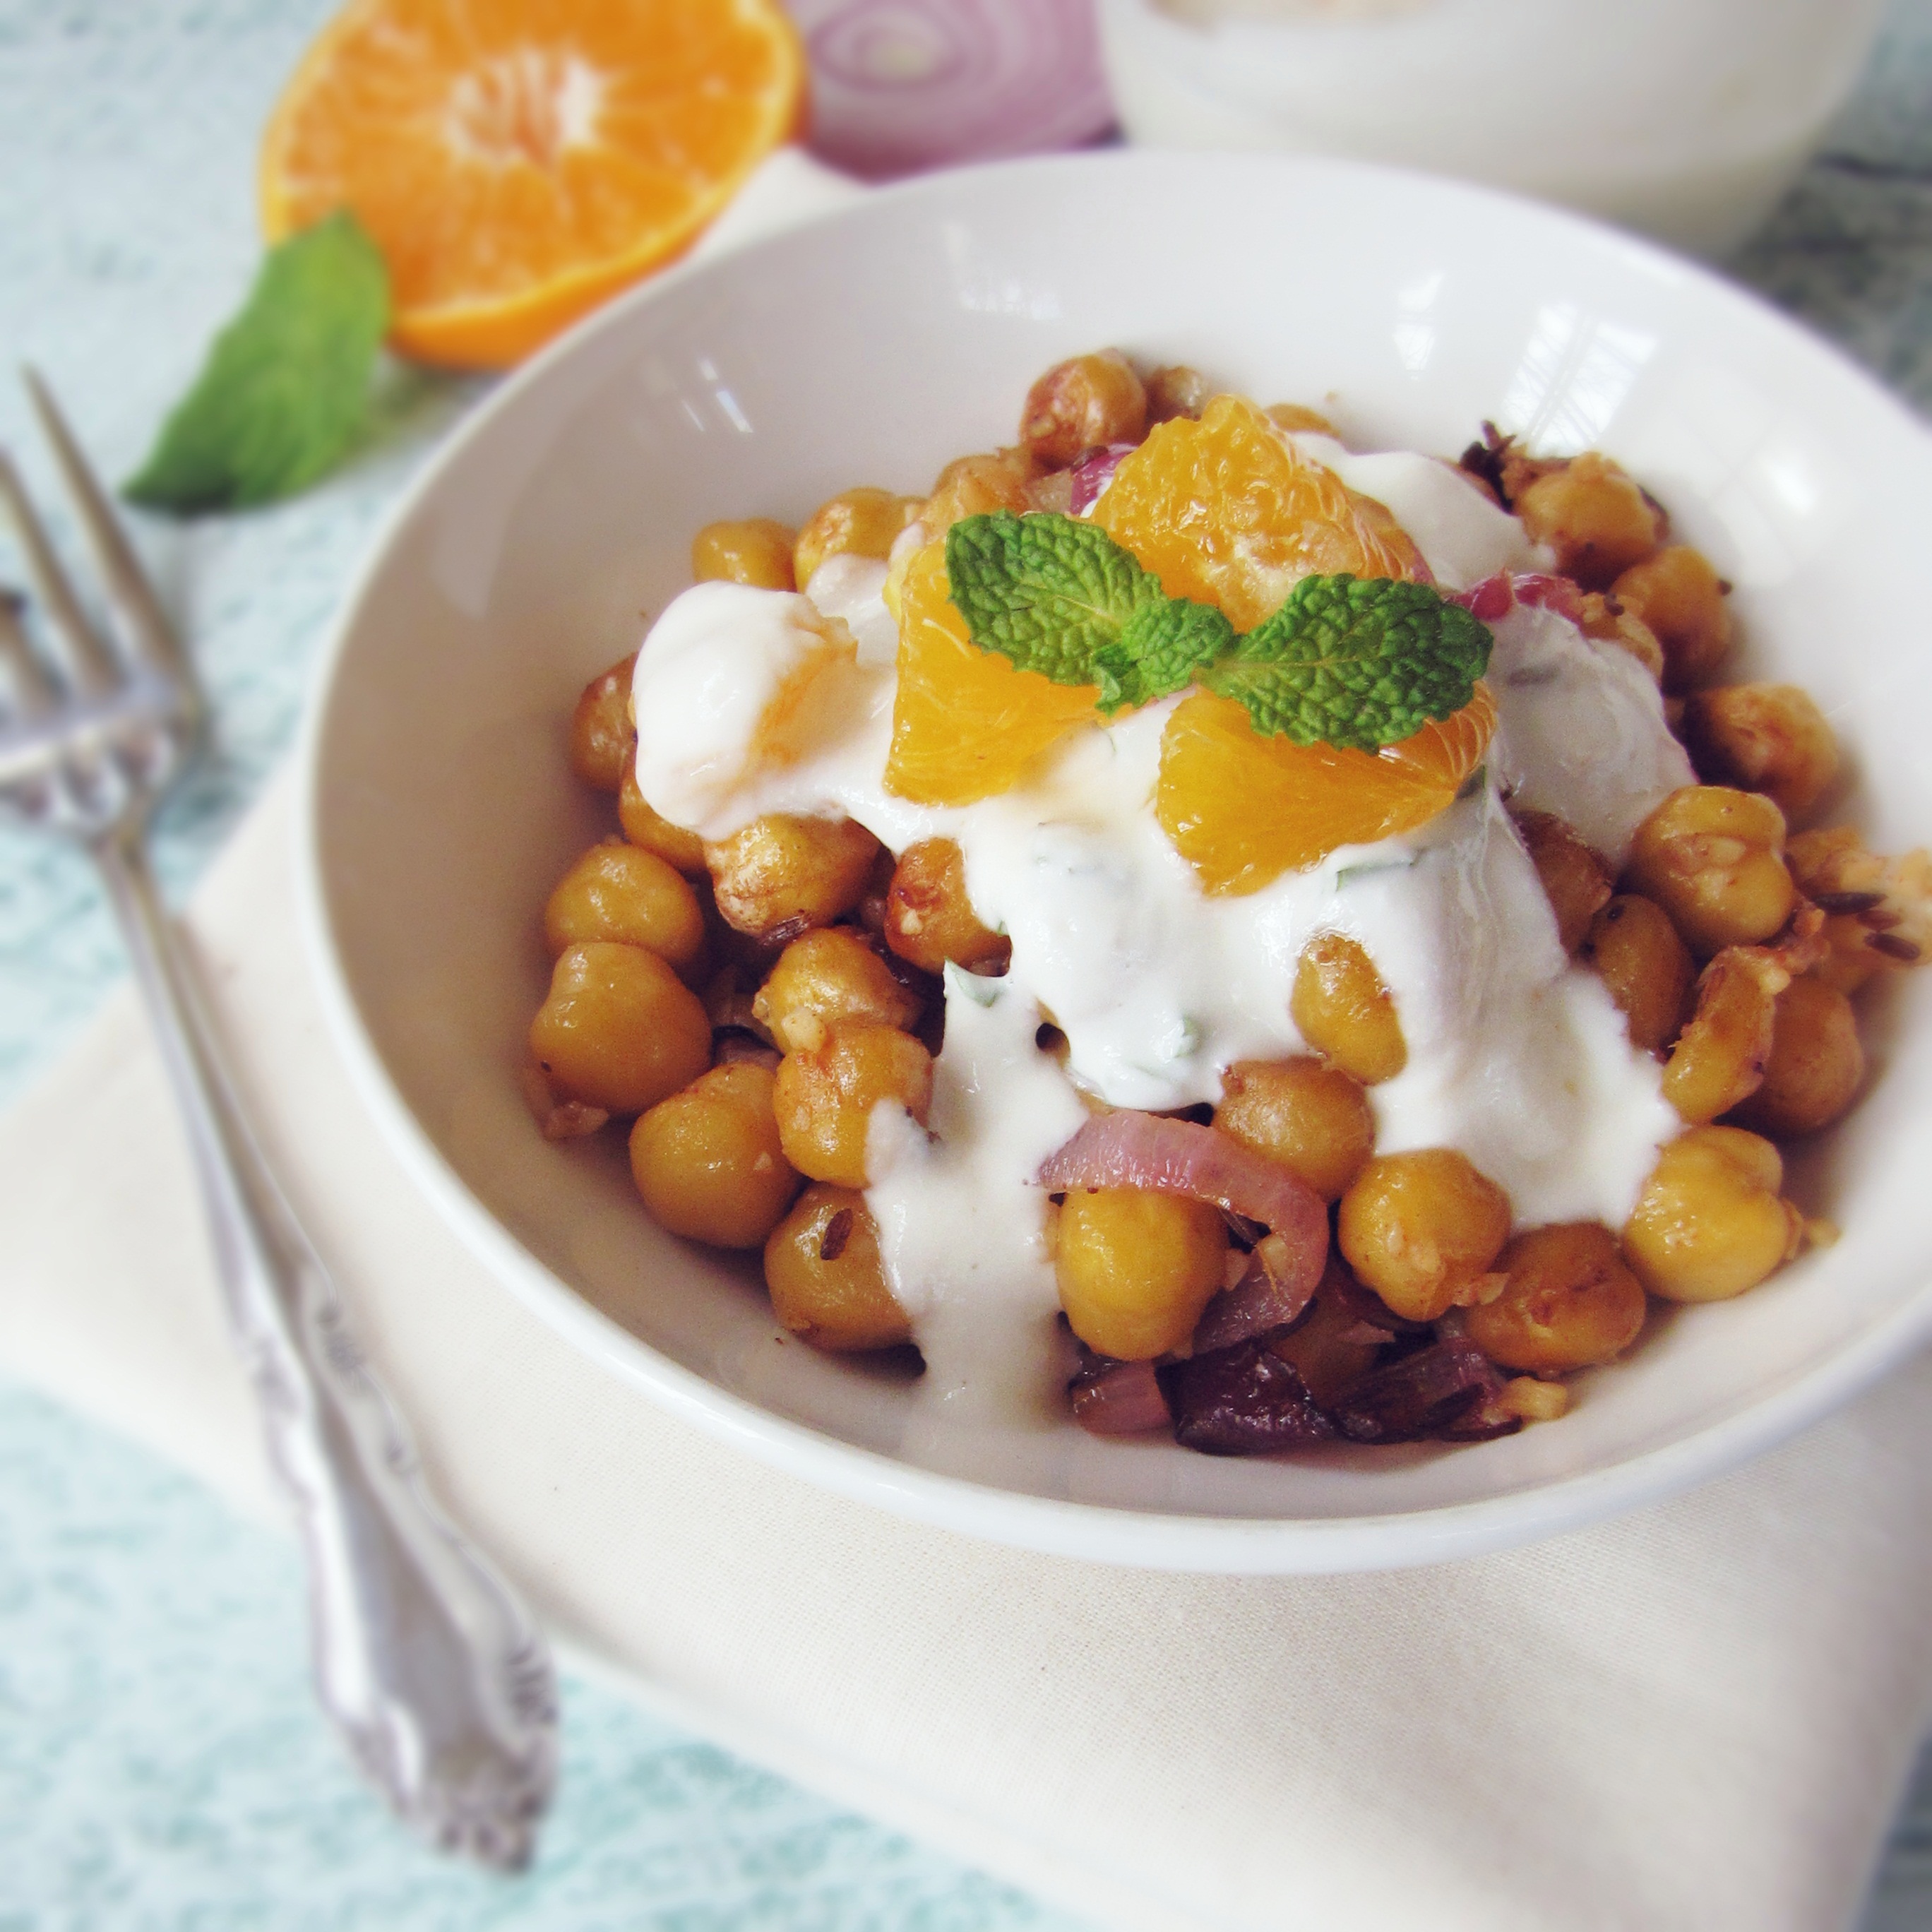
Day 3: Breakfast – Peach and Blueberry Smoothie, 1 piece of whole wheat toast w/ PB; Lunch – Leftover Udupi Dal + green salad (from work cafeteria); Dinner – Pan-Fried Chickpeas w/ Orange-Mint-Yogurt Dressing

Day 4: Breakfast – Arugula, Mango, and Ginger Smoothie (strain it before drinking for a better texture!) and 2 scrambled eggs; Lunch – Leftover Fried Chickpeas + green salad (from work cafeteria); Dinner – Ultimate Winter Couscous w/ Roasted Vegetables

Day 5: Breakfast – Peanut-butter and Banana Oatmeal; Lunch – Leftover Winter Couscous and Veggies; Dinner – Went out!  Had chana masala and rice

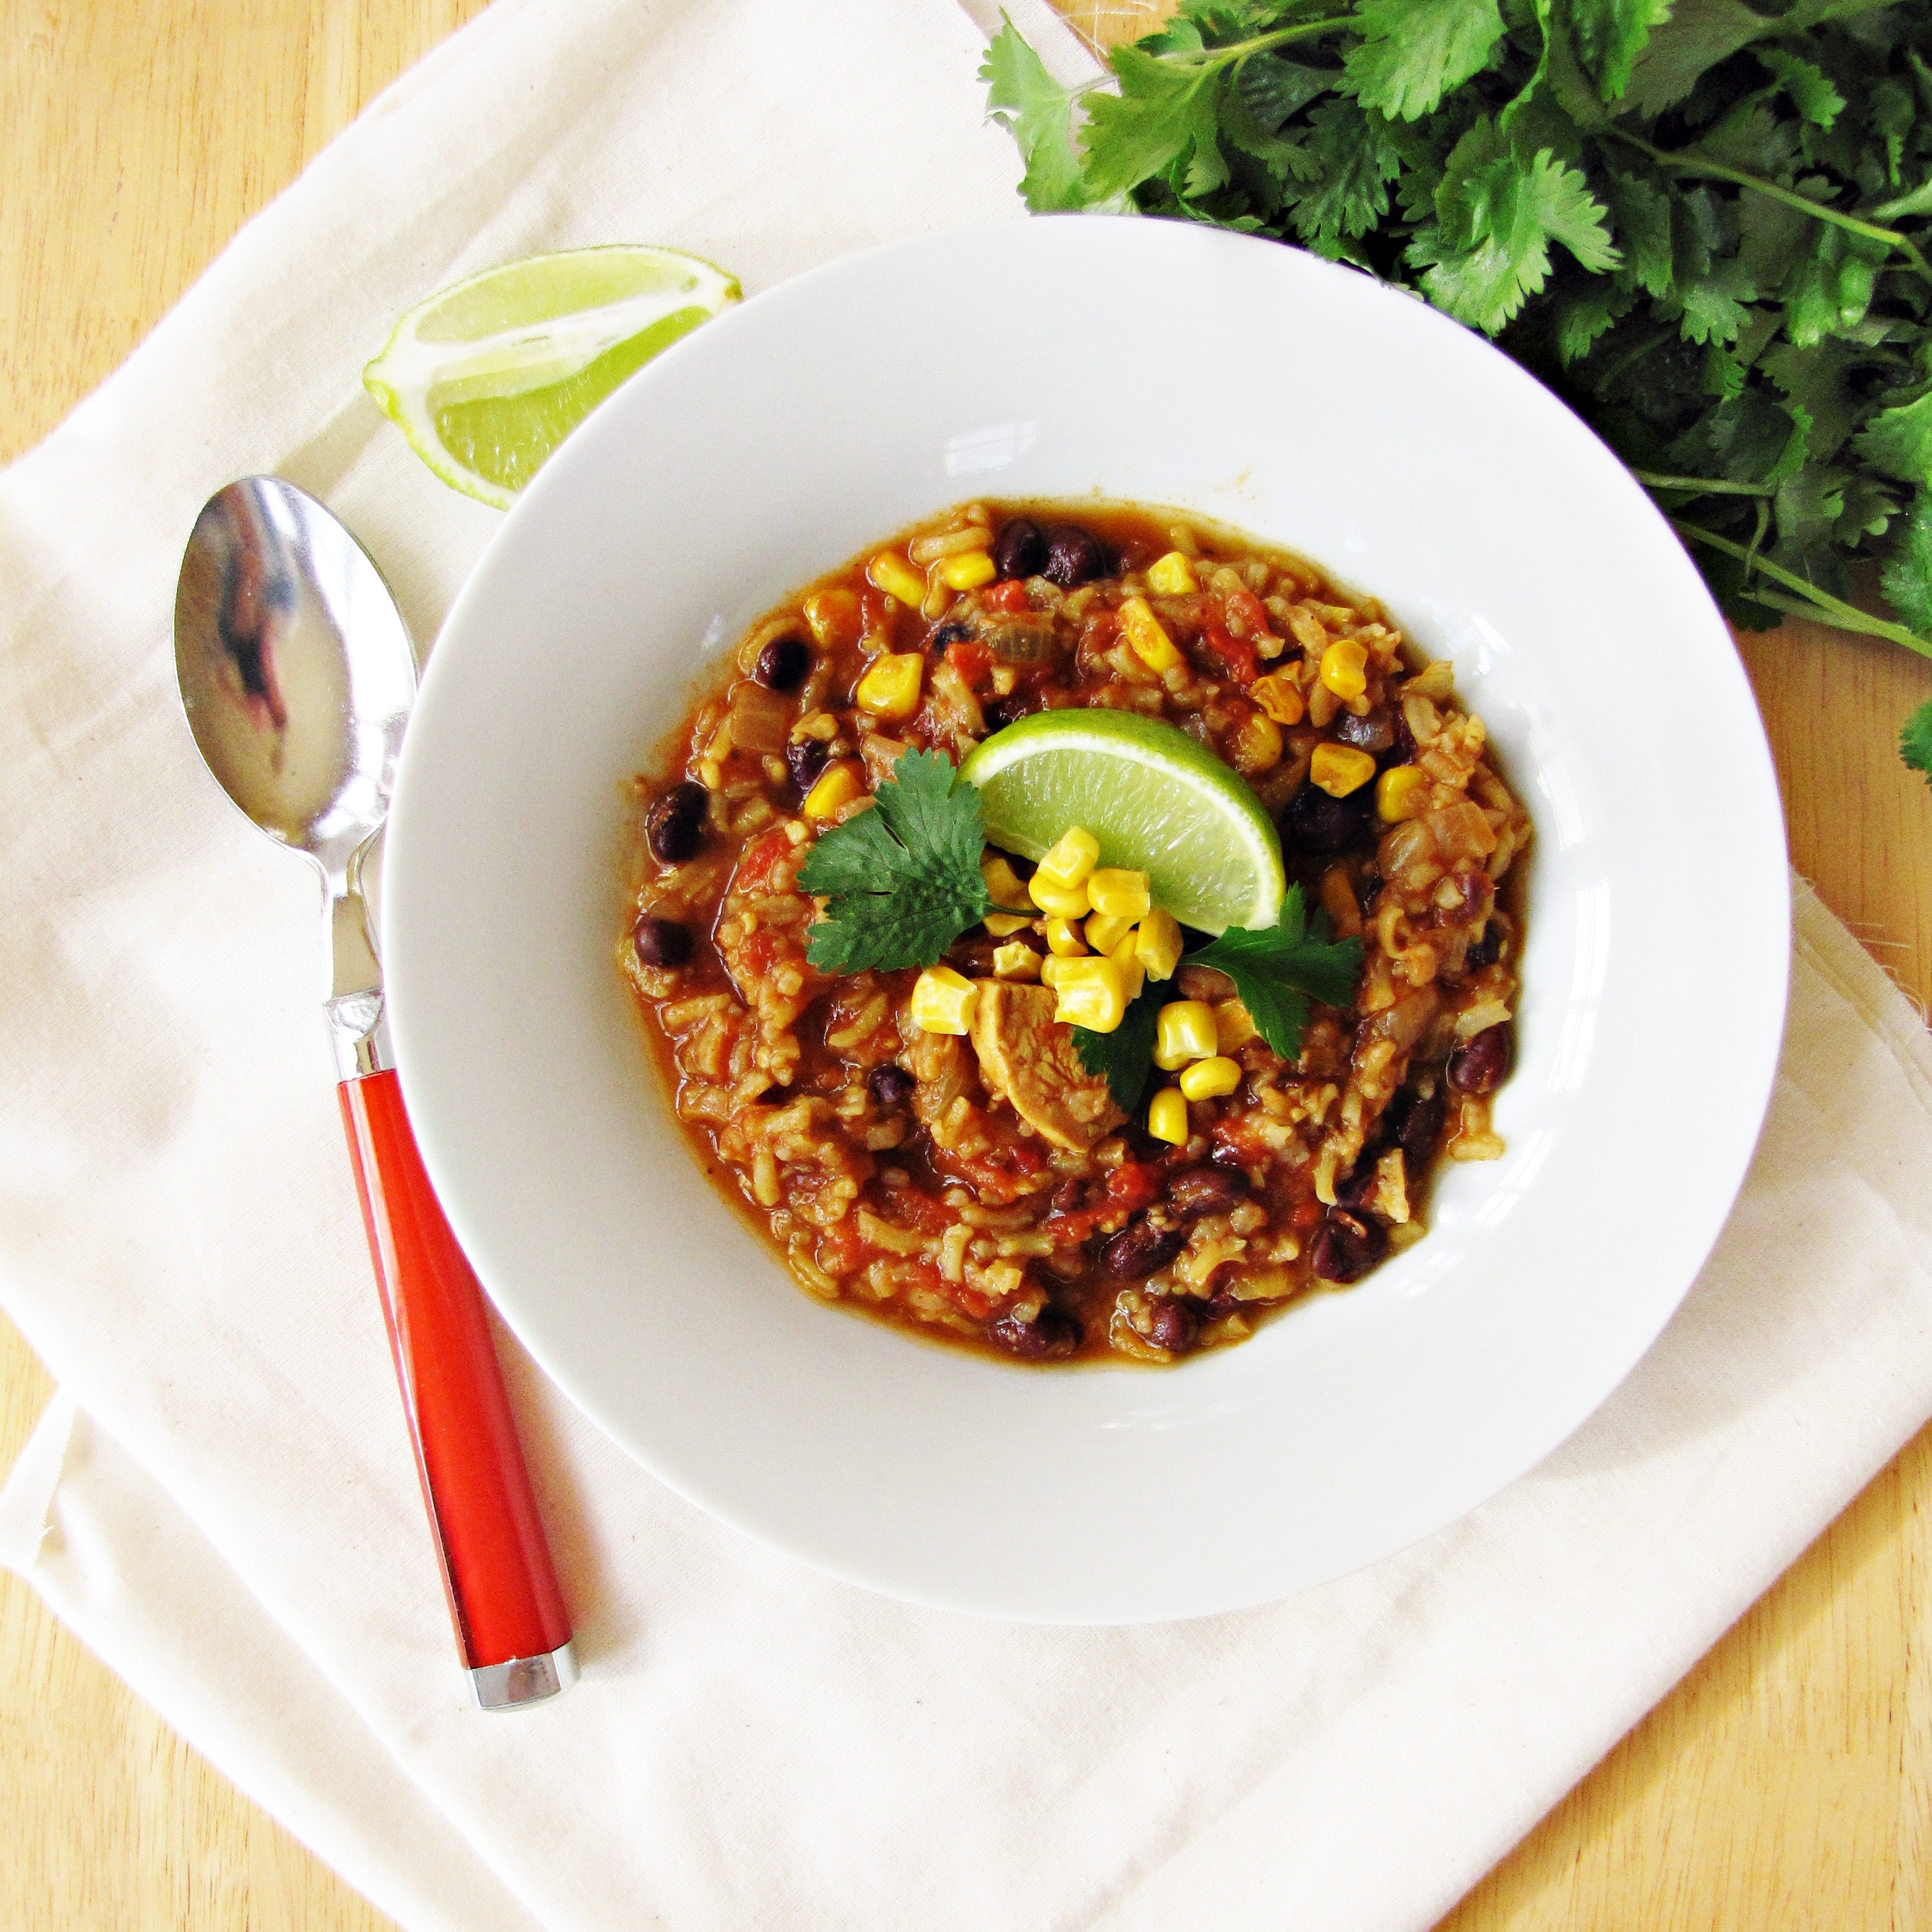
Day 6 (wknd): Brunch – Leftover Winter Couscous and Veggies; Snack – 1/2 an Avocado; Dinner – Chili-Chicken Stew w/ Black Beans and Rice

Day 7 (wknd): Breakfast – Greek Yogurt w/ Berries and Pistachios; Lunch – Pan-Fried Chickpeas (again… they’re really good!); Dinner – Indian Scrambled Eggs w/ Cilantro-Jalapeno Sauce

Week 2 Menu is now available!

Disclaimer: I am not a dietician, nutritionist, doctor, or medical professional of any sort.  I simply wanted to share my personal menu and goals for the past week, so please realize that I have tapered this plan to what I feel my own nutritional needs are, and carefully consider your own health needs and consult your doctor before following any diet, cleanse, or detox plan! 

3 January 8, 2012 Food

Chili-Chicken Stew with Black Beans and Rice

I really wanted to call this “the fastest soup in the west.”  ‘Cuz, you know, I just cut up some chicken and opened some cans and threw in some spices and BAM, there was dinner.  No pre-meditation, just a sudden flash of inspiration followed by a rush to the kitchen to create the meal I has just tasted in my imagination.  And, you know, it’s Southwestern, and it was fast, so… fastest soup in the west?  Yes?  Man, my cheesy side is just dying to get out right now.  Dying.  But I feel a little better at least having told you how kinda-funny I think I am.

Anyway, this recipe was created mostly out of laziness.  On the cleanse menu for Saturday night was Pink Parsley’s Red Chile Chicken with Black Beans and Rice, which has been on my to-make list for almost forever, but I was procrastinating making dinner because I didn’t feel like making multiple components to a meal (although on looking back at that recipe, it actually is pretty easy.  Still, one pan is better than two).  Plus, I wanted soup.  Big, hearty, spicy soup.  So I took the four ingredients in the name of that recipe (chile, chicken, black beans, and rice), and morphed them into a soup in my head.  And once I got the idea of a spicy, tomatoey chicken soup, I couldn’t shake it, so I went down to the kitchen and made the soup I was imagining.  And it turned out really good, for very, very minimal effort. So I wrote down the recipe, and here it is.  Make it when you’re feeling under the weather or lazy or bland or too tired to make anything else, and I’m pretty sure you’ll be pleased with the results.

I included this recipe as part of my winter cleanse rotation – you can find the rest of the recipes for the week here.

Chili-Chicken Stew with Black Beans and Rice

A Katie at the Kitchen Door original.  Serves 4.

  • 2 TBS olive oil
  • 1 onion, diced
  • 1 TBS minced garlic
  • 2 chicken breasts, cut into bite sized pieces
  • 2 tsp sauce from canned chipotles in adobo
  • 1 TBS harissa (or chili-powder, adjust amount to spiciness of your favorite brand of chili powder)
  • 2 tsp dried oregano
  • 1 (28-oz.) can crushed tomatoes
  • 1 (15 oz.) can black beans, rinsed and drained
  • 3/4 c. rice
  • 3 c. chicken stock
  • 1 c. water
  • 1 bay leaf
  • 1/2 c. frozen corn
  • fresh cilantro, lime wedges, and jack cheese for garnish (optional)
  1. Heat olive oil in a large saucepan over medium-heat, and add onion once oil is hot.  Sautee onion for 3-4 minutes, until translucent, then add garlic, and sautee for another minute.  Add chicken pieces, chipotle sauce, harissa, and oregano, and brown chicken on all sides, which should take about 2-3 minutes, stirring frequently.
  2. Add tomatoes, beans, rice, stock, water, and bay leaf to pot.  Bring to a boil, then lower heat and simmer on low, uncovered, for about 30 minutes.  Check pot occasionally during this time, and add water if necessary to keep rice covered.  After 30 minutes, check chicken and rice for doneness, then add frozen corn and cook for another 2 minutes.  Remove from heat, and serve hot, garnished with cilantro, freshly squeezed lime juice, and jack cheese.

0 January 8, 2012 Middle-Eastern

Fried Chickpeas with Orange-Mint-Yogurt Sauce

This is the kind of meal I make all the time, when I don’t feel like cooking for more than 15 minutes but I want something hot, hearty, and wholesome.  I almost always have all of the ingredients on-hand, so it appears frequently on weeknights when I get home late, days before I go to the grocery store, and lazy Sundays when I don’t want to leave bed for too long.  For something which takes so little effort, the flavors in this are fantastic.  When cooked properly, the chickpeas develop a crunchy, garlicky outside that give way to a soft creamy interior as you sink your teeth into them, with little hints of lemon and chili-powder spicing up the experience.  The yogurt sauce is sweet and cooling, with a refreshing hit of mint, and combined with the hot savory chickpeas, absolutely perfect.

I initially started making fried chickpeas because of this recipe on 101 cookbooks.  Later I tried these fried chickpeas, and this chickpea and spinach salad, and since then I’ve morphed all of these experiences into my own favorite way of combining these flavors, and feel safe in calling this particular recipe my own.  Isn’t that really how all recipes are created, anyway?  The final recipe definitely plays strongly off classic Middle-Eastern flavor combinations, and would make a great side dish for a Middle-Eastern lamb dish, or mixed with couscous for a more complete meal.

I included this recipe as part of my winter cleanse rotation – you can find the rest of the recipes for week one here.

Fried Chickpeas with Orange-Mint-Yogurt Sauce

A Katie at the Kitchen Door original.  Serves 2.

  • 2 c. cooked chickpeas
  • 2 TBS olive oil
  • 1/2 red onion, sliced
  • 1 1/2 tsp whole cumin seed
  • 1/8 tsp cayenne powder
  • 1/2 tsp coarse sea salt
  • 2 tsp lemon juice
  • 1 1/2 TBS minced garlic
  • 1 6-oz. container of plain greek yogurt
  • 2 small oranges or clementines
  • 10 large leaves fresh mint, finely diced
  • 1 TBS honey
  1. Slice one of the oranges in half.  Squeeze the juice from the orange halves into the yogurt container, and stir.  Add the honey and diced mint and stir until evenly combined.  Taste for sweetness and flavoring, and add more of any ingredients you feel necessary.  Set aside.
  2. Peel remaining orange and separate segments, cutting into bite sized pieces if necessary.  Set aside for topping the chickpeas.
  3. Heat the olive oil over medium heat in a large frying pan for about 1 minute, then add the cumin seed and cook for 1-2 minutes, until fragrant and beginning to turn brown.  Add the onion, chickpeas, and cayenne powder and cook, stirring every 2-3 minutes, until onions are soft and chickpeas are golden-brown and burnt in places, with a crunchy exterior, about 15 minutes.  Add sea salt, lemon juice, and minced garlic, and cook for another minute (the lemon juice and garlic should sizzle quite a bit when added to the pan), then turn off heat and serve, hot, with dressing spooned on the top and orange segments placed on top of dressing.

1 January 5, 2012 Breakfast

Cleanse Preview: Kale Lovin’

I am in the middle of the first week of a self-devised “cleanse,” as I’ve alluded to a few times in recent posts.  I promise to post a full schedule for both weeks of the cleanse, including my rules, recipes, shopping list, and (maybe) calorie counts, but I wanted to see how it actually went for me before sharing it with all of you.  And how is it going?  Well, to be honest, I have mixed feelings about it.  I had several goals in attempting this diet/cleanse/detox/whatever-you-want-to-call it: to lose the few pounds I’ve been clinging to since last summer, to refresh my system and hopefully find myself more energetic, and to try a slew of new and healthy recipes.  My initial ambitions were lofty – no gluten, dairy limited to greek yogurt only, limited added salt and sugar, and having a green salad as a meal every day.  It turns out that some of my cleanse rules did not actually lead to accomplishing the goals I had set for myself – specifically, not eating gluten does not equal more energy, at least in the first few days after you cut it out of your diet.  In fact, it means quite the opposite.

Case in point: day 1 I followed my rules exactly.  I had baked eggs with kale for breakfast, a raw kale and avocado salad for lunch, and baked chicken with arugula-mashed potatoes (no butter, cream, or cheese!), and I went to bed hungry, but proud of myself for sticking to the plan.  On day 2 I woke up totally exhausted.  Like, could barely move my body out of bed exhausted.  I dutifully made my soymilk-breakfast-quinoa and packed leftover chicken and salad for lunch.  I was feeling determined.  But energy?  Energy I did not have.  After suffering through the morning with a gnawing feeling in my stomach, a headache, and a fuzzy brain, something sparked in my sad, bread-craving brain and I googled “gluten withdrawal.”  Then I googled “dairy withdrawal.”  Turns out I hadn’t done my research.  In a nutshell, gluten and casein (the protein in dairy) have opioid compounds that affect the levels of “happy chemicals” in your brain – basically, they’re like drugs.  Removing them from your diet causes these levels to fluctuate, causing withdrawal-like symptoms such as fatigue, intense craving, headaches, and “brain fogginess.”  You can read more about it on Livestrong.  Immediately after reading that I reached for a bag of pretzels, and within 5 minutes felt much better.  My rationale for calling it quits so quickly?  Since I’m not giving up gluten or dairy in the long term (and it’s actually not recommended for those who don’t have an intolerance to gluten), I decided that it wasn’t worth it to feel crappy for two weeks and play games with my body like that.  Instead, I’m limiting gluten servings to whole wheat foods, and only 1 serving a day.  Balance is everything.

Despite the initial hiccup in my plan, I adjusted the week’s menu and am sticking to it, although I’m being more lenient with myself on snacks than I had originally planned because I want to keep my energy up and stay feeling good.  And today, day 4, I actually am feeling pretty good – energetic, focused, light – and I managed to stick to the planned recipes almost all day.  I do want to share a few recipes I’ve already tried as a sort of “preview” before giving you the whole shebang, so I’m here with two super-healthy, super-easy, kale-centric recipes.  Both of these recipes are really good, with limited fat, salt, carbs, and lots and lots of leafy greens.  Kale is easily my favorite green, and one of the only ones that I actually enjoy the flavor of, so I was particularly stoked to find such a promising recipe for a raw kale salad in Lucid Food: Cooking for an Eco-Conscious Life.  The kale gets “massaged” by hand with avocado, olive oil, and salt, tenderizing and shrinking as you go.  It then gets topped with apples, toasted almonds, and toasted nori – and boy is it good!  The flavors and textures of this salad are spot on, and I found myself picking at the kale-and-avocado mixture (so creamy and filling and addictive) even as I took these photos.  The baked eggs recipe is more basic, but it doesn’t have any cheese or cream – all of it’s flavor comes from sun-dried tomatoes, kale, and spices.  If you’re looking for a few good healthy recipes, definitely try these, and check back soon for the full list of this week’s recipes!

Kale and Avocado Salad with Almonds, Apples and Nori

Adapted from Lucid Food.  Serves 2.

  • 1/2 bunch of kale
  • 1/2 avocado
  • 2 TBS olive oil
  • 1 small garlic clove, finely minced
  • 1/2 tsp sea salt
  • 1/4 c. almonds, toasted till golden brown
  • 1 apple, diced
  • 1 sheet of nori
  1. Wash the kale leaves and shake them dry.  Remove the leaves from the thick stalks and tear leaves into bite sized pieces.  Place the kale, avocado, minced garlic, salt, and olive oil in a large bowl, and massage together with your hands for three minutes.  The kale should shrink and become tender.  Plate the kale mixture and top with 1/2 of the diced apple and half of the toasted almonds.  Use tongs to pick up the nori and pass it over an open burner on medium-low, 3-4 times for about 2 seconds each time.  Try not to let it catch fire!  As it passes over the open flame, the nori should turn bright green and get soft and pliable briefly.  Fold the nori in quarters, then use scissors to cut the quarters into long strips.  Sprinkle over salad.  Enjoy!

Baked Eggs with Sun-Dried Tomatoes and Garlicky Kale

Serves 1.

  • 2 medium eggs
  • 1 large leaf kale
  • 1 TBS + 1 tsp olive oil
  • 1 heaping tablespoon minced garlic
  • 5 dried sun-dried tomatoes
  • leaves from 5 small sprigs fresh thyme
  • freshly ground black pepper
  1. Reconstitute the sun-dried tomatoes: place the sun-dried tomatoes in a small, heatproof bowl, and pour very hot or boiling water over them.  Stick in the microwave for 30 seconds, then let stand for 5 minutes.  Remove the sun-dried tomatoes from soaking liquid and chop finely.
  2. Preheat oven to 375°F.  Grease one creme-brulee sized ramekin with 1 tsp olive oil and set aside.  Heat remaining 1 TBS olive oil over medium-heat in a saucepan until shimmering, then add kale and garlic.  Cook, stirring frequently, until garlic is brown and kale is beginning to become tender, about 5 minutes.  Add 1-3 TBS of water if the kale seems dry, and continue to cook until fully tender, about another 3 minutes.  Line prepared ramekins with kale, then carefully crack the eggs on top of the kale.  Sprinkle with the thyme leaves, black pepper, and minced sun-dried tomatoes, and bake for 10-15 minutes, until eggs are set.

0 January 1, 2012 Breakfast

A lemon tree, and learning new things

I have this vision.  A vision of myself, in 15 years.  In this vision, I live on a small, successful farm that sustains itself through selling beautiful homemade cheeses and jams and artisan breads and hosting intimate gourmet farm-to-table dinners.  I wake up early every morning and milk the cows and goats, feed the horses, collect eggs from the chickens, harvest whatever vegetables need to be harvested.  In the afternoon I whip up batch after batch of fresh jam, bake loaves of bread on a stone hearth outside (which of course is handmade as well), and check the cheeses for ripeness.  Everything around me is bright and clean and wholesome.

Enter reality.

Most people in my generation, and the generation before mine, did not grow up with the skills needed to live “a homemade life.”  I’ve never grown a plant larger than 6″ tall, never had a pet that stayed alive more than 2 years, and head to the grocery store for things like jam and cheese and bread at least once a week.  My family is more wholesome than average – my dad has an extensive vegetable garden and a small fruit orchard, my mom makes incredible homemade bread, and we generally eat healthy, homemade food at home.  So I have an advantage over some.  But if I ever want my vision to be reality, and I really, really do, I have a lot to learn.  Actually, a ton to learn.  And learning new things can be hard.

New Year’s is a good time to focus on your dreams, no matter how far in the future they might seem.  Since I’m living in the city (and since I’m only 22), I can’t get started on the big things yet.  Aka, I’m not going to order any bees for my backyard or keep a goat tethered to my front hedge.  This year, at least.  I figure, however, that there are some things I can start learning.  How to take care of plants.  How to make homemade cheese that actually behaves like cheese and not some weird milk-yogurt-hybrid.  How to preserve fresh fruits and vegetables.  Cheese is an ongoing project, one that Trevor really takes the lead on.  Bread is also kind of his thing.  So lately, my project has been lemons.  Growing, preserving, making jam with, and loving lemons.

Not too long ago, meyer lemons arrived on the shelves of all the organic groceries near me.  Never having had a meyer, but having read accounts of their sweeter flavor and lovely scent on blogs everywhere, I snatched a bunch up.  At 99 cents a lemon, they aren’t cheap, so I started musing about whether or not I could find a meyer lemon tree nearby to keep inside for the winter.  A quick google search revealed that they could be found at Mahoney’s, and after musing aloud some more to Trevor, one thing lead to another and he showed up at my door one day with a lemon tree.  I actually jumped up and down a little I was so excited (and surprised).  Isn’t he the best?  Who surprises their girlfriend with a meyer lemon tree?  I’m the luckiest.  And I really, really hope I don’t kill this tree.  Fingers crossed.

The lemons on my tree are still ripening, but I did have a bunch of lemons from the store that needed to be used, so I tackled two meyer lemon recipes to begin my education in preserving.  The first was a meyer lemon marmalade, which was my first hands-on canning experience.  I first learned about canning on spring break last year, where the major takeaway for me were a. if you do it wrong you’ll kill everyone you love through botulism poisoning, and b. sterilize everything in your kitchen before starting.  So when I embarked on this canning adventure, I was a little bit paranoid about doing it right.  So paranoid, in fact, that I failed to read the actual recipe thoroughly, and missed the step where you uh, cut up the lemons.  Aka about three quarters of the way through the recipe I was staring at a pot of lemon halves, water, and sugar, and wondering when it would turn into marmalade.  Duh, me.  Good thing I have a very loving boyfriend with a high tolerance for holding hot things who sliced up the hot lemon halves into more marmalade sized pieces.  The preserved lemon recipe was much simpler, for me, and didn’t involve any sterilizing or canning.  The marmalade is great – very bright and tart, and I have yet to try the preserved lemons (they’re still resting), but I’m looking forward to using them in some Middle Eastern recipes.  And I’m very glad to have taken some actual steps towards learning some traditional homesteading skills, rather than just reading and daydreaming about them.  Hopefully this year will be full of similar exciting learning experiences!

Meyer Lemon Marmalade

Recipe from Gourmet.  Makes 4 (1/2 pint) jars.

  • 4 meyer lemons
  • 3 c. water
  • 3 c. sugar
  1. Thoroughly wash the lemons.  Slice in half crosswise and remove all the seeds, placing the seeds in a muslin or cheesecloth bag and setting aside (tie off the bag – you will cook the bag with the lemons).   Thinly slice the lemon halves (that’s the step I missed!) and place in a non-reactive stockpot with the 3 c. water and the bag of lemon seeds.  Cover and let stand at room temperature for 24 hours.
  2. Bring lemons and their soaking water to a boil over medium-high heat.  Reduce heat and simmer, uncovered, for 45 minutes, or until the mixture has reduced to about 3 cups.  Stir in the sugar and boil the mixture, stirring occasionally, until a drop of the mixture dropped on a cold plate gels.  Ladle the hot jam into your hot, sterilized jars (more about that below), filling to within 1/4 inch of the top of the jar.  Carefully wipe the rims of the jar, place the sterilized lid on top of the jar, and screw the sterilized band over the top.  Using canning tongs, move the filled jars back into the pot used to sterilize the jars, being sure that there is enough water in the pot to cover the jars by 1 inch, and bring the water to a gentle boil.  Boil the filled jars for 5 minutes, then remove and let cool completely on a rack.  If the lid has sealed, the marmalade will keep in a cool, dark place for up to 1 year.  Any jars that did not seal, or that were not completely filled, should be kept in the fridge for 2-3 weeks only.

Sterilizing Jars for Canning

If you have never before canned, you should read a thorough primer on how to safely can to ensure that you do it properly.  Improper canning can lead to food that is not safe to eat.  This is a good basic primer for the boiling water method (what I used), and there are tons and tons of books out there.  Better yet, have someone who’s been canning for ages teach you how – that’s the best way to learn.

To sterilize jars for this recipe, wash the jars, lids, and bands in hot soapy water, then place immediately into a clean pot filled with water.  Bring the water to a boil, and boil the jars, covered, for at least 15 minutes or until you about 15 minutes before you are ready to fill the jars.  To keep the jars from knocking around and breaking one another, you may either use a canning rack in the bottom of the pot or, in a pinch, a clean washcloth on the bottom of the pot.  Once the jars have been sterilized, turn off the heat and let the water come down to 180°F or slightly less.  At this point, add the lids and bands to the pot and let all three pieces of the jar assembly sit in the pot for 10 minutes.  If you boil the lids, the seal may become damaged and not seal properly, so be sure that the water is less than 180°F before adding them.  Once your jam is ready and your jars are sterilized, use canning tongs to lift the jars out of the pot one at a time, carefully dumping the hot water out of the jar.  Fill the hot jars with the hot jam (wiping the rim and filling to the level specified in the recipe), then set the lids on top, and screw down with the band.  Process the filled jars in the hot water bath as described above.  When your processing is finished, check the seal on your jar.  You should not be able to push the “button” on the lid up and down – it should be firmly vacuum sealed and not move. Try pressing the top of a lid on a new or opened mason jar to see what I mean; it will make a popping noise when you push down on it and move slightly down and up.

Preserved Meyer Lemons

Recipe adapted from Gourmet.  Makes 1 (1/2 pint) jar.

  • 4 meyer lemons
  • 1/4 c. coarse kosher salt
  • 1 1/2 TBS olive oil
  1. Thoroughly wash lemons.  Cut two of the lemons into 8ths (slice in half lengthwise and then quarter each half into 4 wedges) and remove and discard all seeds.  Toss the cut lemon slices with the salt, and then pack into a clean jar.  Cut the remaining two lemons in half and squeeze the juice into a cup measure – it should measure about 1/3 of a cup.  Pour this lemon juice over the salt packed lemons to cover them.  If it does not cover them, supplement with additional lemon juice.  Close the jar and let stand at room temperature for 5 days, shaking gently once a day.  After 5 days, add the olive oil and keep in the fridge, for up to 1 year.

0 December 28, 2011 Boston

Gingerbread 2011 – The Zakim Bridge

Just wanted to quickly share a few photos of this year’s gingerbread creation: a to-scale model of the Zakim Bridge in Boston.  That’s just the kind of thing that happens when you have two civil engineering students who also love food.  Some of you may remember last year’s treehouse, and pre-blog, we did a Romanesque cathedral.  The annual gingerbread extravaganza is always driven by Trevor – he does the planning, the pattern, and the baking, while I’m more like a whiny little sibling who complains about there not being enough to decorate.  This year, I got my fun in by making Santa out of homemade marzipan.  I was going to do a gingerbread sleigh as well, but the bridge collapsed before I got around to it.  Sad day.  And good thing real bridges aren’t made out of gingerbread.  Trevor did the design and made the cable stays out of homemade candy canes, which was kind of a fun process – see pictures below.

I’m including a collection of links for the various pieces of this project, just in case anyone wants to start planning early for next year.  One suggestion I would have for the homemade marzipan is to sculpt it the day you make it – after a few days in the fridge it was oily and difficult to work with, hence the kind of scary looking Santa.  In other news, check out the new logo and the cookbook review section I’ve recently added – feedback on either is welcome.  I’m working on a few projects for the blog, including a two-week cleanse-diet-sort-of-thing, an article about our experience dabbling in cheesemaking, and recipes inspired by my new lemon tree, so expect lots of exciting and healthy recipes from me soon!

Click here for our gingerbread recipe.

See this recipe for homemade marzipan instructions and this article for tips on working with it.

Lastly, how to make your own candy canes!

0 December 23, 2011 Drink

Last Minute Christmas Cheer

Christmas always took an agonizingly long time to arrive when I was little.  I started flipping through the giant JC Penny’s toy catalog and circling the 625 items I wanted in October.  We had to wait for what seemed like ages to decorate the tree once December finally arrived.  And as soon as school got out the rest of the month was dedicated to absorbing Christmas – eating cookies, decorating gingerbread, doing the advent calendar, and watching A Muppet Christmas Carol (available on Amazon Instant?? My night just got so much better…) as many times as possible.  Then, of course, Christmas Eve itself was the longest night ever, and I rarely fell asleep within an hour of going to bed.  Now that I’m not so little though, Christmas seems to sneak up on me all of a sudden – I’m barely getting in the spirit when the day has come and gone.  It’s easy to get so caught up in your life – and the shopping, and parties, and rushing around that seem to epitomize Christmas now – that you forget to just enjoy the Christmas spirit.  And to think about what Christmas actually means – whatever that may signify for you.

Luckily, we all still have at least another 48 hours to soak up as much Christmasyness as possible, and I plan on doing just that.  And you know what’s helping the most?  The eggnog.  Sweet, rich, creamy, and just a little spicy, one sip of this eggnog and I feel a little bit more relaxed, a little bit less anxious, and a little bit more ready to enjoy the next two days for what they are.  Fifteen more sips and you can just imagine how good I feel. :-)  Really though, it’s extremely easy to whip up, and I even made a half batch just for Trevor and myself to enjoy on the spot.  If you have a little bit more time on your hands, chop up some apples, oranges, and pomegranates and throw a batch of this Christmas sangria in the fridge as well.  Turn on some Christmas music, plug in the tree, put out a plate of cookies, and pour yourself a glass of your drink of choice.  Christmas is here – enjoy it!

P.S. Recipe for the Chocolate Mint Thumbprint cookies pictured can be found here!

Christmas Sangria

Adapted from Lucid Food: Cooking for an Eco-Conscious Life.  Serves 6.

  • 1 bottle (750mL) red wine
  • 2 c. apple cider
  • 3/4 c. brandy
  • juice of 1 lime
  • 2 sweet, crisp apples, chopped into 1 inch cubes
  • seeds of 1 large pomegranate
  • 1 orange, sliced
  1. Mix all ingredients together in a large pitcher, stirring with a wooden spoon.  Refrigerate for 3-4 hours to allow the flavors to blend.  Serve cold, and don’t forget to eat the fruit!  Will last in the fridge for 3-4 days, if, like me, you cannot drink an entire bottle of wine in one night. :-)

Homemade Eggnog

Adapted from Food Network.  Serves 4.

  • 4 eggs, separated
  • 1/3 c. sugar, plus 1 TBS
  • Pinch cream of tartar
  • 2 c. whole milk
  • 1 c. heavy cream
  • 3-4 oz. bourbon or brandy
  • 1 tsp nutmeg
  1. In a medium bowl or stand mixer, whisk egg whites until foamy.  Sprinkle cream of tartar over, and continue whisking/beating until they form soft peaks.  While still whisking, sprinkle 1 TBS of sugar over them and beat until egg whites are stiff.
  2. In a large bowl (preferably with a spout) or pitcher, whisk egg yolks and 1/3 c. sugar until pale yellow and creamy.  Whisk in milk, heavy cream, and booze until incorporated, then gently fold in egg whites until the consistency is even.  Divide between four glasses and top with nutmeg.  Drink right away.

*NOTE: This recipe contains raw egg yolks.  If you are uncomfortable eating raw egg yolks, heat the milk and cream over low heat until just beginning to simmer, then pour over the egg yolk and sugar mixture, whisking yolks rapidly to prevent scrambling, to temper the yolks.  Chill the mixture before continuing.

0 December 19, 2011 Cookbook

Cookbook of the Month: Gourmet Gifts… and Sugarplums!

Did you know sugarplums are a real thing?  That they’re more than just a name for a delightful fairy in The Nutcracker?  That you can make and eat and admire them and that they really are worthy of visions dancing in your head?  That they might actually be both the most Christmasy and the healthiest treat I’ve made for the holidays?  Yeah, me neither, at least until a week ago when I picked up a copy of Gourmet Gifts by Dinah Corley, and flipped to a page with tiny sparkly plum-resembling treats titled sugarplums.  And man am I glad to stand corrected, because these things are good.  But let’s back up a little.

Last weekend I went to my very first Boston Brunchers’ brunch.  The Boston Brunchers are a lovely group of food bloggers/writers/enthusiasts that get together once or twice a month to network and share blogging stories and, well, brunch.  Last weekend’s event was hosted by Harvard Common Press – a huge thanks to them for hosting and feeding us! – an independent publisher specializing in cookbooks and parenting books.  While there we ate brunch treats from several of their cookbooks (all delicious – especially the strata and the cranberry coffee cake), chatted each other up, and heard a presentation from the publishers themselves on the process of going from blog to cookbook.  The presentation was filled with new information for me, and convinced me to finally jump on the twitter bandwagon, something I’ve been avoiding for ages.  (Feel free to follow me @Kitchen_Door: I’ll be posting updates on great recipes I don’t have time to blog about, the upcoming gingerbread extravaganza, my beginner gardening attempts, learning to make homemade cheese, and more.  Rest assured that I’m highly opposed to constant communication as I think it can drive people insane, so I promise to use it in moderation.)  After the presentation, they announced that the cookbooks decorating the tables were a freebie for us bloggers – which was a bit like announcing to a candy store full of children that everything was free and then handing them paper bags.  Mild adult chaos.  Anyway, I snagged a copy of Gourmet Gifts, because it seemed seasonally appropriate and it had a pretty cover… and I usually judge books by their covers. Not kidding.

I’m cheating a little bit in posting this review as December’s cookbook of the month, since I’ve only made the sugarplums, and my self-imposed rule is to make at least three recipes from a book before allowing it into the ranks of the cookbook of the month club.  However, I really wanted to share these sugarplums before Christmas, because they’re just so pretty and delicious and … Christmasy!  With that noted, I’ll just give a preliminary review of the book, with updates to come as I explore it a bit more thoroughly.  So far I think the most valuable parts of this book for me are the decoration and delivery ideas – with every recipe comes detailed instructions for how to wrap and present that gift, and the ideas are really quite creative.  I bookmarked several pages just for photography and styling ideas – painting a cutting board with chalkboard paint and using it as a labeled cheeseboard?  Genius!  The recipes also seem very solid.  A few ideas are slightly worn out in the food blog world – spiced nuts, macarons, etc. – but most are novel and intriguing.  High on my list are the kumquat-cognac punch (if only it didn’t have a 6 week infusing time! Next year…), the rose petal vinegar, and the cute little cakes baked into eggshells.  There are ideas for all seasons, and many recipes for portable dishes that might be a great contribution to the next party you attend.  All in all I’m glad I grabbed it, and I’m looking forward to trying out a few more recipes.

And now it’s time to bring it back to the sugarplums, the first trial recipe from this book, which was a huge success.  The gist of the recipe is this: blend dried apricots, dates, figs, pistachios, Christmas spices, apricot jam and brandy to a sticky, chewy paste.  Let sit.  Shape into adorable little plums and roll in sanding sugar.  Pop into your mouth and be really, really surprised by how much you like them.  And how completely they taste of Christmas.  Easy and quick, these are definitely worth giving a try before the big day – especially since your guests will be impressed by how pretty they look on a platter.  Just be sure that your food processor is ready for a workout – I think this may have been the last straw for my little Ninja processor.

FTC disclaimer: I received a copy of Gourmet Gifts for free but was not asked to write this review, nor was I compensated for doing so.  All opinions are my own and reflect my honest impressions of the book.

Pistachio Sugarplums

Recipe adapted slightly from Gourmet Gifts by Dinah Corley.  Makes about 30 pieces.

  • 2 c. pitted dates, chopped
  • 1 c. shelled pistachio nuts
  • 1/2 c. dried apricots, chopped
  • 1/2 c. dried figs, chopped
  • 3 TBS brandy
  • 2 TBS apricot jam
  • 1/4 tsp orange oil, or 1 TBS dried orange peel
  • 1 tsp ground ginger
  • 1/2 tsp ground cloves
  • 1 tsp ground mace
  • 3/4 tsp ground cinnamon
  • 30 whole cloves (for the stems!)
  • 3/4 c. large crystal sugar (sanding or turbinado sugar)
  1. Place all ingredients except whole cloves and sanding sugar in food processor and rapidly pulse until mixture is evenly ground and forms a sticky paste.  If your food processor is too small to do all this at once, process the dried fruit and nuts in batches, then add them all back in (each ingredient should shrink in volume as it is processed) with the remaining ingredients until they are evenly mixed and blended.  Knead the dough/paste for 2-3 minutes then wrap in plastic wrap and refrigerate 2-3 hours or overnight.
  2. Pull off tablespoon sized balls from the refrigerated dough and roll into small oval shapes between your hands (to resemble plums).  Roll in sanding sugar, then stick a whole clove into the end to make a stem.  Lay the sugarplums out on a baking sheet and allow to firm up in a cool, dry place overnight.  Store in single layers in airtight containers at room temperature.

0 December 9, 2011 Cookbook

Udupi-Style Risotto with Dal

Just posting this recipe for inclusion in the winter 2012 cleanse – if I make it again, I’ll be sure to take some pictures!  This dish comes from a book called The Dance of Spices, which I haven’t yet gotten a chance to fully explore.  It’s packed with vegetables and spices, and the heat can be adjusted to your personal preference.  This recipe makes a lot (it’s hard to scale down recipes to use half of vegetables like eggplants and peppers without a lot of food going to waste), so stick some in the freezer for a lazy night.

Udupi-Style Risotto with Dal

Adapted slightly from The Dance of Spices.  Serves 6.

  • 1 c. Arborio rice
  • 1/2 c. yellow split peas
  • 1 1/2 tsp salt
  • 2 TBS canola oil
  • 1 tsp mustard seeds
  • 1/4 tsp asafetida
  • 2 TBS chopped cilantro leaves and stems
  • 1/4 tsp turmeric
  • 1 onion, thinly sliced
  • 1 medium Yukon gold potato, washed and cubed
  • 1/2 a large eggplant or 1 small Japanese eggplant, diced
  • 2 carrots, peeled and sliced
  • 1 green bell pepper, chopped
  • 1 small head of broccoli, cut in 1-inch pieces (about 3/4 c.)
  • 2 TBS tamarind concentrate, dissolved in 1/2 c. water
  • 1 recipe rasam powder, recipe below
  • 2 TBS butter
  1. Combine rice and split peas in a bowl and cover with cold water.  Soak for 30 minutes, then drain and rinse twice.  In a large saucepan, combine rice, split peas, 3 1/2 c. water, and 1/2 tsp salt and bring to a boil.  Reduce heat to low, cover, and simmer until split peas are tender, about 30 minutes.  Turn off heat and let stand, covered.
  2. Heat oil in a large skillet over medium heat.  Add mustard seeds and asafetida, and cook for about 1 minute, then add cilantro, turmeric, onion, potato, eggplant, carrots, bell pepper, and broccoi, and cook, stirring for 3-5 minutes.  Add dissolved tamarind liquid.  If needed, add more water to almost cover veggies, then cover pan, and cook over medium heat until potato is tender, about 8-10 minutes.  When potato is tender, season with salt and add the huli anna powder as well as 1 c. water, stir to combine then pour over rice and split pea mixture.  Stir to combine, then cook over medium heat for about 2 minutes, to allow the water to be absorbed.  Mix in 2 TBS of butter, and serve hot.

Rasam Powder

Recipe adapted from The Dance of Spices.

  • 2 tsp vegetable oil
  • 3 TBS coriander seeds
  • 1 tsp cumin seeds
  • 1 tsp whole black peppercorns
  • 1/2 tsp fenugreek seeds
  • 10 fresh kari leaves
  • 1 small, hot dried chile (such as a Thai chile), stemmed and broken into rough pieces
  • 1/4 tsp asafetida
  1. Heat the oil in a medium skillet over medium heat.  Add coriander, cumin, peppercorns, fenugreek, kari leaves, and chile pieces.  Toast, stirring constantly, until the seeds are beginning to brown and the leaves are beginning to crisp, about 5 minutes.  Add asafetida and cook for 1 additional minute.  Transfer mixture to a mortar and pestle (or electric spice/coffee grinder) and pound or grind to a powder.

1 December 9, 2011 Recipe

Basic Arugula Mashed Potatoes

Just posting this recipe for inclusion in the winter 2012 cleanse – if I make it again, I’ll be sure to take some pictures!  These were made to make my grape and ginger chicken dinner more filling, but without the inclusion of butter and cheese… well, let’s just say they weren’t the potatoes I was dreaming of.  Still, I ate them all, and it was a great way to sneak another serving of leafy greens into my day!

Arugula Mashed Potatoes

Serves 3.

  • 3 medium yukon gold potatoes, washed and cut into 1 inch cubes
  • approx 4 cups arugula, rinsed
  • 3 TBS olive oil
  • salt and pepper
  1. Place the potatoes in a large pot and cover with cold water.  Add about 1 TBS salt.  Bring potatoes to a boil and then cook until tender, about 5 minutes.  Remove potatoes from pot with a pasta skimmer and place in a large bowl.  Add arugula to the still boiling water, and blanch until bright green, about 1 minutes.  Quickly drain and run under cold water to stop the cooking process, then blend the arugula, potatoes, and olive oil until they form a smooth puree.  Season with salt and pepper and serve.
  • « Go to Previous Page
  • Go to page 1
  • Interim pages omitted …
  • Go to page 44
  • Go to page 45
  • Go to page 46
  • Go to page 47
  • Go to page 48
  • Interim pages omitted …
  • Go to page 57
  • Go to Next Page »

Primary Sidebar

Subscribe!

Get creative recipes and menu ideas delivered straight to your inbox.

Most Popular

A House // Sweet Potato and Coconut Milk Soup with Brown Rice and Lentils

Monthly Fitness Goals: July // Homemade Spinach Wraps with Chopped Greek Salad

A New Job // Classic Seven-Layer Bars

Butternut Squash Carbonara with Fried Sage and Caramelized Onions

Happy Birthday, Trevor! // Peanut Butter Fudge

Cookbook Review and Giveaway: Home Made Winter

Drizly

Please note!

Full disclosure: if you purchase anything at Amazon using the above links or any other links to Amazon on this site, I will receive a small commission. Just so you know!

Copyright© 2025 · Cookd Pro Theme by Shay Bocks

This site uses cookies: Find out more.