• Skip to primary navigation
  • Skip to main content
  • Skip to primary sidebar
  • Home
  • Recipes
  • Features
    • Cookbook Reviews
    • Ingredient of the Week
    • Sunday Dinner
    • Fitness Goals
  • Travel
  • About
    • Privacy Policy
    • Cookie Policy
  • Work With Me

Katie at the Kitchen Door

Globally-inspired, seasonal recipes

Blog Page

1 December 6, 2012 Cookbook

SPQR: Modern Italian Food and Wine

Cocoa Linguine with Venison Ragu {Katie at the Kitchen Door}

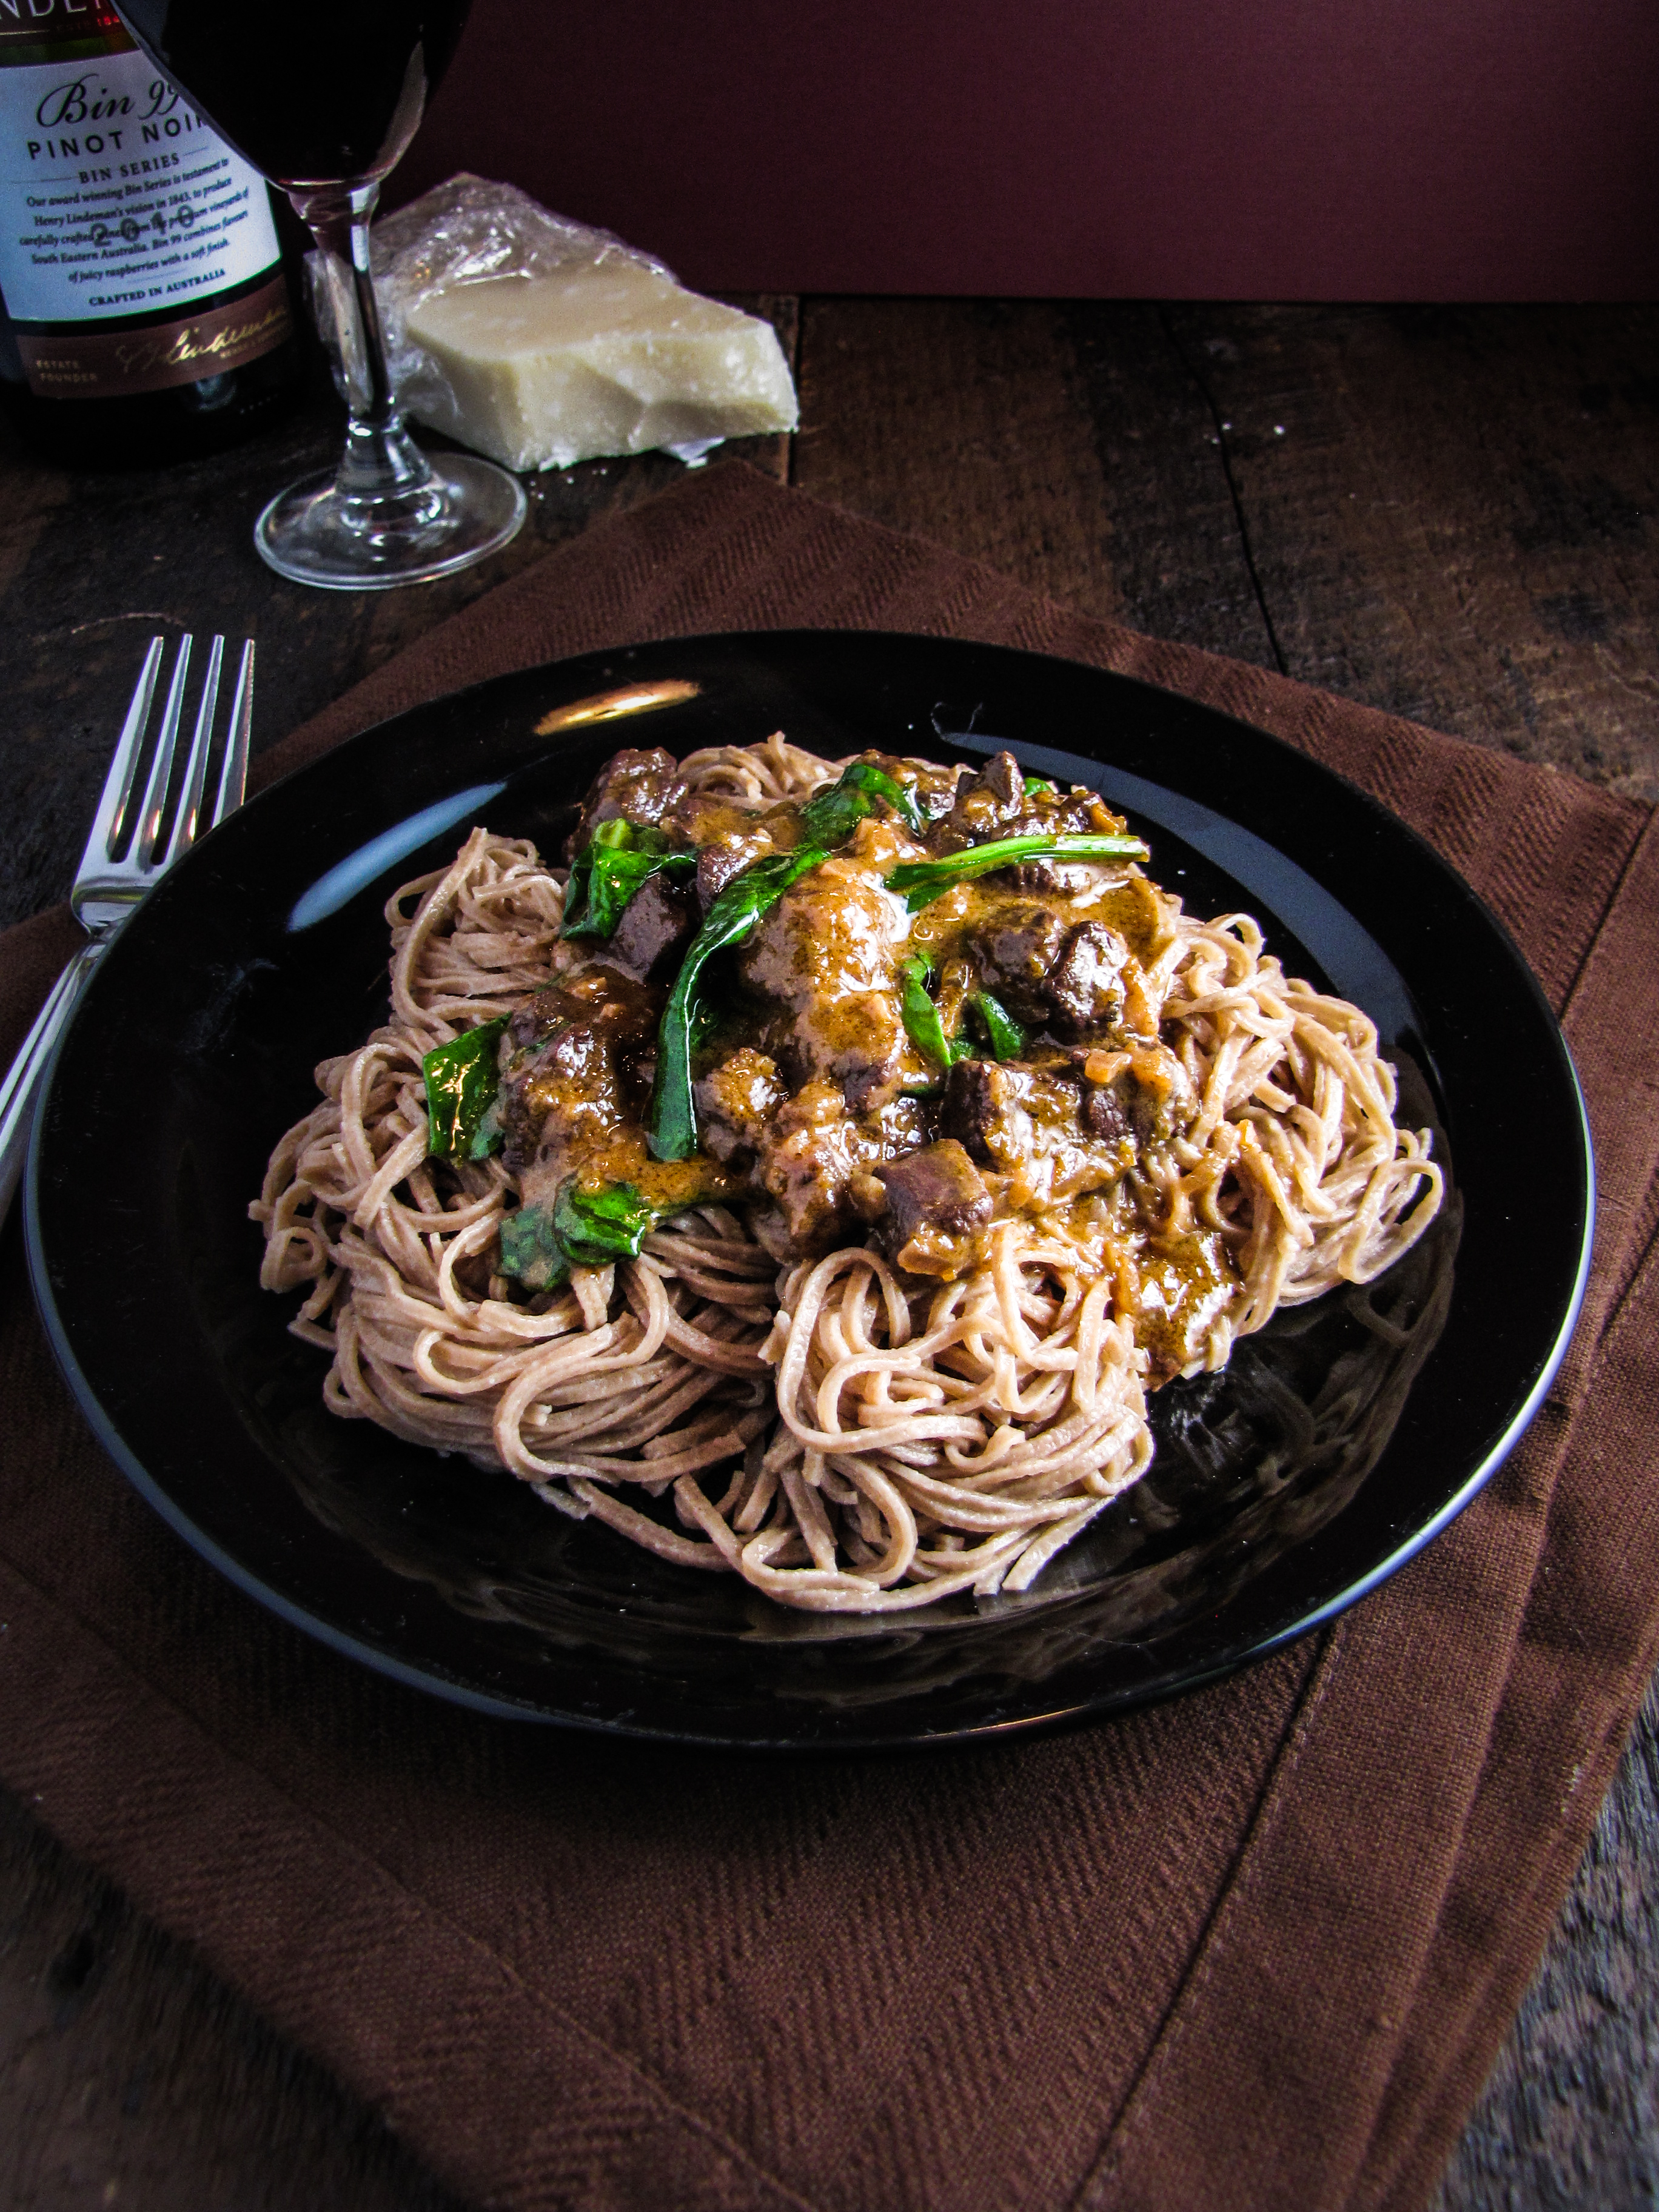
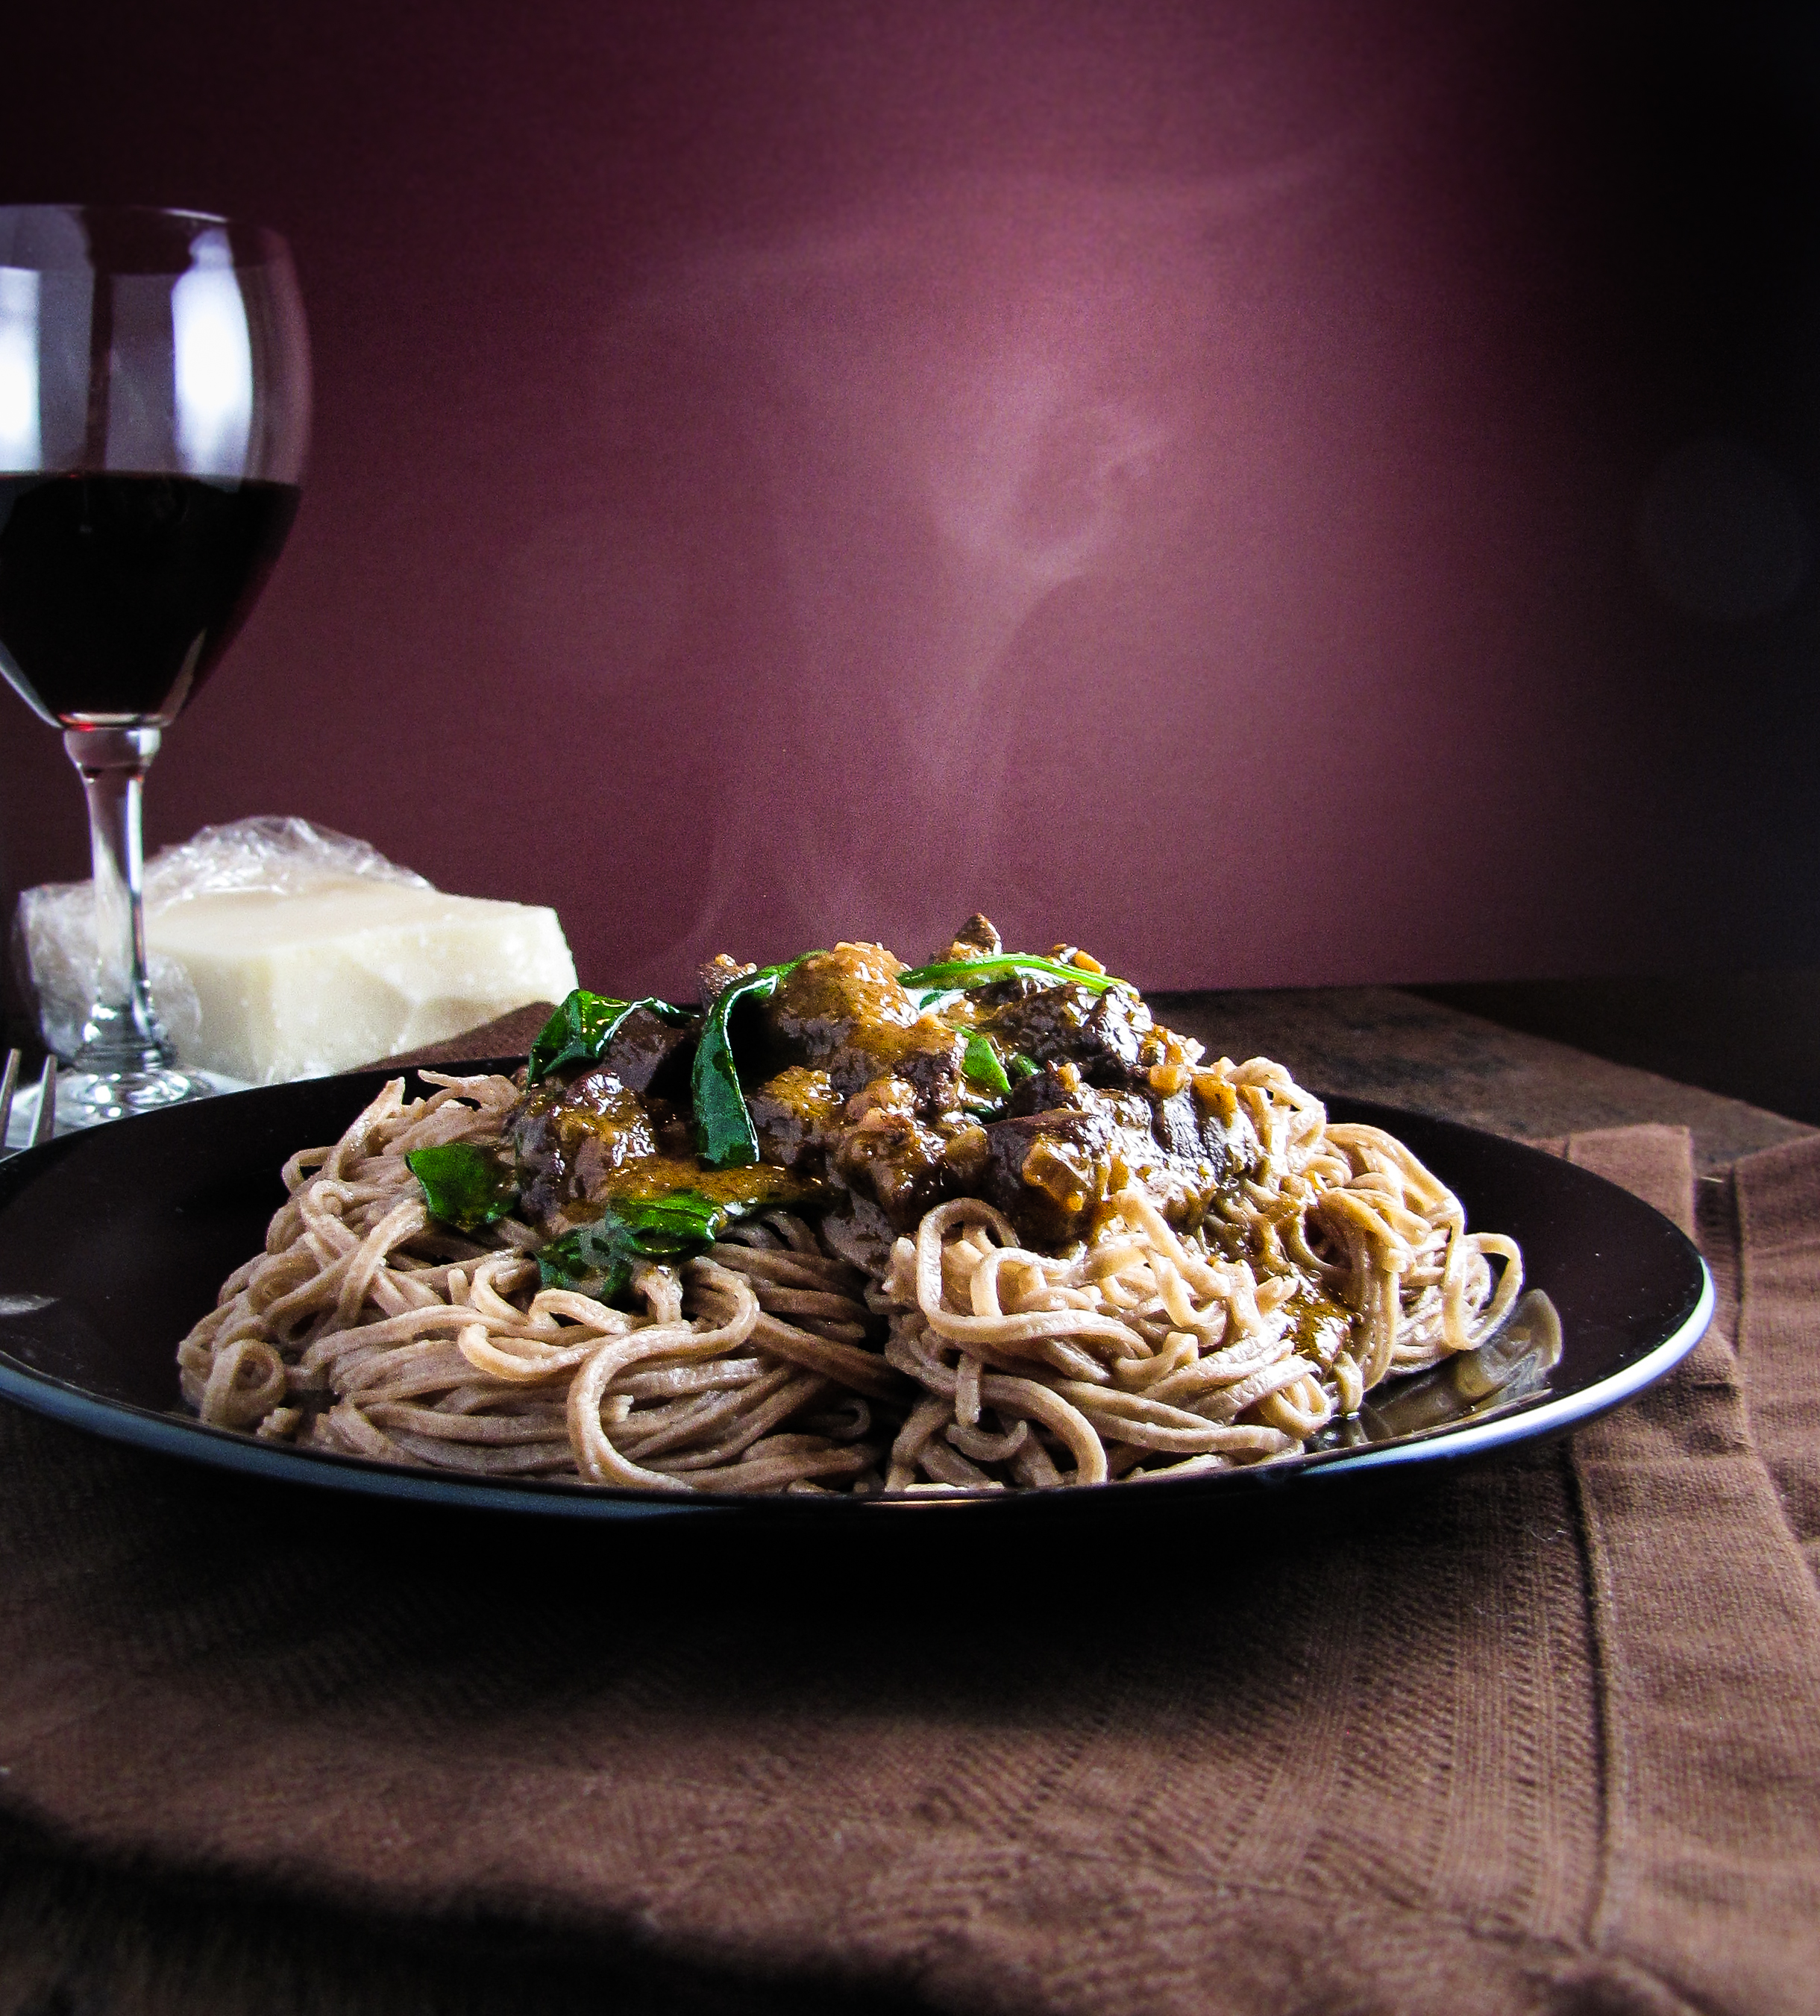
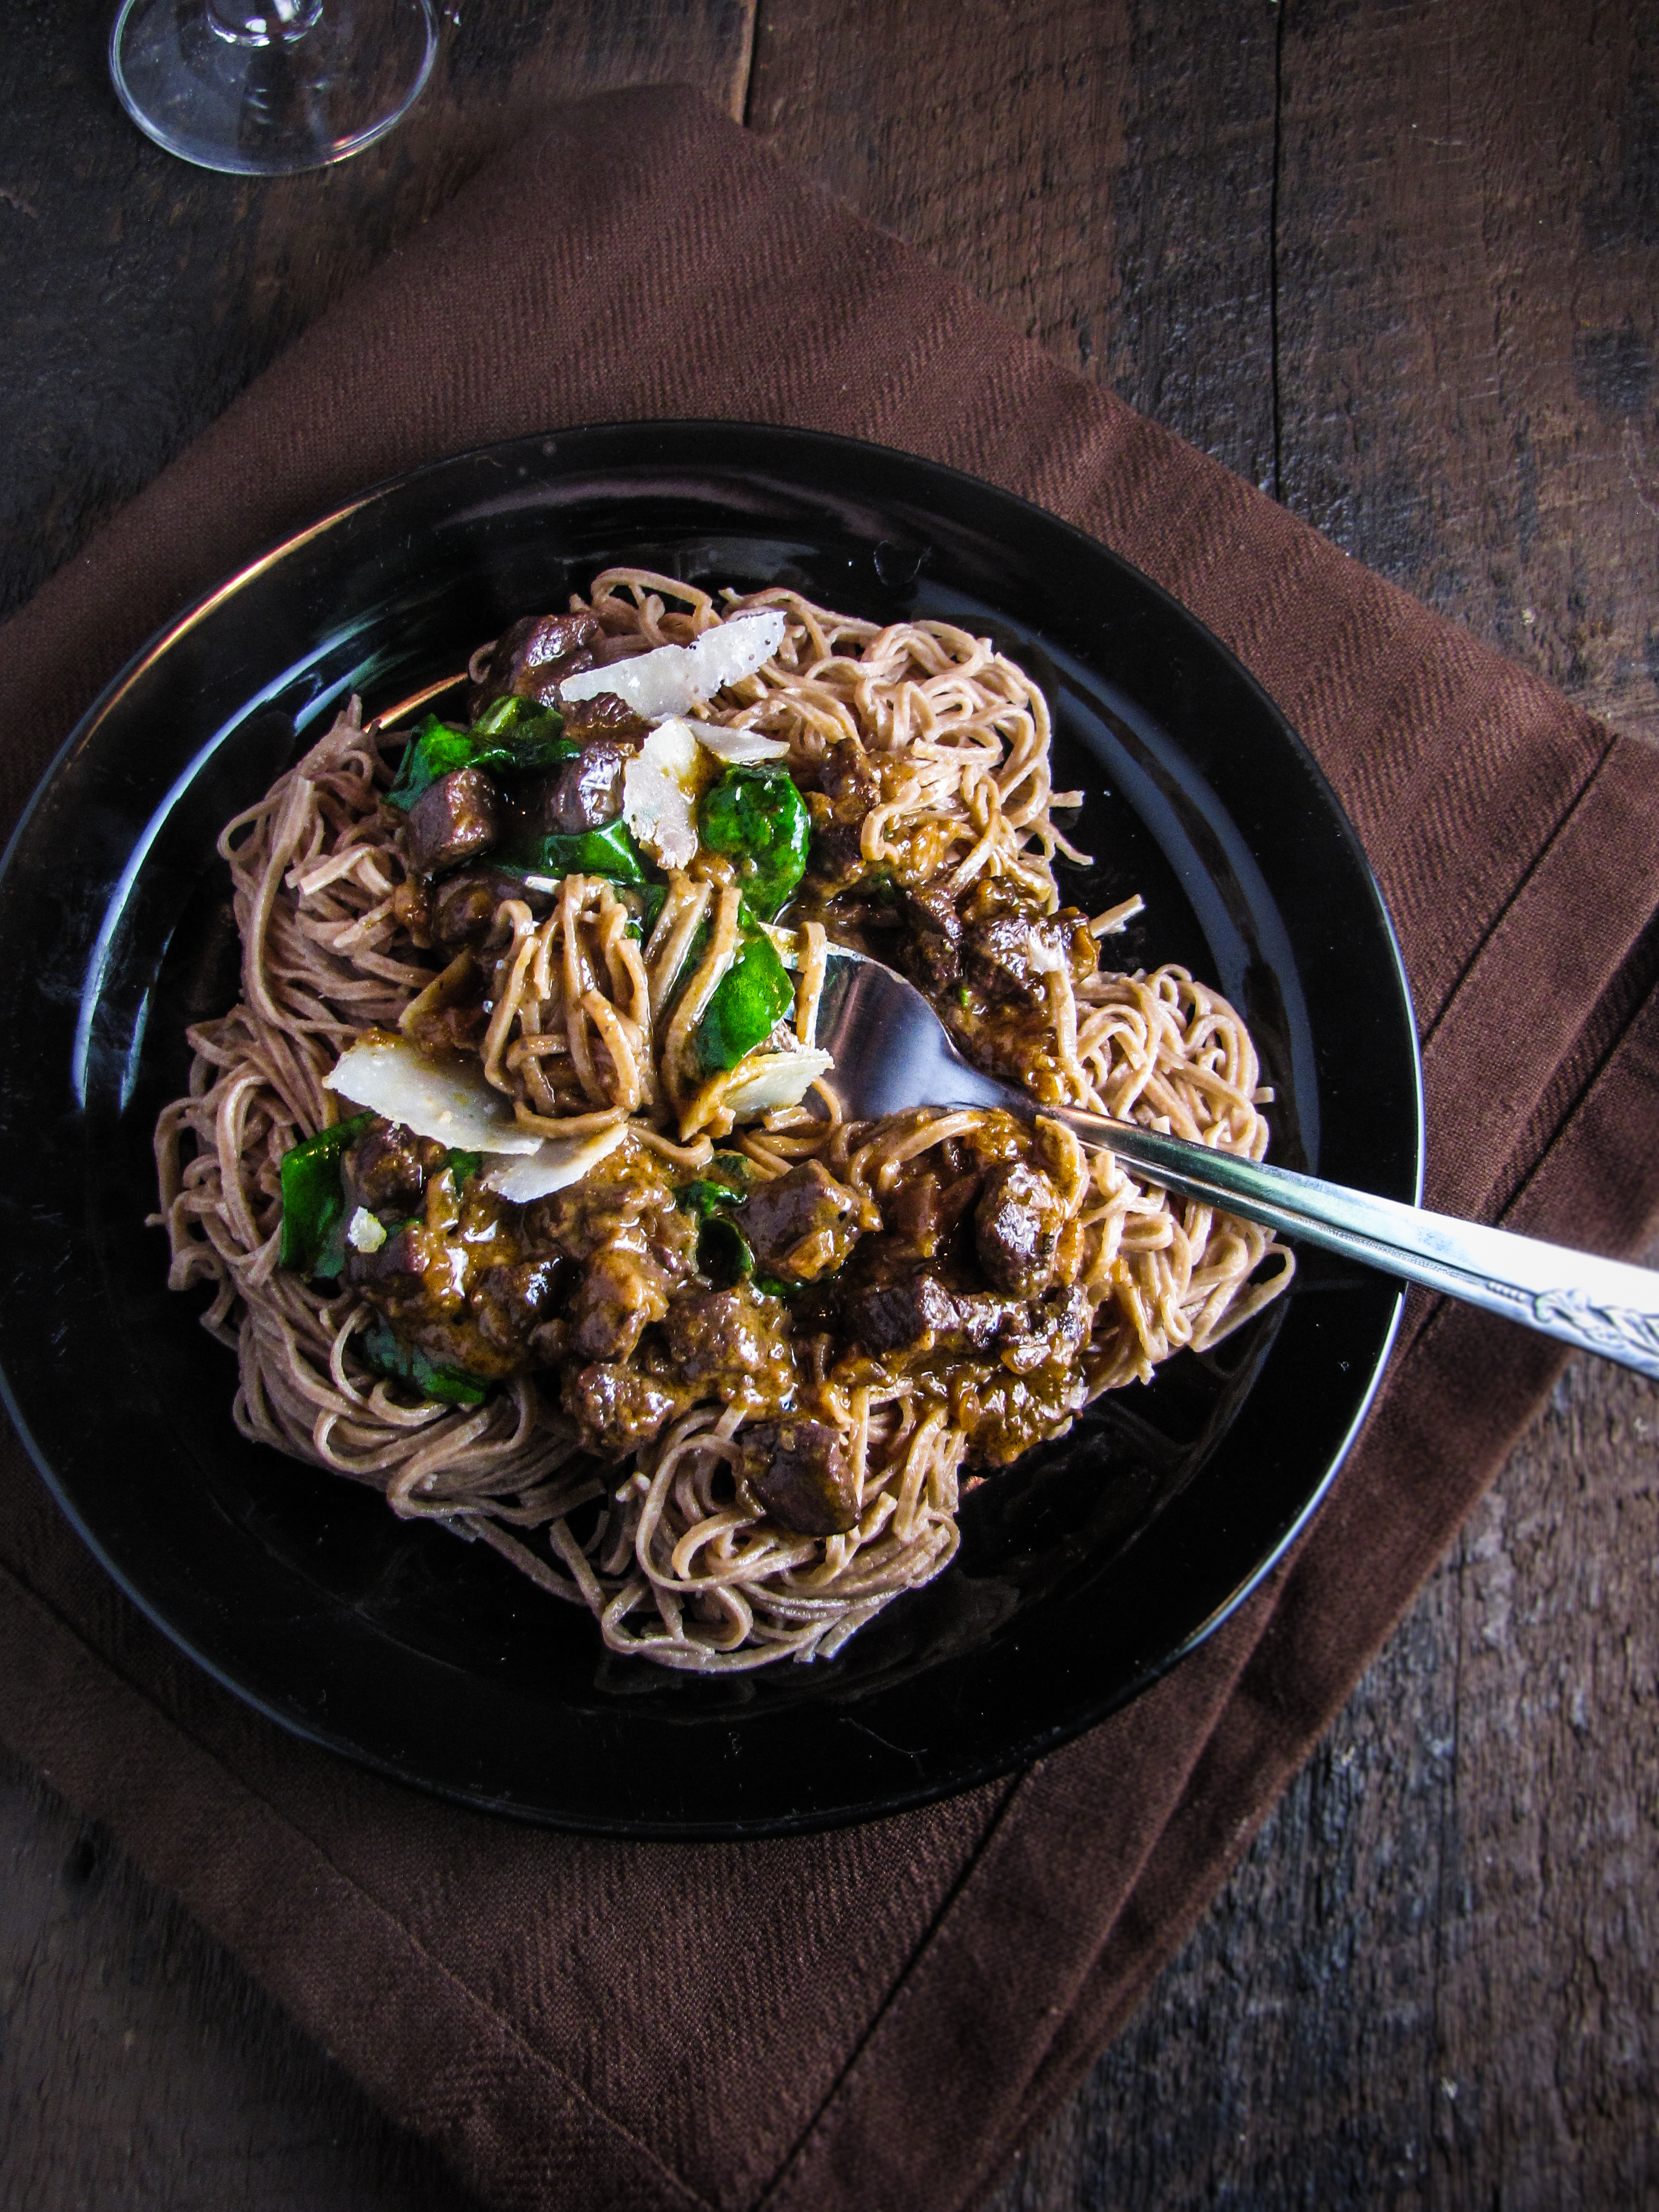
Before I tell you about this book, I have to tell you about something else. This recipe. We finished the last bowl of leftovers over a week ago and yet I can’t stop thinking about it. It’s venison ragu. On cocoa-infused spaghetti. Venison. Cocoa-infused spaghetti. You heard me. If venison weren’t obscenely expensive (seems ironic given the deer population, no?), I would make this, er, have Trevor make this, at least once a week. The spaghetti is earthy and workable and tender, the venison rich and lean and just amazing. I had no idea I even liked venison. But now I’m a convert. Anyone with extra deer on their hands in Massachusetts?

2012-11-24 074

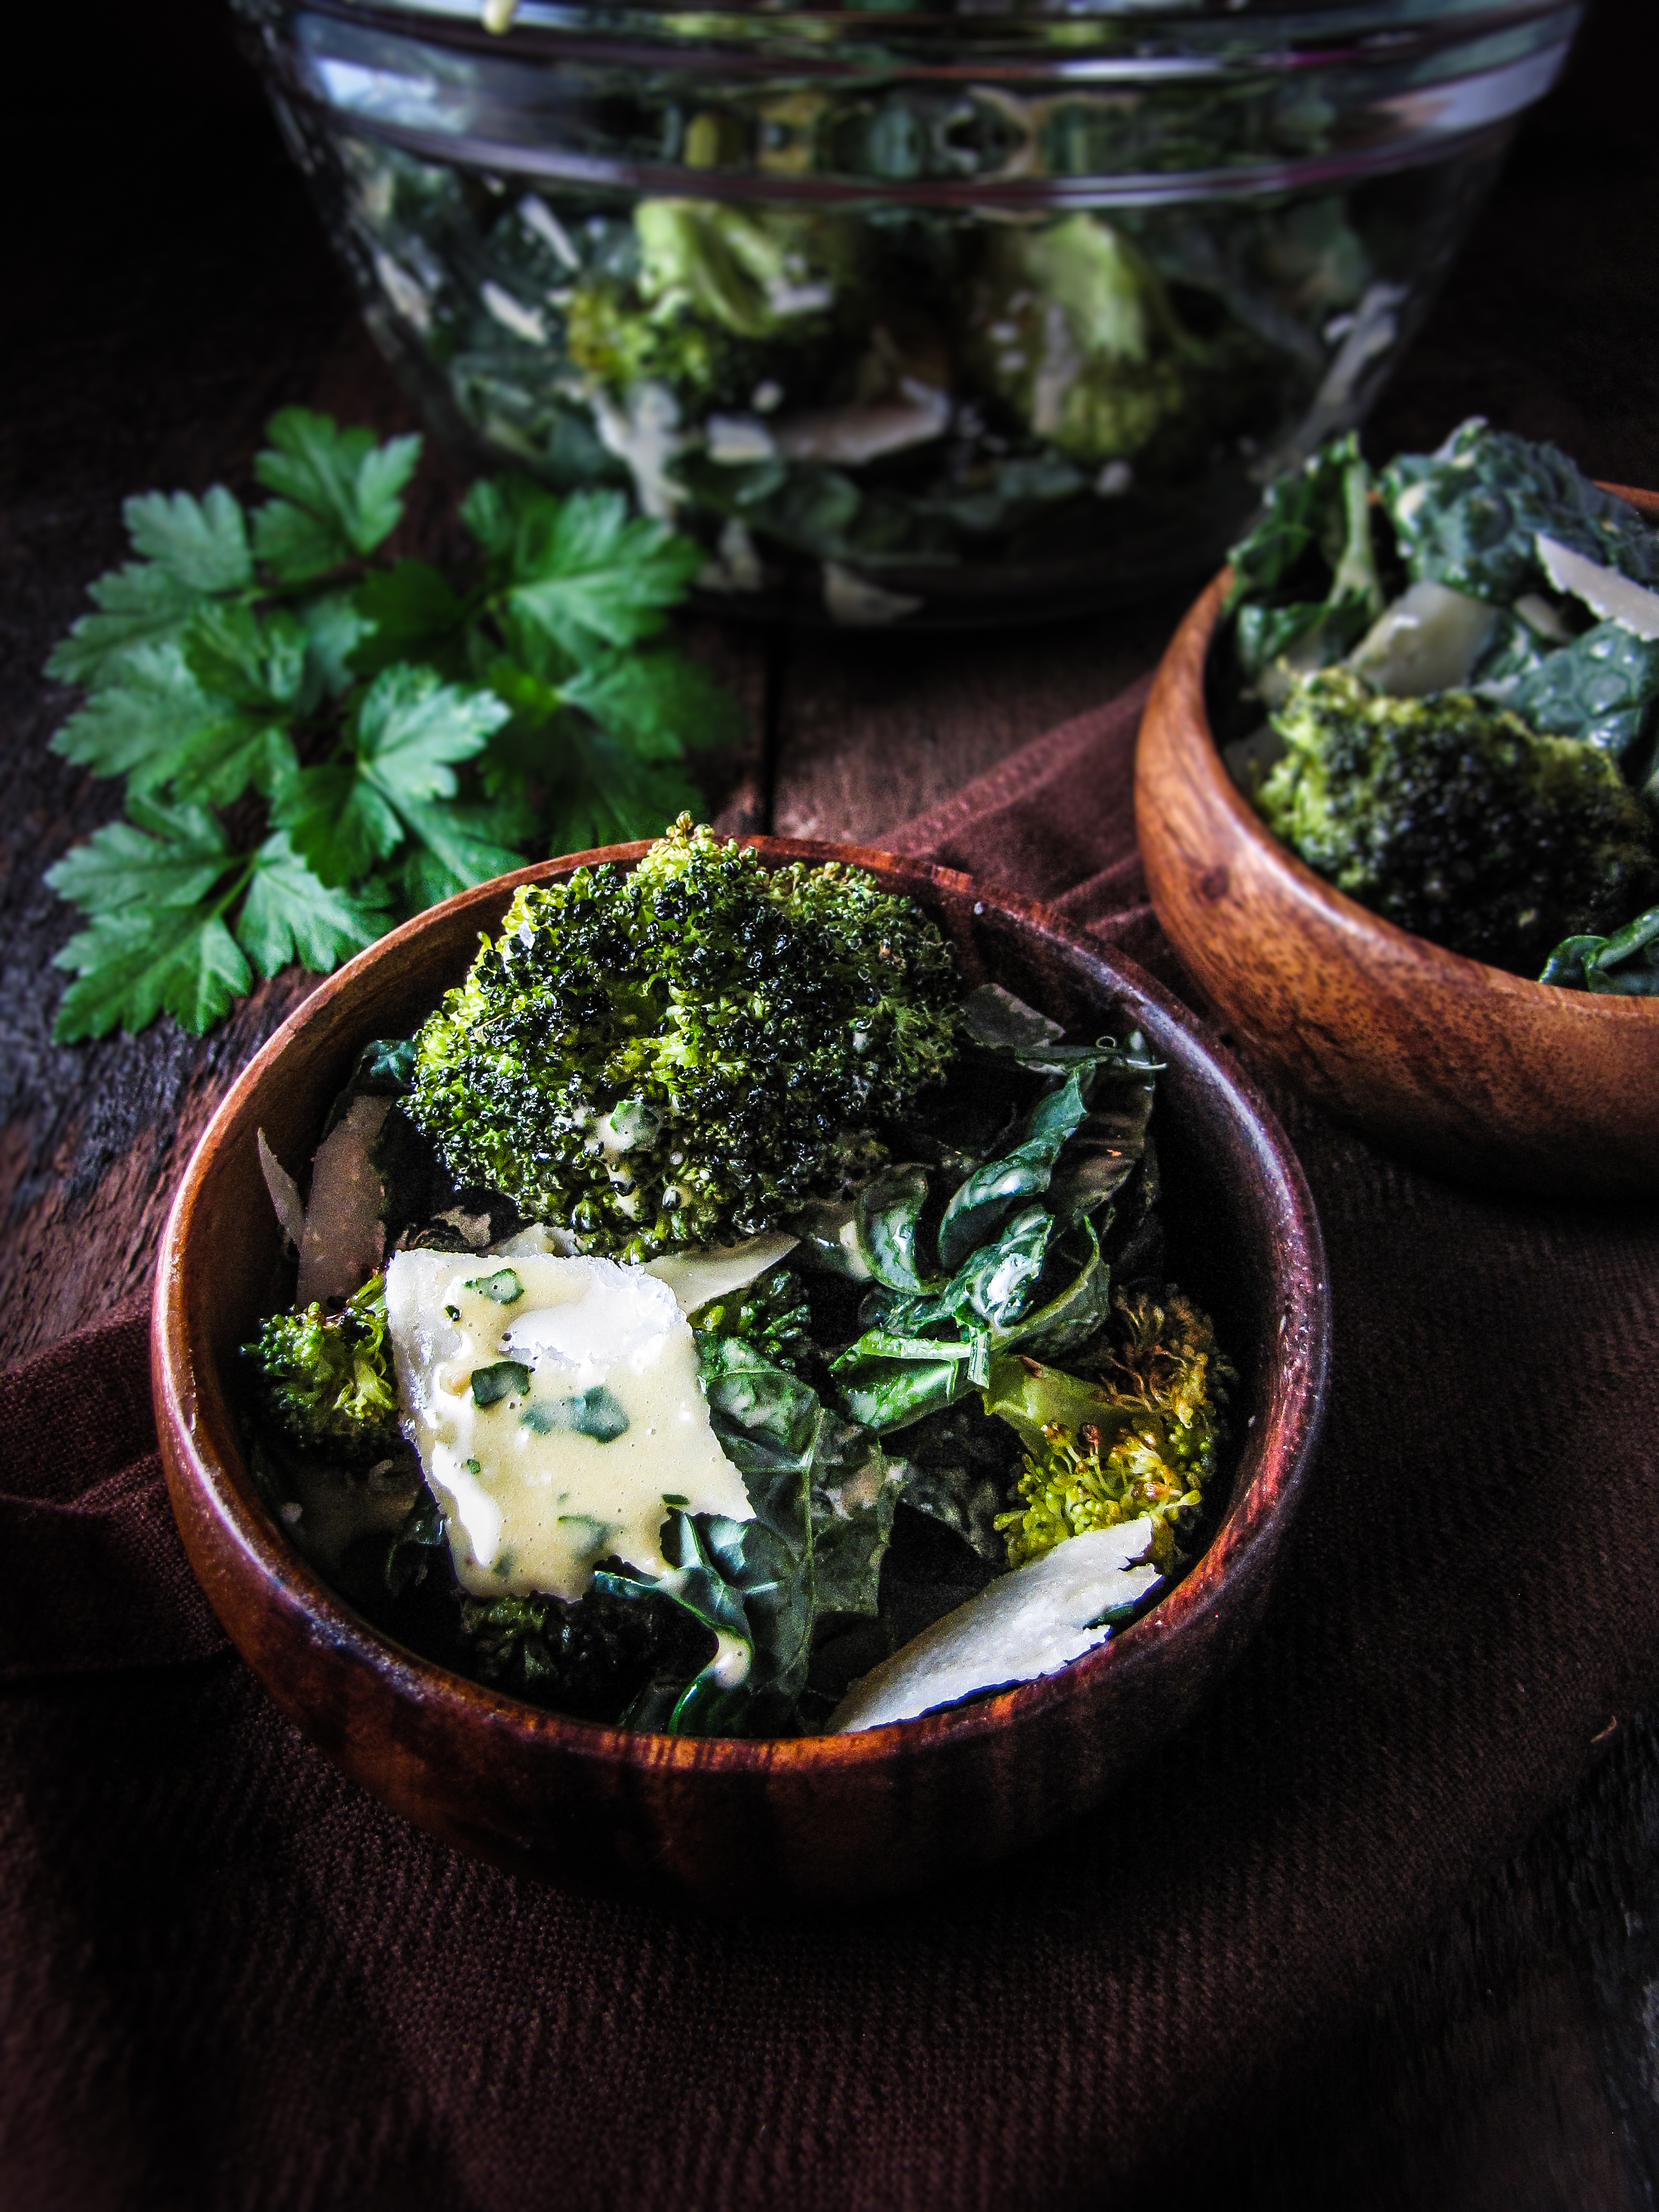
Now, back to the book that provided us with this amazing recipe – SPQR: Modern Italian Food and Wine. As I cracked open the cover of this book and turned through the first pages of this book my mind immediately went something like: “Oh my God, this is a beautiful book.”   Full page spreads of the Italian countryside, hands carefully harvesting grapes, bottles and bottles of wine, freshly picked artichokes, all in muted browns and greens that are calming and serene.  Cookbook checklist item #1: beautiful photography?  Instantly checked off.

Cocoa Linguine with Venison Ragu {Katie at the Kitchen Door}

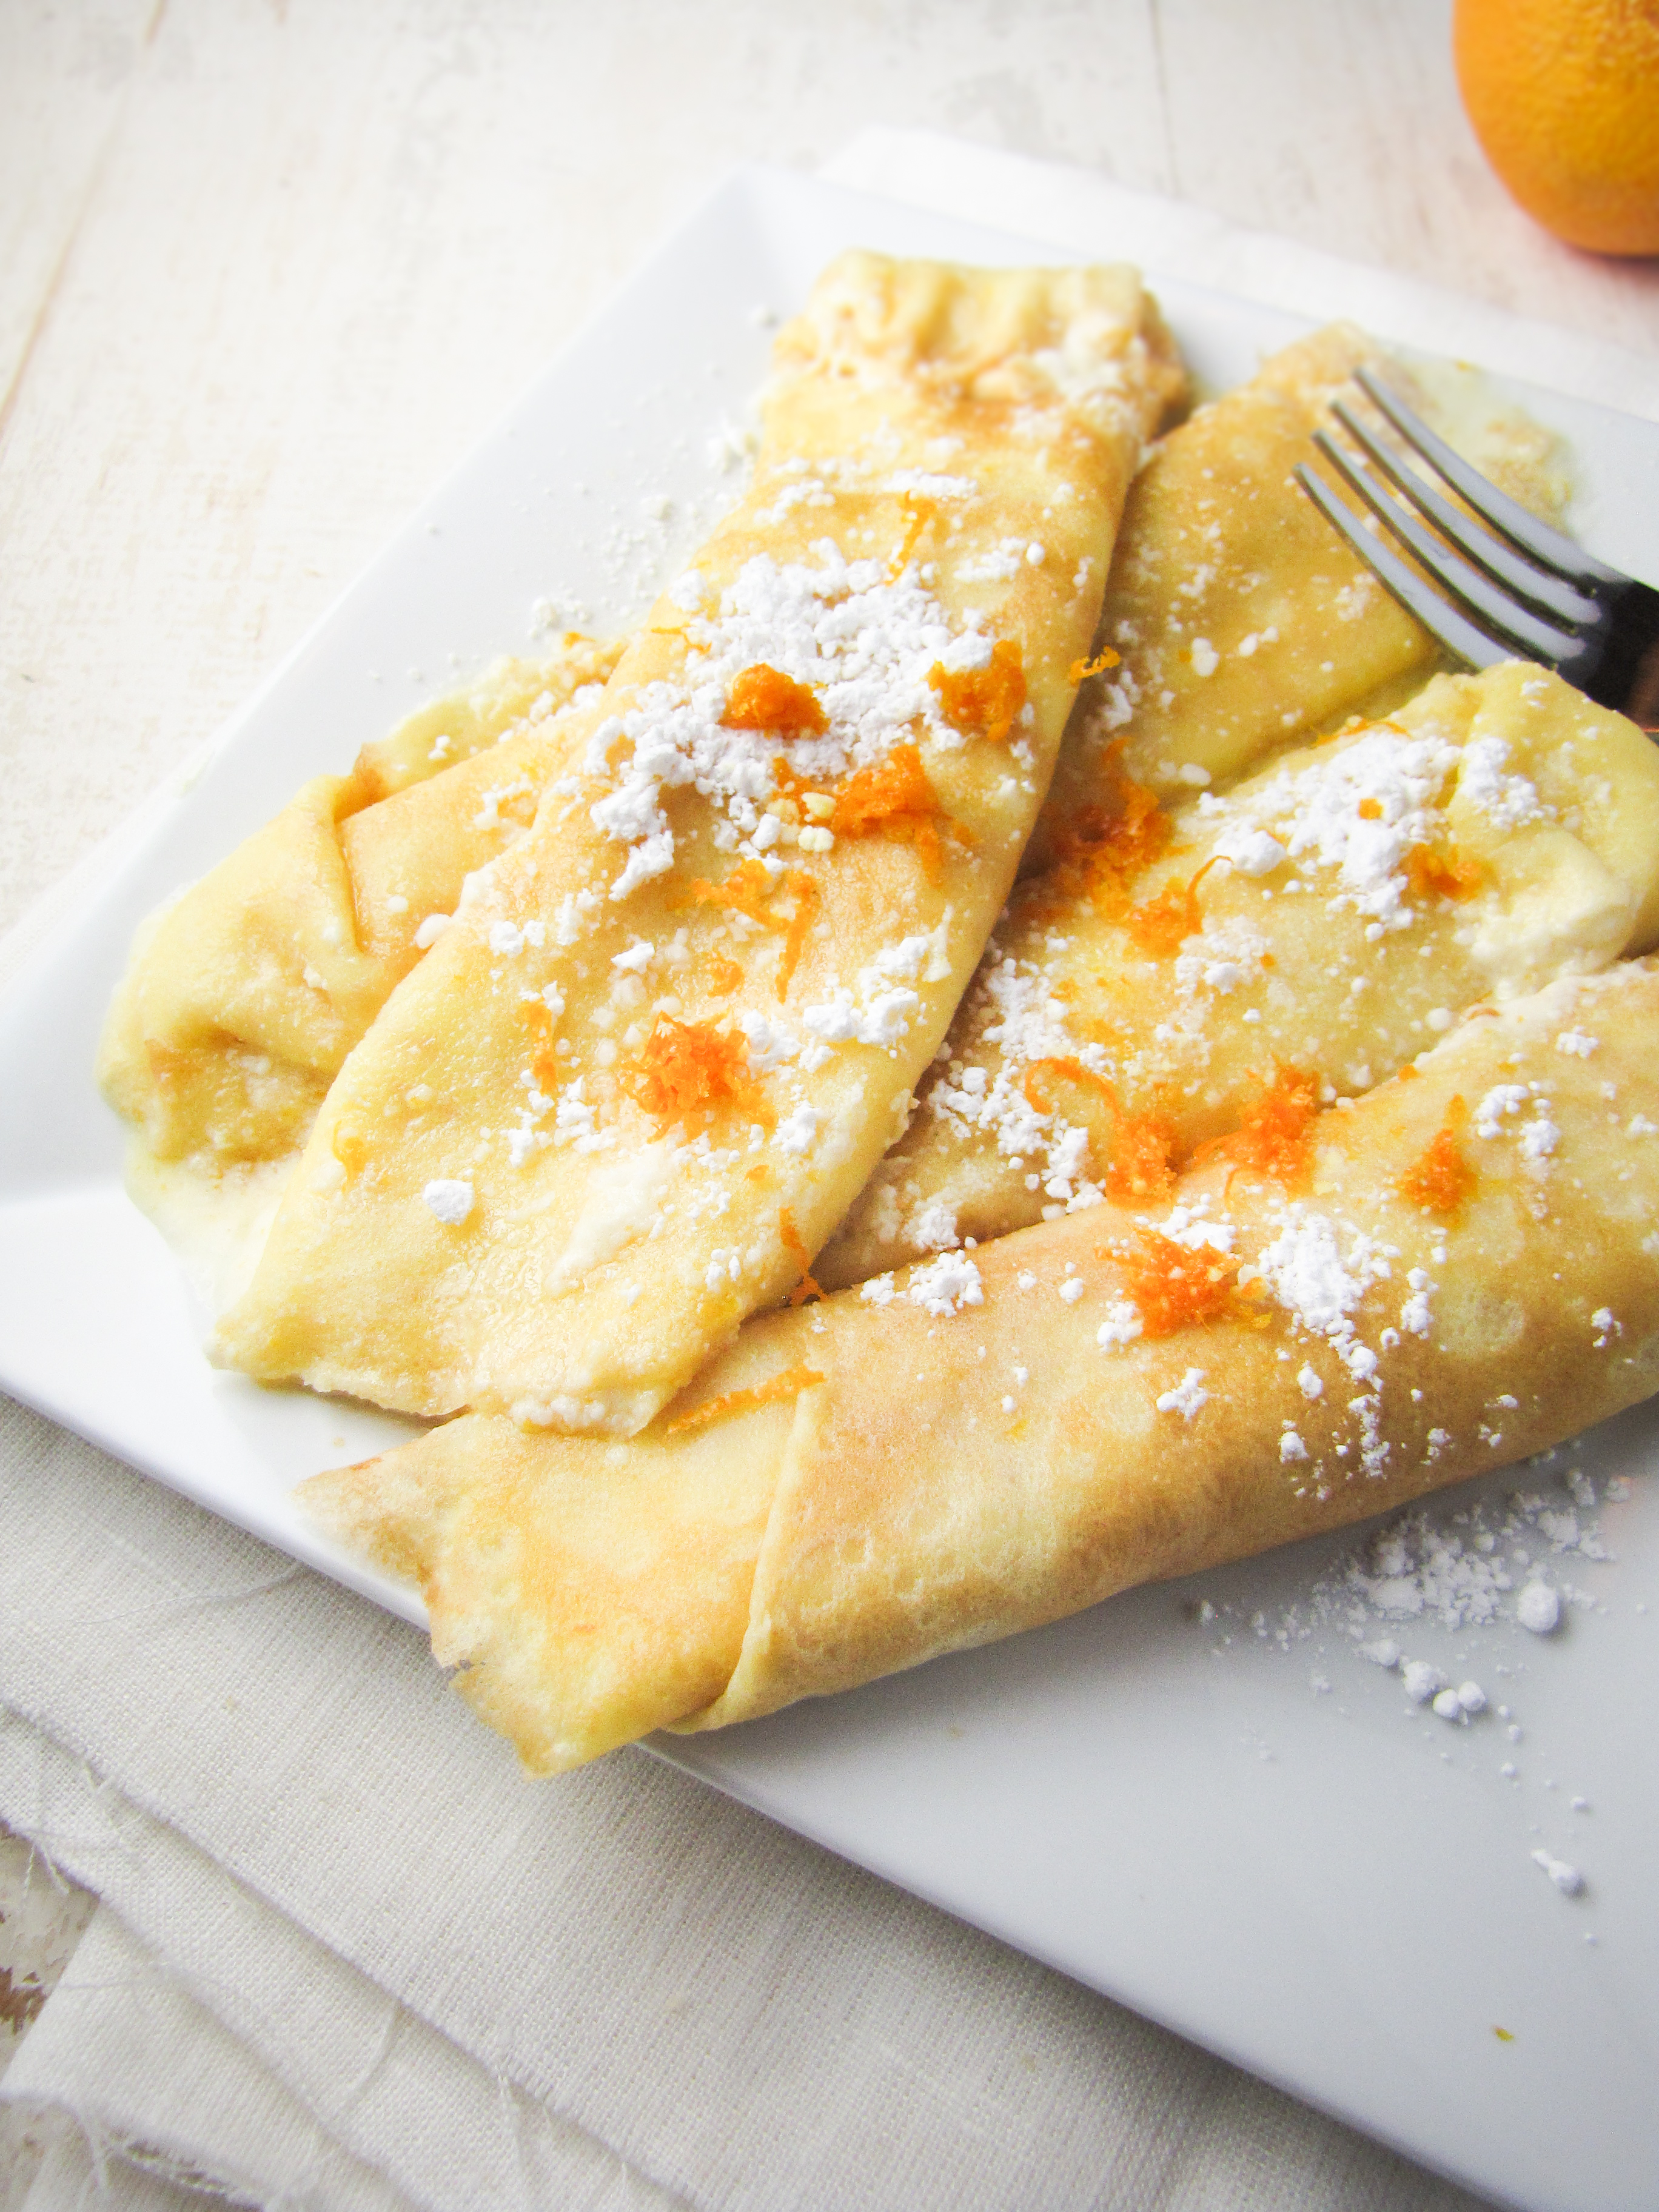
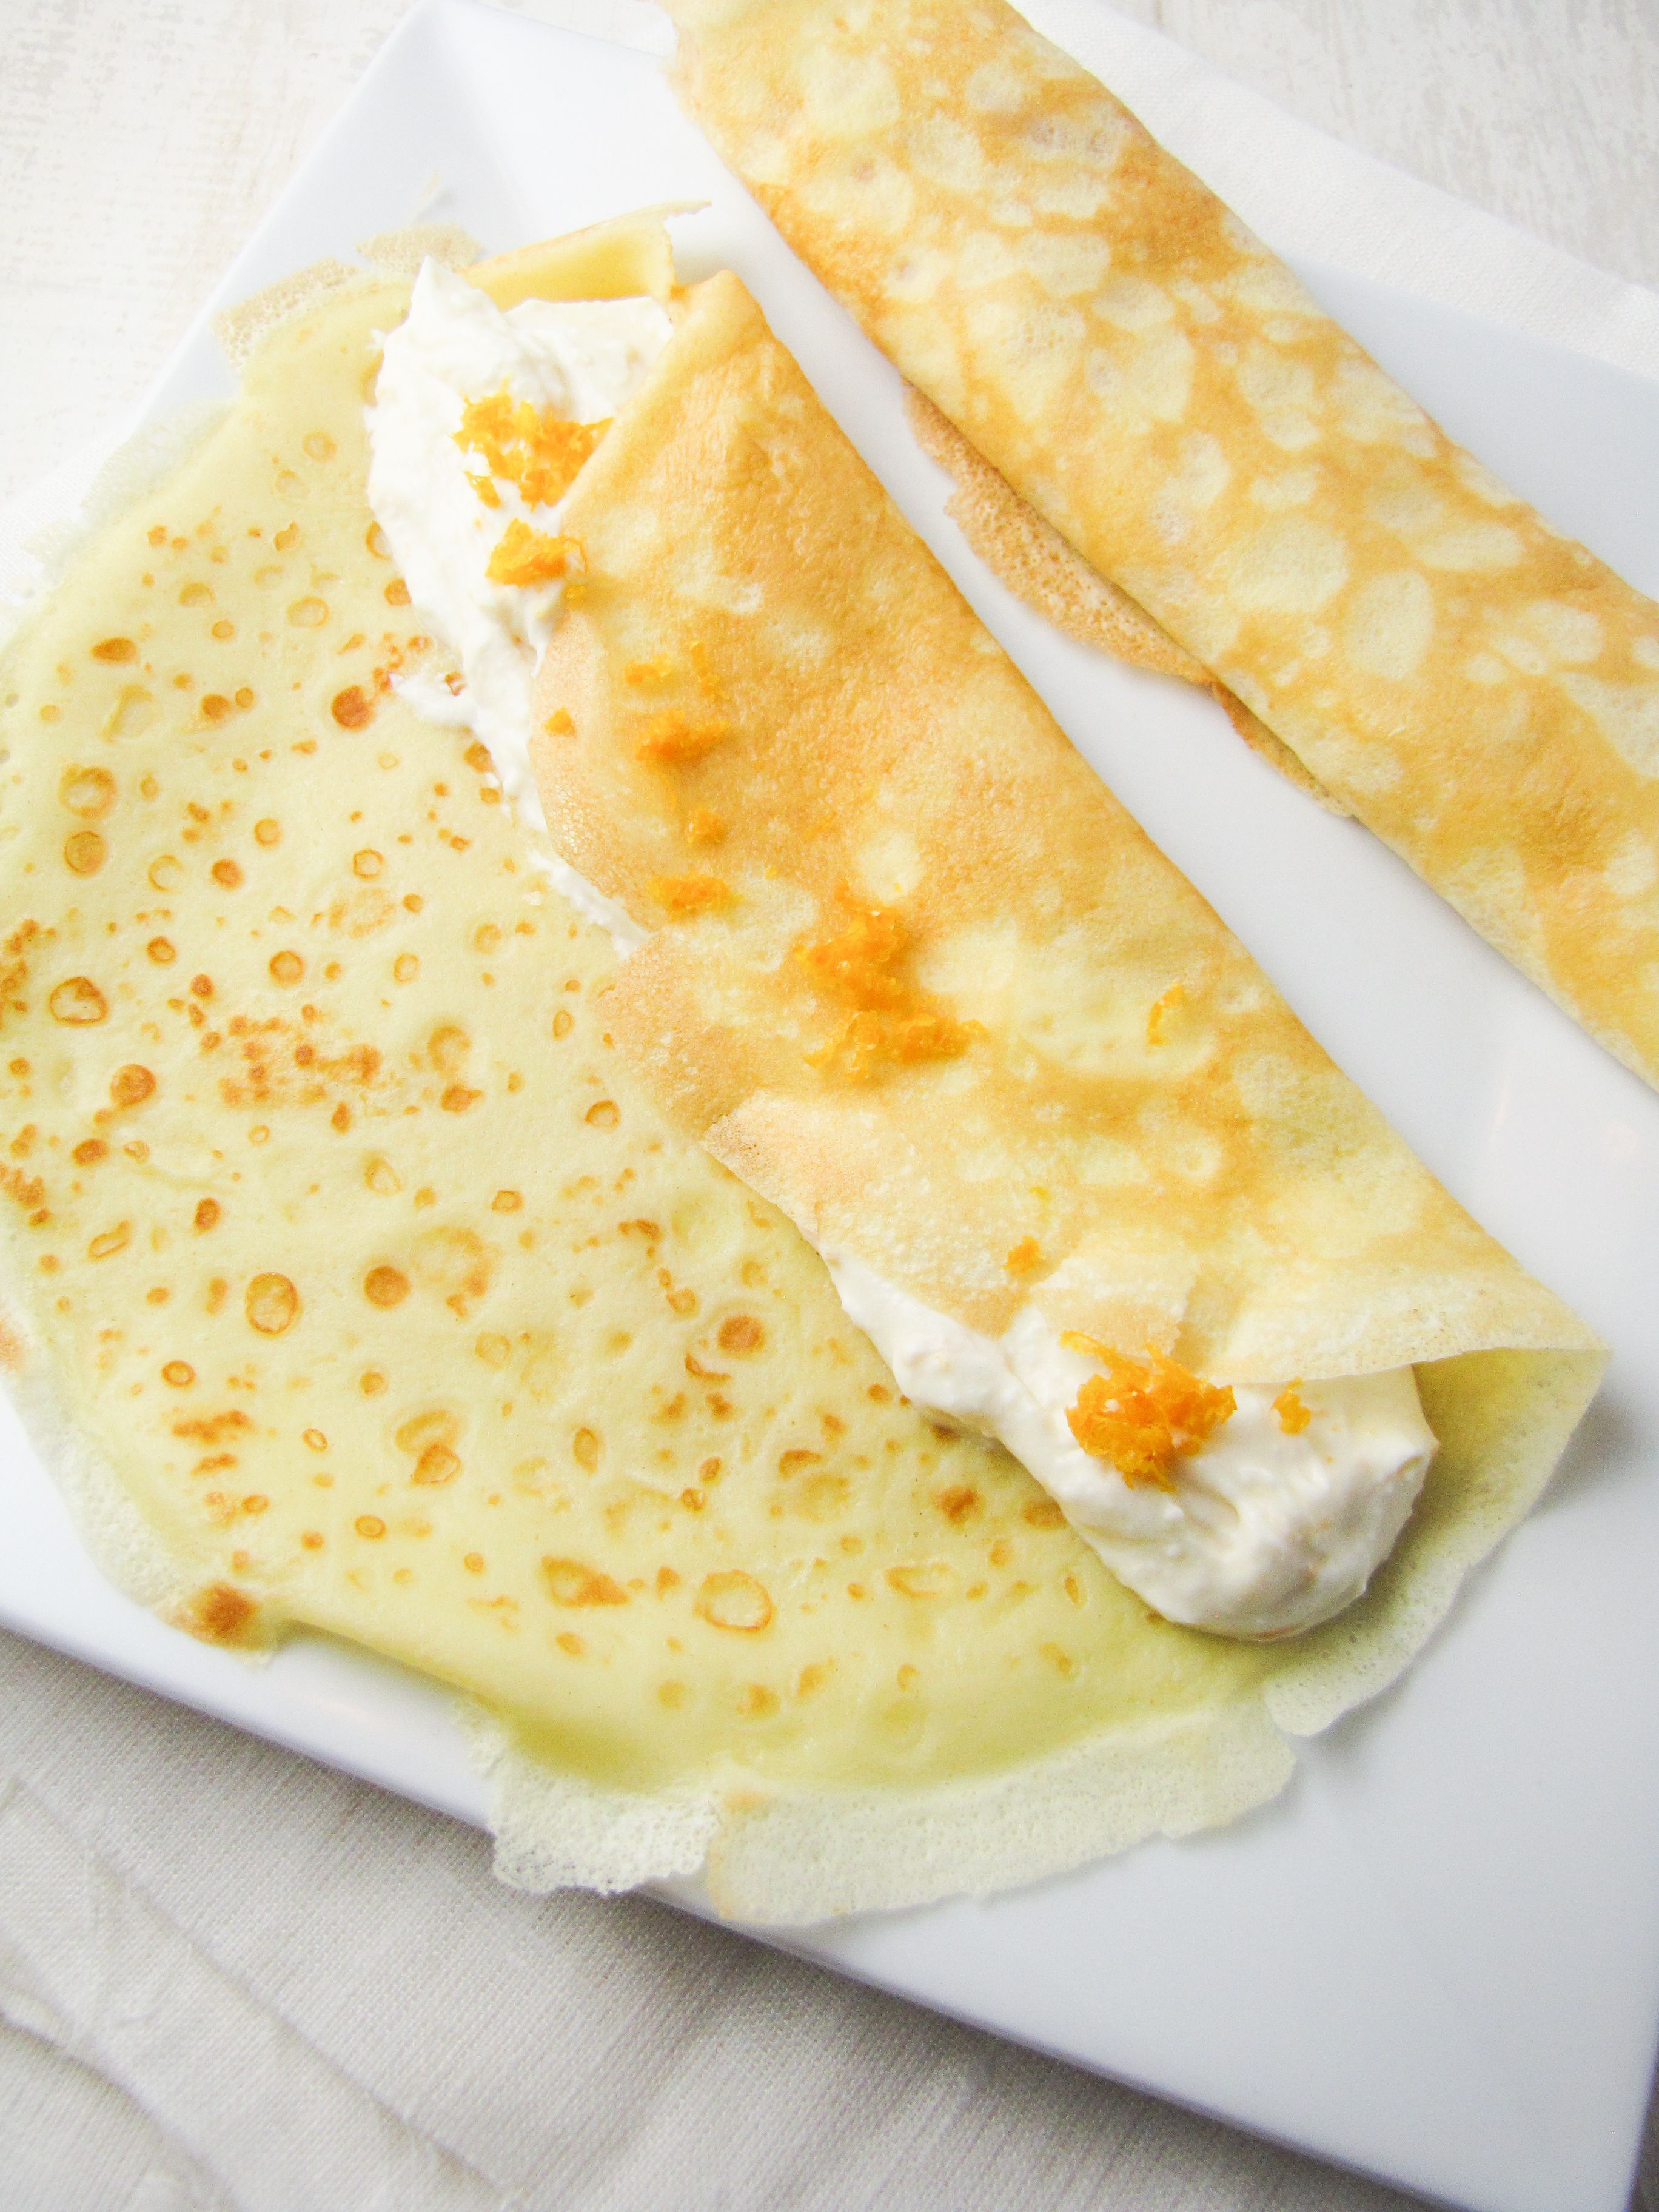
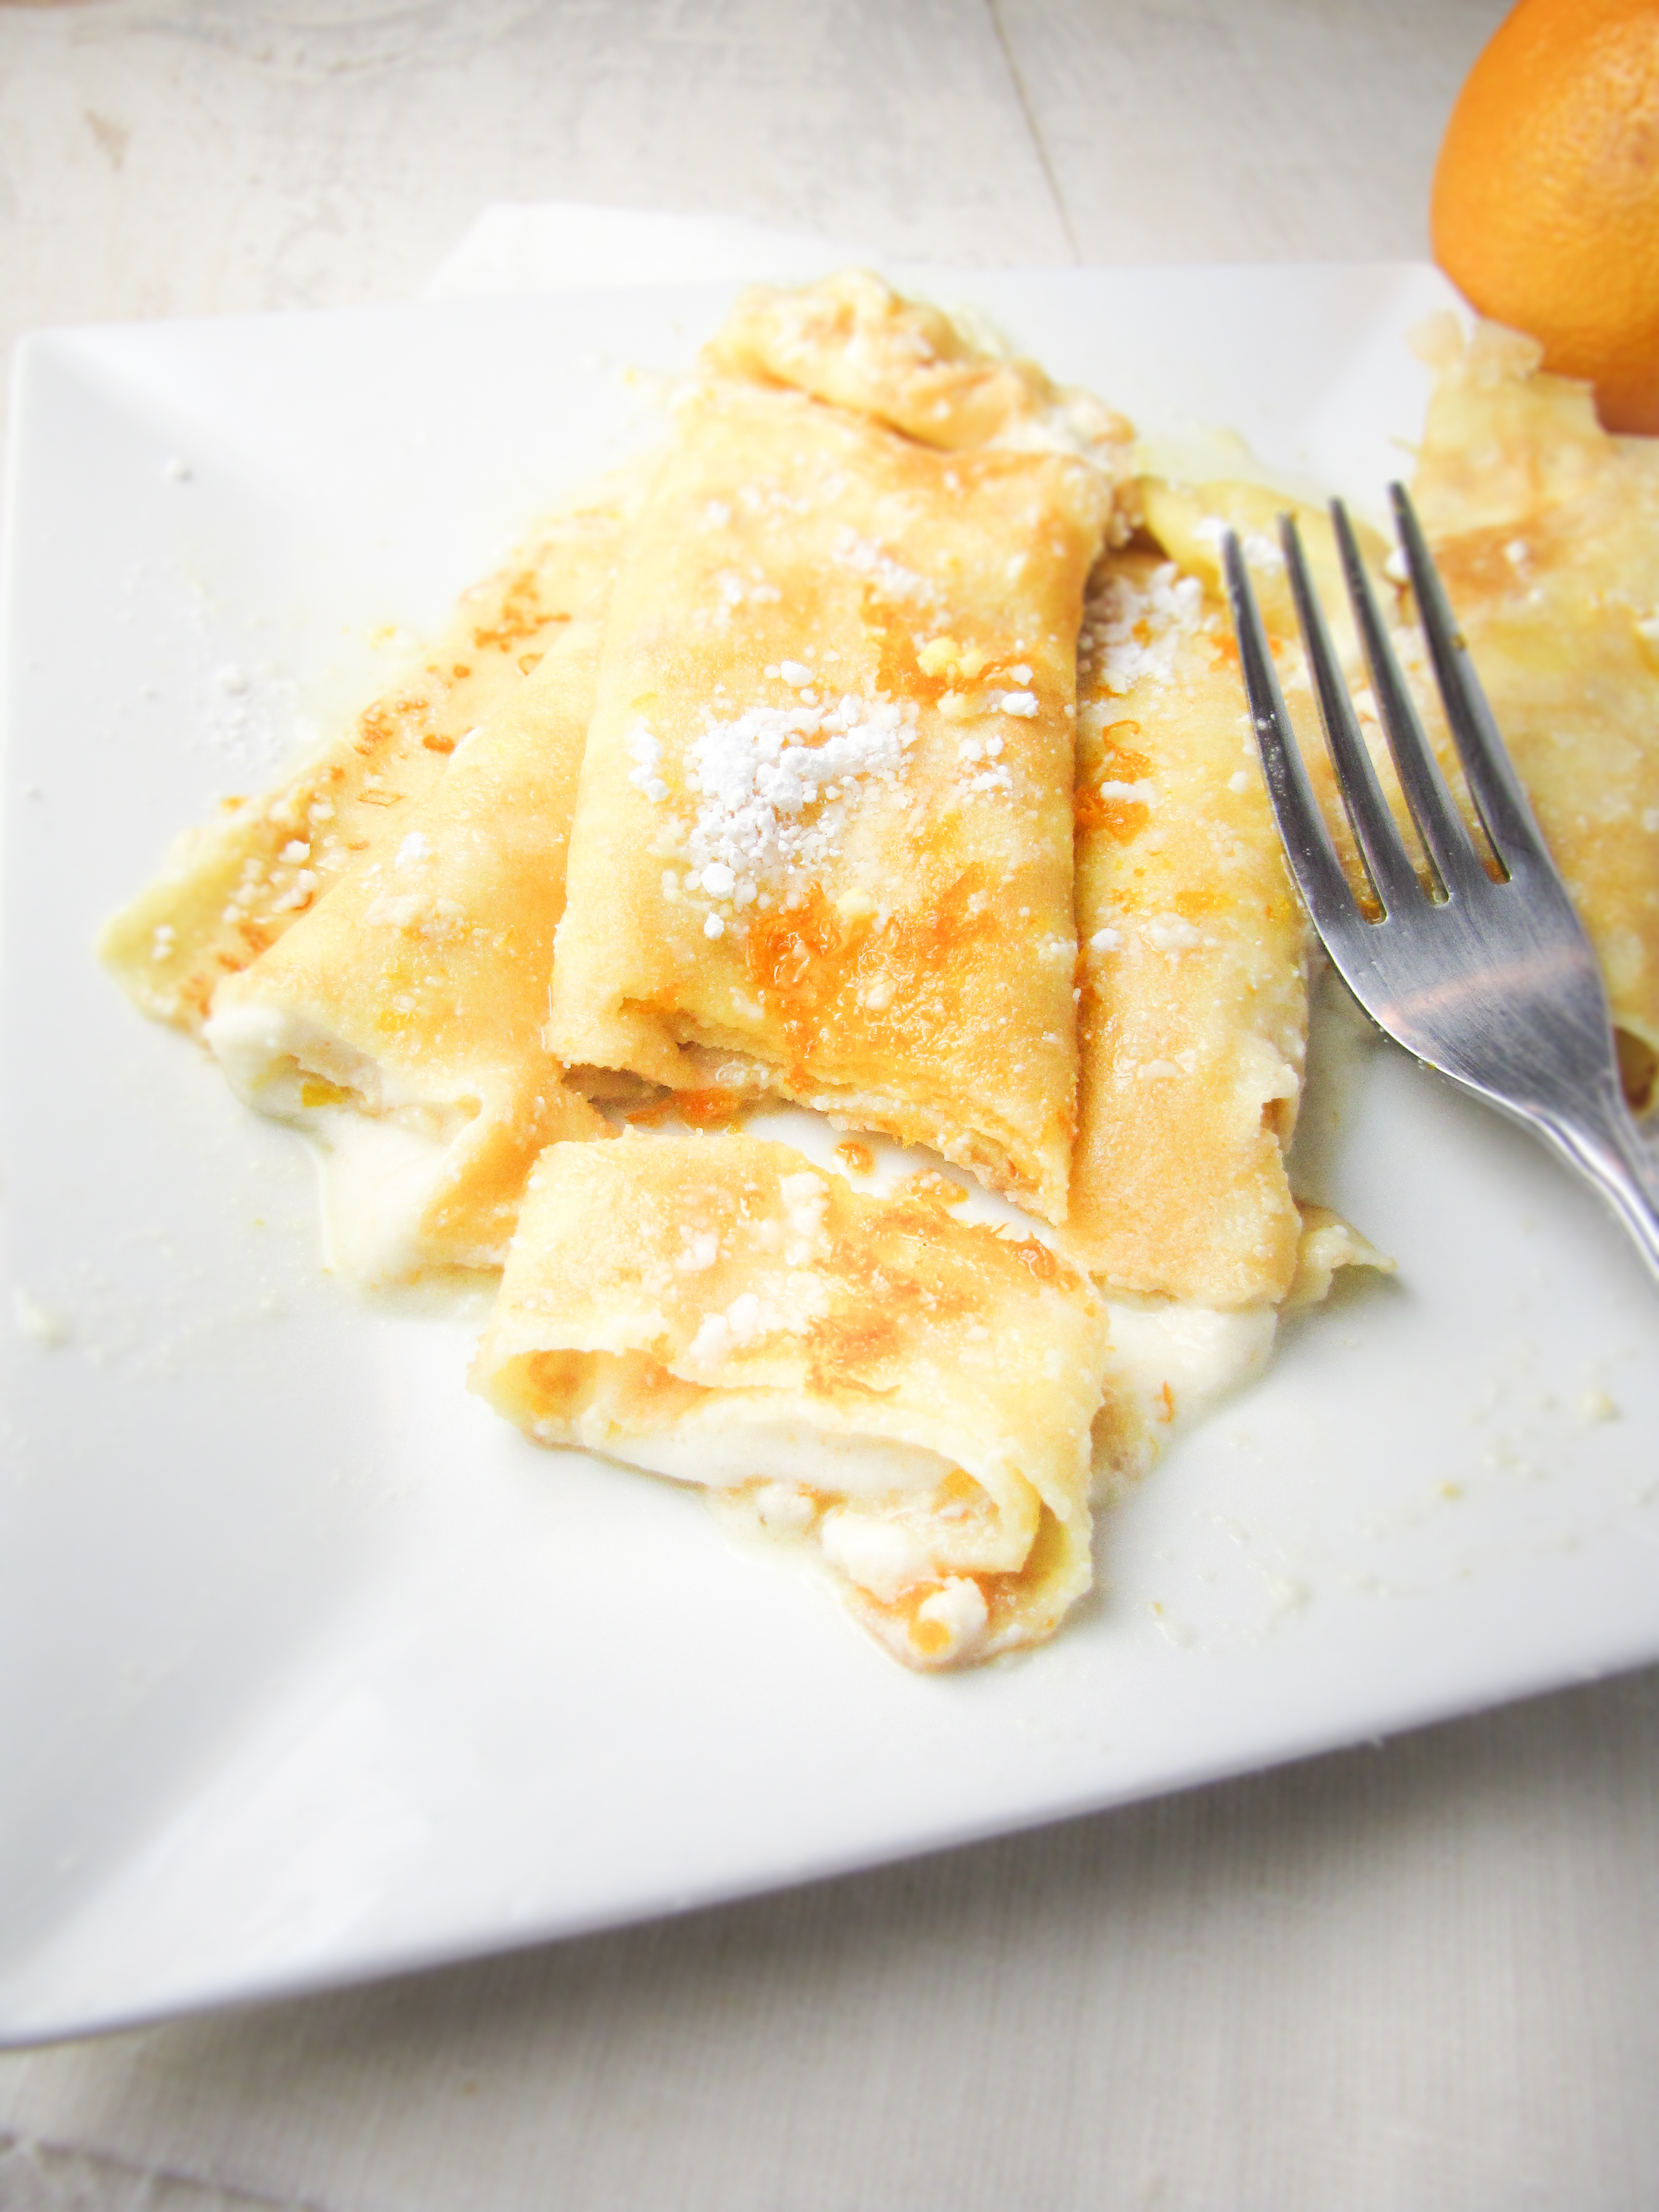
Flipping through the recipes in this book is like browsing a high-end restaurant menu where I want to order everything. Spiced Ricotta Fritters with Smoked Maple Syrup? Yes, please. Baked Polenta with Beef Cheek Ragu, Eggs, and Fontina? OK, I’ll try that too. Fava Bean Agnolotti with Mashed Black Truffle? If only it were fava season already! Now, you  might be able to tell from the names alone that these recipes are not simple. In fact, this is probably the most “advanced” cookbook I own, with recipes that require you to do everything from roll your own pasta, to sous vide a stuffed rabbit roulade, to clean and cure your own pig ears, and beyond. It’s more of an “I have all weekend to prepare a dinner party” book than an “it’s 8pm on Wednesday what’s for dinner” book. So, obviously, not for everyone. But I’m totally digging it – and if you’re also the kind of person who likes devoting a Saturday afternoon to preparing a venison ragu or brown-butter crepes filled with goat cheese and orange-caramel sauce, I’m pretty sure you’ll dig it too.

Cocoa Linguine {Katie at the Kitchen Door}

A few more tidbits: organized by region based on 8 major thoroughfares from Ancient Rome, each section has not only inspired recipes, but a wealth of information on the grapes and wines of that region. While I don’t claim to know much about wine, I’m excited to dig into the detailed grape descriptions – maybe I’ll even find something to order that I know I’ll like besides Merlot. I also think the overall look and feel of this book is – in true Ten Speed Press style – really gorgeous. It’s the kind of book I find myself flipping through just for the sake of daydreaming (sort of like Ripe, and Tender).

SPQR
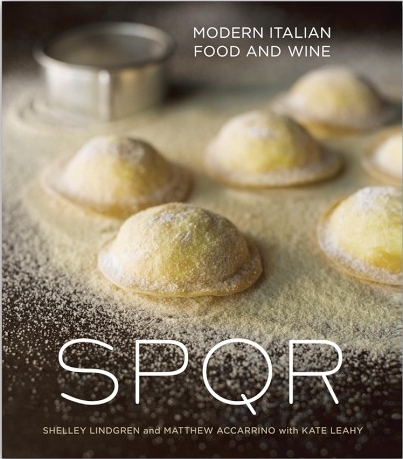
The bottom line: Perfect for the adventurous cook looking for new ways to challenge himself (or who wants to truly impress their guests!), SPQR: Modern Italian Food and Wine is packed with recipes for restaurant-quality dishes that will excite even jaded diners. The book also offers detailed information on grape-types and wine producers for each region of the country, as well as truly stunning photographs that make me want to hop on the next plane to Rome. While the challenging nature of the recipes in this book means it’s probably not for everybody, I can tell it’s going to become one of my new favorites.

Disclaimer: I received a complimentary review copy of SPQR from Ten Speed Press, but all opinions are my own.

2012-11-24 143

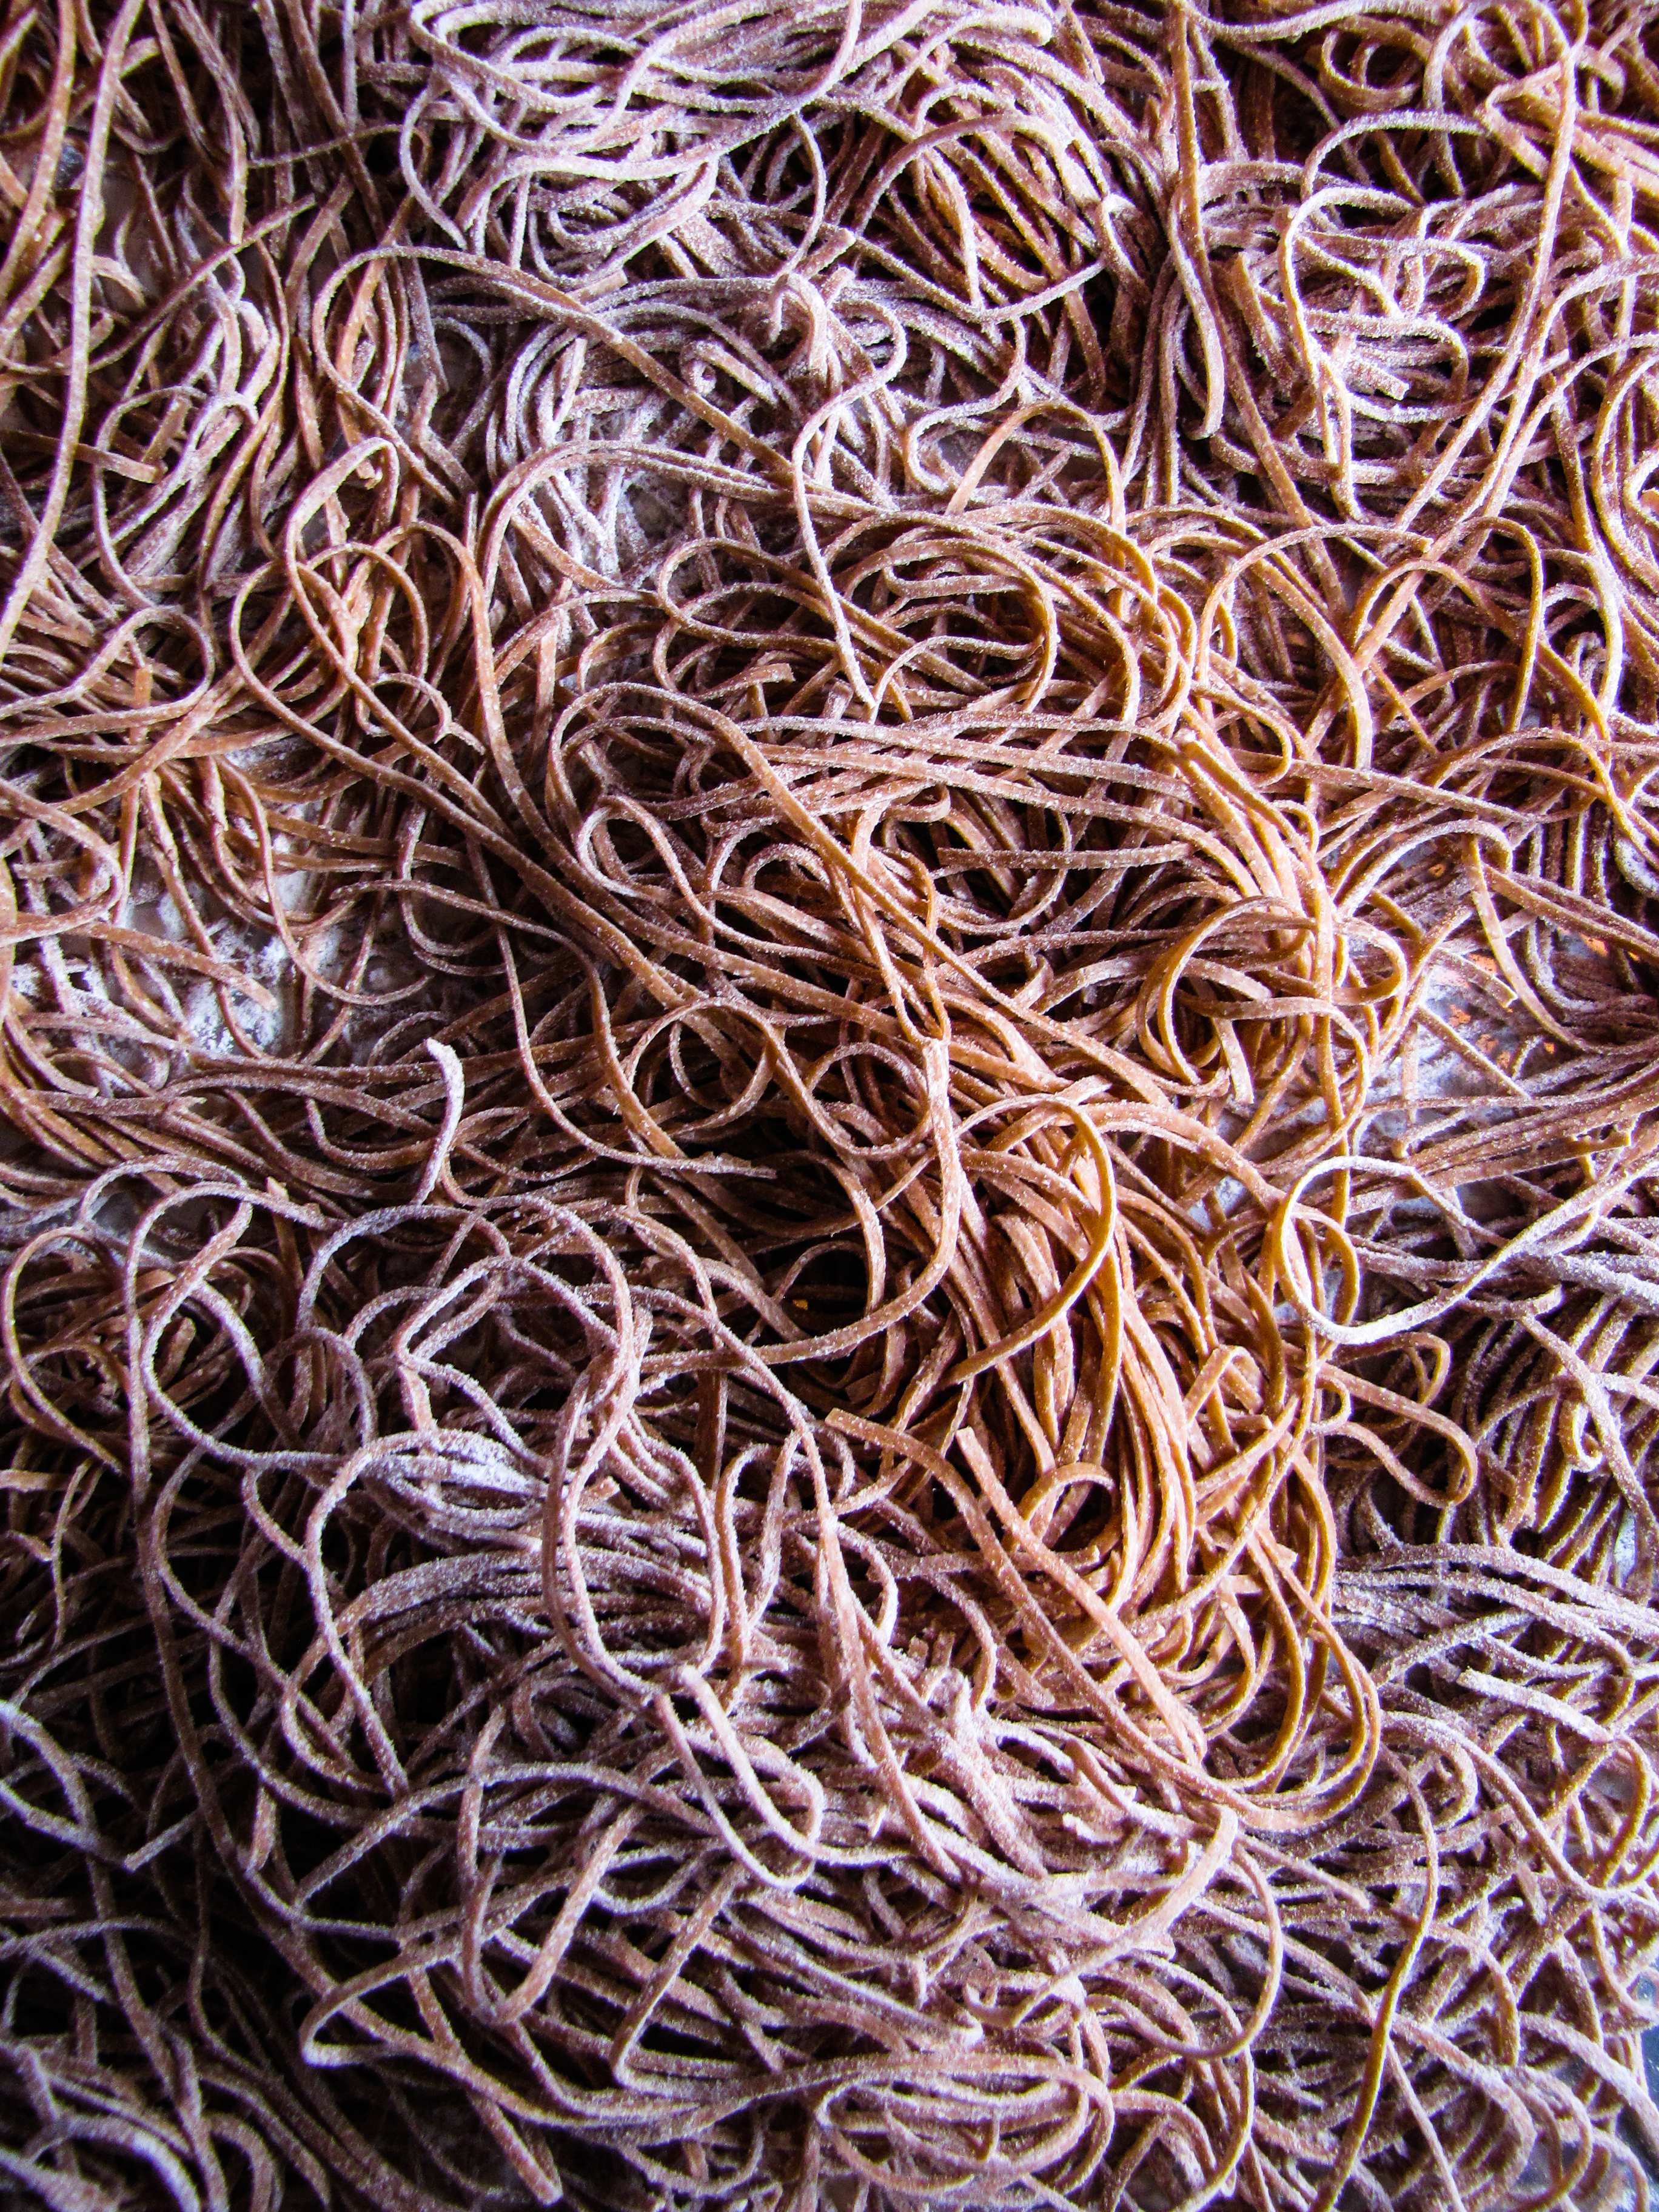
Linguine al Cocoa with Venison Ragu

Recipe adapted slightly from SPQR: Modern Italian Food and Wine. Serves 6.

For the soffritto:

  • 1 carrot, peeled and chopped
  • 1/2 onion, peeled and chopped
  • 1 1/2 celery stalks, sliced
  • 1/2 c. olive oil
  • 1 1/2 tsp salt

For the linguine:

  • 1 1/2 c. flour
  • 1 1/4 c. “00” durum flour
  • 1 TBS plus 1 tsp unsweetened cocoa powder
  • 1/2 tsp salt
  • 2 eggs
  • 5 TBS warm water

For the ragu:

  • olive oil
  • 13 oz. ground venison, preferably shoulder meat (we couldn’t find any ground, so used finely chopped loin)
  • 1/2 medium yellow onion, peeled and finely chopped
  • 4 garlic cloves, minced
  • 1/4 c. tomato paste
  • 1/4 c. soffritto (recipe below)
  • 1/4 tsp dried red pepper flakes
  • 1 tsp chile oil (omit if unavailable)
  • 1 1/2 c. red wine
  • 1 1/2 c. chicken stock
  • 4 sprigs thyme
  • 1 sprig sage
  • 10 whole black peppercorns
  • 4 whole cloves
  • 1/4 c. heavy cream
  • 1/4 tsp quatre epices
  • 2 c. baby spinach leaves
  • 1 to 2 TBS butter
  • Parmesan cheese, for serving

Make the soffrito:

  1. Combine the carrot, onion, and celery in a food processor and pulse until very finely chopped. Heat olive oil in a large pan over low heat. Stir in the ground vegetables and salt and cook, stirring occasionally, until all oil has been absorbed, about 45 minutes. Remove from heat and set aside. This will make more soffritto than you need for this recipe – save the rest in the fridge for another use.

Make the linguine:

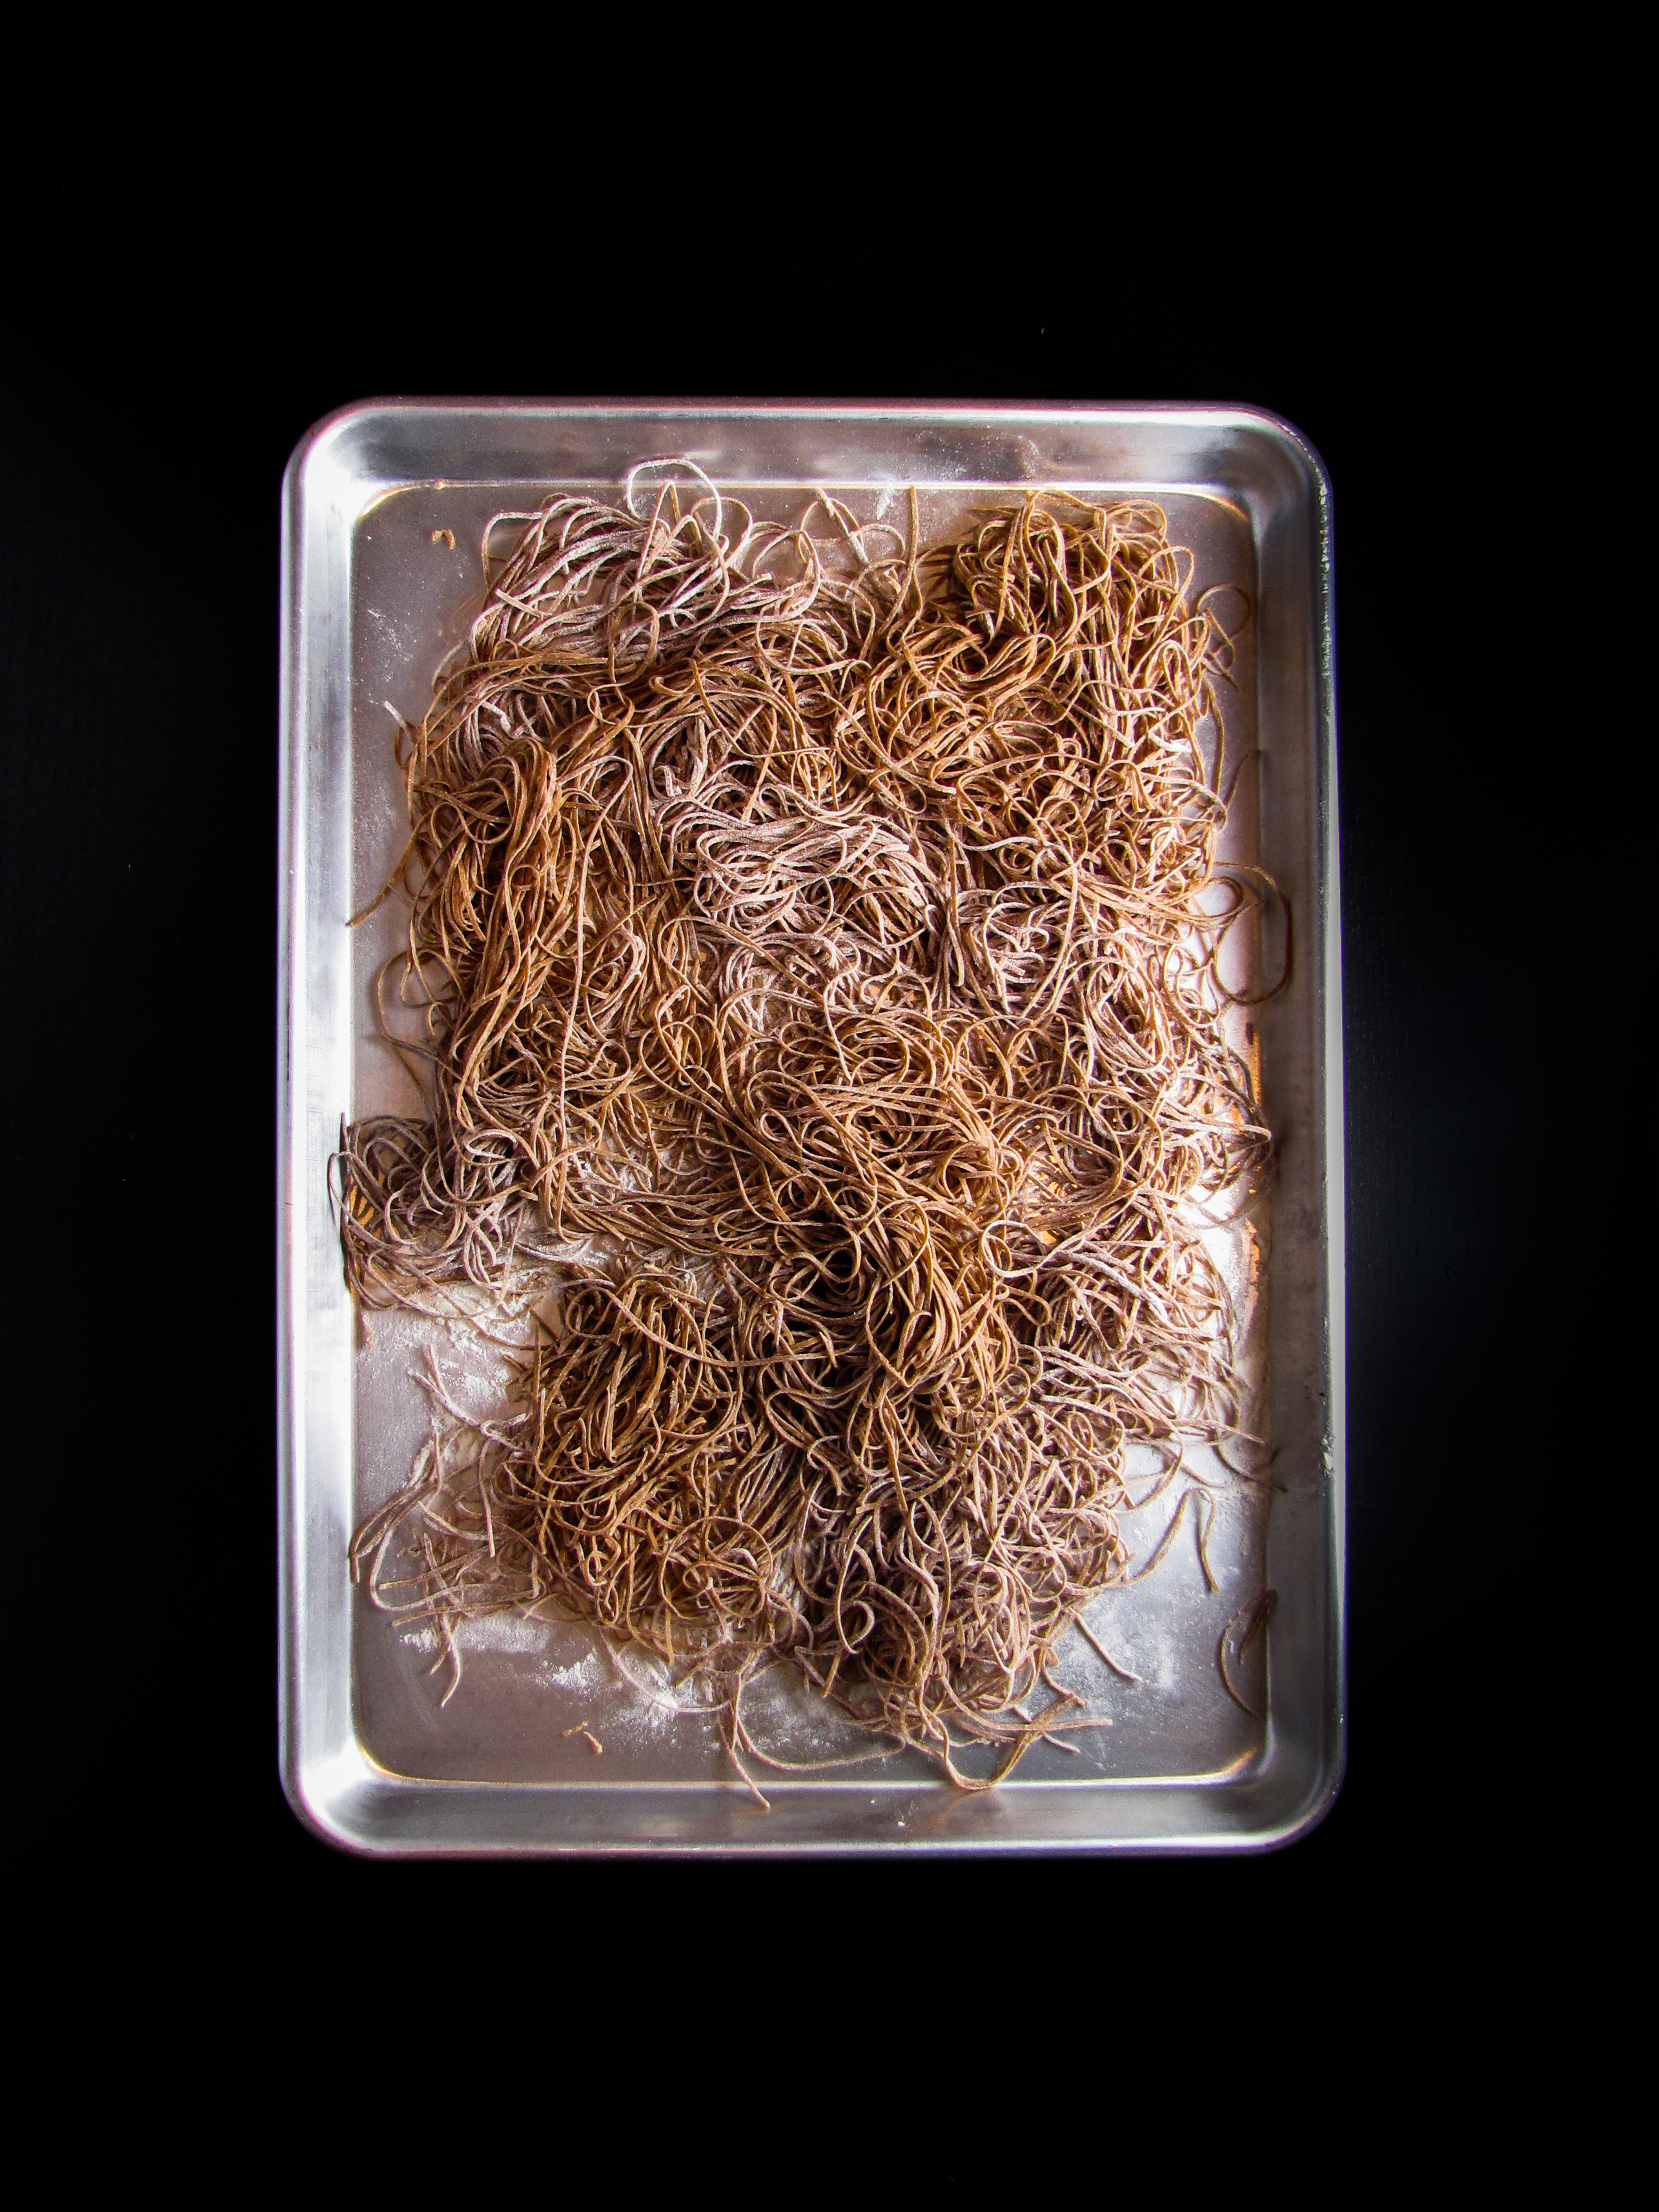
  1. Sift together flours, cocoa powder, and salt in a large bowl. In a small bowl, whisk together eggs and water. Slowly drizzle the liquid into the flour, whisking as you do. Knead the dough for several minutes – the dough will feel firm and dry. Flatten the dough into a rectangle, wrap in plastic wrap, and leave on counter for 30 minutes.
  2. Roll out the dough using a pasta machine – roll it to the thinnest setting possible. Use the pasta machine to cut into linguine noodles (if you don’t have a noodle cutter attachment, you can cut out thicker noodles by hand). Toss the noodles with a little bit of flour to keep from sticking and set aside.

Make the ragu:

  1. Heat a thin film of olive oil in a large sauce pot over medium-high heat. Stir in venison and brown well, cooking for about 5 minutes. Season with salt and pepper, then add onion and garlic. Cook until onion is soft, about 3 minutes. Stir in tomato paste, soffritto, and red pepper paste. Cook for a few minutes, then add chile oil (if using), and red wine. Bring to a simmer and simmer for 30 minutes. Fill a sachet (or improvise with cheesecloth and cooking twine) with the thyme, sage, peppercorns, and cloves. Add the sachet and the chicken stock to the ragu and simmer to reduce liquid by half, about another 30 minutes. Stir in cream and the quatre epices. Simmer until thick and velvety, about 15 minutes. Season to taste. Remove the sachet.
  2. Bring a large pot of salted water to a boil. When at a rolling boil, add linguine and cook for 2-3 minutes. Add noodles and about 1/4 c. of the pasta cooking water to the ragu. Add the spinach to the ragu. Cook for 2-3 minutes longer, just to wilt the spinach and cause the ragu to stick to the noodles. Finish with a pat of butter. Serve hot with grated parmesan cheese.

3 December 3, 2012 Cookbook

Monday (Morning) Resoultions: Italian Crepes with Sweet Cheese Filling and Caramel Sauce

Orange and Ricotta Crespelle

Yes, I know it’s not the morning anymore, but at least it’s still Monday! And I did do my new resolution today, I just didn’t get the chance to tell you about it. Actually, there are a bunch of things I want to tell you about, all somewhat unrelated, so excuse this post for being a little bit jumpy…

Let’s start off with this week’s resolution: to bring a healthy snack to work each day (with the ultimate goal of staving off those mid-afternoon junk food cravings). Today I brought half an avocado and a clementine, tomorrow I’m thinking nuts and dried cherries. Anyone out there have any great snack suggestions for me? I’d love to hear them.

Ricotta and Orange Crespelle {Katie at the Kitchen Door}

More on the resolutions – I did a pretty good job with them last week, except I ate only three green salads instead of four. I’ve forgiven myself, though. If you’re new to my little resolutions challenge, you can read about the impetus behind it here, and please join in by posting your own resolutions in the comments (or updating me on how they’re going, for those of you who have already shared)! And to continue holding myself accountable, here are all my cumulative resolutions thus far:

  • Week one: No chocolate from the chocolate box at work
  • Week two: Walk to or from Park St. Station each day (an additional 15 minutes of walking on my commute)
  • Week three: Do ten minutes of strength training and stretching every day
  • Week four: Eat at least four green salads per week
  • Week five: Bring a healthy snack to work every day

Moving on: the reason I was late in posting today was because I spent the weekend away on a girl’s weekend with my mom, as my (very) belated birthday present to her for her 50th. I had so much fun and it was really nice to get away, so I just wanted to share a few trip notes and pictures. We stayed at a cute B&B – William’s Grant Inn – in Bristol, RI, through a LivingSocial deal, and while we were there took a tour of The Breakers (which was all decked out for Christmas!) in Newport. It’s stunning how much detail went into those houses. As part of the deal we had a lovely dinner at Le Central, where I was pleasantly surprised by how yummy the food was. Sunday we spent some time walking around Bristol shopping (I picked up a great set of Spanish bakeware at an antique shop – I can’t wait to photograph it), and then went on a neat little hike in the Norman Bird Sanctuary. Such a nice little getaway!

Girl's Weekend

And now for everyone’s favorite part – the food! The pictures here are of a super delicious crespelle recipe from a beautiful new book on Italian food, SPQR: Modern Italian Food and Wine. I’ll be posting the full review later this week, but I couldn’t wait to share these lovely little treats. Crespelle are just the Italian version of crepes, and these particular ones are filled with a mixture of sweetened goat cheese, mascarpone, and ricotta, then simmered briefly in an orange-caramel sauce. To top it off, the crepes themselves are made with nutty browned butter and are as light as air, with crispy lacy edges. The cumulative result is kind of sigh-inducing, and totally worth the extra work. If you’re looking for a more savory crepe, check out these Mushroom and Goat Cheese Crepes I created for Life’d last week (it appears I’m on some sort of major crepe kick). And one last thing I wanted to mention before I leave you with the recipe: I’m being featured on NoshOnIt on Wednesday, if you’d like to check it out. Personally, I’ve been loving reading their daily emails and discovering great new food bloggers and recipes, and I highly recommend them.

Ricotta and Orange Crespelle {Katie at the Kitchen Door}

Ricotta and Goat Cheese Crespelle with Orange-Caramel Sauce

Adapted from SPQR: Modern Italian Food and Wine. Serves 3-4.

Notes: The original recipe made a lot of crepe batter, so I’ve scaled the proportions back to make it more manageable for a small household. However, I thought the ratio of filling to crepe in the original recipes was a bit off, so I’ve left the amount of filling at the original amount. Feel free to fill them according to your taste. The crepes are very thin and delicate, and flipping them takes a little bit of practice. You also have to plan ahead a little for this one, as both the batter and the filled crepes require a little chilling time in the fridge. Refrigerating the batter overnight will yield the most delicate crespelle.

  • 1 1/2 TBS + 1 TBS salted butter, divided
  • 3/4 c. whole milk
  • 2 eggs
  • 1/4 c. + 2 TBS flour
  • 1 1/2 TBS + 1 TBS sugar, divided
  • 1/4 c. goat cheese
  • 1/4 c. mascarpone cheese
  • 1/3 c. ricotta cheese
  • 1/2 tsp vanilla extract
  • 1/3 c. powdered sugar, sifted, plus additional for garnish
  • 1 navel orange, zest and juice (1/2 c. juice needed)
  1. Make the batter: Melt 1 1/2 TBS of the butter in a small saucepan over medium heat. Cook the butter until it bubbles and begins to smell nutty, then pour into a bowl and let cool slightly. Add the milk to the same saucepan and return to the heat. Heat the milk for 2-3 minutes, just enough to scald it. Remove the milk and let cool slightly (it should feel warm to the touch but you should be able to touch it without hurting yourself).
  2. Add the warm milk and the eggs to a blender and pulse to combine. Add the flour and 1 1/2 TBS of the sugar and blend to combine. Drizzle in the butter (with the blender running, if possible), and blend until fully combined. Strain the batter through a fine-mesh strainer into a large bowl. Cover and refrigerate the batter for at least 30 minutes, or overnight.
  3. Make the filling: in a medium bowl, stir together the goat cheese, mascarpone, and ricotta until smooth. Add the vanilla and the sifted powdered sugar and stir to combine. Zest the orange and add 1 tsp of the orange zest to the mixture. Reserve the remaining zest for garnish. Stir to combine, then refrigerate until ready to use.
  4. Cook the crepes: Heat a very small pat of butter in a large non-stick saute pan over medium heat, then carefully wipe most of it out with a paper towel. Pour 1/4 c. of batter into the heated pan and quickly swirl in a circle to coat the bottom of the pan. Cook for 1 minute, until light golden brown, then carefully and quickly flip to cook the other side for 1 minute. Remove the cooked crepe to a plate and continue with remaining batter. This should make about 8 crepes.
  5. When the cooked crepes are cool, spoon 1-2 TBS of the cheese filling in the middle of each crepe. Spread in a vertical line about 1/2 inch thick, then roll the crepe up like a burrito. Place the filled crepes on a platter, cover, and refrigerate for 1-2 hours, to firm up the filling.
  6. When ready to serve, heat the remaining 1 TBS of butter in your largest saute pan over medium-low heat. Add the filled crepes, seam side down, and toast for 2 minutes, before carefully flipping each crepe over. Sprinkle with the remaining 1 TBS of sugar. Once it dissolves, and the orange juice from the orange. Cook down the mixture until the juice is slightly thickened and has been absorbed somewhat by the crepes. Remove the crepes to individual plates and top with the extra orange caramel. Garnish with powdered sugar and any extra orange zest.

2012-12-3 072

7 December 2, 2012 Czech Republic

Memories of Prague, Hot Chocolate, and Cookies


European-style Hot Chocolate {Katie at the Kitchen Door}

This time of year always seems to be filled with ghosts of the four months that I spent living in Prague. Maybe it’s the drop in temperature, or the quality of light, but I find myself lost in little memories almost daily. Thoughts of walking through the cobbled streets after dark, buying klobasy (sausages) and svarak (mulled wine) from the glowing carts. Shivering as I waited to catch the tram each morning, then suddenly overwhelmed with heat once I’d stepped through the doors. The view across the river on the way to and from class, of all those thousands of spires. Haggling with the Vietnamese vendors over scarf prices at the Holesovice market. Long afternoons spent sitting alone in the park, stealing pictures of the people around me. Riding the tram out to the end of the line to go for long and wandering runs through the forest, hardly knowing where I was headed or what I would see. Piling up on the floor of the dorm’s music room with dozens of friends to listen to The Relatives play by candlelight.

Prague Rooftops

Scrolling through my reader a few weeks back, I came across this short little post from Nicole, which triggered one particular memory for me. I spent much of my time in Prague taking pictures, but one particular shot I wanted to capture was the Charles Bridge at sunrise. Iconic and touristy? Yes, but I wanted it anyways.

Where we lived was a little ways out from the city center, maybe 20 minutes on the tram, plus a short walk on both ends. So getting a picture of the sunrise wasn’t a matter of rolling out of bed, but an adventure that needed some planning. I chose a weekday with predictions for good weather, laid out my clothes, and set the alarm for 4 am. Without disturbing my 3 sleeping roommates (we all slept in the same room), I pulled on layers of clothes, grabbed my camera, and stepped out into the still-starry dark. As I waited on the corner for the tram, I was amazed to see so many other people up and about, mostly stony-faced Czech men headed out for work. I arrived at the bridge in that pre-dawn gray haze, hoping against hope the sunrise would be clear and worthwhile.

I think it was probably late September or early October, and it was chilly and misty by the river. There was no one else there, which was both lucky and eerie. As the first hints of light and color snuck into the sky I began to snap pictures at every angle until the pink was gone from the sky and my fingers were stiff with cold. Then, I put away the camera and walked. Walked and walked along the river, absorbing everything around me going through its early morning routine – the old man in the row boat, the swans clustered around the shore, vendors setting out goods. I walked until I reached Cafe Savoy, where I had been wanting to try the hot chocolate. I sat on a bench, chilled to the bone, until the cafe opened, and was one of the first customers inside. Sitting by myself in the corner, I slowly sipped the rich chocolate until my insides were warm and my fingers had unclenched. Then, I walked to school and promptly fell asleep on the couch.

Sunrise at Charles Bridge

Hot chocolate is a bit of a thing in Prague. There are dozens of round-up articles of the best hot chocolate in town, and there is a cup out there for every taste. The ones I associate most with Prague are the thick ones, like the one served at Cafe Louvre – it’s more like hot chocolate pudding then a drink, but it’s certainly an exercise in indulgence. To celebrate this post and that morning and all my lovely memories of Prague, I made a pot of hot chocolate – the thick kind made from real chocolate – and a batch of chocolate cut-out cookies for dipping. It’s hitting the spot.

European Style Hot Chocolate {Katie at the Kitchen Door}

Every single day there was an adventure. Every day was marked by freedom. I can’t remember a time in my life when I’ve felt more alive than those four months. It could just be because of the rosy haze of memory, but I think there’s more to it than that. I think I’ll have to go back to find out. But for now, I’m enjoying the beginning of winter on this side of the ocean.

2012-12-2 095

European-Style Hot Chocolate

Adapted from Bell’Alimento. Serves 2-3. (A little goes a long way!)

  • 4 oz. high quality bittersweet chocolate, chopped into pieces
  • 1 1/2 c. whole milk
  • 1 TBS sugar
  • 2 tsp corn starch
  • whipped cream for topping
  1. Add chocolate and 2 TBS of the milk to a small saucepan. Melt the chocolate over low heat, stirring the whole time. Once melted, slowly whisk in remaining milk until well combined. Add the sugar and the corn starch and whisk to fully integrate and dissolve. Cook the hot chocolate over low heat, whisking the whole time, until the chocolate has thickened enough to coat the back of a spoon. It will take about 10 minutes for the chocolate to begin thickening, but once it does, it will continue to thicken quickly so keep an eye on it! Serve hot.

Chocolate Cut-Out Cookies {Katie at the Kitchen Door}

Chocolate Cut-out Cookies

Recipe adapted slightly from Bake at 350. Makes 40-50 cookies.

  • 2 1/2 c. flour
  • 1/2 c. cocoa powder
  • 1 tsp instant espresso powder
  • 1 c. (2 sticks) salted butter, at room temperature or slightly softened in microwave
  • 1 c. sugar
  • 1 egg
  • 1 tsp vanilla
  1. Whisk together flour, cocoa powder, and espresso powder in a medium bowl. In a large bowl, beat together softened butter with sugar until the mixture is light and creamy. Beat in the egg until fully combined, then beat in the vanilla.
  2. Add the flour mixture to the butter mixture in 3 additions, fully incorporating the flour into the butter between each addition. The dough will appear somewhat crumbly, but should stay together when pressed into a ball. Press the dough into two disks, then wrap these in plastic wrap and refrigerate for 30 minutes.
  3. Preheat the oven to 350°F. Line baking sheets with parchment paper. Lightly flour your work space and a rolling pin, and roll out one of the disks of dough to about 1/4 inch thickness. If the dough is cracking or not staying together, knead with your hands until it is smooth and workable. Cut out as many cookies as you can from the dough, then press back into a ball and roll out again. Repeat until all dough is used. Bake cookies for 7-8 minutes, then remove to a cooling rack. Frost and decorate once fully cooled.

1 November 28, 2012 Cookbook

The Latin Road Home Blog-Around: Chipotle-Chicken Nachos

Some cookbooks are meant to be impersonal. They are written to be useful, educational, reference guides to the kitchen. But this is not true of all cookbooks. There is another group of cookbooks out there, in which the flood of images, stories, and commentaries begin to carry the cookbook into a different realm – the realm of travelogues  of memoirs, of novels. Both types of books are important – which you prefer is a matter of taste, or of your current mood, or of your particular kitchen dilemma. Do you need to be inspired, transported to another place and time? Or do you simply need to know the best technique for baking a fluffy muffin, and why it works?

Jose Garces’ The Latin Road Home is definitely of the personal variety. The Iron Chef, restaurateur, cookbook author, and all-around food personality uses this book to take readers on a journey through the five countries that have influenced his cooking style – Ecuador, Spain, Cuba, Mexico, and Peru. Unlike Gran Cocina Latina, this is not an exhaustive look at the cuisines of these countries. Rather, each country has four regional menus that range in difficulty and simplicity, with the fourth menu in each country encompassing a massive spread – cocktails, snacks, appetizers – in short, party food. The recipes range from the traditional, like Moros y Cristianos and Tostones, to the innovative, like Citrus-Marinated Halibut and Calamari in Coconut Broth and Griddled Potato Cakes topped with Mushrooms with Saffron and Ginger. And if you like seafood, you’re in luck – it’s the most heavily represented food group in the book, with 8 different recipes for ceviche alone. Another bonus – most of the recipes are accompanied by beautiful full-page photographs that are bright and full of life.

I would also like to point out how well the recipes are laid out. Each recipe is very clearly broken down into its multiple parts, with a separate table of ingredients and set of instructions for each component of the recipe. For recipes with 4 or more different components, this is highly valuable – and it’s executed without causing the design of the book to suffer at all. Beauty and usability!

Lake Isle Press invited me to participate in a blogger cook-around of this book today. A group of bloggers are all cooking recipes from the fourth Mexico menu – a taco-bar party menu – with recipes including Mango Margartitas, Carnitas, Beer-Braised Beans, Shrimp Skewers, and Tres Leches Cake. I chose to make the Chipotle Chicken Nachos, mainly because I couldn’t get over how delicious they looked. I can now confirm that they also taste delicious – sweet and a little smoky, with falling-apart tender chicken and just the right amount of sauce. While I went the whole nine-yards and fried my own corn tortilla chips, I actually liked the filling (called pollo ropa vieja) the best without any garnish, rolled up in a soft, warm corn tortilla. Making the filling is simple – a matter of throwing the sauce ingredients in the blender, sauteeing peppers and onions, and briefly poaching chicken thighs in boiling water. Definitely a good addition to any weeknight meal rotation.

The bottom line: Jose Garces’ The Latin Road Home gives readers a brief and personal take on the cuisines of five different Latin countries. While not an exhaustive look at any one cuisine, the recipes featured are traditional with an innovative twist, and well worth taking a crack at. Combined with the heartfelt narrative and bright and inviting photos, the recipes in this book make it a worthwhile addition to the shelves of any cook looking for inspiration in Latin flavors.

Disclaimer: Lake Isle Press sent me a review copy of this book, but all opinions are my own.

Chipotle Chicken Nachos

Recipe from The Latin Road Home. Serves 8 as an appetizer.

Notes: If you’re trying to get dinner on the table fast, roasting the garlic (step 1) might be best done the morning or even the night before dinner is served. Two alternative ways to serve this dish that I really enjoyed are to 1) prepare the chicken ropa vieja and serve in warm corn tortillas as tacos and 2) prepare the chicken ropa vieja and mix with cooked rice or couscous and serve in a bowl.

For the Chicken Ropa Vieja:

  • 20 cloves garlic, divided, peeled
  • 2 TBS olive oil
  • sea salt, used throughout recipe
  • 3 Spanish onions, divided, peeled
  • 1 fresh bay leaf
  • 2 lb. boneless skinless chicken thighs
  • 1/4 c. vegetable oil
  • 2-3 red bell peppers, seeded, deveined, and finely chopped
  • 4 canned chipotles in adobo
  • 1 c. ketchup
  • 1 c. chicken stock
  • 2 TBS Spanish smoked sweet paprika
  1. Preheat the oven to 375°F. Place 6 of the peeled garlic cloves in a piece of tinfoil, drizzle with the olive oil and sea salt, and fold the edges of the tinfoil up to make a closed packet. Roast the garlic in this packet (seam side facing up in the oven to avoid leaks!) for 45 minutes – garlic should be tender when done.
  2. While garlic is roasting, bring a large saucepan of heavily salted water to a boil. Take one of the onions and roughly chop it. Add this onion, the bay leaf, and the chicken to the boiling water, lower the heat to a simmer, and simmer the chicken for 10-14 minutes, until chicken is cooked through. Remove the chicken from the water with a slotted spoon to a bowl, let cool, then shred into bite-size pieces by hand. Set aside. Discard the cooking water and onion.
  3. Finely chop the remaining 14 cloves of garlic and 2 onions. Heat the vegetable oil over medium heat, then add the chopped onions, garlic, and bell peppers. Let cook, stirring occasionally, for about 10 minutes, until beginning to soften.
  4. While vegetables are sauteing, combine the roasted garlic, chipotles in adobo, ketchup, chicken stock, and paprika in a blender. Blend until smooth. Add the sauce to the vegetables and cook at a gentle simmer until mixture is reduced by one quarter, about 15 minutes. Stir in the chicken and heat through. Continue with nacho recipe or serve as mentioned in head note above.

For the Nachos:

  • 12 small (6-inch) corn tortillas OR 1 bag corn tortilla chips
  • vegetable oil, for frying
  • 2 c. grated cheese
  • 2 avocados, peeled, seeded, and roughly chopped
  • 4 radishes, washed and cut into thin matchsticks
  • 1/4 c. chopped fresh cilantro
  • 1/4 c. Mexican crema OR sour cream
  1. If making your own chips, stack the tortillas in groups of 4 and cut each stack into 6 triangles. Separate the triangles. Heat about 1 inch of vegetable oil in a large frying pan over medium heat. Fry the tortillas in batches until golden brown and crispy, then remove with a slotted spoon and let drain on a paper towel lined baking tray.
  2. Top chips with the chicken ropa vieja mixture and sprinkle with grated cheese. If serving to a crowd, do this in a casserole dish and broil on high for 2-3 minutes to melt the cheese. If making for yourself, do this on a plate and just pop in the microwave for 30 seconds.
  3. Top nachos with avocados, radishes, and cilantro. Serve with crema/sour cream on the side.

0 November 26, 2012 Food

Monday Morning Resolutions: Roasted Broccoli and Kale Caesar Salad

I didn’t do very well at my resolution last week. The resolution was to do 10 minutes of strength training/stretching every day, and, well, when you find yourself still needing to do that after 4 glasses of wine, let’s just say I went heavy on the stretching part. And also I counted the starfish stretch as stretching.

But it’s a new week, so I’m trying again! And since these next 5 weeks are (hopefully) going to be full of cookies and cocktails, I’m making this week’s resolution about salad. Sometimes when I tell myself I have to eat a salad for lunch, I end up with a bowl full of hard-boiled eggs, blue cheese, chickpeas, bacon bits, and avocado, with a sprinkling of arugula on top. Delicious, but not really what I was aiming for. So I’m making things a bit more specific, and saying I have to eat at least four green salads this week. Plus continue to stay away from the chocolate box, walk to work every morning, and do 10 minutes of actual strength training.

The first salad that I’m piling on my plate this week? This roasted broccoli and kale salad with a creamy Caesar dressing. I could eat roasted broccoli all day, so this was a good way for me to sneak some green in. I do think it could use a bit of crunch, so although the photos don’t show it, I’ll be eating it with homemade croutons. All in all this is not a salad you’d have to talk me into eating. With a little egg on top a plate of this could make a delicious and filling meal.

If you want more background on this whole resolution thing (which I’m planning on keeping up at least until the new year), check out posts one and two. And, as usual, if you’d like to join in, post your resolutions for this week in the comments! I find it very encouraging and inspiring to hear what habits you all would like to change.

Happy Monday!

Roasted Broccoli and Kale Caesar Salad

Adapted liberally from Huffington Post. Serves 3-4 as a side.

  • florets from 3 small heads broccoli
  • 2 TBS + 1/3 c. olive oil
  • 1 tsp sea salt
  • 1 large bunch of Tuscan kale (cavolo nero)
  • 4 anchovy fillets
  • 2 cloves garlic, peeled
  • 2 large egg yolks
  • juice from 1/2 medium lemon (about 1 TBS of juice)
  • 1/4 c. fresh parsley leaves
  • 1/4 c. grated or flaked parmesan cheese (use a vegetable peeler to create large parmesan flakes)
  • 1 c. croutons, preferably homemade
  1. Preheat oven to 375°F. Toss broccoli florets with the 2 TBS olive oil and the salt until fully coated, then spread on a baking sheet and roast for 20-25 minutes or until tender and beginning to brown on edges, stirring once to prevent burning.
  2. Wash kale, shake dry, and slice leaves away from tough center ribs. Discard ribs and tear kale into bite-sized pieces. Place in a large bowl with the roasted broccoli.
  3. In a food processor, combine anchovies, garlic, egg yolks, and lemon juice and blend until smooth. With the machine running, slowly drizzle in remaining 1/3 c. olive oil. Dressing should be thick and creamy. Add the parsley and pulse a few times just to break up the herbs (but not to fully blend). Pour the dressing on the salad and toss to fully coat kale. Let sit for 10 minutes to allow kale to become more tender. Sprinkle each plate with cheese flakes and croutons just before serving. Dressed salad (without croutons) will keep for 1-2 days in the fridge.

0 November 23, 2012 Cookbook

Chestnut Potato Soup & A Foodie Gift Guide

I know that by the time I publish this, some of you will have been up for hours, standing in long lines and snagging amazing deals on everything from that perfect pair of riding boots to new televisions and cameras. I take my hat off to you, since I plan on being in bed all morning,  nibbling on leftovers and looking forward to having a bowl of this lovely soup for lunch, all while taking advantage of Black Friday via my favorite shopping vehicle – the internet.

Online shopping – it’s a beautiful and terrifying thing.

But while I’m lying here clicking away, I thought I’d take a moment and, in the spirit of consumerism, share some of my favorite holiday picks for the food-lovers in your life. If you’re only interested in the soup pictured above (one of my favorites, a sweet-nutty-creamy blend of roasted chestnuts, potatoes, and thyme, topped with a smidgen of goat cheese), skip on down to the bottom for the recipe.

A quick note – I really like themed gifts. I’d typically much rather give (and get!) a bunch of little things that all go together than one big thing. I think it’s fun, so most of the ideas below reflect that. I also tried to keep everything within a price range that wouldn’t have made my heart skip a beat when I was in college – sometimes the small, thoughtful gifts are the best! Also, I had a lot of fun putting this together, but I know it’s a bit different from what I usually post – if you found this helpful, or if you think I should stick to the recipes, I’d appreciate you letting me know in the comments.

1) For the Coffee Lover
This is a version of a gift I got for Trevor a few years ago. Maybe this is a memorable gift for me because I’m still benefiting from it – namely in the form of piping hot lattes served to me in bed. The Bialetti is a great little espresso maker – my family always has one with us!

1) Bialetti Stovetop Espresso Maker; 2) AeroLatte Milk Frother; 3) Espresso Cups; 4) Coffee Grinder; 5) The Blue Bottle Craft of Coffee; 6) Sugar Bowl

2) For the DIY-er
I’m kind of obsessed with the “do it the way your great-grandmother would have” movement back towards creating our own kitchen staples through various forms of preserving. It’s not always practical, but if you have the inclination, it can be a lot of fun! Below are some of my favorite resources for making your own bread, pasta, cheese, and canned goods – most of which I own or have given to friends in the past few years.

1) Baguette Pan; 2) Local Breads; 3) Pizza/Artisan Bread Stone; 4) Pasta Maker; 5) Pastry Wheel/Ravioli Cutter; 6) Artisan Cheese Making at Home; 7) The Preservation Kitchen; 8) Canning Basket; 9) Canning Tools

3) For the Cookbook Collector
There were a lot of cookbooks released this fall. I’ve been reviewing and giving away a bunch of them over the past month or so, but there’s so many I haven’t gotten to yet. If the food-lover in your life stays current with the cookbook scene, here are some of the most exciting books from this fall. (It’s so great to see that some of the best books are coming from bloggers, too!)

1) Burma: Rivers of Flavor; 2) Jerusalem: A Cookbook; 3) Gran Cocina Latina (see my review); 4) The Smitten Kitchen Cookbook; 5) Small Plates & Sweet Treats; 6) What Katie Ate; 7) Baked Elements; 8) Japanese Farm Food (see my review); 9) Bouchon Bakery

4) Stocking Stuffers – My Favorite Kitchen Gadgets
Given that the little presents are my favorite kind, it might come as no surprise to you that stockings are my favorite part of present opening. These are some of my favorite everyday kitchen gadgets that are small enough to fit inside a stocking. Also, this can opener? It will change your life. Mine was a gift from my parents and my roommates are so amazed by it. And I know that the pastry brush is marketed to kids – I just like that it’s silicone, and a fun color.

1) OXO Can Opener; 2: Silicone Pastry Brush; 3) Microplane Grater/Zester; 4) Cherry Pitter; 5) Pastry Cutter; 6) Garlic/Ginger Press

Note: I feel it’s especially important to disclose in a post like this that if you buy anything through the Amazon links provided in this post, I’ll get a small commission from the sale. If you’re not cool with that but interested in the items recommended, just don’t use the link! And if you do use the link, I appreciate it!

And now for the soup! If you can get your hands on some fresh chestnuts, please do try this – in my mind, it’s one of the ultimate seasonal treats.

Roasted Chestnut and Potato Soup with Goat Cheese

Adapted from Cannelle et Vanille. Serves 2-3.

Note: Buy more chestnuts than you think you’ll need. Fresh chestnuts are very perishable, and I always end up with at least a few that have gone moldy inside. Others just never come out of their shells, so leave yourself some wiggle room. And when you’re at the store, try to pick nuts that still feel completely firm – any mushiness may be a sign that they’ve begun to mold.

  • 20 chestnuts, roasted and peeled
  • 1 TBS butter
  • 1 small leek, trimmed, washed, and sliced into thin rounds
  • 1 small onion, peeled and finely diced
  • 2 small russet potatoes, peeled and roughly chopped
  • 4 c. chicken stock
  • 1 tsp fresh thyme leaves
  • 1 c. skim milk
  • 2 oz. fresh goat cheese, crumbled
  • salt and pepper to taste
  1. Heat the butter in a medium saucepan over low heat. Add the leek and the onion and saute until soft and translucent, about 5 minutes. Add potato and saute for another 5 minutes. Add stock, thyme leaves, and roasted chestnuts, and bring to a boil.
  2. Lower the heat, cover the pot, and simmer for 20-30 minutes, until potatoes and chestnuts are tender. Carefully ladle hot soup into a blender (or use an immersion blender) and blend into a smooth puree. Add the cup of milk and blend to combine. Season to taste with salt and pepper, and ladle into bowls. Top each bowl with some of the crumbled goat cheese. Serve hot.

2 November 21, 2012 Breakfast

Greatist Collaboration: Brussels Sprout, Sweet Potato, and Chorizo Hash

The big day is almost here! I’m headed home for the holiday (and bringing this cake and this salad with me), but I wanted to say a quick hello first and share with you this yummy little recipe I’ve put together for Greatist. When you all come out of your turkey and mashed potato comas, give this hash a try. It’s got brussels sprouts, sweet potatoes, roasted chestnuts, chorizo, and goat cheese – in other words, health and flavor. The perfect thing to ease you back into normal eating habits without depriving you of deliciousness. Just please don’t forget a sunny-side up egg to top it off – the runny yolk oozing into the warm hash lifts this dish from good to great. You can find the full recipe here.

Wishing you all a Happy Thanksgiving!

0 November 19, 2012 Food

Monday Morning Resolutions & A Mango, Satsuma and Black Rice Salad

Last week I wrote about a new little thing I’m trying – making a week-long resolution relating to health and trying to stick with it all week. The trick is that you have to make the resolution specific enough that it’s not mentally daunting, e.g. “No chocolate from the candy box at work” instead of “No dessert at all.” Doing something for a week is challenging enough to feel like an accomplishment when you’ve finished, but not so challenging that you give up after three days. If, at the end of the week, you’re glad that you were able to keep your resolution for the week, try to keep that one going for another week and add a new one as well.

So far, I’ve completed two weeks of these little resolutions, and I’m feeling pretty good about it so I’m going to try and keep it up, at least for a little while. This week, I’m going to try and do 10 minutes of strength training and stretching every day. Strength training is something I do sporadically, at best, but I know that doing it regularly will both help me feel better about how I look, and help my balance and coordination in ballet. If you’re interested in joining me, I’d love to hear your own resolutions in the comments – and if you commented last week, let me know if you were successful!

To keep track of my resolutions so far…

  1. Week one: No chocolate from the chocolate box at work – Success for week one and week two! This is huge.
  2. Week two: Walk to or from Park St. to work at least once each day – Success! I even went in the rain.
  3. Week three: Do ten minutes of strength training/stretching every day

And now for the food. Trevor and I took a trip to Wholefoods this weekend and, silly me, I went without a list. This resulted in a lot of impulse purchases, like camembert, Haitian mangoes, blackberries, satsuma oranges, and clementines. None of it local, all of it too tempting to pass up. I was originally tempted to use all the fruit in a mango-cream tart, but since this week is such a big eating week, and since I had just made a batch of chocolate cookies, I managed to talk myself into a healthier option – mango, satsuma, and black rice salad.

When I realized that I had bookmarked this salad from multiple sources, I knew it was about time that I tried it. Strangely, this salad seems both like summer food and winter food – summer food because it’s light and fruity and healthy, and winter food because it’s bright and citrusy and nutty. I doctored the original up a little bit, adding sour cherries and increasing the amount of orange. Feel free to play with the ratios to get it the way you like – an extra handful of peanuts, all scallions instead of the red onion, etc. It’s an easy and forgiving recipe!

Mango, Satsuma and Black Rice Salad

Adapted from Bon Appetit. Serves 4-5 as a side.

  • 1 1/2 c. black rice, rinsed and drained
  • 2 c. water
  • 1/4 tsp salt
  • 3 satsuma tangerines or 1 c. canned mandarin oranges, drained, plus 1/4 c. of the drained juice
  • 3 TBS fresh squeezed lime juice (from 1 large lime)
  • 2 TBS canola oil
  • 1 mango, peeled, sliced, and cut into 1/2 inch cubes
  • 1/2 c. fresh cilantro, chopped
  • 1/2 c. red onion, finely chopped
  • 1/2 c. roasted salted peanuts
  • 4 scallions, white and dark green parts removed, sliced
  • 2 jalapenos, seeded and finely chopped
  • 1/4 c. dried cherries
  1. In a medium saucepan, combine rice, water, and salt. Bring to a boil, then reduce heat, cover, and simmer until water is absorbed and rice is tender, about 25 minutes. Remove from heat and let sit, covered, for 15 minutes longer.
  2. If using fresh tangerines, peel tangerines, remove as much of the white pith as possible, and separate into segments. Using a small knife, carefully slice along the skinny length of each tangerine segment, then use your fingers to remove the skin/membrane of the tangerine. Save the membranes with the little pieces of fruit attached (some staying attached is inevitable). Squeeze the membranes over a bowl and collect the juice – you should have about 1/4 – 1/3 of a cup. If you have less, squeeze one or two of your tangerine segments into the bowl to make up the difference. If you’re using canned mandarin oranges, you can skip this step, just be sure to save 1/4 c. of the juice.
  3. Whisk together the tangerine juice, lime juice, and oil. Pour over the black rice and let cool.
  4. Stir the tangerine segments, mango, cilantro, red onions, peanuts, scallions, jalapenos, and dried cherries into the salad. Taste and adjust the seasoning with more salt or lime juice if desired. Serve chilled or at room temperature.

0 November 17, 2012 Boston

Double-Chocolate Cookies from Finale

I was going to write about Thanksgiving today. Probably make some delicious stuffing or tricked out pie or some other Thanksgiving-y recipe. But then, as I browsed through the hundredth roundup of Thanksgiving recipes, I just got overwhelmed. I mean, I know Thanksgiving is the biggest American food holiday of the year, but there’s a lot of information circulating about it out there. Dozens of magazines dedicated to it, thousands of blog posts about it, whole books and TV shows trying to break it down into little tiny pieces. And it’s just one day! I mean, it’s a great day, but still, it’s only one day. Then I realized that there are probably a lot of people out there like me – people who love Thanksgiving just as much as the next girl, but who just aren’t cooking it. Because their mom, or grandmother, or father-in-law, or best friend’s boyfriend is taking care of that, and at most they’re bringing a pie, and their relatives and friends are kind of picky traditionalists who will complain if it’s not the pumpkin pie recipe from the back of the can. Or maybe there are people out there who are hosting Thanksgiving, but they’ve had their menu planned for weeks, if not months, and, given all the choices out there, they probably had a hard enough time deciding what to make in the first place.

So for those of you who need a break from the Thanksgiving madness, I have a recipe that’s good in any season, at any time of day – double chocolate cookies. And not just any chocolate cookies – these are based on a recipe from Finale, which is one of my favorite Boston lunch spots. There’s one close to my office, and I’m a frequent customer, partly for the great baked goods but also for the amazing turkey-avocado-bacon-chipotle mayo sandwich that I wish was healthy enough to eat every day. Plus, I’m a sucker for any place that includes a free brownie bite with your meal – lunch should always end with just a little bit of chocolate.


These cookies, like all Finale’s desserts, are great. They have a crinkly brownie-like crust and a gooey-fudgy middle, plus they’re super chocolaty, and easily cure even the worst chocolate cravings. With or without chocolate chips, they’re seriously yummy. Just be careful not to over-bake them, and be sure to plan ahead – the batter needs to rest for a few hours before baking.
Double Chocolate Cookies
Recipe adapted from Finale Desserterie via WHDH News. Makes 18 cookies.
  • 2 eggs
  • 2/3 c. + 2 TBS sugar
  • 1 tsp vanilla
  • 1/3 c. salted butter
  • 2 oz. bittersweet chocolate, chopped into small pieces
  • 6 oz. semisweet chocolate, chopped into small pieces
  • 1/3 c. flour
  • 1/4 tsp baking powder
  • 1 c. bittersweet chocolate chips, optional
  1. Whisk together eggs, sugar, and vanilla until light and frothy.
  2. In a double boiler, melt together butter and the bittersweet and semisweet chocolate pieces, stirring. Once melted, remove from heat and pour into egg mixture, whisking to combine.
  3. In a small bowl, whisk together the flour and baking powder, and gently fold into the chocolate-egg mixture. If using, mix in the chocolate chips at this stage as well. Batter will be fairly liquidly.
  4. Cover bowl and let sit at room temperature for 3 hours, at which point batter should have firmed up, then preheat oven to 350°F. Line a baking sheet with parchment paper, then place rounded spoonfuls of batter into pan, about 3 inches apart. Bake for 10-15 minutes, until top is cracked and center springs back lightly at the touch. Remove to a cooling rack and let cool slightly. Best served warm, within a day or two.

4 November 15, 2012 Cookbook

Gran Cocina Latina

At 902 pages, I think that Gran Cocina Latina may be the only cookbook I own that can truly be referred to as a tome. It’s massive, exhaustive, focused – and incredibly exciting.

I won’t lie, I’ve been a little bit daunted by this cookbook. It sat on my bedside table for a few weeks, teasing me, during which time I opened it four or five times, flipped through it, drooled  a little bit, and then got nervous. I’ll save it for when I have more time, I kept telling myself, for this is a cookbook that clearly needs time. When I received my copy of Home Made Winter, I spent a lovely sunny Saturday morning in bed with it, drinking coffee and taking notes. Three hours later, I felt like I really knew the cookbook – I had bookmarked all the recipes I wanted to make, read every word Yvette had written, and absorbed the style and message of the book. I was satisfied. This book would take 3 dedicated weeks, if not more, to feel the same way. But I don’t want to scare you off! This book deserves the time. And besides, it’s the kind of cookbook you’ll have on your kitchen shelf for the next 20 years, so you don’t have to rush things.

Maricel Presilla is not your average cookbook author – she’s a scholar. And so, this book is not your average cookbook. It’s not about pretty pictures and glossy pages – it’s about learning. Learning how to cook truly authentic Latin American cuisine from the ground up. It’s literally packed with information – from how to select and prepare quintessential Latin ingredients such as plantains, yuca, and passionfruit, to the difference between avocado varieties, to deconstructing the infamous mole type sauces in order to master the technique for making them. Beyond the kitchen, there are legends and histories of the various countries as Maricel takes you from country to country, from the past to now. As a testament to the thoroughness of the education that this book will give you: the first 200 pages of the book barely make it through the flavor-building essential sauces and condiments that authentic cooking requires; every recipe is given a thorough head note, is broken down into manageable steps, and is clearly written; when an ingredient may be unfamiliar or a technique difficult to explain, simple black and white sketches serve to illustrate the process. Clearly, this book has been a long time in the making, and it shows.

The recipes themselves run the gamut, from the simplest of the simple, such as Simple Boiled Quinoa, to well-known classics, like Tres Leches Cake, to exotic and enticing recipes that would be a reach in difficulty for even a seasoned home cook, like Quinoa and Broccoli Rabe-Stuffed Calamari with Panca Pepper and Pisco Sauce. You’ll find almost every country and island on the continent well represented – Peruvian Purple Corn Punch, Brazilian Feijoada, Argentinian Beef Empanadas, Ecuadorian Shrimp Cebiche with Peanuts, even Puerto Rican Salt Cod Fritters. You could easily cook your way up and down the continent several times over, and probably find several new favorite meals along the way.

To get over my intimidation of this book, I opened it to the middle, read through 20 pages of recipes, and started cooking the recipe that inspired me the most. (Please note, this is extremely unorthodox for me. I like list-making and being methodical. Don’t expect such brash behavior from me in the future.) The recipe? Rice with Corn, Chickpeas, Green Beans, and Chorizo. Yes, I kind of just picked a recipe with five ingredients that I love in the name. This recipe also happened to be a two-fer, since you had to prepare the Green Beans with Bacon recipe separately to be included in the rice dish. Two done, 998 to go. (I made that up, but I wouldn’t be surprised…). Both recipes were solid – well-balanced flavors (and nutritional profiles), simple techniques, easy to execute quickly and well. The kind of things I’d make on a weeknight when I wanted something warm and filling and delicious but without any fuss. And these two are just a start… I can’t wait to cook my way through the rest of this book.

The bottom line: Gran Cocina Latina is an authoritative, exhaustive, and incredibly educational cookbook – think of it as The Joy of Cooking for Latin America. If you enjoy cooking or eating Latin food, this is a book that will likely be close at hand in your kitchen for the next 20 years. Typically I recommend cookbooks I like to a particular audience I think will enjoy them. This book is an exception – if you cook at all, do yourself a favor and buy this book. It’s a great resource for any level of cook and the information and recipes you’ll find within are more than worth the $25 you’ll pay on Amazon.

Disclaimer: W.W. Norton provided me with a review copy of this book free of charge, but as usual, all opinions are my own!

Rice with Corn, Chickpeas, Green Beans, and Chorizo

Recipe from Gran Cocina Latina. Serves 6-8 as a side.

  • 2 c. long grain rice
  • 3 TBS achiote-infused olive oil [I subbed regular olive oil this time around]
  • 6 oz. Spanish chorizo, sliced into 1/4 inch rounds
  • 3 garlic cloves, peeled and finely chopped
  • 1 medium onion, peeled and finely chopped
  • 1 green bell pepper, cored, seeded, deveined, and finely chopped
  • 4 medium plum tomatoes, fresh or canned, peeled if fresh, drained if canned, and finely chopped either way
  • 1 c. fresh or frozen corn kernels
  • 1 15 oz. can of chickpeas, drained and rinsed, or 2 c. plain cooked chickpeas
  • 4 oz. Green Beans with Bacon [see below]
  • 3 1/2 c. chicken broth
  1. Rinse the rice in cold water, swirl with your hand, then drain in a sieve. Repeat several times, until water runs clear. Set rice aside.
  2. Heat the oil in a saucepan over medium heat. Add the chorizo and saute until golden brown, about  5 minutes. Then add the onion, green peppers, and garlic, and saute until the onion is translucent, another 5 minutes. Add the diced tomatoes, corn, chickpeas, green beans, rice, and broth and bring to a boil over high heat. Once the mixture is boiling, reduce the heat to medium and simmer, uncovered, until the liquid is mostly absorbed. At this point, fluff the rice gently, cover, lower the heat, and cook on the lowest possible setting for an additional 15-20 minutes. Remove from heat and let sit, still covered, for 10 minutes. Remove the lid and fluff the rice again before serving.

Green Beans with Bacon

Recipe from Gran Cocina Latina. Serves 4 as a side.

  • 3 tsp salt
  • 1 lb green beans, trimmed and sliced on a bias into 1 inch lengths
  • 1 TBS olive oil
  • 8 oz. bacon, cut into 1/4 inch dice
  • 3 cloves garlic, peeled and minced
  • 1 small yellow onion, peeled and finely chopped
  • 3 medium plum tomatoes, peeled, seeded, and coarsely chopped [I used drained canned whole San Marzano tomatoes with good results]
  • 1 TBS minced fresh flat-leaf parsley
  • 1/4 tsp ground black pepper
  • 1/8 tsp ground nutmeg
  1. Add 2 tsp of the salt to a large pot of water and bring to a boil over high heat. Add the green beans and blanch for 2-3 minutes, until bright green. Drain, and immediately place the green beans in ice water to stop the cooking process.
  2. Heat the oil in a large frying pan. Add the bacon and cook until golden brown and crispy. Add the onion and saute until soft, about 5 minutes. Add the garlic and cook an additional 1 minute. Add the tomatoes, parsley, pepper, and nutmeg, and cook for a few minutes just to meld the flavors. Stir in the green beans, then season with remaining tsp of salt. Serve immediately, or use in other recipes as required.
  • « Go to Previous Page
  • Go to page 1
  • Interim pages omitted …
  • Go to page 36
  • Go to page 37
  • Go to page 38
  • Go to page 39
  • Go to page 40
  • Interim pages omitted …
  • Go to page 57
  • Go to Next Page »

Primary Sidebar

Subscribe!

Get creative recipes and menu ideas delivered straight to your inbox.

Most Popular

A House // Sweet Potato and Coconut Milk Soup with Brown Rice and Lentils

Monthly Fitness Goals: July // Homemade Spinach Wraps with Chopped Greek Salad

A New Job // Classic Seven-Layer Bars

Butternut Squash Carbonara with Fried Sage and Caramelized Onions

Happy Birthday, Trevor! // Peanut Butter Fudge

Cookbook Review and Giveaway: Home Made Winter

Drizly

Please note!

Full disclosure: if you purchase anything at Amazon using the above links or any other links to Amazon on this site, I will receive a small commission. Just so you know!

Copyright© 2025 · Cookd Pro Theme by Shay Bocks

This site uses cookies: Find out more.