• Skip to primary navigation
  • Skip to main content
  • Skip to primary sidebar
  • Home
  • Recipes
  • Features
    • Cookbook Reviews
    • Ingredient of the Week
    • Sunday Dinner
    • Fitness Goals
  • Travel
  • About
    • Privacy Policy
    • Cookie Policy
  • Work With Me

Katie at the Kitchen Door

Globally-inspired, seasonal recipes

Blog Page

1 December 9, 2011 Cookbook

Grape and Ginger Glazed Chicken

Just posting this recipe for inclusion in the winter 2012 cleanse – if I make it again, I’ll be sure to take some pictures!  This is good – not particularly inspiring but fairly interesting and yummy.  One major note: the original recipe is for an entire roast chicken, so this is my very loose adaption.

Grape and Ginger Glazed Chicken

Adapted loosely from Lucid Food: Cooking for an Eco-Conscious Life.  Serves 3.

  • 3 boneless skinless chicken breasts
  • 1 TBS olive oil
  • kosher salt and freshly ground black pepper
  • 6 cloves garlic, sliced
  • 3 c. grapes, a mix of green and red
  • 2 inch fresh ginger, peeled and minced
  • 1 TBS honey
  • 1 1/2 TBS mustard
  • 1 TBS butter
  1. Make sauce: put grapes and ginger in blender or food processor and process until smooth.  Strain juice into a bowl, then whisk in honey and mustard.
  2. Preheat oven to 450°F.  Rub chicken breasts with 1/2 TBS olive oil, salt, pepper, and garlic slices, then place all in a roasting dish with 1/2 c. of the grape sauce.  Marinate for 10 minutes.
  3. Heat remaining 1/2 TBS olive oil in a saute pan over medium-high heat.  Add chicken breasts and brown on both sides, about 2 minutes per side.  Return the breasts to the pan with garlic and juices, and roast for 15 minutes, uncovered, until chicken is cooked through and tender.
  4. While the chicken is roasting, wash out saute pan and return to stove, over medium heat.  Add remaining grape mixture to pan and cook down while the chicken roasts, until it has thickened slightly to form a sauce.  Add the butter to the sauce to finish and remove from heat.  Serve the chicken with the sauce drizzled on top.

9 December 8, 2011 Recipe

Beet and Chickpea Salad

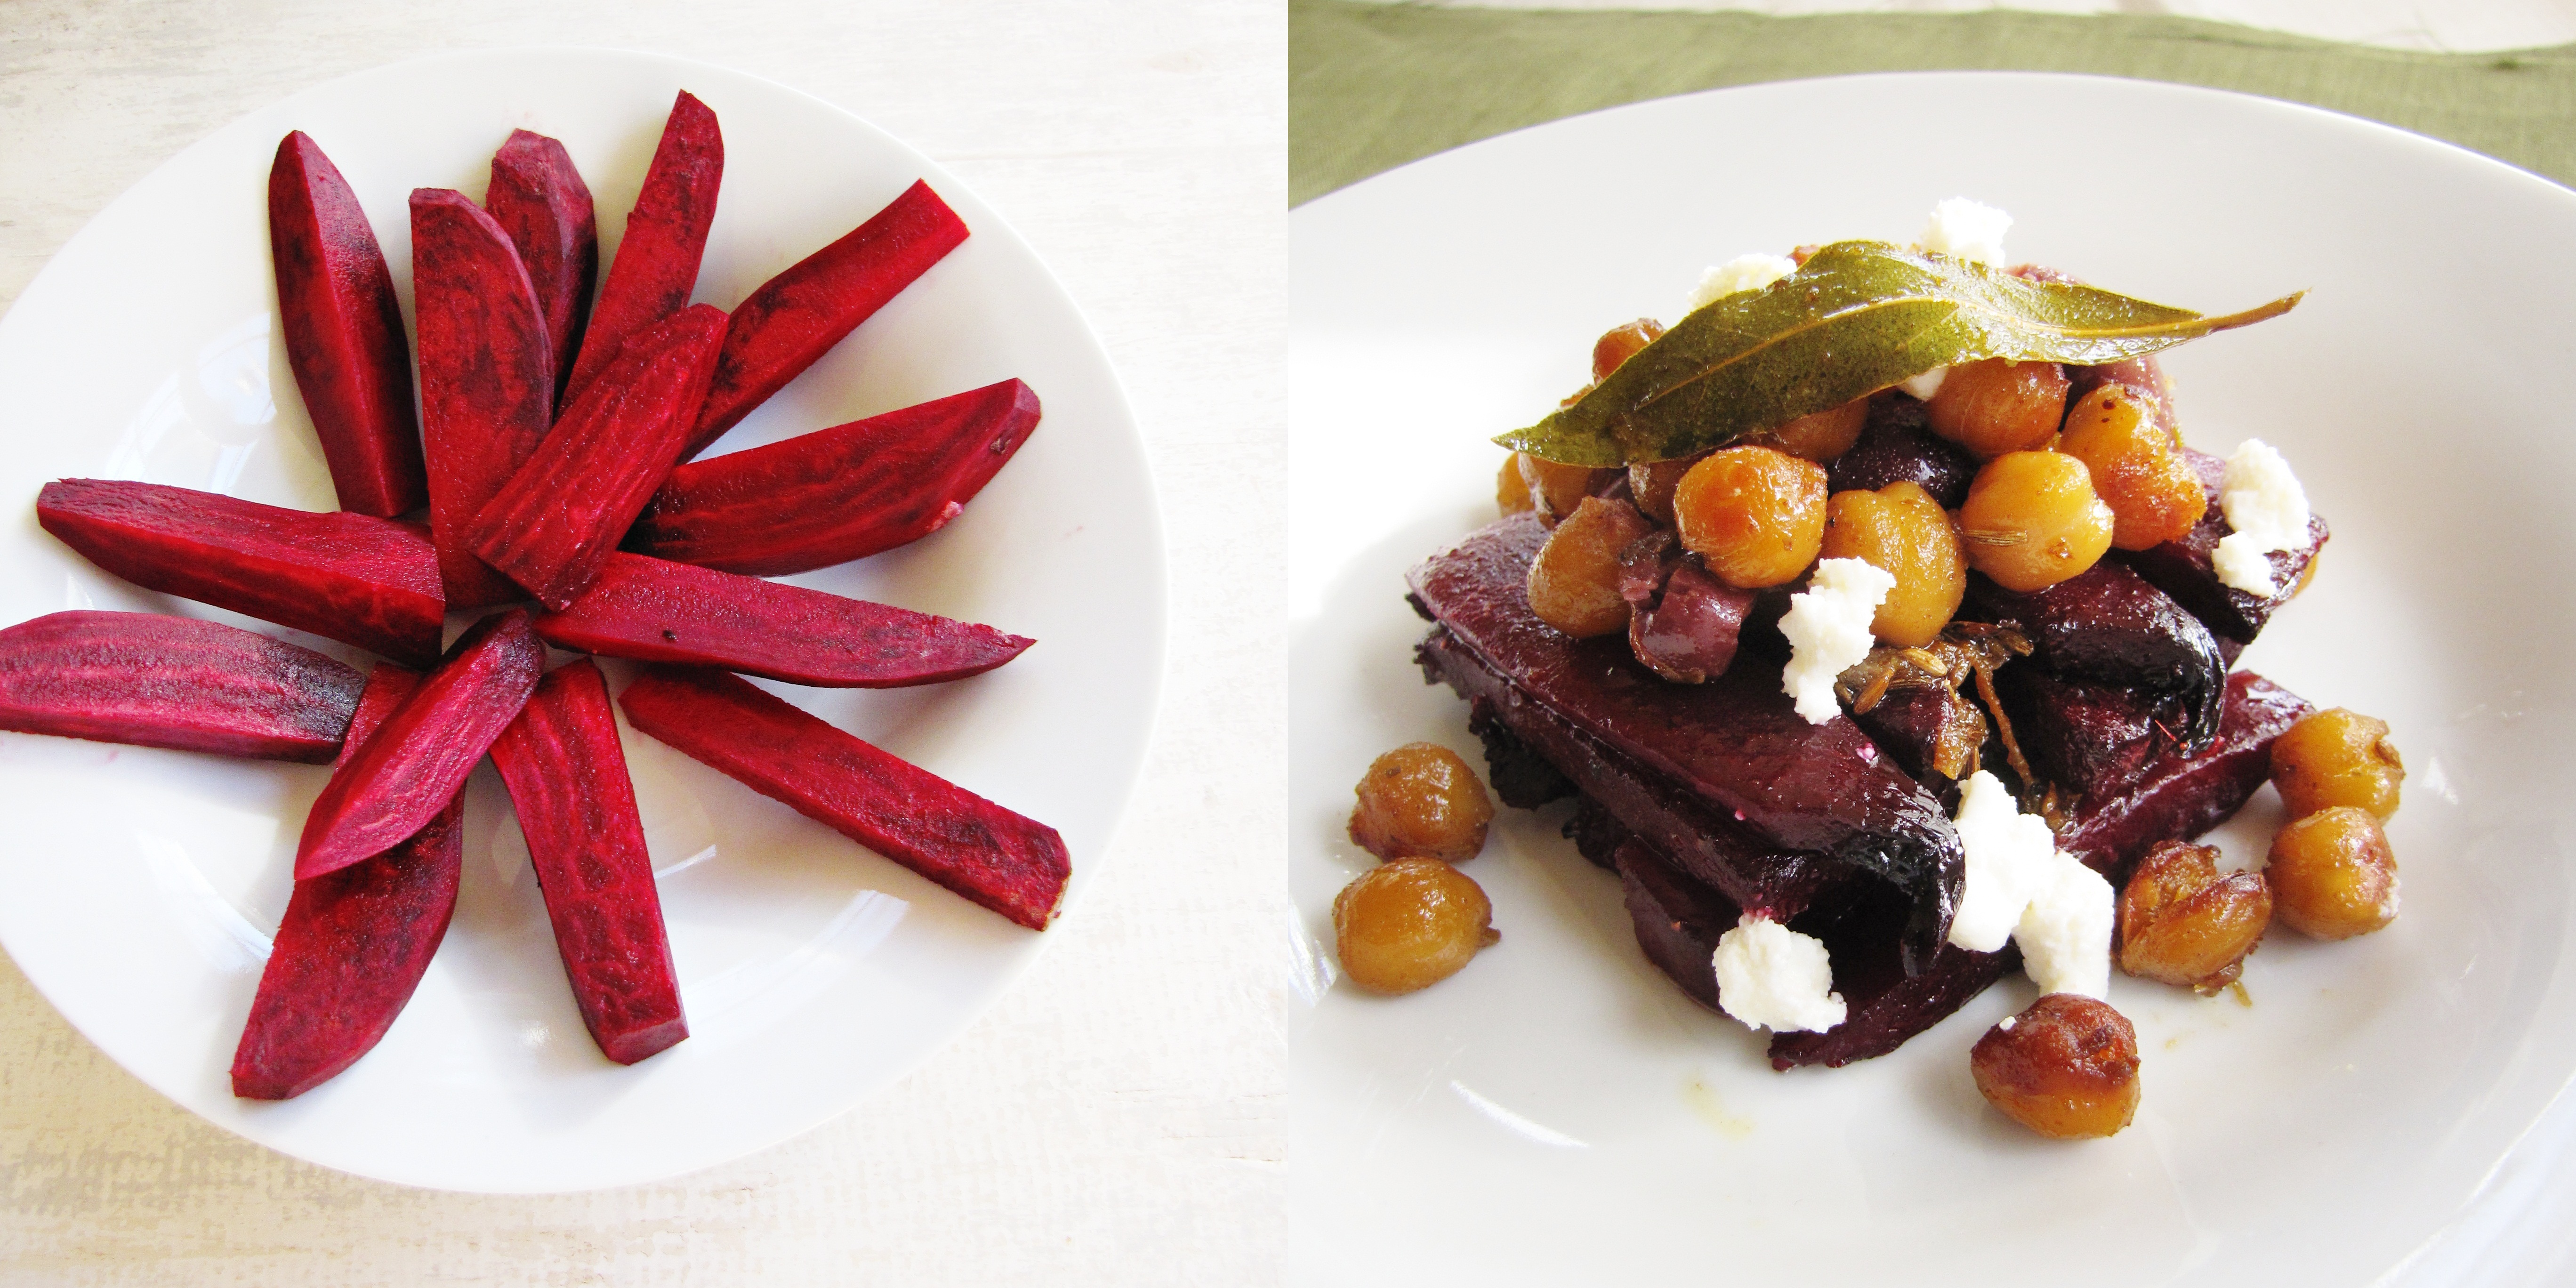
I’ve been on a bit of a beet kick lately – I made beets for Thanksgiving, I’ve made this incredible beet and chickpea salad twice in the past week, and I have recipes for beet keftedes and beet soup and beet-bulghur pilau shortlisted for the next two weeks.  This isn’t such a bad thing – beets are packed with health benefits.  I mean, their vegetable family also includes spinach, chard, and quinoa – superfoods much?  Beets are full of something called betalains, which have got all that antioxidant, pro-eyesight, anti-cancer stuff going on.  Plus, they’re filling and delicious and even eating them roasted in large amounts of olive oil makes me feel good about myself.  However, I suppose there can be too much of a good thing, even when that good thing is related to lots of superfoods.  So if there’s any blame to be laid for the perhaps excessive amount of beets in my diet recently, I’m laying it on the Somerville Winter Farmer’s Market and the super gorgeous, super sweet, potato shaped beets they have every week.  They’re so pretty and pink and shapely, I just can’t help myself!


This salad is, as Trevor would put it, “flavor-exciting.”  There’s a lot going on in this dish, and all of it is good.  Roasted beets, chickpeas cooked in spiced broth and fried with cumin, ricotta cheese, kalamata olives, parsley, and a simple dressing of red wine vinegar and lemon juice give you pretty much every flavor and texture you could want in a single dish.  For me, the chickpeas are the star element of this dish, and the key to getting them just right is patience.  Now, I’m not usually that patient in the kitchen – think slightly undercooking the pasta, turning the heat up on an omelette to get it to cook faster and burning it in the process, etc.  But these chickpeas are worth the wait.  After cooking to a firm-tender bite in the beautifully spiced broth, you have to wait even longer for them to fry.  And fry.  And fry.  It takes a long time (a good 15 or 20 minutes) for these little beans to get to that golden-brown chewy-crunchy magic spot, but don’t let yourself toss them into the salad until they’re just right.  With under-fried chickpeas the salad will be good… but with perfectly fried chickpeas you won’t be able to stop eating it.  Promise.

Roasted Beet and Fried Chickpea Salad

Recipe adapted from Sunday Suppers at Lucques.  Makes 3-4 meal-sized servings.

For the chickpeas:

  • 1 c. dried chickpeas, soaked overnight and drained
  • 2 TBS oilve oil
  • 1 small onion, diced
  • 6 cloves garlic, smashed
  • 1 aji amarillo chile or chile de arbol, crumbled
  • 1 bay leaf
  • 1 tsp sweet Hungarian paprika
  • 1/8 tsp cayenne pepper
  • 1/2 tsp. cinnamon

For the salad:

  • 4-5 large beets, peeled and cut into wedges
  • 1/4 c. + 2 TBS olive oil
  • sea salt and pepper to taste
  • 1 tsp cumin seeds
  • 2 TBS red wine vinegar (optional)
  • 1 TBS lemon juice (optional)
  • 1/2 c. kalamata olives, halved
  • 1/2 c. fresh flat parsley leaves, chopped
  • 1/2 c. fresh ricotta
  1. Make the chickpeas: In a medium saucepan, heat olive oil over medium heat.  Add onion and smashed garlic and cook for 5 minutes, stirring occasionally, until starting to brown.  And chile, bay leaf, spices, and chickpeas and cook for 2 minutes, stirring to coat chickpeas with spices.  Add just enough water to cover chickpeas and cook at a low simmer for 1/2 an hour.  Add 1 tsp salt, then continue cooking until chickpeas are tender, another 15-30 minutes.  Take off heat and set aside, leaving in cooking liquid.
  2. Preheat oven to 425°F.  Place peeled beet wedges in a 9×13 glass baking pan, toss with 1/4 c. olive oil and salt and pepper – beets should be well coated with oil.  Cover pan tightly with aluminum foil and roast for 40-50 minutes, until tender when pierced with a fork.
  3. In a large frying pan, heat remaining 2 TBS olive oil over medium heat.  Add cumin seeds and toast for 1 minute.  Add chickpeas (drained of their liquid but including chile and onion bits – I use a large slotted spoon to scoop them from the saucepan to the frying pan) and fry, stirring every 2 minutes or so, until golden-brown and crunchy on the outside, about 20-25 minutes.
  4. Mix roasted beets, fried chickpeas, kalamata olives and parsley leaves until combined.  Drizzle vinegar and lemon juice over salad if using and toss to combine.  Serve warm, and dot with fresh ricotta after plating.

0 December 5, 2011 Breakfast

Overnight Cinnamon Pumpkin Rolls

It’s that time again!  Vote for me in the Marx Food fregola challenge here!

Just because Thanksgiving has passed, Halloween is a distant memory, and I’ve already started posting about Christmas does not mean the season for canned pumpkin has ended.  But does it mean that it’s too late to share pictures of this year’s pumpkin carving?  Probably, but I’m ignoring that, because our pumpkin (and I’m using the word “our” loosely, as it was carved 100% by Trevor – how talented is he?) is too awesome not to share.  3D dragon?  Hell yeah.

Now that that bit of semi-irrelevant bragging is taken care of, let’s talk about some ways to use the 17 cans of pumpkin you (and by you I mean I) hoarded in your cabinet when you thought that there was going to be a pumpkin shortage.  Seriously, at the end of September, things were looking dire – I hadn’t seen a single can of pumpkin in any of the (four) grocery stores that I frequent.  So when I saw four measly cans at Pemberton Farms, I bought three (leaving one for someone else in my pumpkin-less situation out of empathy).  That same morning, Trevor brought over a supply of cans from his house.  Pumpkin shortage avoided.  Since then, I’ve used 1 and a half cans of pumpkin.  Turns out a little pumpkin goes a long way when you’re just one person.  I made these pumpkin scones, which didn’t have a great scone texture or a great pumpkin flavor, pumpkin oatmeal cookies, which were OK but mine came out too soft for my liking, this pumpkin ale bread, which was super fantastic, and I’m planning on trying this smoothie this week, but the recipe I’m choosing to share with you is much more decadent: pumpkin-cinnamon-pecan breakfast rolls with cream cheese frosting.  Um, yum.

These rolls are the perfect treat for a lazy weekend morning.  You can prep the dough and the frosting the night before, let them rest in the fridge overnight, and then in the morning all you’ve got to do is roll out the buns, slather with cinnamon-sugar butter, and pop them in the oven.  Twenty minutes later, as the house fills up with the smells of pumpkin and cinnamon and people start coming downstairs to sniff around, you officially become the worlds’ best mother/girlfriend/wife/daughter/male-versions-of-these-terms.  They taste like a really good, really soft cinnamon roll, but with the added punch of pumpkin, ginger, and nutmeg.  The toasted pecans in the filling and the lemon-cream-cheese frosting take them over the top.  I can almost guarantee you that a steaming pan of these and a hot pot of coffee could make any sunny December morning complete.

Overnight Cinnamon-Pumpkin Rolls

Roll recipe adapted from TheKitchn.  Frosting recipe from Good Life Eats.  Makes 8 large rolls.

For the dough:

  • 2 TBS warm water
  • 1/2 TBS instant yeast
  • 1/2 c. milk
  • 1/2 stick (1/4 c.) butter
  • 1/4 c. sugar
  • 1/2 (15 oz.) can pumpkin puree
  • 1/2 tsp salt
  • 2 1/2 c. AP flour

For the filling:

  • 6 TBS butter
  • 3/4 c. brown sugar
  • 1 1/2 tsp cinnamon
  • 1/4 tsp ginger
  • 1/4 tsp nutmeg
  • 1 c. pecans, chopped finely and toasted

For the frosting:

  • 2 oz. cream cheese, softened
  • 1/2 stick butter, softened
  • 1 c. powdered sugar
  • 1-2 tsp lemon juice
  1. Proof the yeast: In a small bowl, add the yeast to 1/8 c. warm (not hot) water and let sit for 10 minutes.  Meanwhile, heat the milk and the 1/2 stick butter over low heat until the butter is melted.  Mix in the sugar until fully dissolved, then let cool slightly so that it is warm to the touch, but not hot.  Stir the proofed yeast and the canned pumpkin into the milk mixture until evenly mixed, then add the salt and all the flour at once.  Stir to incorporate fully – dough should come together into a slightly sticky but workable mass.  Add another 1/4 c. of flour if dough is too sticky to work with.  Cover dough with a towel and let rise for 1-2 hours (until doubled in volume) in a warm place.  Punch down and place in fridge overnight.  (You can make the rolls directly from this point without the overnight refrigeration as well, but the extra resting time will result in a better flavor.)
  2. Remove the dough from the refrigerator and roll out into a large rectangle of dough 1/2 inch thick, about 14 inches by 8 inches in size.  Melt the 1/2 stick of butter for the filling in the microwave, then mix in the brown sugar and spices, and spread on top of the dough, leaving an inch at the top (the long way – you’re going to roll it into a long tube and need a space to pinch the dough together).  Sprinkle toasted, chopped pecans on top.  Roll the dough into a long (14 inch tube) and pinch the ends together.  Use a sharp knife to slice the tube horizontally into 8 rolls.  Place these rolls in a buttered 9 inch cake pan with about 1/2 inch of room between them.  Cover and let rise for 40 minutes.
  3. Preheat the oven to 375°F and bake risen rolls for 20-25 minutes, until golden brown on edges and no longer doughy in center.  While they bake, prepare the frosting: mix together cream cheese and butter until smooth.  Add powdered sugar and lemon juice and beat until they form a thin frosting.  Test for flavor and consistency, and adjust with more sugar or more lemon juice as needed.  Let rolls cool slightly then drizzle with cream cheese frosting.  Serve warm.

0 December 1, 2011 Dessert

Chocolate-Covered-Cherry Cookies

Everyone has different first-of-the-month traditions.  A lot of people make sure the first thing they say is “rabbit, rabbit,” to bring good luck all month. A harmless, fun tradition, right?  Well in my family, on the first of the month, we physically abuse each other.  I.e. we wake up, sprint into each other’s rooms, yell “pinch and a punch, first day of the month” while brutally delivering the requisite pinch and the punch, then run out of the room to get everyone else.  The ultimate goal is to get everyone before anyone gets you, which can be challenging in a family of 5. Family agreement used to state that you had to wait until someone was awake before you got them, but now that my brother is in college mode and sleeps till noon when he’s home, the rules have changed such that jumping on someone while they’re asleep is fair game.  Needless to say, Ryan hates this game.  It’s not something you can escape by leaving home either – this morning, my Dad called at 7:10.  Now, I’m always awake at 7:10, but I usually haven’t spoken to anyone yet, nor am I in the mood too.  Additionally, getting phone calls at strange hours always puts me on the alert -something must be wrong if you want to talk that early in the morning and I know you’re not trying to make breakfast plans with me.  So I answer, slightly nervous, only to hear the whole gang on speaker phone, virtually pinching and punching me and delighting in their victory.  I actually just grunted and hung up (which made me feel a lot like my brother).  Later in the day, I received several emails from aunts across the country, all claiming their own victory.  Ah, family :-).  I’ve never actually met anyone else who does “pinch and a punch,” but a quick wikipedia search reveals that it is an old British tradition, so we can’t be the only crazy ones still doing it.

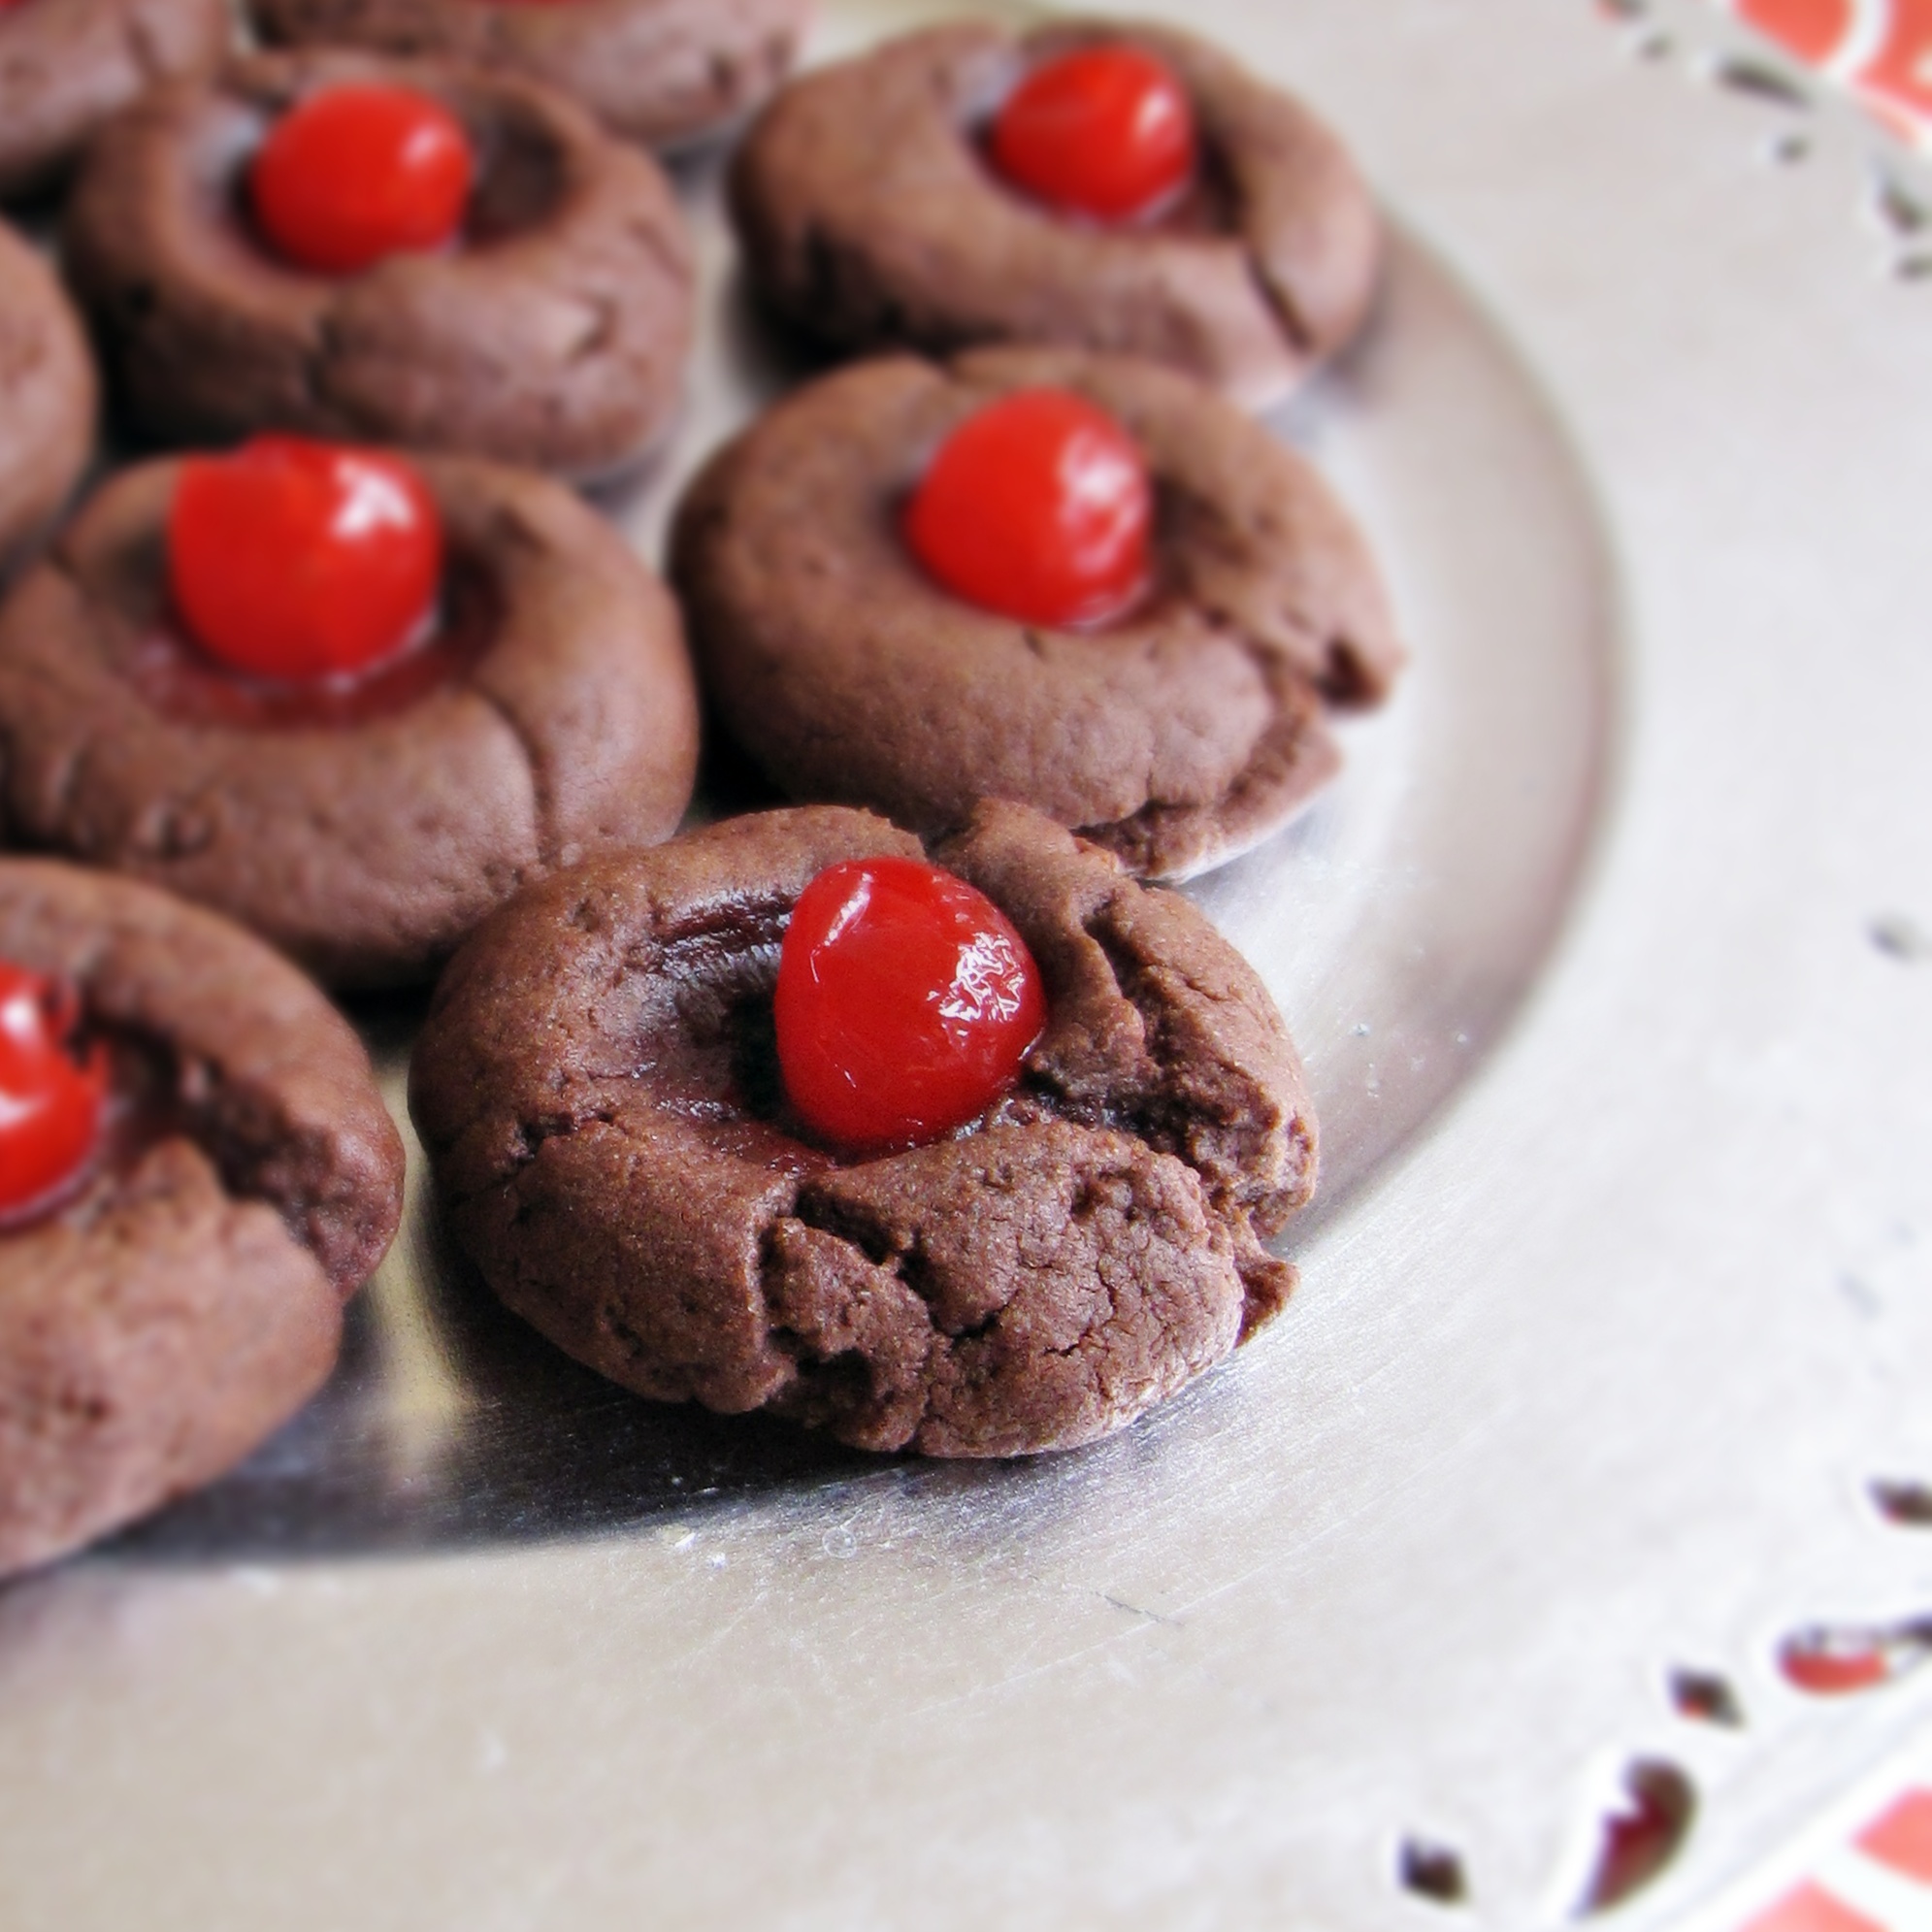
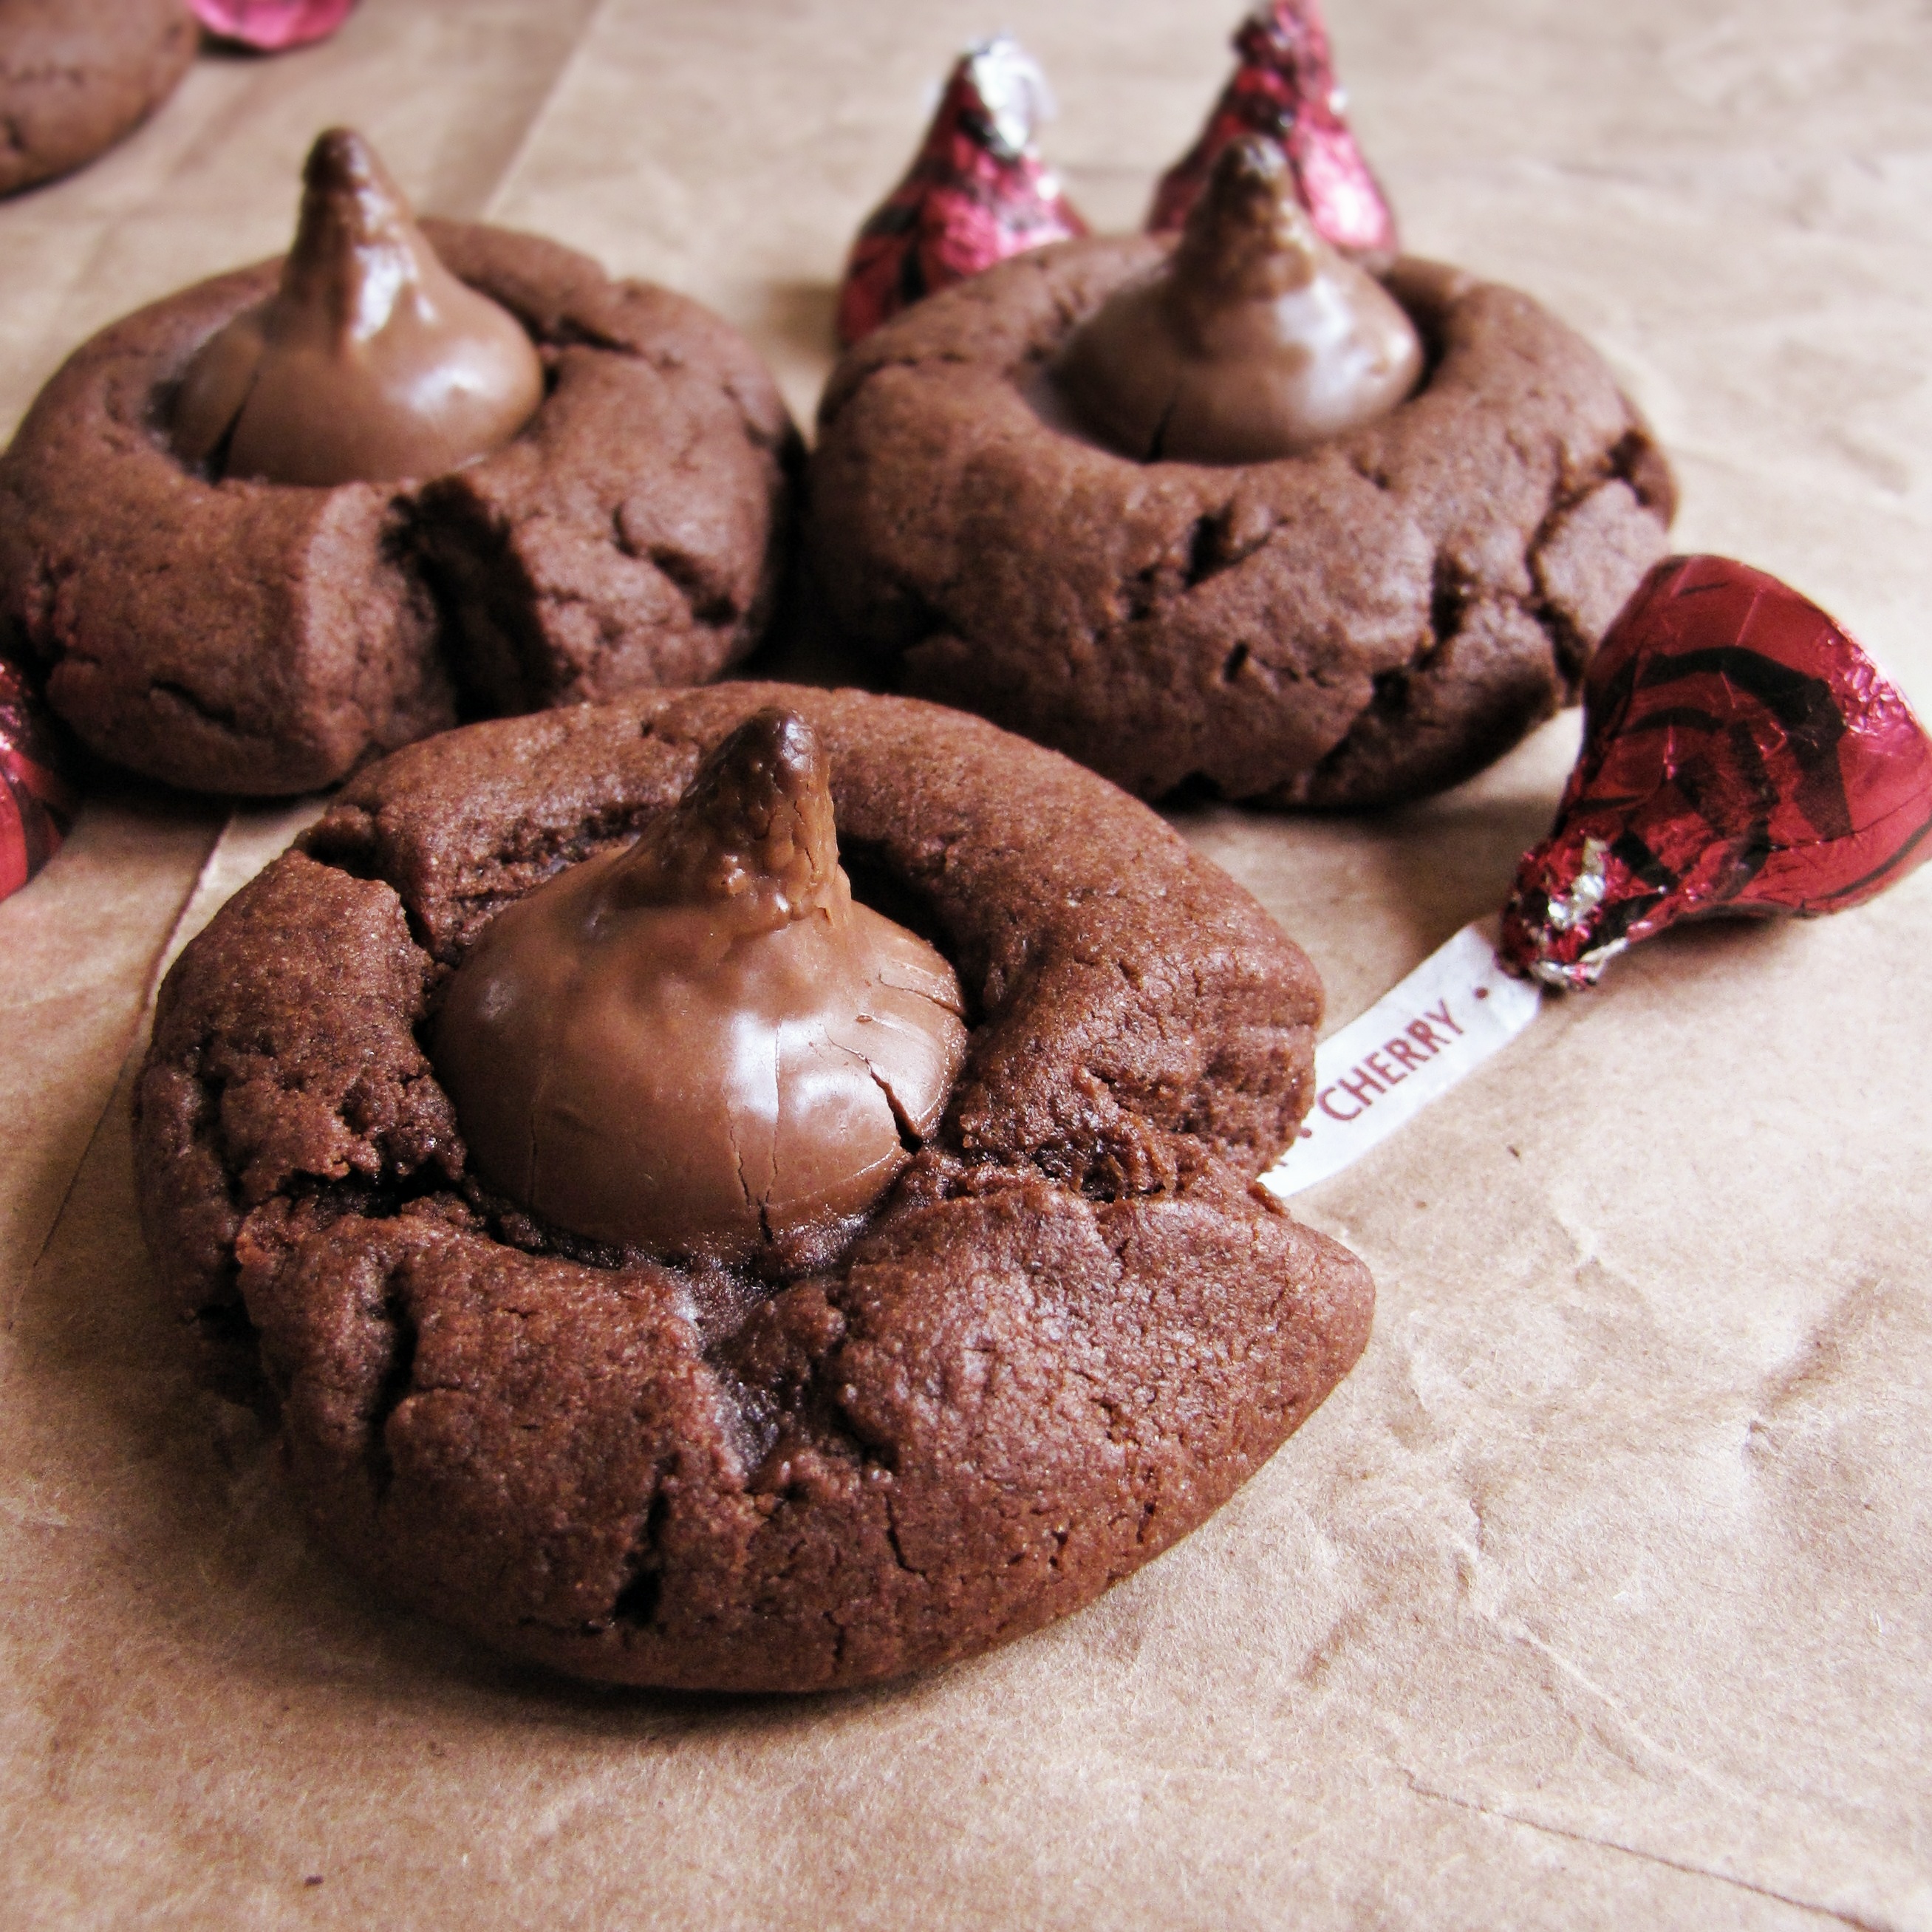
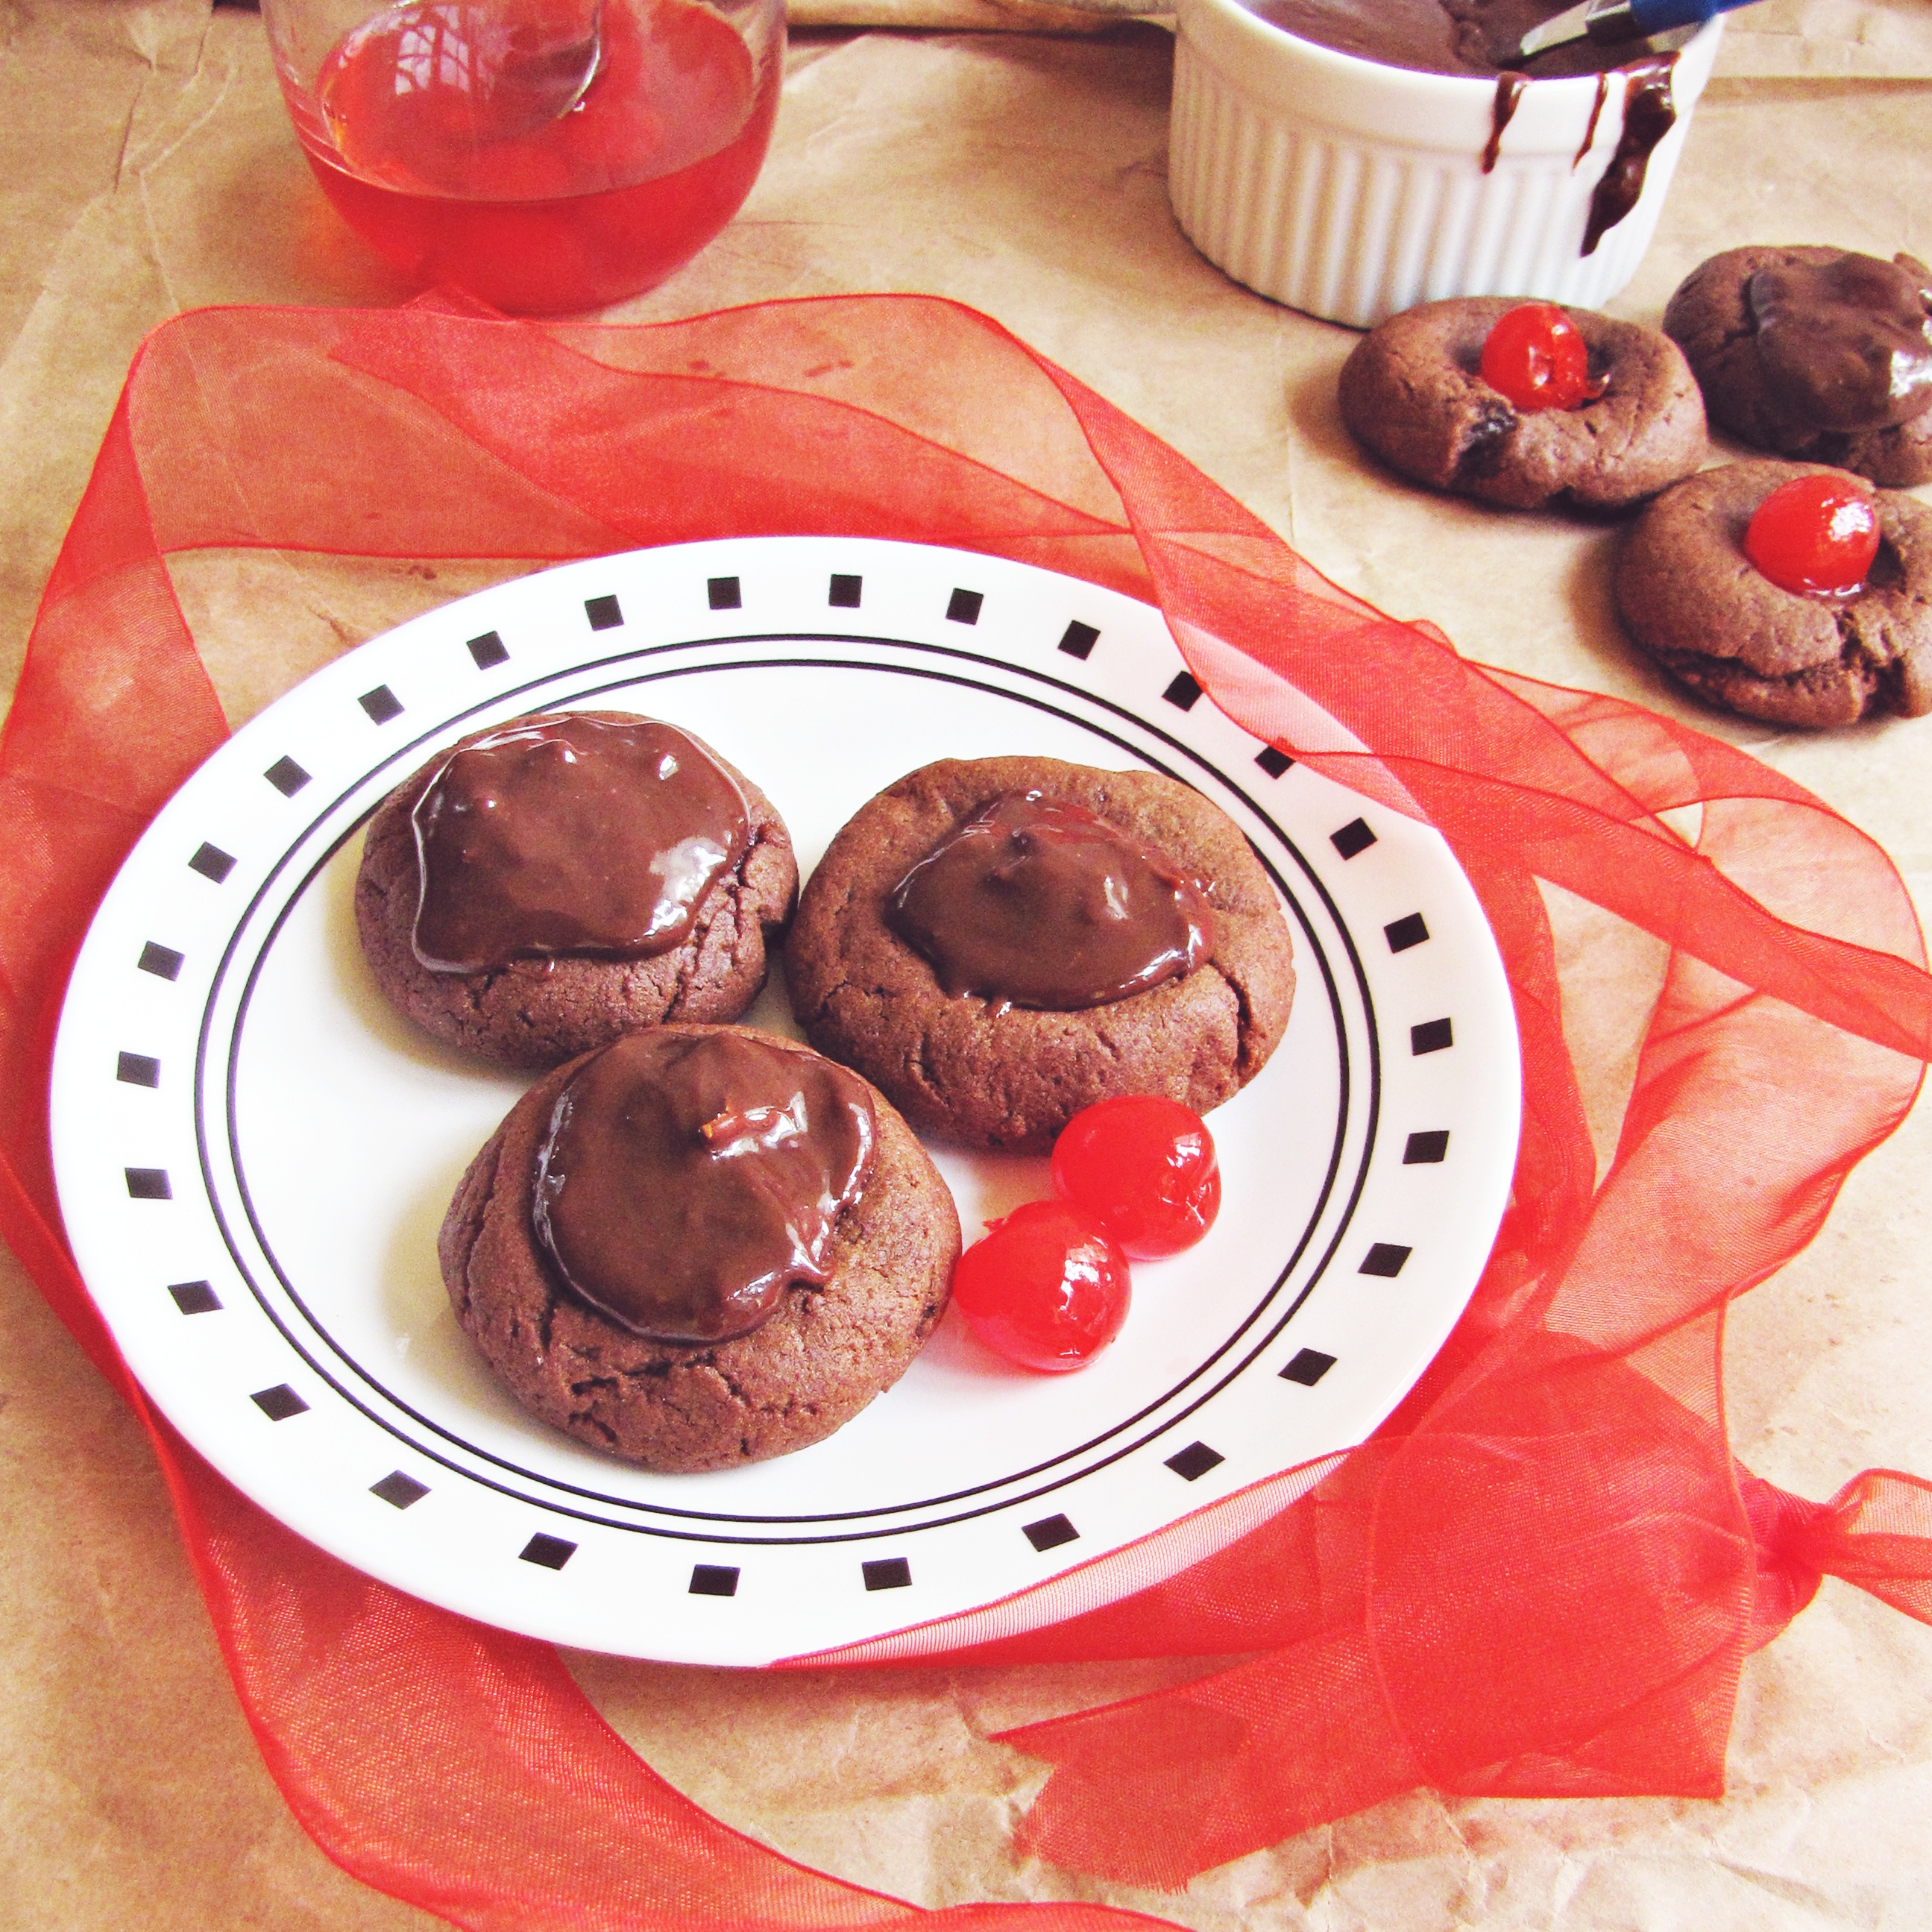
So, now that it’s December, there are going to be two types of food on everyone’s mind: 1) decadent, delicious holiday treats to celebrate the season, and 2) crash-diet-type meals to make up for all the over-indulging.  I wish I could say I was going to break the mold and don’t feel the need to either lose weight or indulge in excessive baking around the holidays, but I can’t.  I’m just like everyone else – simultaneously writing my Christmas cookie list and planning how to lose 15 pounds.  This is blog is going to reflect that over the next month.  And let’s be serious – who wants to start with healthy?  Healthy is for when you feel guilty about unhealthy.  We’re starting with cookies.  These chocolate-covered-cherry cookies from lolfoodie are probably the best cookies I’ve made all year.  Possibly ever.  My parents thought they were good.  My roommate declared them incredible (he just walked in and said they might have been “the single best cookies he’s ever had in his life.”  Wow.)  I loved them.  We finished the first batch in 48 hours, and as I type, Trevor is making another batch for me to bring in to work tomorrow.  (OK, secret’s out.  Trevor does my blog baking occasionally.  But usually it’s me.  Honest.)  They’re definitely going on the annual Christmas cookie list.  The only possible improvement?  Soaking the cherries in brandy for a few days first.  Try it.

Chocolate-Covered-Cherry Cookies

Recipe from Lolfoodie.  Makes 18 cookies.

  • 1 stick butter, well softened (partially melted)
  • 2/3 c. white sugar
  • 1/3 c. brown sugar
  • 1 egg
  • 1 tsp vanilla
  • 1/4 tsp salt
  • 1 1/2 c. flour
  • 1/2 c. unsweetened cocoa powder
  • 1/4 tsp baking soda
  • 1/4 tsp baking powder
  • 1 (10-0z) jar maraschino cherries
  • 1/3 c. sweetened condensed milk
  • 1 TBS juice from maraschino cherries
  • 2/3 c. chocolate chips
  1. Preheat oven to 350°F.  In a large bowl, cream together softened butter and sugars, beating vigorously until light and fluffy, about 2 minutes.  Add the salt, egg, and vanilla, and beat well to incorporate.
  2. In a small bowl, whisk together flour, cocoa, baking soda, and baking powder until evenly combined – be sure to break up any clumps of cocoa powder to the best of your ability.  Add the dry ingredients to the wet ingredients and mix together.  The mixture will be very dry at first, with an almost sandy texture.  Keep mixing it – the dough will come together into a very thick, moist mixture that stays together easily when formed into balls.
  3. Pinch off 1 inch balls from the dough and roll into balls, then flatten slightly and place on a baking sheet.  Use your finger to make a small indent in the center of each cookie, then place a maraschino cherry in the indentation.  Bake the cookies for 12 minutes – they should be just beginning to crack around the edges, then remove and let cool completely on a rack.
  4. In a small saucepan, heat the condensed milk, cherry juice, and chocolate chips over very low heat, stirring continuously, until the chocolate has melted and formed a smooth frosting with the condensed milk.  If you are worried about seizing the chocolate, this step can be done in a double boiler.  Remove from heat and let cool slightly before placing a 1/2 TBS of frosting over the tops of each cookie, hiding the cherry underneath.

0 November 27, 2011 Breakfast

Marx Challenge: Sweet Fregola Fritters

It’s that time again!  Vote for me in the Marx Food fregola challenge here!

In the past two years I’ve participated in several recipe development challenges hosted by Marx Foods, an online company that sells specialty meats (think alligator, kangaroo, and frog), truffle products, mushrooms, unique pantry goods, and lots of other culinary goodies.  The first challenge I participated in was the four-part “Ridiculously Delicious” challenge they hosted last winter, for which I made dill and feta stuffed cucumber cups, spicy cherry-chocolate souffles, and a trio of wasabi-centric recipes using fresh wasabi.  Then, this summer, I participated in the dried chile challenge, and made a smoky-sweet adobo and corn frittata, which I very much enjoyed.  And now it’s time for another challenge!  This time around the challenge is to make a sweet recipe using fregola – an ingredient I’d never even heard of until this month.  I have yet to win one of these challenges, but maybe this will be my lucky recipe.

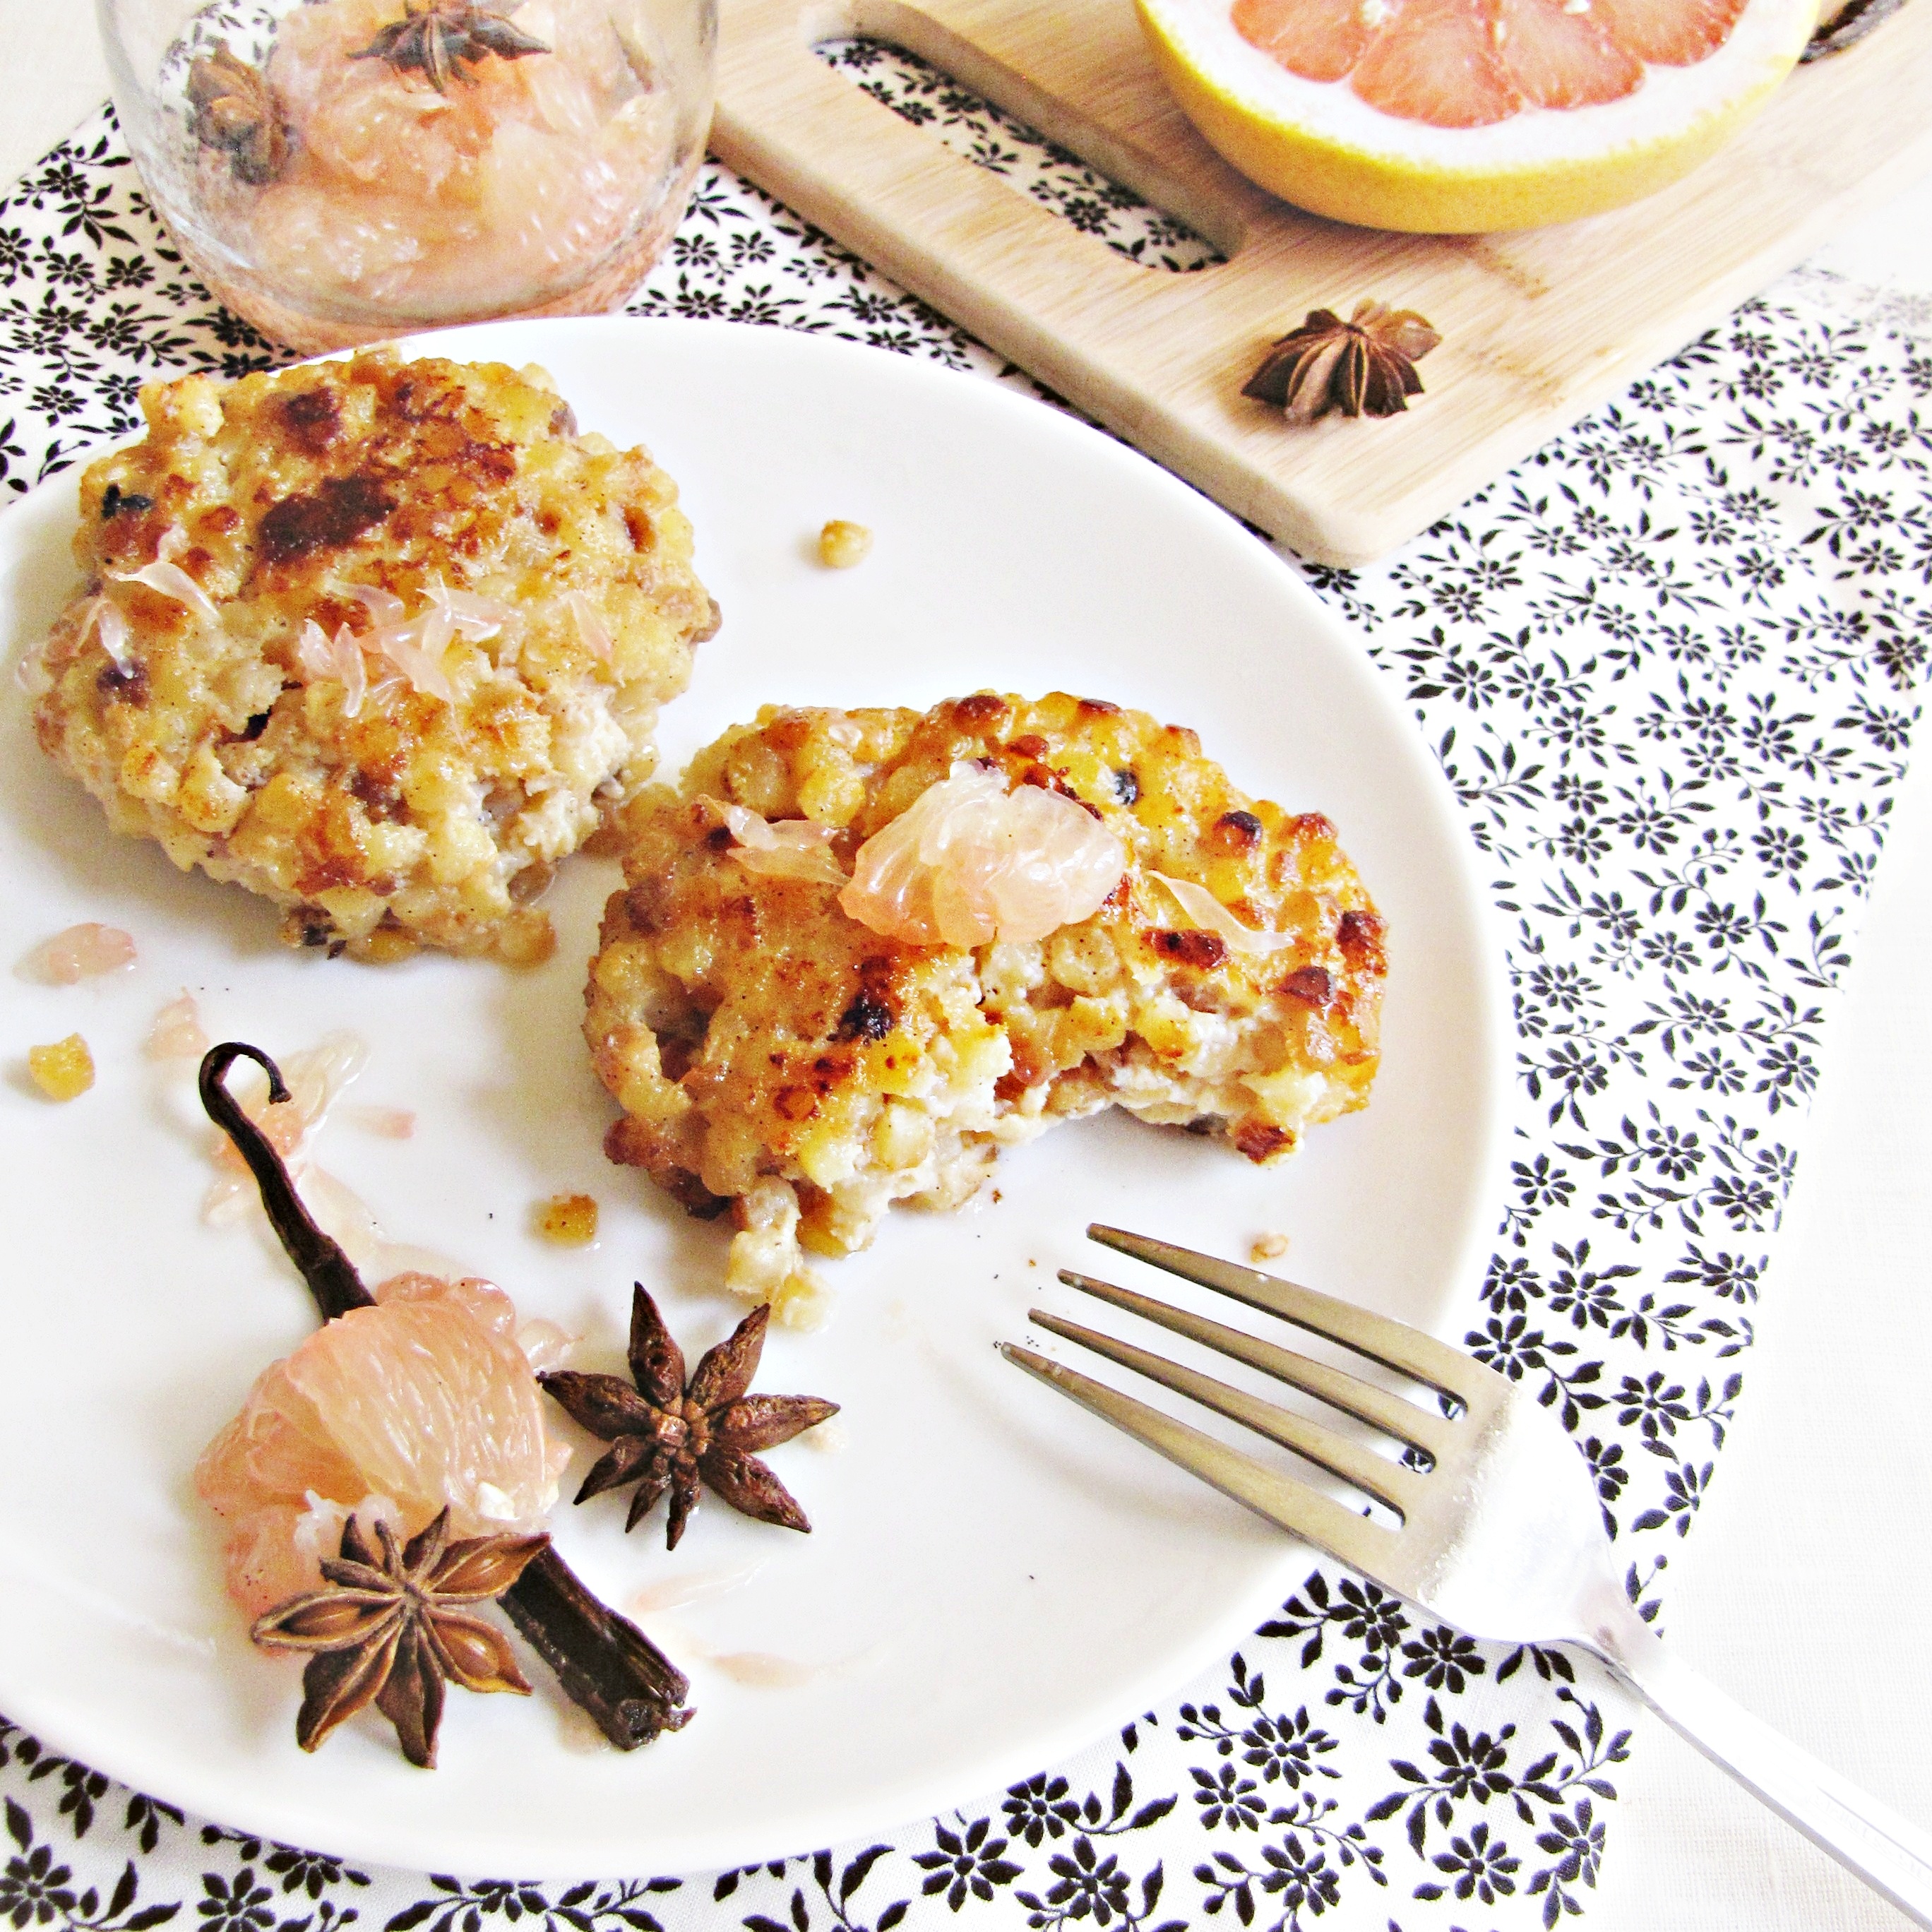
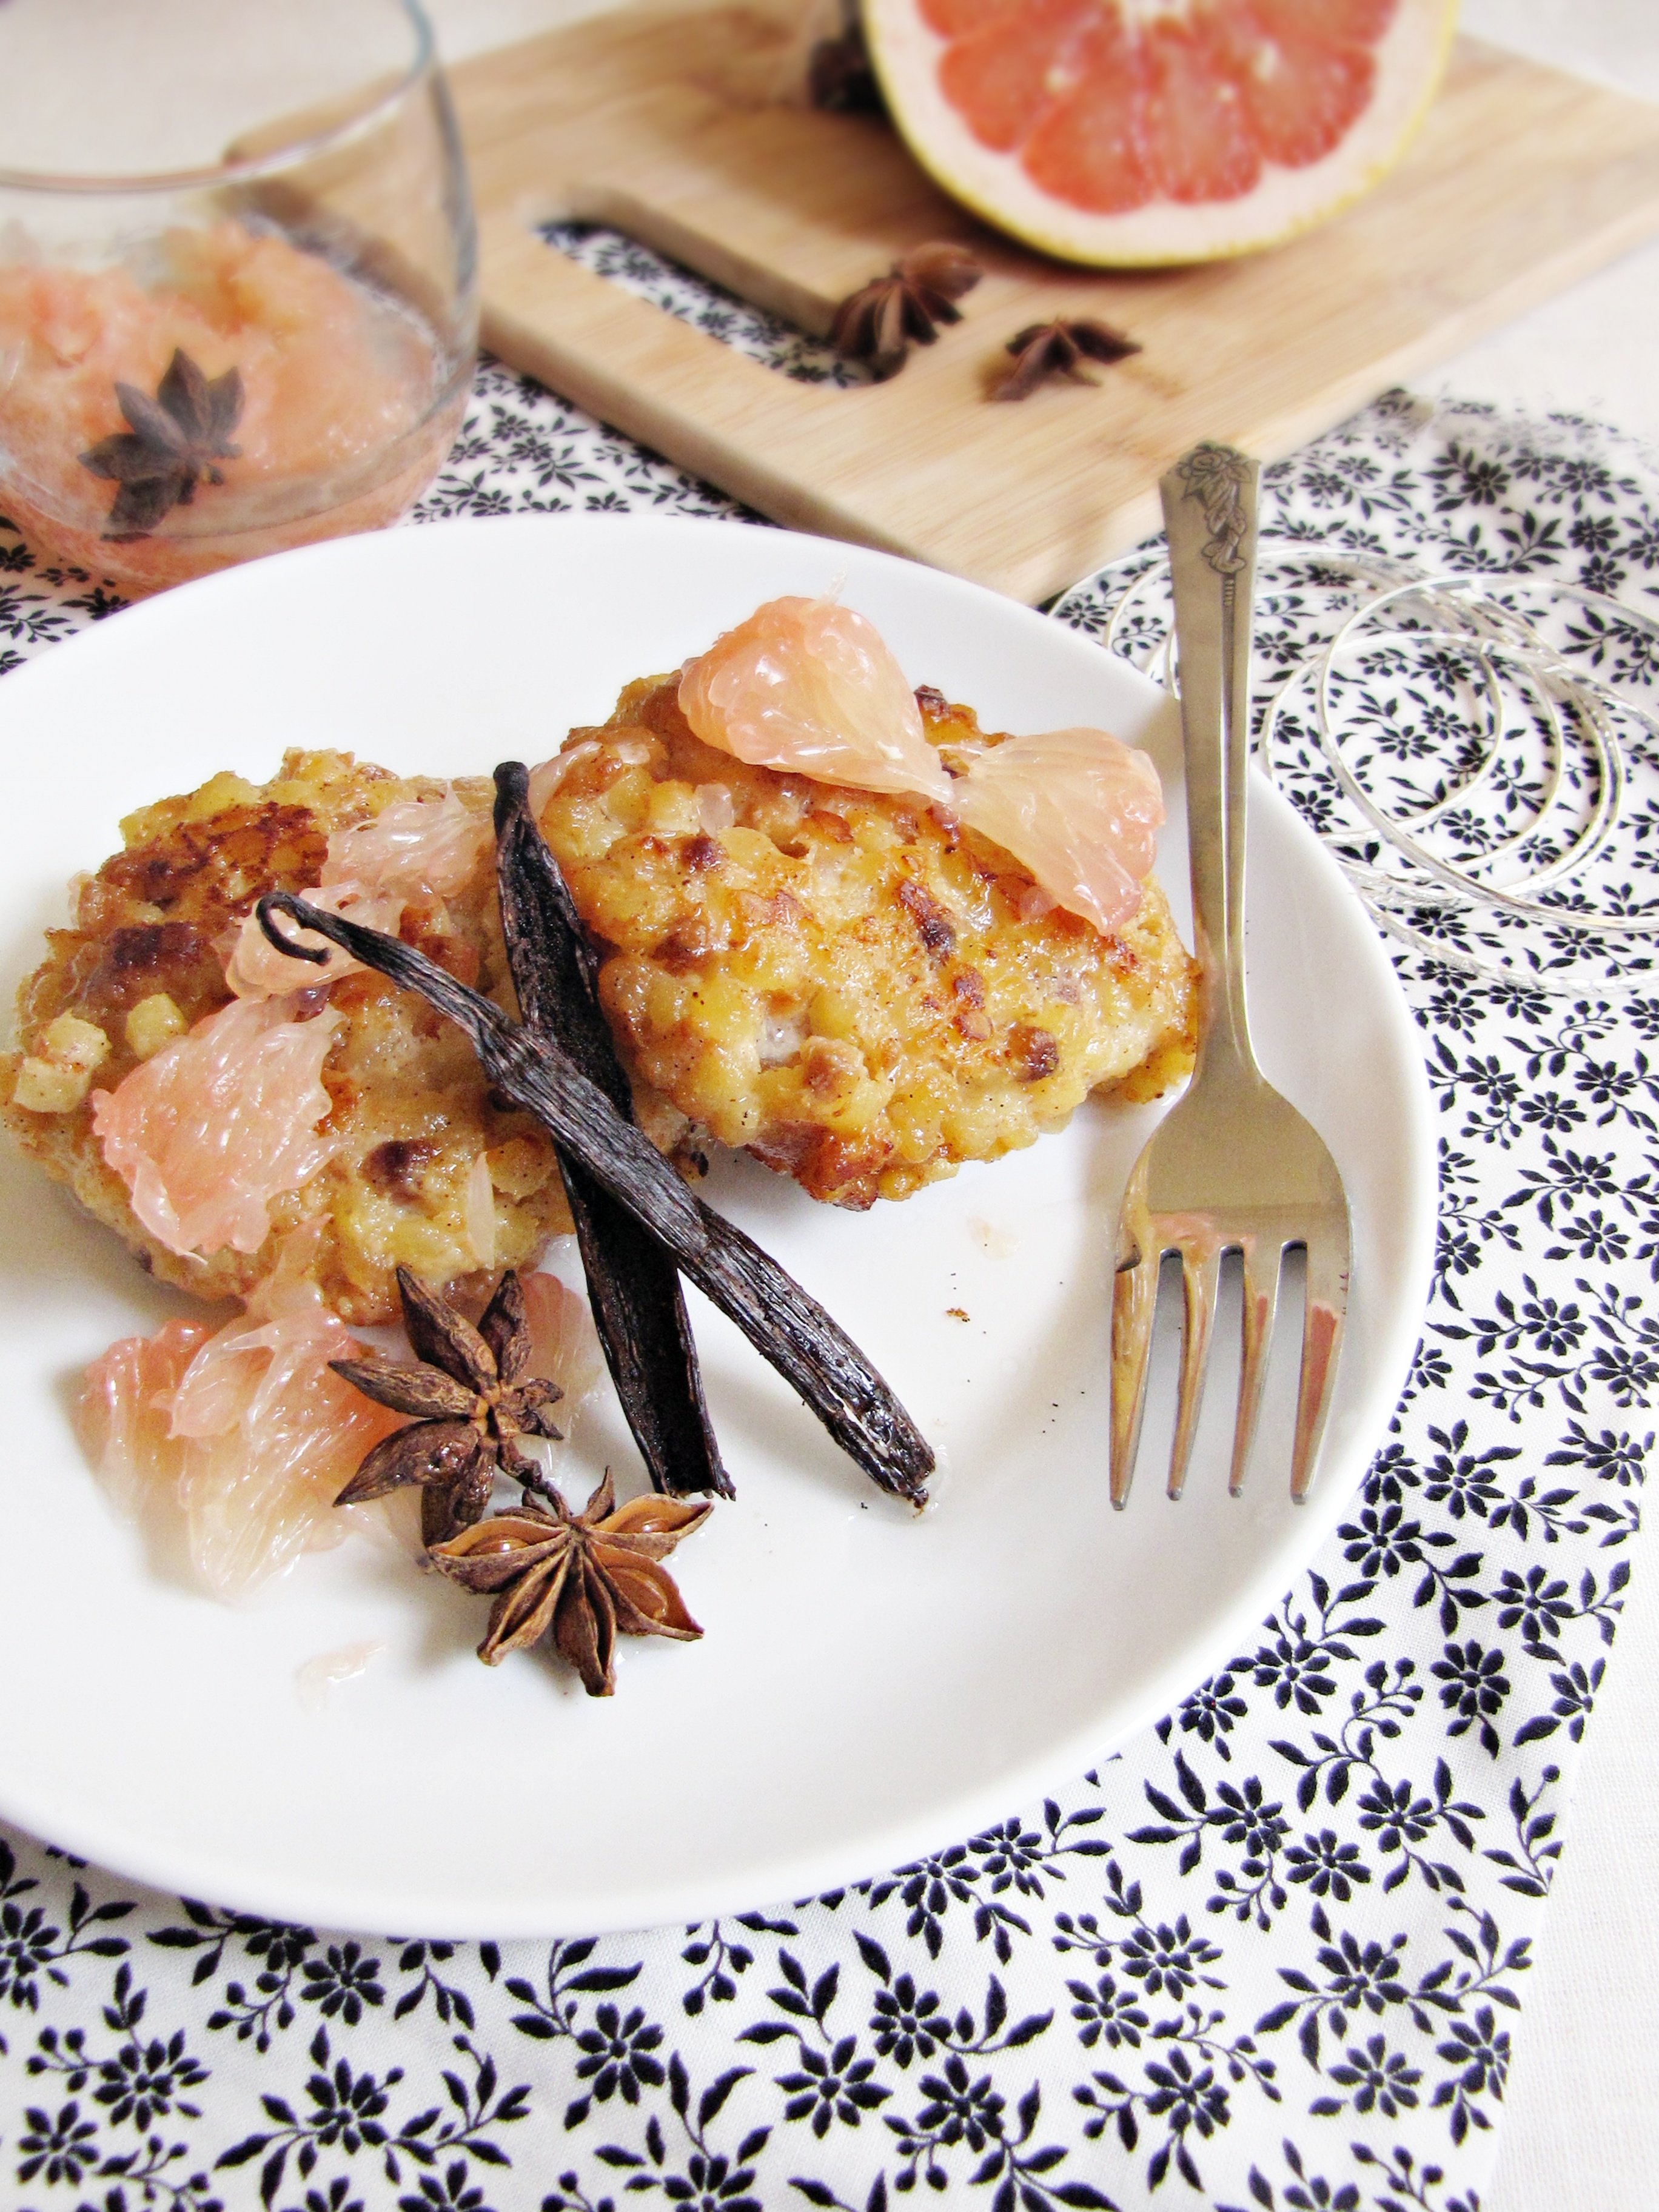
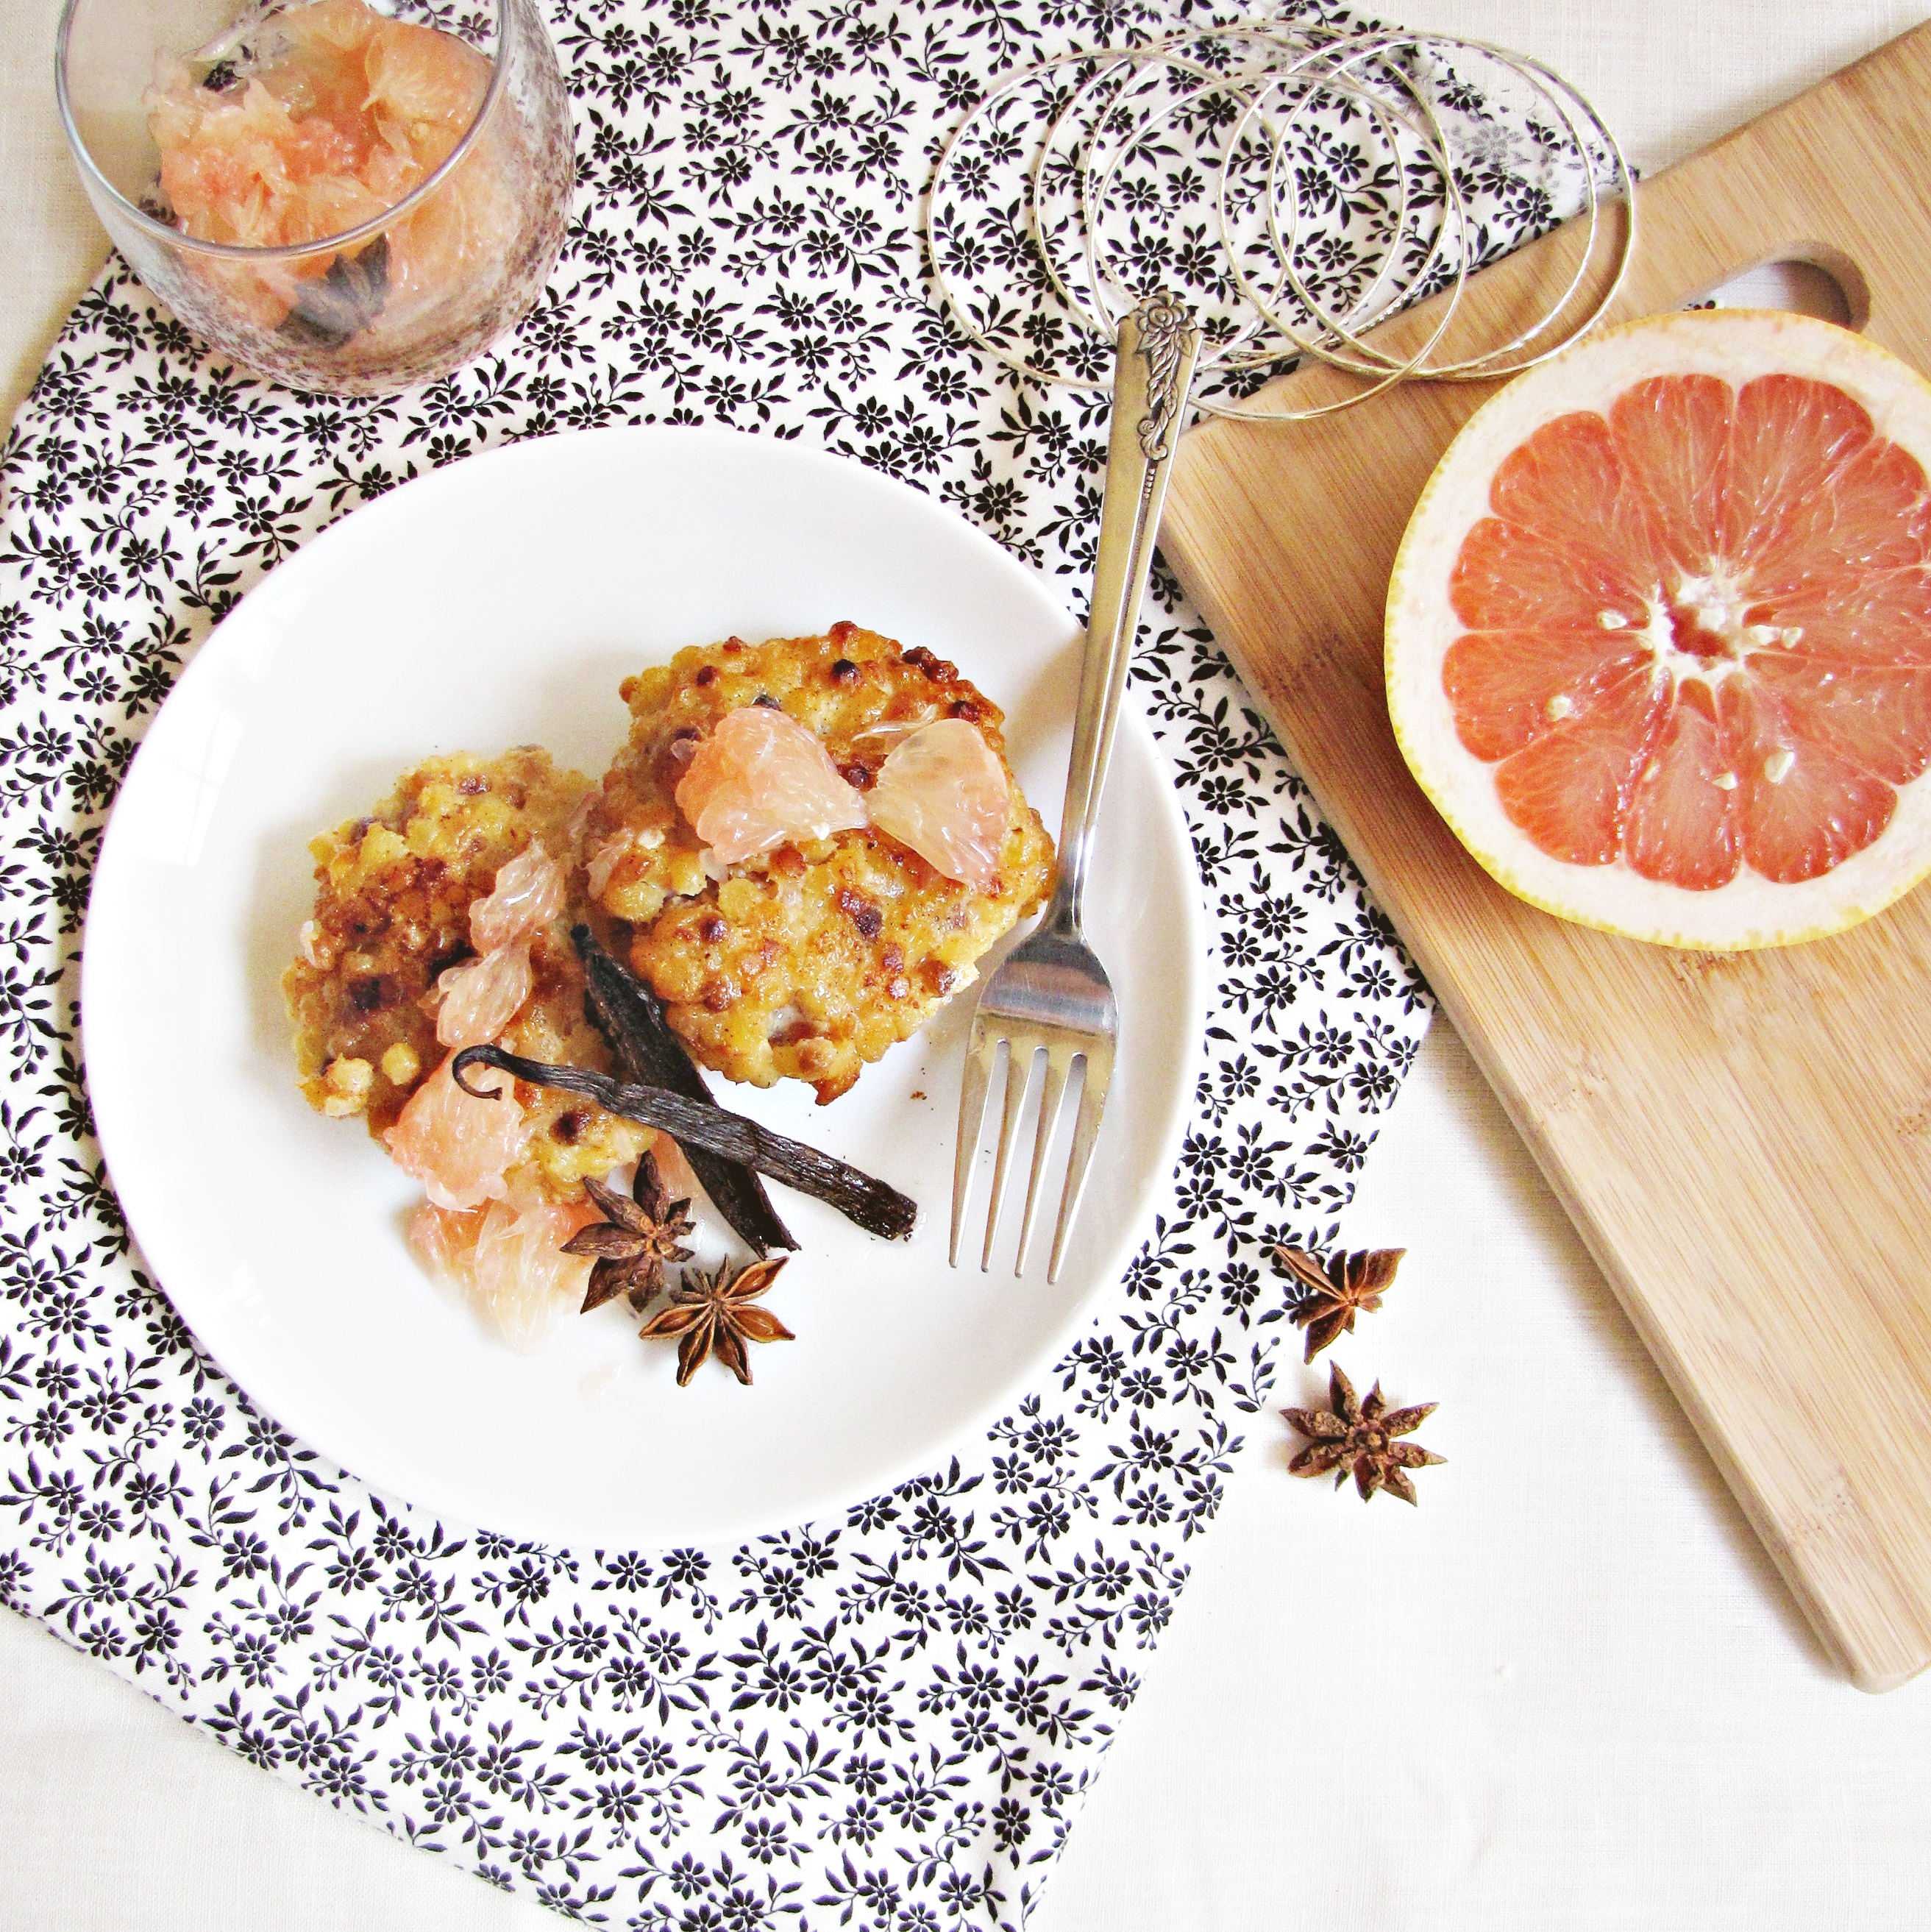
Fregola is a toasted Italian pasta, similar in size and shape to Israeli couscous.  I could eat couscous all day every day, so I was super excited to try another version of it.  To be honest, I didn’t like the fregola as much as I like regular old couscous – it’s very chewy and has an almost tapioca-like consistency – but it was still an interesting new addition to my kitchen.  Along with the sample of fregola, Marx sent a handful of other goods to inspire a sweet fregola creation – whole vanilla beans, star anise, and saffron.  The contestants were required to use at least one of the extra ingredients along with the fregola.  Almost immediately upon signing up for this contest I knew that I wanted to create a fregola fritter, something that played on arancini – the delicious cheesy fried risotto balls made with leftover risotto which I seem to be eating a lot of lately.  So I made a fregola pudding using milk, cinnamon, nutmeg, honey, and vanilla, and then, after a brief rest in the fridge, fried it up into fritters.  To cut the grease and add another level of flavor, I made a batch of Gourmet’s grapefruit and star anise salad.  My mom and I make this salad every year on Christmas morning, and it’s my favorite part of Christmas breakfast without fail.  Even when there’s vanilla bean coffee cake, maple-turkey sausage patties, and pomegranate mimosas – that should tell you something about how delicious it is.  It was the perfect complement to the slightly sweet, chewy fritters, and the syrup soaked right into them.  I’ll be enjoying the leftovers for breakfast for the next few days (and not even feeling that bad about it – thank you, grapefruit).  I think this is the original recipe that I’m most proud of – I guess there’s something to be said for keeping it simple.

Sweet Fregola Fritters with Star-Anise and Grapefruit Compote

Grapefruit compote recipe from Gourmet.  Makes 5 large fritters.

  • 1 c. fregola
  • 3 c. milk
  • 1/2 tsp cinnamon
  • 1/8 tsp nutmeg
  • 1/4 c. honey
  • 1 vanilla bean
  • canola oil for frying
  • 2 grapefruits
  • 1/4 c. water
  • 1/4 c. sugar
  • 3 whole star anise
  1. In a large saucepan mix together fregola, milk, cinnamon, nutmeg, and honey.  Scrape out seeds from vanilla bean and add to the mixture along with the pod.  Bring to a gentle simmer and cook, stirring frequently (be sure to scrape any milk skin off the bottom to prevent from burning) for 20-30 minutes, until pasta has just a bit of chewiness left and milk has boiled down to create a thick fregola pudding.  Remove the vanilla bean pod and refrigerate mixture for 1 hour, or until cool.
  2. In a small saucepan, dissolve sugar in water, and add the star anise.  Bring to a gentle boil and cook for 5 minutes to create a thin syrup.  Peel the grapefruits and remove their segments, placing in a medium bowl.  Squeeze any excess grapefruit juice into bowl as well.  Add the star anise syrup to the grapefruit mixture and set aside.
  3. Heat a 1/2 inch of canola oil in a large saucepan over medium-low heat.  When oil is hot, form the fregola pudding into 5 patties about 3 inches in diameter and 1 inch thick, and gently fry for 5 minutes on each side, until golden brown.  Fregola mixture should stay firmly together when formed into patties by hand.  Drain fritters on a paper towel and serve warm, with the grapefruit compote served on the side.

0 November 23, 2011 Cookbook

Cookbook of the Month: Modern Vegetarian Kitchen

I know it’s the day before Thanksgiving and everyone else is probably writing about Thanksgiving food… but I’m not.  I am actually making things to bring to Thanksgiving this year – specifically this roasted beet and carrot salad with goat cheese dressing, and this pear and celery salad, but they aren’t actually in existence yet and so I can’t take any pretty pictures or tell you how they were.  What I can do, however, is tell you about November’s Cookbook of the Month – Peter Berley’s Modern Vegetarian Kitchen.

Compared to most cookbooks that I tend to grab off the bookstore shelves – generally the flashy, hot-off-the-press ones that I’ve seen popping up all over the internet – this cookbook is ancient.  Published in 2000 by Peter Berley and Melissa Clark, it’s not toted as a culinary classic, but since it has flawless reviews on Amazon, I decided to take a look.  Sometimes I find that cookbooks written more than 10 years ago are already out of date – food trends seem to vary as quickly as other trends – hey, remember pogs? furby? how about silly bandz? – and recipes that were hip and new in 2000 have either gone out of style or become culinary staples.  In some instances, this book fell into the no-longer-that-interesting category for me – the vegetable chapter, for example, was sorely uninspiring, with only one recipe (for caramelized fennel) catching my eye amidst the pages of recipes for roasted root vegetables, sauteed garlicky greens, and steamed new potatoes.  However, other chapters were jam packed with great ideas, like the pasta chapter – recipes for chickpea flour pasta with zesty leek and tomato sauce, white bean ravioli in herbed vegetable and saffron broth, whole wheat pasta with creamy walnut-portobello sauce, and chestnut pasta with porcinis, pumpkin and leeks all surprised me with their originality.  This book also has strong Asian influences throughout, with a lot of sesame and seaweed used, but that influence is not overwhelming and is balanced by French, Indian, and German touches.  One of the books strongest points is its commitment to truly cooking from scratch – it includes recipes for several creative vegetable stocks, homemade curry powders, sourdough starters, and 5 or 6 kinds of homemade pasta, using wholesome and readily available ingredients.  It is also packed with recipes, and would be a great starter book for someone just starting down the vegetarian path and looking for both staples and a few more creative recipes.  I should also note that, as someone who eats meat with relish and just happens to cook mostly vegetarian because I find it more interesting and economical, that I whole-heartedly avoid any recipe that calls for tofu, seitan, or tempeh, so I’m not rating the book on that front, although it includes plenty of recipes for using those particular ingredients.  All-in-all, it’s a solid, if slightly outdated, vegetarian tome that I’m likely to cook from again – I’ll give it 4 out of 5 stars.

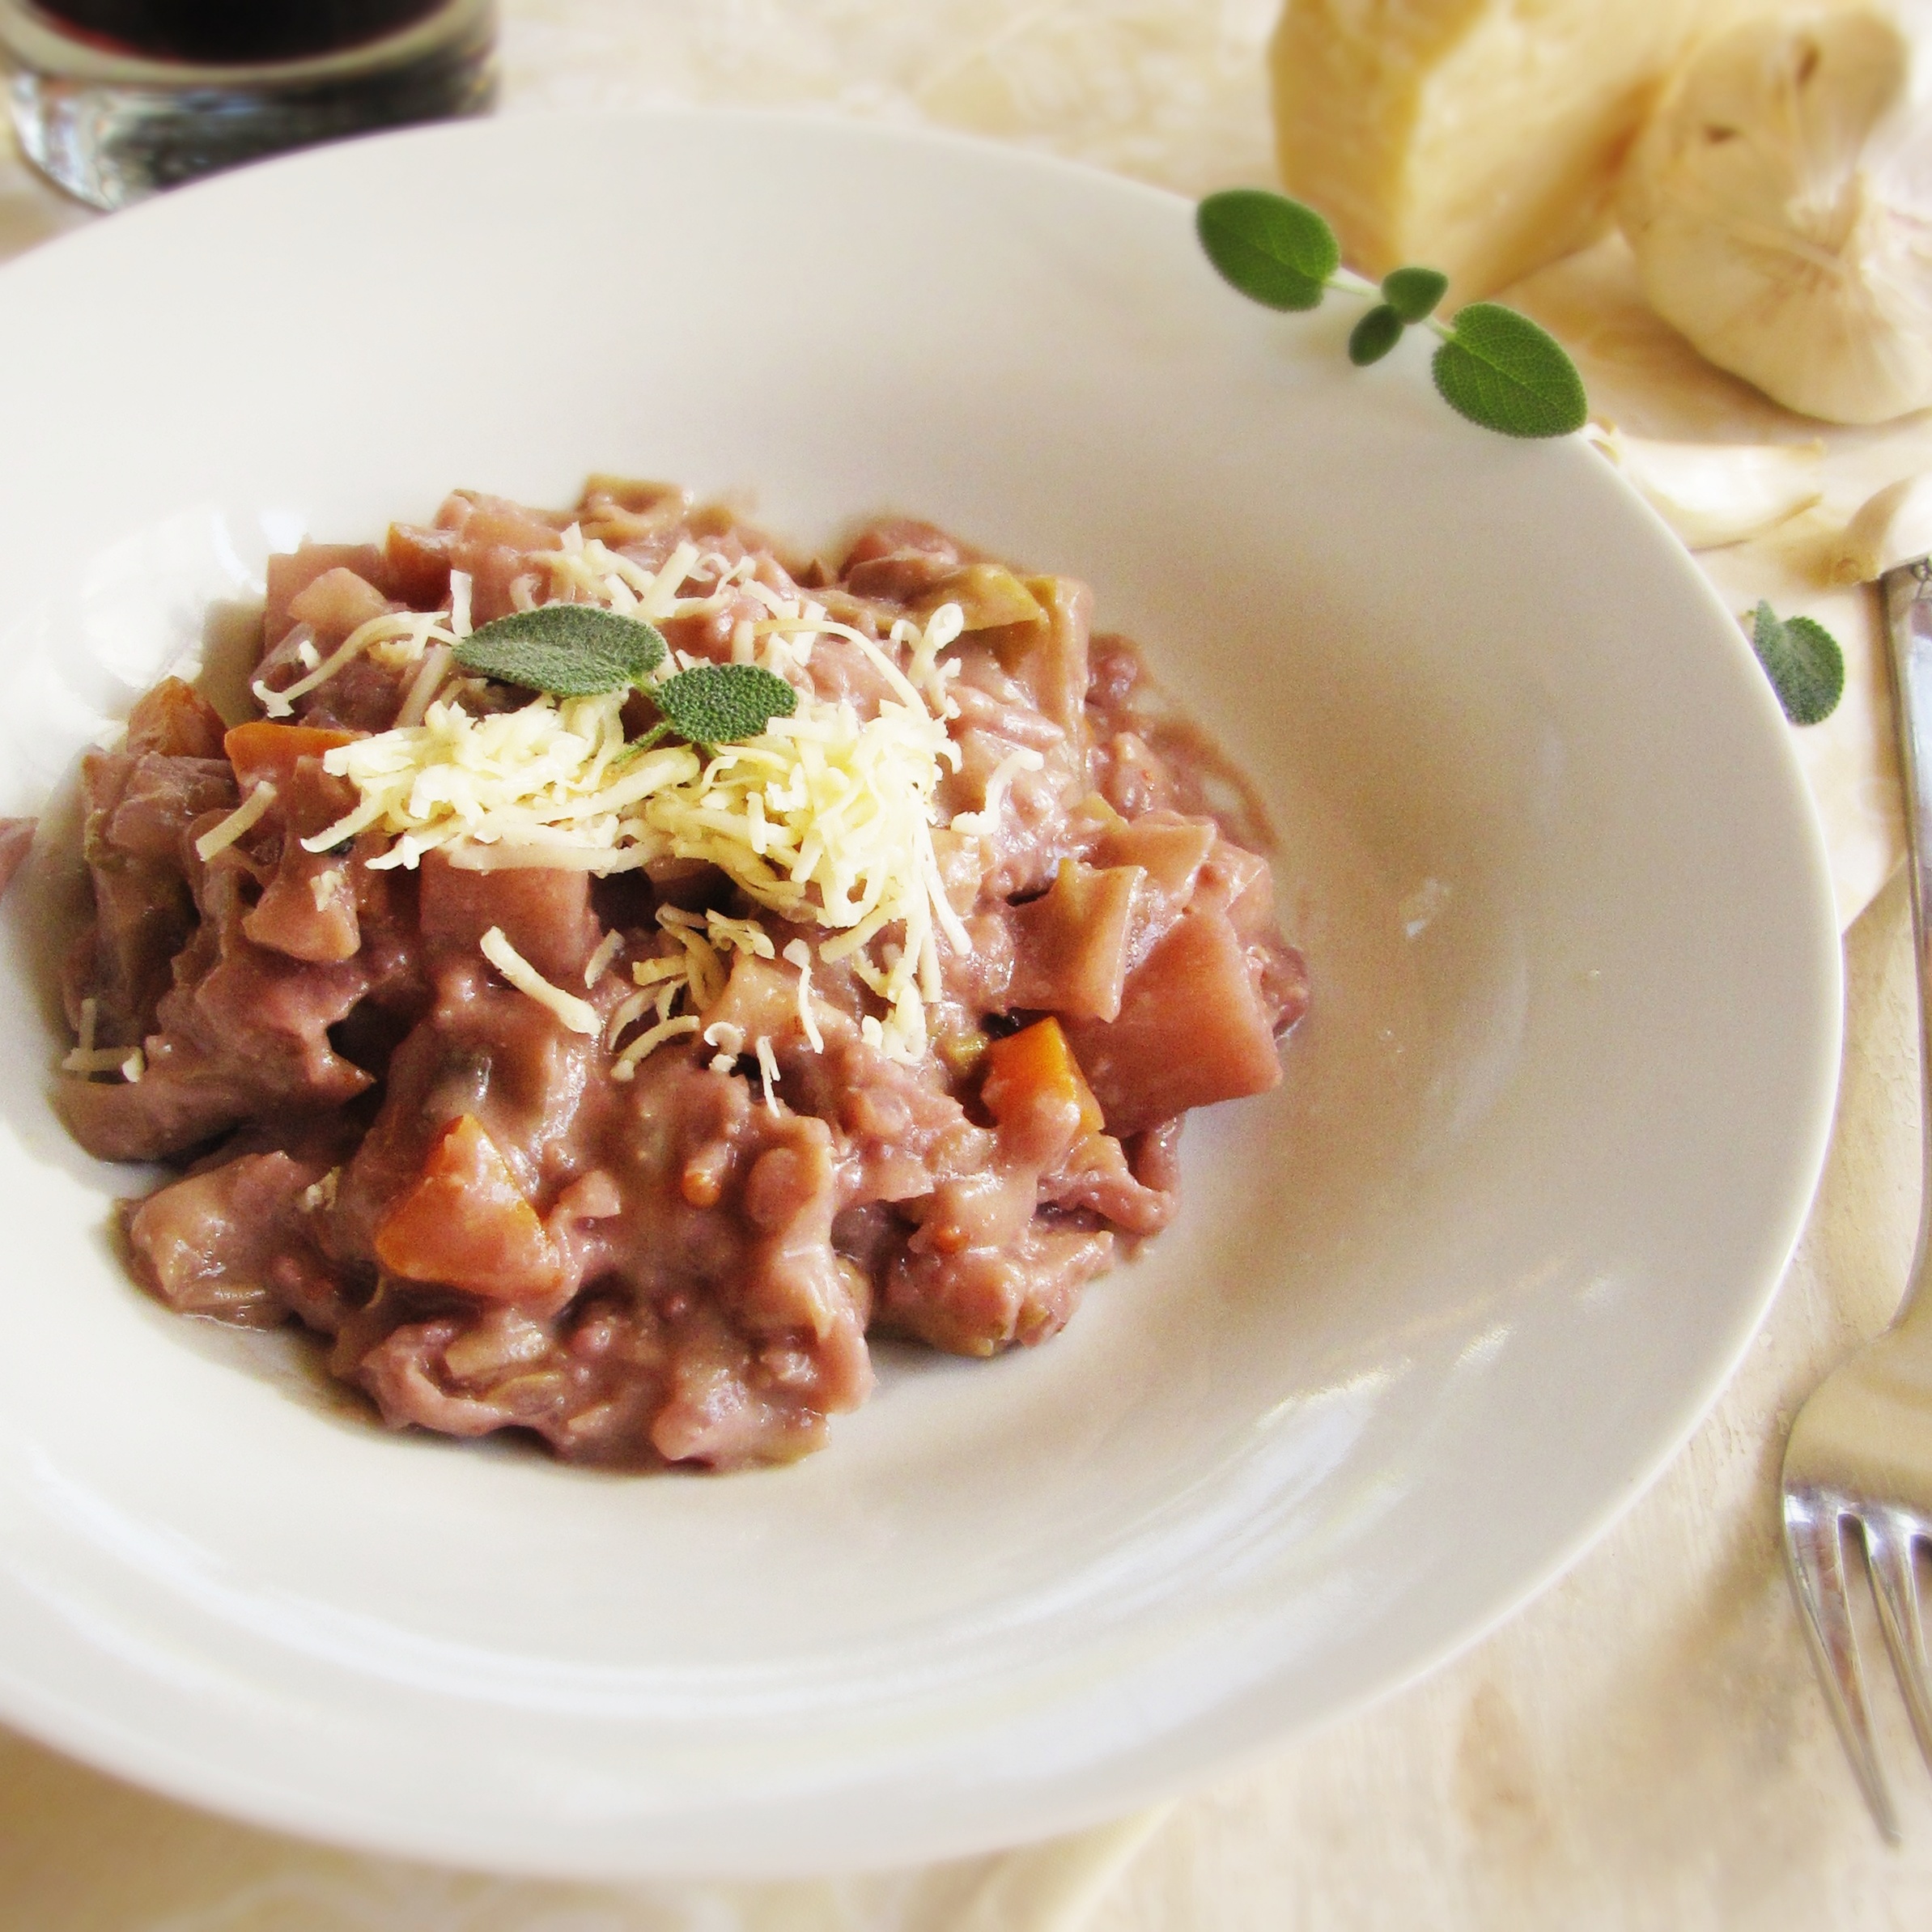
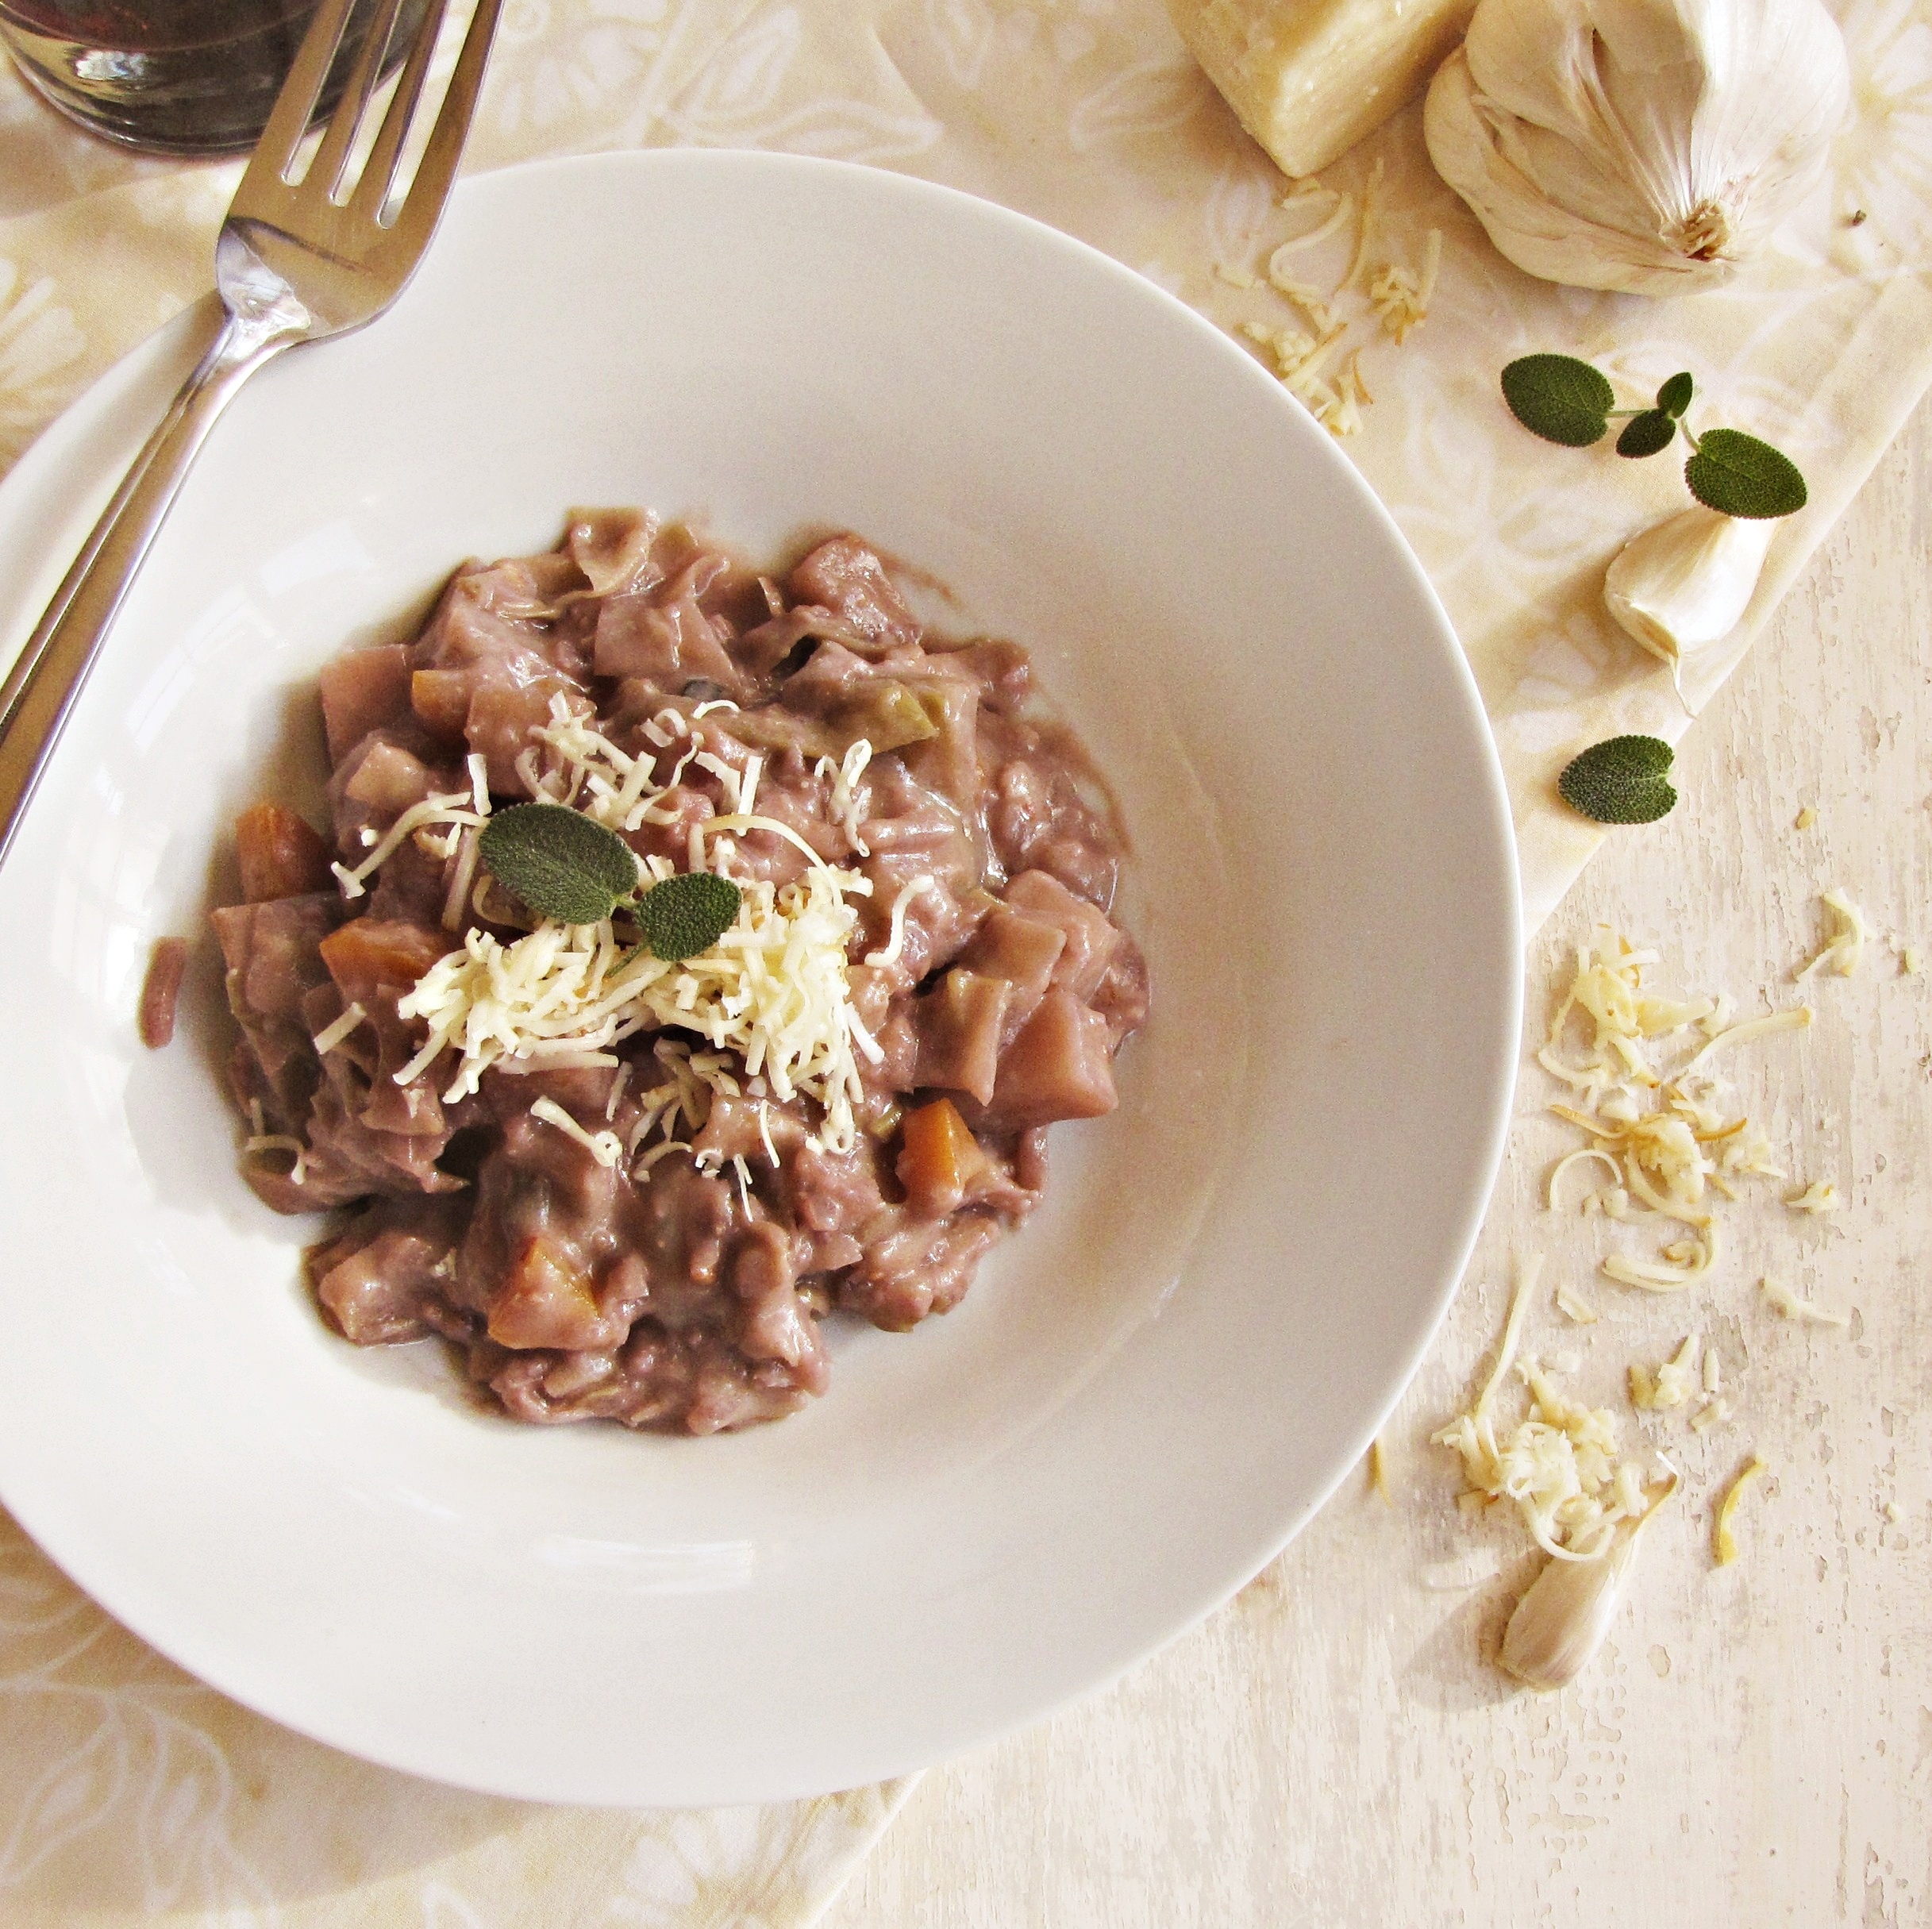
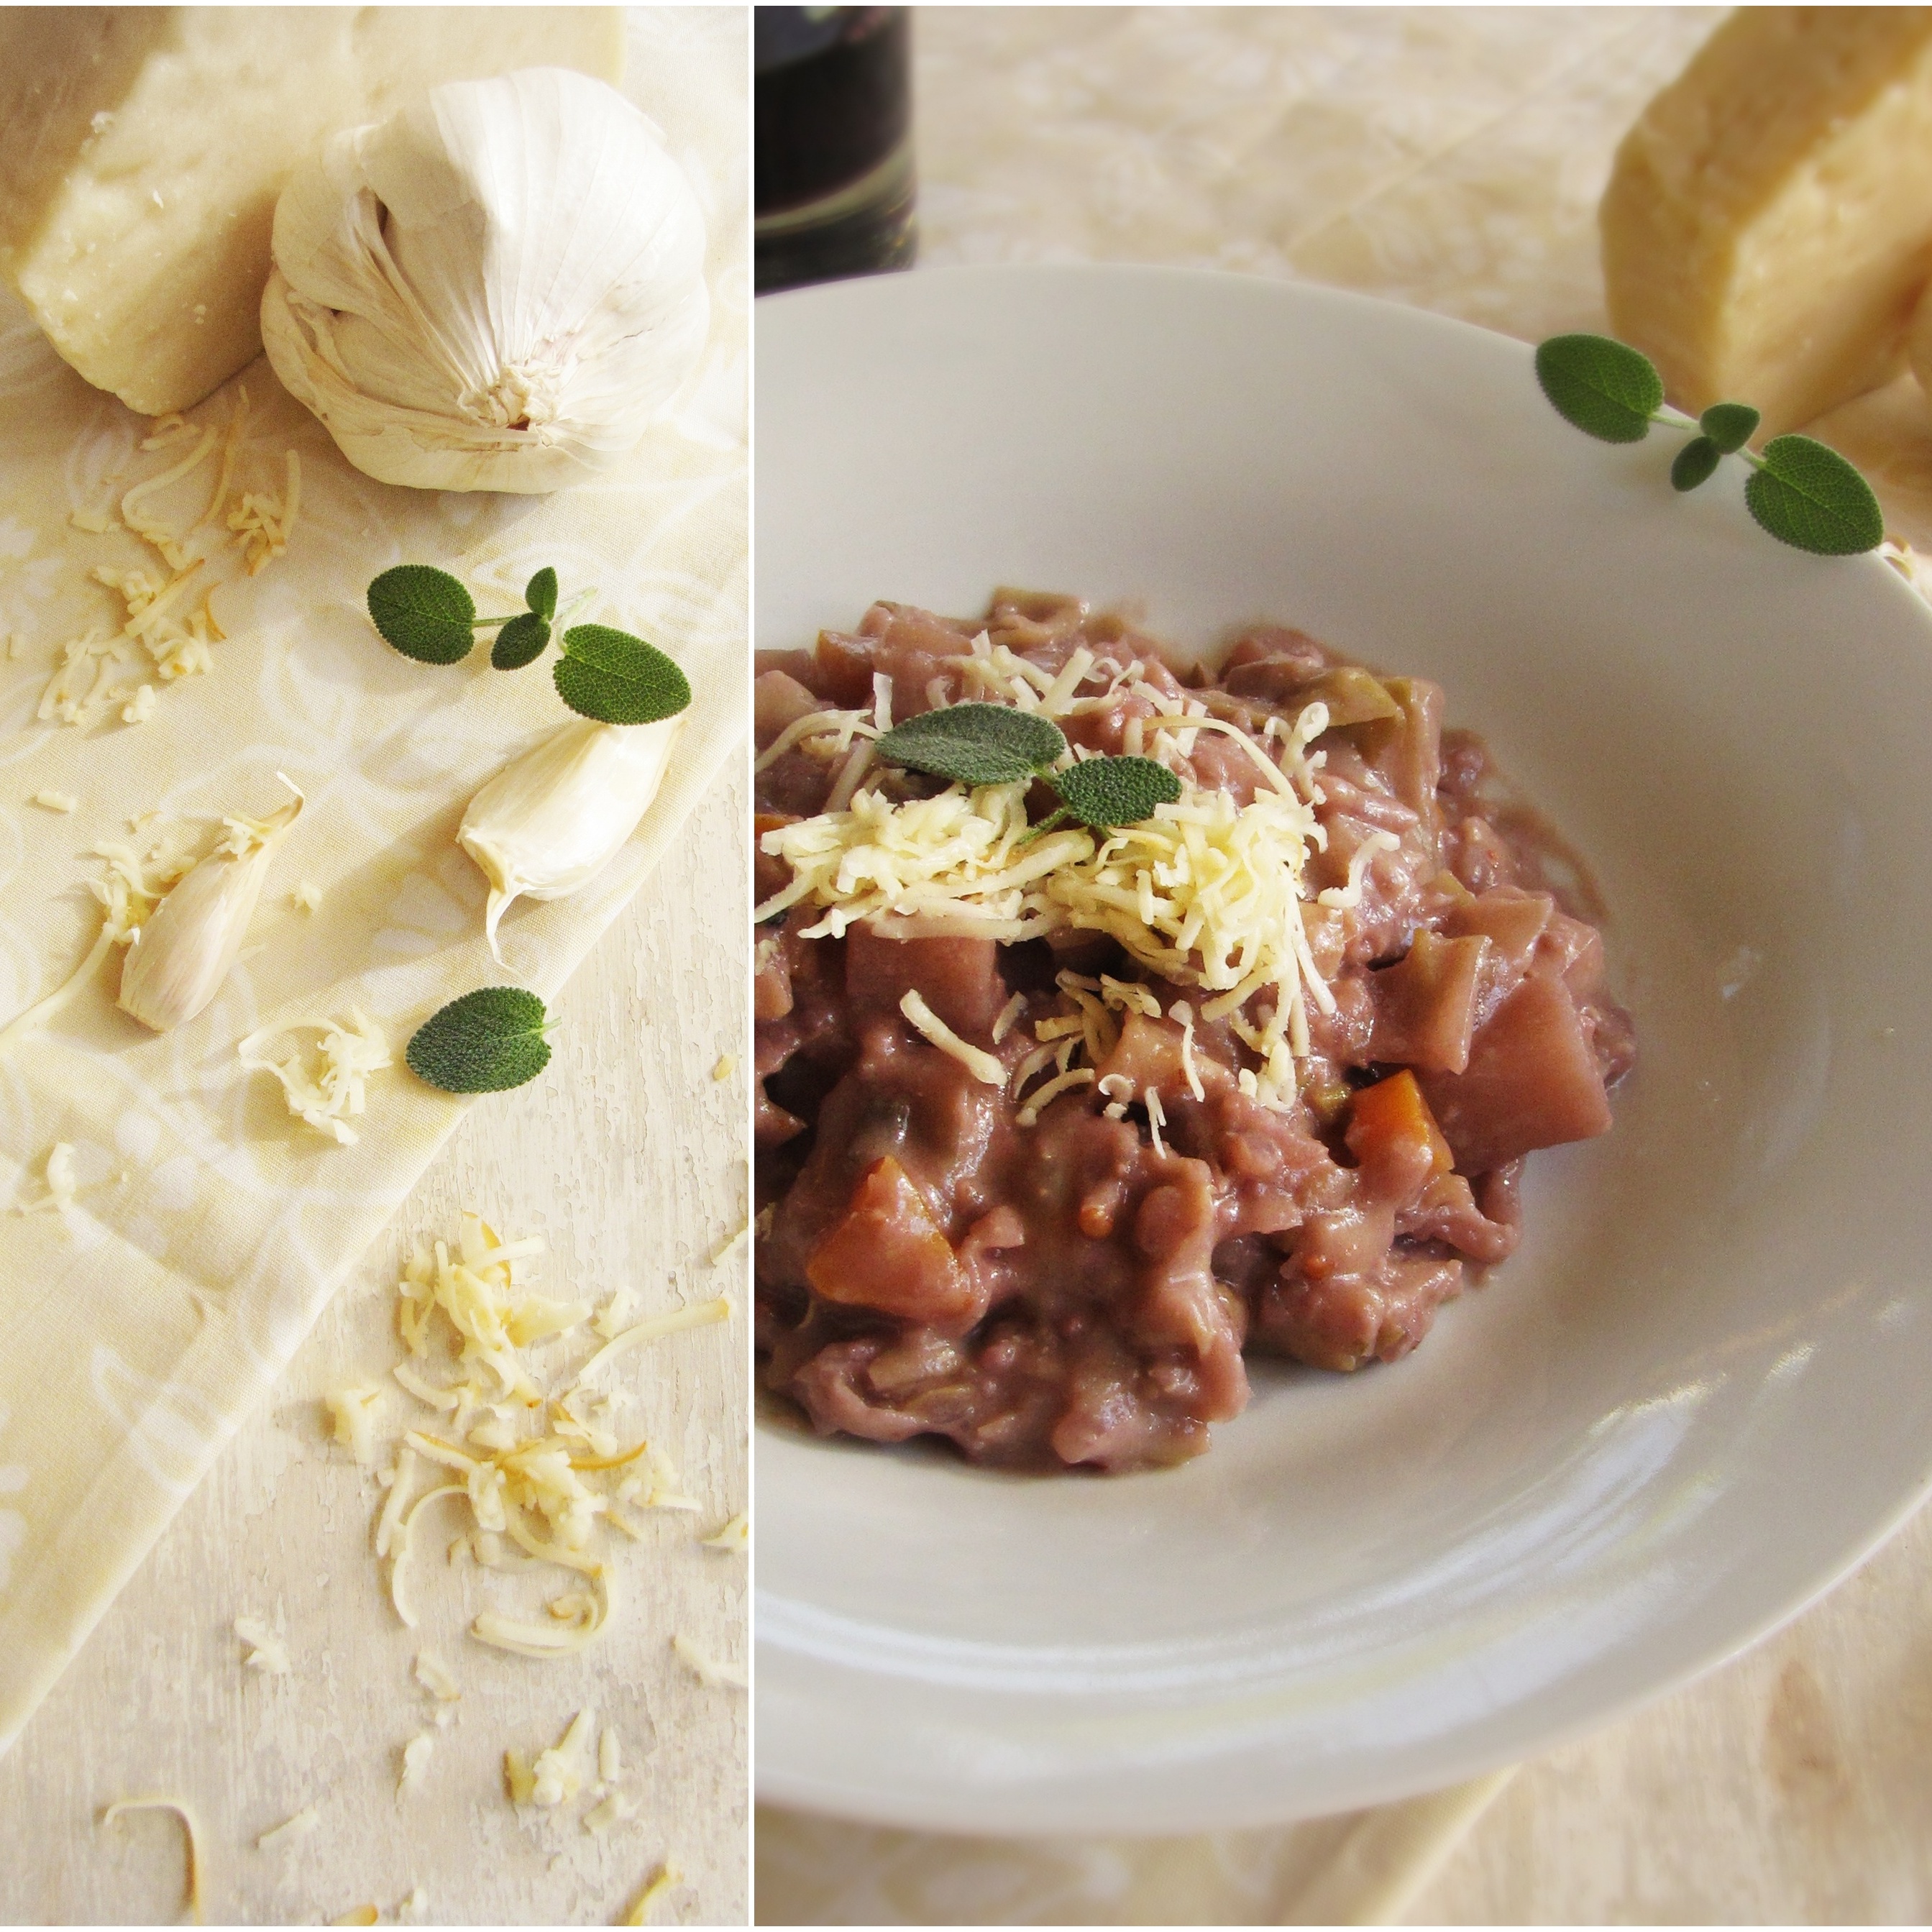
I’ve already shared two recipes adapted from this book – these sesame-cranberry-maple cookies (incredible!) and these white bean ravioli.  The recipe I’m sharing today is one for pizzoccheri, a traditional Swiss dish.  Unfortunately, I somehow managed to only copy down the ingredient list before preparing this, and totally neglected to write down the actual instructions.  I realized this just after I had prepped my vegetables and heated up my pot.  Not having the book around for reference, all I had to work with was a story from the header of the recipe about a Swiss host mother making this dish nightly by making a big vegetable soup, with red wine, then boiling buckwheat noodles in the soup, and finishing it with cheese.  It sounded straightforward enough, so I just went for it, and it turned out great!  I now have a copy of the book in front of me again, and it turns out that the brief description was all I needed – I came up with almost exactly the same recipe that was printed.  That being said, this does not seem to be the traditional recipe for pizzoccheri.  A quick google search will reveal that it’s generally a dish with similar ingredients, but layered and baked with buckwheat noodles like a lasagna, rather than served as a sauce.  I’ve never tried the traditional version, but I loved this one.  I actually preferred the dish without the buckwheat noodles, although I did make them by hand, and think that the sauce can stand alone as a meal – like a thick, hearty stew.  I’m printing the recipe the way I made and enjoyed it (i.e. without the pasta) rather than how it is originally written, since that’s the way I ate it.  If you want a more authentic glimpse into the recipes in this book, check out the cookie or ravioli recipes listed above, or grab a copy for yourself.  It’s only $15 on Amazon, and in my opinion well worth the amount of material it contains.

Pizzoccheri

Quite loosely adapted from Modern Vegetarian Kitchen, by Peter Berley.  Serves 4.

  • 2 TBS salted butter
  • 1 red onion, thinly sliced
  • sea salt
  • 2 c. chopped green cabbage (1 small head)
  • 1 russet potato, washed and cut into 1 inch cubes
  • 1 carrot, peeled and cut into 1 inch cubes
  • 6 garlic cloves, sliced
  • 6 sage leaves, minced
  • pinch red pepper flakes
  • 1 c. red wine
  • 1 c. water
  • 1/2 c. grated smoked gruyere
  • salt and pepper to taste
  1. Melt the butter in a large saucepan over medium heat.  Add the onion and a pinch of salt and cook until onions are very tender.  Add cabbage, potato, carrot, garlic, sage, and red pepper flakes and cook for 3-4 minutes.  Add red wine and water and turn heat down so that stew is simmering gently.  Cook, uncovered, for about an hour, adding more water as necessary to keep vegetables just covered, until all vegetables are tender and sauce has reduced and thickened to an applesauce-like consistency.  Turn off heat and stir in grated cheese, then season with salt and pepper.  Serve hot, either alone, with a thick slice of fresh bread, or on pasta.

1 November 20, 2011 Cookbook

White Bean Ravioli

It feels like ravioli season to me.  I don’t know that anyone ever named November ravioli month, but it would seem appropriate to do so.  It’s time for comfort food – it’s getting cold, the days are getting shorter, and all sorts of things that are delicious in raviolis – butternut squash, sage, chestnuts, mushrooms – are coming into season.  A bowl of steaming ravioli with a thick, tangy sauce seems about as comforting as comfort food can get.

I enjoy making pasta by hand, but I don’t do it that frequently.  To me it is only worthwhile when I’m filling the pasta with something interesting – the difference between the flavor of the $2 boxed fettucine and my hand cut fettucine is just not worth the time, but the difference between the flavor of pre-packaged tortellini and homemade ones is well worthwhile.  When I do break out the pasta roller for ravioli, I tend to make a lot at once and throw a few meals worth in the freezer.  It even goes by pretty quickly with help from a friend who’s willing to work for his dinner.

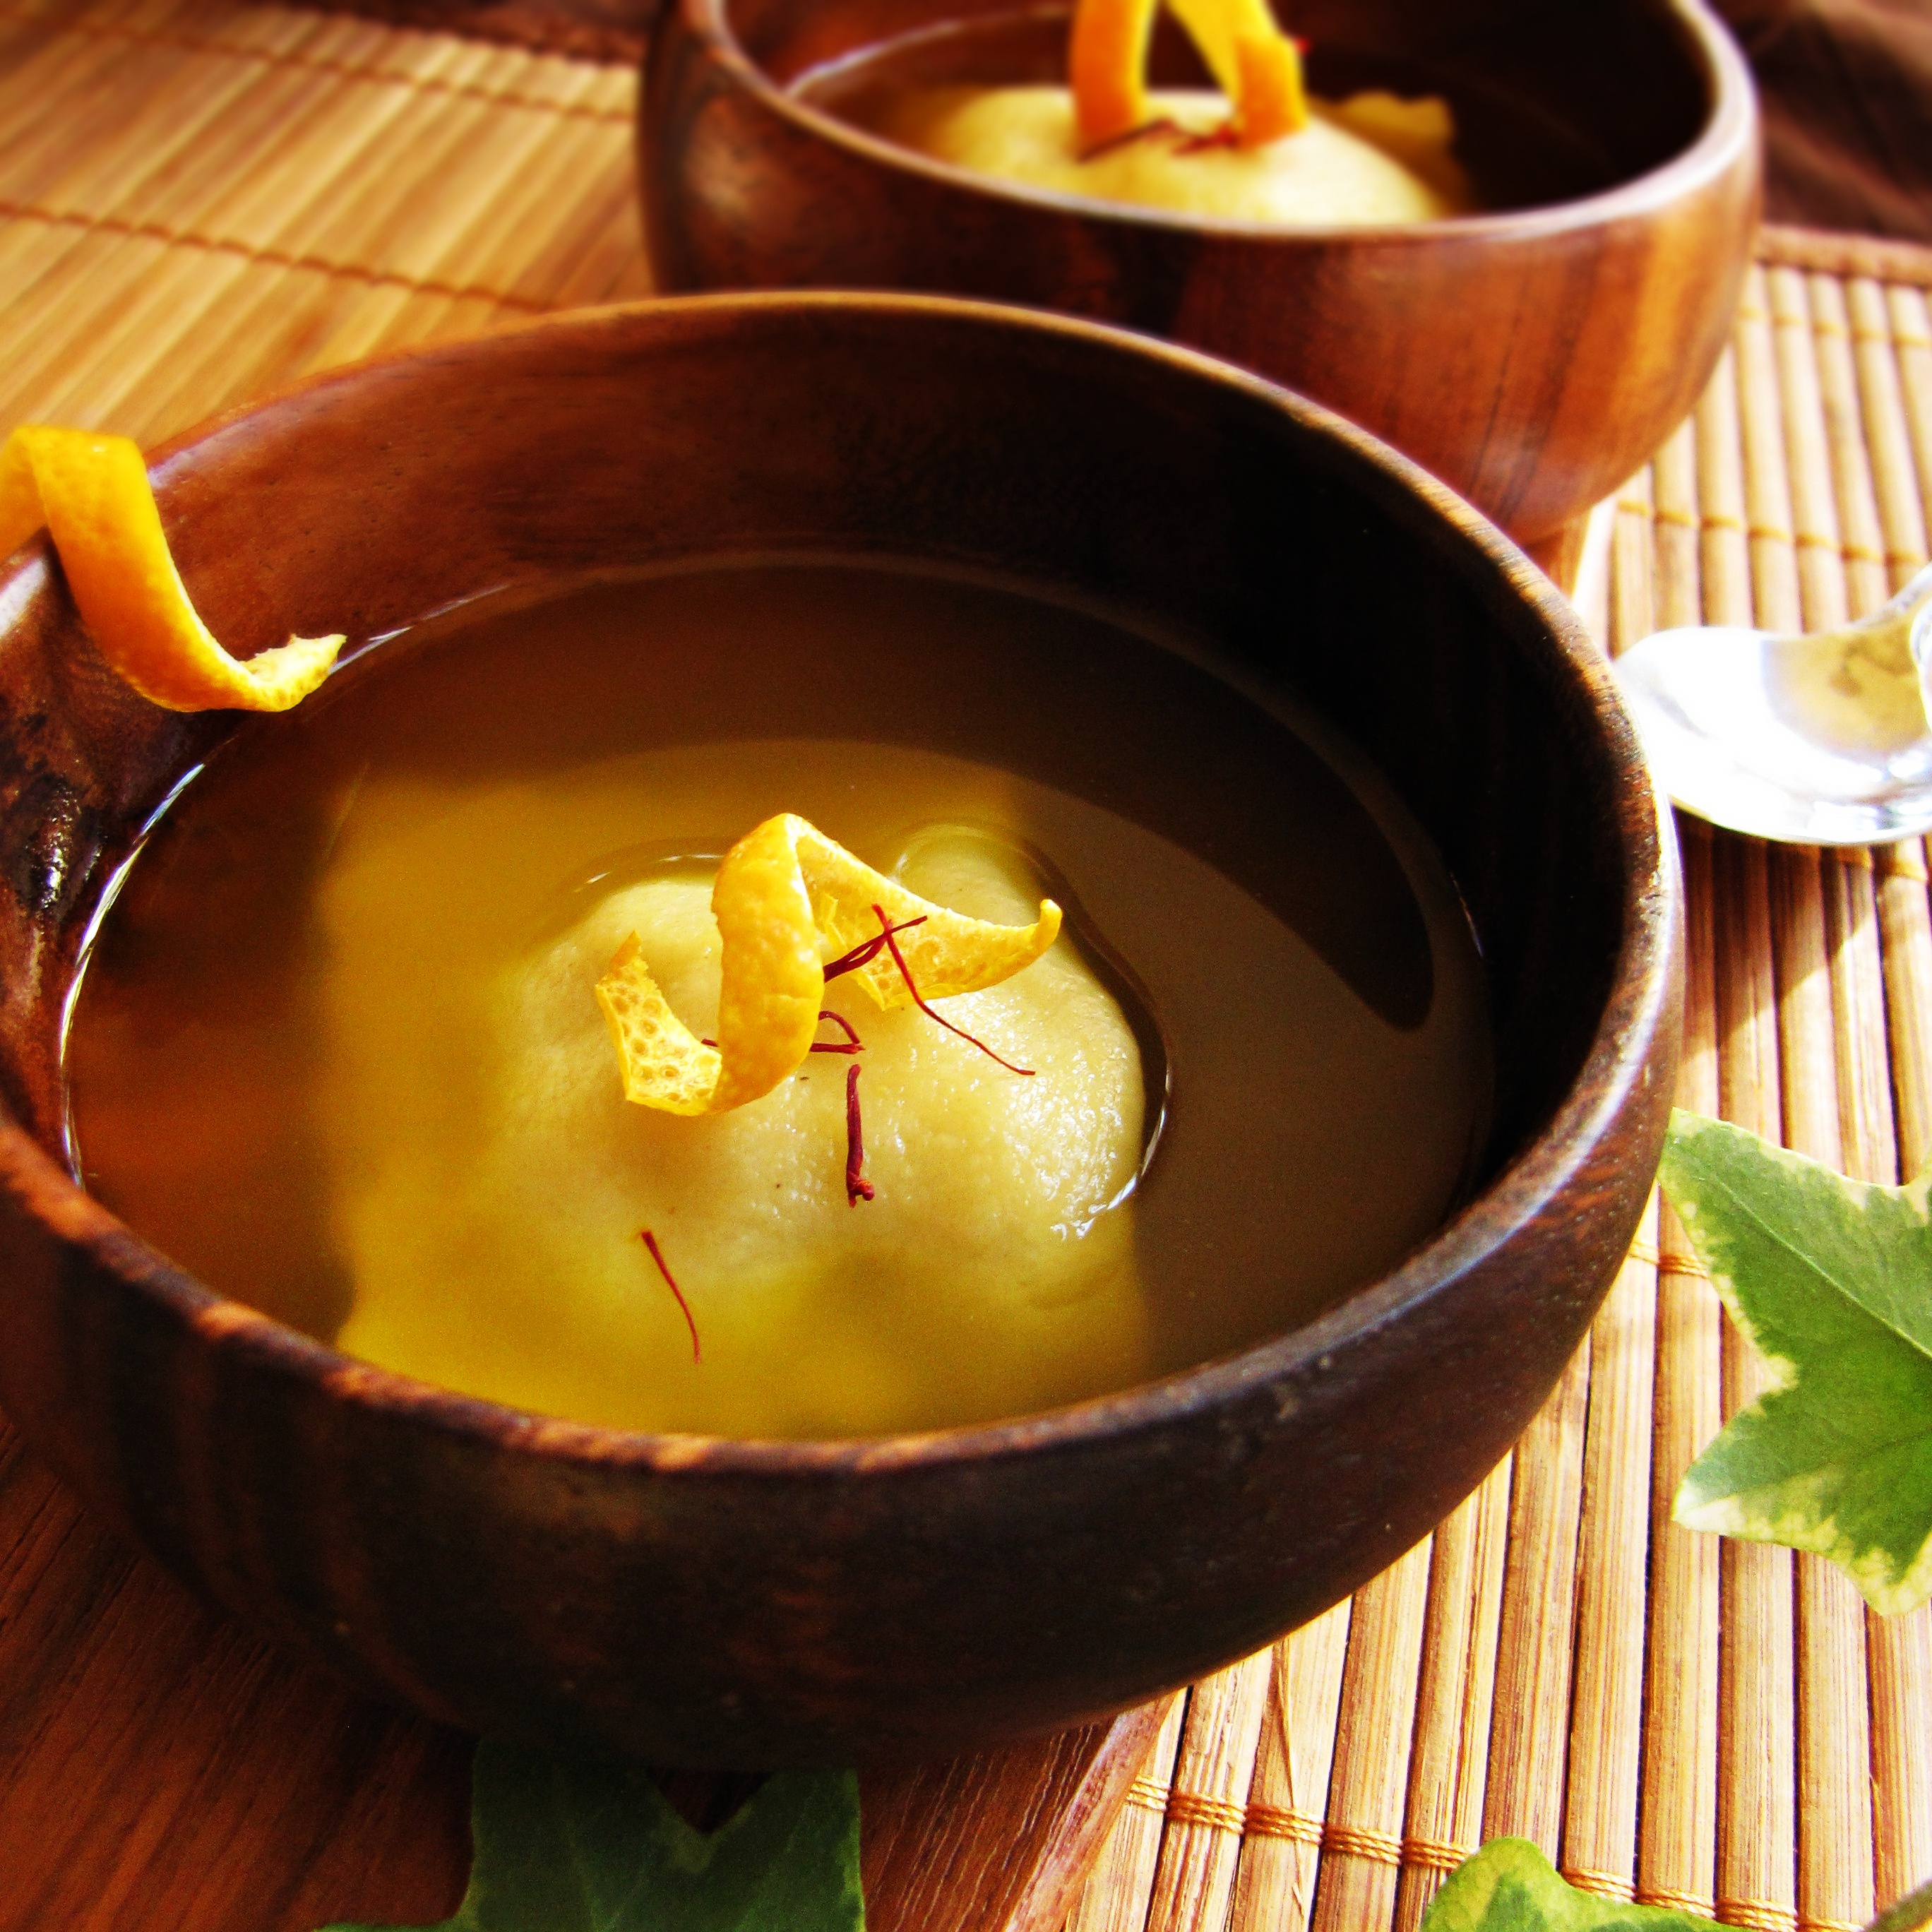
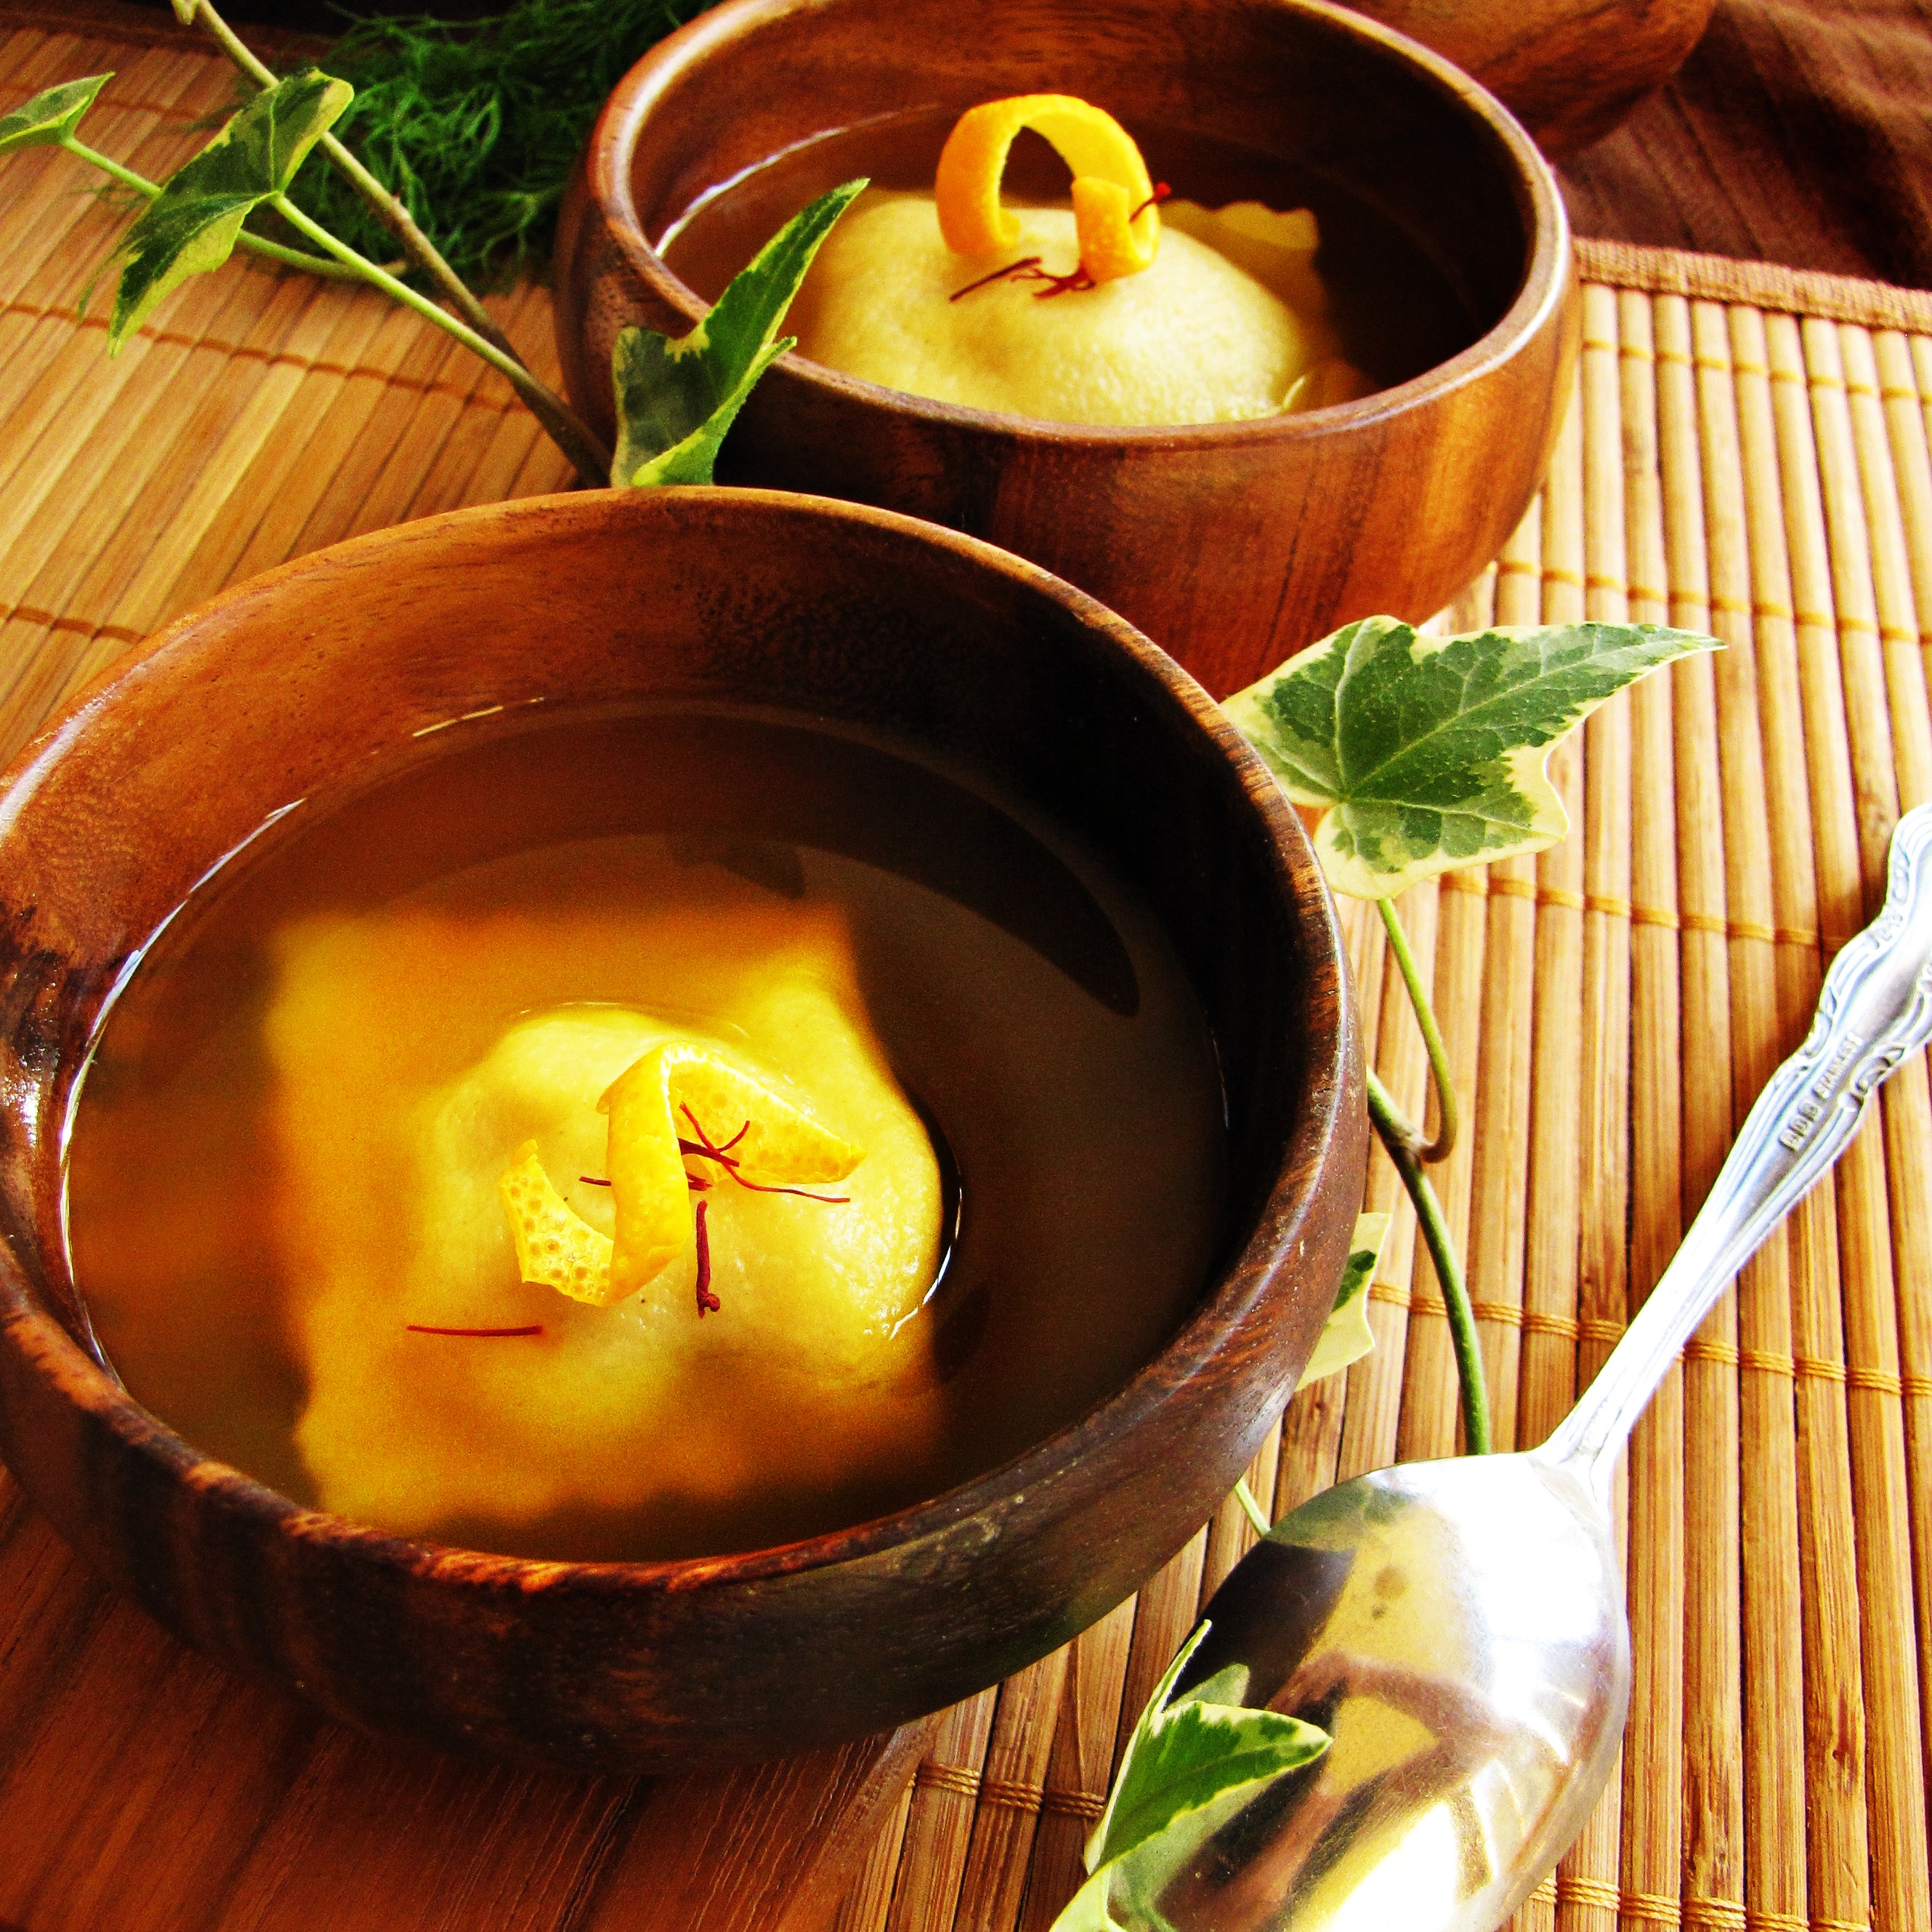
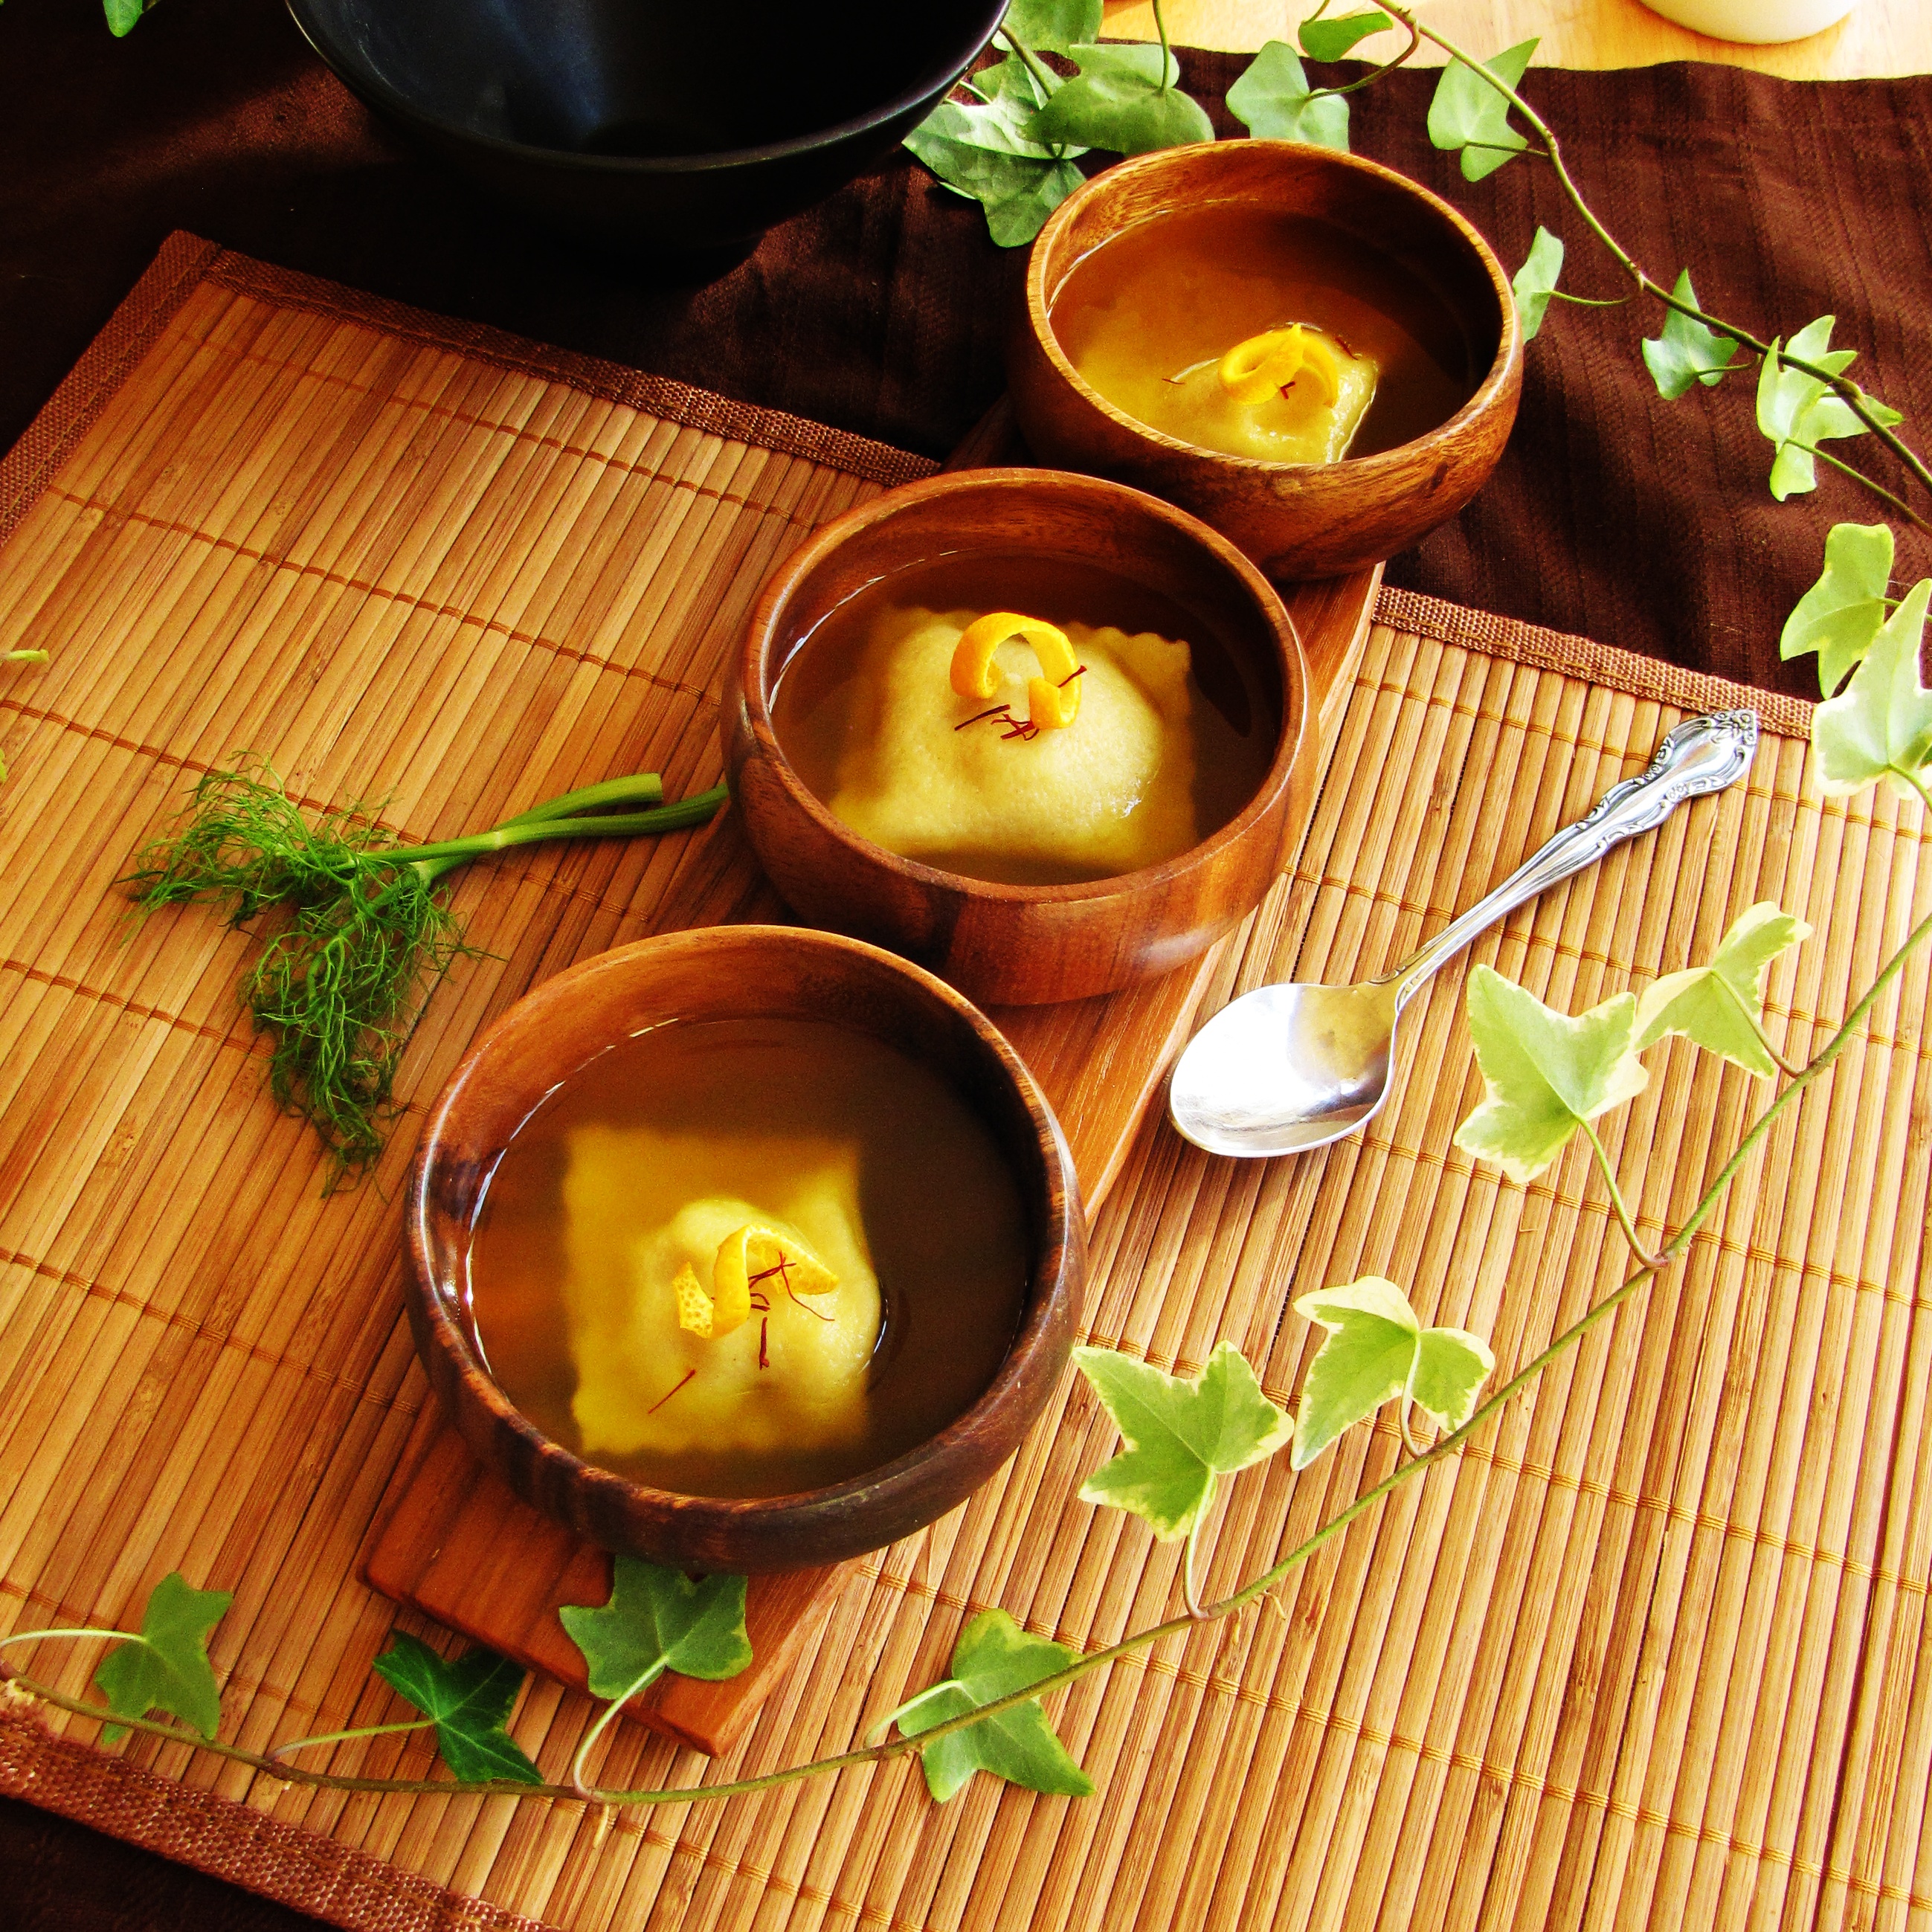
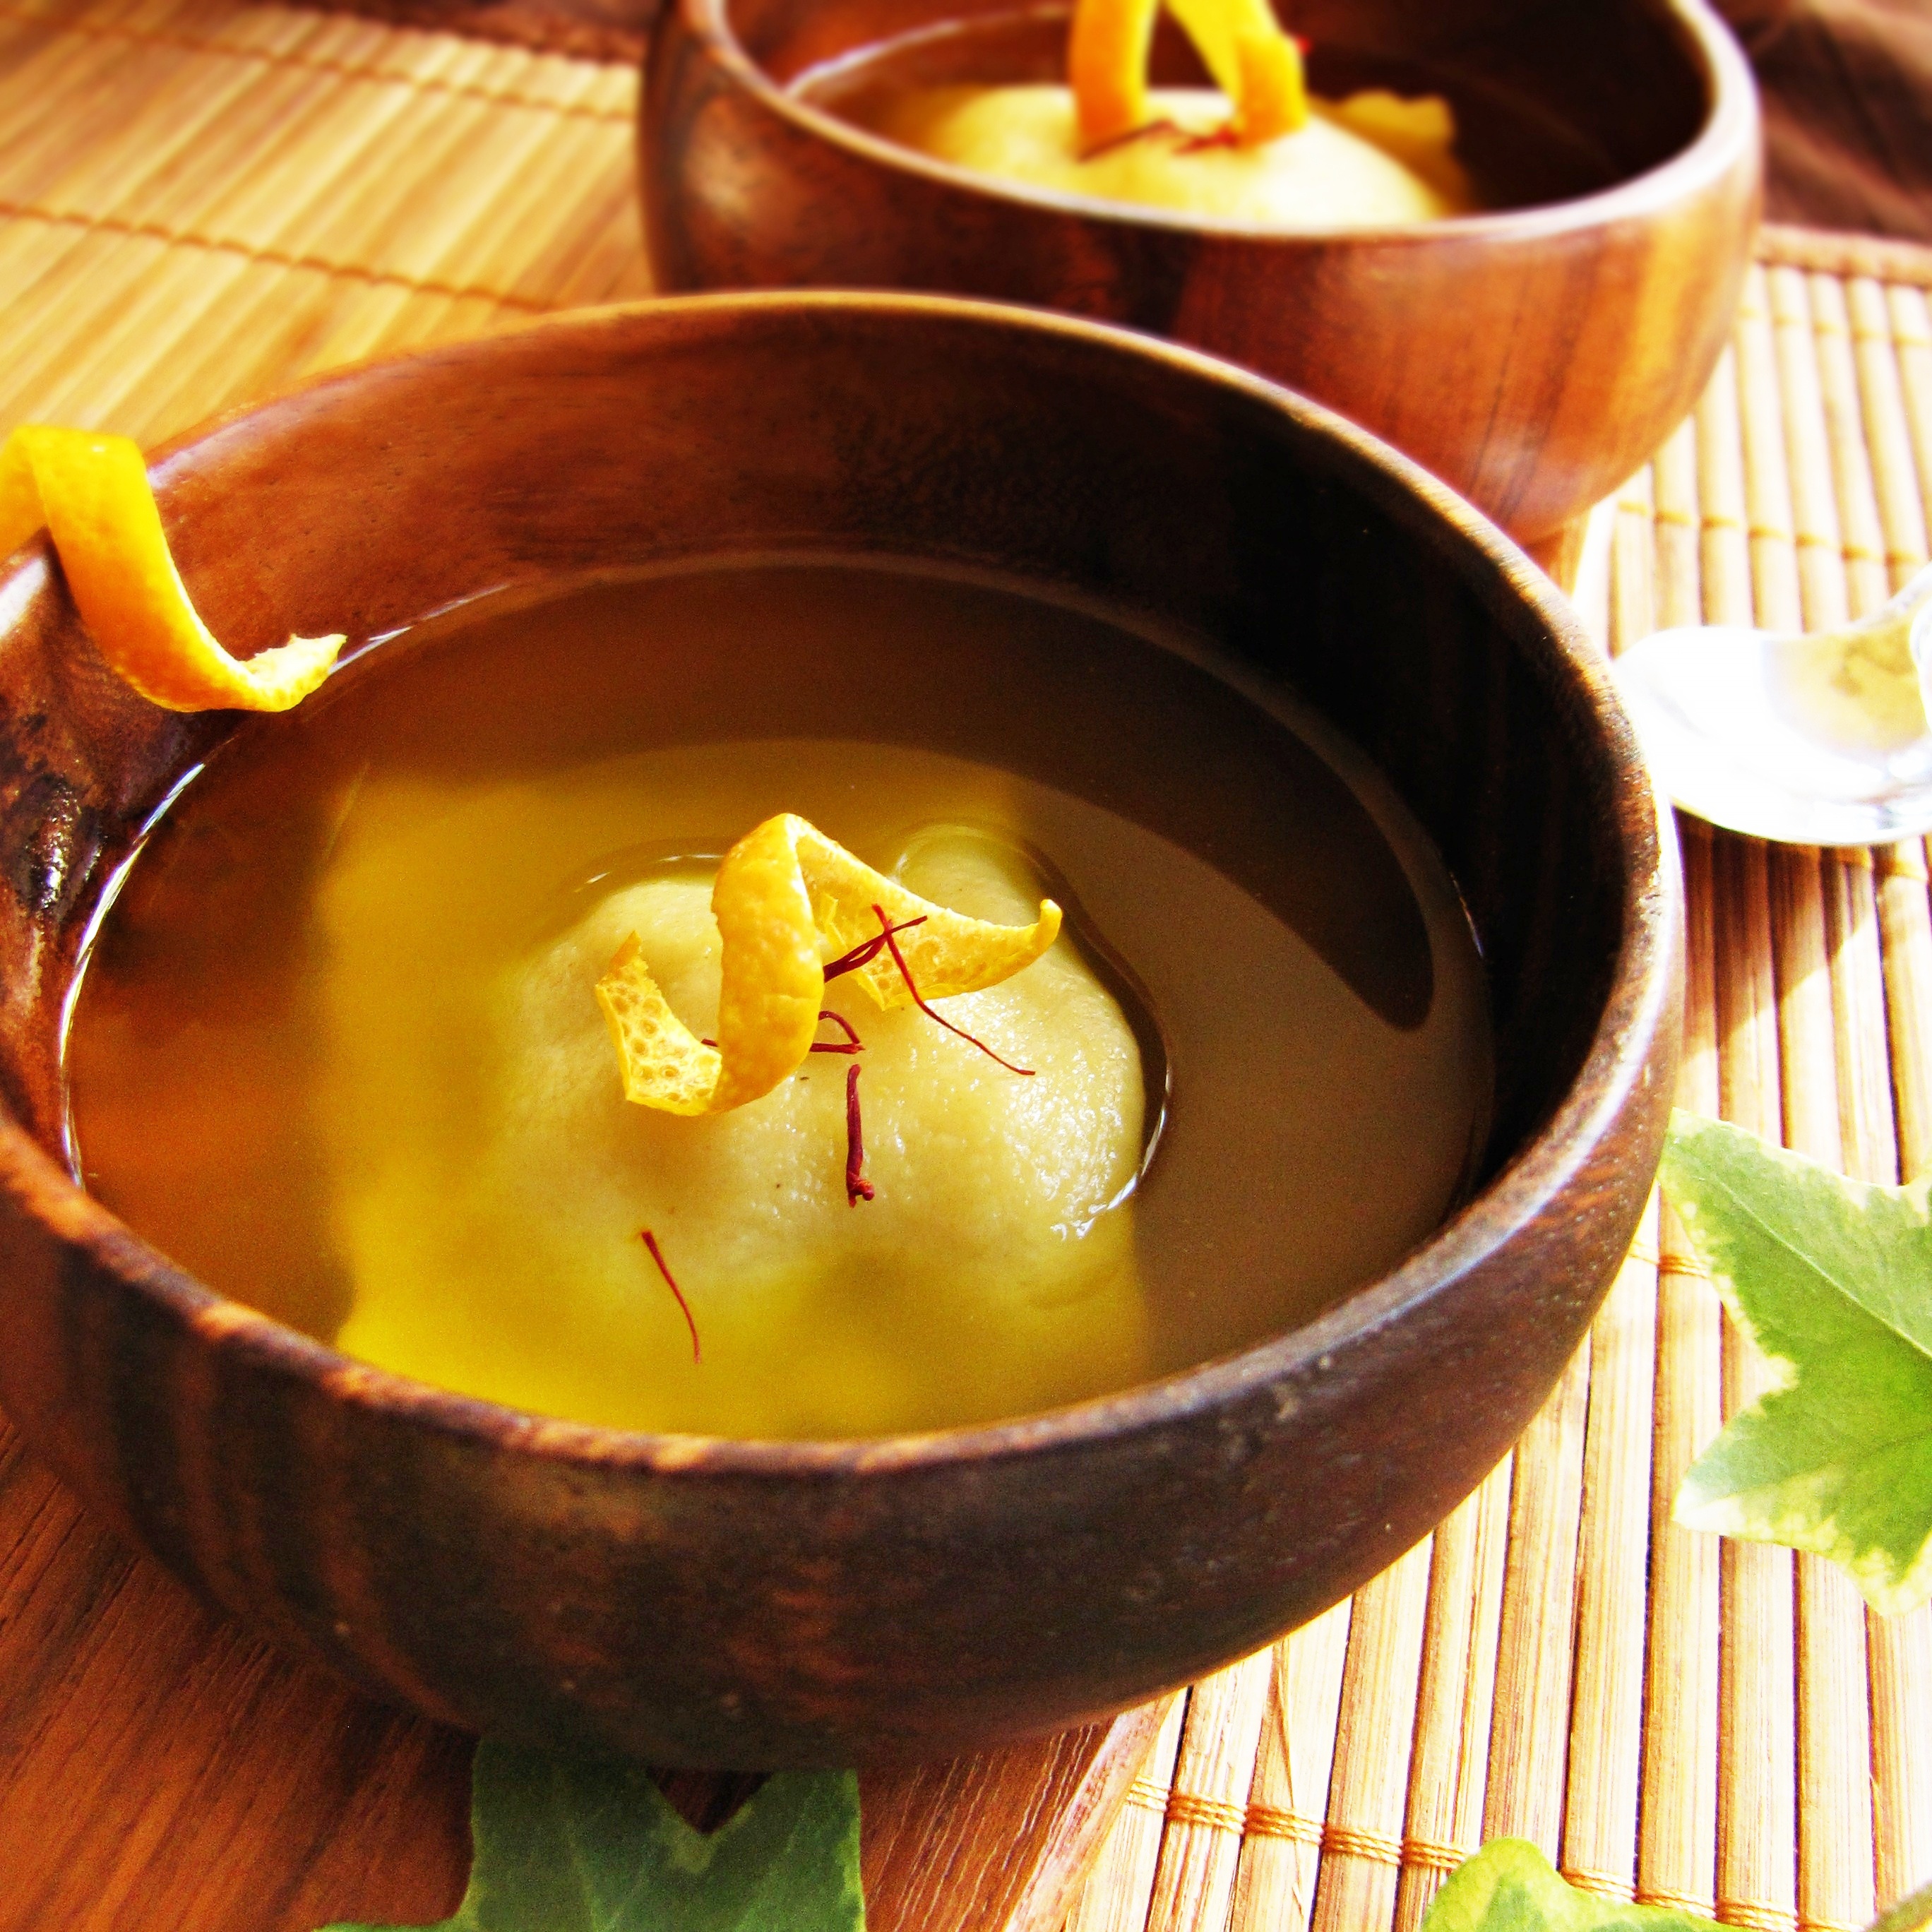
This particular recipe is another one from Peter Berley’s Modern Vegetarian Kitchen, and stuffs a classic semolina pasta dough with a white bean and sage filling, then serves the pasta in a light saffron-infused vegetable broth.  I did make a few significant changes to the broth, choosing to cook all of the vegetables together and then remove them all, leaving a clear broth, rather than leaving the carrot and fennel pieces in the soup, as the recipe calls for.  I enjoyed both parts of the recipe, and would make the broth again for an elegant presentation, or perhaps even as the base for a soup, but probably not if I was just going to eat the ravioli themselves – I think they might be better suited to a thick tomato sauce.  I might even take these the greek route, and add a small amount of feta cheese to the bean mixture, although they were also delicious with just the beans as a filling.  I did end up adding some of our homemade cheese to about half of the ravioli to a positive effect.  Yes, I said homemade cheese.  You can have the full story when we’ve got a little bit of a better handle on the whole cheesemaking process, but if our most recent attempt is any indicator, there may be some super delicious cheeses in our future.  With or without cheese, I enjoyed these bean filled ravioli, and I’m looking forward to the few dozen I have stashed in my freezer for the next month!

Looking for more ravioli?  Try these beet ravioli with goat cheese, these pumpkin stuffed ravioli served in a coconut curry sauce, or these delicate mint-flecked ravioli filled with sweet peas.

White Bean Ravioli in Orange-Saffron Broth

Adapted from Modern Vegetarian Kitchen.  Makes about 4 servings

For the pasta:

  • 1/2 c. semolina flour
  • 1/2 c. AP flour
  • 1/4 tsp salt
  • 1 egg
  • 2 TBS warm water
  • 1/2 TBS olive oil

For the filling:

  • 1 TBS olive oil
  • 1/4 c. finely chopped onion
  • 2 tsp minced garlic
  • 2 tsp finely chopped fresh sage
  • pinch red pepper flakes
  • 1 c. Great Northern beans, cooked (from 1/3 dried beans, soaked and cooked)
  • 1 tsp red wine vinegar
  • salt
  • pepper

For the broth:

  • 6 c. cold water
  • 1 onion, chunked roughly
  • 1 stalk celery, chunked roughly
  • 1 carrot, chunked roughly
  • 1 fennel bulb, chunked roughly
  • 2 tsp tomato paste
  • 8 garlic cloves, peeled
  • 8 leaves fresh sage
  • 2 tsp fennel seeds
  • 1/4 tsp saffron threads
  • 2 3-inch strips of orange peel
  • 1 bay leaf
  • 10 whole peppercorns
  1. Make the pasta dough: in a large bowl, whisk together the semolina flour, AP flour, and salt.  Make a well in the middle of the flour and crack egg into well.  Beat egg lightly in the well, then add water to the well.  Use a fork to slowly pull the flour on the outside into the wet center, trying not to disturb the well for as long as possible.  Continue doing this until the dough is an even consistency.  The dough will be fairly dry, but should stay together when pressed.  If it does not, add 1 TBS of water.  Pull dough together into a loose ball, drizzle with olive oil, then wrap in plastic wrap and let rest for 30 minutes.
  2. Make the filling: heat a medium pan over medium-high heat.  Add the olive oil, onion, garlic, and sage, and cook for 5-7 minutes, until beginning to brown.  Remove from heat and add to cooked beans, along with vinegar, salt, pepper, and red pepper flakes.  Mash the mixture with a potato masher until it is mostly smooth with a few bean chunks.
  3. Roll out the pasta according to pasta maker instructions, starting on the largest setting and working your way down.  Cut the resulting pasta sheets into 2-inch by 4-inch rectangles, and place a teaspoon of the bean filling on one side of each rectangle.   Use your pinkie finger dipped in cold water to brush the edges of the dough with water, then fold opposite side of dough over, pressing along edges to seal ravioli.  Work in batches – the dough will dry out quickly if it is left as sheets for long.  It will take longer to dry out when pressed in a ball.
  4. Make the broth: place all the ingredients in a large stockpot and cook at a simmer for 1 hour, adding 1-2 cups more water if necessary as the water evaporates.  Strain the broth through a colander, catching the broth in a bowl and discarding the cooked vegetables and herbs (or eating them).  Season the broth to taste and set aside.
  5. Cook the ravioli in a large pot of salted gently boiling water.  They should cook in approximately 2 minutes.  Serve ravioli in a warm bowl of broth, garnished with orange zest.

0 November 17, 2011 Dessert

100!

This is my 100th post!  How excellent is that?  In my opinion, pretty excellent.  This seems like the appropriate time to speak sagely about blogging and what it means to me and how it has changed my life, but I’m not really in the mood for that today – maybe I’ll save it for hitting the 2 year mark.  However, I do think that having written 100 posts calls for a celebration, so I spent Sunday making myself (and Trevor, ardent blog supporter) a nice dinner with a yummy, blog-worthy treat for dessert.  To my other ardent blog supporters – I would have made you dinner too if you lived as close as Trevor does, don’t worry.  Dad.

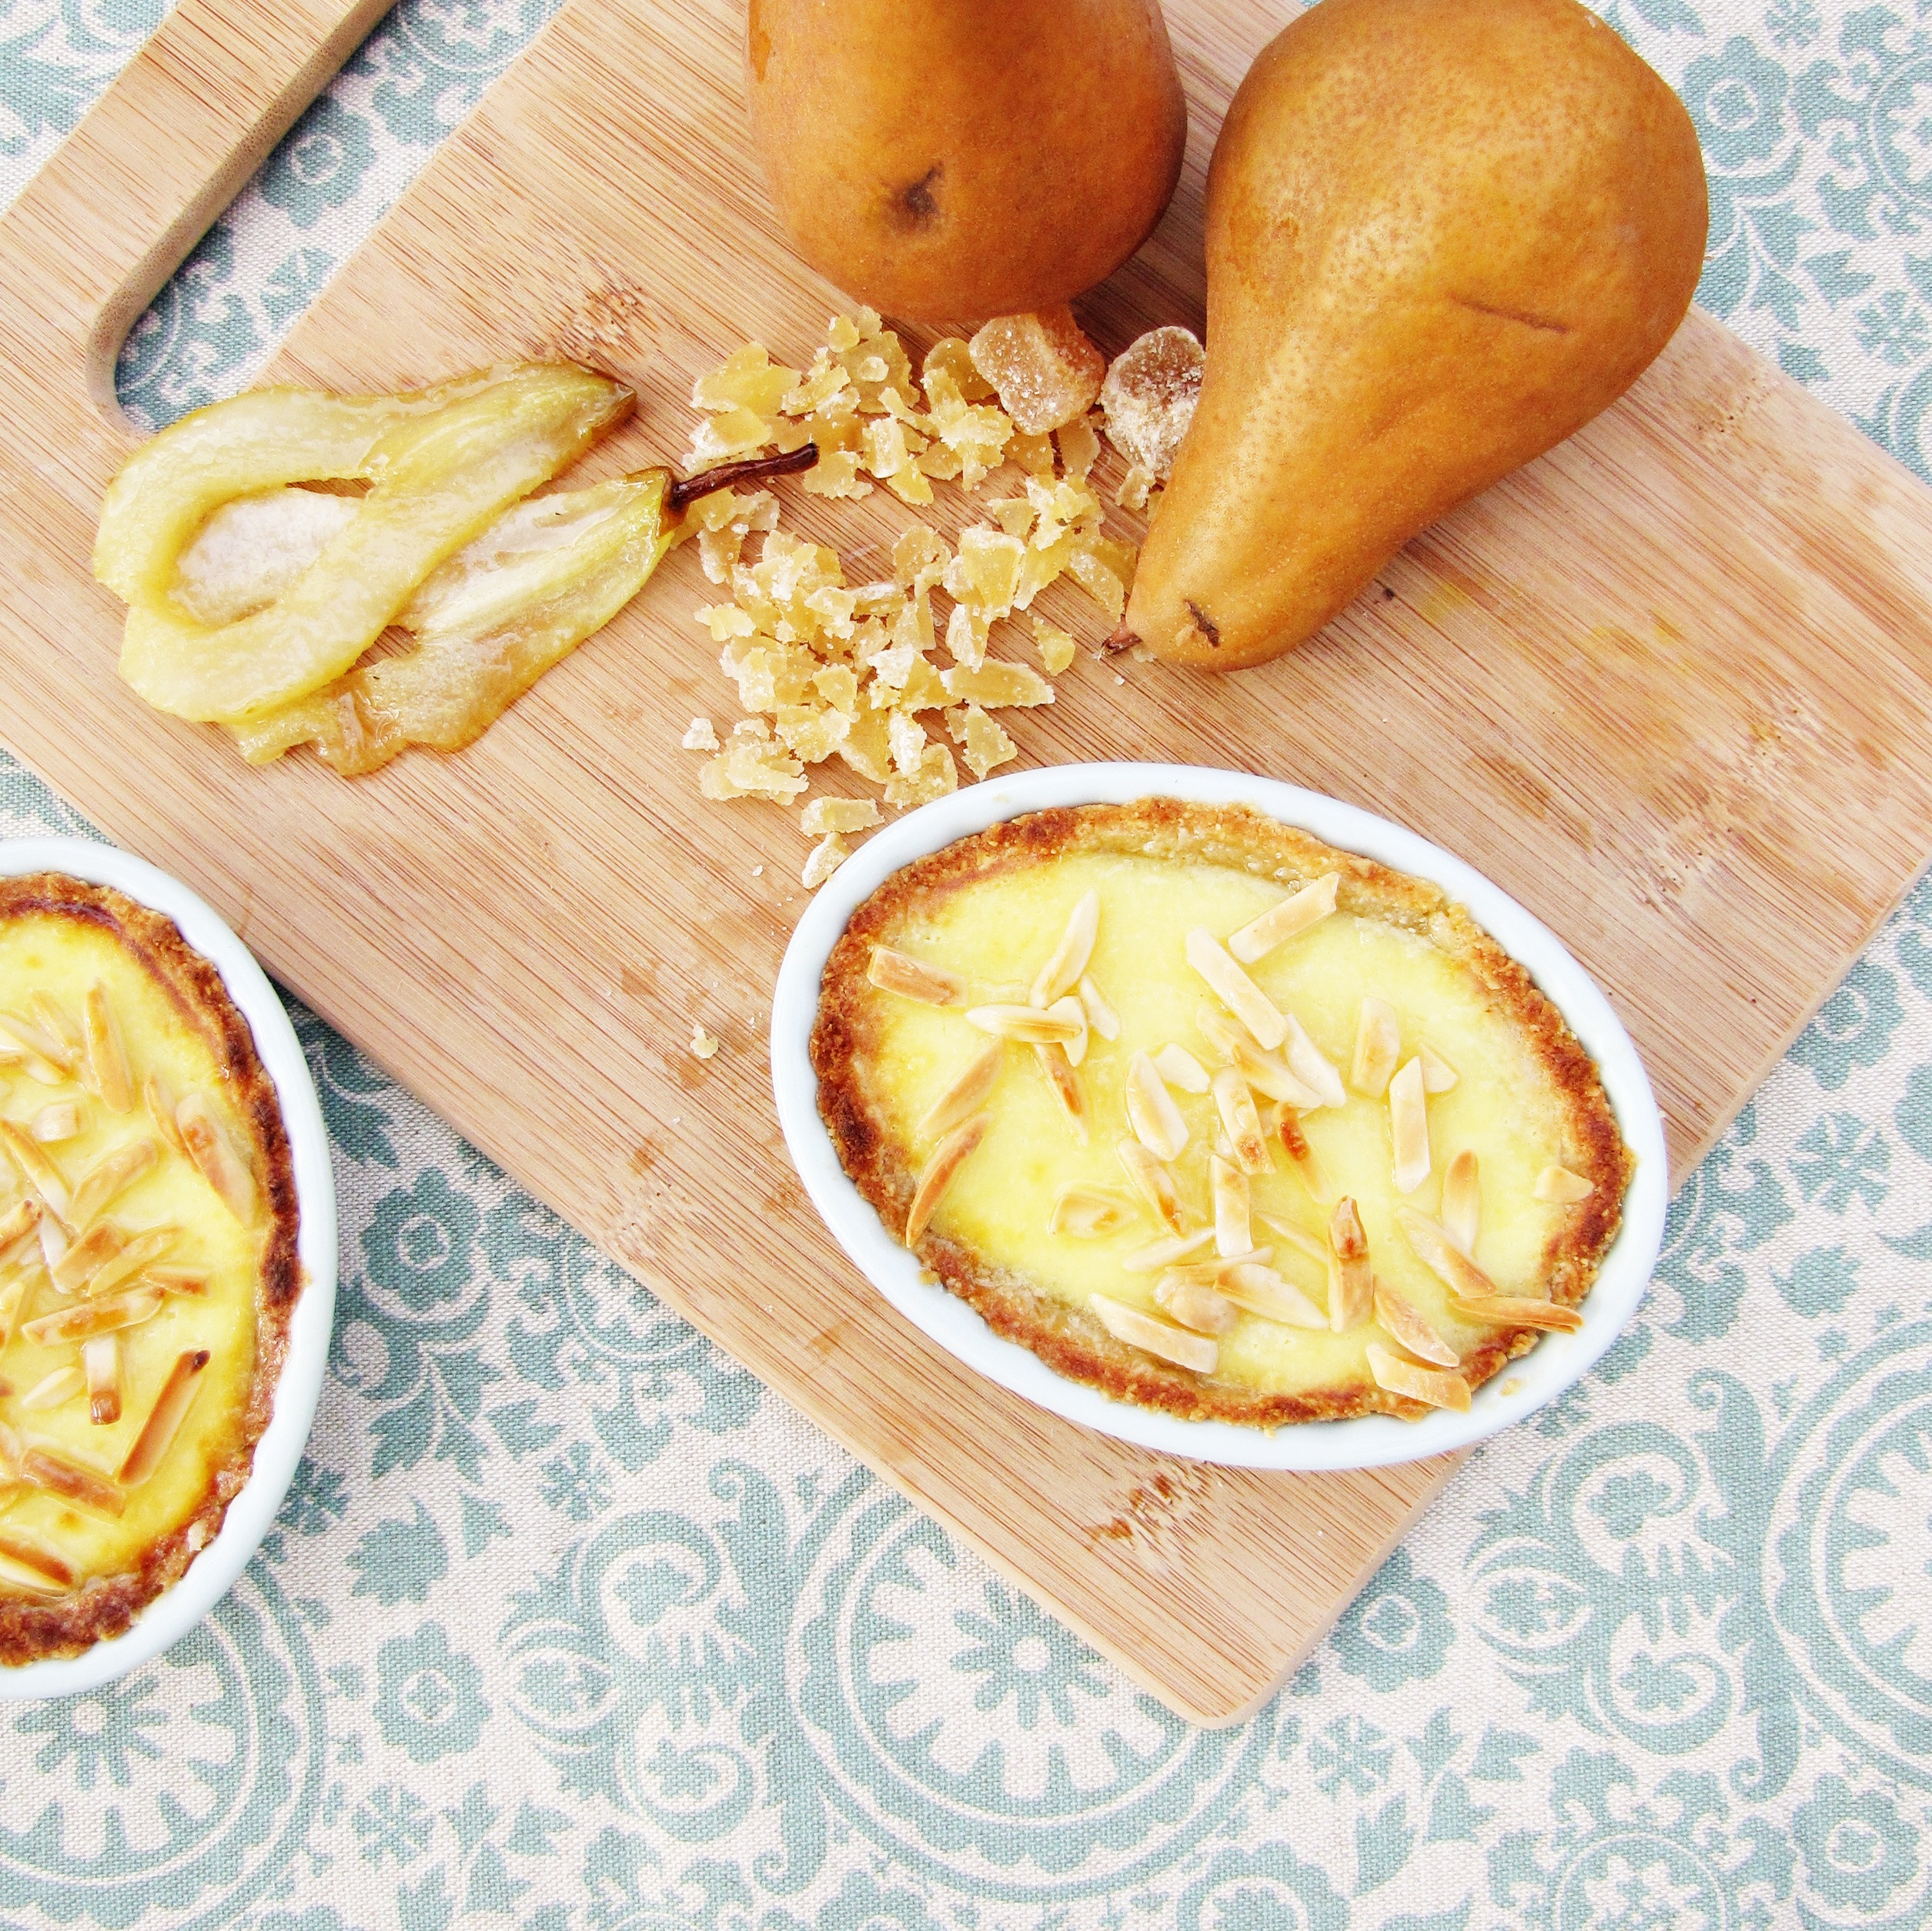
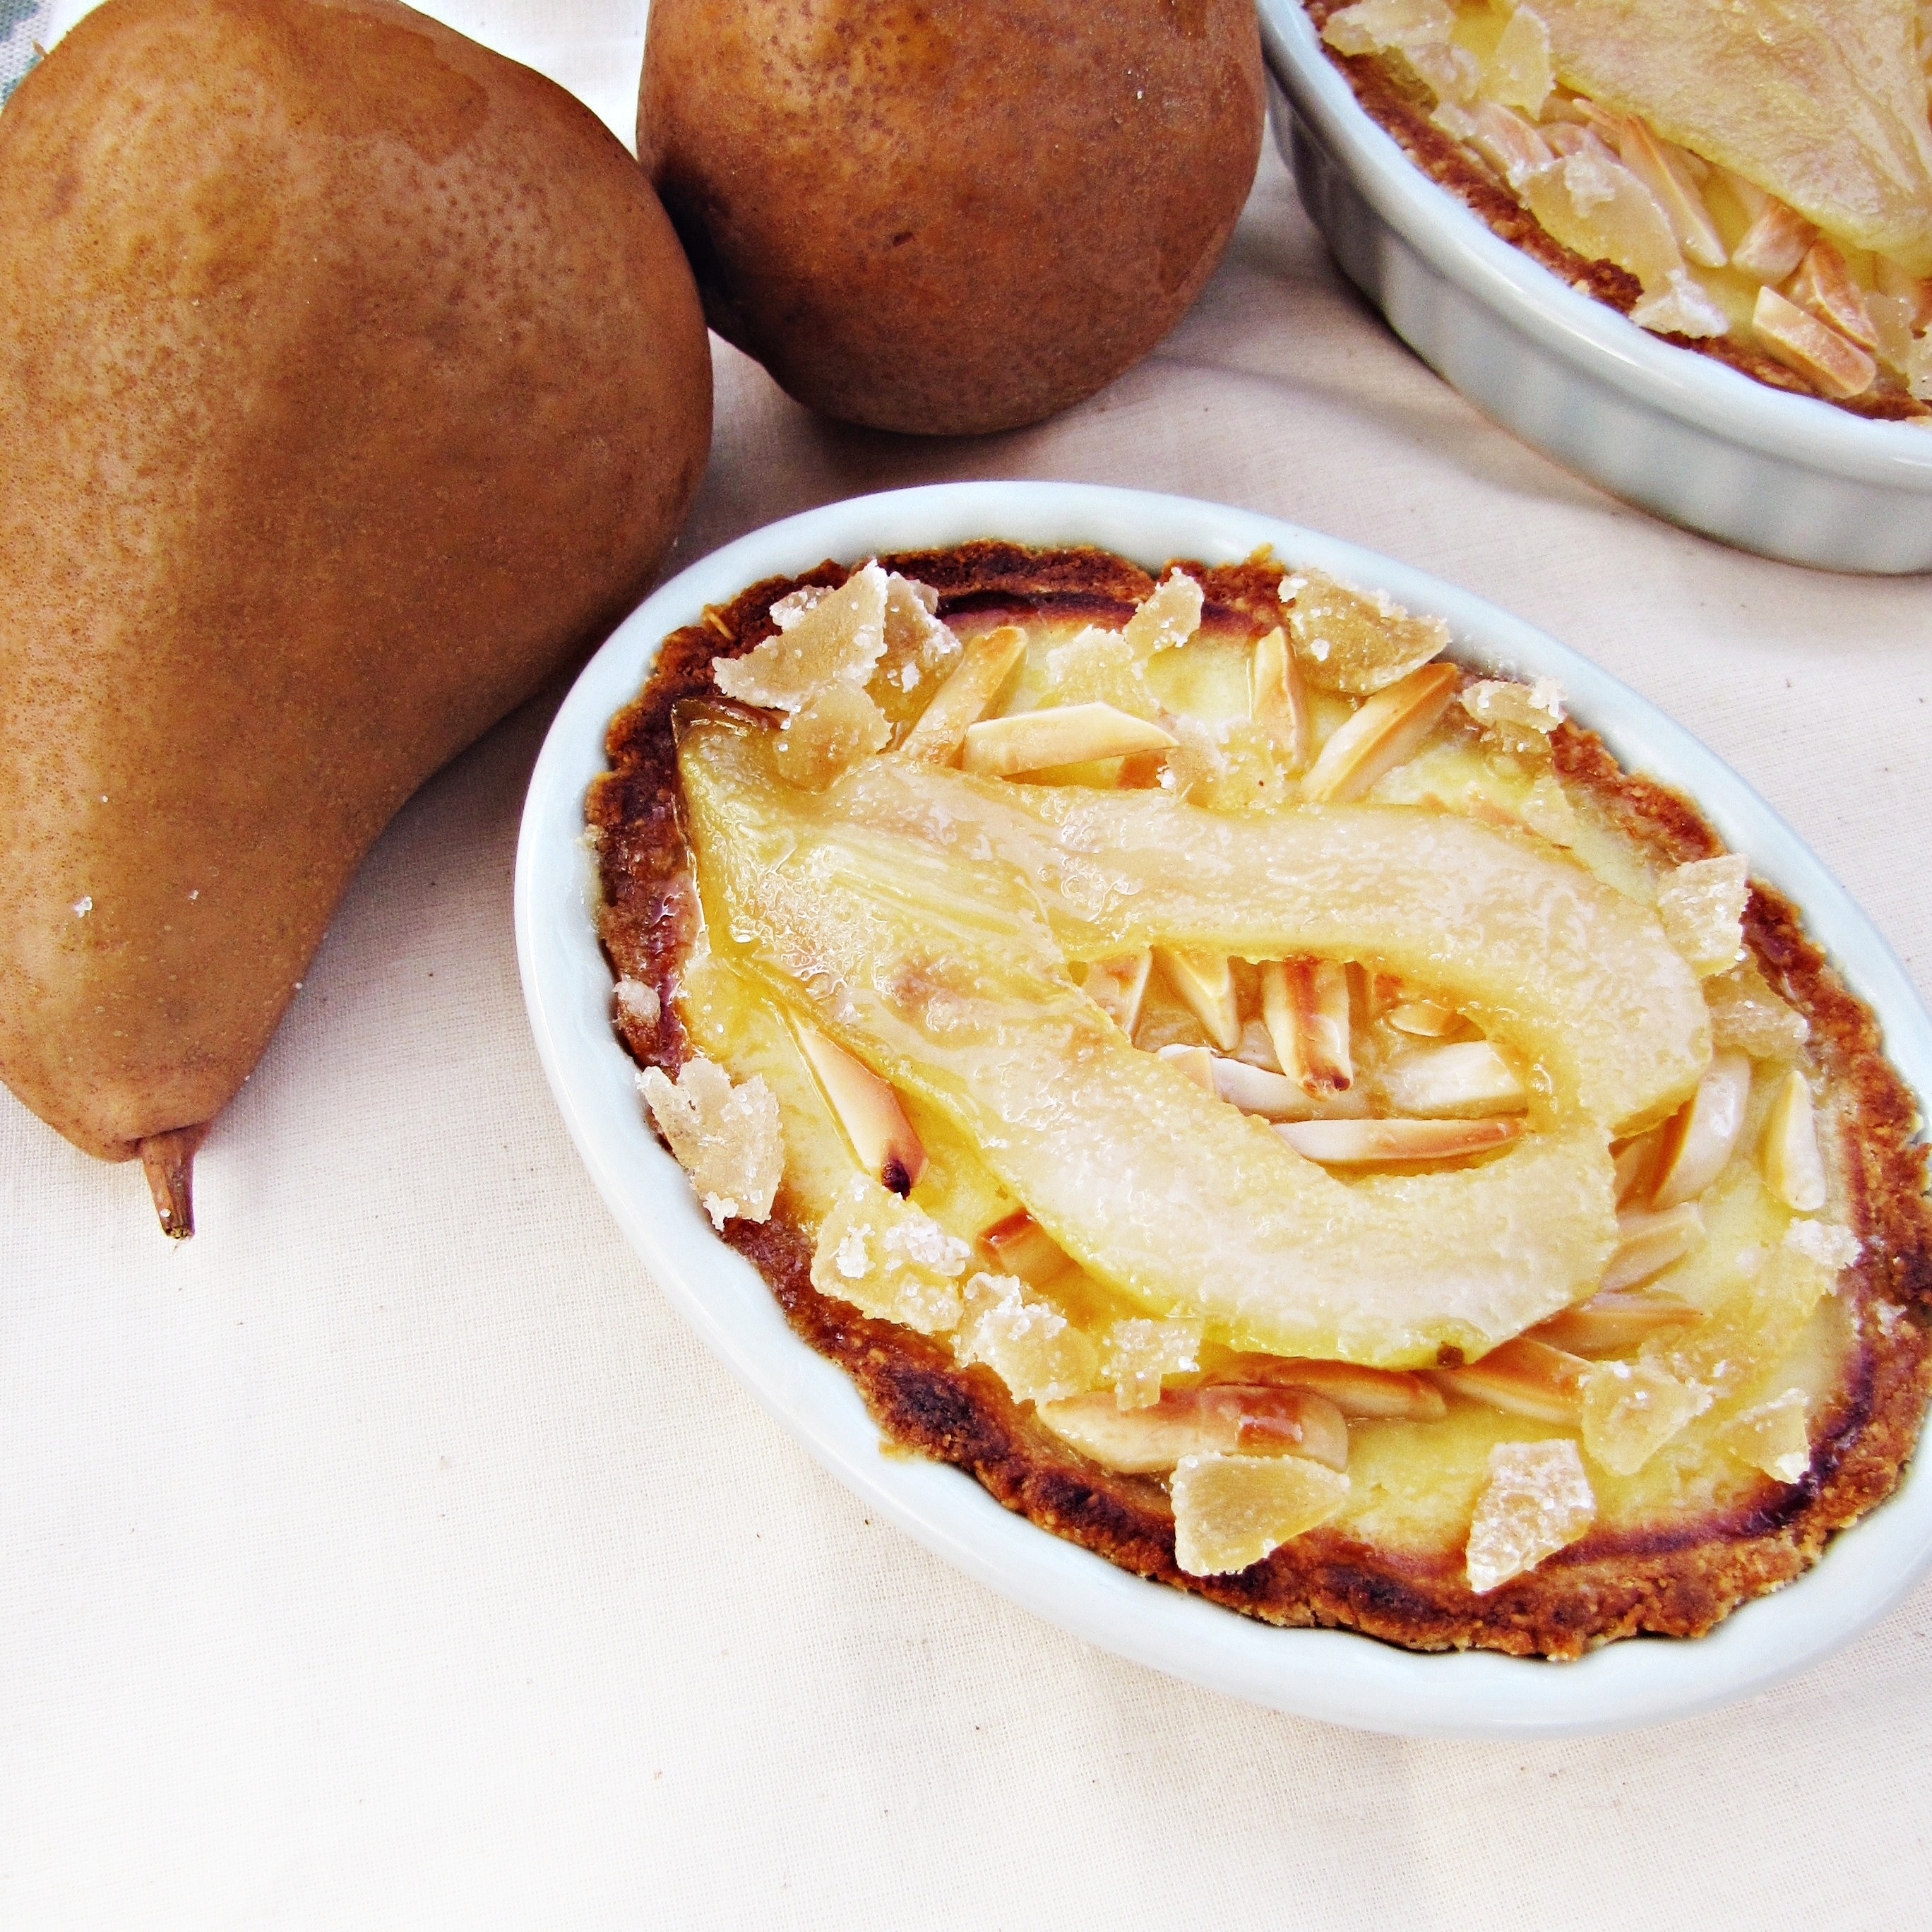
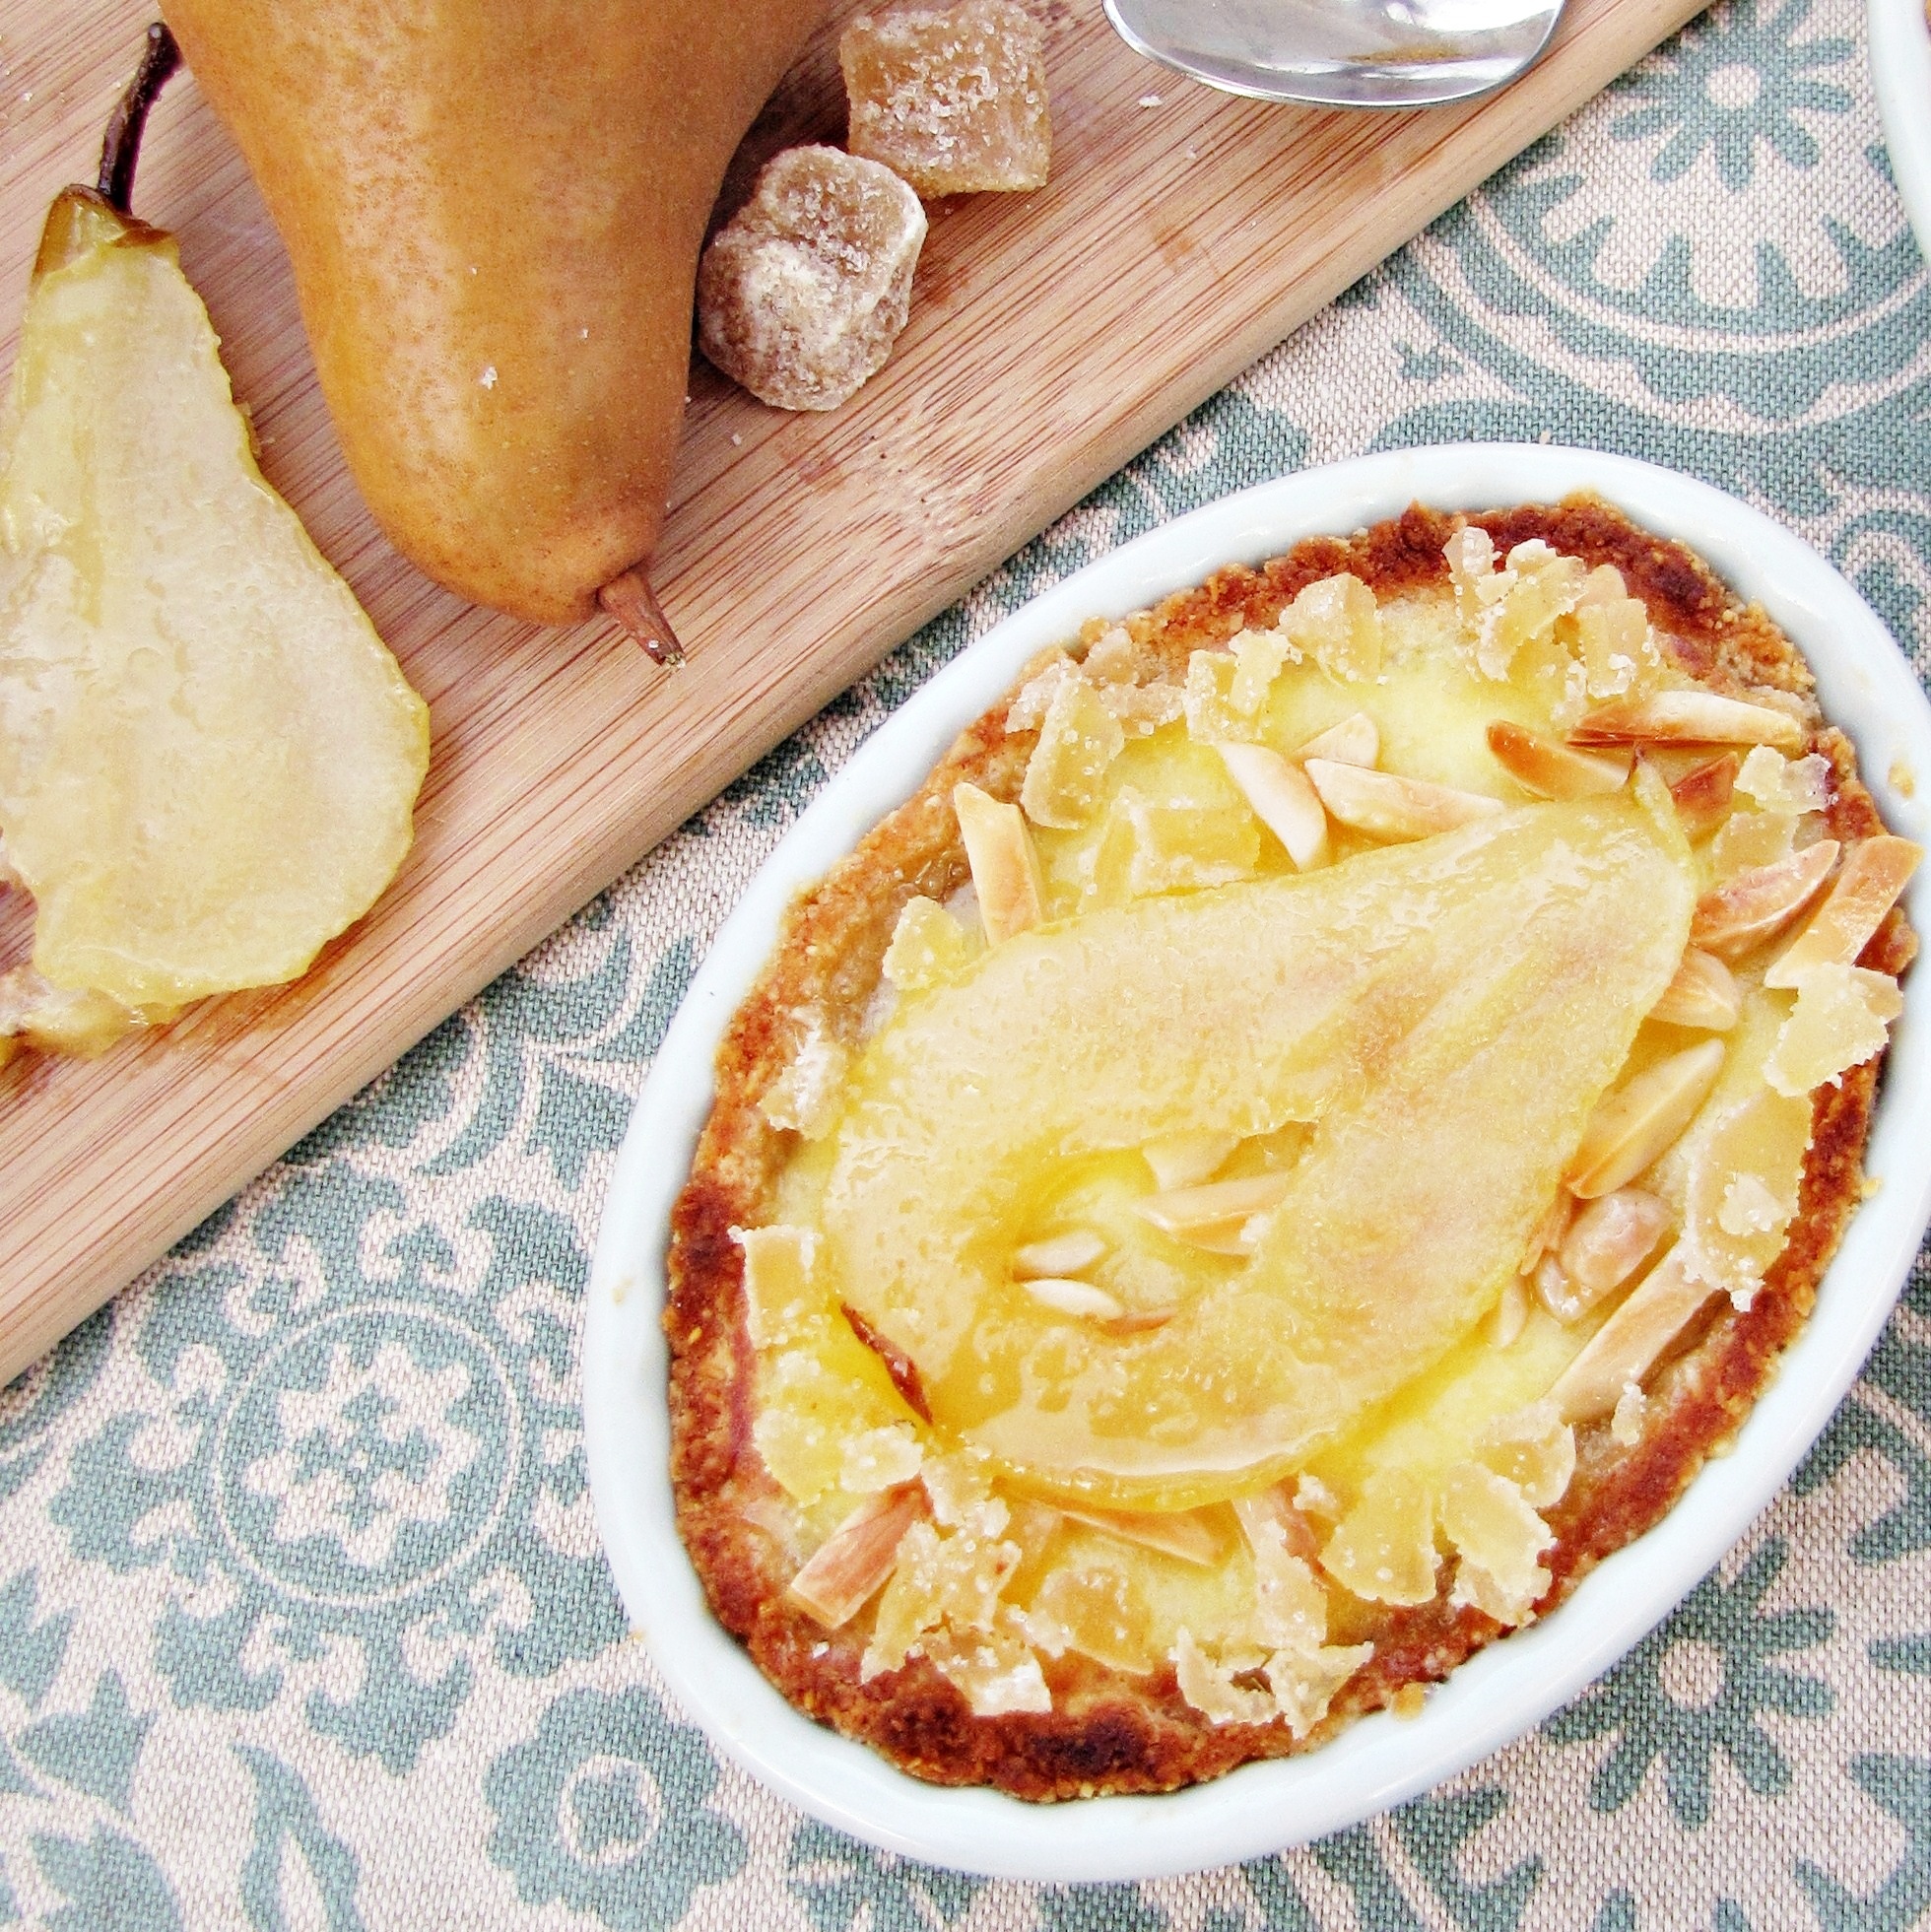
Saturday I visited the Somerville Winter Farmer’s Market for the first time and was so overwhelmed by the quality and variety of produce that I got a little of everything, including a few things that I didn’t need and had no plan for but couldn’t resist.  These pears included.  Once I arrived home I quickly decided that they would be the star of my celebratory dessert.  I went with a ricotta, pear, almond, and ginger tart adapted from this recipe.  It seemed autumn-y and festive and appropriate.  I’ve made a lot of ricotta-based desserts this year – I keep picking them out because somehow they feel healthier to me – but I’m usually disappointed by them.  Although I like the texture of ricotta in some dishes, I don’t love it in dessert.  This recipe was an exception.  I think the addition of sour cream and heavy cream to the custard base smoothed out some of the graininess associated with ricotta, without taking away from the ricotta’s flavor.  The final tartlets had a great mix of flavors and textures – a crunchy almond crust, sweet ricotta custard, caramelized pears, and spicy, chewy bites of ginger.  The only change I would make next time is to increase the amount of pear used – I’m imagining a sort of caramelized pear chutney for the top rather than a single slice of pear.  Give this recipe a try if you’re looking to mix it up a little, or trying to impress someone.  Happy 100 to me!

Pear, Ricotta, and Almond Tartlets

Recipe adapted from Know Whey.  Serves 4.

For the crust:

  • 2/3 c. almond flour
  • 1/2 c. flour
  • 3 TBS sugar
  • 3 TBS cold butter
  • 1/8 tsp salt
  • 2 TBS cold heavy cream
  • 1 TBS cold water

For the filling:

  • 1 c. ricotta
  • 1 tsp almond flour
  • 1 tsp flour
  • 1 egg
  • 2 TBS heavy cream
  • 1 TBS sour cream
  • 1/4 c. sugar

For the topping:

  • 1 pear, peeled and sliced
  • 1 TBS butter
  • 1/4 c. sugar
  • 4 1-inch cubes crystallized ginger, finely diced
  • 1/3 c. slivered or sliced almonds
  1. Prepare crust.  In a medium bowl, mix together almond flour, flour, sugar and salt.  Cut in cold butter and press with a fork or a pastry cutter until the mixture is crumbly with pea-sized lumps.  Add the chilled cream 1 TBS at a time, mixing with a fork between additions.  Press the dough together into a ball – if it just stays together, it is ready, if it is still too loose to hold to itself, add the extra tablespoon (or two if necessary) of cold water to get it to firm up.  Press the dough into individual creme brulee ramekins, so that it is about 1/4 inch thick all the way around and up the side.  Freeze the ramekins for 10 minutes.
  2. Preheat the oven to 350°F.  In a medium bowl, mix together ricotta, almond flour, flour, sour cream, heavy cream, sugar, and egg, until the batter is an even consistency.  Set aside.
  3. Heat 1 TBS of butter in a medium saucepan over medium-low heat.  Add 1/4 c. of sugar and let sit until it begins to turn golden brown.  Add pear slices and cook until pear is tender and pear syrup has thickened slightly.  Remove from heat and set aside.
  4. Blind bake the prepared ramekins with tart dough for 7 minutes, until just starting to turn golden.  Divide the ricotta mixture evenly between the ramekins and bake on a cookie tray for 15-20 minutes, until custard is beginning to firm up and turn slightly golden.  Remove from oven, and change oven setting to broil.  Brush the tops of the custards with pear syrup.  Sprinkle almonds over the top of custards and broil on high for two minutes, until almonds and crust are golden-brown.  Remove from oven and top with diced ginger and pear slices.  Refrigerate until ready to serve.  Serve cold.

0 November 13, 2011 Dessert

Stowe, VT and Maple-Sesame-Cranberry Cookies

Now that I’m back from my first real business trip – which was hectic and busy and fun and interesting and a serious crash course in Spanish, what with participants from Venezuela, Argentina, Chile, Colombia, and Brazil – I’m here with a trip report and pictures from my mini-vacation to Vermont last weekend.  I’m probably being an idealist, but I have visions of Vermont as being beautiful in every season – green and bucolic in summer, crisp and splendidly colorful in the fall, quiet and snowy in the winter, and breathtakingly fresh in the spring.  I have some foundation for these ideas – I used to go to summer camp on Lake Champlain, and it was always gorgeous and idyllic.  More recently, I visited a friend at Middlebury in late spring, and I’ve never enjoyed a drive as much as the one through those mountains, nor seen quite as many daffodils in one place.  Now I can confirm that the fall is just as crisp and wholesome and nice as I imagined, leaving only winter for me to investigate.  If I like winter, I might just have to move there.

Stowe is a very quiet place in November – the leaf-peepers are gone, and the skiers have yet to arrive.  A few trees have straggling bursts of orange, but most leaves have faded to brown and begun to fall.  Frost covers everything in the mornings, but the sun can still be warm enough at midday to forego the winter jacket.  I loved it.  We drove up Friday afternoon and after getting settled in our hotel, we got a casual dinner at Piecasso, a local pizza place that made really good pizza (loved the crust), but just OK hamburgers (duh, Katie.  But, I only went the hamburger route because I had train station pizza at lunch).  Then early to bed – the biggest, best, most comfortable bed ever.  We stayed at the Green Mountain Inn, and had an absolutely wonderful experience.  A large part of this was due to the king-sized bed, gas fireplace, and fireside Jacuzzi tub combo, but we also enjoyed pretty much every other aspect of the hotel.  Highly recommended if you’re planning a trip up that way.

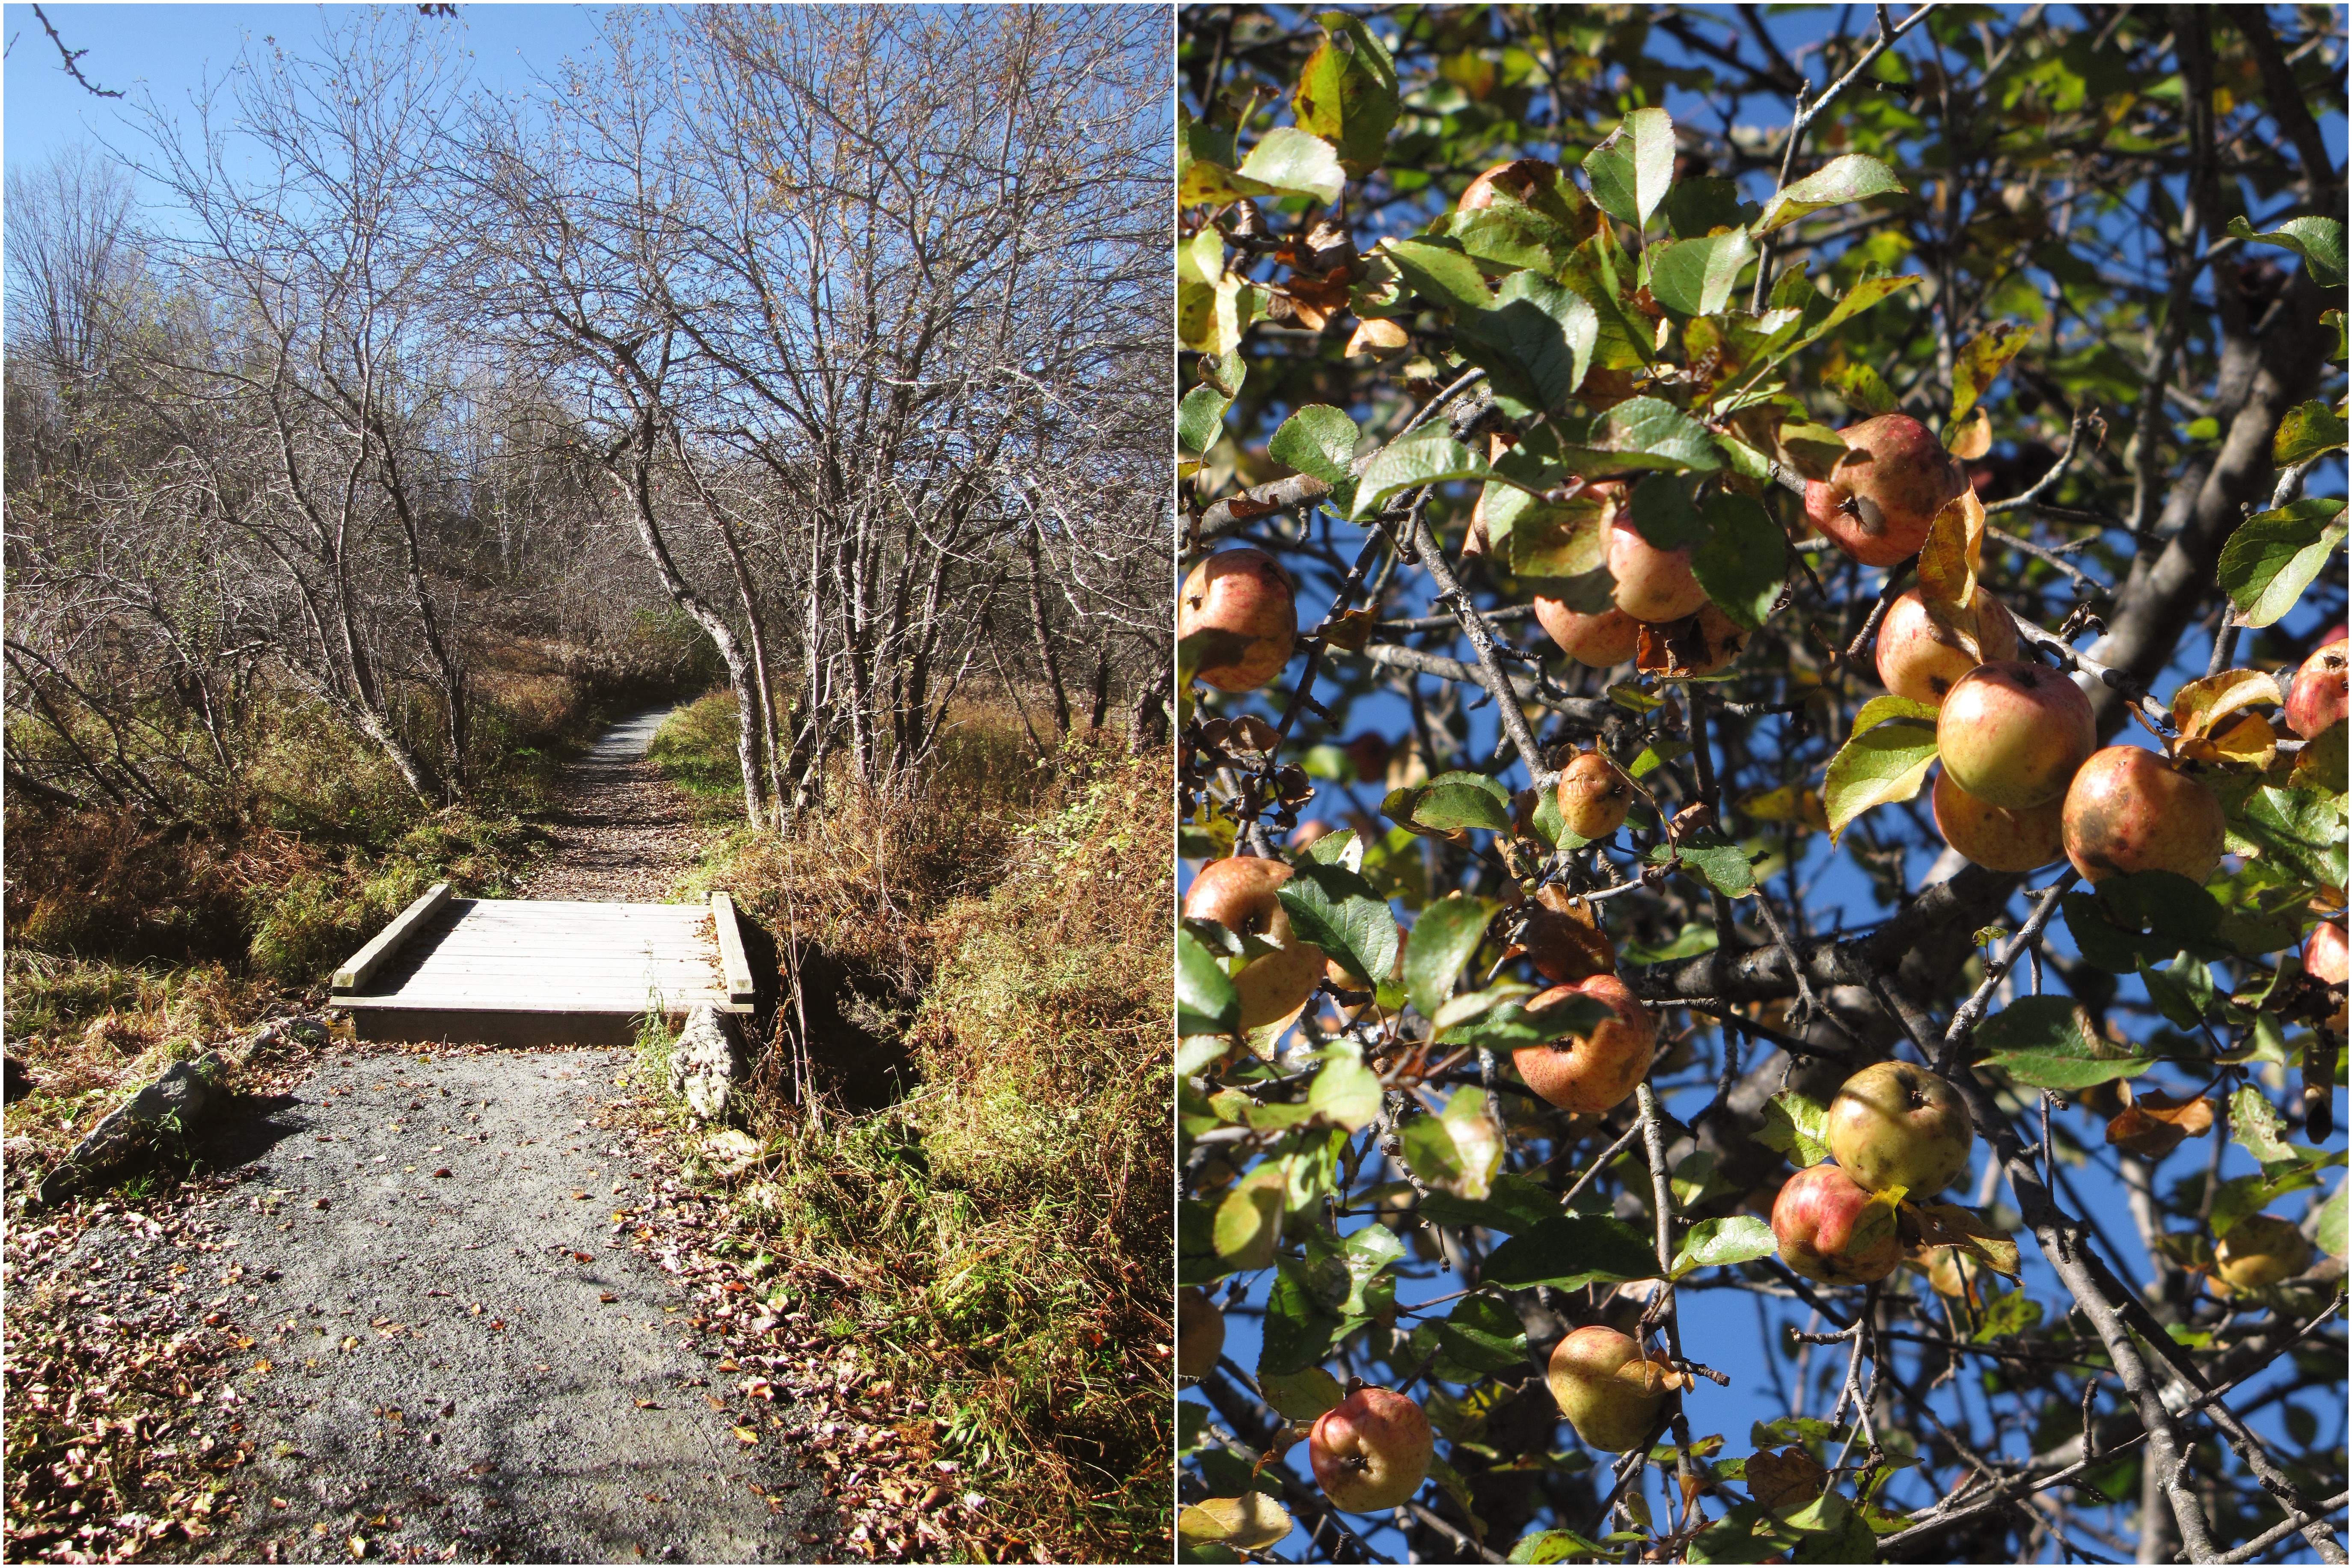
Saturday, we went for a frigid but absolutely gorgeous run on Stowe’s 5-mile riverside recreation path.  Everything was covered in beautiful frost even well after the sun had risen.  We passed a picturesque herd of dairy cows and crossed wooden bridges and it was basically the exact experience I was looking for.  After the run we had breakfast (real maple syrup on everything!) at The Gables Inn and did a little thrifting in a local “stuff” store – I got blog props, of course, but Trevor found the greatest old architectural magazine.  Old, like, 1880s old, and full of detailed black and white sketches of houses and staircases and it’s totally awesome.  We spent the afternoon (as well as Sunday morning) doing some of the foodier things that Vermont has to offer – touring the Magic Hat brewery in Burlington, sampling the cider at the Cold Hollow Cider Mill, picking up Lake Champlain chocolates, and trying every single one of Cabot’s cheddars.  Other than the brewery tour, I was kind of disappointed with the “factory” stores – they were very cut and dry and touristy, and mostly focused on selling their products at higher than retail price rather than demonstrating how they were made or even explaining the process.  I guess what I was really looking for was a more farm-to-table experience, and I probably shouldn’t have expected as much as I did from such big-box names.  I was tempted by the enormous bins of apples outside the cider mill on sale for 50 cents a pound.  50 cents a pound!  That’s a pretty good deal.  But, since I was leaving Monday morning and I haven’t finished my last batch of apples, I refrained.

Sunday we slept in and then had a lovely brunch at our hotel, then headed out.  On the way we stopped for a walk at the Waterbury reservoir, a beautiful, quiet spot with great views of the mountains over the water.  The area used to be farmland, and many of the trees were still covered in apples, with that great scent of slightly fermented apples hovering over the ground.  It was a good sendoff for our drive back to Massachusetts.

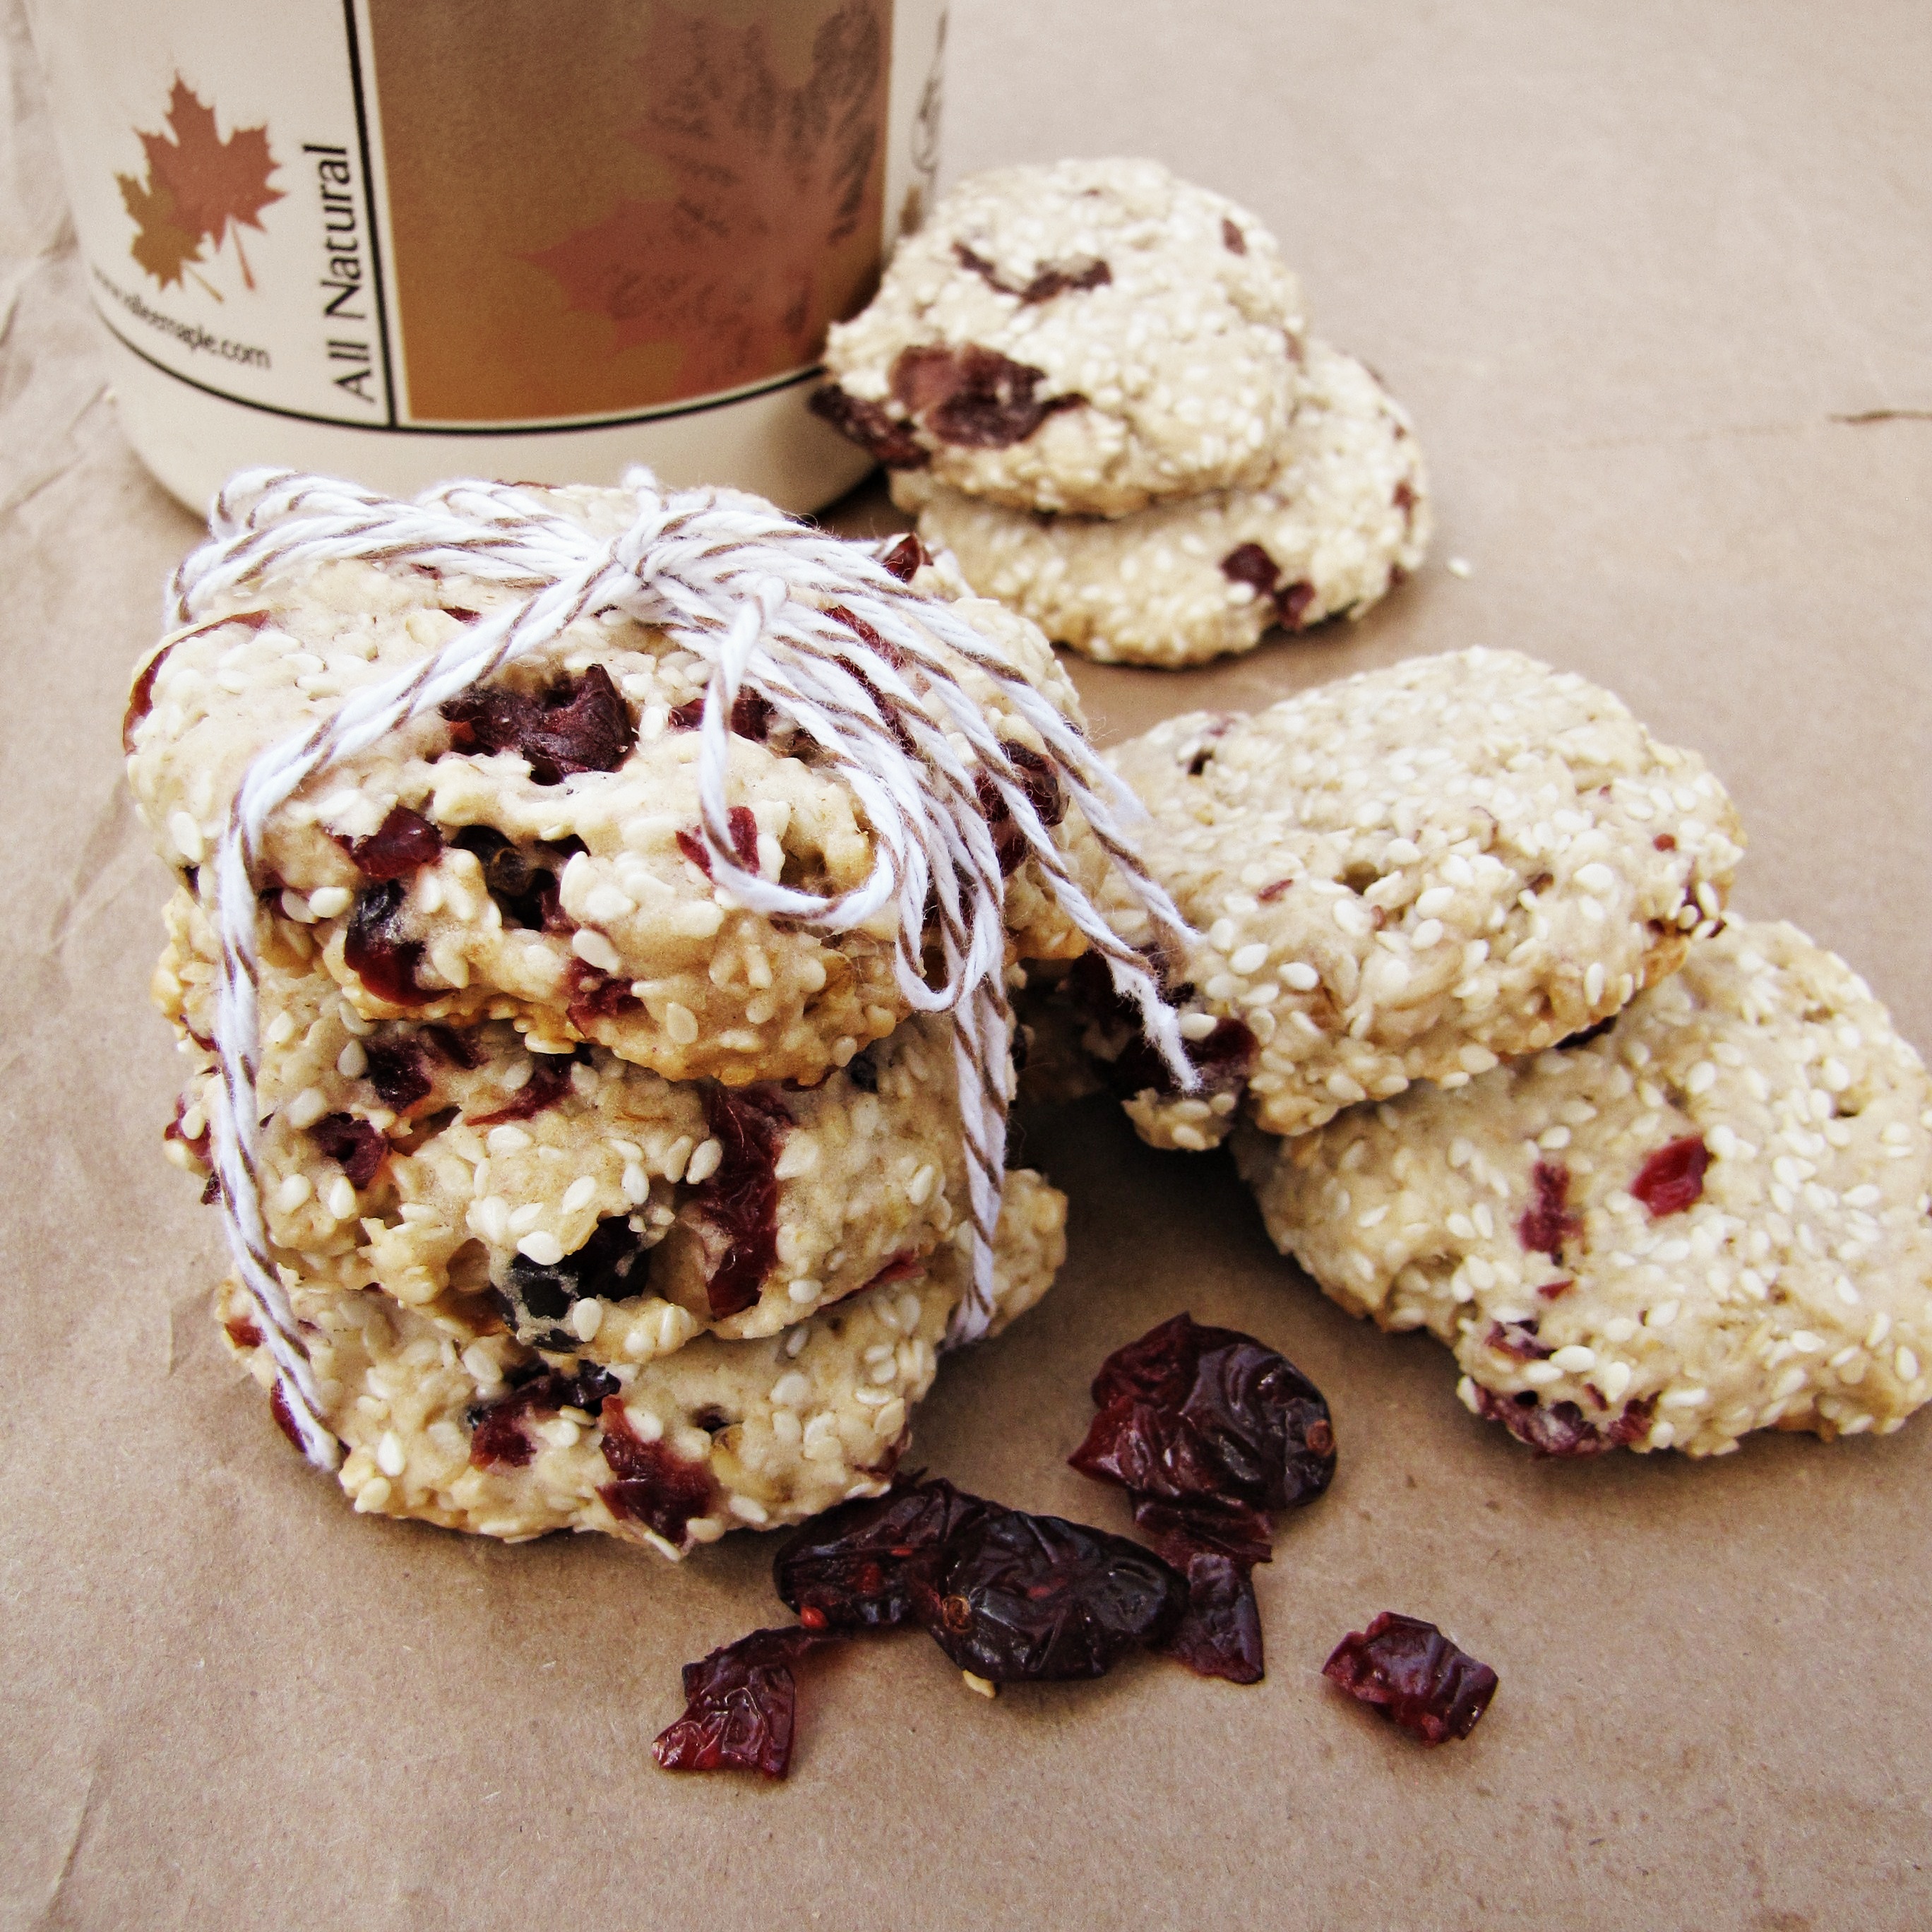
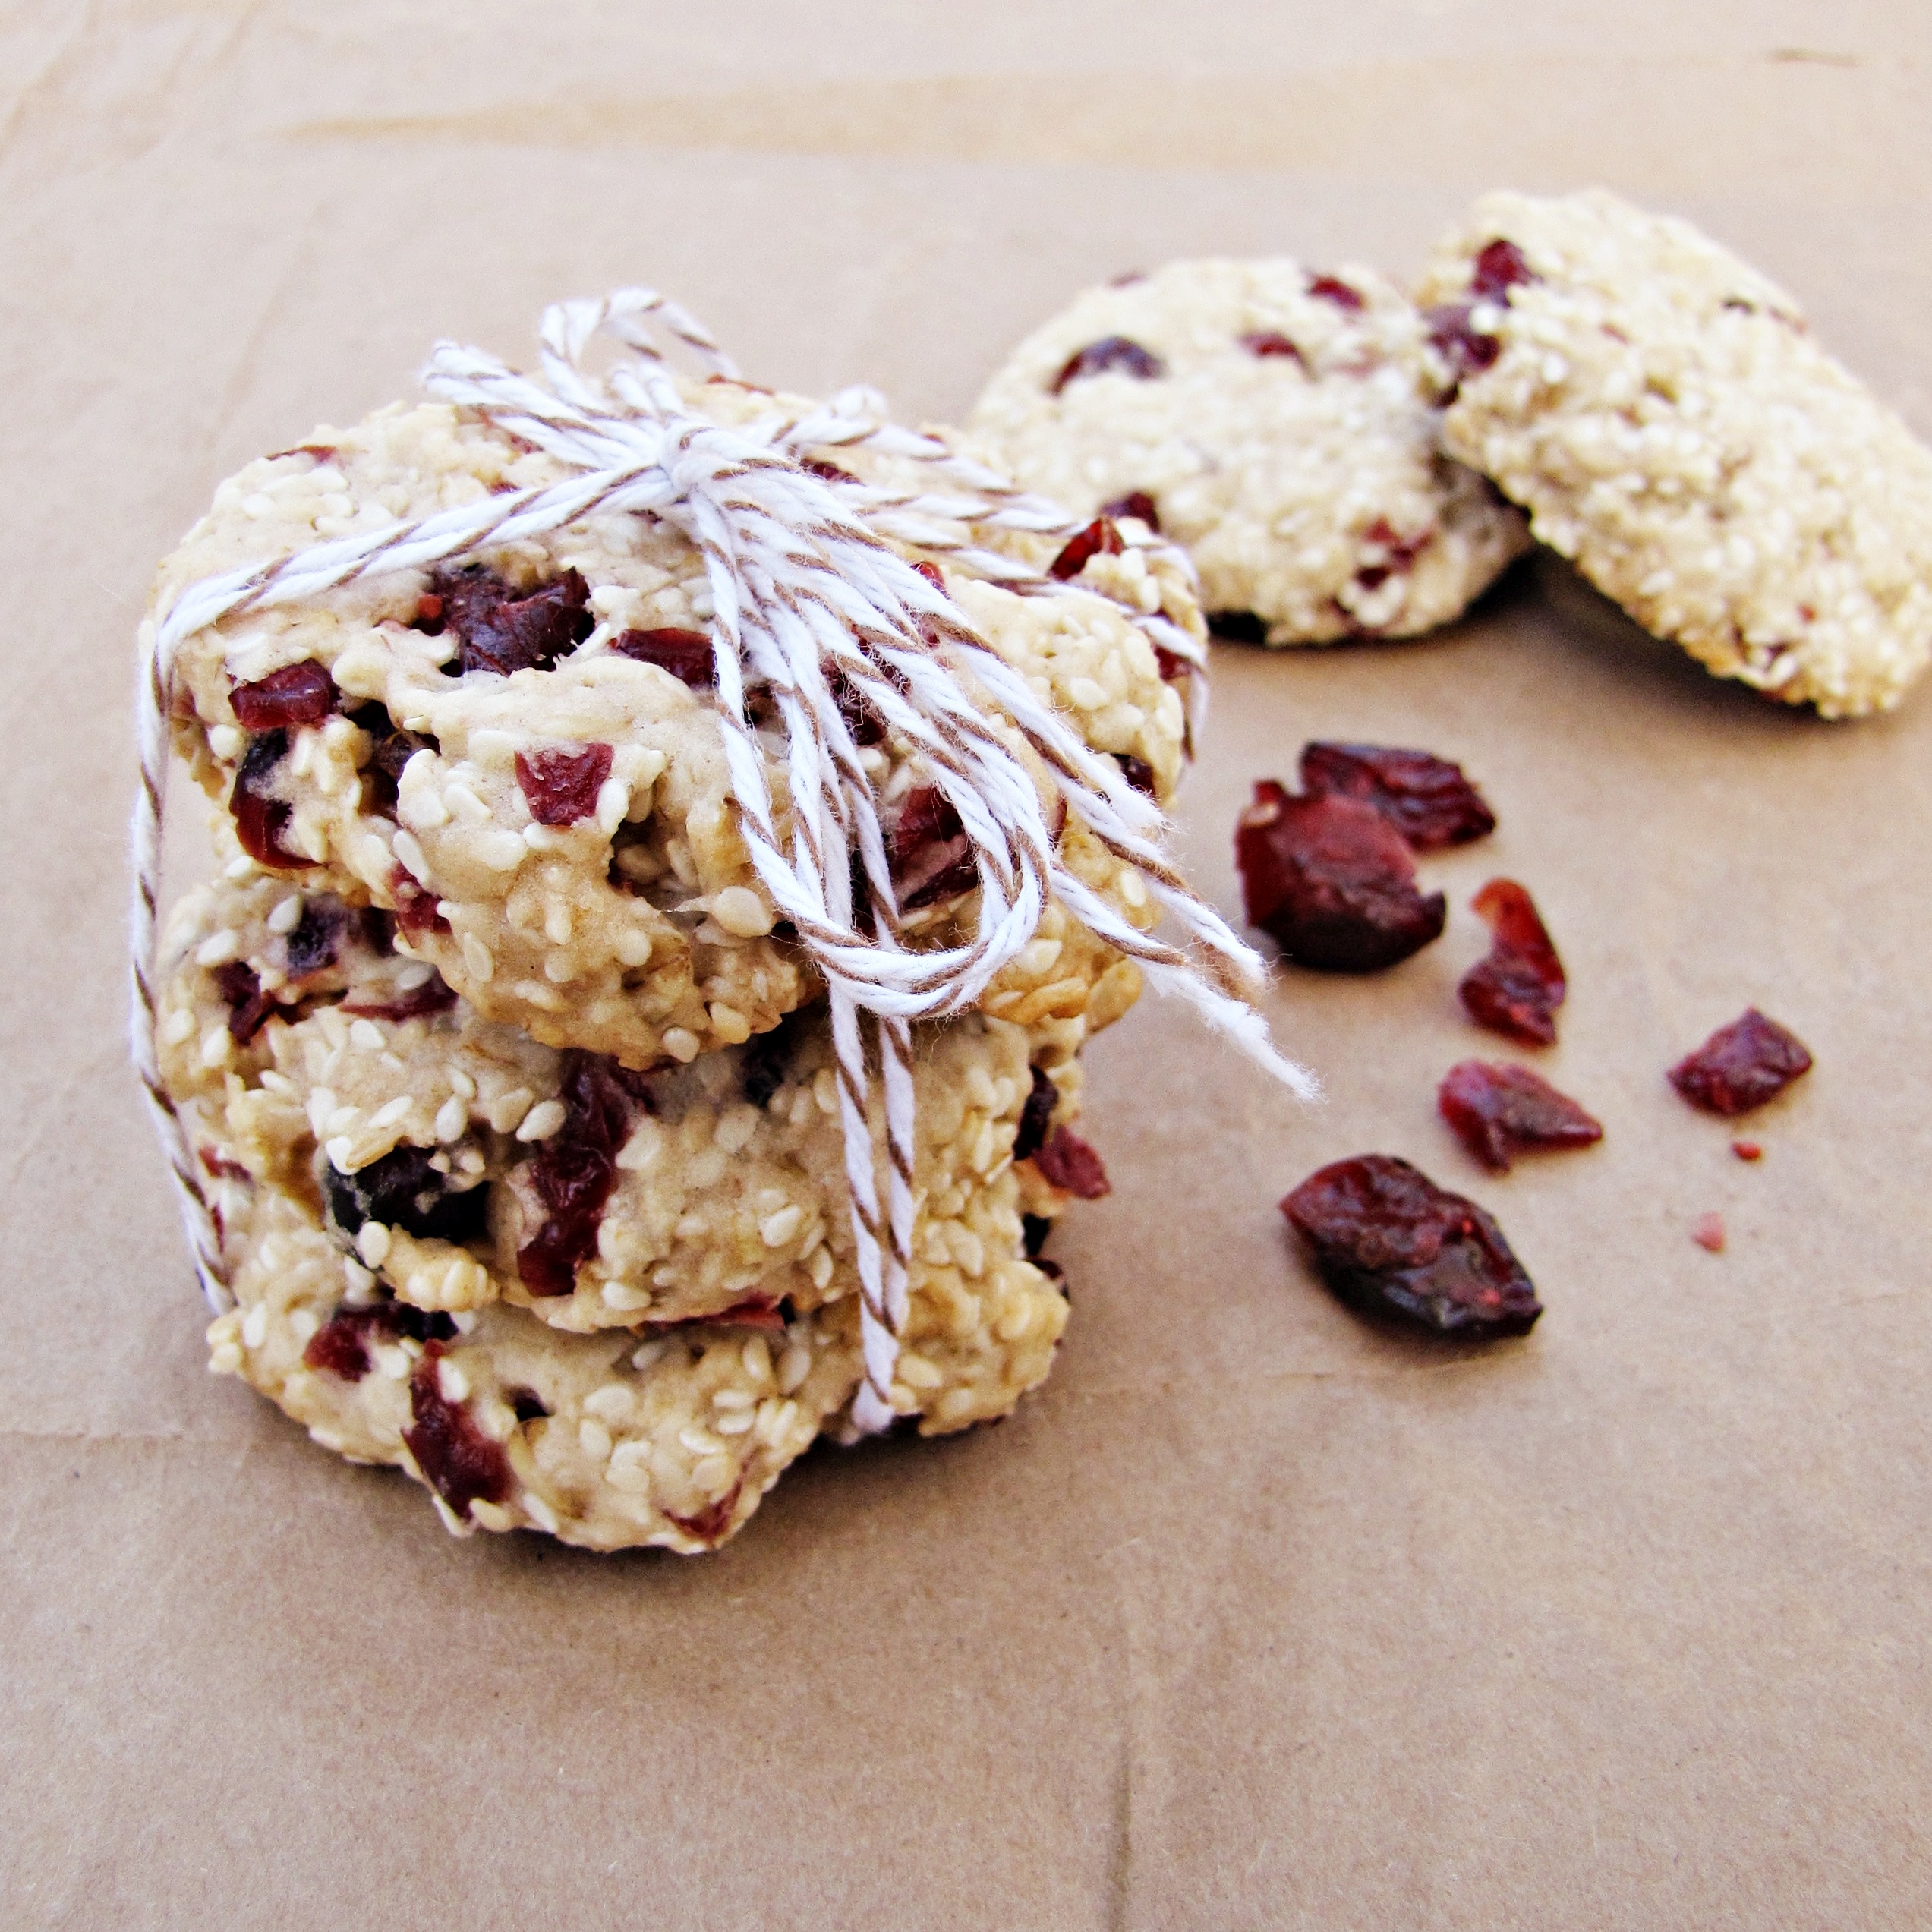
And now for the food – maple syrup is probably the most quintessential Vermont ingredient, so I knew this post had to include it somehow.  However, it is also one of the most expensive condiments I know of.  The lowest price I saw on it was $15 a quart, in a gas station close to our hotel, which is where I ended up buying some.  I’m sure you can get it more cheaply direct from a sugarhouse, but since it’s not sugaring season (maybe we’ll go back for it!) I figured this was my best bet.  Maple syrup in hand, I started going through maple-laden recipes I have bookmarked, but a lot of them called for a large amount of syrup and I just couldn’t bring myself to part with 2 cups of the precious stuff barely a week after I had gotten it.  As a happy medium, I went with these cookies, which are from Peter Berley’s Modern Vegetarian Kitchen.  As I mixed up the batch I was a little bit skeptical – no eggs, no sugar, no leavening, and only half a cup of flour?  Not your typical cookie.  But, as I pulled them from the oven and bit into one I was pleasantly surprised – they were some of the best cookies I’ve made in recent months.  Crunchy, dense, and both sweet and savory they make a great snack, and are particularly good dipped in a little bit of orange tea.  As an added bonus, they’re fairly healthy – although they are not low calorie (160 per cookie), the bulk of the calories in them are coming from the sesame seeds, which provide a massive dose of several minerals, as well as calcium, healthy protein, and fiber.  I think these may become my more wholesome and natural alternative to power bars for the near future.  Lastly, they can easily be made vegan with the simple substitution of olive oil for the melted butter, which is even recommended by the author.  They’re easy to whip up, so pick up some sesame seeds in bulk (try wholefoods) and give them a try!

Sesame-Cranberry Cookies

Adapted from Peter Berley’s Modern Vegetarian Kitchen .  Makes 9 cookies.

  • 1/2 c. sesame seeds
  • 1/2 c. flour
  • 1/2 c. oats
  • 1/2 c. dried cranberries, coarsely chopped
  • pinch of salt
  • 3 TBS maple syrup
  • 3 TBS melted butter (could substitute olive oil for vegan cookies)
  • 1 tsp vanilla
  1. Preheat oven to 350°F.  Soak cranberries in hot water in a bowl for 10 minutes.  Meanwhile, pulse flour, oats, and salt together in a food processor until oats are finely ground.  Transfer to a bowl and mix in sesame seeds.  In a separate bowl, whisk together melted butter, maple syrup, and vanilla until combined, then pour wet ingredients into dry and whisk together.
  2. Drain most of the water from the cranberries and add the cranberries to the dough.  Mix together until it forms a thick dough.  If the dough is too dry to press together, add a small amount of the cranberry soaking liquid to the dough to moisten it.  Form the dough into small balls and then flatten into 2 inch disks and place on baking sheet.  Bake for 15-17 minutes, rotating halfway through for even cooking, until cookies are just beginning to turn golden brown.  Great straight out of the oven and several days later!

0 November 11, 2011 Fall

Quinoa and Brussel Sprout Primavera

Before leaving for Miami I thought that going a full week without access to a kitchen was going to be horrible.  That I would come back dying for something freshly prepared with my own two hands.  That I would feel gross and weighed down by too-hearty breakfasts and unhealthy dinners.  For most people, a week of fully-paid-for restaurant food would be a cause for celebration, not concern, but I was seriously worried.  Turns out I was being a little bit ridiculous.  The breakfasts are a little bit on the heavy side, but seeing as it’s a buffet, it’s totally within my control.  The buffet lunches actually have a surprising number of fresh and interesting dishes – yesterday they had three separate dishes incorporating three of my favorite foods –  pesto, chickpeas, and avocados – and today spinach ravioli and a chorizo bar.  Last night, we had an incredible dinner at Red Fish Grill – I was really stunned by how much flavor each of the ingredients in my salad had (super sharp and creamy blue cheese, slightly smoky and slightly sweet candied pecans, smoky smoky smoky bacon, and crisp-tart apples) and the key lime pie was perfect.  Literally, perfect.  Plus, having a gym a 60 second walk from my bed and my “office” right downstairs decidedly increases the frequency of my visits to the gym.  So, really, not much to complain about here.

Still, I do sort of miss the act of cooking.  It’s one of my favorite ways of unwinding on weeknights.  Occasionally on weekends when the cooking I’m doing is for the blog and I’m racing against the daylight, it gets stressful, but I still enjoy it.  And it’s certainly nice to have homemade food for lunch every day (well, most days… sometimes it’s nice to just get pizza).  Since starting work, as you might have noticed, I’ve been concentrating a little more on quick and healthy recipes – recipes that I can make before I leave in the morning, and that counteract the serious increase in eating out that I’ve experienced since moving to the city … and having an income.  This recipe is one of my favorites for fulfilling both those purposes – with the added bonus that I find it absolutely delicious.  The idea for this comes from Let’s Dish, but I’ve tailored it to my own tastes – which is sort of what the original recipe encourages you to do, anyways.

This recipe was also the first way that I tried brussel sprouts, about 2 months ago.  Brussel sprouts have never been on my family’s table, because my mom absolutely hates them.  I think it’s because she was forced to eat them in a very unpleasant, boiled soggy, flavorless form as a kid, and swore never to force her own children to eat them.  I’m the complete opposite though, and absolutely love them, enough to have made them several times since first trying them.  I always blanch them in water or broth before caramelizing them with butter, half because I love the flavor the caramelization gives them, and half because that ridged golden brown effect makes them so pretty!  For this dish, I then toss them with hot quinoa, a bit of cream cheese, a sprinkling of parm, and whatever other vegetables happen to be in my kitchen at the time, briefly sauteed with garlic – I’ve included carrots, green beans, asparagus, and onions, but the brussel sprouts are so far the only mandatory vegetable.  I brought this along to Vermont with us, but we didn’t have a microwave in our hotel room, and it’s really best heated up.  Also, cooking the quinoa in chicken broth seriously ups the flavor because it absorbs so much of it – water is OK, but definitely inferior.  If you don’t like brussel sprouts, give the original recipe a try with whatever vegetables you do like, and enjoy a quick, healthy lunch!

Quinoa and Brussel Sprout Primavera

Adapted from Let’s Dish.  Serves 2.

  • 1 c. quinoa
  • 2 c. chicken broth
  • 3 oz. cream cheese
  • 3 c. fresh brussel sprouts, washed and halved
  • 2 c. other vegetables, cut into small chunks (optional)
  • 2 cloves garlic, sliced
  • 3 TBS butter
  • parmesan cheese, for topping
  1. Bring chicken broth to a low boil.  Immediately upon boiling, add halved brussel sprouts and blanch by cooking for 2 minutes, then removing with a slotted spoon and rinsing in cold water.  Add quinoa to boiling chicken broth and turn heat down to medium.  Cook qunioa for around 15 minutes, until it has absorbed all the broth and the “tails” of the quinoa grains have unfurled.
  2. While quinoa is cooking, heat half the butter in a large saucepan over medium heat.  Add the garlic slices and cook for 1 minute, until golden.  Add the brussel sprouts and let cook without disturbing for 2-3 minutes, then flip sprouts so that both sides can brown.  Remove brussel sprouts when they are golden-brown in places, and set aside.  Add remaining butter to pan along with other vegetables, if using.  Cook veggies until they are just a bit more tender than when fresh, about 2-7 minutes depending on the vegetables.  Toss brussel sprouts, vegetables, and quinoa together.  Stir in cream cheese until melted throughout.  Top with parmesan cheese and season with salt and pepper, if needed.  Serve hot.

  • « Go to Previous Page
  • Go to page 1
  • Interim pages omitted …
  • Go to page 45
  • Go to page 46
  • Go to page 47
  • Go to page 48
  • Go to page 49
  • Interim pages omitted …
  • Go to page 57
  • Go to Next Page »

Primary Sidebar

Subscribe!

Get creative recipes and menu ideas delivered straight to your inbox.

Most Popular

A House // Sweet Potato and Coconut Milk Soup with Brown Rice and Lentils

Monthly Fitness Goals: July // Homemade Spinach Wraps with Chopped Greek Salad

A New Job // Classic Seven-Layer Bars

Butternut Squash Carbonara with Fried Sage and Caramelized Onions

Happy Birthday, Trevor! // Peanut Butter Fudge

Cookbook Review and Giveaway: Home Made Winter

Drizly

Please note!

Full disclosure: if you purchase anything at Amazon using the above links or any other links to Amazon on this site, I will receive a small commission. Just so you know!

Copyright© 2025 · Cookd Pro Theme by Shay Bocks

This site uses cookies: Find out more.