• Skip to primary navigation
  • Skip to main content
  • Skip to primary sidebar
  • Home
  • Recipes
  • Features
    • Cookbook Reviews
    • Ingredient of the Week
    • Sunday Dinner
    • Fitness Goals
  • Travel
  • About
    • Privacy Policy
    • Cookie Policy
  • Work With Me

Katie at the Kitchen Door

Globally-inspired, seasonal recipes

Blog Page

2 June 23, 2015 Dessert

Moving // Rosé-Poached Rhubarb Cheesecake Tart

Rosé-Poached Rhubarb Cheesecake Tart {Katie at the Kitchen Door}

Every time I move I make some sort of clean out the pantry dish. Trevor reminded me of the first one the other day when I was starting to clean out the fridge. I’m almost embarrassed to show you –  not only does it look awful, if I’m remembering correctly, it also tasted awful. But hey it’s on the Internet so it’s fair game. I was just a little baby blogger then, wasn’t I?

Rosé-Poached Rhubarb Cheesecake Tart {Katie at the Kitchen Door}

The second time was not so bad: Cranberry Cornmeal Cake (warning, that post comes with a lot of emotions about graduating from Duke) and a less-thrilling but still decent Corn Broth Quinotto. Coincidentally, I have a lot of cranberries, cornmeal, and quinoa in my pantry now, too – aparently I always hoard cranberries in the freezer in October and it turns out I almost never use them after November. The third time I moved was when we moved to this apartment – only two years ago – during a summer that was almost as hectic as this one, with me away in Russia at least once a month. I made this Baked Blackberry Oatmeal to help me stay sane and somewhat energized during the move (still a favorite recipe) and also these Corn, Goat Cheese, and Jalapeno Tartines (which I can’t imagine particularly helped me clean out the fridge, but maybe I was just planning on leaving all my extra food for my roommates).

Rosé-Poached Rhubarb Cheesecake Tart {Katie at the Kitchen Door}

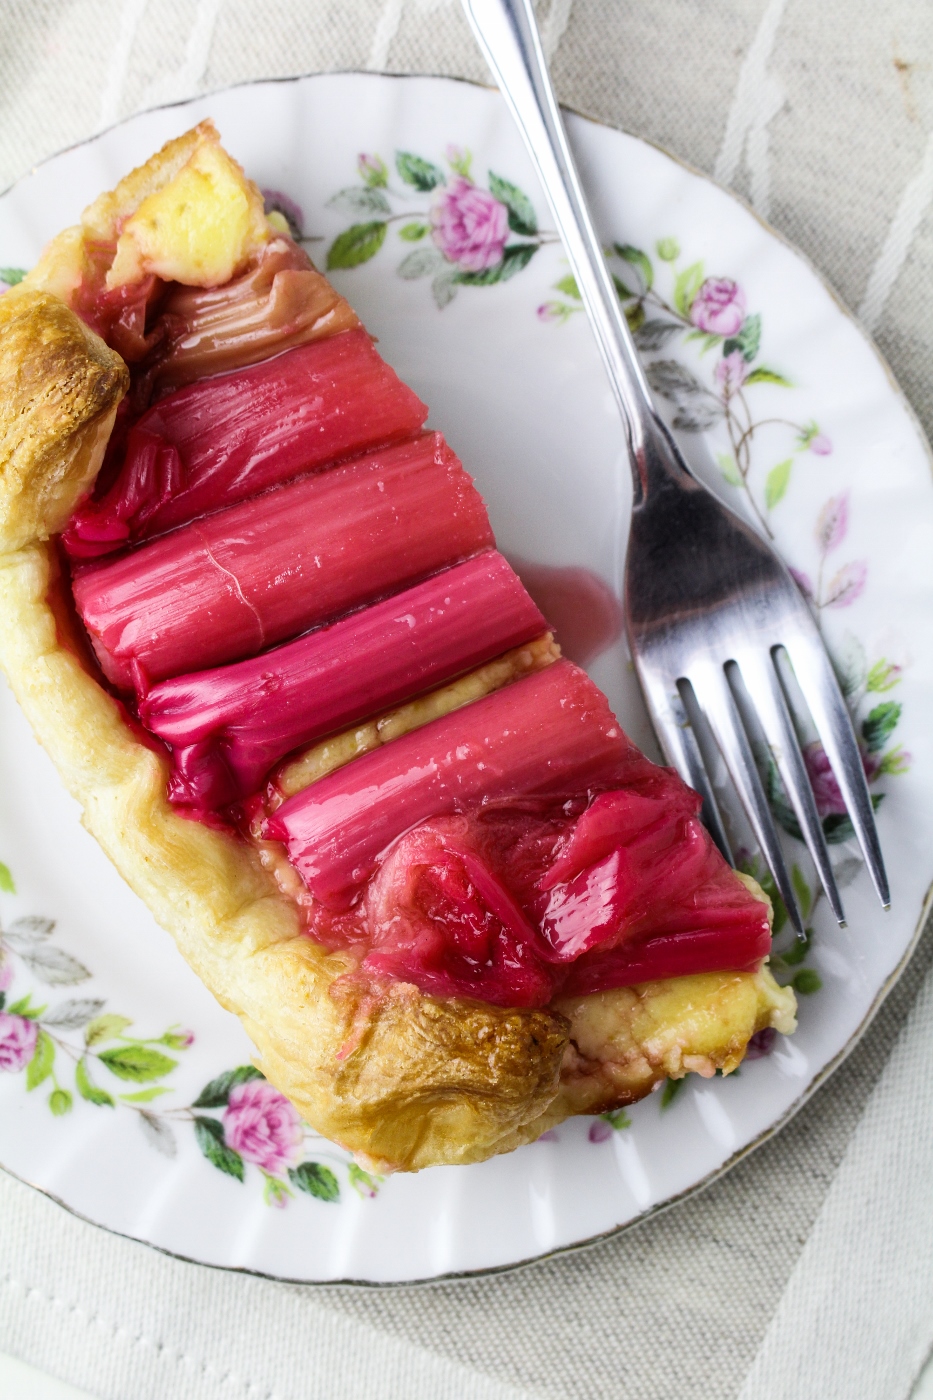
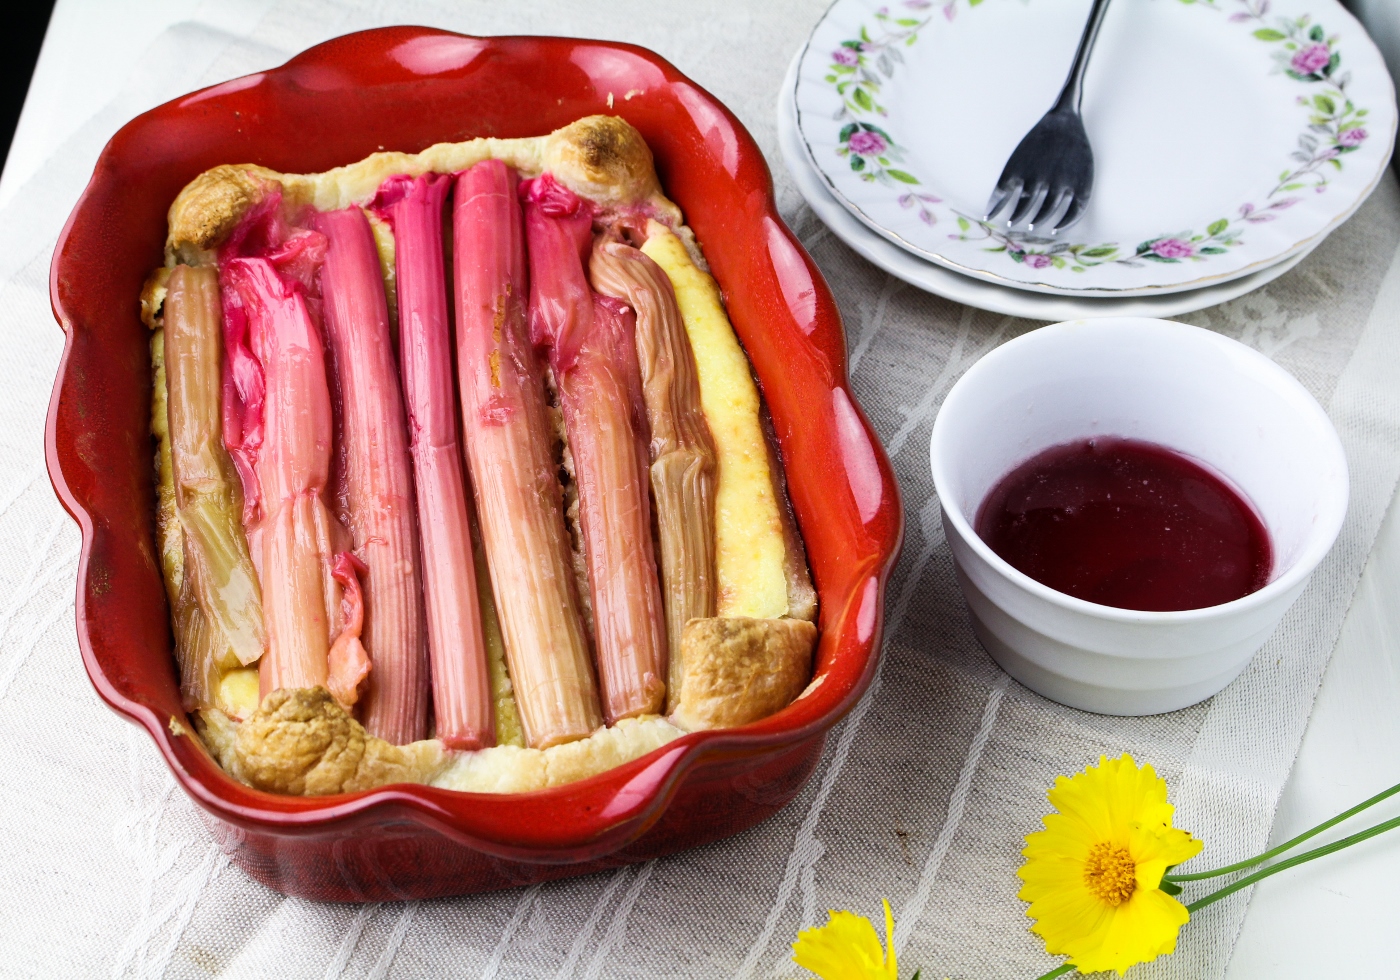
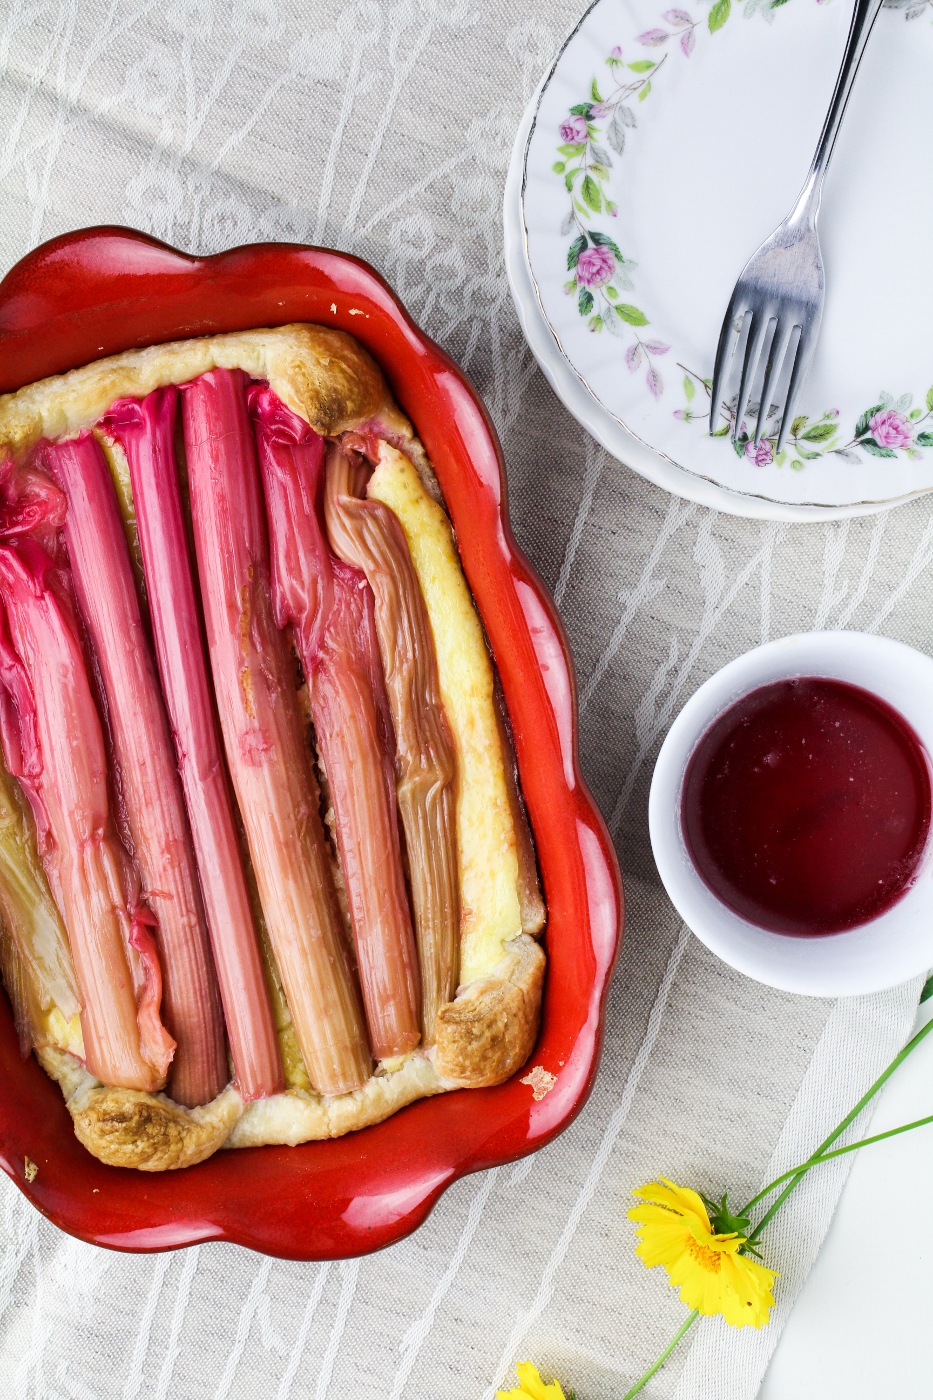
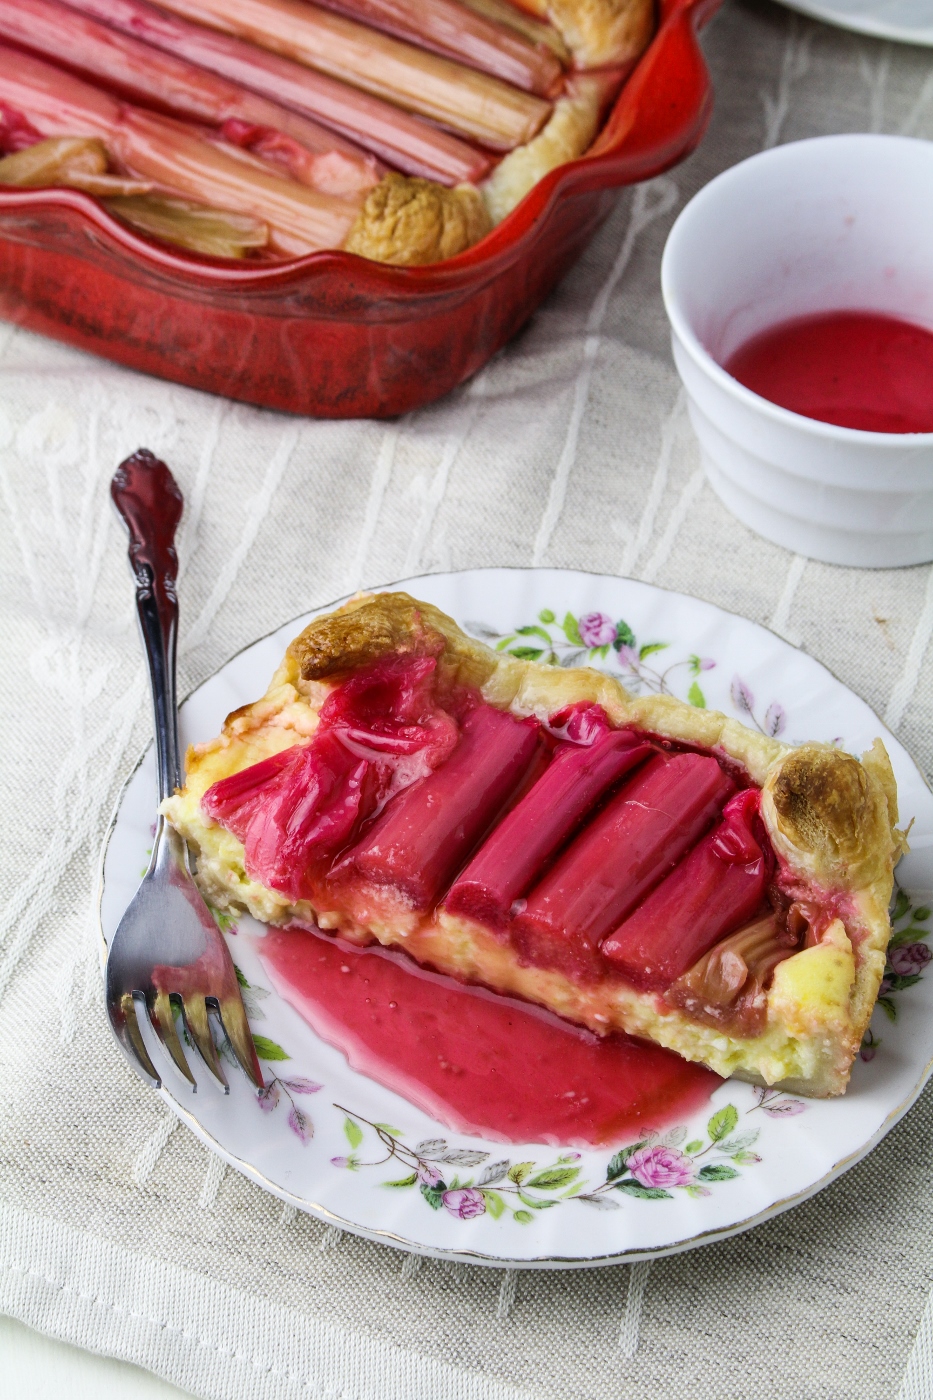
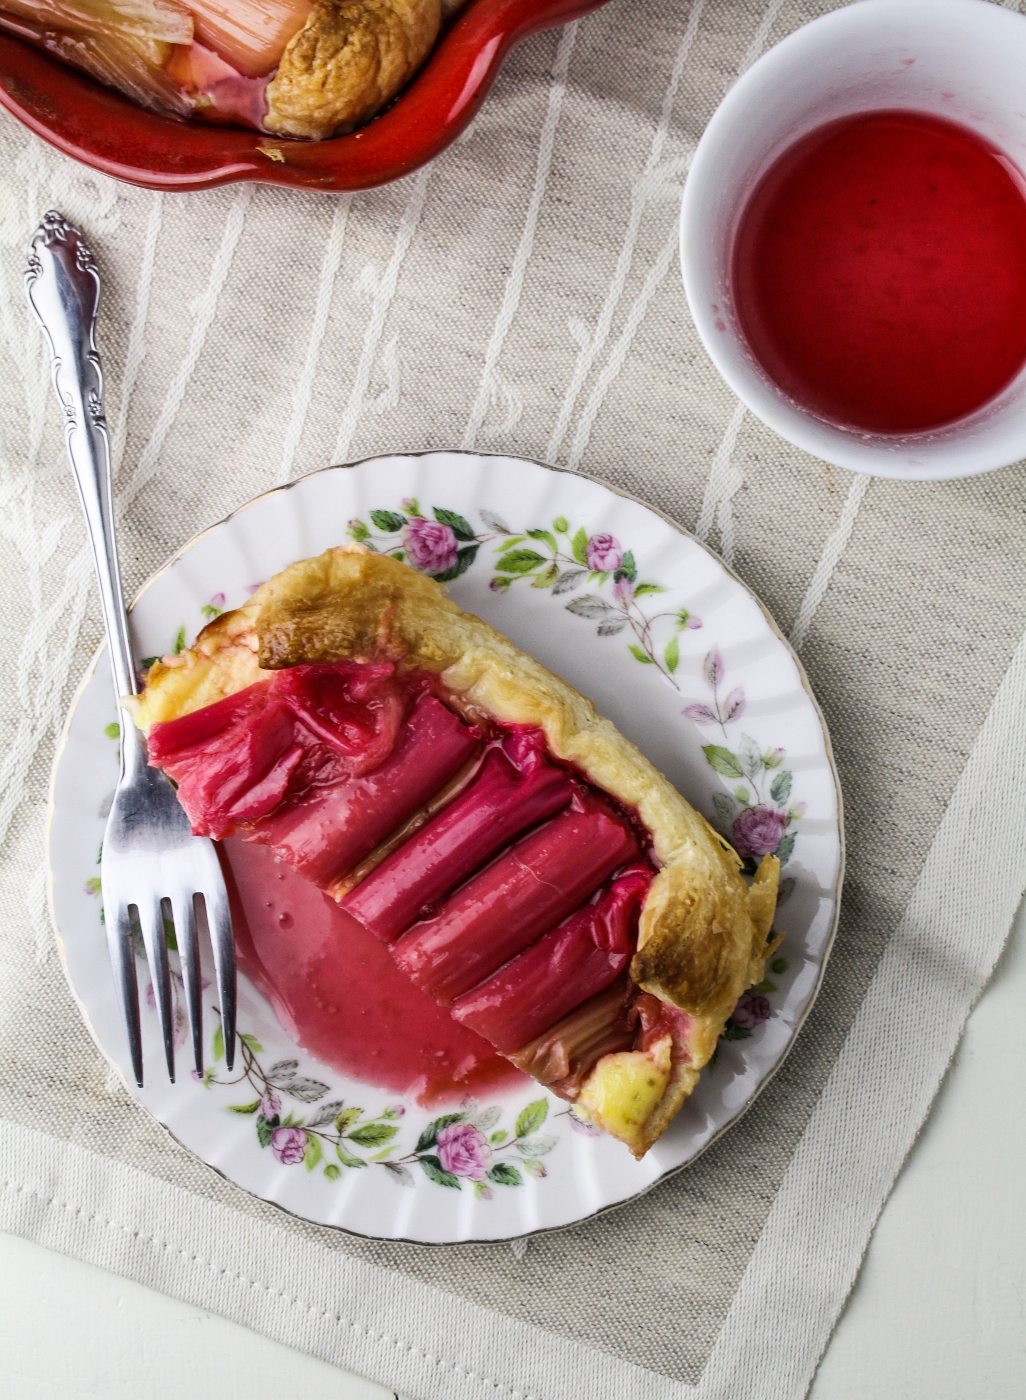
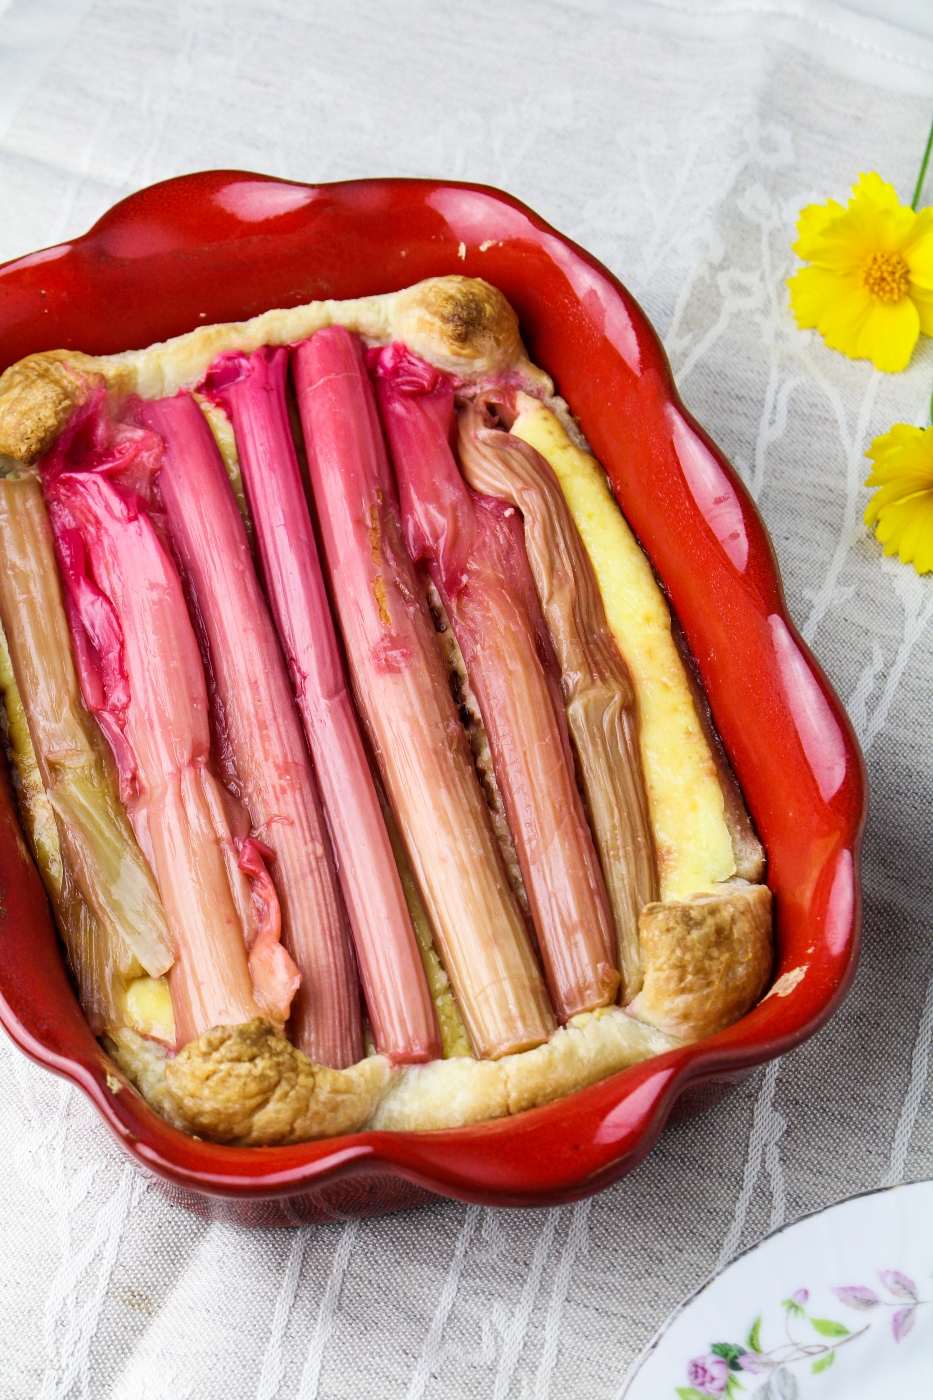
I’d like to think that both my cooking and photography skills have improved since then but I’ll let you be the judge. This time around, some of the fridge languishers were rhubarb, cream cheese, half a package of frozen puff pastry, and a few splashes of rosé. A tart seemed the obvious way to use up the puff pastry, and from there I worked backwards to end up with a cheesecake filling topped with rosé-poached rhubarb stalks. I left the rhubarb stalks whole and poached them just to the point of tenderness for presentation’s sake, but the flavors will be just as good if you let the rhubarb soften a little bit more. The tart was delicious, but between the puff pastry and the cheesecake filling it’s very rich – a small slice is perfect after a long day of packing and moving but it’s definitely a little indulgent!

Rosé-Poached Rhubarb Cheesecake Tart {Katie at the Kitchen Door}

Rosé-Poached Rhubarb Cheesecake Tart {Katie at the Kitchen Door}

I hope this is the last time we move for a long while. It’s funny, reading my post from the last time I moved; there’s a lot more sadness about what I was leaving behind. This time, I’m mostly just looking forward to turning our new house into our home. Perhaps I’m not sad because I’m not leaving any people, but I have to admit that I’ve never really loved the apartment that we’re in now. At least not the way I loved my house in Somerville – although I only lived there for 2 years, it felt like home from the first night on, maybe even more so than my childhood house. Our new house needs a lot of work and love before it will be even close to as nice as my Somerville house, but I hope that it starts to feel like home soon.

Like what you just read? Subscribe to Katie at the Kitchen Door in the box on the right, on Feedly or Bloglovin‘, or follow along on Facebook, Twitter, Pinterest, Instagram, or Google+. Thanks for reading!

Rosé-Poached Rhubarb Cheesecake Tart {Katie at the Kitchen Door}

Rosé-Poached Rhubarb Cheesecake Tart

  • 1 c. rosé wine
  • 1 c. water
  • 1 c. sugar, divided
  • 1 lb rhubarb, trimmed to the length of your baking dish
  • 8 oz. cream cheese, softened to room temperature
  • 1 whole egg
  • 2 egg yolks
  • 1 tsp vanilla
  • 7 oz. / 1 sheet of frozen puff pastry, defrosted according to package directions
  1. Preheat the oven to 400°F. Butter a small rectangular baking dish with 4-6 cups of capacity and set aside
  2. Add the wine, water, and 1/2 cup of sugar to a wide-bottomed saucepan. Bring to a simmer over medium-low heat, then add the rhubarb to the pan. Simmer the rhubarb until just tender, about 3-5 minutes depending on the thickness of the rhubarb. Check the tenderness of the rhubarb frequently by squeezing gently with tongs, removing each stalk of rhubarb as soon as it begins to give way to pressure from the tongs. Place the rhubarb on a plate and set aside. Continue simmering the syrup until it has reduced to 3/4 of a cup and is very thick, then remove from heat and let cool to room temperature
  3. To prepare the filling, beat the softened cream cheese until smooth. Beat in the remaining 1/2 cup of sugar, the egg, egg yolks, and vanilla until a smooth batter is formed.
  4. Unfold the pastry sheet and line the prepared baking dish with it, stretching the pastry out as necessary to cover the bottom of the dish. Poke the pastry all over the bottom with the tines of a fork. Pour the cheesecake filling into the pastry and bake until the filling is almost set and the puff pastry has begun to brown, about 20 minutes. Remove from the oven and carefully press the rhubarb stalks on top of the cheesecake filling, then continue to bake until the filling is fully set, another 5-10 minutes. Remove from the oven and cool completely.
  5. Serve the tart chilled with the reduced rosé-rhubarb syrup.


211 June 18, 2015 Dessert

Colombian Limonada de Coco

Colombian Limonada de Coco {Katie at the Kitchen Door}

Colombian Limonada de Coco {Katie at the Kitchen Door}

You guys know that I’m in Colombia all the time for work. I’ve been at least once a month so far this year, if not twice. The food in Colombia is amazing, but because I’m on the road so frequently I’ve had to scale back on how much I let myself indulge when I’m gone, even if it means missing out on arepas, empanadas, patacones, and all the other delicious treats. There’s only one thing that I can’t resist having at least once per trip: Limonada de Coco. It definitely falls into the indulgence category, but it’s too good to pass up.

Colombian Limonada de Coco {Katie at the Kitchen Door}

Colombian Limonada de Coco {Katie at the Kitchen Door}

Limonada de Coco is basically a coconut and limeade smoothie. It’s incredibly simple to make – all you need is fresh lime juice, coconut milk, sugar, ice, and a good blender – but the end result is one of the most heavenly, refreshing, craveable hot-weather drinks I’ve ever tried. I usually describe it to friends or coworkers that I’m convincing to order one as “like drinking key lime pie.” Cold and frothy and rich, with just a touch of sweetness and lime, it’s perfection. And too easy not to try at home this summer. I don’t think a splash of rum would be amiss in this, but try it without first – I think its simplicity and purity is part of its charm. But once you’ve given it a chance unadulterated, let me know how the rum thing goes.

Like what you just read? Subscribe to Katie at the Kitchen Door in the box on the right, on Feedly or Bloglovin‘, or follow along on Facebook, Twitter, Pinterest, Instagram, or Google+. Thanks for reading!

Colombian Limonada de Coco {Katie at the Kitchen Door}

Print

Colombian Limonada de Coco

One of my favorite treats in Colombia – a super-refreshing, icy cold coconut and lime smoothie.

Recipe sourced via My Colombian Recipes and Smitten Kitchen.

  • Author: Katie at the Kitchen Door
  • Yield: 3-4 1x

Ingredients

Scale
  • 1 can of full-fat coconut milk, unshaken
  • 1/3 c. freshly squeezed lime juice (from about 3 limes)
  • 4 TBS sugar
  • 1 1/2 c. ice cubes

Instructions

  1. Open the can of coconut milk and, if it has separated, use a spoon to scoop the heavier coconut cream off the top and into a blender. Then pour about half of the thinner coconut water into the blender. Reserve the rest of the coconut milk for another use. If the can has not separated enough such that you can scoop out the cream, just stir it up and use 2/3 of the can.
  2. Add the lime juice, sugar, and ice to the blender. Blend on high until very smooth. Taste and adjust the amount of lime juice or sugar to your liking. Serve cold.

Did you make this recipe?

Share a photo and tag us — we can't wait to see what you've made!


4 June 13, 2015 Cookbook

Book Club: What Katie Ate on the Weekend // Self-Saucing Mocha Pudding

What Katie Ate on the Weekend

The Book: Katie Quinn Davies of What Katie Ate has been one of the world’s most celebrated, successful food bloggers. Although she doesn’t post as much as she used to, when she does, it’s always a treat for the eyes – and for the tastebuds, if you get the chance to cook her food instead of just drooling over the photos. Her first, eponymous cookbook, was hugely popular and now, her second book, What Katie Ate on the Weekend has just launched in the US. The book is distinctively hers – Katie’s signature photography and writing style fills each of the 310 pages of the book. Her photography style – which is a bit metallic, with high-contrast editing, off-center styling, and strong shadows – is one of the few that I can recognize before seeing the photographer’s name. Her writing, too, is specific to her – verbose and friendly, as if writing a long and warm letter to a friend she hasn’t spoken with in a while. The two come together beautifully in a book that is quirky, warm, and playful, scattered with images and phrases from old advertisements, fun typography, and of course, delicious recipes. The food in What Katie Ate on the Weekend has a universal appeal – pancakes, crispy chicken tacos, burgers, chili, brownies, etc. – but everything is dressed up just enough to make it feel special. It’s casual food, easy to prepare and to serve to friends during weekend gatherings.

Self-Saucing Mocha Pudding {Katie at the Kitchen Door}

The Food: I feel a bit guilty about defaulting to something as simple as a self-saucing pudding to showcase this book, especially when there are so many beautiful and creative savory recipes included. But I was reading this book on a chilly, rainy Sunday afternoon, after an exhausting and emotionally overwhelming week, and nothing sounded better than melty, gooey, chocolate. Perhaps in the end, it’s appropriate for a book called What Katie Ate on the Weekend… as in fact it was exactly what I needed to close out my weekend. This is perhaps not the most memorable or special warm chocolate cake in the world, but it is really easy, and really chocolatey, and probably one of the better ways to satisfy an urgent chocolate craving. It’s a one bowl affair, and any baker will have all the ingredients on hand, meaning it’s only about 35 minutes from conception to digging into a piping hot bowl of gooey chocolate pudding with quickly melting ice cream. There won’t be leftovers.

Self-Saucing Mocha Pudding {Katie at the Kitchen Door}

Recipe Shortlist: Chocolate and Sour Cherry Hotcakes; Chorizo Rosti with Duck Eggs and Anchovy Mayo; Smoked Trout, Egg, and Potato Salad with Cider Mayo; Crispy Chicken Tacos with Creamy Slaw; Lamb Shank Pie; Truffle Beef Burgers with Creamy Mushrooms and Pancetta; Pretzels with Chocolate and Sea Salt; Double Chocolate Brownies with Salted Butterscotch and Cherries

Like what you just read? Subscribe to Katie at the Kitchen Door in the box on the right, on Feedly or Bloglovin‘, or follow along on Facebook, Twitter, Pinterest, Instagram, or Google+. Thanks for reading!

Disclosure: I received a review copy of What Katie Ate on the Weekend from Penguin Random House, but I was not otherwise compensated and all thought and opinions are my own.

Self-Saucing Mocha Pudding {Katie at the Kitchen Door}

Self-Saucing Mocha Pudding

Recipe from What Katie Ate on the Weekend. Serves 4.

  • 2/3 c. AP flour
  • 2 tsp baking powder
  • 4 TBS cocoa powder
  • 1/3 c. light brown sugar
  • 1 1/2 TBS espresso coffee
  • 7 TBS milk
  • 1 egg
  • 3 TBS butter, melted
  • 1 1/2 TBS creme de cacao or chocolate liqueur
  • ice cream, to serve

For the sauce:

  • 1/3 c. brown sugar
  • 4 tsp cocoa powder
  • 1 tsp espresso instant coffee powder
  • 1 c. boiling water
  1. Preheat the oven to 400°F. Butter a 4 cup capacity souffle mold or baking dish and set aside.
  2. Sift the flour, baking powder, and cocoa into a large bowl and whisk to combine. Whisk in the sugar. Add the espresso, milk, egg, melted butter, and creme de cacao and stir to thoroughly combine. Pour into the prepared baking mold and place on a rimmed baking sheet (important to catch drips).
  3. Mix the dry ingredients for the sauce (brown sugar, cocoa powder, and espresso instant coffee powder) together in a small bowl. Scatter evenly over the top of the batter, then pour the boiling water over the top.
  4. Bake for 25-30 minutes or until the pudding has risen and the sauce is bubbling up around the sides. Serve warm with ice cream.

Reprinted by arrangement with Avery Books, a member of Penguin Group (USA) LLC, A Penguin Random House Company. Copyright © Katie Quinn Davies, 2015.

2 June 8, 2015 Food

La Crema Pork and Pinot #2: Caramelized Pork Belly


Red-Wine Caramelized Pork Belly {Katie at the Kitchen Door}

Pork Belly at Home {Katie at the Kitchen Door}

It’s time for more pork and Pinot! If you remember, this summer I’m teaming up with La Crema wine to bring you a series of recipes pairing pork with their Pinot Noir. The first pairing was this Italian-inspired stuffed pork tenderloin – filled with mozzarella, prosciutto, and sage pesto. This time, we’re making a deliciously fatty, savory pork belly – the cut of meat used to make bacon. Pork belly is incredibly tasty (in small doses, only, please) and a bit of a food darling in a lot of major restaurants right now, especially given its importance in Asian and Latin cuisines. It takes a bit of time both to source and to cook at home, but the end result is completely worth it.

Red-Wine Caramelized Pork Belly {Katie at the Kitchen Door}

Sourcing pork belly can be a bit of a challenge, depending on where you live. I’m lucky to live in a part of the country where I can get almost anything within a half mile’s walk. Pig trotters? Around the corner. ‘Nduja? At the wine store across the street. Fresh morels? At the closest Wholefoods, if you’re willing to pay an arm and a leg for them. Dried chiles, palm sugar, and pretty much any spice you’ve ever heard of? All available at Christina’s. So for me, finding fresh, uncured pork belly was a matter of walking 45 steps around the corner to Savenor’s and handing over $12 for a gorgeous, 2 lb. slab of heritage pig. But I know it’s not that easy for everyone. Your local butcher or Wholefoods is a good place to start – if they don’t carry pork belly regularly, they may be able to special order some for you. You can also order it online and have it shipped to you, but it’s a bit pricier.

Red-Wine Caramelized Pork Belly {Katie at the Kitchen Door}

There are a lot of different ways to prepare pork belly, taking anywhere from 30 minutes to 5 days. There are also a lot of different ways it can turn out: roasted whole until it’s falling apart, sandwich-sized slabs with shatteringly crispy skin, small caramelized pieces with a candy-like coating… or as bacon, of course. I decided to take the longer route this time – although not the 5 day version, I’ll admit. To prepare the belly, I put together a rub of brown sugar, paprika, cayenne, and salt and let it marinate in the fridge overnight. Then, in the morning, I threw it in the oven for a few hours until the meat was completely tender and a lot of the fat had rendered out. After roasting, the belly sits in the fridge until firm again, and then gets used in the recipe of your choice. Although it requires advance planning for the chilling and roasting times, this method is not particularly labor intensive – I probably spent longer removing the skin from the belly than I did with all the other steps.

Red-Wine Caramelized Pork Belly {Katie at the Kitchen Door}

Red-Wine Caramelized Pork Belly {Katie at the Kitchen Door}

Post chilling, I divided my belly into two big pieces. Half was eventually destined for Banh Mi sandwiches, but for now, let’s talk about what I did with the other half – Red Wine Caramelized Pork Belly slices. I’ve had candied pork belly at bars before – the fatty, salty, sweet slices are highly craveable with just about anything you might want to drink. Since I was making these to pair with Pinot Noir, I decided to play up the pairing and candy the pork belly in a red wine caramel sauce. I served the sticky, delicious slices alone, as a simple and indulgent appetizer with a glass of La Crema Monterey Pinot Noir. All the flavors of the Pinot Noir are echoed in the pork belly, and amplified by the rich, umami flavors of the belly itself.

For full instructions and the recipe for Red Wine Caramelized Pork Belly, head over to the La Crema Blog!

This is a sponsored conversation written by me on behalf of La Crema. The opinions and text are all mine.

Like what you just read? Subscribe to Katie at the Kitchen Door on Feedly or Bloglovin‘, or follow along on Facebook, Twitter, Pinterest, Instagram, or Google+. Thanks for reading!

190 June 2, 2015 Food

A House // Sweet Potato and Coconut Milk Soup with Brown Rice and Lentils

Sweet Potato and Coconut Milk Soup with Brown Rice and Lentils {Katie at the Kitchen Door}

This post was supposed to be a cocktail. Something springlike and sparkling because we just bought a house. And, well, it’s worth celebrating. The problem is it’s 45° and raining, I’m leaving on another 10-day trip to Latin America in 36 hours, and the idea of packing and moving and fixing all of the things in the house that need fixing has my brain in overdrive. Don’t get me wrong – I’m excited and I know this is a huge milestone – it’s just all a little overwhelming right now. So a cocktail, however springlike and celebratory, is not what I needed today. What I needed was something comforting, energizing, nourishing, and whole. Something to warm me up and keep me focused. Like this soup.

Sweet Potato and Coconut Milk Soup with Brown Rice and Lentils {Katie at the Kitchen Door}

Sweet Potato and Coconut Milk Soup with Brown Rice and Lentils {Katie at the Kitchen Door}

This soup, which is lightly adapted from Sprouted Kitchen Bowl + Spoon, is healthy soul food  (because another thing I need right now is to be especially careful about what I put in my body). It’s based on a mixture of gently spiced sweet potatoes and coconut milk, served with a few spoonfuls of crisped black lentils to give it more staying power. I followed the original recipe fairly closely, only adding the step of roasting the sweet potatoes for a bit more sweetness and depth, and serving the whole thing over a bowl of brown rice for extra body. The flavors in this are balanced just right – I often find vegetable purees too spicy or too one-dimensional, but this uses a good amount of fresh ginger, and just a touch of turmeric and curry powder. You can taste the coconut but it doesn’t overwhelm the other flavors, and the soup has a good body. It’s a keeper. And despite the fact that it’s the first day of June and Sweet Potato Soup sounds like something you should make in October, it’s exactly what I want to eat right now.

Sweet Potato and Coconut Milk Soup with Brown Rice and Lentils {Katie at the Kitchen Door}

Sweet Potato and Coconut Milk Soup with Brown Rice and Lentils {Katie at the Kitchen Door}

I promise I’ll tell you all about the house soon. In fact, you might even get tired of hearing about it, given that we’re planning on remodeling practically everything, and I’m sure I’ll be coming here to share our victories and challenges. And maybe later this summer – once we have some furniture and a place to enjoy a cocktail – we’ll get to that festive, sparkling drink.

Like what you just read? Subscribe to Katie at the Kitchen Door in the box on the right, on Feedly or Bloglovin‘, or follow along on Facebook, Twitter, Pinterest, Instagram, or Google+. Thanks for reading!

More nourishing soups…

Spicy Chorizo Soup with Italian Couscous and Mole Sauce {Katie at the Kitchen Door}

Spicy Chorizo Soup with Italian Couscous

Lentil and Roasted Tomato Soup with Saffron

Black Bean Soup with Roasted Poblano

Sweet Potato and Coconut Milk Soup with Brown Rice and Lentils {Katie at the Kitchen Door}

Sweet Potato and Coconut Milk with Brown Rice and Lentils

Slightly adapted from Sprouted Kitchen Bowl + Spoon. Serves 6.

  • 2-3 large sweet potatoes, peeled and cut into 1/4 inch thick slices
  • 2 TBS olive oil
  • sea salt and pepper to taste
  • 3 TBS coconut oil, divided
  • 1 large yellow onion, peeled and diced
  • 1 tsp ground turmeric
  • 1 TBS curry powder
  • 2 TBS freshly grated ginger (from a 1 inch piece of ginger)
  • 4 c. vegetable or chicken broth
  • 3/4 c. orange juice
  • 1 c. coconut milk
  • 2 large shallots, peeled and minced
  • 1 1/2 c. cooked black lentils
  • 3 c. cooked brown rice
  • yogurt, for serving
  • fresh minced cilantro, for serving
  1. Preheat the oven to 400°F. Toss the sweet potatoes with the olive oil, salt, and pepper and spread out on a large rimmed baking sheet. Roast until tender when pierced with a fork, about 25 minutes. Remove from the oven and set aside.
  2. Melt 2 TBS of the coconut oil over medium heat in a large saucepan. Add the onion and saute until translucent, about 3 minutes. Add the turmeric, curry powder, and ginger and saute until fragrant, 2 minutes more. Add the roasted sweet potato and broth and bring to a boil, then reduce heat to a simmer. Simmer for 2o minutes, then remove from heat and carefully transfer to a blender. Add the orange juice and coconut milk and blend until very smooth. Season to taste with salt and pepper. Set soup aside.
  3. In a small frying pan, melt the remaining 1 TBS of coconut oil over medium heat. Add the shallots and saute until translucent, about 2 minutes. Add the cooked lentils and saute until crispy, another 2 minutes. Remove from the heat.
  4. Scoop a 1/2 cup of brown rice into each bowl. Pour soup over the rice, then top with lentils, yogurt, and cilantro.


0 May 28, 2015 Breakfast

Chocolate Almond Granola Bites

Chocolate Almond Granola Bites {Katie at the Kitchen Door}

Chocolate Almond Granola Bites {Katie at the Kitchen Door}

I’ve learned by now that there’s really no way around my post-lunch chocolate cravings. I’ve tried ignoring them, or substituting something healthier, and sometimes that works for a few days, but it inevitably ends in a huge chocolatey binge at some point.  I’m just a person who needs chocolate, and that’s that. But since I’m determined to rein in the travel-driven overeating of the last few months, I’m currently searching for less-bad-for-you, more-portion-controlled chocolate treats.

Chocolate Almond Granola Bites {Katie at the Kitchen Door}

For the past few months my chocolate fix has been to go down to the lobby shop and fill a bag with chocolate covered almonds, chocolate covered raisins, and white chocolate pretzels. This is a bad, bad habit, because even if I tell myself a lot of times that the bag of chocolate-covered goodies will last me all week, I always eat it in one sitting, staring at my computer screen, during that 3pm work slump. (Is that a universal thing? It seems to be at my office). And then I usually feel sick, because I usually overfill the bag.

Chocolate Almond Granola Bites {Katie at the Kitchen Door}

So taking inspiration from this habit, I came up with a recipe that hits the same notes but is a bit less indulgent: Chocolate Almond Granola Bites. Using oats, rice cereal, a mix of Blue Diamond Dark Chocolate and Sea Salt Almonds, almond butter, honey, and of course, chocolate, I whipped up a batch of these bars, and then cut them into very manageable pieces. They are still chocolatey and satisfying but the almonds, almond butter, and oats give them more staying power and nutritional value. I also used unsweetened chocolate, which made me feel extra virtuous. I’m not saying that eating one of these is the same as eating a bag of chocolate covered pretzels… but it does the trick!

This post is sponsored by Blue Diamond Almonds. All opinions are honest and my own.

Like what you just read? Subscribe to Katie at the Kitchen Door in the box on the right, on Feedly or Bloglovin‘, or follow along on Facebook, Twitter, Pinterest, Instagram, or Google+. Thanks for reading!

Chocolate Almond Granola Bites {Katie at the Kitchen Door}

Chocolate Almond Granola Bites

Makes 16 bars.

  • 1/4 c. almond butter
  • 1/2 c. honey
  • 3 oz. unsweetened chocolate
  • 1 1/2 c. rolled oats
  • 1 1/2 c. puffed rice cereal
  • 1/2 c. Blue Diamond Sea Salt Almonds
  • 1/2 c. Blue Diamond Dark Chocolate Almonds
  • 16 white-chocolate covered pretzels
  1. Preheat the oven to 350°F. Line an 8×8 inch baking pan with parchment paper and set aside.
  2. In a small saucepan, combine the almond butter, honey, and chocolate. Stirring, melt the liquids over low heat until the mixture is smooth and even in color. Remove from the heat
  3. Add the oats, rice cereal, and almonds to a large bowl and stir to combine. Pour the chocolate-honey mixture over the cereal and stir to thoroughly coat the cereal with the chocolate. Let cool to room temperature, then press the mixture firmly into the prepared pan. Press the white-chocolate covered pretzels on top of the mixture, spacing them evenly.
  4. Bake the granola bites for 15 minutes, then remove from the oven. Let cool completely before slicing and serving.

5 May 21, 2015 Food

Ecuadorian Locro – Creamy Potato, Cheese and Fava Bean Soup

Ecuadorian Locro - Creamy Potato, Cheese, and Fava Bean Soup {Katie at the Kitchen Door}

It will come as no surprise to most of you that one of my favorite things about my frequently overwhelming travel schedule is all of the opportunities it affords me to eat delicious food. In the past 14 months I have been on 12 international trips, mostly for work, visiting Hong Kong, Ecuador, Canada, Italy, Malaysia, Ireland, Colombia, and Chile. Although right now thinking about it is sort of exhausting (particularly since I just got off a plane from Chile and I get back on one to Colombia in less than 2 weeks), I know how lucky I am to have these experiences.

Ecuadorian Locro - Creamy Potato, Cheese, and Fava Bean Soup {Katie at the Kitchen Door}

I can tell you with certainty that none of these things are good for my waistline, but the three things I love the most about eating in Latin America are:

  1. The juices (yes, please, I would like fresh passionfruit juice with every meal)
  2. Enormous avocados served with everything
  3. The soups

The third one was a little bit of a surprise to me – while I’d eaten plenty of Mexican food and Latin street food before I first traveled to Latin America, I had never even heard of all the incredible Latin soups out there before my first trip to Ecuador. I generally think of Latin America is a place with a pretty warm climate, which is why I never used to connect soup to Latin cuisine. Now that I’ve spent so much time in Ecuador, Colombia, and Chile, though, I can tell you that those high altitude nights can be seriously chilly… and a bowl of hearty, potato-based soup is exactly what you want to eat.

Ecuadorian Locro - Creamy Potato, Cheese, and Fava Bean Soup {Katie at the Kitchen Door}

Ecuadorian Locro - Creamy Potato, Cheese, and Fava Bean Soup {Katie at the Kitchen Door}

A while back I posted my favorite Colombian soup, Ajiaco Bogotano, a thick chicken and potato stew served with generous amounts of avocado and capers. Now, since there are finally fresh fava beans in the markets, it’s time for my favorite Ecuadorian soup: Locro. Locro de papa is an Ecuadorian soup based on the combination of potatoes and cheese – pretty much my two favorite food groups. I’ve had different variations of it in different parts of the country, but my favorite bowl was served in a tiny town outside the quilotoa lagoon, a gorgeous aquamarine lake in a volcanic crater in the Andes. I was actually miserable during my hike down into and back up from the lagoon, the only time I really suffered from altitude sickness, but I think that’s what made the bowl of soup waiting for me at the top so memorable. After two hours of counting my steps in sets of 50, holding back tears and barely able to breathe, sitting down at the long wooden bench and holding a steaming bowl of soup in my frozen hands was heaven. This bowl of locro incorporated lots of fresh fava beans into the usual potato-cheese combination, and now that’s how I like it best. Make it when you need a little bit of comfort on a spring evening.

Like what you just read? Subscribe to Katie at the Kitchen Door in the box on the right, on Feedly or Bloglovin‘, or follow along on Facebook, Twitter, Pinterest, Instagram, or Google+. Thanks for reading!

Ecuadorian Locro - Creamy Potato, Cheese, and Fava Bean Soup {Katie at the Kitchen Door}

Ecuadorian Locro – Creamy Potato, Cheese, and Fava Bean Soup

Serves 4-6. Adapted from Laylita’s Recipes and The Kitchn. Serves 4-6.

  • 2 TBS olive oil
  • 1 small onion, peeled and diced
  • 2 garlic cloves, peeled and minced
  • 2 tsp dried oregano
  • 1 tsp achiote powder
  • 2 large russet potatoes, peeled and cut into 1/4 inch dice
  • 4 c. chicken stock
  • 2 c. water
  • 2 lbs. fava beans in their pods
  • 1 c. whole milk or 1/2 c. heavy cream
  • salt and pepper to taste
  • 6 oz. crumbled feta or queso fresco
  • 2 avocados, peeled and sliced, for serving
  1. In a large saucepan, heat the olive oil over medium heat. Add the onion and saute until soft and translucent, about 5 minutes. Add the garlic, oregano, and achiote powder and saute until fragrant, another 2 minutes. Add the diced potato and saute, stirring frequently, for 5 minutes. Add the chicken stock and water, bring to a boil, then reduce to a simmer. Let soup simmer, uncovered, until potatoes are very soft, about 30 minutes.
  2. While the soup is cooking, blanch the fava beans. Bring a large pot of salted water to a boil. Remove the fava beans from their pods and blanch in the boiling water for 2-3 minutes, then remove with a slotted spoon and run under cold water. As soon as the beans are cool enough to handle, use your thumbnail to split the outer, pale green skin from the bean and pop the inner, bright green beans into a bowl. Set the peeled beans aside.
  3. When the potatoes in the soup are tender, use a potato masher to roughly mash the potatoes in the soup until soup is thick with just a few chunks of potato. Add the peeled fava beans and cook for 2 more minutes, then remove from the heat. Stir in the milk or cream, the crumbled cheese, and season to taste with salt and pepper. Cheese will not fully melt into the soup but should remain slightly chewy. Serve with the sliced avocado.

2 May 18, 2015 Breakfast

Full English Breakfast Sandwich with CBC English Muffins

Full English Breakfast Sandwich with Cobblestone English Muffins {Katie at the Kitchen Door} #sponsored

Full English Breakfast Sandwich with Cobblestone English Muffins {Katie at the Kitchen Door} #sponsored

I think we all have breakfast phases. Personally, I tend to go through a cycle – yogurt and berries; peanut butter and banana oatmeal; kale and mango smoothie; egg, ham and cheese breakfast sandwich; bran muffin and a latte. Repeat. Which phase I’m in (and for how long) is a little bit weather dependent (green smoothies for the summer, oatmeal for the fall) and a little bit schedule dependent (bran muffin and a latte from the cafe downstairs tends to come up a lot when I’m totally slammed at work and need to be in the office early) Because breakfast is part of a morning routine that, for many of us, is executed on auto-pilot, it’s easy to fall into a breakfast rut. But breakfast has such wonderful possibilities as a meal, that I think it’s worth thinking outside the box a little to avoid breakfast boredom.

Full English Breakfast Sandwich with Cobblestone English Muffins {Katie at the Kitchen Door} #sponsored

Full English Breakfast Sandwich with Cobblestone English Muffins {Katie at the Kitchen Door} #sponsored

Cobblestone Bread Co. recently asked us to try out their newest line of English muffins and bagels, which I took as a welcome invitation to come up with a few new ideas for our breakfast routine. English muffins aren’t on my normal grocery list, but perhaps they should be. They’re incredibly convenient, and are a bit of a blank canvas as far as preparing interesting breakfasts goes. The first CBC muffin I sampled I prepared simply, reminding myself of the pleasure of a good, soft, English muffin, faintly toasted with a pat of salted butter and some homemade strawberry jam.

Full English Breakfast Sandwich with Cobblestone English Muffins {Katie at the Kitchen Door} #sponsored

Full English Breakfast Sandwich with Cobblestone English Muffins {Katie at the Kitchen Door} #sponsored

As Trevor and I continued sampling buttered CBC English muffins (for “research purposes,” of course), we chatted about what recipe we might be able to contribute to the already rich collection of breakfast sandwich recipes out there. We wanted something new and a little different to shake up our breakfast routine, but that was still quick to make and filling on a busy weekday morning. I was toying with the idea of a Mexican-inspired breakfast sandwich, when Trevor pointed out that it is, after all, an English muffin… why not make an English sandwich? The most typical (or at least the most famed) English breakfast is a “full English breakfast” or a “fry up” – a plate consisting of eggs, bacon, sausage, black pudding, fried tomato, fried mushrooms, and baked beans. To convert this classic meal into a sandwich easy enough for a weekday, portable enough to take on the go, and that was less likely to give you a heart attack if eaten more than once a week, we opted for just one form of meat, and to keep the tomato raw for just a little freshness. Our sandwich, which was a huge success in our eyes, is prepared with one toasted Cobblestone Bread Co. English muffin, a handful of sautéed mushrooms, a fried egg, a few slices of fried black pudding, a slice of Cheddar cheese, and a juicy slice of fresh tomato to top it off. Not exactly light, but certainly filling for a busy day, and definitely not boring.

Full English Breakfast Sandwich with Cobblestone English Muffins {Katie at the Kitchen Door} #sponsored

Full English Breakfast Sandwich with Cobblestone English Muffins {Katie at the Kitchen Door} #sponsored

A quick note about blood sausage: it might sound a little off-putting (which is perhaps why they call it black pudding), but it’s really mild and delicious – and it totally makes this sandwich. Soft and slightly crumbly, with a hint of allspice flavor faintly reminiscent of Christmas festivities, it’s far less salty than other breakfast sausages, and much more tender. I’m lucky enough to have a good butcher around the corner from my house, but if you can’t find it near you, feel free to replace it with a smaller amount of another sausage or a slice of bacon.

Check out more ways to make breakfast exciting again here!

Like what you just read? Subscribe to Katie at the Kitchen Door in the box on the right, on Feedly or Bloglovin‘, or follow along on Facebook, Twitter, Pinterest, Instagram, or Google+. Thanks for reading!

Compensation for this post was provided by Cobblestone Bread Co. via AOL Media.  The opinions expressed herein are those of the author and are not indicative of the opinions or positions of Cobblestone Bread Co. or AOL.

Full English Breakfast Sandwich with Cobblestone English Muffins {Katie at the Kitchen Door} #sponsored

Full English Breakfast Sandwich

Makes 1 sandwich.

  • 2 TBS salted butter
  • 1 Cobblestone Bread Co. English muffin, sliced in half lengthwise
  • 4 button mushrooms, thickly sliced
  • sea salt and pepper
  • 2 inch piece of black pudding, sliced into 4 pieces, skin removed
  • 1 large egg
  • 1 slice of cheddar cheese
  • 1 slice of fresh tomato
  1. Melt 1 TBS of the butter in a small frying pan over medium heat. Place the CBC English muffin halves sliced side down in the melted butter and toast until golden brown, about 2 minutes. Remove from the heat and set aside.
  2. Add the sliced mushrooms to the pan and saute until golden brown all over, about 5 minutes. Season generously with salt and pepper and place the cooked mushrooms on top of the bottom half of the English muffin.
  3. Add the sliced black pudding to the pan and cook until dark black all the way through, about 2 minutes on each side. Place the slices on top of the mushrooms.
  4. Melt the remaining 1 TBS of butter in the pan and crack the egg into it. Fry the egg to your liking, season with salt and pepper, and then place on top of the black pudding. Top with the cheddar cheese, the tomato slice, and the top of the English muffin. Compress slightly and eat immediately.

0 May 16, 2015 Italian

La Crema Pork and Pinot #1 // Prosciutto, Mozzarella, and Sage Pesto Stuffed Pork Tenderloin

Mozzarella, Prosciutto, and Sage Pesto Stuffed Pork Tenderloin {Katie at the Kitchen Door}

Mozzarella, Prosciutto, and Sage Pesto Stuffed Pork Tenderloin {Katie at the Kitchen Door}

I’m back in Latin America this week, and headed out now to enjoy a day of wine tasting in Chile (work travel isn’t so bad…). But before I go, I wanted to share some other wine-related news: this summer, I’ll be developing four recipes for La Crema Wines featuring pairings of pork and Pinot Noir. Since I’ve been traveling so much and am always discovering new flavors and cooking styles, the series is going to have a global theme. The first stop on our Pork and Pinot tour – Italy.

Mozzarella, Prosciutto, and Sage Pesto Stuffed Pork Tenderloin {Katie at the Kitchen Door}

Mozzarella, Prosciutto, and Sage Pesto Stuffed Pork Tenderloin {Katie at the Kitchen Door}

This stuffed and rolled pork tenderloin may not be strictly traditional, but it takes all of its inspiration from Italian cuisine. The tenderloin is butterflied and filled with layers of sage and rosemary pesto, fresh mozzarella cheese and prosciutto, then rolled up and roasted to juicy perfection. Slicing into the finished tenderloin reveals a beautiful pink, white, and green spiral, and the herbal, salty flavors of the filling permeate each bite of pork. It’s an entrée that looks and tastes “fancy,” but really requires very little effort – the perfect dish for impressing dinner guests. Serve it alongside a bottle of La Crema Sonoma Coast Pinot Noir, and perhaps a platter of simply roasted vegetables, and your next dinner party menu is taken care of.

Stay tuned for more Pork and Pinot! Next up, Vietnam …

Find the recipe for the Prosciutto, Mozzarella, and Sage Pesto Stuffed Pork Tenderloin over on the La Crema blog!

Disclaimer: This post is sponsored by La Crema. All opinions are honest and my own.

Like what you just read? Subscribe to Katie at the Kitchen Door on Feedly or Bloglovin‘, or follow along on Facebook, Twitter, Pinterest, Instagram, or Google+. Thanks for reading!

1 May 14, 2015 Dessert

Peanut Butter Croquembouche

Peanut Butter Croquembouche {Katie at the Kitchen Door}

Peanut Butter Croquembouche {Katie at the Kitchen Door}

Tuesday was Trevor’s 26th birthday. To celebrate, we made a croquembouche, partly because croquembouche is fun to say, partly because it’s elaborate and over-the-top and oh-so-French, all things that Trevor likes, and partly because peanut-butter pastry cream stuffed cream puffs stacked in a tower and stuck together with caramel sauce is a really delicious prospect. It really wasn’t so hard – pate a choux is easy to make (and it’s extremely satisfying to watch the dough puff up in the oven) and pastry cream is simple as long as you are attentive and patient while tempering your eggs. The assembly is a bit tedious, but I’d recommend getting a birthday boyfriend with extreme attention to detail (and no regard for his fingertips / high willingness to touch hot caramel) to do that for you.

Peanut Butter Croquembouche {Katie at the Kitchen Door}

Peanut Butter Croquembouche {Katie at the Kitchen Door}

Trevor, I am so happy that we have spent our last 7 birthdays together. I can’t think of anyone else that I’d rather celebrate. I love you and I think this year will bring even more great things for us – our first house (!!), more travels, and who knows what other goodness. I’m keeping this short and sweet since, as per usual, I have to get on another plane, but really. I love you. Happy Birthday. Rock on.

Like what you just read? Subscribe to Katie at the Kitchen Door in the box on the right, on Feedly or Bloglovin‘, or follow along on Facebook, Twitter, Pinterest, Instagram, or Google+. Thanks for reading!

Peanut Butter Croquembouche {Katie at the Kitchen Door}

Peanut Butter Croquembouche

Pastry cream recipe from How Sweet Eats. Cream puff recipe from Food Network.

For the pastry cream:

  • 1/2 c. granulated sugar
  • 1/4 c. cake flour
  • 1/2 tsp salt
  • 4 large egg yolks
  • 1 1/2 c. whole milk
  • 1/4 c. smooth peanut butter
  • 1 tsp vanilla extract
  • 1 c. heavy cream
  1. In a medium bowl, whisk together the sugar, flour, and salt until evenly combined. In a separate bowl, whisk together the eggs. Add the sugar mixture to the eggs a bit a time, whisking until smooth between additions. When you have finished adding the sugar mixture, the eggs should be pale yellow and smooth.
  2. Heat the milk over medium heat in a medium saucepan, just until small bubbles begin to appear at the edges of the pan. Do not bring the milk to a boil. Remove the milk from the heat and very slowly drizzle the milk into the eggs, whisking the eggs vigorously as you do so. Pour the tempered custard back into the saucepan and return to medium-low heat. Cook the custard until thickened, about 3-5 minutes, whisking vigorously the whole time. Remove the custard from the heat. Immediately stir in the peanut butter until it is melted, then whisk in the vanilla. Transfer to a bowl, cover with plastic wrap so that the plastic wrap touches the surface of the pastry cream, and refrigerate until fully chilled, at least 2 hours.
  3. Just before filling the cream puffs, whip the heavy cream into soft peaks. Fold the whipped cream into the pastry cream until it is evenly mixed.

For the cream puffs:

  • 1 stick salted butter
  • 1 c. water
  • ½ tsp salt
  • 1 1/2 tsp sugar
  • 1 c. flour
  • 4 eggs
  1. Preheat the oven to 425°F. Place the butter, water, salt, and sugar in a medium saucepan. Bring to a boil over medium heat. As soon as it boils, remove from the heat and add the flour all at once, stirring vigorously to incorporate. Stir until the flour is fully incorporated, then return the pot to the heat and cook for 60-90 seconds, beating hard the whole time, until the water has evaporated from the dough to the point that the dough leaves a thin film on the bottom of the pot. Remove from the heat and transfer the dough to a bowl.
  2. Beat the egg yolks into the dough one at a time, thoroughly mixing between additions. When you have added the last egg yolk, the dough should be smooth and shiny, and drip slowly from the spoon when lifted out of the bowl. Line two baking sheets with parchment paper. Use a tablespoon to scoop rounds of dough onto the parchment paper, leaving at least 2 inches between them. Use your finger to flatten any points as they will burn. Alternatively, you can spoon the dough into a pastry bag fitted with a large tip and pipe rounds onto the baking trays, but I found this more difficult than simply scooping them.
  3. Bake the cream puffs for 15 minutes at 425°F, then reduce the heat to 375°F and bake for another 20 minutes, until puffed up and lightly browned all over. Remove from the oven and let cool on a cooling rack.

To assemble:

  1. Spoon the pastry cream into a pastry bag fitted with a medium, straight tip. Fill the cream puffs by inserting the tip of the pastry bag into the bottom of each cream puff (use a knife to cut a small hole if necessary) and filling until the cream puff is heavy and you can’t add any more cream without it coming back out. Set the filled cream puffs aside.
  2. Prepare a caramel sauce for assembling the croquembouche: pour a thin, even layer of sugar (you will use between ¾ and 1 ½ cups, depending on the size of your pan) into a non-stick frying pan. Heat over medium-low heat (do not stir). When the sugar begins to melt and brown in places, use a spatula to carefully push the melted sugar into the unmelted sugar a bit at a time, until the whole pan is melted. Bring to a medium brown color, then immediately remove from the heat.
  3. Have a bowl of ice water at the ready in case of burns from the hot caramel. Very carefully dip the bottom and sides of the filled cream puffs into the caramel (or use the spatula to dab it on) and immediately place the cream puffs on a cake stand or other serving vessels (the caramel will harden quickly so move fast). Place the first layer of cream puffs in a circle, using about 6 cream puffs to complete the circle. The second layer should have 5 cream puffs, then 4, etc., until you have used up all the cream puffs and completed the tower. If the caramel hardens while you are assembling, you can gently reheat it until it is molten again. Drizzle any extra caramel on top of the croquembouche. Serve within 4 hours of assembling.
  • « Go to Previous Page
  • Go to page 1
  • Interim pages omitted …
  • Go to page 10
  • Go to page 11
  • Go to page 12
  • Go to page 13
  • Go to page 14
  • Interim pages omitted …
  • Go to page 57
  • Go to Next Page »

Primary Sidebar

Subscribe!

Get creative recipes and menu ideas delivered straight to your inbox.

Most Popular

A House // Sweet Potato and Coconut Milk Soup with Brown Rice and Lentils

Monthly Fitness Goals: July // Homemade Spinach Wraps with Chopped Greek Salad

A New Job // Classic Seven-Layer Bars

Butternut Squash Carbonara with Fried Sage and Caramelized Onions

Happy Birthday, Trevor! // Peanut Butter Fudge

Cookbook Review and Giveaway: Home Made Winter

Drizly

Please note!

Full disclosure: if you purchase anything at Amazon using the above links or any other links to Amazon on this site, I will receive a small commission. Just so you know!

Copyright© 2025 · Cookd Pro Theme by Shay Bocks

This site uses cookies: Find out more.