• Skip to primary navigation
  • Skip to content
  • Skip to primary sidebar
  • Home
  • Recipes
  • Features
    • Cookbook Reviews
    • Ingredient of the Week
    • Sunday Dinner
    • Fitness Goals
  • Travel
  • About
    • Privacy Policy
    • Cookie Policy
  • Work With Me

Katie at the Kitchen Door

Globally-inspired, seasonal recipes

Blog Page

Book Club: Every Grain of Rice // Gong Bao Chicken with Peanuts

0 February 9, 2013 Asian and Indian

Book Club: Every Grain of Rice // Gong Bao Chicken with Peanuts

Gong Bao Chicken with Peanuts {Katie at the Kitchen Door}

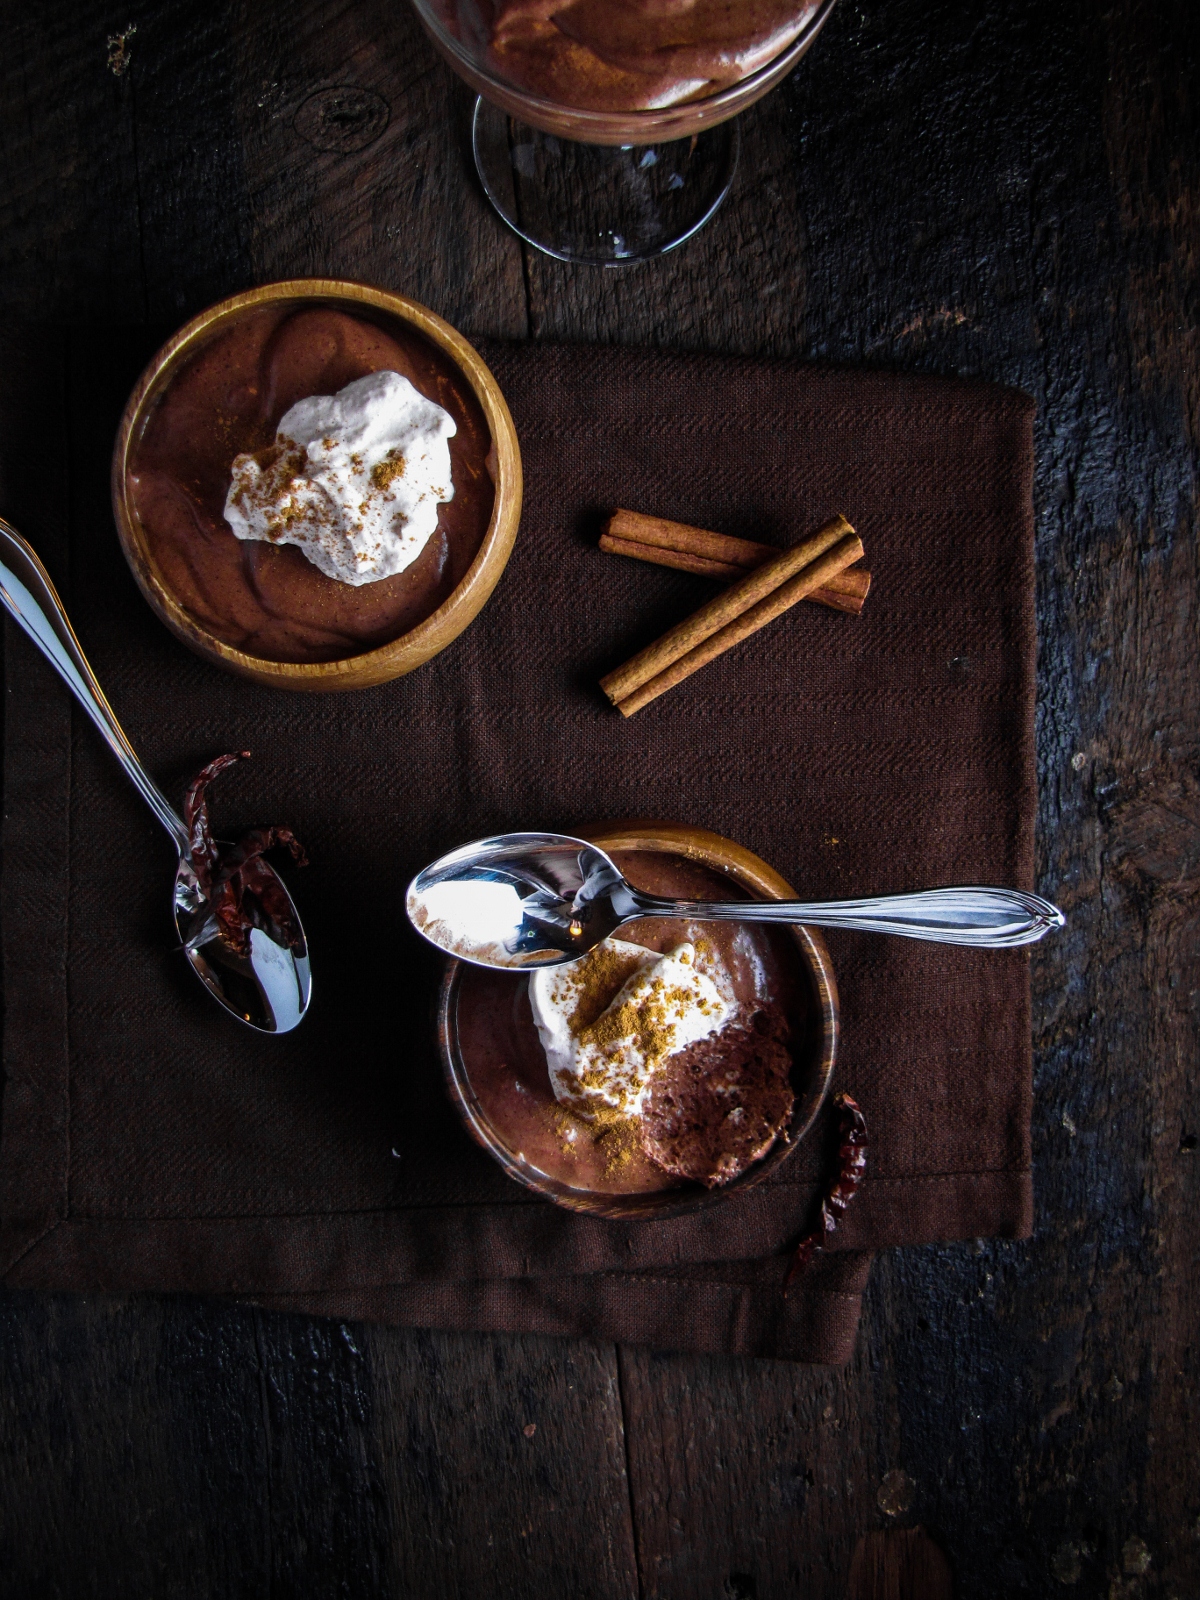
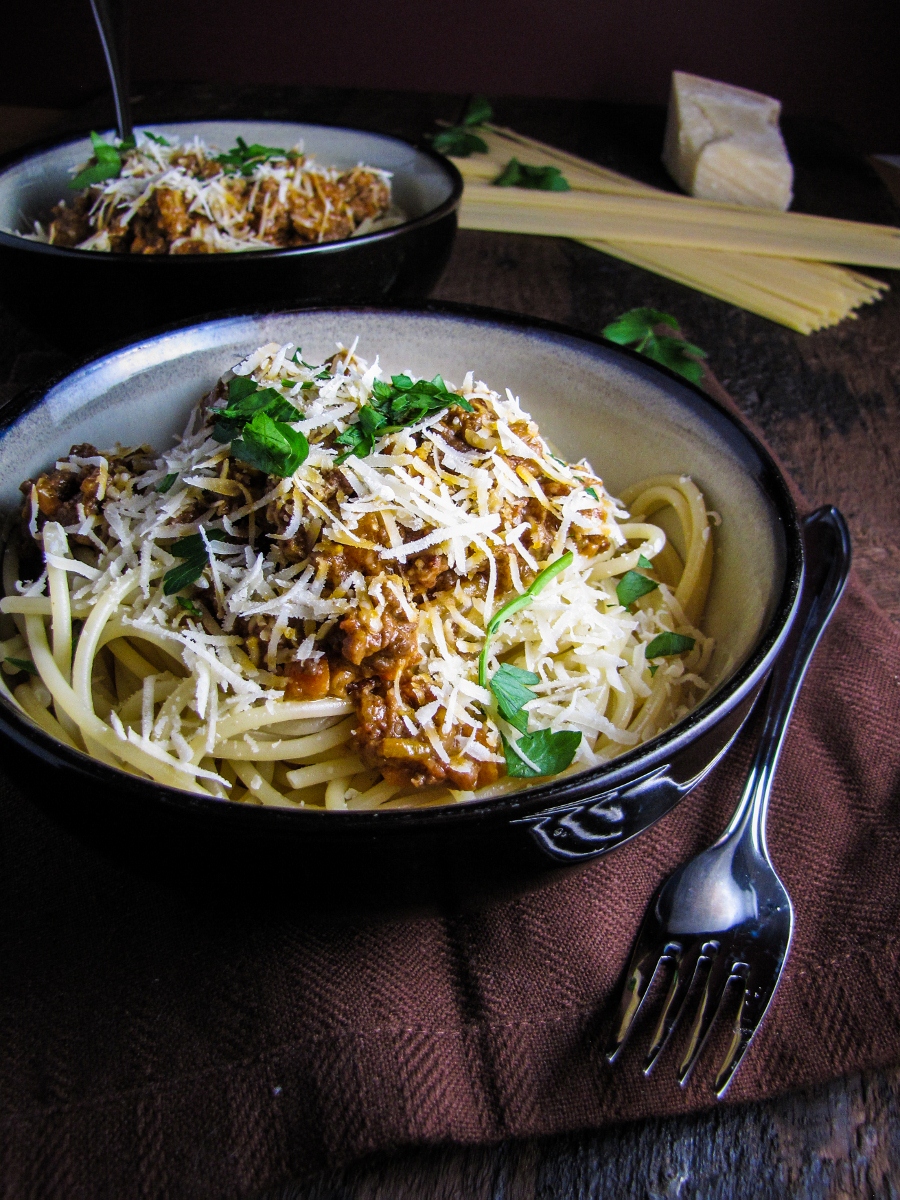
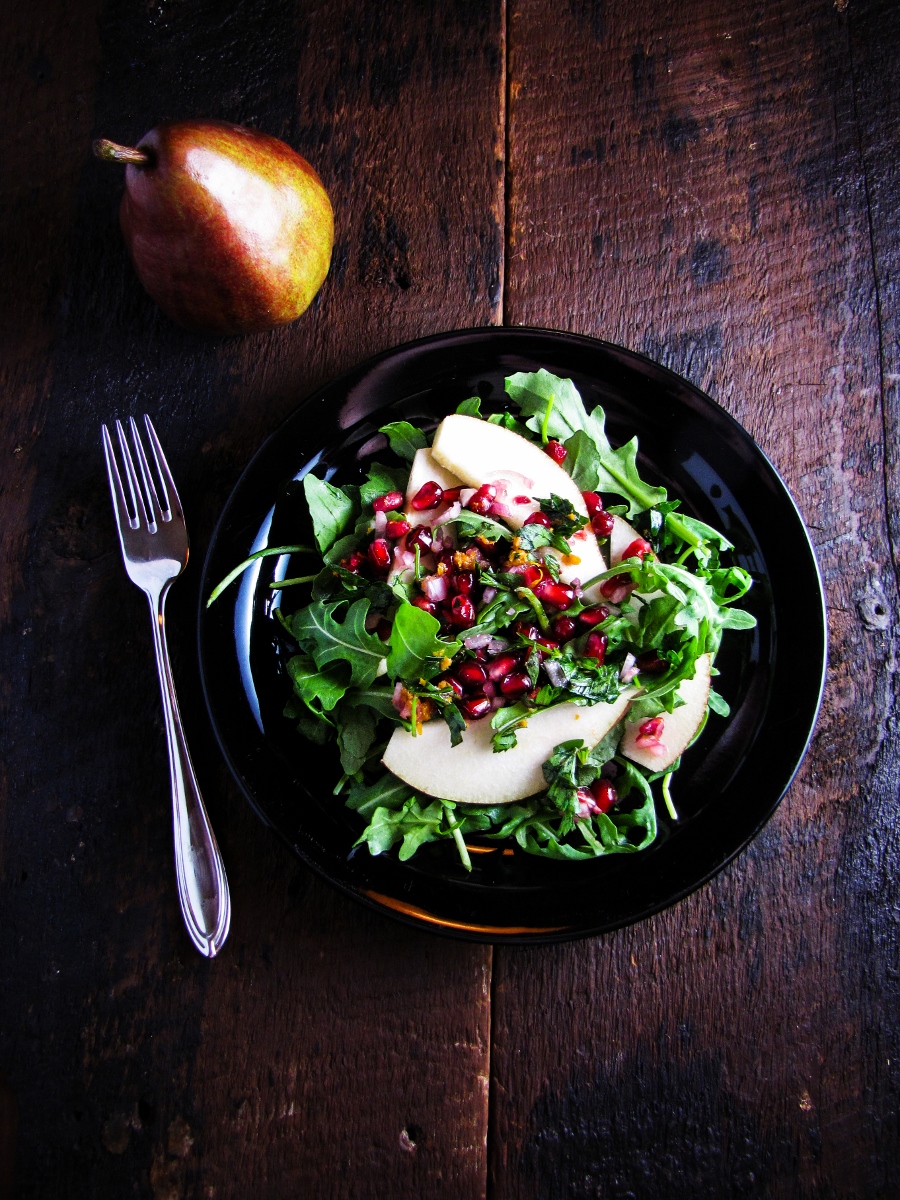
I’ve always been a bit of a bookworm. When I was at the height of my reading-frenzy, which was probably 4th or 5th grade, I used to keep lists of every book I read during the year, and in the summer, I’d frequently go through multiple books a day. Chapter books, of course. Now, a lot of my book time is spent with cookbooks, although don’t be surprised if you find me sitting on the floor in the used paperback section at the bookstore, a stack of 9 books I want to buy at my side. Because I had so much fun writing cookbook reviews this fall, I’ve decided to make it a more regular feature here. Hopefully, weekly, although I’m not off to a good start, given that I planned to post this on Thursday… I’m blaming blizzard preparations. So I bring you “Book Club,” a column that will feature mostly newly released cookbooks, sometimes old cookbooks, and occasionally great fiction or non-fiction I’ve been reading on the side. I hope you enjoy it!

First up is Every Grain of Rice: Simple Chinese Home Cooking, a book by Fuchsia Dunlop, which was just released on Monday. This is Fuchsia’s 3rd cookbook focused on Chinese cuisine – she is also the author of Land of Plenty: A Treasury of Authentic Sichuan Cooking and of Revolutionary Chinese Cooking: Recipes from Hunan Province. In addition, she wrote the memoir Shark’s Fin and Sichuan Pepper detailing her food-driven journeys through China. Although not ethnically Chinese, Fuchsia certainly knows the ins and outs of Chinese cooking better than most.

Gong Bao Chicken with Peanuts {Katie at the Kitchen Door}

Every Grain of Rice is a solid cookbook. It starts with an introduction to Chinese ingredients, utensils, and techniques, and quickly moves into recipes organized by main ingredient – tofu, leafy greens, chicken & eggs, root vegetables, mushrooms, noodles, dumplings, etc. Every recipe has a lengthy headnote, often describing the history or cultural importance of the dish, as well as the flavor and any adaptations you can make. I’m a big fan of good headnotes – when you’re confronted with a book full of a hundred recipes, it makes it so much easier to know what recipe to choose! Almost every recipe also has a beautiful, clean, full-page photograph to go with it. The photographic style is simple and bright, perfectly reflecting the food it depicts.

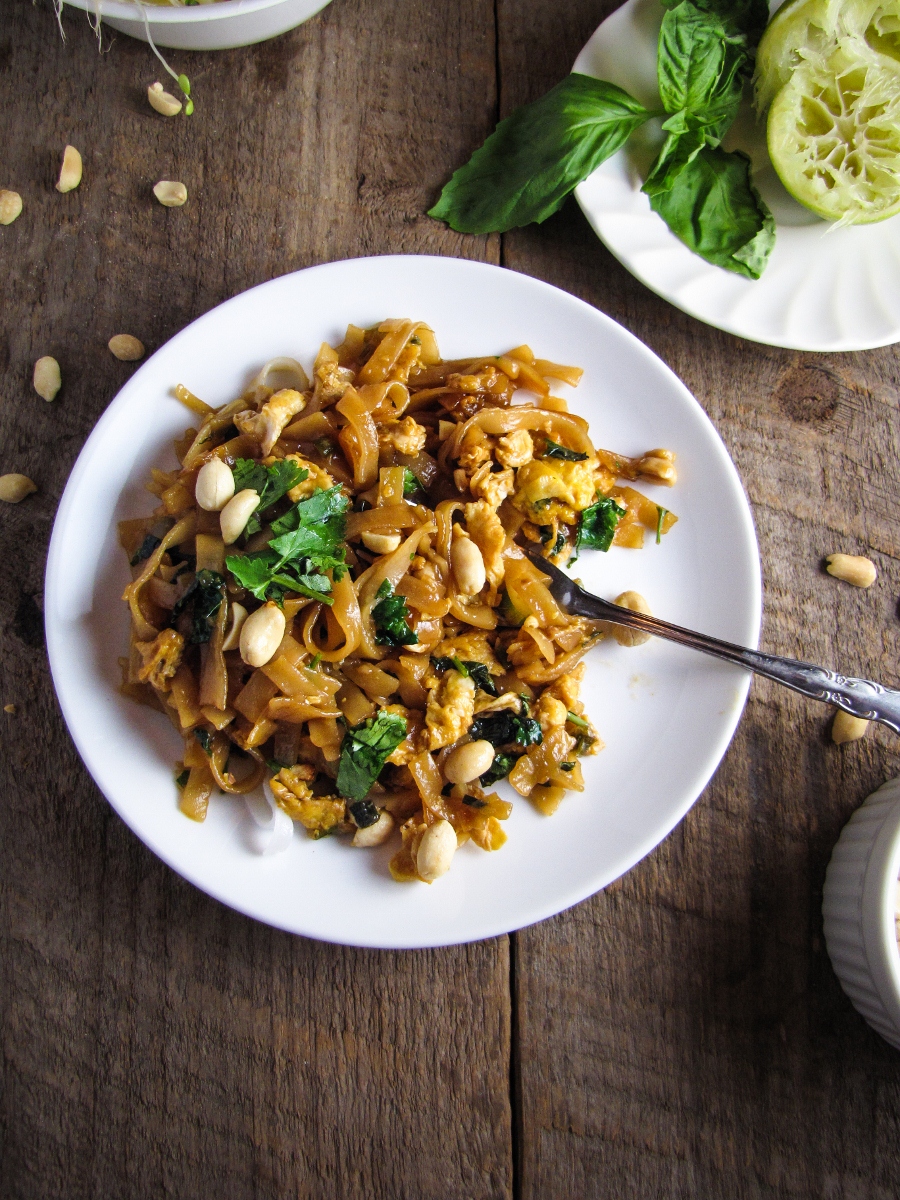
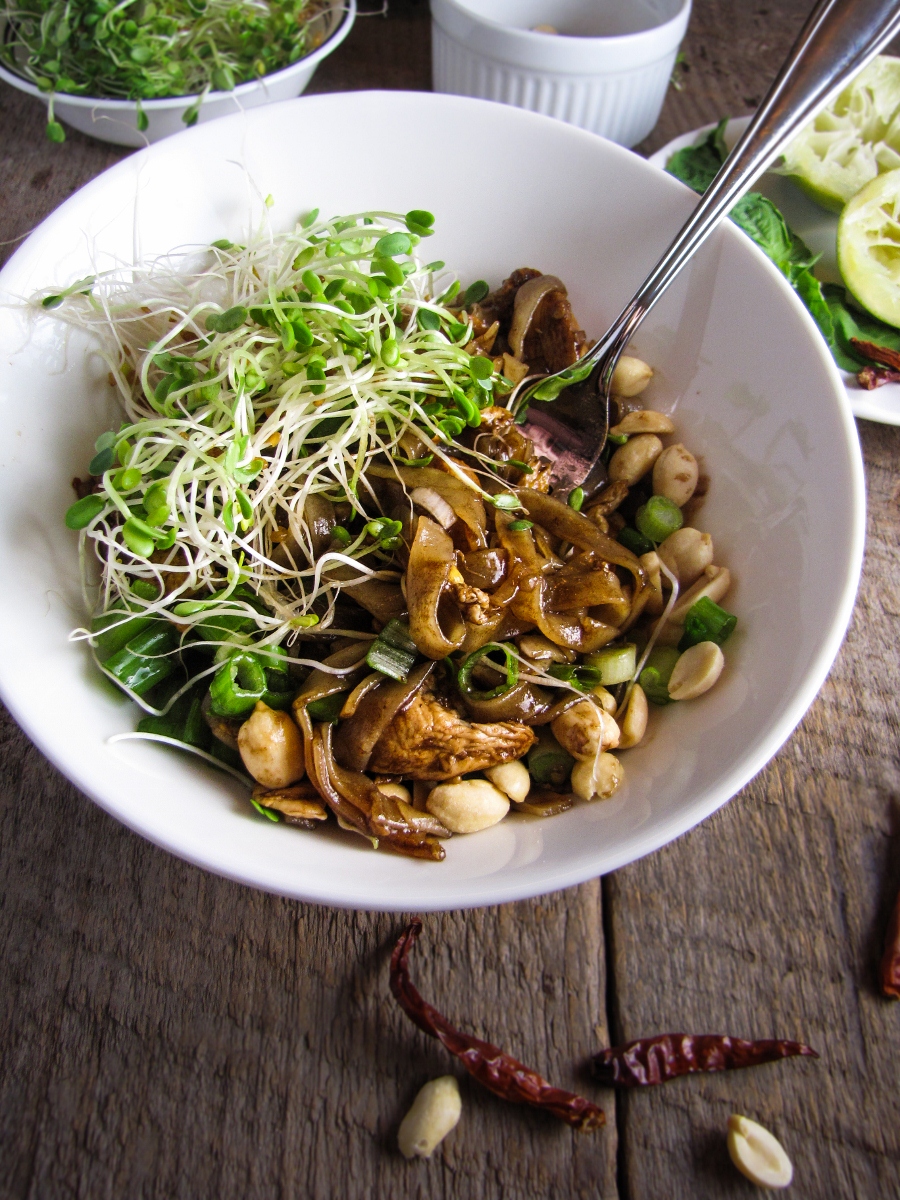
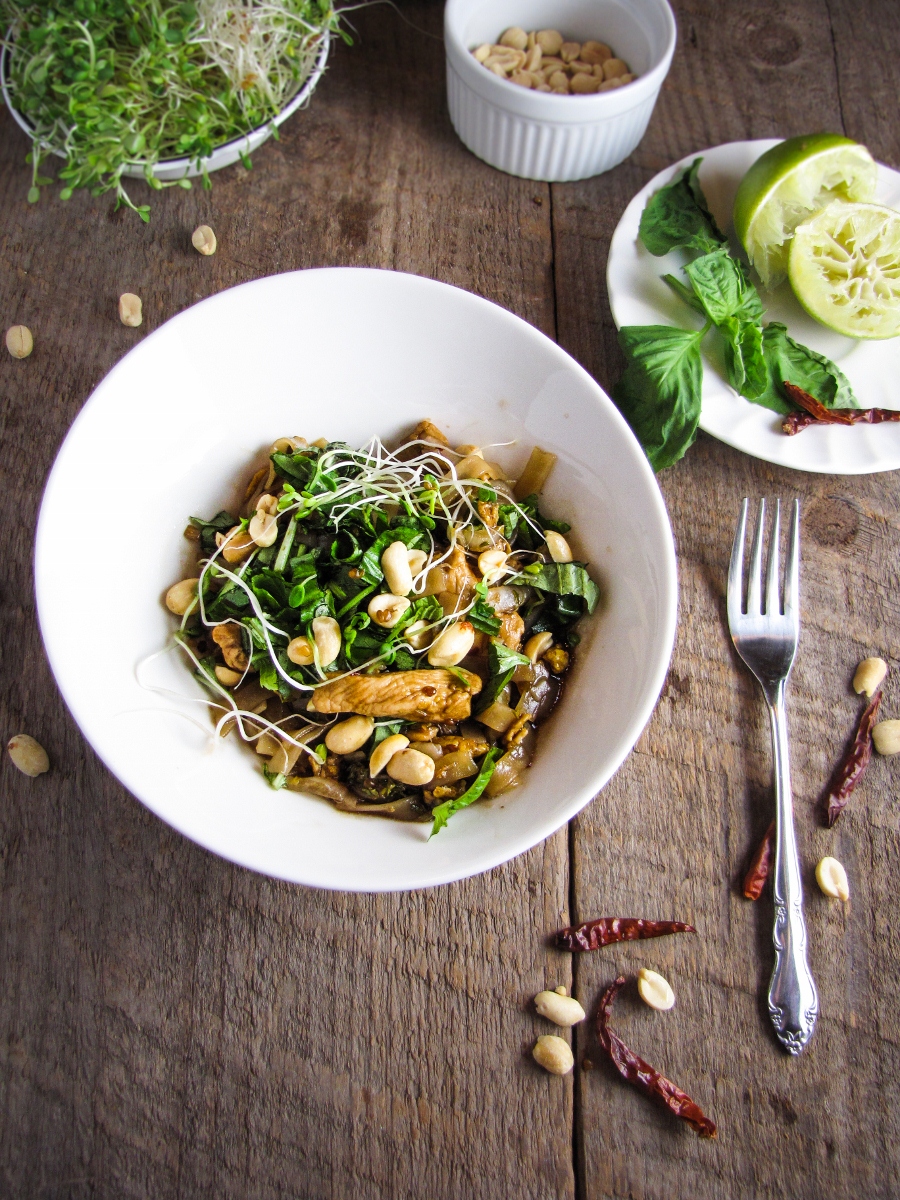
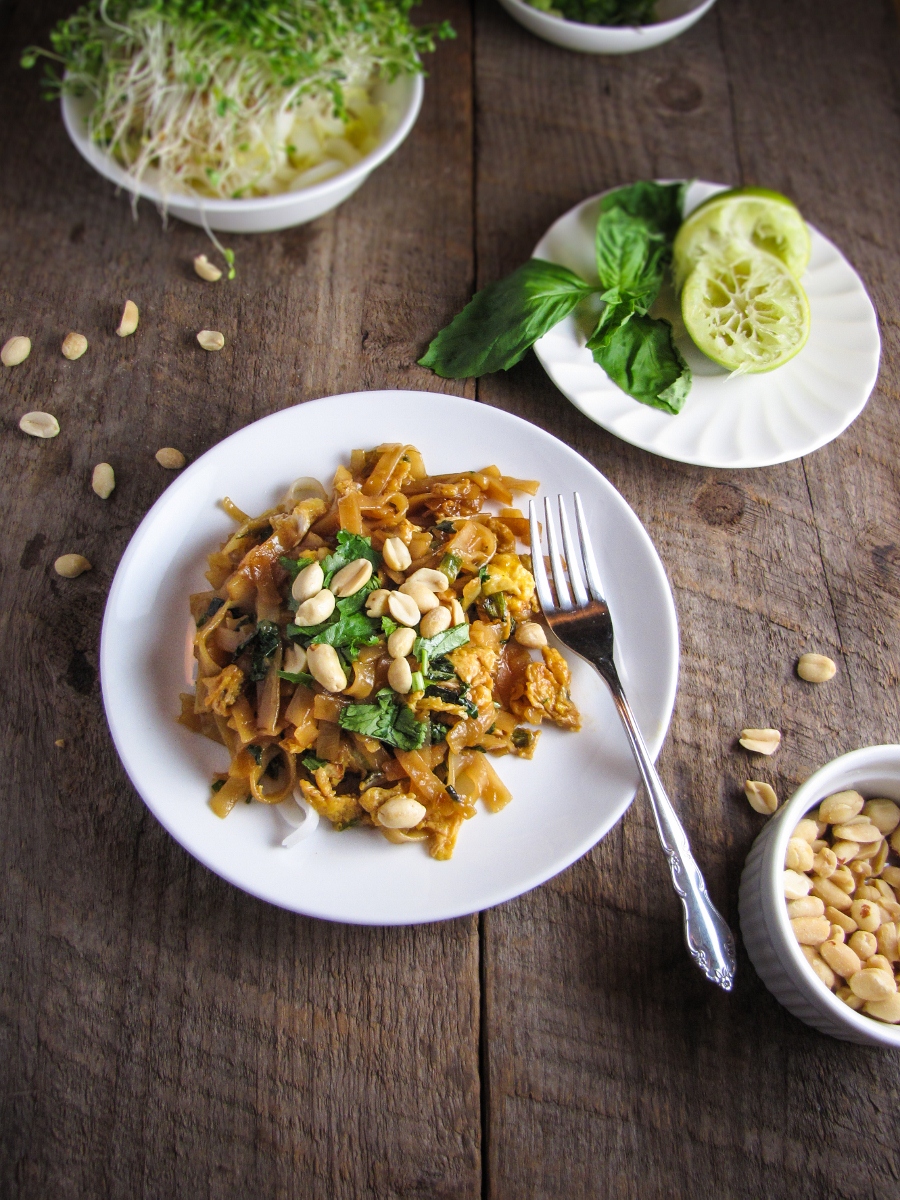
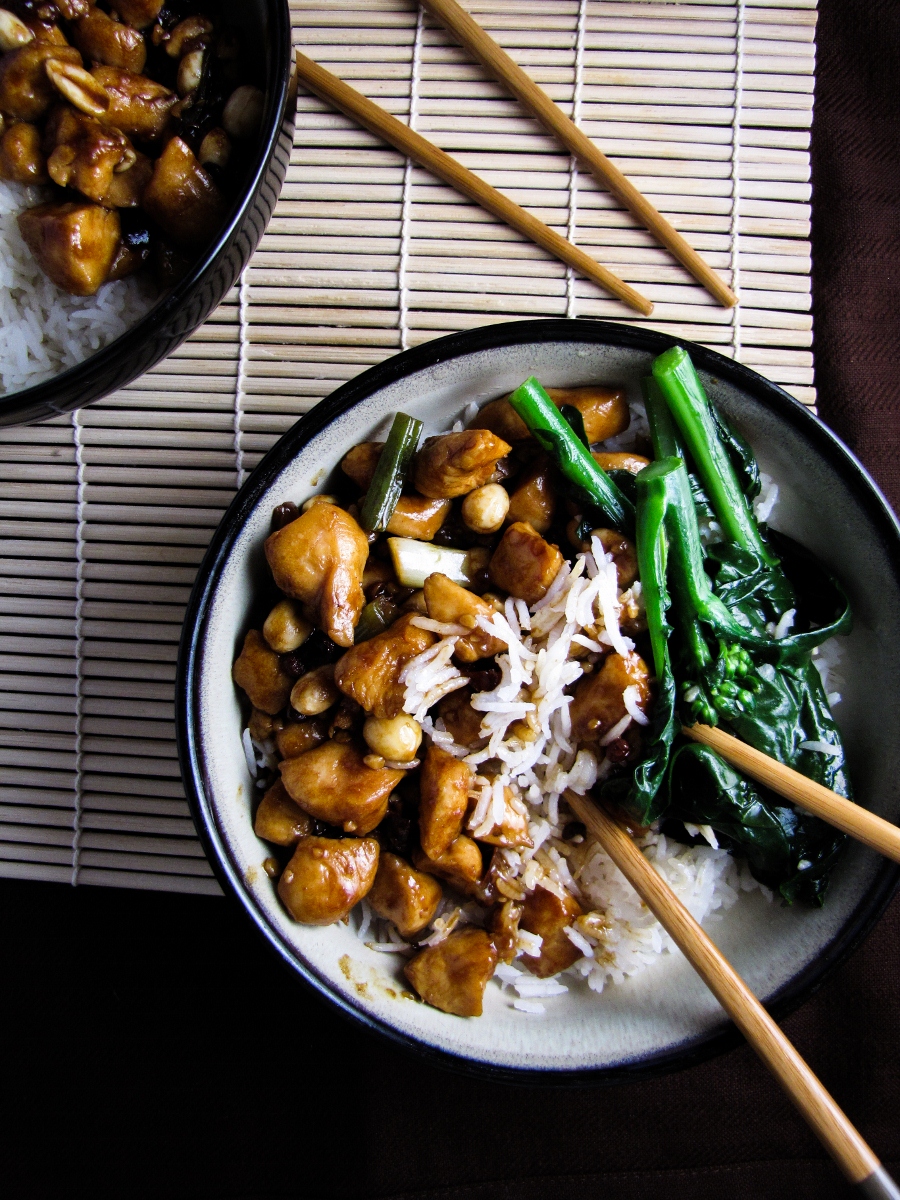
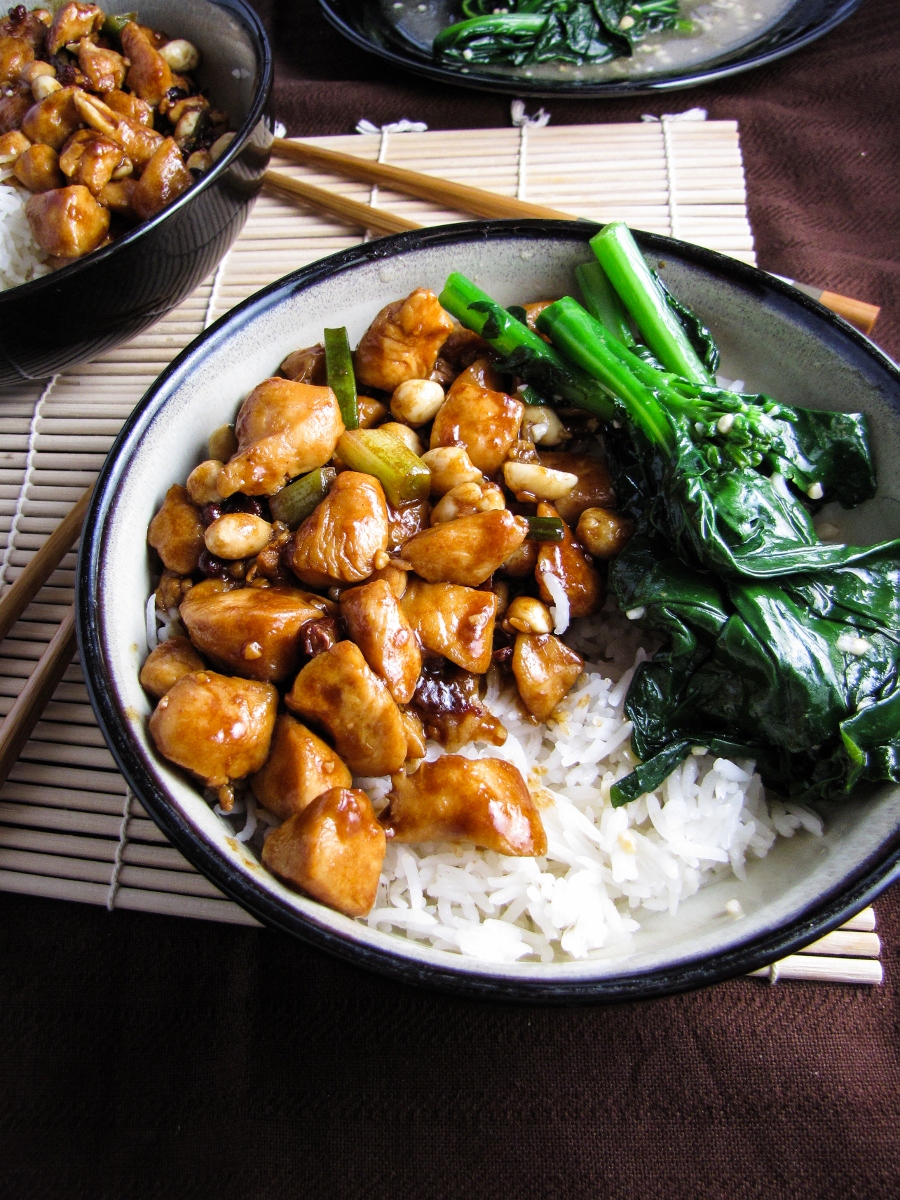
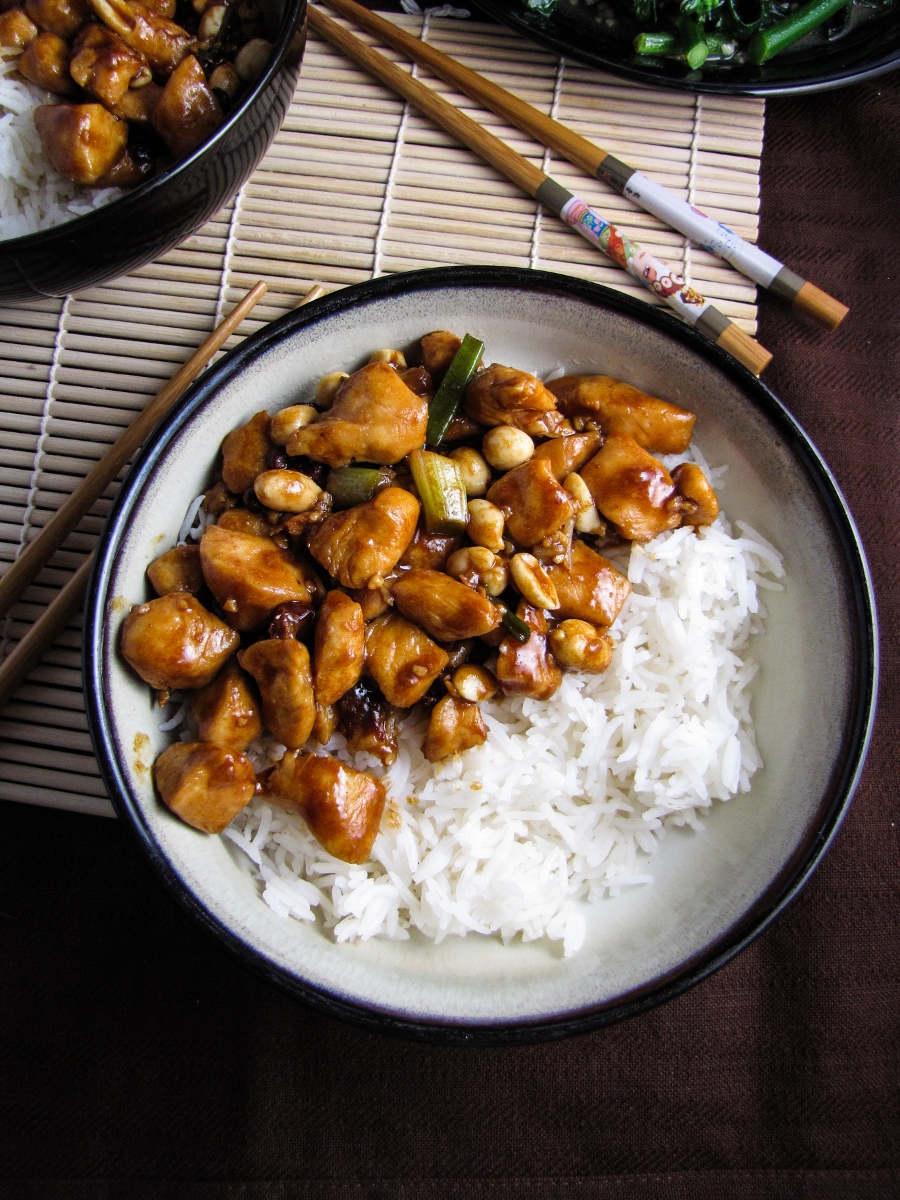
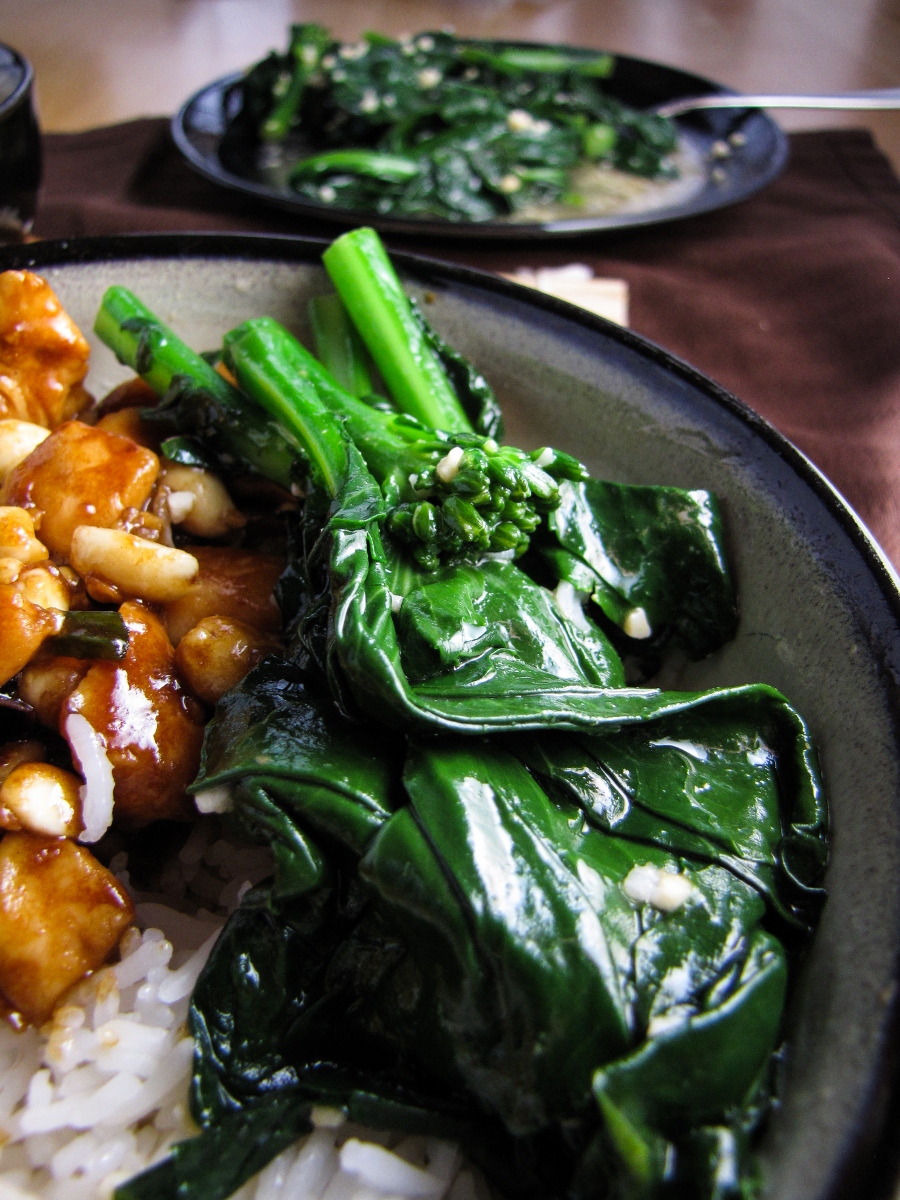
As I started flipping through the recipes, one of my first thoughts was: “This is how Rongjie eats.” Rongjie is my friend/co-worker who sits across from me at work. Both she and her roommate are Chinese, and everyday she brings in a lunch that one of them has made consisting of rice, some sort of dark and saucy meat or tofu dish, and dark leafy greens. It’s very different from how I eat, but also very healthy. I decided that for my recipe testing for this book, I would try and emulate this typical Chinese way of eating, by making Gong Bao Chicken, served with Chinese Broccoli in Ginger Sauce and plain rice. And this is where things got interesting.

Gong Bao Chicken with Peanuts {Katie at the Kitchen Door}

One challenge of Chinese cooking is that you need Chinese ingredients – which can be hard to find, depending on where you live. Since I’m fairly unfamiliar with Chinese cooking, I brought in a list of the ingredients I needed to show Rongjie and to pick her brain on what they were like, and what might be good substitutes if I could’t find them. Her suggestion? Just go to Chinatown. But I didn’t want to go by myself, so I coerced her into coming with me to show me where to go, which is how both of us ended up in an insanely crowded Chinese grocery store, two hours before the MBTA shut down for the blizzard, and two days before Chinese New Year. INSANE. But really exciting. I was super over-stimulated in there – rows and rows of bright and unfamiliar ingredients, being pushed on all sides by tiny old Chinese ladies, the smell of fish in the air, occasional announcements in Chinese that seemed to cause quite a stir among the other shoppers… it was an experience. But I got what I needed – dark soy sauce, Shaoxing wine, Chinkiang vinegar, potato starch, and Chinese broccoli.

Chinatown Grocery

When I got home, snow swirling outside, I was ready to start cooking. But after all that adventuring, I discovered that both my garlic and my ginger had somehow managed to go bad. Sigh. I went forward anyways, borrowing minced garlic and using dried ginger instead. Not as authentic as I wanted, but both dishes still tasted great, so it was all OK. The chicken in particular was delicious – sweet, salty, and spicy, with a thick tangy sauce, it was as good as any Chinese takeout I’ve had. And since I have massive bottles of soy sauce, wine, and vinegar leftover, I’m excited to start trying some of the other recipes – like Stir-Fried Beef with Black Bean and Chili, General Tso’s Chicken, and Buckwheat Noodles with Red-Braised Beef. The real test of any of these dishes, though, will be when I bring the leftovers in for lunch and get Rongjie’s expert opinion. If she has any comments, I’ll report back.

The bottom line: Every Grain of Rice is a solid cookbook that serves as a great introduction to simple Chinese cooking. Based on my limited knowledge of Chinese cuisine, the recipes seem authentic, and the few that I’ve tried have been delicious. Cooking from the book will require an investment in a few special ingredients, but once you have the basics, you’ll be able to cook most of the recipes in the book. From a design standpoint, Every Grain of Rice is clean and well organized, with plenty of beautiful full-page photographs. I’d recommend this to anyone who likes eating Chinese food, or who is interested in learning a new cuisine.

Disclaimer: I was sent a free review copy of Every Grain of Rice by the publisher, W.W. Norton, but I was not otherwise compensated to write this review and all opinions are my own!

Gong Bao Chicken with Peanuts {Katie at the Kitchen Door}

Gong Bao Chicken with Peanuts

Reprinted from Every Grain of Rice: Simple Chinese Home Cooking by Fuchsia Dunlop. Copyright © 2012 by Fuchsia Dunlop. With the permission of the publisher, W.W. Norton & Company.

  • 2 boneless chicken breasts, with or without skin (11–12 oz/300–350g in total)
  • 3 garlic cloves
  • An equivalent amount of ginger
  • 5 spring onions, white parts only
  • A handful of mild dried chillies (about 10)
  • 2 tbsp cooking oil
  • 1 tsp whole Sichuan pepper
  • 3 oz (75g) roasted peanuts

For the marinade:

  • 1/2 tsp salt
  • 2 tsp light soy sauce
  • 1 tsp Shaoxing wine
  • 11/2 tsp potato flour

For the sauce:

  • 1 tbsp sugar
  • 3/4 tsp potato flour
  • 1 tsp dark soy sauce
  • 1 tsp light soy sauce
  • 1 tbsp Chinkiang vinegar
  • 1 tsp sesame oil
  • 1 tbsp chicken stock or water
  1. Cut the chicken as evenly as possible into 1/2 in (11/2cm) strips, then cut these into small cubes. Place in a small bowl. Add the marinade ingredients together with 1 tbsp water, mix well and set aside while you prepare the other ingredients.
  2. Peel and thinly slice the garlic and ginger and chop the spring onions into chunks as long as their diameter (to match the chicken cubes). Snip the chillies in half or into sections. Discard their seeds as far as possible. Combine the sauce ingredients in a small bowl.
  3. Heat a seasoned wok [or frying pan] over a high flame. Add the oil with the chillies and Sichuan pepper and stir-fry briefly until the chillies are darkening but not burned (remove the wok from the heat if necessary to prevent overheating). Quickly add the chicken and stir-fry over a high flame, stirring constantly. As soon as the chicken cubes have separated, add the ginger, garlic and spring onions and continue to stir-fry until they are fragrant and the meat just cooked through (test one of the larger pieces to make sure).
  4. Give the sauce a stir and add it to the wok, continuing to stir and toss. As soon as the sauce has become thick and shiny, add the peanuts, stir them in and serve.

Chinese Broccoli in Ginger Sauce {Katie at the Kitchen Door}

Chinese Broccoli in Ginger Sauce

Reprinted from Every Grain of Rice: Simple Chinese Home Cooking by Fuchsia Dunlop. Copyright © 2012 by Fuchsia Dunlop. With the permission of the publisher, W.W. Norton & Company.

  • 3/4 lb (350g) Chinese broccoli
  • Salt
  • 4 tbsp cooking oil
  • 2 tbsp finely chopped ginger
  • 1 tbsp Shaoxing wine
  • 1/2 tsp sugar
  • 1 tsp potato flour mixed with 1 tbsp cold water (optional)
  1. Bring a large panful of water to a boil (a generous 21/2 quarts/21/2 liters will do). Wash and trim the Chinese broccoli. If the lower parts of the stems are thick and fibrous, peel away their outer skin with a potato peeler.
  2. When the water is boiling, add 1 tbsp salt and 1 tbsp oil, then the Chinese broccoli. Blanch it for a minute or two to “break its rawness.” The stems should be just tender, but still crisp. If you are stir-frying them immediately, simply drain the broccoli stems and shake dry in a colander; if you want to serve them later, refresh the stems under a cold tap to arrest cooking before draining well.
  3. When you wish to serve the broccoli, add the remaining oil to a seasoned wok over a high flame, swirl it around, then add the ginger and sizzle briefly until you can smell its fragrance. Splash in the Shaoxing wine and add the sugar. Add the broccoli and stir-fry, adding salt to taste, until it is piping hot. (If you are using broccoli blanched earlier, then cooled, you will need to pour 2–3 tbsp water or stock into the wok and cover it, so the stems reheat thoroughly.)
  4. Remove the stems from the wok and lay them neatly on a serving dish. If you wish to thicken the juices, give the potato flour mixture a stir and add just enough, in stages, to thicken the sauce to a clingy consistency; then pour the sauce over the broccoli and serve. If you do not wish to thicken the juices, simply pour them and the ginger over the broccoli.
Cherry-Hazelnut Biscotti

0 February 5, 2013 Dessert

Cherry-Hazelnut Biscotti

Cherry-Hazelnut Biscotti {Katie at the Kitchen Door}

Even though my last post was only five days ago, I somehow feel like I’ve been avoiding writing here, and I feel guilty. What is that all about anyway, blogger’s guilt? It’s unwelcome, and I would like it to leave. I tried in earnest to post yesterday – something healthy, since I seem to have been avoiding healthy food posts since finishing the cleanse. I was planning on sharing lamb-and-beet burgers with goat cheese and fried eggs, inspired by Nigel Slater’s Tender. But they came out more like lamb-and-beet sloppy joes, probably because I skipped half the steps out of laziness, and I also didn’t measure any of the ingredients. My bad.

So I’m reverting to cookies. Biscotti, actually, since somehow they seem to me to be a healthier sort of cookie, something just a little sweet and crunchy to have with your tea and help tide you over until dinner. I seem to need a lot of “tiding over” the past few weeks – winter is starting to drag on, and when the light starts to leave the sky and you can tell just by looking that it’s going to be breathtakingly cold as soon as you leave the building, it’s a little depressing. So I’ve been guzzling mug after mug of cinnamon spice tea, and trying my best not to snack mindlessly from the office snack drawer. Tomorrow, though, mindless snacking won’t be a problem – I’ll bring a few of these little guys, and have them to look forward to all morning. A cup of tea, a small plate of biscotti, and I’ll have made it over the hump. And soon, I know the days will get longer and the weather warmer, my seedlings will start to flourish, spring will be back, and maybe I’ll no longer need tiding over. It isn’t so much longer, you know.

Cherry-Hazelnut Biscotti {Katie at the Kitchen Door}

Cherry-Hazelnut Biscotti

Adapted slightly from Martha Stewart. Makes about 3 dozen.

  • 1 3/4 c. dried cherries
  • 1/2 c. frangelico liqueur
  • 3 c. flour
  • 2 tsp baking powder
  • 1/2 tsp coarse salt
  • 4 TBS salted butter, softened slightly
  • 1 c. sugar
  • 4 eggs (3 for dough and one for brushing the cookies)
  • 2 tsp vanilla extract
  • 3/4 c. coarsely chopped hazelnuts
  1. Preheat oven to 325°F. Place dried cherries and frangelico in a small saucepan, and bring to a low simmer over medium-low heat. Cook until cherries have softened, 5-8 minutes, stirring occasionally. Strain the cherries, reserving the cherry-frangelico liquid.
  2. In a medium  bowl, whisk together flour, baking powder, and salt. Set aside. In a separate, larger bowl, beat together softened butter and sugar until pale and creamy. One at a time, beat 3 of the 4 eggs into the batter – it should be pale yellow and fairly runny. Beat in the vanilla, and 2 TBS of the reserved cherry-frangelico liquid. Add the flour to the wet ingredients a cup at a time, stirring between additions, until dough is smooth. Stir in cherries and hazelnuts until evenly incorporated.
  3. Lightly flour a work surface and turn the dough out onto it. Divide the dough in half, and shape into two logs about a foot long each. Flatten the logs to make rectangles that are a half inch thick. Transfer to a baking sheet lined with parchment paper. Beat the remaining egg lightly in a small bowl. Brush the beaten egg on top of the dough. Bake for 35 minutes, then remove from oven and allow to cool for 20 minutes on wire racks.
  4. Reduce the oven temperature to 300°F. Slice each log on the diagonal into cookies about 1/2 inch thick. Lay cookies down on the baking sheet, and bake for 8 minutes. Remove from oven, flip the cookies, and bake for another 8 minutes. Remove and let cool. Store in an airtight container.

Cherry-Hazelnut Biscotti {Katie at the Kitchen Door}

Taza Chocolate Giveaway and Mayan Chocolate Mousse

0 January 31, 2013 Boston

Taza Chocolate Giveaway and Mayan Chocolate Mousse


Mayan Chocolate Mousse (and a chocolate giveaway from Katie at the Kitchen Door)

Update: The giveaway is now closed. Congrats to Amy of U Try.It on winning! And thank you everyone for sharing your perfect Valentine’s Day dreams… so fun to read.

If you live in Somerville, MA, you’ve almost definitely heard of Taza Chocolate.  If you live elsewhere in Greater Boston and have ever gone to any event remotely food-related, you’ve probably heard of Taza Chocolate.  But if you’re further afield, you may never have had the delicious experience of eating their stone-ground Mexican chocolate, and so I’m here to share the love, because I really do love Taza’s chocolate.  It’s different – gritty, not super sweet, and infused with flavors like chipotle and cinnamon and orange – but it’s addicting.  Trevor introduced me to it a few years ago and I’ve gotten more and more excited about it ever since.  Visiting the Taza factory in Somerville has been high on my “to-do in Boston” list since I moved back, and when I finally got around to it (which, admittedly was kind of a while ago at this point…), it was well worth the trip.

Taza Chocolate - Valentine's Day Recipe and Giveaway

I’ve been on a decent amount of food tours – to breweries, cheesemakers, cider houses, farms, and restaurant kitchens – and they can definitely be hit or miss.  The Magic Hat Brewery Tour was a disappointment and I learned very little.  Visiting Prodigal Farm in North Carolina was truly fascinating (you can read more about it here).  The Taza tour was way up on my quality scale – honestly, it was one of the most interesting and informative tours I’ve ever been on, and I’m not just saying that because there was a constant supply of chocolate samples during the tour.  It probably helped that I knew very little about the chocolate making process to start.  Did you know how huge cocoa pods are?  Or that they grow straight from the trunk of the tree?  Or that they turn beautiful colors in the fall?  Just the images of the cocoa trees themselves fascinated me.  Then we moved onto the harvesting, shipping, roasting, winnowing, and grinding processes, and every piece of information was new and exciting.  I don’t want to give away their whole tour, in case some of you would like to actually hear it from the Taza people themselves rather than in an overly-excited and garbled form from me, but I will share some of the highlights.  Like that one of the co-founders of Taza spent a year in Oaxaca learning to properly dress the traditional millstones used to grind the chocolate.  Or that their winnowing machine is an old Italian giant they found on a cocoa sourcing trip.  Or that they travel to the countries from which their cocoa beans come every year to pick the best quality beans and make sure the farms they come from are fair.  Or that the difference between European and Mexican chocolate is the addition of milk and a thorough mixing process to smooth it out.

Mayan Chocolate Mousse (and a chocolate giveaway from Katie at the Kitchen Door)

I highly recommend a trip to the factory if you live in the area or are ever visiting. And if you’re really looking for the full chocolate experience, Taza offers a week-long trip to Belize every March in which you go through the entire process of making chocolate, from picking cocoa beans to making your own bars (sometimes I really wish I was richer). If a quick jaunt to make chocolate in the jungle isn’t in the cards for you this year, either, I have two other things you might enjoy – one, a delicious chocolate mousse recipe, and two, a Taza chocolate giveaway.

Typically I just eat Taza chocolate straight – my favorite flavors are the salt & pepper and the cinnamon – but since we’re getting close to Valentine’s Day, I thought I’d step my game up and make a Mayan Chocolate Mousse, inspired in equal parts by Food & Wine’s Mayan Chocolate Pudding, and Bon Appetit’s recent article on the perfect chocolate mousse. I went all out with the cinnamon, using two packs of Taza cinnamon chocolate discs, replacing the espresso with my favorite cinnamon tea, and topping it off with a sweetened cinnamon whipped cream. It came out amazing, if I do say so myself. I really loved that the mousse still held the essence of Taza chocolate, it didn’t just taste generically chocolatey. I don’t know if I’ll even be able to wait until the 14th before making it again…

Mayan Chocolate Mousse (and a chocolate giveaway from Katie at the Kitchen Door)

Giveaway Details: Interested in trying Taza chocolate? Enter to win the Chocolate Mexicano Classic Collection, and you can try six of their flavors (a cinnamon disc is included, leaving you just enough to make a portion of this mousse for two…). To enter, leave a comment below telling me how you would spend your ideal Valentine’s Day if money wasn’t an option. For a second entry, follow both me (@Kitchen_Door) and Taza (@TazaChocolate) on Twitter, and tweet to both of us about the giveaway, then come back and leave me a second comment letting me know you tweeted. The giveaway will close at midnight on Tuesday the 5th, at which point I’ll randomly choose a winner. Open to U.S. readers only. If the winner doesn’t respond to me within 48 hours of me notifying them they’ve won, I’ll have to pick an alternate winner

P.S. I LOVED reading all your comments about your most memorable Valentine’s Day on my last giveaway. It was so fun to hear all the stories!

Disclaimer: Taza is hosting this giveaway, but I discovered the product myself and truly love it, and have not been compensated in any way for writing this post.

Mayan Chocolate Mousse (and a chocolate giveaway from Katie at the Kitchen Door)

Mayan Chocolate Mousse

Adapted from Bon Appetit and inspired by Food & Wine. Serves 4.

Note: Chocolate Mousse can be a little bit finicky – I accidentally scrambled my first batch of egg yolks! – so carefully follow the instructions provided and make sure your ingredients are at the correct temperatures. If you mess up, don’t fret – the end result will be worth trying again!

  • 3/4 c. chilled heavy whipping cream, divided
  • pinch cream of tartar
  • 2 egg whites, room temperature
  • 4 TBS sugar, divided
  • 4 egg yolks
  • 1/4 c. strong cinnamon tea, at room temperature
  • 1/8 tsp salt
  • 2 packages of cinnamon Taza chocolate, or 5.4 oz. dark chocolate, finely chopped
  • 1/8 tsp cayenne chili powder
  • 1/8 tsp allspice
  • 1/4 tsp cinnamon if using regular chocolate + 1/4 tsp cinnamon for whipped cream
  1. Measure out 1/2 c. of the heavy cream into a medium bowl. Whisk vigorously until foamy, sprinkle with the cream of tartar, then whisk until stiff peaks firm. Cover and chill.
  2. Beat egg whites vigorously until soft peaks form. Sprinkle 1 TBS of the sugar over the top, and continue beating until stiff, shiny peaks form. Set aside.
  3. Bring a large pot of water to a gentle simmer. In a medium metal bowl, or a smaller metal-bottomed pot, whisk together the egg yolks, 2 TBS of the remaining sugar, room temperature tea, and salt. Set the bowl over the simmering water and whisk vigorously until mixture is pale yellow in color and doubled in volume. This will only take about a minute – remove immediately when it’s ready (or a second before you think it’s ready, as this is where it’s easy to accidentally scramble your eggs). Add the finely chopped chocolate and stir until it’s melted. If chocolate is not melting, it’s OK to set back over the simmering water for intervals of 5-10 seconds while whisking the mixture, but finely chopping the chocolate should remove the need for this. Once chocolate is melted, add the cayenne, allspice and 1/4 tsp cinnamon (if not using cinnamon chocolate) and whisk to incorporate. Let cool to room temperature.
  4. Fold the egg whites into the chocolate mixture in two additions, only folding until just incorporated. Fold in the whipped cream until just incorporated. Divide between four dishes and chill for at least 1 hour.
  5. Just before serving, beat remaining 1/4 c. of heavy cream and 1/4 tsp cinnamon until soft peaks form. Sprinkle with remaining 1 TBS of sugar and whisk to incorporate. Dollop a bit of whipped cream on top of each portion, and serve.
Pad Thai: Taste Test

3 January 28, 2013 Asian and Indian

Pad Thai: Taste Test

Pad Thai Taste Test (3 Recipes) via Katie at the Kitchen DoorTonight, I made three different Pad Thai recipes. If my roommates didn’t think I was crazy before, I’m pretty sure they do now. But I had an important goal! And that was to find the best Pad Thai recipe out there, because I love Pad Thai (the American take-out kind; I’ve never had the made-in-Thailand kind), and I would feel pretty impressive if I knew how to whip up a batch at home.

I made small changes to each of the three recipes I tried. In general, I don’t think it’s fair to review a recipe that you’ve changed, since you’re no longer reviewing the recipe as the author tested it. In this case, however, what I was really testing were the sauces, and for the most part, I didn’t change those. I also made each dish in a way that was practical to me – e.g. I don’t eat shrimp, so I’d never include it, and I’m unlikely to have “sweet preserved shredded radish” around, even if I were to cook Thai food regularly.

Some general tips for cooking any of these recipes – have all your ingredients prepped and ready to go before you turn on the stove, as things will move quickly once you begin cooking. Use fairly high heat so that your ingredients sizzle as you add each one. And last, don’t overcook any of the ingredients – you want your veggies to remain a little crisp and your egg to not completely dry out.

Pad Thai Taste Test (3 Recipes) via Katie at the Kitchen Door

1) Bon Appetit Pad Thai

While I have a feeling that this recipe was the most authentic, it was actually my least favorite of the three. It was too sharp tasting and not balanced enough for my liking. Of course, as I mentioned above, I did make a few changes – in this case, scallions in place of garlic chives, chicken instead of shrimp, no tofu, and no preserved radish. Admittedly, these changes are fairly substantial, but the sauce just didn’t do it for me. Now, if you like a sour and slightly spicy Pad Thai, you might enjoy this dish, but it’s not going to get you that takeout flavor I suspect most of us are looking for.

Pad Thai Taste Test (3 Recipes) via Katie at the Kitchen Door

2) Mark Bittman’s Pad Thai via Serious Eats

This recipe straddles the line between authentic and take-out quite nicely. It has all the complexity and flavor that I’m looking for, but the sauce was a little too thin, the sauce to noodle ratio was too high, and I found the vinegar flavor a little bit too strong. Further investigation led me to the fact that Mark’s original recipe has some substantial differences from the Serious Eats version, but I didn’t test that one out – I’ve added it to the list for the future. The changes I made to this recipe were as follows: vegetable oil instead of peanut oil, chopped endive instead of Napa cabbage (only because the only Napa cabbage at the store would have been far too large to fit in my fridge), and chicken instead of shrimp. After tasting the sauce, I also added two tablespoons of palm sugar to the sauce, as I found the sauce as written to be too sour. With the additional sweetener the flavor was pretty close to what I wanted. I think to get my perfect Pad Thai recipe, I’d have to somehow combine this recipe with number 3…

Pad Thai Taste Test (3 Recipes) via Katie at the Kitchen Door

3) Easy Pad Thai from Brownies for Dinner

This recipe is decidedly the least authentic, but it was also super-duper easy, with fairly good results. I followed this one almost to the T – I just replaced the brown sugar with an equal amount of palm sugar, since I had already bought the palm sugar and I figured it would add a little more complexity. Flavor-wise, this recipe was the least challenging of the three – it would be easy for kids and picky eaters to palate. However, the trade-off was a loss of depth, and I did think the soy flavor was a little out of place. If you’re new to Thai cooking, though, I’d start with this recipe – for the amount of effort (and investment in special ingredients) you put into this recipe, I think you’ll be pleased with the end result.

The conclusion: I haven’t found my ideal Pad Thai recipe yet, but I feel a lot more knowledgeable about what works and what doesn’t. I’ve scribbled down some ideas about how I might combine recipes two and three to get what I’m looking for, and I’m going to keep testing recipes – I’ll let you know when I find a combination I love. In the meantime, if you have a favorite Pad Thai recipe, please share!

Monkey Bread, For Sharing

0 January 25, 2013 Breakfast

Monkey Bread, For Sharing

Monkey Bread {Katie at the Kitchen Door}

Over a year ago, I promised my coworkers that I would bring in some homemade monkey bread for them. Today, they finally got it. What happened in between? Mostly, a lot of excuses, like, “I can’t bake monkey bread this week, I’m trying to eat healthy!” and “Monkey bread is off this weekend guys, I have to make Peppermint Mocha Sundaes.” This week I decided to cut the excuses – I put “make monkey bread” in my calendar for Thursday night, I came home from work in the 5 degree weather, and I did it.

Monkey Bread {Katie at the Kitchen Door}

Monkey bread, for those of you who don’t know, is like a bundt pan full of a hundred tiny cinnamon buns that have been drenched in butter. As you might be able to guess from the description, it’s pretty much hard to go wrong with it. Most versions use canned biscuit dough as the base, but I decided to go fully homemade and make the sweet bread dough – thanks to my bread-baking mother and boyfriend, I don’t have a fear of making yeasted things. Actually, I think it’s pretty easy, and I think you will too. Plus, since you’re covering this particular bread in cinnamon-sugar-butter, no one is going to notice if you didn’t let the dough fully complete its rise.

My coworkers devoured these in a matter of minutes. So quickly, in fact, that I had to promise to make another batch next week for the people who didn’t get to try any. Also, Trevor just threw a mini-fit when he found out I made it and he didn’t even get a chance to sample some. Like I said, it’s hard to go wrong. Give this recipe a try – maybe this weekend, to ward off the cold – and people will love you.

P.S. You have until midnight tomorrow to enter my chocolate giveaway sponsored by Lake Champlain Chocolates!

P.P.S. WordPress just informed me that today is my 3rd blogging anniversary. Consider this monkey bread a celebration!

Monkey Bread {Katie at the Kitchen Door}

Monkey Bread

Adapted slightly from Cooks’ Illustrated, via Mel’s Kitchen Cafe. Serves 8-10.

Note: I got away with using a few tablespoons less butter than the original recipe called for (I melted the full 8 TBS, but ended up with a few leftover), so I’ve listed the amount I used below. If you run out of butter for dipping, just melt a little bit more. Also, I don’t have a stand mixer so I make everything by hand – if you’re lucky enough to have one, check out Mel’s Kitchen Cafe for instructions on making the dough with one.

  • 10 TBS butter, divided
  • 1 c. plus 2 TBS milk
  • 1/3 c. water
  • 1/4 c. sugar
  • 2 1/4 tsp instant yeast
  • 3 1/4 c. flour
  • 2 tsp salt
  • 1 c. light brown sugar
  • 2 tsp ground cinnamon
  • 1 c. confectioner’s sugar
  1. In a medium, microwave-safe bowl, mix 2 TBS of the butter, 1 c. of the milk, and 1/3 c. water. Microwave on medium for about 90 seconds, until liquid is warm to the touch (but not hot), and butter is mostly melted. Stir to incorporate the butter. If the liquid is too hot, let cool until it feels warm to the touch (liquid that is too hot will kill the yeast). Stir the 1/4 c. of sugar into the warm milk mixture, then sprinkle the yeast over the top of the mixture. Let sit for 10 minutes. Yeast should begin to bubble up as it sits.
  2. In a large bowl, mix together the flour and the salt. Make a well in the middle, and pour in the milk-yeast mixture. Stir to incorporate, then knead with your hands until the dough is smooth and elastic. If you took the dough out of the bowl to knead it, return to the bowl, cover with a towel, and let rise in a warm place for 1-2 hours.
  3. Remove the risen dough from the bowl and shape into an 8×8 inch square. Use a knife to cut 8 lines across the top of the dough, rotate 90 degrees, then cut 8 lines in the other direction to form a cross-hatch pattern. You don’t have to cut all the way through, just mark the squares. Pull the squares off one by one and roll into small balls. Set the balls aside – you should have 64 of them.
  4. Melt the remaining 8 TBS of butter in the microwave. Use a pastry brush to brush some of the butter on the inside of a bundt pan. In another bowl, stir together the brown sugar and cinnamon. Dip each of the balls into the melted butter, then into the cinnamon-sugar mixture, then place into the bundt pan. Try to fill the bundt pan evenly with the balls. Cover the bundt pan with a towel, and let rise 1-2 hours in a warm place.
  5. Preheat the oven to 350°F. Remove the towel, and bake the monkey bread for 35 minutes. Remove from oven, let cool 5 minutes, then turn out onto a plate while it’s still warm. Don’t let it cool completely in the pan, or it won’t come out of the pan easily.
  6. Mix together the remaining 2 TBS of milk and the confectioners sugar and drizzle over the warm bread as a glaze. Serve warm.

Monkey Bread {Katie at the Kitchen Door}

Greatist Collaboration: Quinoa Breakfast Bake

8 January 23, 2013 Breakfast

Greatist Collaboration: Quinoa Breakfast Bake

Quinoa Breakfast Bake {Katie at the Kitchen Door}

As I try to keep up with the healthy habits I was starting to establish during my cleanse (no thanks to the likes of these chocolate-hazelnut mousse cakes I made for Lake Champlain Chocolates!), I’ve come to realize that if I don’t get started on the right foot in the morning, my whole day is thrown off. Making sure that I have a healthy breakfast doesn’t necessarily mean I’ll stick to the plan through dinner, but starting the day off with something bad usually means I can’t recover and end up indulging all day. This is good knowledge to be armed with, but it’s still something I struggle to execute on. I like mornings, so that’s not the problem – it’s more that I’m the sort of person who’s perpetually five minutes late to everything because I try to cram too many things into one time slot. So when 8:05 rolls around and I’m still in bed writing emails and catching up on my reader, and I suddenly realize I have exactly 7 minutes to get dressed, make breakfast, clean up from breakfast, brush my teeth, make my lunch, do my hair, and leave, breakfast frequently falls by the wayside. And I’m still 10 minutes late to work.

Enter pre-made breakfasts: I’ve found that having something already made in the fridge makes it about 90% more likely that I’ll eat something nutritious before leaving for work. If it’s something I’m excited about eating, I’ll even go grab a plateful at 7:30 and then return to bed with it. Last week I did really well with a batch of whole wheat fruit and nut pancakes that I made on Sunday and ate throughout the week. This week, I whipped up this breakfast quinoa bake and have really been enjoying it. A quinoa bake was kind of a logical next step when breakfast quinoa is already a staple meal of mine, and overnight oats have inundated the internet. So I threw some ingredients together that I thought might work, and it turned out even better than I hoped – it’s sweet, mild, and fruity, with a consistency similar to rice pudding. Definitely worth getting out of bed for. You can find the recipe over at Greatist – if you try it, let me know what variations you make!

Lake Champlain Chocolate – Individual Chocolate-Hazelnut Mousse Cakes and A Giveaway

0 January 20, 2013 Dessert

Lake Champlain Chocolate – Individual Chocolate-Hazelnut Mousse Cakes and A Giveaway

Individual Chocolate-Hazelnut Mousse Cakes, and a Valentine's Day Giveaway {Katie at the Kitchen Door}

Update: Giveaway is now closed. Congrats to Corinne of Sparecake for winning! I really loved hearing all your stories about Valentine’s Day – thanks for sharing! And keep an eye out for another chocolate-y giveaway this week…

Between 6th grade and 9th grade, I spent 3 summers at Brown Ledge sleep-away camp on the beautiful Lake Champlain in Northern Vermont. (Actually, I spent 1 summer at Camp Kiniya, then went to Brown Ledge, but BLC is where my fondest memories are from). While 3 summers doesn’t exactly qualify me as a summer camp junkie like some of my friends, I did love those long months, spent swimming in the lake, going on daily 5am horseback rides with the drill team, staying up giggling and swapping stories with my bunkies, singing songs and holding hands in the theater, savoring care packages from my parents and letters (signed “love”!) from my middle-school crush. Sometimes I was homesick, but it was such a positive experience overall – I hope my future kids are able to enjoy it someday.

On drop-off and pick-up days, my parents and I used to spend time in Burlington, getting Ben & Jerry’s and doing other things I can’t really remember. But I do remember eating Lake Champlain Chocolates, and being excited several years later when I found them in Wholefoods. I’ve always associated them with those sunny days at camp. So I was thrilled to see that LCC was one of the sponsors for the Blog Better Boston conference I went to at the end of October, and even more excited when, after the conference, I was able to connect with them to arrange a recipe development/giveaway post.

Lake Champlain Chocolate Giveaway

I knew I wanted this recipe to be something special – something decadent and Valentine’s Day worthy. I’ve had the combination of chocolate and hazelnuts floating around in my mind for days (inspired by a truffle I ate recently), so I knew where to start with the flavors. Lake Champlain sent me three of their select origin dark chocolate bars – a single-origin bar from Tanzania, one from Sao Thome, and an African blend. Before I dove into baking, of course, I had to taste all of them – I wasn’t too thorough, but they were definitely all different. I liked the bar from Sao Thome the best, as it had a round, fruity flavor. The Tanzania bar was smoother, lighter, and sweeter, even though it had a higher cocoa content. The African blend bar was darker and more bitter with coffee-like-notes. I decided that the Sao Thome (70% cocoa) and African blend (80% cocoa) bars would form the base of a dense, almost-flourless cake. The sweeter Tanzania bar (75% cocoa) would be used two ways – in a mascarpone-frangelico-chocolate mousse, and as a chocolate ganache. I’d make individually sized cakes that would be just the sort of dessert you could share on a romantic, Valentine’s Day date.

Individual Chocolate-Hazelnut Mousse Cakes, and a Valentine's Day Giveaway {Katie at the Kitchen Door}

The cake, which was inspired by Pastry Affair’s (actually) flourless chocolate rum cake, came out dark, dense, moist, and not too sweet. By itself it’s very intense, but topped with the absolutely dreamy, boozy, mascarpone-based chocolate-frangelico mousse (which, if you can’t tell, I was SO happy with), and drizzled with a little chocolate ganache it was perfect. Rich, chocolaty, indulgent – just the sort of thing to impress a date… or to eat too much of by yourself when you’re feeling needy.

Giveaway Details: Never tried Lake Champlain Chocolate? No worries! Lake Champlain has generously offered to giveaway a giant heart-shaped box full of chocolate truffles to one lucky reader. To enter, leave me a comment below telling me about your most memorable Valentine’s Day. For one extra entry, follow me (@Kitchen_Door) and Lake Champlain Chocolates (@LCChocolates) and tweet about the giveaway, then come back here and leave me a second comment letting me know you tweeted! The giveaway will close at midnight on Saturday the 26th, at which point I’ll randomly choose a winner. Open to U.S. readers only. If the winner doesn’t respond to me within 48 hours of me notifying them they’ve won, I’ll have to pick an alternate winner.

Disclaimer: Lake Champlain Chocolates sent me some sample products free of charge to develop this recipe, and is hosting the giveaway. I received no compensation for writing this post, and was a fan of Lake Champlain Chocolates way before I started blogging!

Individual Chocolate-Hazelnut Mousse Cakes, and a Valentine's Day Giveaway {Katie at the Kitchen Door}

Individual Chocolate-Hazelnut Mousse Cakes

Original recipe overall, but cake recipe was inspired by Pastry Affair. Makes 4 individual cakes; each cake can easily be shared by 2 people.

For the cake:

  •  6 oz. high quality chocolate with at least 75% cocoa content, roughly chopped (I used a blend of Lake Champlain Chocolate’s Sao Thome bar (70%) and African Blend bar (80%)
  • 1 stick salted butter, cubed
  • 4 eggs
  • 1/2 c. sugar
  • 1/4 c. rum
  • 6 TBS flour
  • 6 TBS high quality cocoa powder (I used Lake Champlain Chocolate’s organic cocoa)
  • 1/2 tsp salt
  1. Preheat the oven to 375°F. Line an 8×8 inch square baking pan with parchment paper. Set prepared pan aside. Add the chocolate and the butter to a small saucepan and heat over very low heat until fully melted, stirring the whole time. Set aside and let cool slightly.
  2. Beat together the eggs and sugar until thick and pale yellow, at least 3-4 minutes. Stir the rum into the chocolate mixture, then slowly fold the chocolate mixture into the egg mixture.
  3. Sift together the flour, cocoa powder, and salt. Fold into the batter. Pour the batter into the prepared pan and smooth the top with a spatula so that the batter rests evenly in the pan (it won’t spread much). Bake for 15 minutes, or until a toothpick inserted into the center comes out mostly clean, with only a few moist crumbs attached. Set cake aside.

For the frangelico chocolate mousse:

  • 1/4 c. mascarpone cheese
  • 1/2 c. heavy cream
  • 1/8 tsp cream of tartar
  • 1 TBS sugar
  • 5 TBS frangelico (hazelnut liqueur)
  • 1 1/2 oz. dark chocolate (I used LCC’s Tanzania bar (75% cocoa))
  • 1 TBS butter
  1. Whisk together the mascarpone and heavy cream. Sprinkle with the cream of tartar, then beat until cream has stiffened enough to hold soft peaks. Sprinkle with sugar, and whisk in. Beat in the frangelico one TBS at a time.
  2. Over very low heat, melt together the chocolate and the butter in a small saucepan, stirring the whole time. As soon as it is fully melted, remove from heat, and let cool slightly.
  3. Pour warm chocolate over the whipped cream. Whisk in to incorporate. Mousse should be thick and spreadable. Refrigerate until needed.

For the chocolate ganache:

  • 2 oz. dark chocolate (I used LCC’s Tanzania bar (75% cocoa))
  • 2 TBS heavy cream

Add the dark chocolate and the heavy cream to a small saucepan and heat over very low heat, stirring until melted. Remove from heat and set aside

To assemble:

  • 1 recipe chocolate-rum cake (above)
  • 1 recipe frangelico-chocolate mousse (above)
  • 1 recipe chocolate ganache (above)
  • 2 TBS chopped, toasted hazelnuts

Use a biscuit cutter to cut four 2-inch rounds out of the cake – save the extra pieces for snacking. Place the four cake rounds on four plates, and divide the mousse amongst the four plates, spreading it evenly on top of the cake. Place cakes in the freezer for 10 minutes to allow mousse to firm up slightly. Remove from freezer, and drizzle with the ganache (rewarmed slightly if necessary). Sprinkle with the toasted hazelnuts, and serve!

Cookbook Review: La Cucina Italiana and Classic Spaghetti Bolognese

6 January 19, 2013 Cookbook

Cookbook Review: La Cucina Italiana and Classic Spaghetti Bolognese

Classic Spaghetti Bolognese {Katie at the Kitchen Door}

It’s funny, before I really cooked much cookbooks were a single category, filed in my brain under “types of books.”  Now, when I open a cookbook, I instantly start checking off characteristics: single-subject, informational, restaurant tribute, DIY… the list goes on.  It’s kind of like buying a couch.  Before you’ve ever bought a couch, you think – “couches, they’re pretty simple, the only difficult part of this will be having so many to choose from!”  Then you start shopping for couches, and slowly you start checking off things you like and don’t like – skirted couches are out, no plushy cushions, definitely not leather.  Before you know it, your couch-shopping-brain is saying “structured couch, must have arms, wooden legs, a blue-gray linen but not too finely woven, curved back, three cushions not two” and your problem has become that you can’t find the couch of your dreams.

Anyway, couches are not the point.  The point is, cookbooks are all different.  This one, La Cucina Italiana: The Encyclopedia of Italian Cooking, very much fits its title.  Before anything else, it’s instructive. It’s not a book that I’d be likely to turn to for spur-of-the-moment inspiration, but it is one that I would reach for when I had a question – how do you make homemade tomato puree?  Why should you purchase bronze-cut spaghetti? What is the classic preparation of Pasta All’amatriciana?

Classic Spaghetti Bolognese {Katie at the Kitchen Door}

This book was created by the editors of La Cucina Italiana magazine, and covers 21 categories of Italian cuisine in its 450 pages, including fresh pasta, dried pasta, garden vegetables, beef, pork, poultry, lamb, seafood, and desserts. Many of the recipes are photographed step-by-step, making it visually simple to understand the preparations.  Aesthetically, I’m not usually a big fan of this sort of photography, but here it’s entirely appropriate, and very useful.  Folding tortellini, making couscous by hand, peeling and coring celeriac – these are things that aren’t very intuitive the first time around!

One trade-off for having all of this useful information packed into one book?  You lose the personal voice and story.  Many of my favorite cookbooks are my favorites precisely because I can hear the author’s thoughts through their words, because their recipes are accompanied with stories that ignite my imagination. This book is missing that element, but it does make a great reference for preparing the most classic Italian dishes.

Classic Spaghetti Bolognese {Katie at the Kitchen Door}

I have to mention one thing that really frustrates me about this book – the recipe layout. The introduction explains that there are several types of sections in this book – ingredient guides, which cover basic information about the taste and varieties of various ingredients; feature recipes, which are laid out like a traditional recipe, with an ingredient list and numbered steps; and essential methods, which are basic recipes using the ingredient in question, and are laid out paragraph style. The majority of the recipes in this book come from the “essential methods” sections, and while I understand what they were going for with the layout, I find it somewhat irritating not to have a separate list of ingredients and amounts available when I’m writing a grocery list or planning a menu. It may just be personal taste, but I think it would make using these sections of the book a bit more challenging for beginners.

However, overall this book is a well thought-out, thorough, and useful guide to Italian cooking. Because this book focuses on traditional cuisine, I wanted the first recipe I tried to be a classic, so I went with the most classic one I could find – spaghetti bolognese. The preparation was very simple, and after two long hours of the ragu simmering on the stove and making my whole house smell like the North End, Trevor and I finally dug into huge bowls of spaghetti topped with the tender, flavorful sauce and some good Parmesan. The sauce was spot-on, exactly what you might have in your favorite Italian hole-in-the-wall restaurant when you were craving comfort food. Next time I’m definitely making a double batch to freeze!

The bottom line: La Cucina Italiana: The Encyclopedia of Italian Cooking is a great learning book for both beginning and advanced home cooks. While it’s not the most inspiring cookbook I own, its practical information and detailed step-by-step photographs will make it a book that I turn to when I need to know the basics of a classic Italian recipe. The recipes themselves are fairly traditional, and they are well-tested and clearly explained.

Disclaimer: I was sent a free review copy of La Cucina Italiana by the publisher, Rizzoli New York, but I was not otherwise compensated to write this review and all opinions are my own!

Classic Spaghetti Bolognese {Katie at the Kitchen Door}

Classic Spaghetti Bolognese

Recipe from La Cucina Italiana: The Encyclopedia of Italian Cooking. Serves 3-4.

  • 2 oz. pancetta, minced
  • 1 carrot, peeled and minced
  • 1 stick celery, minced
  • 1 onion, minced
  • 1 lb ground beef
  • 1/2 c. dry white wine
  • 2 TBS tomato paste
  • 3/4 c. whole milk
  • salt to taste
  • 3/4 to 1 lb. spaghetti, cooked according to package directions
  1. Add pancetta to a large saucepan and place over medium heat. Cook, stirring occasionally, for 5 minutes, or until pancetta begins to crisp. Add carrot, celery, and onion to pan, and cook, stirring the whole time to prevent burning, for another 8 minutes, or until beginning to soften.
  2. Add ground beef to the pan and brown, chopping up into small bits with a wooden spoon. Cook until mostly browned, about 5 minutes. Add the white wine, stir to incorporate, and raise heat to bring to a boil. Cook until it has almost completely evaporated.
  3. Add the tomato paste to 1 1/2 c. warm water and stir to dissolve. Add this to the pan, and stir to incorporate. Reduce heat to a low simmer. Place the milk in a pourable container. Add a small splash of the milk to the pan and stir to incorporate. Cook the ragu at a low simmer for 1 1/2 to 2 hours, adding a small splash of milk and stirring every 10-15 minutes, until you’ve used up all the milk. Season with salt to taste (do this at the very end so you don’t over-salt it). Serve ragu over spaghetti with a generous grating of parmesan cheese.
Winter Cleanse 2013: Week Two

0 January 16, 2013 Food

Winter Cleanse 2013: Week Two

Winter Cleanse Week Two - Mushroom and Olive Veggie  Burger, Pear and Pomegranate Salad

Tah-dah! I have the menu/grocery-list/pictures for the second week of my 2013 winter cleanse! I have some wrap-up thoughts on how this went for me this year, but before I get into that, I want to direct everyone over to the week one post for more info on the reason behind the cleanse, why I even call it a cleanse, how it’s set-up, and more. The only new logistical thing I’ll mention is that the beginning of week two makes use of leftovers from the end of week one, so keep in mind that there will be a little bit more cooking if you do this week as a stand-alone menu.

Now for the wrap-up: overall, I feel better about the cleanse this year than I did last year. I wasn’t as stressed out by all the cooking, in large part due to better planning, and I stuck to the plan more closely than last year. I think having snacks built-in helped, as did writing out by hand each night what was on the plan for the next day, and checking off each thing that I ate (plus writing down any mistakes in an “oops” section – I’ll admit to one fresh chocolate-chip cookie, and a couple days where a little piece of chocolate may have found its way into my belly after dinner). I also think setting aside one night “off” to attend a party I’d known about in advance was crucial – it gave me a special meal to look forward to, and extra dedication to eating well that day and the day before. Having that meal out also gave me perspective on how this might work if I stuck with it all year – knowing that you’re going to indulge ahead of time and treating it as an indulgence that should be balanced with healthful habits before and after is a good way to approach eating in general!

Winter Cleanse Week Two - Greek Egg and Lemon Soup with Chicken, Kale and White Bean Soup

One thing that I didn’t anticipate was the sheer volume of leftovers I ended up with. At first, this was kind of stressing me out – I like to be able to eat all the food that I make/buy, and typically, I only make three or four dinners in a week, so making seven different things meant almost twice as much food, even with most recipes scaled down. I also only have one shelf in a fridge shared with four people, and even less space in the freezer, so between more fresh ingredients than usual and more leftovers than usual, to say I was squeezed for space is an understatement (every time I took anything out of the fridge it was like doing a jigsaw puzzle). Eventually, I snapped out of it and turned on the extra freezer in the basement (sometimes it’s the littlest things that you procrastinate doing…) and stored all the leftovers, neatly labeled, in there. The added benefit of this is that I actually have a ton of “cleanse” food to keep me eating healthy through the next two weeks or so, so I’m planning on continuing with the general plan for the most part.

Winter Cleanse Week Two - Fruit and Nut Pancakes, Granola

The last thing that I want to mention is that this time around, not only did I lose 4 pounds, but I really felt like doing this cleanse gave me a ton of energy (and also protected me somewhat from the flu that’s going around… knock on wood). It’s nice to find that sort of balance, and I hope I can continue to maintain it!

With all that said, here are the logistics for this week:

Weekend prep activities (i.e. things to do when you have extra time that will make the rest of the week a little easier):

  • Make granola
  • Roast broccoli
  • Roast beets
  • Cook hard-boiled eggs
  • Wash and dry spinach, arugula, and kale
  • Make the almond salad dressing for the spinach salad
  • Remove pomegranate seeds and prepare pomegranate gremolata (for pear and pomegranate salad)
  • Make the pomegranate salad dressing
  • Soak chickpeas (for beet and fried chickpea salad)

Menu Attachment
Grocery List Attachment

Disclaimer: I am not a dietitian, nutritionist, doctor, or medical professional of any sort.  I simply wanted to share my personal menu and goals for healthy eating, so please realize that I have tapered this plan to what I feel my own nutritional needs are, and carefully consider your own health needs/consult your doctor before following any diet, cleanse, or detox plan! 

Winter Cleanse Week Two - Beet and Fried Chickpea Salad, Kale and Avocado Salad

Winter Cleanse Menu 2013 – Week Two

Day Eight, Sunday:

  • Brunch: Homemade Granola, Greek Yogurt, and Fresh Fruit Parfait; Small Latte
  • Snack: Leftover Quinoa Puttanesca (from week one)
  • Dinner: Mushroom and Olive Veggie Burgers; Kale and Avocado Salad with Almonds, Apples, and Nori

Day Nine, Monday:

  • Breakfast: Leftover Shakshuka (Eggs and Potatoes in Spicy Tomato Sauce, from week one)
  • Snack: 2 Clementines
  • Lunch: Leftover Bulghur with Butter-Roasted Almonds and Chicken (from week one)
  • Snack: 1 c. Roast Broccoli
  • Dinner: White Bean, Kale, and Pesto Soup; Pomegranate, Pear, and Arugula Salad

Day Ten, Tuesday:

  • Breakfast: Leftover Apple Quinoa Cake (from week one)
  • Snack: Small Latte
  • Lunch: Leftover Mushroom and Olive Veggie Burgers, Leftover Pomegranate, Pear, and Arugula Salad
  • Snack: 1 6-oz. Greek Yogurt
  • Dinner: Roasted Beet and Fried Chickpea Salad

Day Eleven, Wednesday:

  • Breakfast: Granola, Greek Yogurt, and Fresh Fruit Parfait
  • Snack: 2 Clementines
  • Lunch: Leftover White Bean, Kale, and Pesto Soup
  • Snack: Snack Bag – 1/4 c. Pecans, 1/4 c. Dried Fruit, 2 TBS Chocolate Chips
  • Dinner: Chickpea Dumplings in Tomato-Yogurt Sauce, Kale and Avocado Salad with Almonds, Apples, and Nori

Day Twelve, Thursday:

  • Breakfast: Leftover Apple Quinoa Cake
  • Snack: Fruit Smoothie – 1 c. orange juice, 1 c. frozen mixed berries, 1 6-oz container greek yogurt, 1 TBS maple syrup
  • Lunch: Leftover Chickpea Dumplings in Tomato-Yogurt Sauce
  • Snack: 1 c. Roast Broccoli
  • Dinner: Roast Beet and Spinach Salad with Goat Cheese, Pomegranate, and Eggs

Day Thirteen, Friday:

  • Breakfast: Raspberry-Maple Breakfast Quinoa
  • Snack: Small Latte
  • Lunch: Leftover Roast Beet and Spinach Salad with Goat Cheese, Pomegranate, and Eggs
  • Snack: Snack Bag – 1/4 c. Pecans, 1/4 c. Dried Fruit, 2 TBS Chocolate Chips
  • Dinner: Greek Egg and Lemon Soup with Chicken, Brown Rice, and Chickpeas

Day Fourteen, Saturday:

  • Brunch: Whole Wheat Fruit and Nut Pancakes with Maple Syrup
  • Snack: Leftover Roast Beet and Chickpea Salad
  • Dinner: Quinoa Salad with Broccoli-Avocado Pesto

Winter Cleanse Week Two - Menu and Grocery List, from Katie at the Kitchen Door

Pomegranate & Pear Salad

0 January 15, 2013 Food

Pomegranate & Pear Salad

Pomegranate and Pear Salad {Katie at the Kitchen Door}

Alright, guys – one more salad recipe, then I’ll post the week two menu and groceries tomorrow, and then I’ll shut up about cleansing for a good long while. In fact, I have two decidedly non-cleanse-friendly recipes coming up in the next week – think comforting Italian, then think Valentine’s Day planning. I’m excited already. Not that I’m going to give up all my cleanse habits – on the contrary, I plan to continue eating a lot of salads and veggie-based dishes for at least the near future. It’s just that I’m sneaking some indulgences back in there too.

But first thing’s first – salad. This salad is from the November issue of Food and Wine, and was actually developed by chef/blogger/recent-cookbook-author Aida Mollenkamp (check out her new book, Keys to the Kitchen, if you haven’t already). It’s very simple and refreshing and sweet, with juicy pomegranate seeds and fresh pears, just the thing for when you’re not feeling too much like eating a traditional salad but want to get your greens in. Making the dressing, which uses pomegranate molasses, honey, and mustard, is a must. The only thing I changed was the ratios of the pomegranate gremolata to the greens and of the greens to the dressing – the original recipe was made to serve 10, and I certainly can’t eat 10 servings worth of the same salad before it goes bad. I also like my salads a little bit fruit-heavy, so that’s reflected below.

Arugula Salad with Pears and Pomegranate Gremolata

Recipe adapted slightly from Food and Wine magazine. Serves 4.

  • 1/2 c. pomegranate arils
  • 2 TBS fresh, finely chopped flat-leaf parsley
  • 1/2 small shallot, peeled and finely minced
  • 1/4 tsp freshly grated orange zest
  • 2 TBS olive oil
  • 1 TBS pomegranate molasses
  • 1 TBS red wine vinegar
  • 1 1/2 tsp honey
  • 1 1/2 tsp mustard
  • 5 oz. arugula, washed and dried
  • 1-2 ripe Bosc pears, thinly sliced
  1. To make the gremolata, combine the pomegranate, parsley, shallot, and orange zest in a small bowl. Set aside.
  2. Make the dressing by vigorously whisking together the olive oil, pomegranate molasses, vinegar, honey, and mustard. Season to taste with salt. Pour the dressing over the greens and toss to coat. Divide the greens among 4 plates, and top each plate with a few slices of pear and 2 heaping TBS of the pomegranate gremolata. Serve immediately.
  • « Previous Page
  • Page 1
  • …
  • Page 33
  • Page 34
  • Page 35
  • Page 36
  • Page 37
  • …
  • Page 57
  • Next Page »

Primary Sidebar

Subscribe!

Get creative recipes and menu ideas delivered straight to your inbox.

Most Popular

A House // Sweet Potato and Coconut Milk Soup with Brown Rice and Lentils

Monthly Fitness Goals: July // Homemade Spinach Wraps with Chopped Greek Salad

A New Job // Classic Seven-Layer Bars

Butternut Squash Carbonara with Fried Sage and Caramelized Onions

Happy Birthday, Trevor! // Peanut Butter Fudge

Cookbook Review and Giveaway: Home Made Winter

Drizly

Please note!

Full disclosure: if you purchase anything at Amazon using the above links or any other links to Amazon on this site, I will receive a small commission. Just so you know!

Copyright© 2018 · Cookd Pro Theme by Shay Bocks

View Mobile Site
This site uses cookies: Find out more.