• Skip to primary navigation
  • Skip to content
  • Skip to primary sidebar
  • Home
  • Recipes
  • Features
    • Cookbook Reviews
    • Ingredient of the Week
    • Sunday Dinner
    • Fitness Goals
  • Travel
  • About
    • Privacy Policy
    • Cookie Policy
  • Work With Me

Katie at the Kitchen Door

Globally-inspired, seasonal recipes

Blog Page

Greatist Collaboration: Baked Stuffed Apples with Maple Cream

0 December 19, 2012 Breakfast

Greatist Collaboration: Baked Stuffed Apples with Maple Cream

Baked Stuffed Apples with Maple Cream {Katie at the Kitchen Door}

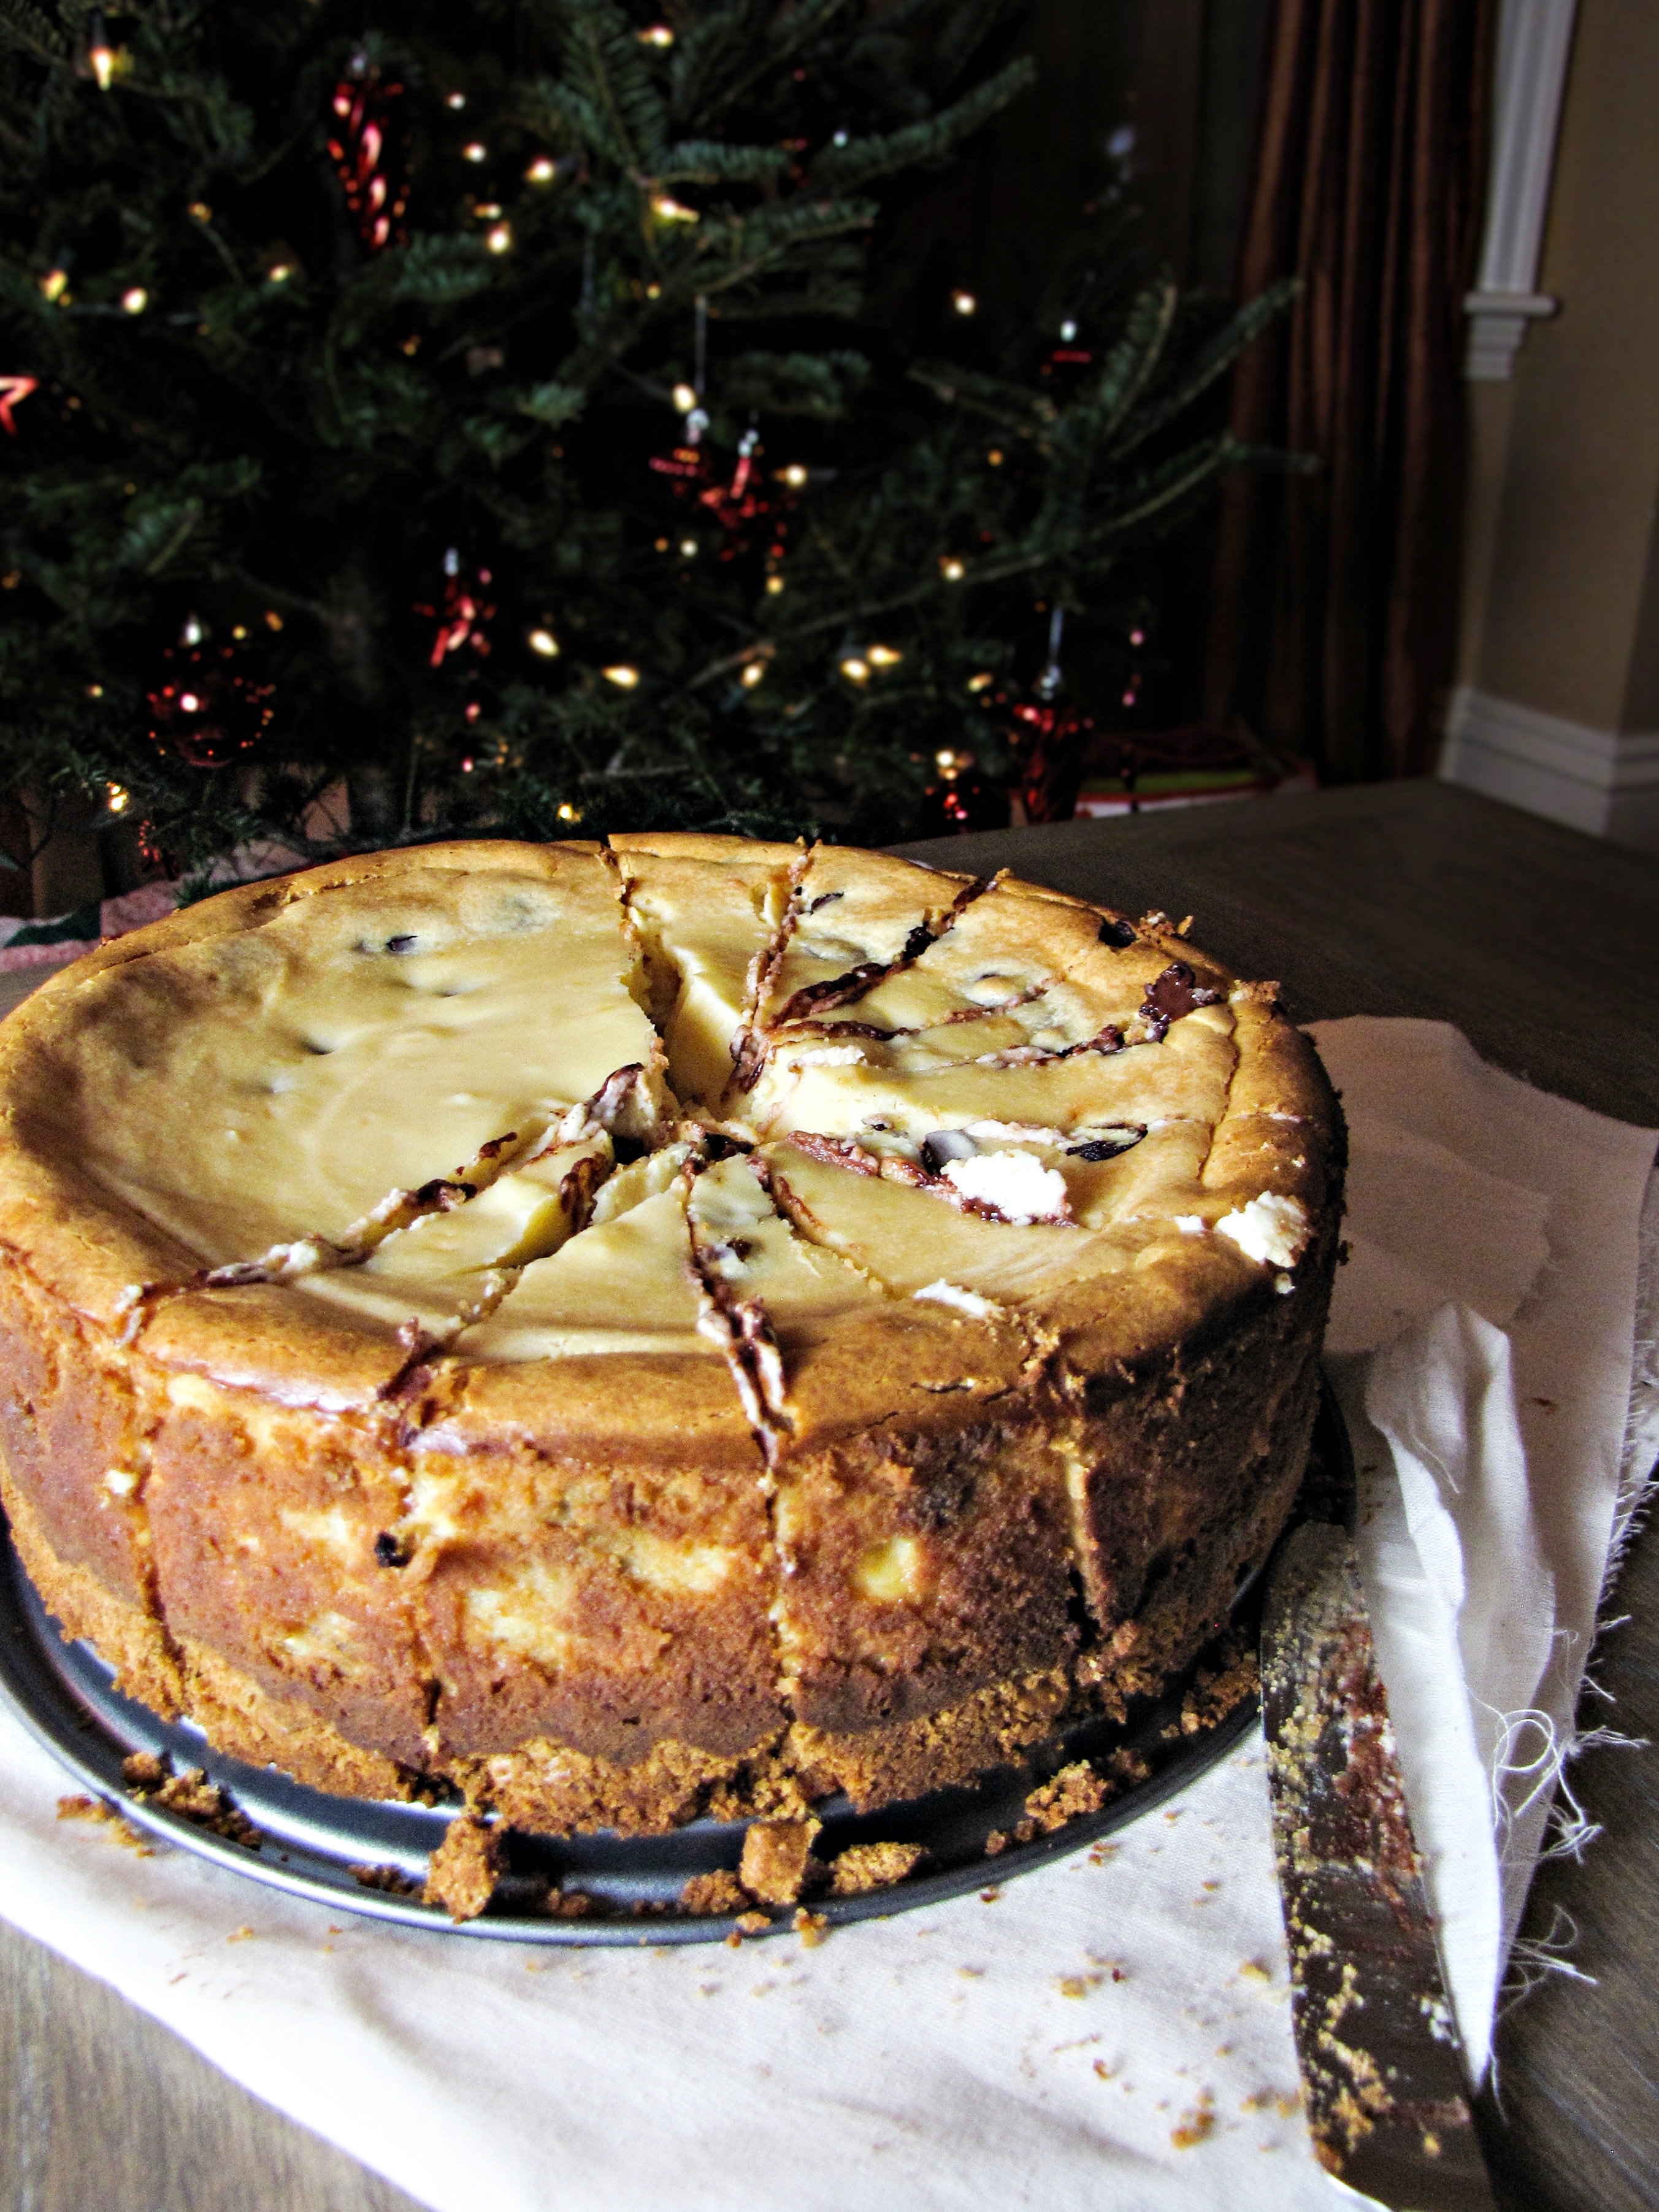
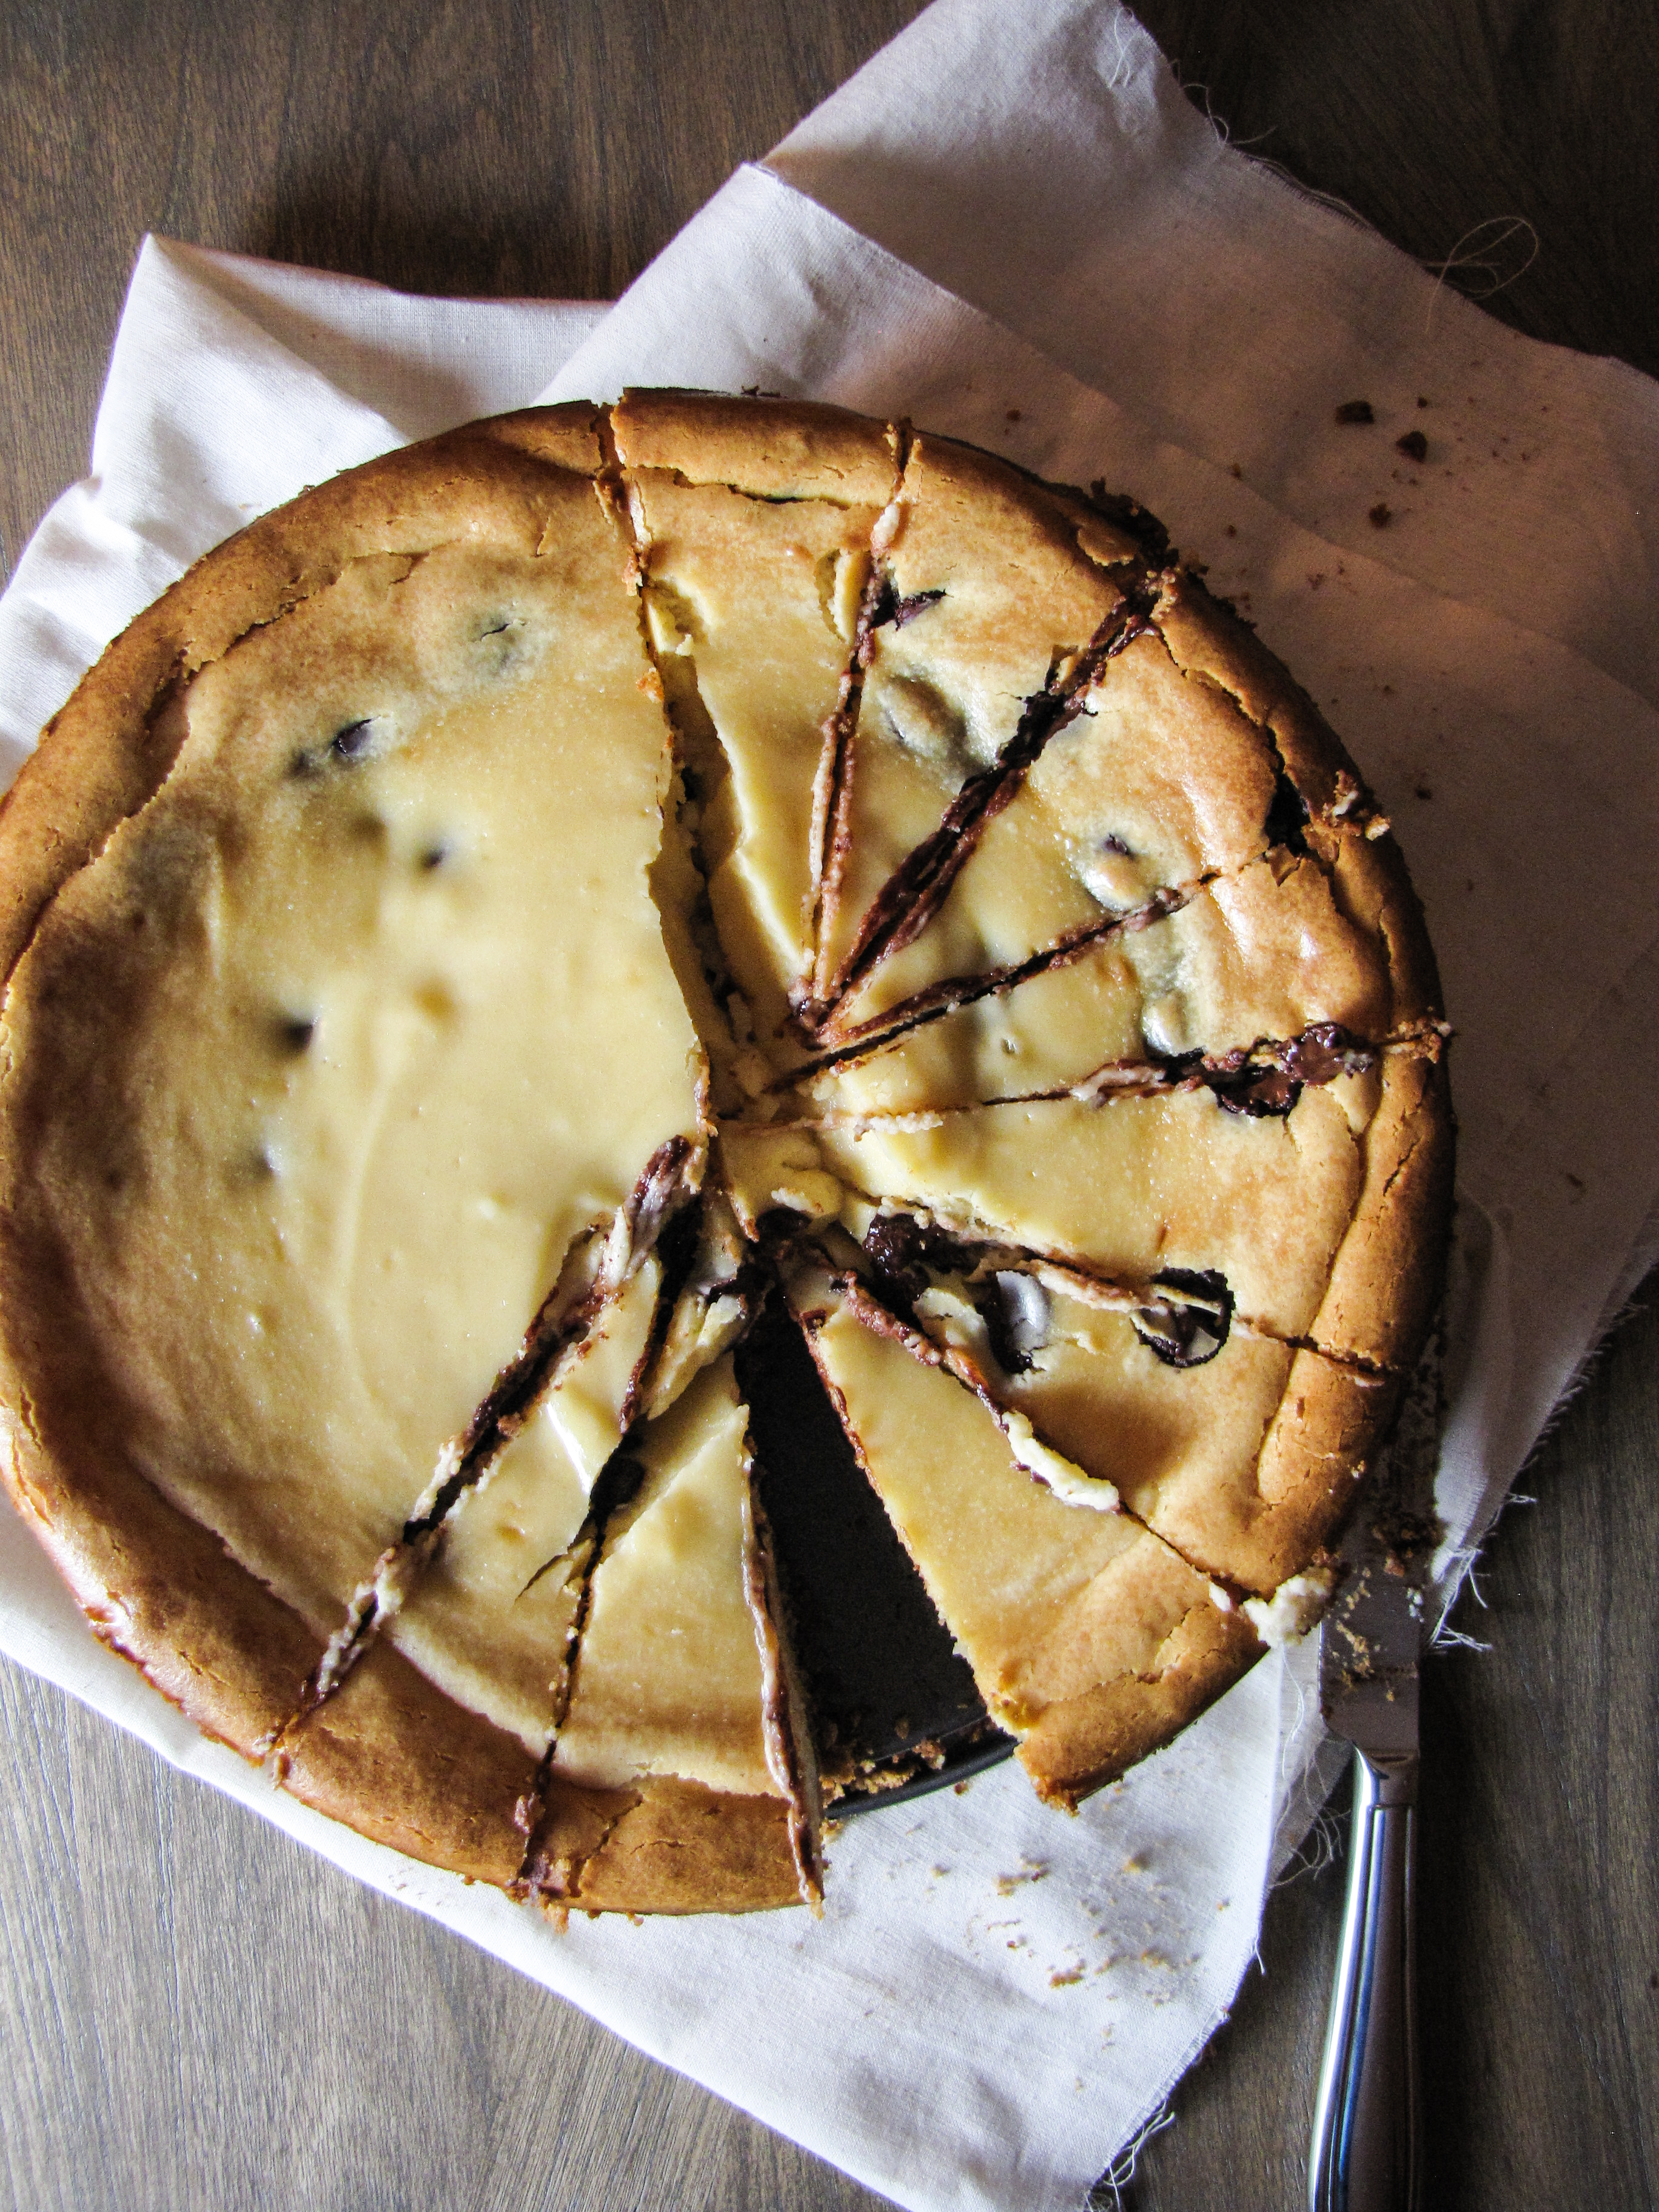
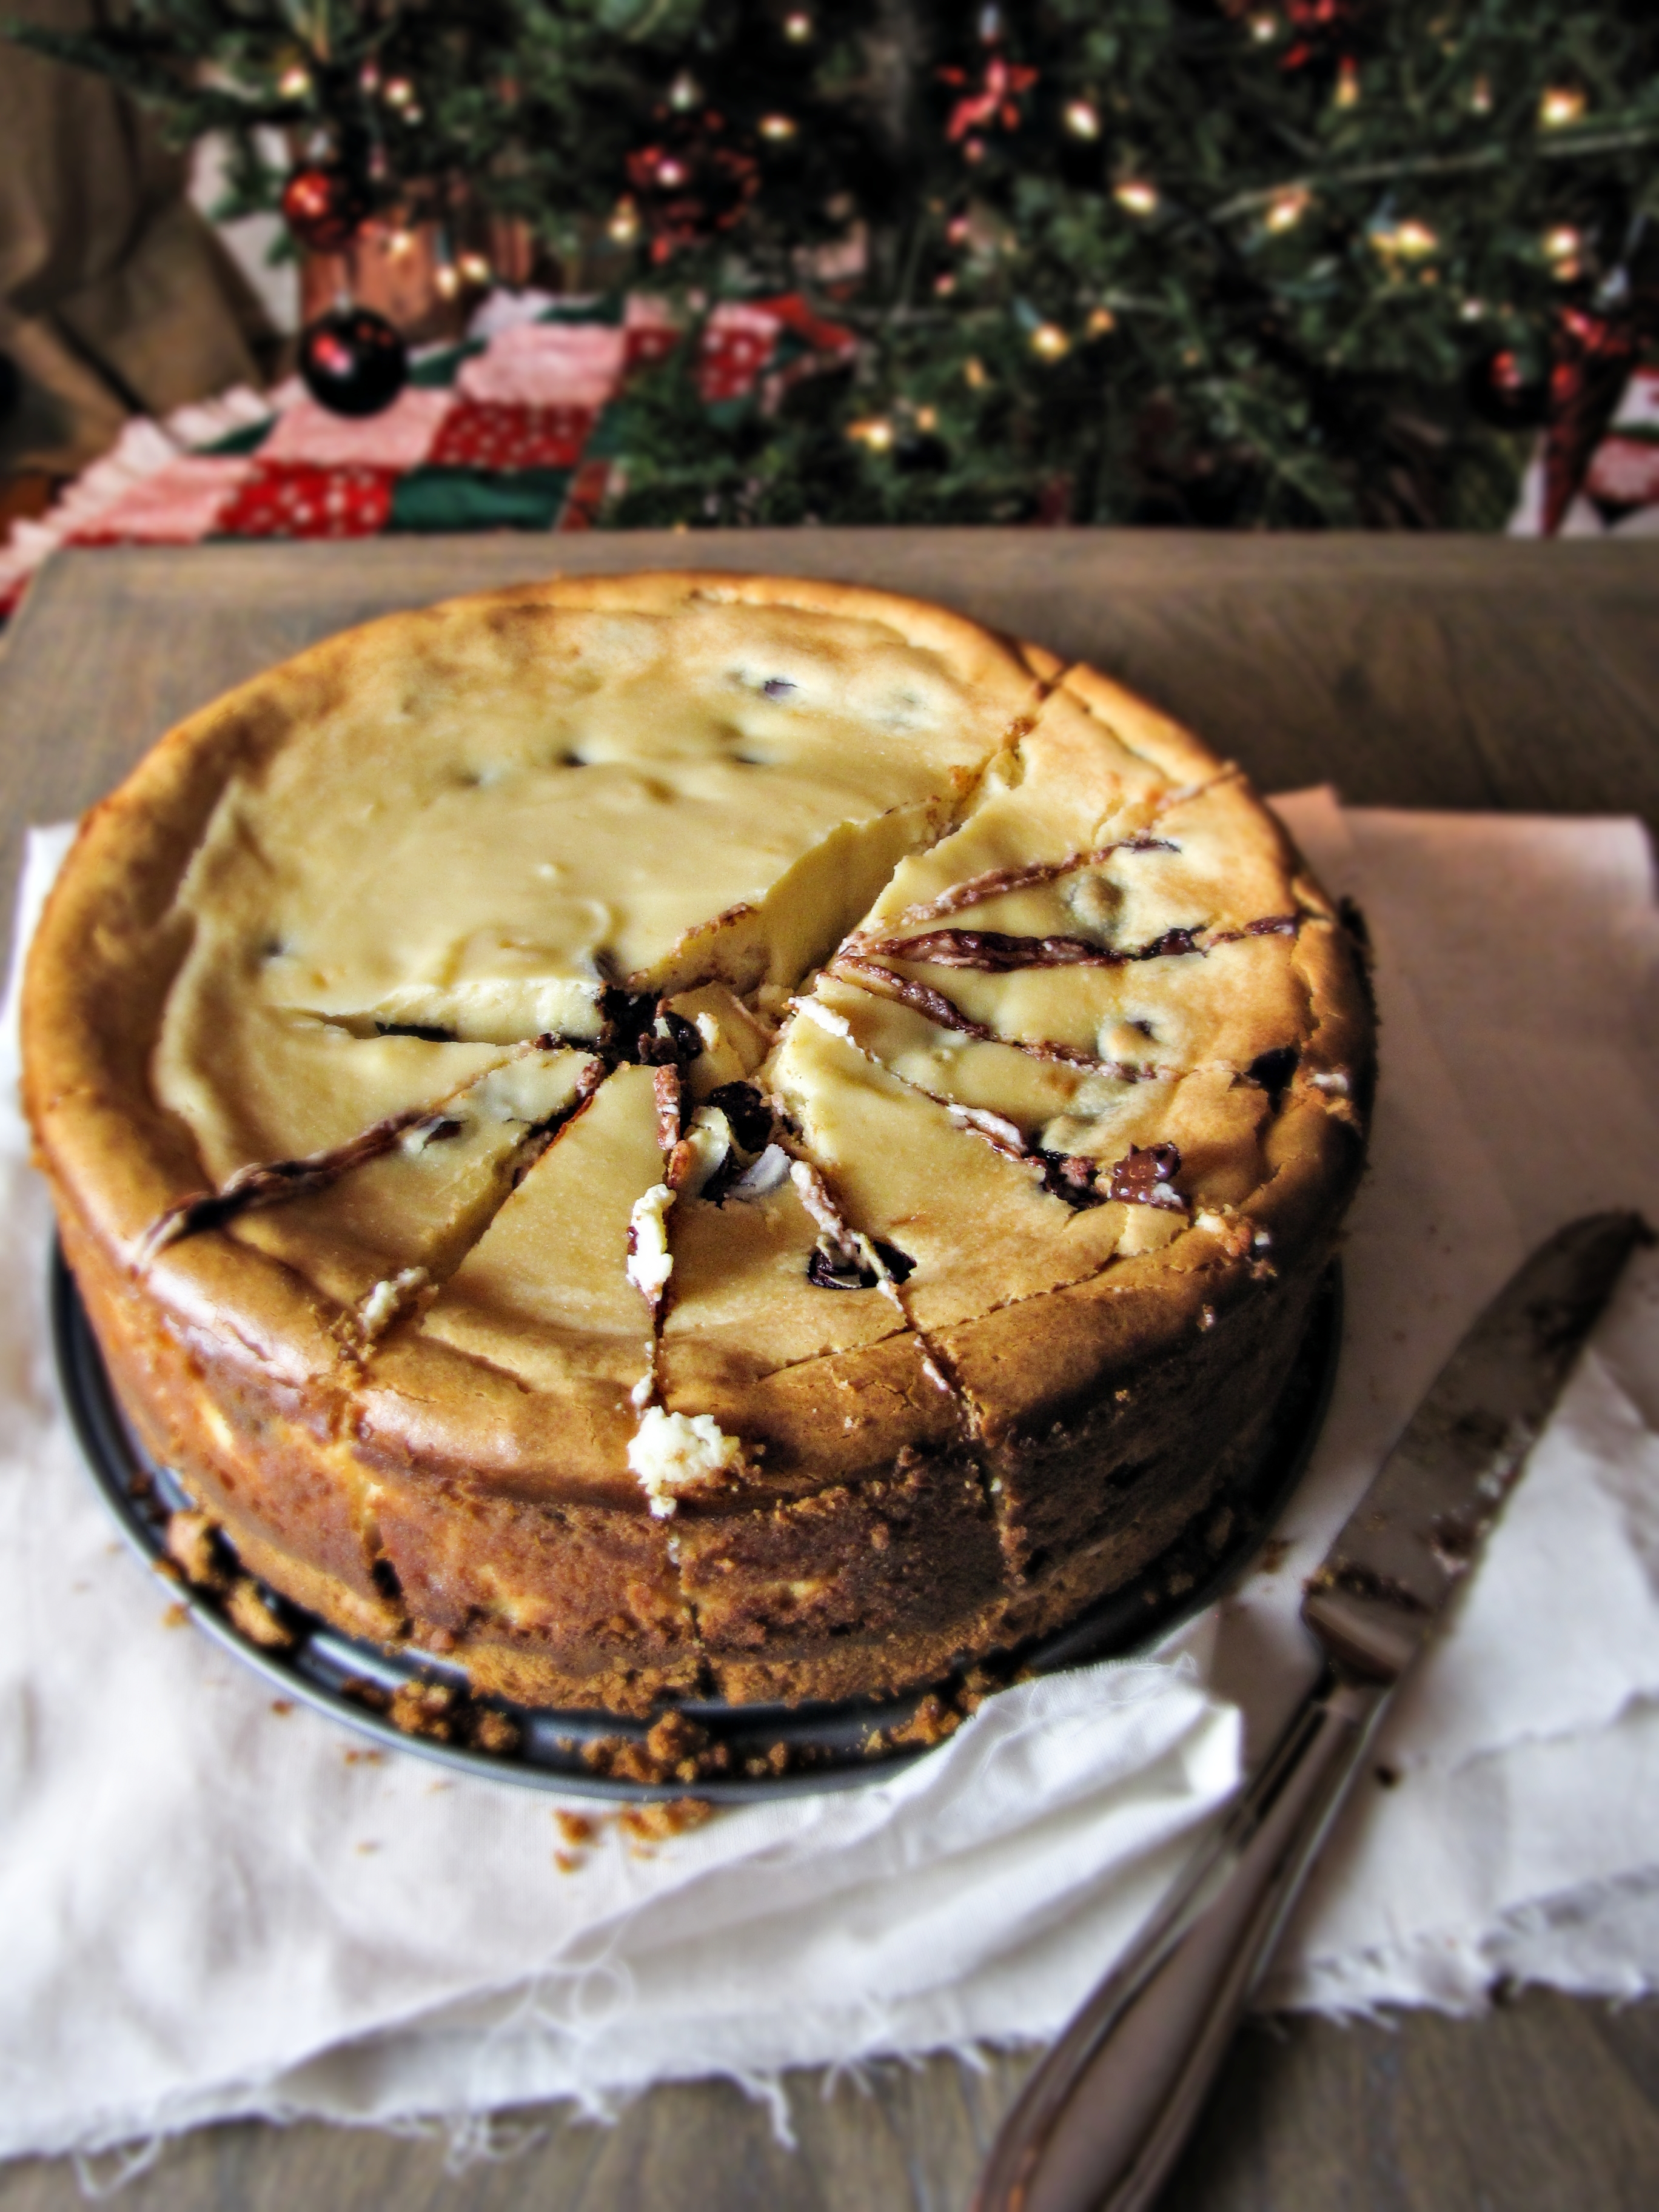
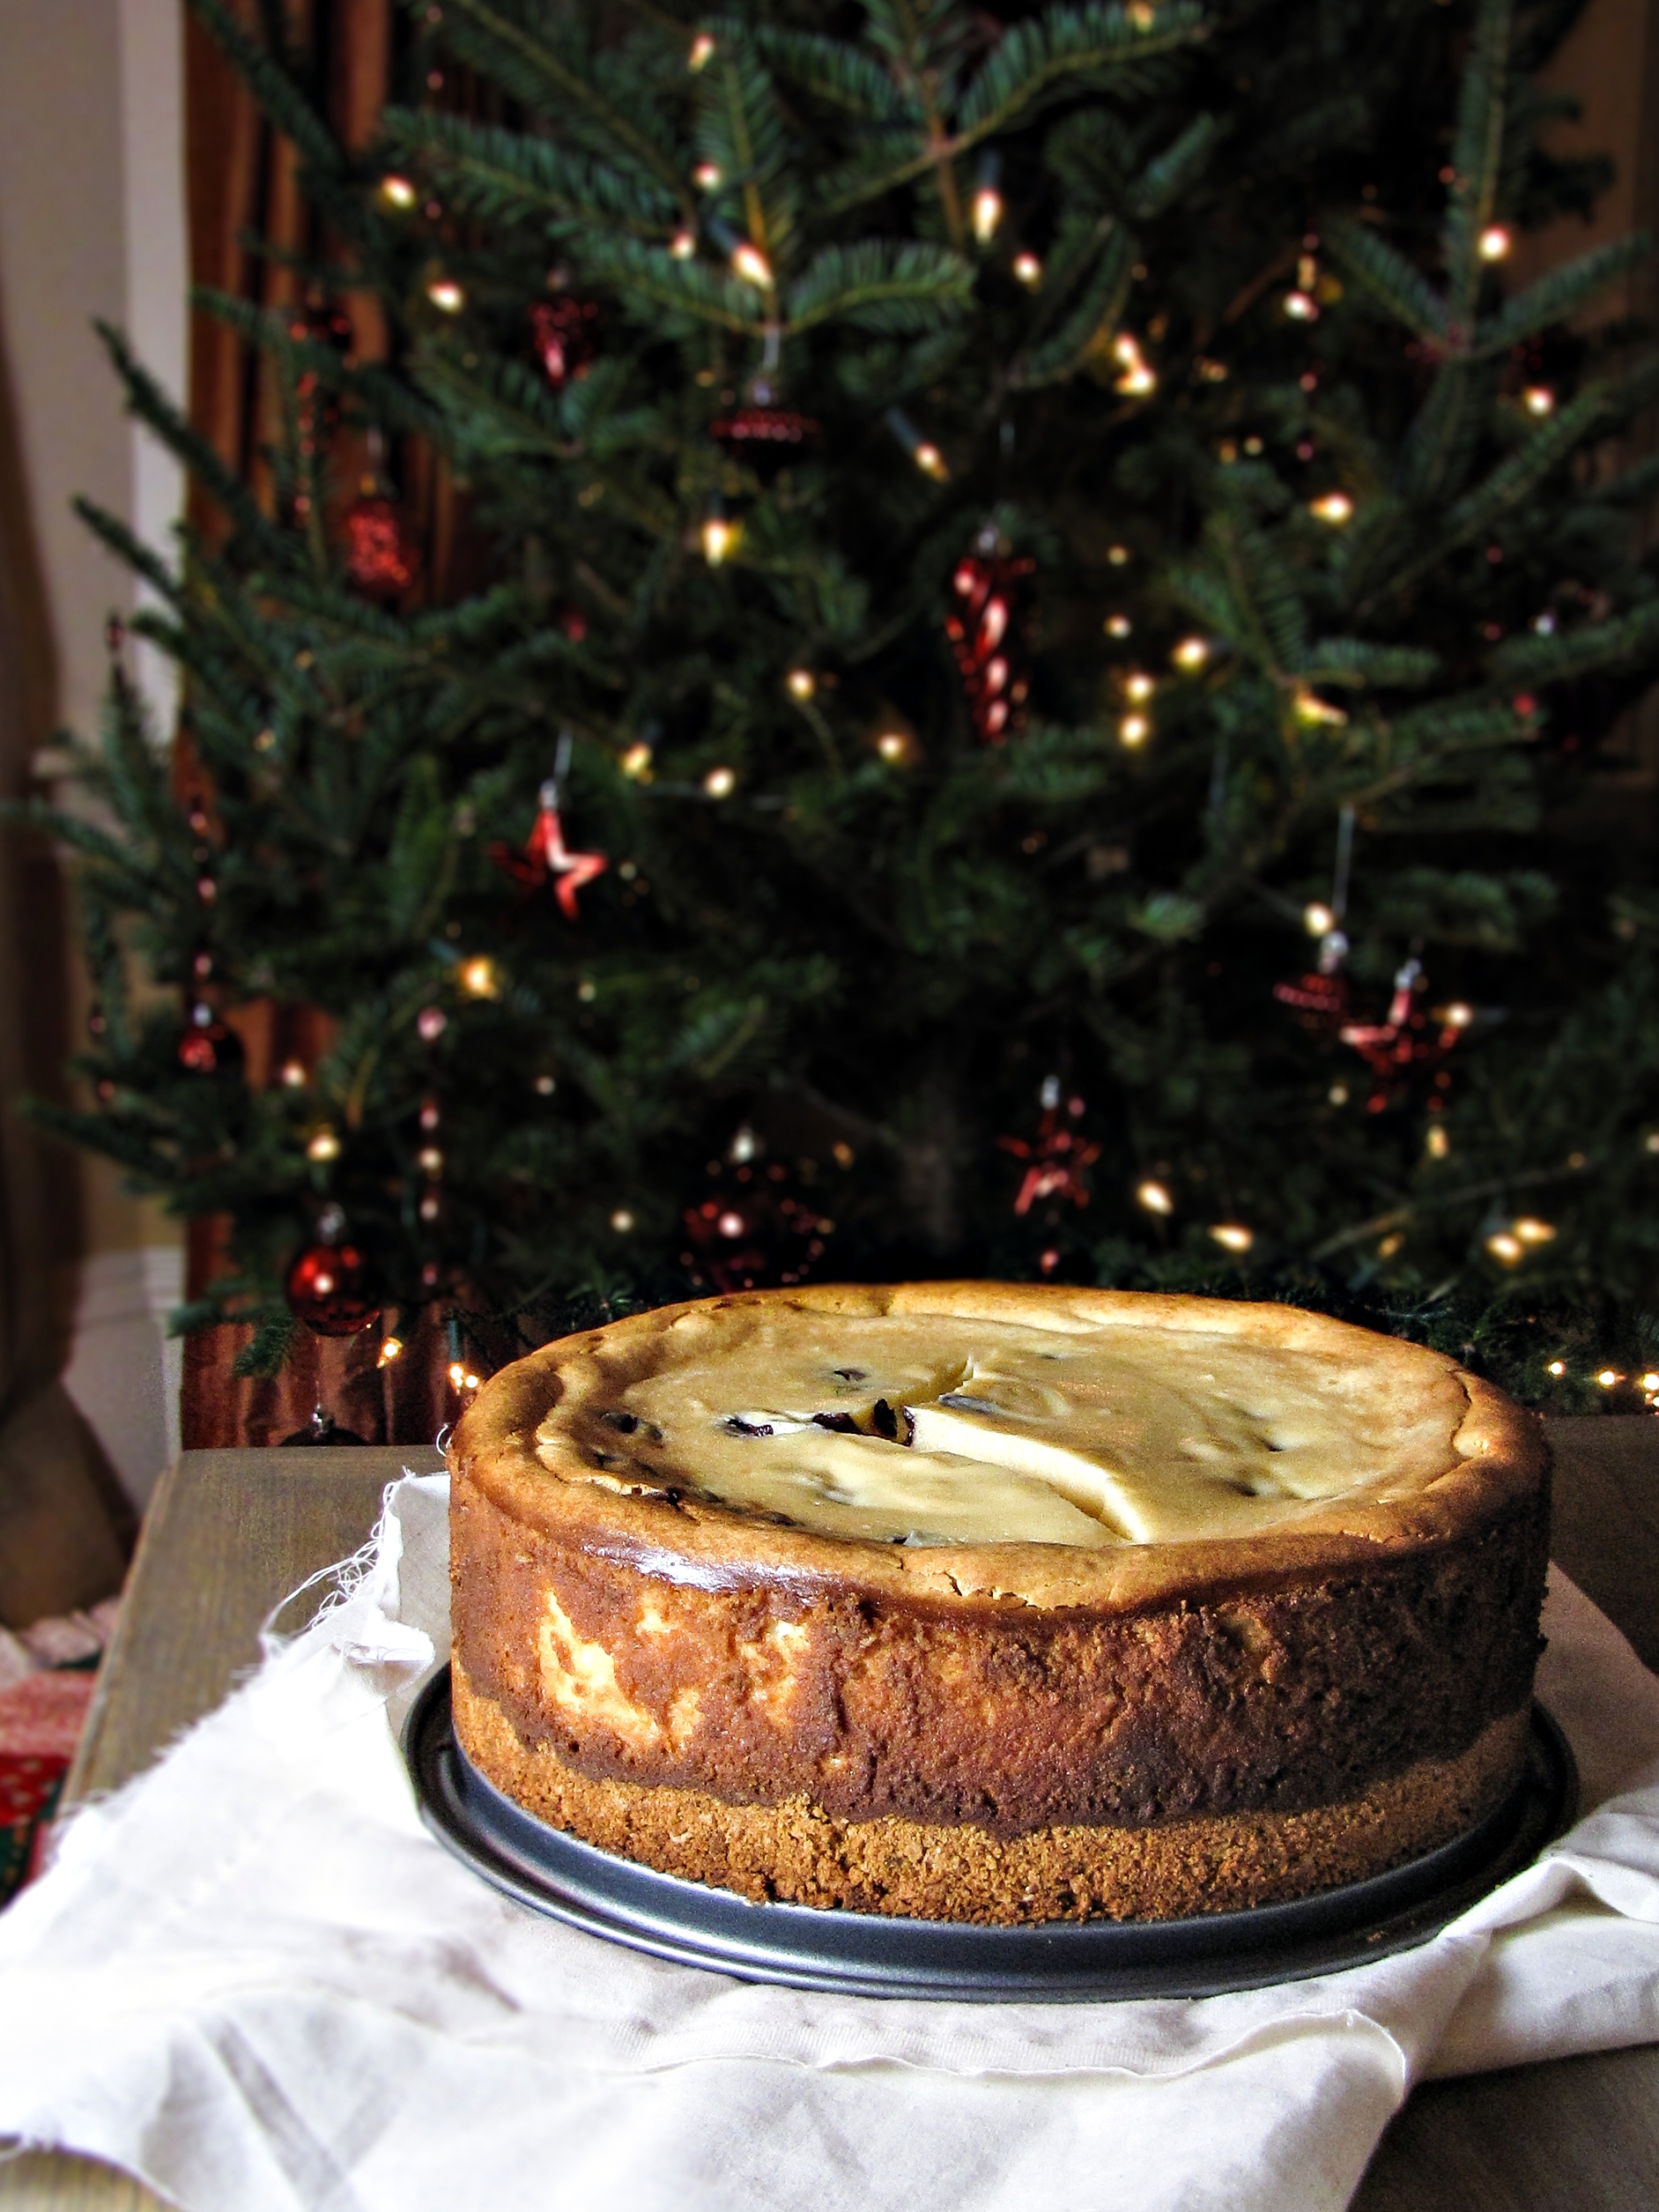
On Monday, I posted the richest, most decadent dessert in my repertoire – Bailey’s Chocolate-Chip Cheesecake. It’s one of my all-time favorites, which shouldn’t be a surprise, coming from a girl who has been known to order a blue cheese salad, followed by pasta carbonara, followed by creme brulee when out to dinner. (Read: I don’t know what I’d do with myself if I were lactose intolerant). But even I have limits, and as I was making that cheesecake and actually seeing what 2 pounds of cream cheese looks like in a bowl, I knew I’d have to exercise some self-control. And then atone for my gluttony.

Baked Apples stuffed with Pecans and Dates {Katie at the Kitchen Door}

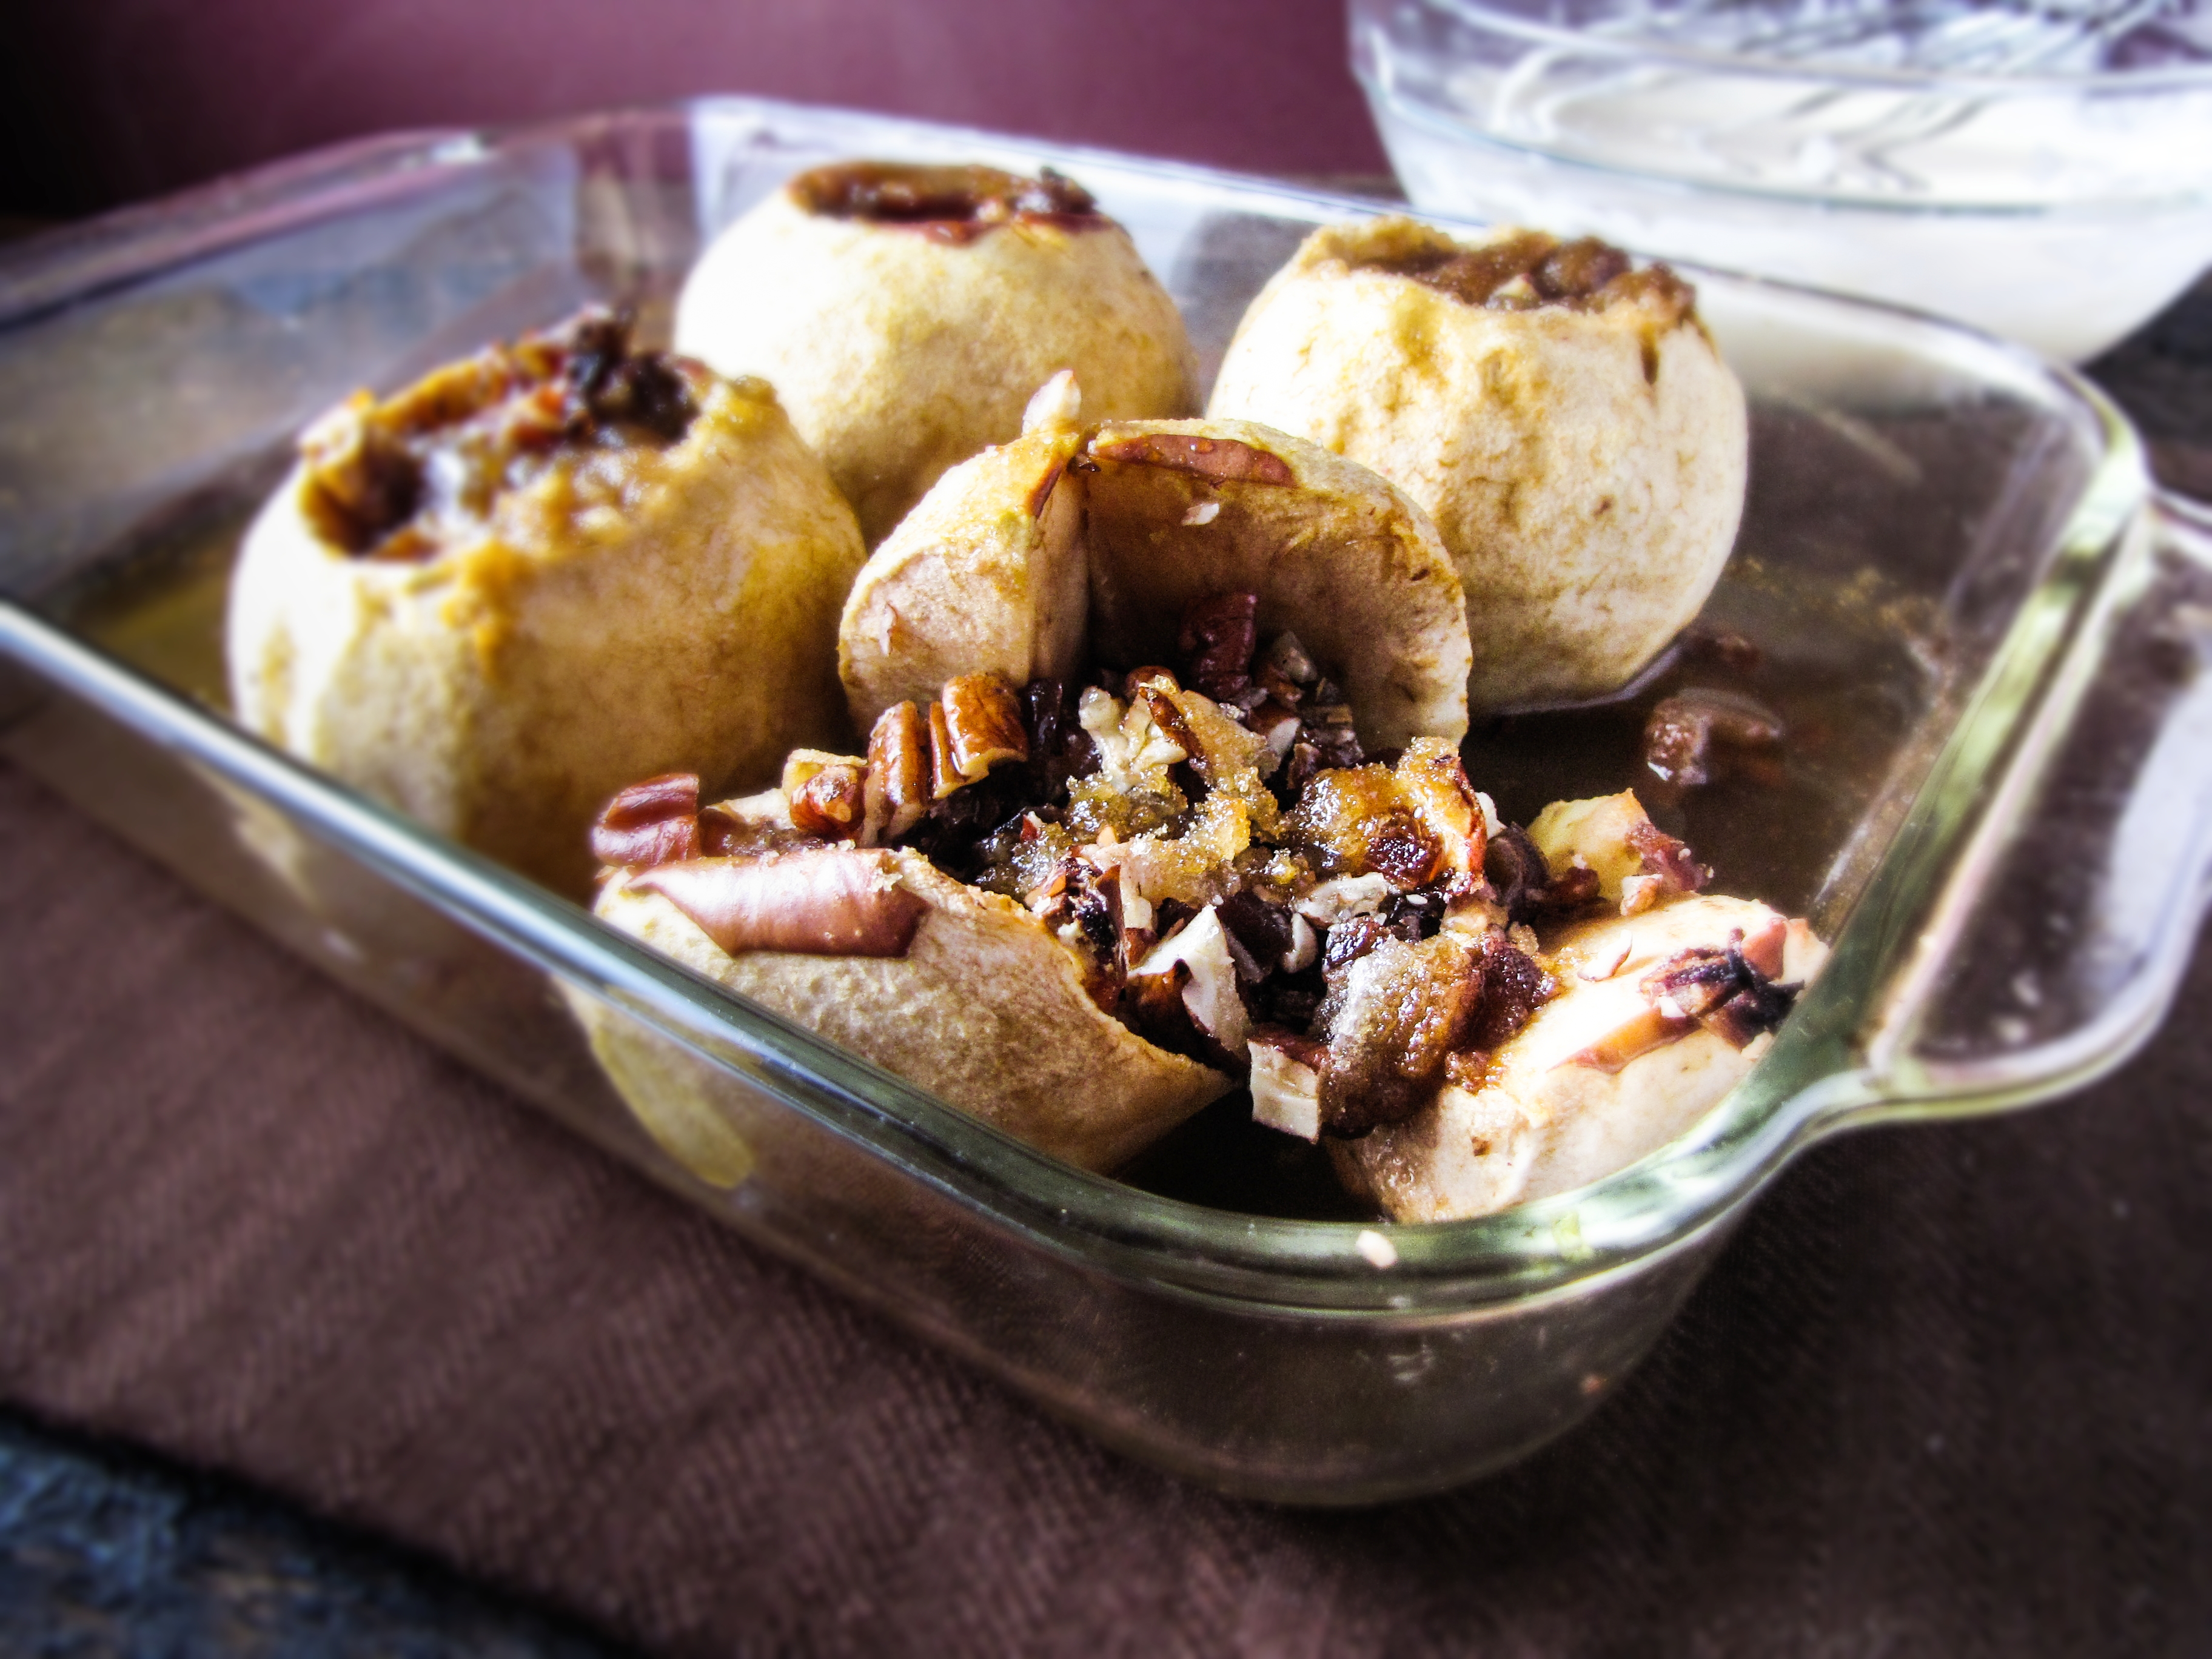
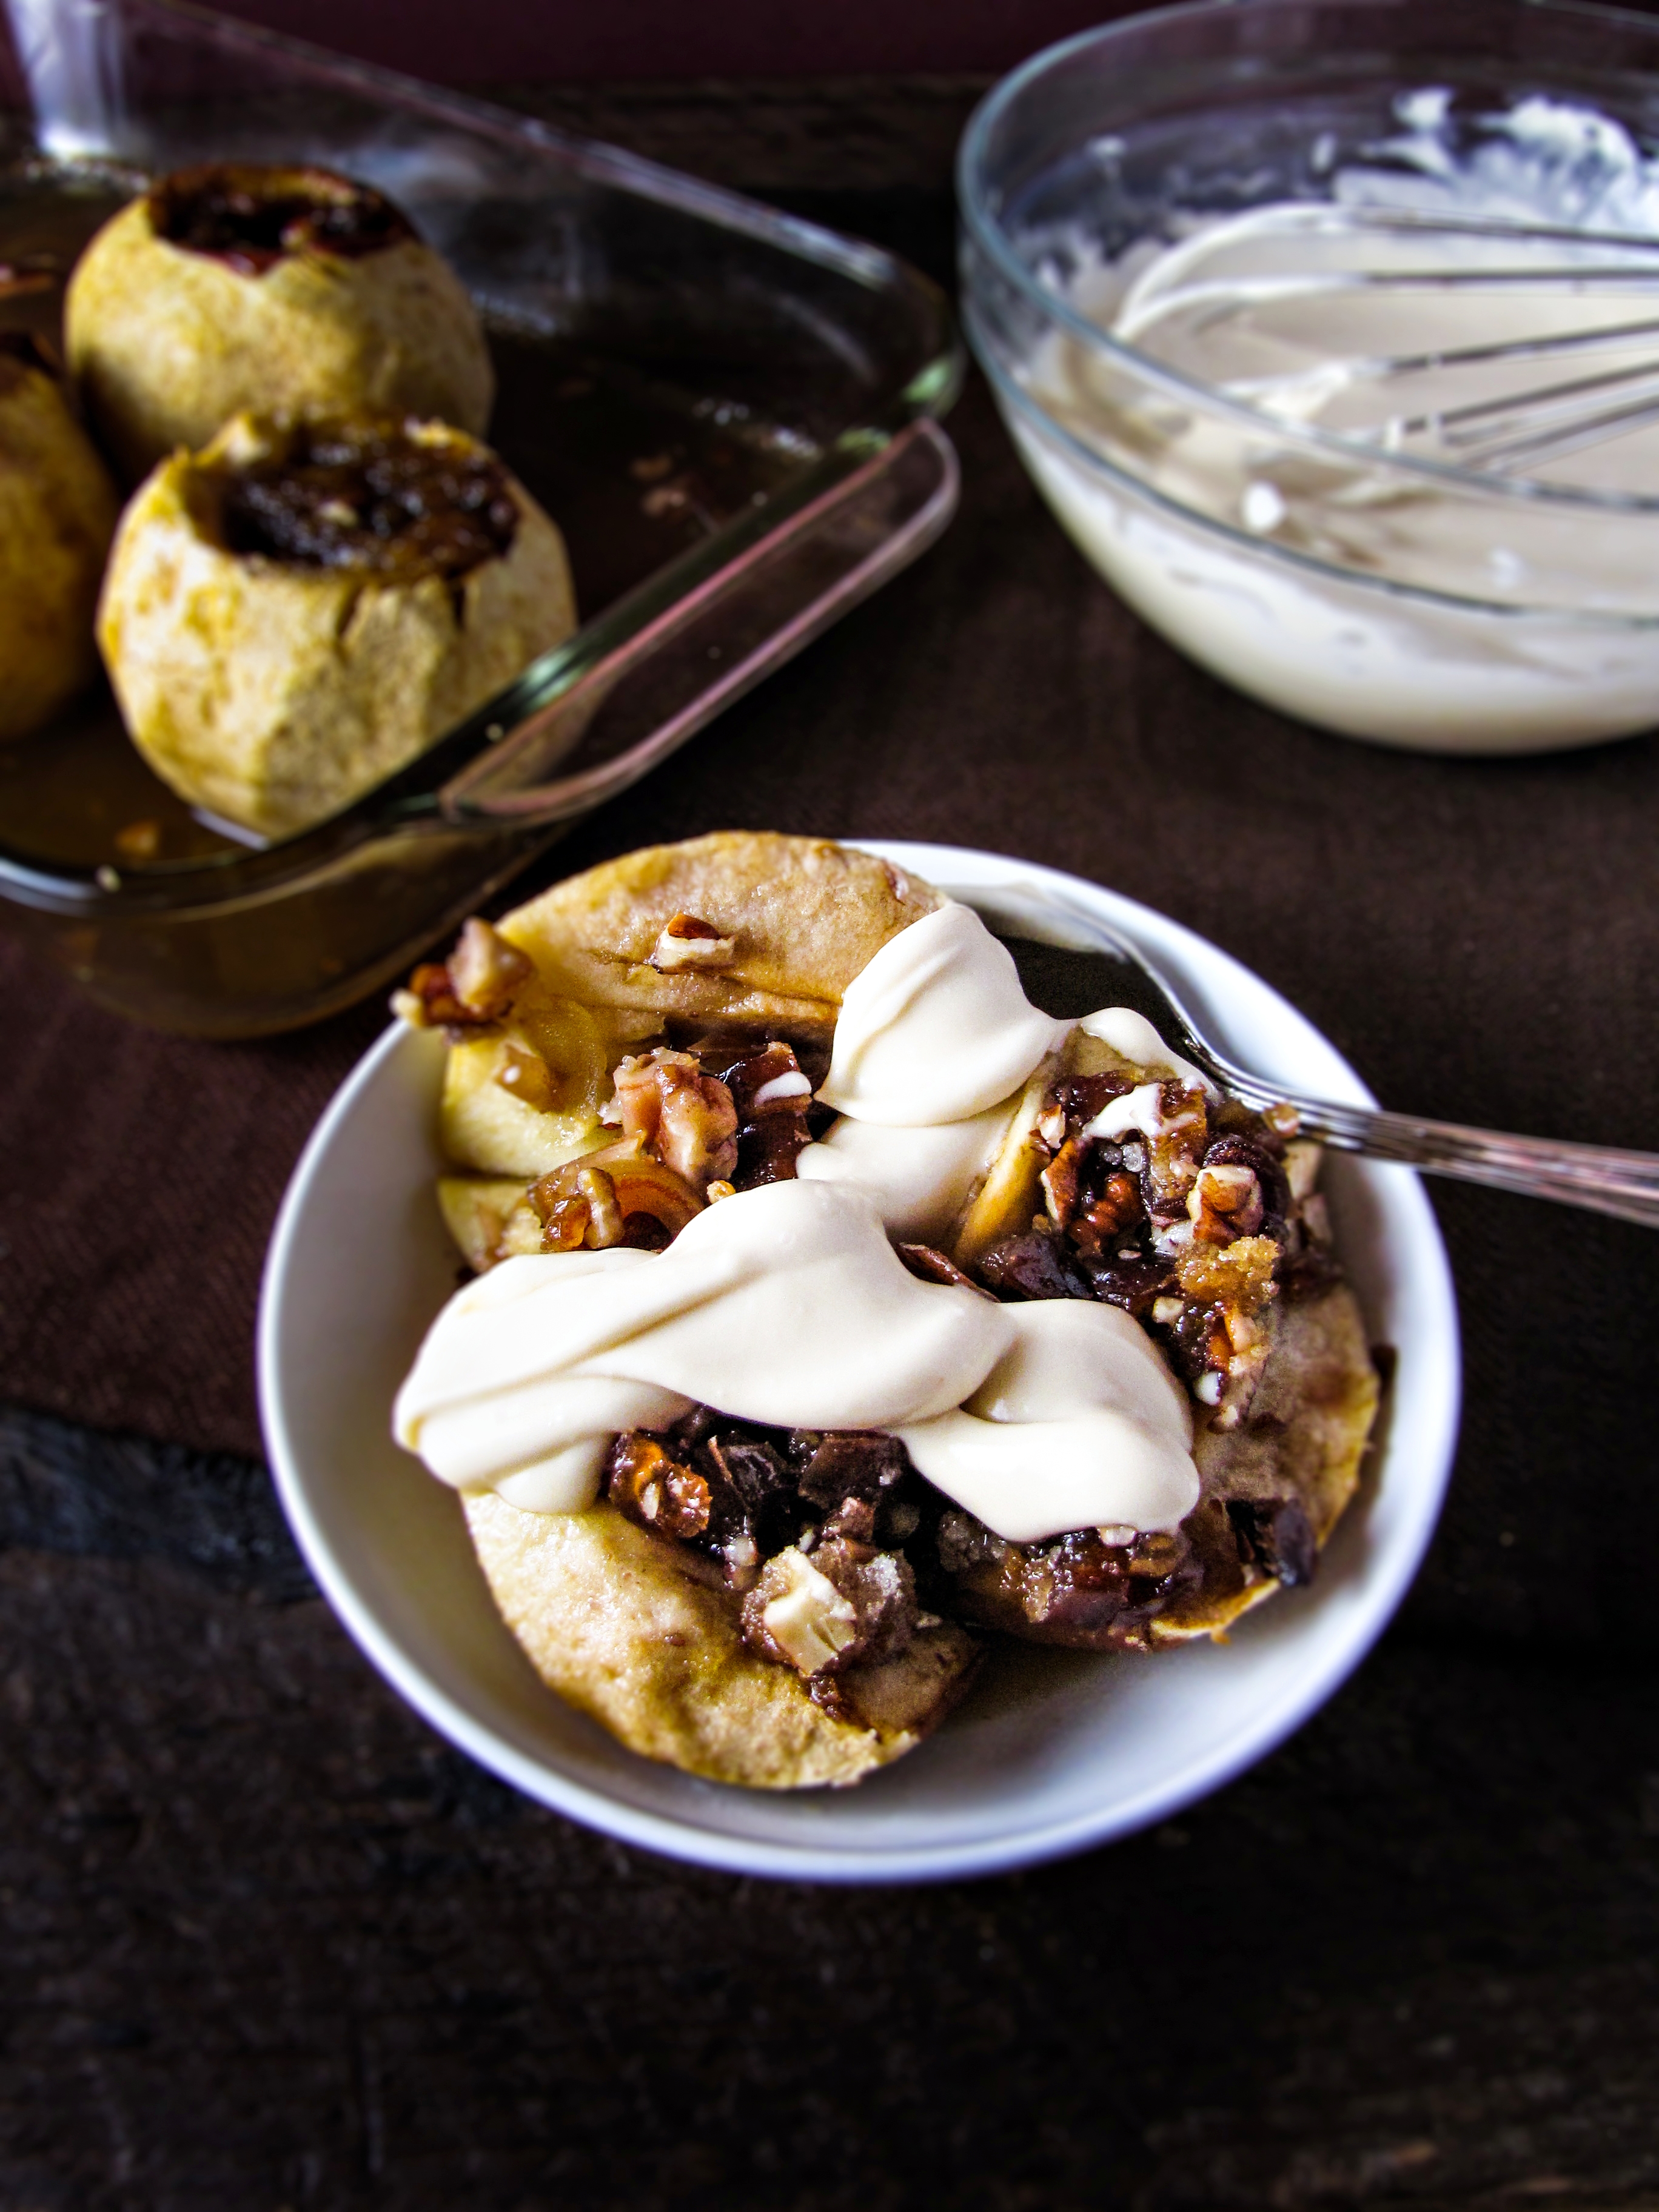
Enter these baked apples. Stuffed with dates and pecans and drizzled with just a touch of maple-flavored mascarpone cream (yes, there’s still dairy…), they are significantly lighter than most of the desserts of this season, yet still delicious, festive, and elegant enough to serve to company. And, dare I say it, these might even be healthy enough to have for breakfast. At least on a special occasion. Like a Tuesday.

Head on over to Greatist for the recipe, and check back here on Friday for more Christmas-time treats!

Bailey’s Chocolate-Chip Cheesecake

80 December 17, 2012 Dessert

Bailey’s Chocolate-Chip Cheesecake

Bailey's Chocolate Chip Cheesecake {Katie at the Kitchen Door}

No new Monday morning resolution this week. I’m still going to stick with all the resolutions I’ve created so far, but I’m not adding any new ones for a while. This is partly because of Christmas coming up, but also because I already have six resolutions going, and it’s a lot to keep up with! I figure it’s better to take a break and let these six truly become a part of my daily routine then to keep adding new resolutions, get overwhelmed and end up backtracking on the progress I’ve already made. I am planning on doing another winter cleanse during the first few weeks of January, so maybe I will pick up the new resolutions again after that.

Bailey's Chocolate Chip Cheesecake {Katie at the Kitchen Door}

We had a lovely Christmas party at my house on Saturday night. The house looked pretty and festive, the food was yummy, the drinks were free-flowing, and everyone seemed to have a great time. I made a few of my childhood Christmas favorites – a fancified holiday trifle (the recipe for which you can find on Life’d), punch with sherbet, and this Bailey’s Chocolate-Chip Cheesecake.

This cheesecake is one of my all-time favorite desserts, and every bite tastes like Christmas to me. It’s super rich, creamy, and the Bailey’s flavor makes it totally addictive. It does require some planning ahead, however, since it has to sit in the oven for 5 hours after it’s done baking (to allow it to set) and then chill for a few more hours. I should also admit that I didn’t splurge for real Bailey’s this time, I used the knock-off stuff… it still tasted great, though. Maybe next time I’ll just make the liquor myself too!

Bailey's Chocolate Chip Cheesecake {Katie at the Kitchen Door}

Bailey’s Chocolate-Chip Cheesecake

Adapted from the Bailey’s website. Serves 16-20.

  • 10 whole graham crackers
  • 4 TBS salted butter, melted
  • 32 oz. cream cheese (four 8-oz packages), at room temperature
  • 1 1/2 c. sugar
  • 3/4 c. Bailey’s Irish Cream liquor (or other Irish cream liquor)
  • 4 eggs
  • 1 c. sour cream
  • 1 TBS vanilla extract
  • 1/4 c. flour
  • 1 1/2 c. bittersweet chocolate chips
  1. Preheat oven to 350°F. Grease the sides of a 9-inch round springform pan. Place the graham crackers in a heavy-duty plastic bag and crush into small pieces with a rolling pin. Mix with the crumbs with the melted butter, then press the crust into the bottom of the pan. Place the pan on top of a rimmed baking sheet, and set aside.
  2. In a large bowl, beat the cream cheese and the sugar until smooth. Beat in the Bailey’s, then mix in the eggs one at a time. Mix in the sour cream and vanilla, then the flour, stirring just until smooth.
  3. Stir half of the chocolate chips into the batter, then pour the filling into the prepared pan (careful, it will be very full!). Sprinkle the remaining chocolate chips on top of the cake, gently folding into the top half of the cake with a spatula. Place the cake (still on top of the baking sheet, in case of leaks) carefully into the oven.
  4. Bake for 1 hour, then turn off the oven and leave the door closed. The cake will still be jiggly in the center at this point, but it will continue baking in the closed oven. Let the cake sit in the oven for 4-5 hours, to finish baking and setting. Remove from oven, then chill for 3-4 hours before serving. Serve cold, with whipped cream as a garnish.

Bailey's Chocolate Chip Cheesecake {Katie at the Kitchen Door}

Gingerbread 2012: Italian Country Villa

0 December 15, 2012 Dessert

Gingerbread 2012: Italian Country Villa

2012 Gingerbread House

Well, it took over a week to complete, but our 2012 gingerbread house is complete – let Christmas begin! And none too soon, as our holiday party is in a few hours, and the gingerbread house is a crucial element of the decorations. Really.

2012 Gingerbread House {Katie at the Kitchen Door}

For those of you who weren’t around last year, Trevor and I build a gingerbread house worthy of our dual civil engineering degrees every year. It’s really more Trevor’s thing than mine, but I whip up a batch or two of frosting and stand-by supportively while he makes it, so I like to take partial ownership. The first year we did one (pre-blog!) we made a Romanesque cathedral, in 2010 it was a gingerbread treehouse (complete with tree), and last year it was a to-scale model of the Zakim bridge. This year, in anticipation of our trip to Italy this spring (YAY!), we went for an Italian country villa, complete with a hilly landscape (made of rice krispies), cypress trees, and outdoor terraces. Enjoy! And my Christmas baking season began today, so look forward to lots of yummy festive recipes over the next 10 days.

Caramel-Banana Bread Pudding with Butterscotch Sauce

0 December 12, 2012 Cookbook

Caramel-Banana Bread Pudding with Butterscotch Sauce

Caramel-Banana Bread Pudding

As promised, I’m back with the amazing cajeta-banana bread pudding recipe from Tacos, Tortas, and Tamales. While the duck tacos we made from the book last weekend were a great treat for a special dinner (duck is expensive!), this bread pudding is the kind of thing I want to make on a weekly basis. I won’t, because I value my ability to support my own body weight, but know that I want to. Why? Because caramel, cinnamon, custard, challah bread, and banana, baked up all warm and soft and topped with a scoop of vanilla ice cream and a little extra caramel sauce for good measure is about as close to the perfect comfort dessert as you can get.

Homemade Cajeta Caramel {Katie at the Kitchen Door}

This recipe is also pretty easy for such a crowd-pleaser. If you choose to go the fully homemade route, making the cajeta – Mexican goat’s milk caramel – takes a bit of effort, but once you have it on hand, making the rest of this recipe is a breeze. It’s also a new and different way to use up overripe bananas. Or challah that’s going stale. Or milk that’s going to expire. And even if you don’t have anything stale or overripe or expiring, it’s worth rushing to the store to get all new stuff to make this recipe. I think you probably get the picture, so I’ll stop gushing (side-effect of midnight blogging?) and let you get cooking!

Caramel-Banana Bread Pudding {Katie at the Kitchen Door}

Cajeta-Banana Bread Pudding

Recipe from Tacos, Tortas, and Tamales. Serves 8-10.

Note: I only made 1/4 batch of the cajeta recipe, which yielded 1 c., but immediately wished I had made a full batch so I had some leftovers. Making the cajeta from scratch takes 45 minutes to an hour.

  • 1 lb. brioche or challah, torn into 1/2-inch chunks
  • 1 c. whole milk
  • 1 c. cajeta (homemade is best)
  • 1 tsp ground cinnamon
  • 1 tsp vanilla extract
  • pinch of salt
  • 1 c. heavy cream
  • 3 large eggs
  • 3 ripe bananas, peeled and thinly sliced
  1. Preheat the oven to 350°F. Butter a shallow baking dish (a 9 inch pie pan would work well) and set aside.
  2. Place the torn bread pieces in a single layer on a large baking sheet. Toast in the oven for 10-15 minutes, until dry on the outside but not colored. Let them cool.
  3. In a small saucepan, combine the milk, cajeta, cinnamon, vanilla, and salt. Bring to a gentle simmer, whisking, until cajeta is completely melted, then remove from heat. In a medium bowl, whisk together eggs and heavy cream until smooth. Slowly drizzle in the hot milk mixture, whisking the eggs the whole time to keep from scrambling.
  4. Toss the bread and the banana slices together in a large bowl. Add half of the custard to the bowl, stir to coat the bread, and let sit for 15 minutes to absorb the liquid. Add the remaining half of the custard and let sit for another 15 minutes. Pour the bread pudding into the buttered baking dish and bake for 30-35 minutes – the top should be browned slightly and a knife inserted into the center should come out clean. Serve hot with vanilla ice cream and leftover cajeta or butterscotch sauce (see recipe below).

Butterscotch Sauce

Recipe from the Food Network. Makes about 1 1/2 cups.

  • 1/2 c. salted butter
  • 1/2 c. heavy cream
  • 1 c. light brown sugar
  1. Combine all ingredients in a medium saucepan or saute pan. Bring to a boil over medium heat, stirring constantly. Boil gently until mixture has thickened, about 8 minutes. Remove from heat and serve over bread pudding – refrigerate leftovers.

Caramel-Banana Bread Pudding {Katie at the Kitchen Door}

Monday Morning Resolutions: Healthy Christmas Muffins

0 December 10, 2012 Breakfast

Monday Morning Resolutions: Healthy Christmas Muffins

Healthy Orange-Date-Apricot Muffins {Katie at the Kitchen Door}

I’m pretty pleased with how these Monday morning resolutions are going. What I started on kind of a whim I’ve actually been able to stick with!  I haven’t eaten a single piece of chocolate from the chocolate box at work for 5 weeks now (huge accomplishment), and I haven’t skipped a day of walking the extra 15 minutes to my office in at least one direction, rain or shine. I’ve been slightly less consistent with some of the eating stuff – getting four green salads in per week has been surprisingly difficult. But what I think I’m proudest of is the strength training. Although I got off to a rough start during Thanksgiving week, over the past two weeks I’ve actually started to look forward to my daily 10 minutes of strength and stretching, and some nights, I’ve even managed to do 20 minutes. While I haven’t lost any weight in pounds, I definitely feel stronger and more flexible – last night I did 25 push-ups in a row (probably an all-time high for me), and I’ve been holding my balances much longer in ballet. It’s really encouraging.

Healthy Orange-Date-Apricot Muffins

So, as promised, I’m sticking with it. This week’s new resolution is inspired by Hannah of All Things Lovely‘s comment last week: to have a hearty, healthy breakfast at home each day. To kick things off, I made a batch of healthy whole wheat muffins from Maria Speck’s Ancient Grains for Modern Meals. With dates, apricots, orange, and pistachios, they remind me very much of Christmas sugarplums (which I need to make a batch of soon…).  They’re packed with good stuff, and have plenty of natural sweetness and flavor, but I did find them a little dry. I’m going to tinker around a bit with adding buttermilk or Greek yogurt to see if that moistens them a bit – until then, I’m leaving you with the original recipe. Let me know if you try it out! And as usual, please share your resolutions in the comments if you want to play along.

Healthy Orange-Date-Apricot Muffins

That’s all for now. I’ve got a bunch more Christmasy recipes to share with you over the next few weeks, so stay tuned! Also, Trevor and I are halfway through this year’s gingerbread house (see last year’s model of the Zakim bridge, and 2010’s gingerbread treehouse to get a taste of what your’e in for). I’ll hopefully be back with pictures of the finished product by the end of the week!

P.S. Other healthy breakfast recipes from Katie at the Kitchen Door:

  • Apple Quinoa Cake
  • Baked Eggs with Sun-Dried Tomatoes and Kale
  • Breakfast Polenta with Honeyed Yogurt
  • Carrot and Apple Muffins
  • Shakshuka (Eggs in Spicy Tomato Sauce)

Healthy Orange-Date-Apricot Muffins {Katie at the Kitchen Door}

Healthy Orange-Date-Apricot Muffins with Anise

Adapted slightly from Ancient Grains for Modern Meals by Maria Speck. Makes 12 regular muffins.

Note: As mentioned above, I found these muffins a little bit dry as written. I’m still tinkering with the recipe, but the original (below) still makes a very healthy muffin with great flavor and natural sweetness. I’ll update the recipe below if I find a way to make them less dry. Also, Maria calls for a topping made of 2 TBS sugar, 1/2 tsp ground anise, and 3 TBS chopped pistachios – I opted to top these with pistachios only.

  • 2 c. white whole wheat flour
  • 1/4 c. sugar
  • 1 1/2 tsp baking powder
  • 1/2 tsp baking soda
  • 1/2 tsp ground cinnamon
  • 1/2 tsp ground anise seeds
  • 1/2 tsp salt
  • 1/2 c. chopped dried dates
  • 1/4 c. chopped dried apricots
  • 3 large eggs, at room temperature
  • 1/2 c. honey
  • 1/3 c. olive oil
  • 2 tsp freshly grated orange zest
  • 3/4 c. freshly squeezed orange juice (from ~2 medium navel oranges)
  • 1/2 c. + 3 TBS chopped roasted pistachios
  1. Preheat the oven to 375°F. Line a standard-sized muffin tin with muffin cups or grease the pan itself.
  2. Whisk together the flour, sugar, baking powder, baking soda, cinnamon, anise, and salt. Add the chopped dates and chopped apricots and stir briefly to coat the fruit with flour.
  3. In a medium bowl, whisk together the eggs. Add the honey, olive oil, orange zest, and orange juice, and whisk until smooth. Make a well in the center of the dry ingredients and pour in the wet ingredients. Use a spatula to fold the two together until just combined – do not overmix. Stir in the 1/2 c. chopped pistachios, and add a heaping 1/4 c. of batter to each muffin cup. Sprinkle the tops of the muffins with the remaining 3 TBS chopped pistachios. Bake for 15-17 minutes, until domed and golden brown. Let cool on a wire rack.

{Katie at the Kitchen Door}

Tacos, Tortas, and Tamales: Duck Tacos in Habanero Cream Sauce

1 December 9, 2012 Cookbook

Tacos, Tortas, and Tamales: Duck Tacos in Habanero Cream Sauce

Duck Tacos with Habanero Cream Sauce {Katie at the Kitchen Door}

Apparently I have a thing for Latin cuisine. First, I couldn’t stop singing the praises of Antojitos, then, last month, I reviewed (and loved) Gran Cocina Latina and The Latin Road Home, and now, I’m reviewing yet another Latin American cookbook – Tacos, Tortas, and Tamales, by Roberto Santibanez. And what’s not to love about Mexican food? It’s full of sweet veggies like corn and peppers and tomatoes, foods wrapped in bread, spicy tender meats, and no one is ashamed to smother anything with cheese.

Duck Tacos in Habanero Cream Sauce {Katie at the Kitchen Door}

I kind of love this little book: it’s cute, fun, and approachable.  Of the three books mentioned above, it takes the narrowest focus, looking mainly at, well, tacos, tortas (Mexican-style sandwiches), and tamales, as interpreted by the “street-side kitchens of Mexico.” There are also a handful of recipes for salsas, drinks, and desserts, just to round out your meal. This book doesn’t delve too deeply into techniques or histories behind the foods presented, but the colorful photographs and evocative recipe notes still manage to bring the street-food culture to life.

The recipes are enticing and non-intimidating – most of the recipes would qualify as comfort food in my book. The taco chapter is my favorite, with recipes for Potato and Chorizo Tacos, Pork and Pineapple Tacos, the amazing Chipotle Duck Tacos shown here, and even some more exotic choices, like Cactus Tacos and Beef Tongue Tacos. I also can’t wait to try some of the yummy agua frescas and margaritas, and I made the Cajeta-Banana Bread Pudding last night to go with the tacos – it was incredible; keep your eye out for the recipe here later this week.

Duck for Chipotle Duck Tacos {Katie at the Kitchen Door}

The tacos here are a mash-up of three different recipes in this book: first, you cook duck legs in orange juice and cinnamon until it’s falling off the bone, to make Duck Carnitas. Then, you cook the duck in a tomato-chipotle sauce to make Tomato-Chipotle Duck Stew. Finally, you roll the duck in fresh corn tortillas and smother them with Habanero Cream Sauce, then bake them enchilada-style. Having tasted the recipe at all three stages – carnitas, stew, and habanero-cream sauce covered – I can say with confidence that doing any of the three versions is well worth your time.

The bottom line: Tacos, Tortas, and Tamales is a cute little book focused on comforting Mexican recipes, street-cart style. The recipes are approachable, the photos are bright and colorful, and the stories behind the three styles of street food are engaging. If you’re already well-versed in Mexican cooking, it probably won’t offer much new knowledge or inspiration, but for a relative newbie it offers many new ideas, simple and accessible enough to add to your weeknight dinner rotation.

Disclaimer: I received a complimentary review copy of Tacos, Tortas, and Tamales, but all opinions are my own.

Duck Tacos in Habanero Cream Sauce {Katie at the Kitchen Door}

Duck Tacos in Habanero Cream Sauce

Recipe adapted slightly from Tacos, Tortas, and Tamales. Makes 12 tacos, enough for 4-6 people.

Note: The habanero cream sauce recipe presented here is different from the original in that it doesn’t roast the tomato before adding. Since tomatoes aren’t in season now, I used canned tomatoes and still loved the sauce. If you make this in the summer, replace the canned tomatoes listed in the sauce recipe below with 1 medium, ripe, cored tomato, roasted at 500°F for 25 minutes (until blackened), then chopped and added to the sauce with the peppers.

For the duck filling:

  • 4 1/2 lbs duck legs (6-8 small legs)
  • 1 large or 2 medium white onions, peeled
  • 1 medium head garlic
  • 1 stick Mexican cinnamon
  • 2 TBS kosher salt
  • 1 medium orange, peel left on, quartered
  • 2 TBS reserved duck fat
  • 1/2 c. reserved duck cooking liquid, fat skimmed off
  • 1 dried chipotle chili
  • 1 bay leaf
  • 1/4 tsp dried thyme
  • 1 1/2 c. canned, diced tomatoes

For the habanero cream sauce and tacos:

  • 2 large red bell peppers
  • 1 small fresh habanero chile
  • 1 TBS reserved duck fat
  • 1 small white onion, peeled and coarsely chopped
  • 3 medium garlic cloves, peeled and coarsely chopped
  • 1 c. canned, diced tomato
  • 8 whole allspice berries
  • 1 1/2 c. heavy cream
  • salt, to taste
  • 12 small corn tortillas
  1. Preheat the oven to 350°F. Take one of the onions (or half of the large onion) and thinly slice. Remove one clove from the garlic, peel, and set aside. Slice the remaining head of garlic in half horizontally, peel left intact. Add the duck legs, skin side up, sliced onion, head of garlic, and cinnamon stick to a large dutch oven or oven safe-pot with lid. Sprinkle the duck with the 2 TBS salt and rub gently into the skin, then squeeze the orange quarters over the duck. Add the squeezed orange quarters to the pot, cover with lid, and place in the oven.
  2. Roast the duck for 2 1/2 hours, shuffling the legs around a bit after 1 1/2 hours. Remove the duck from the pot and let cool slightly. Remove the skin from the duck and discard, then use a fork or your hands to tear the duck meat off the bone into bite-sized pieces.
  3. Strain the liquid and duck fat out of the pot into a bowl. Discard the duck bones and cooked vegetables. Let the liquid sit for a few minutes to separate the fat from the juices. Finely chop the remaining onion (or half of the large onion), and the reserved 1 clove peeled garlic. Pour a small amount of very hot water over the dried chipotle in a small bowl, and let sit for 5 minutes to soften, then remove the stem and seeds from the chipotle and finely chop the pepper.
  4. Skim 2 TBS of duck fat from the top of the liquid and heat in a large saute pan over medium heat. Add the chopped onion, garlic, chipotle pepper, bay leaf, and thyme, and cook for 3-5 minutes, until the onion is translucent. Add the diced tomatoes and cook for 5 minutes longer, then add the duck and the 1/2 c. cooking liquid (with as little fat as possible). Simmer for 10 minutes, and taste for seasoning, adding salt as needed. Remove from heat and set aside.
  5. Make the sauce: Set the oven to broil, and place the two peppers on a baking sheet. Broil, watching closely and turning the peppers every minute or two, until the skin is blistered and blackened, about 5-7 minutes. Place the peppers in a bowl and cover with plastic wrap. Let sit for 20 minutes, then rub off/peel off the skin, cut out the stems and seeds, and roughly chop the roasted pepper flesh.
  6. Using gloves, remove the stem and seeds from the habanero. Place the pepper in a dry saute pan and toast over medium-low heat, turning frequently, until softened and beginning to blacken, about 8 minutes. Use tongs to remove to a cutting board and chop finely, wearing gloves if you’re touching the pepper directly.
  7. Heat the duck fat in the saute pan over medium heat. Add the onion, garlic, and allspice berries and cook for about 5 minutes, until the onion is translucent. Add the chopped red pepper, the habanero, and the chopped tomatoes to the pan and cook for 5 minutes longer. Add the heavy cream, bring to a simmer, and simmer for 10 minutes. Season to taste with salt. Carefully blend the sauce until fully smooth, then strain through a fine mesh strainer (to remove any large chunks or allspice berries).
  8. Preheat the oven to 350°F (if you’ve turned it off after roasting the duck). Divide the duck filling equally among the 12 tortillas, then roll up and place in a baking pan, seam-side down. Pour 2-3 cups of the habanero sauce over the tacos, and bake for 10 minutes. Serve warm.
SPQR: Modern Italian Food and Wine

0 December 6, 2012 Cookbook

SPQR: Modern Italian Food and Wine

Cocoa Linguine with Venison Ragu {Katie at the Kitchen Door}

Before I tell you about this book, I have to tell you about something else. This recipe. We finished the last bowl of leftovers over a week ago and yet I can’t stop thinking about it. It’s venison ragu. On cocoa-infused spaghetti. Venison. Cocoa-infused spaghetti. You heard me. If venison weren’t obscenely expensive (seems ironic given the deer population, no?), I would make this, er, have Trevor make this, at least once a week. The spaghetti is earthy and workable and tender, the venison rich and lean and just amazing. I had no idea I even liked venison. But now I’m a convert. Anyone with extra deer on their hands in Massachusetts?

2012-11-24 074

Now, back to the book that provided us with this amazing recipe – SPQR: Modern Italian Food and Wine. As I cracked open the cover of this book and turned through the first pages of this book my mind immediately went something like: “Oh my God, this is a beautiful book.”   Full page spreads of the Italian countryside, hands carefully harvesting grapes, bottles and bottles of wine, freshly picked artichokes, all in muted browns and greens that are calming and serene.  Cookbook checklist item #1: beautiful photography?  Instantly checked off.

Cocoa Linguine with Venison Ragu {Katie at the Kitchen Door}

Flipping through the recipes in this book is like browsing a high-end restaurant menu where I want to order everything. Spiced Ricotta Fritters with Smoked Maple Syrup? Yes, please. Baked Polenta with Beef Cheek Ragu, Eggs, and Fontina? OK, I’ll try that too. Fava Bean Agnolotti with Mashed Black Truffle? If only it were fava season already! Now, you  might be able to tell from the names alone that these recipes are not simple. In fact, this is probably the most “advanced” cookbook I own, with recipes that require you to do everything from roll your own pasta, to sous vide a stuffed rabbit roulade, to clean and cure your own pig ears, and beyond. It’s more of an “I have all weekend to prepare a dinner party” book than an “it’s 8pm on Wednesday what’s for dinner” book. So, obviously, not for everyone. But I’m totally digging it – and if you’re also the kind of person who likes devoting a Saturday afternoon to preparing a venison ragu or brown-butter crepes filled with goat cheese and orange-caramel sauce, I’m pretty sure you’ll dig it too.

Cocoa Linguine {Katie at the Kitchen Door}

A few more tidbits: organized by region based on 8 major thoroughfares from Ancient Rome, each section has not only inspired recipes, but a wealth of information on the grapes and wines of that region. While I don’t claim to know much about wine, I’m excited to dig into the detailed grape descriptions – maybe I’ll even find something to order that I know I’ll like besides Merlot. I also think the overall look and feel of this book is – in true Ten Speed Press style – really gorgeous. It’s the kind of book I find myself flipping through just for the sake of daydreaming (sort of like Ripe, and Tender).

SPQRThe bottom line: Perfect for the adventurous cook looking for new ways to challenge himself (or who wants to truly impress their guests!), SPQR: Modern Italian Food and Wine is packed with recipes for restaurant-quality dishes that will excite even jaded diners. The book also offers detailed information on grape-types and wine producers for each region of the country, as well as truly stunning photographs that make me want to hop on the next plane to Rome. While the challenging nature of the recipes in this book means it’s probably not for everybody, I can tell it’s going to become one of my new favorites.

Disclaimer: I received a complimentary review copy of SPQR from Ten Speed Press, but all opinions are my own.

2012-11-24 143

Linguine al Cocoa with Venison Ragu

Recipe adapted slightly from SPQR: Modern Italian Food and Wine. Serves 6.

For the soffritto:

  • 1 carrot, peeled and chopped
  • 1/2 onion, peeled and chopped
  • 1 1/2 celery stalks, sliced
  • 1/2 c. olive oil
  • 1 1/2 tsp salt

For the linguine:

  • 1 1/2 c. flour
  • 1 1/4 c. “00” durum flour
  • 1 TBS plus 1 tsp unsweetened cocoa powder
  • 1/2 tsp salt
  • 2 eggs
  • 5 TBS warm water

For the ragu:

  • olive oil
  • 13 oz. ground venison, preferably shoulder meat (we couldn’t find any ground, so used finely chopped loin)
  • 1/2 medium yellow onion, peeled and finely chopped
  • 4 garlic cloves, minced
  • 1/4 c. tomato paste
  • 1/4 c. soffritto (recipe below)
  • 1/4 tsp dried red pepper flakes
  • 1 tsp chile oil (omit if unavailable)
  • 1 1/2 c. red wine
  • 1 1/2 c. chicken stock
  • 4 sprigs thyme
  • 1 sprig sage
  • 10 whole black peppercorns
  • 4 whole cloves
  • 1/4 c. heavy cream
  • 1/4 tsp quatre epices
  • 2 c. baby spinach leaves
  • 1 to 2 TBS butter
  • Parmesan cheese, for serving

Make the soffrito:

  1. Combine the carrot, onion, and celery in a food processor and pulse until very finely chopped. Heat olive oil in a large pan over low heat. Stir in the ground vegetables and salt and cook, stirring occasionally, until all oil has been absorbed, about 45 minutes. Remove from heat and set aside. This will make more soffritto than you need for this recipe – save the rest in the fridge for another use.

Make the linguine:

  1. Sift together flours, cocoa powder, and salt in a large bowl. In a small bowl, whisk together eggs and water. Slowly drizzle the liquid into the flour, whisking as you do. Knead the dough for several minutes – the dough will feel firm and dry. Flatten the dough into a rectangle, wrap in plastic wrap, and leave on counter for 30 minutes.
  2. Roll out the dough using a pasta machine – roll it to the thinnest setting possible. Use the pasta machine to cut into linguine noodles (if you don’t have a noodle cutter attachment, you can cut out thicker noodles by hand). Toss the noodles with a little bit of flour to keep from sticking and set aside.

Make the ragu:

  1. Heat a thin film of olive oil in a large sauce pot over medium-high heat. Stir in venison and brown well, cooking for about 5 minutes. Season with salt and pepper, then add onion and garlic. Cook until onion is soft, about 3 minutes. Stir in tomato paste, soffritto, and red pepper paste. Cook for a few minutes, then add chile oil (if using), and red wine. Bring to a simmer and simmer for 30 minutes. Fill a sachet (or improvise with cheesecloth and cooking twine) with the thyme, sage, peppercorns, and cloves. Add the sachet and the chicken stock to the ragu and simmer to reduce liquid by half, about another 30 minutes. Stir in cream and the quatre epices. Simmer until thick and velvety, about 15 minutes. Season to taste. Remove the sachet.
  2. Bring a large pot of salted water to a boil. When at a rolling boil, add linguine and cook for 2-3 minutes. Add noodles and about 1/4 c. of the pasta cooking water to the ragu. Add the spinach to the ragu. Cook for 2-3 minutes longer, just to wilt the spinach and cause the ragu to stick to the noodles. Finish with a pat of butter. Serve hot with grated parmesan cheese.
Monday (Morning) Resoultions: Italian Crepes with Sweet Cheese Filling and Caramel Sauce

3 December 3, 2012 Cookbook

Monday (Morning) Resoultions: Italian Crepes with Sweet Cheese Filling and Caramel Sauce

Orange and Ricotta Crespelle

Yes, I know it’s not the morning anymore, but at least it’s still Monday! And I did do my new resolution today, I just didn’t get the chance to tell you about it. Actually, there are a bunch of things I want to tell you about, all somewhat unrelated, so excuse this post for being a little bit jumpy…

Let’s start off with this week’s resolution: to bring a healthy snack to work each day (with the ultimate goal of staving off those mid-afternoon junk food cravings). Today I brought half an avocado and a clementine, tomorrow I’m thinking nuts and dried cherries. Anyone out there have any great snack suggestions for me? I’d love to hear them.

Ricotta and Orange Crespelle {Katie at the Kitchen Door}

More on the resolutions – I did a pretty good job with them last week, except I ate only three green salads instead of four. I’ve forgiven myself, though. If you’re new to my little resolutions challenge, you can read about the impetus behind it here, and please join in by posting your own resolutions in the comments (or updating me on how they’re going, for those of you who have already shared)! And to continue holding myself accountable, here are all my cumulative resolutions thus far:

  • Week one: No chocolate from the chocolate box at work
  • Week two: Walk to or from Park St. Station each day (an additional 15 minutes of walking on my commute)
  • Week three: Do ten minutes of strength training and stretching every day
  • Week four: Eat at least four green salads per week
  • Week five: Bring a healthy snack to work every day

Moving on: the reason I was late in posting today was because I spent the weekend away on a girl’s weekend with my mom, as my (very) belated birthday present to her for her 50th. I had so much fun and it was really nice to get away, so I just wanted to share a few trip notes and pictures. We stayed at a cute B&B – William’s Grant Inn – in Bristol, RI, through a LivingSocial deal, and while we were there took a tour of The Breakers (which was all decked out for Christmas!) in Newport. It’s stunning how much detail went into those houses. As part of the deal we had a lovely dinner at Le Central, where I was pleasantly surprised by how yummy the food was. Sunday we spent some time walking around Bristol shopping (I picked up a great set of Spanish bakeware at an antique shop – I can’t wait to photograph it), and then went on a neat little hike in the Norman Bird Sanctuary. Such a nice little getaway!

Girl's Weekend

And now for everyone’s favorite part – the food! The pictures here are of a super delicious crespelle recipe from a beautiful new book on Italian food, SPQR: Modern Italian Food and Wine. I’ll be posting the full review later this week, but I couldn’t wait to share these lovely little treats. Crespelle are just the Italian version of crepes, and these particular ones are filled with a mixture of sweetened goat cheese, mascarpone, and ricotta, then simmered briefly in an orange-caramel sauce. To top it off, the crepes themselves are made with nutty browned butter and are as light as air, with crispy lacy edges. The cumulative result is kind of sigh-inducing, and totally worth the extra work. If you’re looking for a more savory crepe, check out these Mushroom and Goat Cheese Crepes I created for Life’d last week (it appears I’m on some sort of major crepe kick). And one last thing I wanted to mention before I leave you with the recipe: I’m being featured on NoshOnIt on Wednesday, if you’d like to check it out. Personally, I’ve been loving reading their daily emails and discovering great new food bloggers and recipes, and I highly recommend them.

Ricotta and Orange Crespelle {Katie at the Kitchen Door}

Ricotta and Goat Cheese Crespelle with Orange-Caramel Sauce

Adapted from SPQR: Modern Italian Food and Wine. Serves 3-4.

Notes: The original recipe made a lot of crepe batter, so I’ve scaled the proportions back to make it more manageable for a small household. However, I thought the ratio of filling to crepe in the original recipes was a bit off, so I’ve left the amount of filling at the original amount. Feel free to fill them according to your taste. The crepes are very thin and delicate, and flipping them takes a little bit of practice. You also have to plan ahead a little for this one, as both the batter and the filled crepes require a little chilling time in the fridge. Refrigerating the batter overnight will yield the most delicate crespelle.

  • 1 1/2 TBS + 1 TBS salted butter, divided
  • 3/4 c. whole milk
  • 2 eggs
  • 1/4 c. + 2 TBS flour
  • 1 1/2 TBS + 1 TBS sugar, divided
  • 1/4 c. goat cheese
  • 1/4 c. mascarpone cheese
  • 1/3 c. ricotta cheese
  • 1/2 tsp vanilla extract
  • 1/3 c. powdered sugar, sifted, plus additional for garnish
  • 1 navel orange, zest and juice (1/2 c. juice needed)
  1. Make the batter: Melt 1 1/2 TBS of the butter in a small saucepan over medium heat. Cook the butter until it bubbles and begins to smell nutty, then pour into a bowl and let cool slightly. Add the milk to the same saucepan and return to the heat. Heat the milk for 2-3 minutes, just enough to scald it. Remove the milk and let cool slightly (it should feel warm to the touch but you should be able to touch it without hurting yourself).
  2. Add the warm milk and the eggs to a blender and pulse to combine. Add the flour and 1 1/2 TBS of the sugar and blend to combine. Drizzle in the butter (with the blender running, if possible), and blend until fully combined. Strain the batter through a fine-mesh strainer into a large bowl. Cover and refrigerate the batter for at least 30 minutes, or overnight.
  3. Make the filling: in a medium bowl, stir together the goat cheese, mascarpone, and ricotta until smooth. Add the vanilla and the sifted powdered sugar and stir to combine. Zest the orange and add 1 tsp of the orange zest to the mixture. Reserve the remaining zest for garnish. Stir to combine, then refrigerate until ready to use.
  4. Cook the crepes: Heat a very small pat of butter in a large non-stick saute pan over medium heat, then carefully wipe most of it out with a paper towel. Pour 1/4 c. of batter into the heated pan and quickly swirl in a circle to coat the bottom of the pan. Cook for 1 minute, until light golden brown, then carefully and quickly flip to cook the other side for 1 minute. Remove the cooked crepe to a plate and continue with remaining batter. This should make about 8 crepes.
  5. When the cooked crepes are cool, spoon 1-2 TBS of the cheese filling in the middle of each crepe. Spread in a vertical line about 1/2 inch thick, then roll the crepe up like a burrito. Place the filled crepes on a platter, cover, and refrigerate for 1-2 hours, to firm up the filling.
  6. When ready to serve, heat the remaining 1 TBS of butter in your largest saute pan over medium-low heat. Add the filled crepes, seam side down, and toast for 2 minutes, before carefully flipping each crepe over. Sprinkle with the remaining 1 TBS of sugar. Once it dissolves, and the orange juice from the orange. Cook down the mixture until the juice is slightly thickened and has been absorbed somewhat by the crepes. Remove the crepes to individual plates and top with the extra orange caramel. Garnish with powdered sugar and any extra orange zest.

2012-12-3 072

Memories of Prague, Hot Chocolate, and Cookies

4 December 2, 2012 Czech Republic

Memories of Prague, Hot Chocolate, and Cookies


European-style Hot Chocolate {Katie at the Kitchen Door}

This time of year always seems to be filled with ghosts of the four months that I spent living in Prague. Maybe it’s the drop in temperature, or the quality of light, but I find myself lost in little memories almost daily. Thoughts of walking through the cobbled streets after dark, buying klobasy (sausages) and svarak (mulled wine) from the glowing carts. Shivering as I waited to catch the tram each morning, then suddenly overwhelmed with heat once I’d stepped through the doors. The view across the river on the way to and from class, of all those thousands of spires. Haggling with the Vietnamese vendors over scarf prices at the Holesovice market. Long afternoons spent sitting alone in the park, stealing pictures of the people around me. Riding the tram out to the end of the line to go for long and wandering runs through the forest, hardly knowing where I was headed or what I would see. Piling up on the floor of the dorm’s music room with dozens of friends to listen to The Relatives play by candlelight.

Prague Rooftops

Scrolling through my reader a few weeks back, I came across this short little post from Nicole, which triggered one particular memory for me. I spent much of my time in Prague taking pictures, but one particular shot I wanted to capture was the Charles Bridge at sunrise. Iconic and touristy? Yes, but I wanted it anyways.

Where we lived was a little ways out from the city center, maybe 20 minutes on the tram, plus a short walk on both ends. So getting a picture of the sunrise wasn’t a matter of rolling out of bed, but an adventure that needed some planning. I chose a weekday with predictions for good weather, laid out my clothes, and set the alarm for 4 am. Without disturbing my 3 sleeping roommates (we all slept in the same room), I pulled on layers of clothes, grabbed my camera, and stepped out into the still-starry dark. As I waited on the corner for the tram, I was amazed to see so many other people up and about, mostly stony-faced Czech men headed out for work. I arrived at the bridge in that pre-dawn gray haze, hoping against hope the sunrise would be clear and worthwhile.

I think it was probably late September or early October, and it was chilly and misty by the river. There was no one else there, which was both lucky and eerie. As the first hints of light and color snuck into the sky I began to snap pictures at every angle until the pink was gone from the sky and my fingers were stiff with cold. Then, I put away the camera and walked. Walked and walked along the river, absorbing everything around me going through its early morning routine – the old man in the row boat, the swans clustered around the shore, vendors setting out goods. I walked until I reached Cafe Savoy, where I had been wanting to try the hot chocolate. I sat on a bench, chilled to the bone, until the cafe opened, and was one of the first customers inside. Sitting by myself in the corner, I slowly sipped the rich chocolate until my insides were warm and my fingers had unclenched. Then, I walked to school and promptly fell asleep on the couch.

Sunrise at Charles Bridge

Hot chocolate is a bit of a thing in Prague. There are dozens of round-up articles of the best hot chocolate in town, and there is a cup out there for every taste. The ones I associate most with Prague are the thick ones, like the one served at Cafe Louvre – it’s more like hot chocolate pudding then a drink, but it’s certainly an exercise in indulgence. To celebrate this post and that morning and all my lovely memories of Prague, I made a pot of hot chocolate – the thick kind made from real chocolate – and a batch of chocolate cut-out cookies for dipping. It’s hitting the spot.

European Style Hot Chocolate {Katie at the Kitchen Door}

Every single day there was an adventure. Every day was marked by freedom. I can’t remember a time in my life when I’ve felt more alive than those four months. It could just be because of the rosy haze of memory, but I think there’s more to it than that. I think I’ll have to go back to find out. But for now, I’m enjoying the beginning of winter on this side of the ocean.

2012-12-2 095

European-Style Hot Chocolate

Adapted from Bell’Alimento. Serves 2-3. (A little goes a long way!)

  • 4 oz. high quality bittersweet chocolate, chopped into pieces
  • 1 1/2 c. whole milk
  • 1 TBS sugar
  • 2 tsp corn starch
  • whipped cream for topping
  1. Add chocolate and 2 TBS of the milk to a small saucepan. Melt the chocolate over low heat, stirring the whole time. Once melted, slowly whisk in remaining milk until well combined. Add the sugar and the corn starch and whisk to fully integrate and dissolve. Cook the hot chocolate over low heat, whisking the whole time, until the chocolate has thickened enough to coat the back of a spoon. It will take about 10 minutes for the chocolate to begin thickening, but once it does, it will continue to thicken quickly so keep an eye on it! Serve hot.

Chocolate Cut-Out Cookies {Katie at the Kitchen Door}

Chocolate Cut-out Cookies

Recipe adapted slightly from Bake at 350. Makes 40-50 cookies.

  • 2 1/2 c. flour
  • 1/2 c. cocoa powder
  • 1 tsp instant espresso powder
  • 1 c. (2 sticks) salted butter, at room temperature or slightly softened in microwave
  • 1 c. sugar
  • 1 egg
  • 1 tsp vanilla
  1. Whisk together flour, cocoa powder, and espresso powder in a medium bowl. In a large bowl, beat together softened butter with sugar until the mixture is light and creamy. Beat in the egg until fully combined, then beat in the vanilla.
  2. Add the flour mixture to the butter mixture in 3 additions, fully incorporating the flour into the butter between each addition. The dough will appear somewhat crumbly, but should stay together when pressed into a ball. Press the dough into two disks, then wrap these in plastic wrap and refrigerate for 30 minutes.
  3. Preheat the oven to 350°F. Line baking sheets with parchment paper. Lightly flour your work space and a rolling pin, and roll out one of the disks of dough to about 1/4 inch thickness. If the dough is cracking or not staying together, knead with your hands until it is smooth and workable. Cut out as many cookies as you can from the dough, then press back into a ball and roll out again. Repeat until all dough is used. Bake cookies for 7-8 minutes, then remove to a cooling rack. Frost and decorate once fully cooled.

The Latin Road Home Blog-Around: Chipotle-Chicken Nachos

1 November 28, 2012 Cookbook

The Latin Road Home Blog-Around: Chipotle-Chicken Nachos

Some cookbooks are meant to be impersonal. They are written to be useful, educational, reference guides to the kitchen. But this is not true of all cookbooks. There is another group of cookbooks out there, in which the flood of images, stories, and commentaries begin to carry the cookbook into a different realm – the realm of travelogues  of memoirs, of novels. Both types of books are important – which you prefer is a matter of taste, or of your current mood, or of your particular kitchen dilemma. Do you need to be inspired, transported to another place and time? Or do you simply need to know the best technique for baking a fluffy muffin, and why it works?

Jose Garces’ The Latin Road Home is definitely of the personal variety. The Iron Chef, restaurateur, cookbook author, and all-around food personality uses this book to take readers on a journey through the five countries that have influenced his cooking style – Ecuador, Spain, Cuba, Mexico, and Peru. Unlike Gran Cocina Latina, this is not an exhaustive look at the cuisines of these countries. Rather, each country has four regional menus that range in difficulty and simplicity, with the fourth menu in each country encompassing a massive spread – cocktails, snacks, appetizers – in short, party food. The recipes range from the traditional, like Moros y Cristianos and Tostones, to the innovative, like Citrus-Marinated Halibut and Calamari in Coconut Broth and Griddled Potato Cakes topped with Mushrooms with Saffron and Ginger. And if you like seafood, you’re in luck – it’s the most heavily represented food group in the book, with 8 different recipes for ceviche alone. Another bonus – most of the recipes are accompanied by beautiful full-page photographs that are bright and full of life.

I would also like to point out how well the recipes are laid out. Each recipe is very clearly broken down into its multiple parts, with a separate table of ingredients and set of instructions for each component of the recipe. For recipes with 4 or more different components, this is highly valuable – and it’s executed without causing the design of the book to suffer at all. Beauty and usability!

Lake Isle Press invited me to participate in a blogger cook-around of this book today. A group of bloggers are all cooking recipes from the fourth Mexico menu – a taco-bar party menu – with recipes including Mango Margartitas, Carnitas, Beer-Braised Beans, Shrimp Skewers, and Tres Leches Cake. I chose to make the Chipotle Chicken Nachos, mainly because I couldn’t get over how delicious they looked. I can now confirm that they also taste delicious – sweet and a little smoky, with falling-apart tender chicken and just the right amount of sauce. While I went the whole nine-yards and fried my own corn tortilla chips, I actually liked the filling (called pollo ropa vieja) the best without any garnish, rolled up in a soft, warm corn tortilla. Making the filling is simple – a matter of throwing the sauce ingredients in the blender, sauteeing peppers and onions, and briefly poaching chicken thighs in boiling water. Definitely a good addition to any weeknight meal rotation.

The bottom line: Jose Garces’ The Latin Road Home gives readers a brief and personal take on the cuisines of five different Latin countries. While not an exhaustive look at any one cuisine, the recipes featured are traditional with an innovative twist, and well worth taking a crack at. Combined with the heartfelt narrative and bright and inviting photos, the recipes in this book make it a worthwhile addition to the shelves of any cook looking for inspiration in Latin flavors.

Disclaimer: Lake Isle Press sent me a review copy of this book, but all opinions are my own.

Chipotle Chicken Nachos

Recipe from The Latin Road Home. Serves 8 as an appetizer.

Notes: If you’re trying to get dinner on the table fast, roasting the garlic (step 1) might be best done the morning or even the night before dinner is served. Two alternative ways to serve this dish that I really enjoyed are to 1) prepare the chicken ropa vieja and serve in warm corn tortillas as tacos and 2) prepare the chicken ropa vieja and mix with cooked rice or couscous and serve in a bowl.

For the Chicken Ropa Vieja:

  • 20 cloves garlic, divided, peeled
  • 2 TBS olive oil
  • sea salt, used throughout recipe
  • 3 Spanish onions, divided, peeled
  • 1 fresh bay leaf
  • 2 lb. boneless skinless chicken thighs
  • 1/4 c. vegetable oil
  • 2-3 red bell peppers, seeded, deveined, and finely chopped
  • 4 canned chipotles in adobo
  • 1 c. ketchup
  • 1 c. chicken stock
  • 2 TBS Spanish smoked sweet paprika
  1. Preheat the oven to 375°F. Place 6 of the peeled garlic cloves in a piece of tinfoil, drizzle with the olive oil and sea salt, and fold the edges of the tinfoil up to make a closed packet. Roast the garlic in this packet (seam side facing up in the oven to avoid leaks!) for 45 minutes – garlic should be tender when done.
  2. While garlic is roasting, bring a large saucepan of heavily salted water to a boil. Take one of the onions and roughly chop it. Add this onion, the bay leaf, and the chicken to the boiling water, lower the heat to a simmer, and simmer the chicken for 10-14 minutes, until chicken is cooked through. Remove the chicken from the water with a slotted spoon to a bowl, let cool, then shred into bite-size pieces by hand. Set aside. Discard the cooking water and onion.
  3. Finely chop the remaining 14 cloves of garlic and 2 onions. Heat the vegetable oil over medium heat, then add the chopped onions, garlic, and bell peppers. Let cook, stirring occasionally, for about 10 minutes, until beginning to soften.
  4. While vegetables are sauteing, combine the roasted garlic, chipotles in adobo, ketchup, chicken stock, and paprika in a blender. Blend until smooth. Add the sauce to the vegetables and cook at a gentle simmer until mixture is reduced by one quarter, about 15 minutes. Stir in the chicken and heat through. Continue with nacho recipe or serve as mentioned in head note above.

For the Nachos:

  • 12 small (6-inch) corn tortillas OR 1 bag corn tortilla chips
  • vegetable oil, for frying
  • 2 c. grated cheese
  • 2 avocados, peeled, seeded, and roughly chopped
  • 4 radishes, washed and cut into thin matchsticks
  • 1/4 c. chopped fresh cilantro
  • 1/4 c. Mexican crema OR sour cream
  1. If making your own chips, stack the tortillas in groups of 4 and cut each stack into 6 triangles. Separate the triangles. Heat about 1 inch of vegetable oil in a large frying pan over medium heat. Fry the tortillas in batches until golden brown and crispy, then remove with a slotted spoon and let drain on a paper towel lined baking tray.
  2. Top chips with the chicken ropa vieja mixture and sprinkle with grated cheese. If serving to a crowd, do this in a casserole dish and broil on high for 2-3 minutes to melt the cheese. If making for yourself, do this on a plate and just pop in the microwave for 30 seconds.
  3. Top nachos with avocados, radishes, and cilantro. Serve with crema/sour cream on the side.
  • « Previous Page
  • Page 1
  • …
  • Page 35
  • Page 36
  • Page 37
  • Page 38
  • Page 39
  • …
  • Page 57
  • Next Page »

Primary Sidebar

Subscribe!

Get creative recipes and menu ideas delivered straight to your inbox.

Most Popular

A House // Sweet Potato and Coconut Milk Soup with Brown Rice and Lentils

Monthly Fitness Goals: July // Homemade Spinach Wraps with Chopped Greek Salad

A New Job // Classic Seven-Layer Bars

Butternut Squash Carbonara with Fried Sage and Caramelized Onions

Happy Birthday, Trevor! // Peanut Butter Fudge

Cookbook Review and Giveaway: Home Made Winter

Drizly

Please note!

Full disclosure: if you purchase anything at Amazon using the above links or any other links to Amazon on this site, I will receive a small commission. Just so you know!

Copyright© 2018 · Cookd Pro Theme by Shay Bocks

View Mobile Site
This site uses cookies: Find out more.