• Skip to primary navigation
  • Skip to main content
  • Skip to primary sidebar
  • Home
  • Recipes
  • Features
    • Cookbook Reviews
    • Ingredient of the Week
    • Sunday Dinner
    • Fitness Goals
  • Travel
  • About
    • Privacy Policy
    • Cookie Policy
  • Work With Me

Katie at the Kitchen Door

Globally-inspired, seasonal recipes

Blog Page

0 April 18, 2013 Cookbook

Book Club: Home Made Summer // Polenta-Ratatouille Pizza and A Giveaway!

Polenta Pizza with Spicy Ratatouille {Katie at the Kitchen Door}

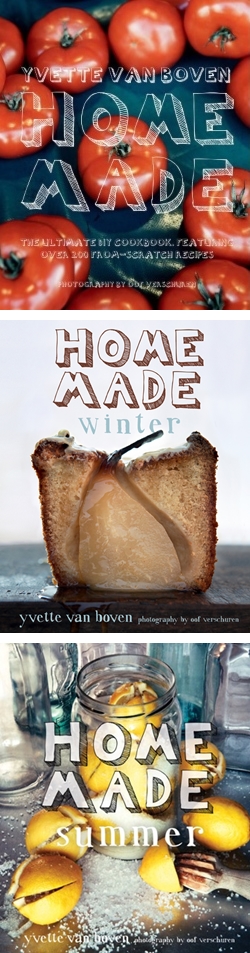
Remember the lovely books from Yvette Van Boven, Home Made and Home Made Winter? Well, lucky for us, Yvette has just released a third book, Home Made Summer, which is just as inspiring as the first two books. And, to celebrate the book’s release and the beginning of summer eating, I’ve teamed up with Abrams Books to giveaway a set of all three books to one lucky reader! Giveaway details are at the end of the post, but first, some thoughts on the latest in the series. Giveaway now closed, congrats to Jen (comment #5) on winning!

Polenta Pizza with Spicy Ratatouille {Katie at the Kitchen Door}

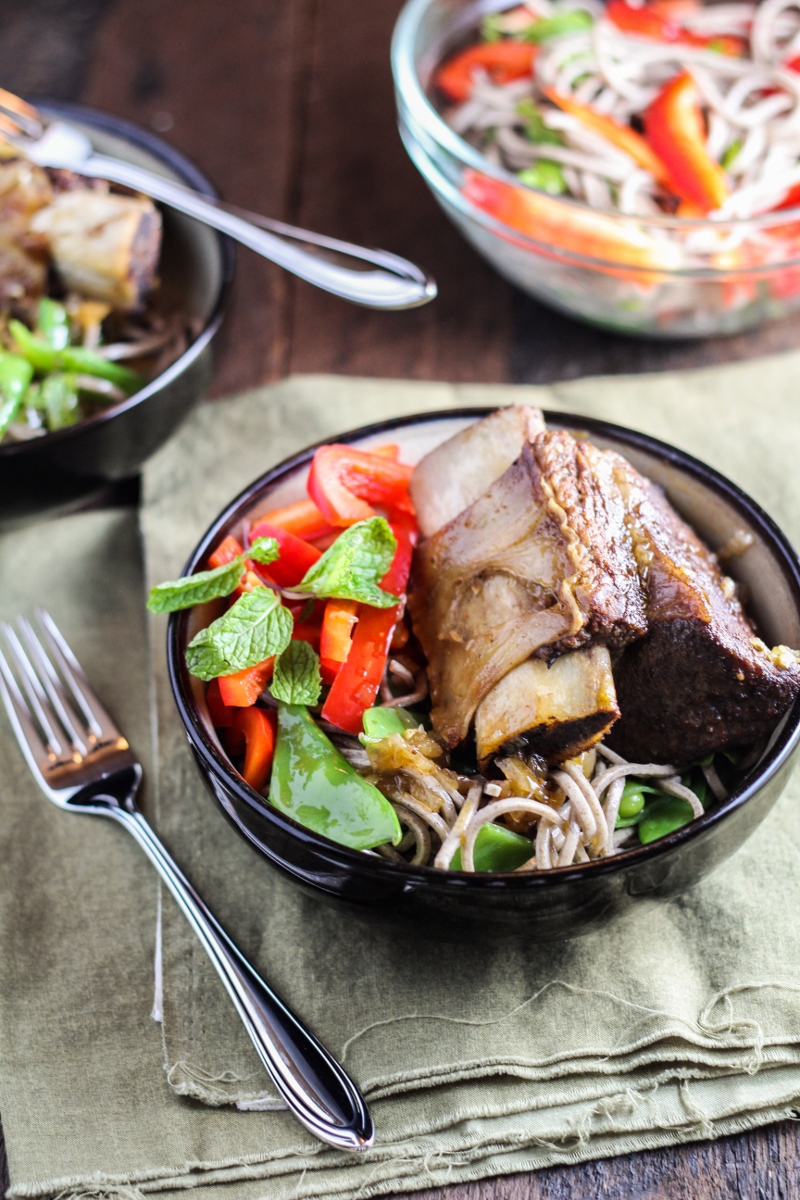
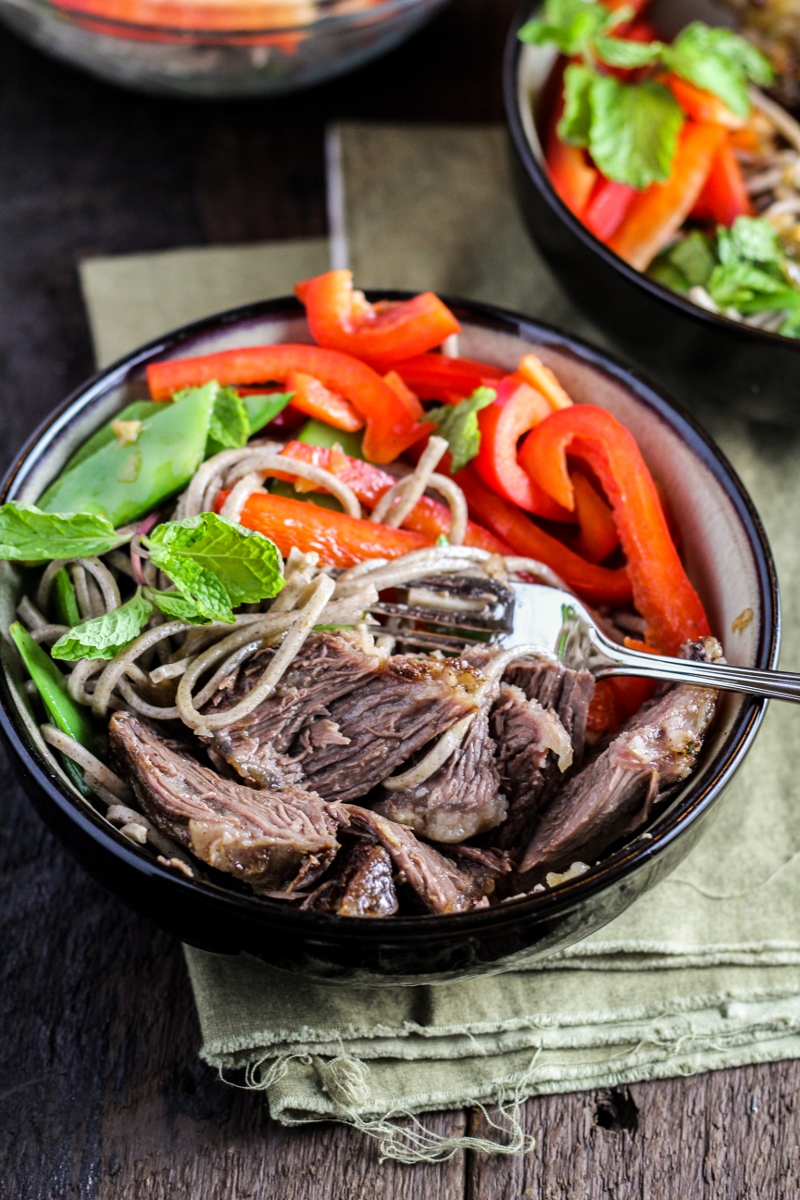
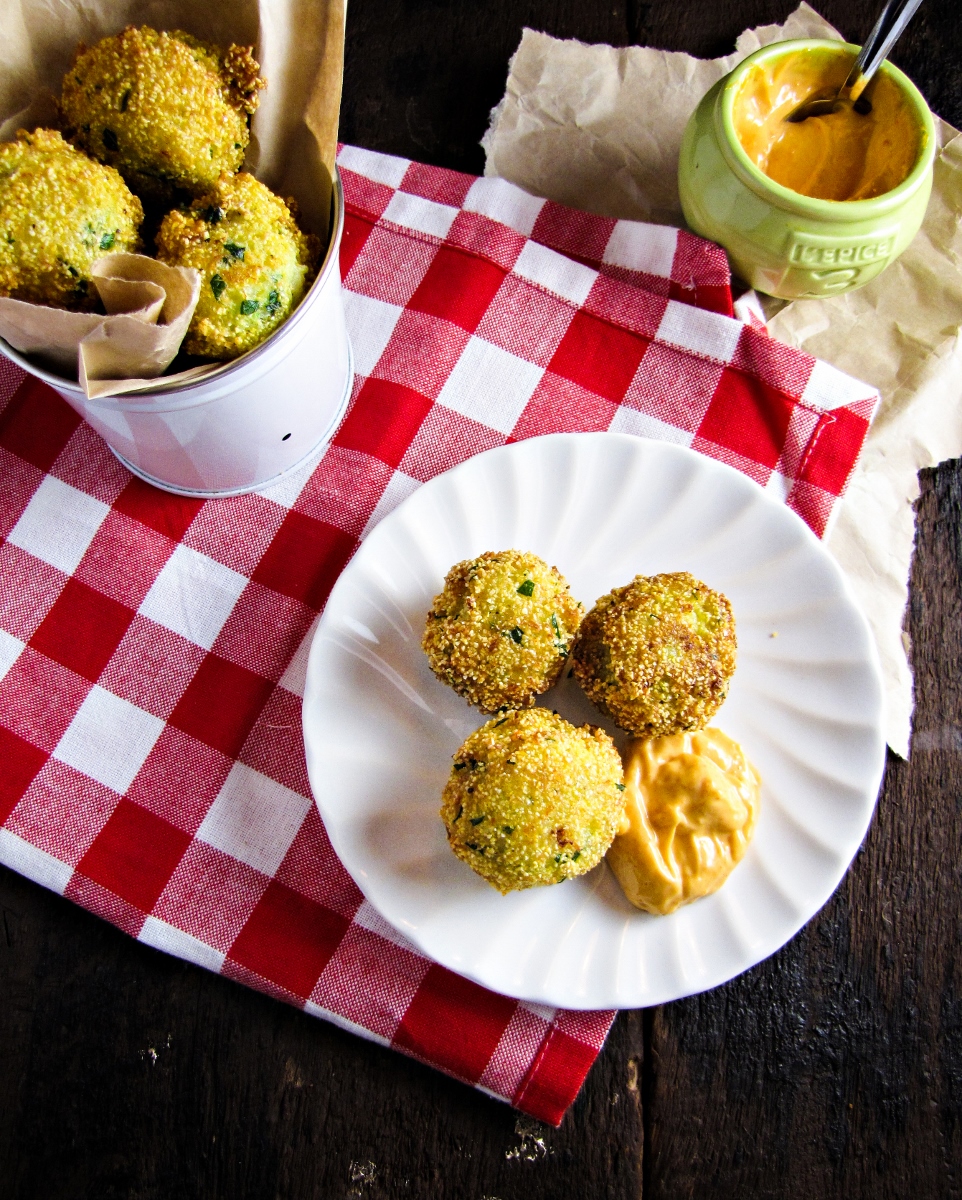
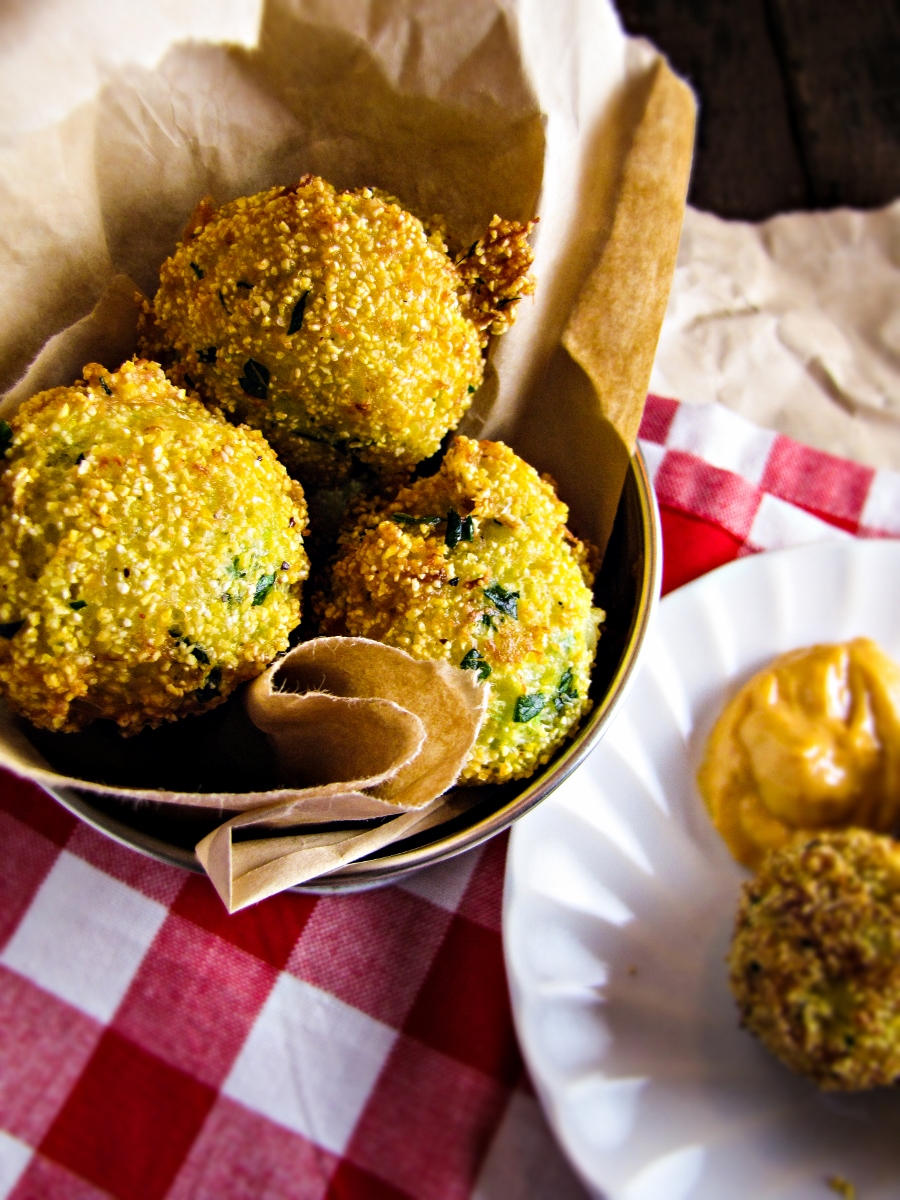
When I reviewed Home Made Winter last fall, the post, and Yvette’s recipe for French Beef Stew, quickly became one of my most popular posts, with many of you trying out the recipe and coming back to let me know how you liked it and what you changed. I think the popularity of that post is really a testament to the quality and appeal of Yvette’s recipes, which is ultimately what keeps me coming back to her books. From her Winter cookbook, I made the beef stew, a delicious apple quinoa cake, and white chocolate lattes, and was pleased with all three. And now, from Summer, I’ve made the Polenta Pizza with Spicy Ratatouille (recipe at the bottom of the post!), and the most delicious Sparkling Cava Sangria (recipe soon!) and was amazed by both recipes. The polenta pizza was the most summery comfort food I’ve ever tasted, flavorful and rich without being too heavy. I devoured it. And the sangria, which uses fresh grapefruit juice and sparkling white wine, was a huge hit at my birthday party – the two pitchers of it were the first thing to go, even before the blackberry margaritas. Since we’ve only just fully entered spring, I’m sure many more recipes will grace my summer table before I switch back to winter food – at the top of  my list are the Quinoa Patties with Feta, Zucchini, and Corn, the super refreshing sounding Avocado, Cucumber, and Lime Shake, the Italian Chicken Stew with Grilled Goat Cheese Polenta, and the White Wine Sorbet. Summer is such a delicious time.

Polenta Pizza with Spicy Ratatouille {Katie at the Kitchen Door}

Style-wise, Home Made Summer stays true to the other books in the series. These books don’t stick to the serious, elegant, bucolic ideal that many cookbooks aspire to represent these days. Instead they are whimsical and lighthearted, full of little sketches, snapshots of Yvette’s many home countries, and cheerful type. Flipping through them is a bit like getting to take a peak inside someone’s kitchen notebook, except all the recipes have already been thoroughly tested and come out flawlessly.

Giveaway of all three Home Made books! On Katie at the Kitchen DoorIf you’re interested in meeting Yvette, she’s currently on book tour! She’s already departed from the East Coast, but if you live in California, she’ll be holding several events in and around San Francisco over the next few days:

  • April 18, 12pm – Rakestraw Books, Danville
  • April 19, 6:30pm – Draeger’s, San Mateo
  • April 20, 3-4pm – Omnivore Books, SF
  • April 21, 1pm – Book Passage/SF Ferry Building demo
  • April 22, 7pm – Books Inc, Berkeley

The bottom line: The three books in the Home Made series are whimsical, fun, and packed with delicious recipes, and Home Made Summer is no exception. The recipes in this book are the essence of summer, with heavy use of all the season’s best vegetables, fruits, and flowers, and flipping through the book makes me dream of picnics and barbecues. The recipes strike a great balance between being simple enough not to need hours of your time and tons of advance planning, but creative enough to remain interesting to experienced cooks, so I can heartily recommend it to both groups.

Giveaway details: To enter to win a copy of Home Made, Home Made Winter, and Home Made Summer, all you have to do is leave a comment below letting me know what summer food you are most looking forward to eating this year. By entering, you are agreeing to the official rules as listed here:

  • No purchase necessary
  • Void where prohibited
  • One entry per household, and only entries answering the question above will be considered!
  • The sponsor of this giveaway is Abrams Books
  • The estimated retail value of the three books is $110
  • The odds of winning will depend on the number of entries received
  • This contest is only open to U.S. Citizens over the age of 18
  • The contest will open today, April 18th at posting time, and will close at 11PM EST on Wednesday, April 24th
  • The winner will be selected randomly and contacted via email (so please leave an accurate email address!). If I do not hear from the winner within 48 hours, the winner forfeits their prize and an alternate winner will be chosen.
  • I will post the winner here by Friday, April 26th

Giveaway now closed! Congrats to Jen on winning.

Disclaimer: Abrams Books sent me a review copy of Home Made Summer free of charge, but I was not otherwise compensated for this review and all opinions, as usual, are my own.

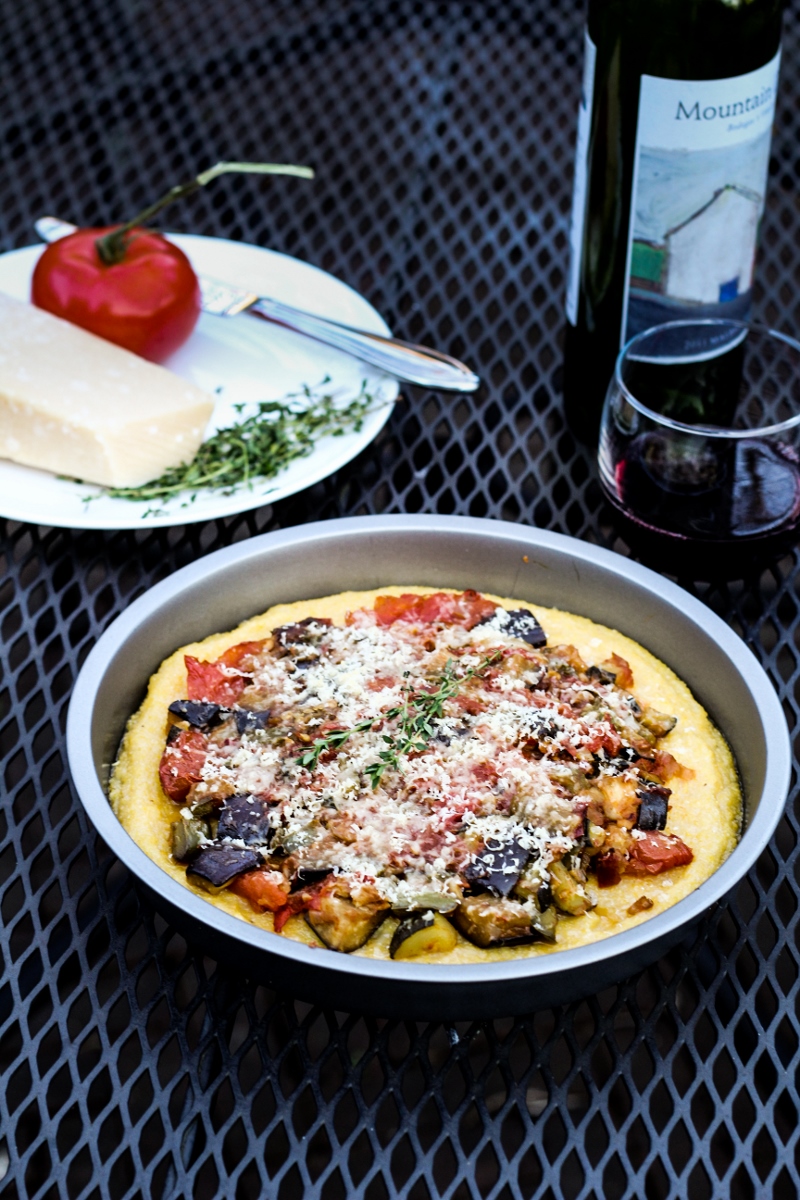
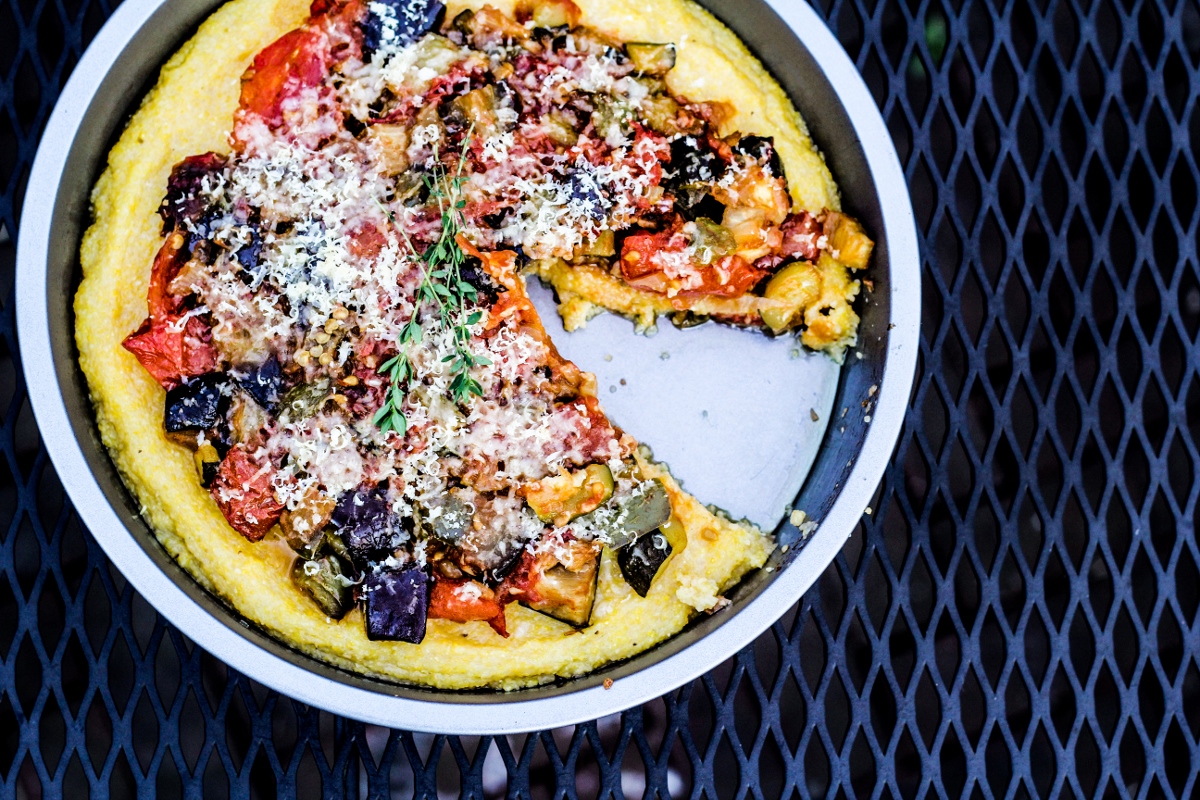
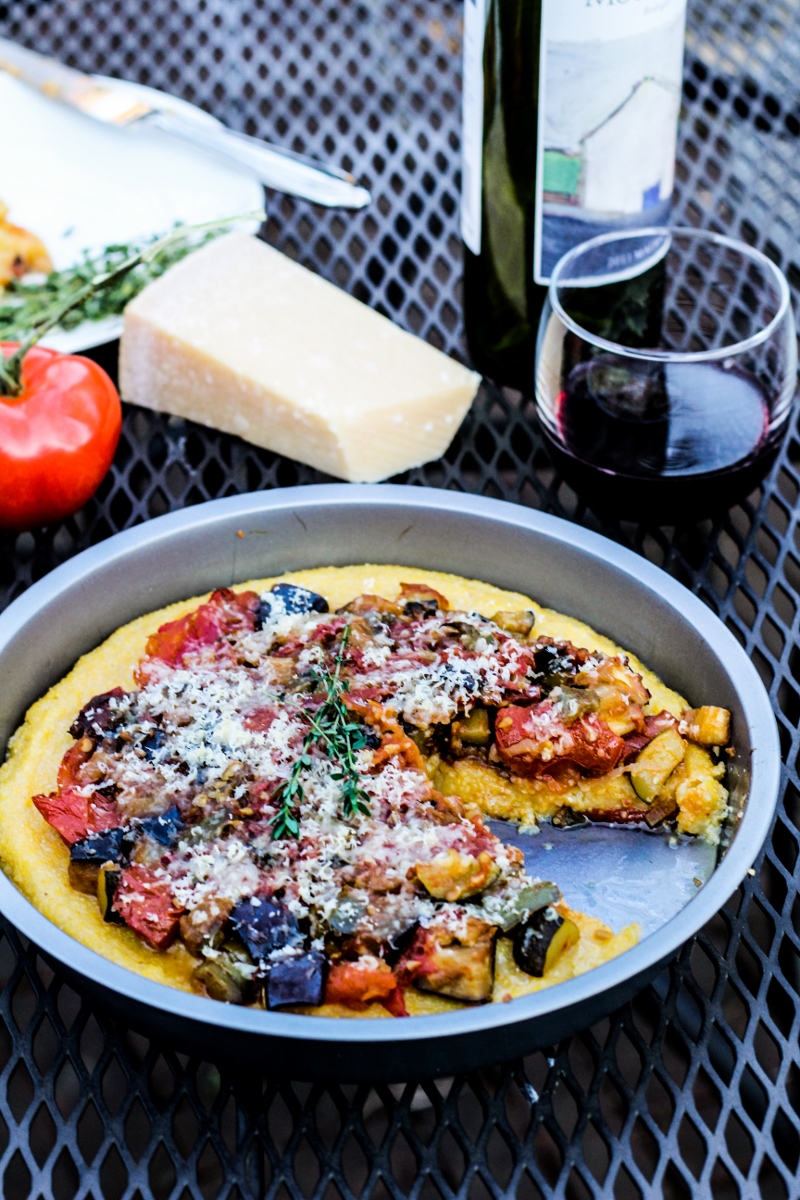
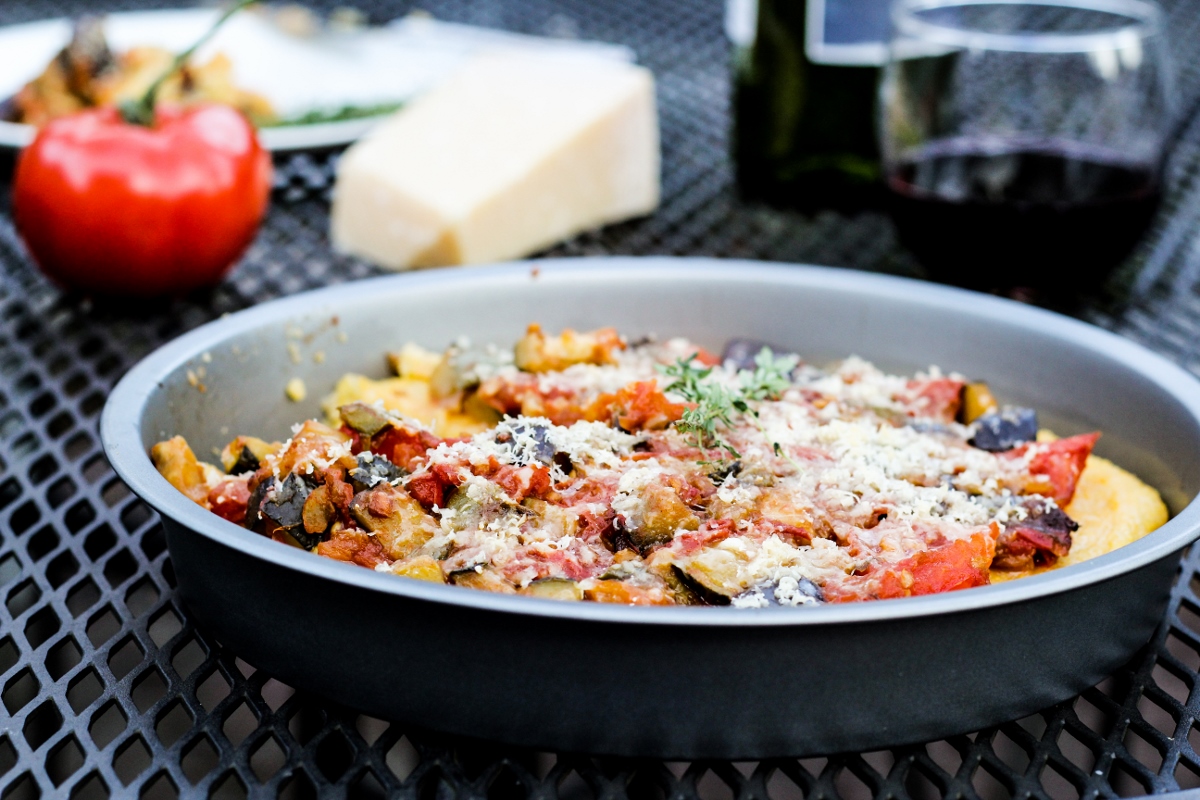
Now, after all that legal mumbo jumbo, how about that polenta pizza with ratatouille recipe?!

Polenta Pizza with Spicy Ratatouille {Katie at the Kitchen Door}

Polenta Pizza with Spicy Ratatouille

Recipe from Home Made Summer. Serves 4-6.

  • olive oil for the pan
  • 1 TBS salt
  • 1 1/4 c. polenta
  • 4 c. water [Katie’s note: or chicken stock for extra flavor, but omit the salt if using]
  • 3 TBS butter
  • 1 1/4 c. freshly grated parmesan
  • freshly ground black pepper
  • 1 recipe spicy ratatouille, cooled to room temperature (recipe below)
  1. Oil a 12-inch round cake pan or pizza pan. Add the salt to the 4 cups of water and bring to a boil over high heat. Pour in polenta in a thin stream, stirring constantly until smooth. Lower the heat to medium-low, and cook, whisking constantly, until polenta is thick with no lumps. Depending on the type of polenta you use, this could take anywhere from 5 minutes to 30 minutes (instant polenta will cook up much more quickly than regular polenta, if you’re in a rush).
  2. Remove the cooked polenta from the heat and immediately stir in the butter and 3/4 c. of the parmesan, stirring until fully melted. Season to taste with salt and pepper, then pour into the oiled cake pan and smooth the top with the back of a spoon or spatula (dip the spoon in water if it is sticking to the polenta). Let cool completely so that it is solid (you can stick the pan in the freezer for 10 minutes to accomplish this if you’re short on time).
  3. Preheat the oven to 350°F. Top the polenta with the ratatouille, leaving about 1/2 an inch of polenta exposed around the perimeter of the pizza. Sprinkle with the remaining 1/2 c. of parmesan, and bake for 25 minutes, until the edges are brown. Let cool slightly so that it’s easier to slice.

Spicy Ratatouille

Recipe from Home Made Summer. Makes about 3 cups.

  • 3 TBS olive oil
  • 2 medium onions, peeled and sliced into rounds
  • 2 cloves garlic, peeled and minced
  • 1/2 red bell pepper, seeded and coarsely chopped
  • 1/2 green bell pepper, seeded and coarsely chopped
  • 1 medium zucchini, stem removed and chopped into 1/2 inch cubes
  • 1 medium eggplant, stem removed and chopped into 1/2 inch cubes
  • 4 big tomatoes, seeded and coarsely chopped
  • 1 TBS chopped fresh thyme leaves
  • 1 TBS harissa (adjust according to the spiciness of the harissa you’re using)
  • salt and freshly ground black pepper
  • 3 TBS chopped fresh parsley
  1. Heat the oil in a large skillet over medium heat. Add the onions and saute for 3-5 minutes, until soft and light brown. Add the garlic and saute for 1 minute, until fragrant. Add the peppers, zucchini, eggplant, tomatoes, thyme, and harissa, and stir to combine. Season with salt and pepper. Reduce the heat to low and cook for 30 minutes, stirring occasionally, or until the vegetables are all tender. Sprinkle with the parsley prior to serving.

0 April 15, 2013 Boston

Flowers for Boston

I was supposed to share a new book and recipe with you today, but I can’t bring myself to. I have never been more grateful for being a homebody than today, when I found myself miles away from the chaos downtown, tucked away in Somerville. But many of my friends and coworkers were there to watch the marathon, cheer on the runners, and soak up the sunshine, beers in hand. Thankfully, they are all safe and accounted for. I so wish that everyone could say the same for their friends and family, but sadly, so sadly, they can’t. My heart aches for everyone who was affected by this terrible thing – my thoughts and prayers are with you.

Love, from Boston.

Spread the word to anyone who needs a place to say, there are dozens of Boston residents sharing their homes with stranded travelers and runners. A list and contact information is available here.

4 April 11, 2013 Food

An Exciting Feature // Mango-Pomegranate Guacamole

Mango-Pomegranate Guacamole {Katie at the Kitchen Door}Mango-Pomegranate Guacamole {Katie at the Kitchen Door}Mango-Pomegranate Guacamole {Katie at the Kitchen Door}

I have exciting news! A while back, I was asked to contribute a recipe to Joanna at a Cup of Jo’s ongoing feature – “The Best ___ You’ll Ever Have.” Joanna is a rockstar blogger, the kind that makes other bloggers daydream about quitting their boring corporate jobs and spending their days writing beautiful, funny, and charming stories with appropriately gorgeous photographs. It’s easy to be fooled into thinking that this is the dream life by someone who makes it look as effortless as Joanna, but I’m sure it’s actually an insane amount of work. Either way, I love reading Cup of Jo and was quite thrilled to be asked to contribute. I chose to make my version of the best ever guacamole (a touchy subject, I know!) which uses mango and pomegranate to add sweetness and crunch to the yummy dip. Head over to Cup of Jo to read the feature and find the recipe!

Many thanks to Shoko, as well, for helping set this up!

1 April 8, 2013 Cookbook

Pecan Toffee Coffee Cake

Pecan Toffee Coffee Cake {Katie at the Kitchen Door}

Sunday afternoon I had a sudden urge to bake. I didn’t have anything planned, and didn’t even have a particularly strong desire to eat baked goods, I just wanted to do the actual baking. The whole whisking, stirring, creaming, folding shebang. Maybe, more than anything, I was just craving ritual. We’re starting to look for an apartment for next year and although I know that there’s no reason to be stressed out about it so early in the process, it can be hard to control that sort of thing. Actually, to tell the truth, I feel stressed out about a lot of things – finding an apartment, finishing planning our upcoming trip, blogging frequently enough, planning my birthday party, getting everything done that I need to at work this week, finding time to exercise, making sure things are going in to the garden on time, and so on. All small things on their own, many of them really fun things on their own, but all together… it feels like a lot. I’m sure everyone has their own list like this and doesn’t need to hear about mine, but it makes me feel better just to write it down. Basically, I need to take a giant chill pill and just relax.

Pecan Toffee Coffee Cake {Katie at the Kitchen Door}

Baking is one version of a chill pill, at least for me. So I turned to my favorite baking cookbook, In The Sweet Kitchen, by Regan Daley – that woman always has something to fit the bill, and her recipes are pretty much foolproof. For whatever reason, I wanted to make something unnecessarily sweet – something with sugary, caramelly flavors in it. As I flipped through the book, I landed on the Pecan Toffee Coffee Cake, and I was sold, even though I knew it meant that I had to run to the store just for toffee bits and sour cream and more nutmeg. (Actually, I took a chance on the tiny Indian corner store down the block and was shocked to find all three things hidden in the shelves. That man’s store is like Mary Poppins’ handbag – I have never gone in there looking for something and left without it. Even obscure things, like power strips and sink strainers.) The flavors in the filling – espresso, cinnamon, nutmeg, pecans, and chocolate-covered toffee bits – are intense and  dark and rich. By the spoonful it would be overpowering, but folded into the center of soft, gently spiced cake, it’s amazing. I’m so glad I gave this a try. Now, the only trick will be to keep myself from stress eating the entire thing.

Pecan Toffee Coffee Cake {Katie at the Kitchen Door}Pecan Toffee Coffee Cake {Katie at the Kitchen Door}

Pecan Toffee Coffee Cake

Adapted very slightly from In The Sweet Kitchen. Serves 12 to 15.

The only two (tiny) changes I made were to double the amount of espresso powder and use salted butter but omit the salt. I also found that I could only use up about half the filling without having the layers touch each other, so I used the extra filling to sprinkle on top of the warm slices. My advice: make the filling recipe as written below, but don’t fret if it seems like you’ll have too much, and don’t try to overfill the layers.

For the filling:

  • 1/2 c. packed light brown sugar
  • 2 TBS granulated sugar
  • 2 tsp instant espresso powder
  • 1 1/2 TBS unsweetened cocoa powder
  • 2 tsp cinnamon
  • 1/2 tsp nutmeg
  • 3/4 c. chopped pecans, toasted until fragrant
  • 3/4 c. (half of a 225 gram package) English toffee bits such as Skor or Heath (chocolate-covered toffee bits are even better!)

For the cake:

  •  3 c. flour
  • 2 tsp baking powder
  • 1 tsp baking soda
  • 2 tsp cinnamon
  • 1 tsp nutmeg
  • 3/4 c. (1-1/2 sticks) salted butter, softened
  • 1 1/4 c. packed light brown sugar
  • 1/2 c. granulated sugar
  • 3 large eggs, at room temperature
  • 2 1/2 tsp vanilla extract
  • 1 3/4 c. full-fat sour cream
  • 3/4 c. (the other half of a 225 gram package) English toffee bits
  1. Preheat oven to 350°F. Generously grease a 10-inch Bundt pan.
  2. To make the filling: In a food processor, pulse together the brown sugar, granulated sugar and espresso powder until finely ground. Transfer to a medium bowl and whisk in cocoa powder, cinnamon, and nutmeg. Stir in chopped pecans and toffee bits. Set aside.
  3. To make the cake batter: In a large bowl, whisk together the flour, baking powder, baking soda, cinnamon, and nutmeg until evenly combined. Set aside. In a separate large bowl, beat together softened butter, brown sugar, and white sugar until light and fluffy. Add the eggs one at a time, beating vigorously after each addition. Stir in vanilla.
  4. Add the flour mixture to the batter in three additions, alternating with the sour cream in two additions. Mix just to blend in between additions – don’t over-mix the batter at this stage or the cake will be tough. After the last flour addition is stirred in, gently fold in the toffee bits.
  5. Spoon 1/3 of the cake batter into the bottom of the prepared pan and spread out with a spatula so it fills the pan evenly. Use a spoon to carve out a shallow “moat” all around the center – you want to leave 1/2 an inch between the edge of the moat and the side of the pan. Generously spoon the filling into the center of the moat, making sure that none of the filling touches the sides. Aim to use about half the filling, but don’t overfill the moat. Spoon another 1/3 of the cake batter on top of the filling and spread all around to cover the filling and reach to the sides. Repeat the moat/filling process to make a second layer of filling. Spoon the last 1/3 of the batter on top of the second layer and smooth with a spatula so the top is even and fills the pan to the edge. Tap the pan once or twice on the counter to remove air bubbles.
  6. Bake the cake in the preheated oven for 50-65 minutes, until it is golden brown and a toothpick inserted into the center of the cake part comes out clean (if you insert it into toffee, it will be hard to tell, so don’t be afraid to poke around a little bit). Let cool in the pan for 10 minutes, then invert onto a cooling rack. Wait until it is completely cool before slicing. Serve with any leftover filling sprinkled on top.

0 April 6, 2013 Asian and Indian

Vietnamese-Style Short Ribs with Soba Noodle Salad

Vietnamese-Style Short Ribs with Soba Noodle Salad {Katie at the Kitchen Door}

There isn’t always something to say about dinner. As a blogger, this fact sometimes stumps me. But food isn’t always nostalgic, or earth-shatteringly creative. Sometimes, dinner is what it is simply because it uses what you had in the fridge and it was the Friday of a long week, so you wanted something more than a quick omelette or a salad. Something hearty that would go well with a much-needed cold beer.

That’s all the story there is behind these short ribs. They were simple and satisfying and good enough to share. The Asian flavors in the spice rub on the beef married well with the lightly dressed soba noodles, and the raw peppers and snow peas provided a nice freshness and crunch. I adapted the recipe from The Great Meat Cookbook, where I turned as soon as I realized my original plan for the short ribs (goulash) wasn’t going to pan out. I reviewed the book late last year, but I’ll say again that it’s an excellent resource for a meat cooking novice. And with that, I’ll leave you all to enjoy your weekend.

Vietnamese-Style Short Ribs with Soba Noodle Salad {Katie at the Kitchen Door}

Vietnamese-Style Short Ribs with Soba Noodle Salad

Adapted from The Great Meat Cookbook. Serves 2.

  • 1/2 tsp Chinese five-spice powder (I made my own)
  • 1-1/2 tsp paprika
  • 1 tsp salt
  • 1/2 tsp black pepper
  • 2 TBS plus 1 tsp dark brown sugar, divided
  • 2 lbs beef short ribs
  • 1 TBS peanut oil
  • 1 medium onion, chopped
  • 2 cloves garlic, minced
  • 2 tsp minced fresh ginger
  • 1 1/2 c. chicken or beef stock
  • 1 TBS Asian fish sauce
  • 2 TBS plus 1 tsp rice vinegar, divided
  • 1 1/2 tsp soy sauce
  • 1 whole star anise
  • 8 oz. dried soba noodles
  • 1 TBS sesame oil
  • 1 red pepper, washed, stemmed and seeded, and sliced into thin strips
  • 1 c. fresh snow peas, washed and sliced in half on the diagonal
  • minced fresh mint or cilantro, for garnish
  1.  In a small bowl, mix together the five-spice powder, paprika, salt, pepper, and 1 tsp of the brown sugar. Rub this spice mixture all over the short ribs, then place on a platter, cover tightly with plastic wrap, and refrigerate overnight.
  2. Preheat the oven to 350°F. Heat the peanut oil in a large dutch oven over medium heat. Add the short ribs and sear for 1 to 2 minutes per side, until nicely browned all over. Remove the short ribs and set aside. Add the onion to the dutch oven and saute for 5 minutes, until softened. Add the garlic and ginger and saute 2 minutes longer, stirring. Add the stock, fish sauce, 2 TBS of the rice vinegar, the soy sauce and the star anise. Scrape up any browned bits from the bottom of the pan, and bring to a boil. Return the short ribs to the pan, cover, and place in the preheated oven.
  3. Cook the short ribs in the oven for 90 minutes, flipping them over and checking for done-ness every 30 minutes. They are done when they are tender enough to pierce with a fork, but are not falling apart. Remove the ribs from the oven but keep covered.
  4. Put a pot of water on to boil and prepare soba noodles according to package directions. While they are cooking, degrease the sauce from the ribs, and add 1 cup of it to a small saucepan. Stir in the remaining 2 TBS brown sugar and 1 tsp rice vinegar. Bring to a boil over medium heat and reduce to make a thick, syrupy sauce, stirring frequently.
  5. When the noodles and sauce are done, toss the noodles with the sesame oil, sauce, and prepared peppers and snow peas. Serve with the short ribs and chopped mint or cilantro.

3 April 1, 2013 Cookbook

Broccoli-Cheddar Hushpuppies

Broccoli-Cheddar Hushpuppies with Sriracha Aioli {Katie at the Kitchen Door}

Happy April, everyone! I’m so glad we’re done with all that January-February-March-extended winter business. I spent the weekend celebrating the warm weather (and Easter!) with some serious gardening and some playing with my new camera and some scalloped potatoes and ham. It was a much-needed break from being indoors stuck in front of a computer screen.

March Garden Collage (800x1200)

I’ve got another recipe from The Chef’s Collaborative Cookbook today (check out my full review – and a recipe for Thai Pork Sliders – here). Hushpuppies are a treat that I haven’t had in a while, so I was stoked to see a recipe for them in The Chef’s Collaborative. I’d never really heard of them before moving to North Carolina, but while I lived there they were a staple side order with my pulled pork sandwiches. The greasy BBQ-joint version of hushpuppies (like the ones from Bullock’s that my roommate always drove home to her dad in NJ over vacations) are super satisfying, but my all time favorites were the ones at the upscale Watt’s Grocery – farmer’s cheese hushpuppies served with basil mayo. Those things were seriously addictive.

This recipe, which utilizes often discarded broccoli stems, as well as a healthy handful of grated cheddar cheese, is not quite as good as the Watt’s version, but it’s certainly easier to make these than to hop on a plane to Durham every time I want a little taste of the South. I served them with leftover sriracha aioli and relished every hot crunchy bite. I saved a little bit of the batter (this recipe definitely serves a crowd!) and learned Saturday morning that this recipe is maybe even better when it’s made into pancakes and topped with a fried egg and roasted red peppers. Just an idea. However you serve them, this recipe is quick, easy, and tasty – well worth the time it takes to mix up the batter!

Broccoli-Cheddar Hushpuppies with Sriracha Aioli {Katie at the Kitchen Door}

Broccoli-Cheddar Hushpuppies

Recipe from The Chef’s Collaborative Cookbook, contributed by John and Julie Stehling of Early Girl Eatery in Asheville, NC. Makes 48 hushpuppies. (To cut in half, use 3 eggs).

  • 3 c. cornmeal
  • 1 1/2 tsp baking powder
  • 1 1/2 tsp salt
  • 1/2 tsp sugar
  • 1/4 tsp baking soda
  • 1/4 tsp cayenne pepper
  • 1/4 tsp freshly ground black pepper
  • 5 large eggs
  • 1/2 c. buttermilk
  • 2 c. grated broccoli stems (from about 5-6 medium heads broccoli)
  • 1 c. grated cheddar cheese
  • 1/2 small yellow onion, peeled and grated (about 1/4 c.)
  • 1/4 c. finely chopped fresh flat-leaf parsley
  • vegetable oil, for frying
  • sriracha aioli, for serving
  1. In a large bowl, whisk together the cornmeal, baking powder, salt, sugar, baking soda, cayenne pepper, and black pepper until combined.
  2. In a separate, medium bowl, whisk together the eggs and buttermilk until evenly combined. Stir in the grated broccoli stems, the grated cheddar cheese, the grated onion, and the parsley. Stir the wet ingredients into the dry ingredients until evenly mixed.
  3. Heat 3 inches of vegetable oil over medium heat in a high-sided frying pan or saucepan until the oil reaches 325°F. If you don’t have a thermometer, test the oil’s temperature by adding a bit of batter to the oil – when it sizzles gently on contact, the oil is ready. If it pops too much or burns quickly, the oil is too hot.
  4. Carefully spoon rounded tablespoons of batter into the oil, adding only enough hushpuppies so that they don’t touch one another (i.e. don’t crowd them). Fry until golden brown, about 2-3 minutes, flipping over once if necessary. Remove with a slotted spoon or Asian noodle strainer, and let drain on a paper-towel lined plate. Serve hot (leftovers are no good, so only fry as many as you can serve/eat in one sitting).

1 March 27, 2013 Food

Fitness Challenge Update // Greatist Collaboration: Twice-Baked Broccoli-and-Kale-Stuffed Potatoes

Twice-Baked Broccoli-and-Kale-Stuffed Potatoes {Katie at the Kitchen Door}

I used to consider baked potatoes a healthy dinner, and one I really loved. Sadly, the past few years of anti-carb diet madness have tainted my love for the potato, and I find myself eating them less often – even though I try hard to ignore fad diets and focus simply on putting nutritious foods in my body (potatoes are nutritious!) and resisting non-nutritious foods, the waters of all the health information out there can be tricky to navigate. In truth, a plain baked potato is a pretty smart dinner choice – it’s fairly low in calories, high in fiber, and high in potassium and several vitamins. The problems arise with the toppings – butter, bacon, sour cream, cheddar cheese, guacamole… potatoes love to be eaten with lots of fat, and not always in moderate amounts.

To help return baked potatoes to their rightful pride of place in my dinner rotation without succumbing to the temptation to use them primarily as a vehicle for butter, I came up with this recipe for twice-baked potatoes stuffed with a broccoli and kale filling. After baking, scoop out most of the potato’s insides, blend with a little bit of milk, cooked broccoli and blanched kale, stuff it back in the potato, top with a small amount of cheddar, broil, and you have a virtuous baked potato dinner the merits of which it’ll be hard to argue with yourself over. You can find the complete recipe over at Greatist.

Twice-Baked Broccoli-and-Kale-Stuffed Potatoes {Katie at the Kitchen Door}

Since we’re talking health, I also wanted to give you a quick update on my March Fitness Challenge. If I were a teacher, I’d probably give myself a B- on this effort, maybe a B for following the spirit, if not the letter of the challenge. So far, out of 27 days, I’ve exercised 21 of them – a 78% success rate. I managed to do the first 10 days in a row without taking a day off, but on the 11th I had a terrible stomachache and just couldn’t do it. Then, things got a little spotty, although I’m hoping to finish out this last week strong. Still, I’ve definitely seen positive effects – I ran my fastest mile (7’29”!) in years at the very end of my run this Sunday, I’ve been getting back into jump rope and managed to do 30 minutes non-stop with 5 speed pieces built in, and doing the Nike Training Club workouts has definitely started to change the shape of my legs and core. Even when I’m tired, I’m usually glad that I sneak something in. Maybe in April I’ll switch things up – 5 days a week for at least 20 minutes? – but I’d like to keep up the pace of my training. I’ll keep you posted! Did any of you manage to stick with this this month?

2 March 24, 2013 Asian and Indian

Book Club: The Chef’s Collaborative // Thai Pork Sliders with Pickled Cucumbers and Sriracha Aioli

Thai Pork Sliders with Pickled Cucumbers and Sriracha Aioli {Katie at the Kitchen Door}

I may have found a new favorite cookbook. When I look through upcoming cookbook releases and think about which books I want to include in my reviews, some are obvious choices – books that have received a lot of advanced praise, like Vegetable Literacy or Gran Cocina Latina, or books that were written by my favorite bloggers, like the upcoming Vegetarian Everyday from the blog Green Kitchen Stories. Others I choose on more of a whim, and the fact that The Chef’s Collaborative Cookbook ended up on my desk is the happy result of one of those whims.

Homemade Slider Buns {Katie at the Kitchen Door}

The Chef’s Collaborative is an organization founded by a group of like-minded chefs in the early 90’s to promote the ideas surrounding sustainable food. The organization now has 6,000 members, 115 of whom have contributed recipes which celebrate local, sustainable ingredients to this collection. Personally, I was happy to see so many local Boston and Cambridge chefs contributing to this book – Jody Adams and Brian Rae of Rialto (Pan-Seared Black Bass with Pepper Stew and Spicy Green Pesto), Ana Sortun of Oleana (Sweet Potato Chickpea Dolmas with Spinach and Crispy Mushrooms), Barry Maiden of Hungry Mother (Heirloom Beet and Upland Cress Salad with Apples, Grapefruit, and Fennel-Buttermilk Dressing), and a dozen others. (Side note: I feel really lucky to be able to walk to so many incredible restaurants. I need to start branching out beyond the Indian place around the corner.) In line with the organization’s mission, this book brings a lot of helpful information about navigating “ethical” eating in today’s world to the table – there are many side-bars with information about label-reading, understanding GMOs, why you should choose grass-fed, and more. Of course, some of these topics are controversial, so you should always read with a critical eye, but this book does begin to answer a lot of the most common questions about food politics.

Thai Pork Sliders with Pickled Cucumbers and Sriracha Aioli {Katie at the Kitchen Door}

Now, on to the food: I want to cook everything in this book – the Asparagus, Spinach and Spring Pea Lasagna, the Chestnut Waffles with Roasted Apples and Cream, the Smoked Rabbit and Andouille Gumbo, the Wild Ramp and Farmstead Cheese Strata with Roasted Tomato Wine Butter, even the Spicy Calamari with Tomatoes and Saffron Aioli (I don’t eat seafood…). Every recipe makes me drool a little bit. I think the book really benefits from having contributions from so many talented chefs with different aesthetics – all the recipes are creative but in slightly different ways, meaning each recipe seems fresh and the collection of recipes doesn’t feel the least bit tired. Just flipping through it is getting me beyond excited for our growing season to start in earnest. The first recipe I tried, these Thai Pork Sliders, was a slam dunk on all accounts. I’ve been craving a burger for a while (OK, let’s be honest, I’m always craving a burger), and these little umami-packed bites where just the ticket – craving 100% satisfied.

Thai Pickled Cucumbers with Basil, Mint, and Cilantro {Katie at the Kitchen Door}

I went all out on this recipe, guys – homemade slider buns, homemade pickles, homemade aioli. It was all surprisingly easy. The slider buns only took 40 minutes from start to finish, with a quick ten minute rise built-in that gave me time to do the dishes before popping them in the oven. The pickles were an essential part of the recipe, but really required nothing more than making a quick salad. The Sriracha aioli was a last minute decision, based on a hunch that these might need something a little creamy to tie them together, and it made all the difference in the world. It’s addictive stuff.

I have to add – Trevor told me while eating these sliders that he gives this book a rating of “seven forks and a spoon.” When I asked what scale this was on, his answer was “the scale of silverware.” I’m pretty sure this means he approves, as well as that he finds himself very amusing. (I suppose he should also get credit for frying the burgers and doing the dishes…)

The bottom line: The Chef’s Collaborative Cookbook is an instant favorite for me. The creativity and quality of recipes in this book – all of which truly celebrate local, seasonal produce, from  quinces and fava beans to fiddleheads and wild crab apples – really help it stand out from the crowd. It’s not a book that will explicitly teach you the basics, but it will bring exciting, restaurant-worthy food down to a level that’s accessible for a home cook. Recommended for anyone who is looking to explore the principles of local, seasonal cooking, or who simply wants to bring a new level of creativity into their kitchen.

Disclaimer: Taunton Press sent me a review copy of The Chef’s Collaborative Cookbook, but I was not otherwise compensated for writing this review and all opinions are my own.

Thai Pork Sliders with Pickled Cucumbers and Sriracha Aioli {Katie at the Kitchen Door}

Thai Pork Sliders with Pickled Cucumbers

Recipe adapted slightly from The Chef’s Collaborative Cookbook. Contributed by Chef Helene Kennan. Makes 8-10 sliders.

Note: the only changes I made to this recipe where to include a little bit more of various seasonings – more garlic, more ginger, more herbs in the pickles. This was simply a matter of taste, but I liked the little bit of extra flavor boost. Also, you will have leftover pickles, but they’re delicious straight out of the jar, so don’t worry about using them up!

  • 1 lb. ground pork
  • 2 cloves garlic, finely minced 
  • 2 TBS finely minced fresh ginger
  • 1 TBS sesame oil
  • 1/2 tsp ground cinnamon
  • 1/2 tsp crushed red pepper flakes
  • 2 tsp soy sauce
  • 1/4 tsp white pepper
  • 1/4 c. rice vinegar
  • 1/4 c. honey
  • 2 TBS freshly squeezed orange juice
  • 2 medium or 1 large cucumber, peeled and thinly sliced
  • 1/2 bunch fresh cilantro, coarsely chopped
  • 8 large fresh basil leaves, coarsely chopped
  • 16 fresh mint leaves, coarsely chopped
  • 1 TBS vegetable oil
  • 1/2 c. roasted salted peanuts, coarsely chopped (optional)
  • 8-10 slider buns (see below for recipe)
  • Sriracha aioli (see below for recipe)
  1. Combine the pork, minced garlic, minced gigner, sesame oil, cinnamon, red pepper flakes, and soy sauce in a medium bowl and stir together until meat is seasoned evenly. Set aside while you prepare the pickles to let the flavors meld.
  2. Whisk together the rice vinegar, honey, and orange juice in a medium bowl until the honey is dissolved. Stir in the cucumbers, chopped cilantro, basil, and mint, and thoroughly coat all the cucumbers with the dressing. Set aside.
  3. Lightly coat a griddle or cast-iron pan with oil and warm over medium heat (if you don’t have a cast-iron pan, use a regular pan but use more oil). Form the pork mixture into 8-10 small burger patties. When the pan is hot, add the patties and cook for 3 minutes per side, or until firm to the touch and cooked through.
  4. Serve the burgers with the pickled cucumbers and Sriracha aioli on top of the slider buns. Serve the extra pickled cucumbers on the side with chopped peanuts, if desired.

Sriracha Aioli

Makes about 1 cup of aioli.

Note: I used an immersion blender to make this aioli. There are lots of other ways to do it – including by hand, or in a food processor, if you don’t have an immersion blender. Just be sure to slowly drizzle in your oil so the emulsion doesn’t break!

  • 1 egg yolk
  • 1 TBS of lemon juice
  • 1 tsp water
  • 1 tsp Dijon mustard
  • 1 c. olive oil
  • Sriracha, to taste (we used about 3 TBS)
  • sea salt, to taste
  1. Place egg yolk, lemon juice, water, and mustard in the bottom of a vessel in which your immersion blender fits snugly. Pulse the blender a few times to blend the ingredients so that they are smooth. Very slowly drizzle in the olive oil as you pulse the blender, pausing the drizzle occasionally to make sure that the aioli is coming together and turning creamy white. Continue drizzling in the olive oil while blending until you’ve used all the olive oil.
  2. Remove the immersion blender and stir Sriracha and sea salt into the aioli a little at a time, tasting as you go, until your aioli has the desired flavor and heat. Refrigerate leftovers in an airtight container for a few days.

Homemade Slider Buns {Katie at the Kitchen Door}

40-Minute Homemade Slider Buns

Recipe adapted slightly from Taste of Home. Makes 16 slider buns.

  • 2 TBS active dry yeast
  • 1 c. plus 2 TBS warm water (110°F to 115°F)
  • 1/3 c. vegetable oil
  • 1/4 c. sugar
  • 1 egg
  • 1 tsp salt
  • 3 1/2 c. flour
  • egg wash – 1 egg beaten with 2 tsp water
  • sesame seeds
  1. Preheat oven to 425°F. In a large bowl, combine yeast, water, oil, and sugar. Let sit and proof for 5-10 minutes – yeast should dissolve and get slightly goopy. Stir in egg and salt, then stir in flour a half cup at a time until you have a soft dough. Turn out dough onto a floured surface and knead until smooth and elastic, about 5-8 minutes. Break into 16 equal sized pieces and roll them into balls. Flatten slightly and place on a greased baking sheet. Cover and let rise for 10 minutes.
  2. Brush the top of each bun with a small amount of egg wash, then sprinkle with sesame seeds. Bake buns for 10-12 minutes, or until golden brown.

23 March 21, 2013 Dessert

A Childhood Cookie // Oatmeal Scotchies

Oatmeal Scotchies

I’ve been craving cookies. I usually try to resist baking them for as long as possible, just because I know once they’re on the counter it will be hard not to eat them by the handful. But I’ve been putting off this particular craving for weeks, and it was time to give in. I thought about trying to come up with some creative new cookie that would really wow you, but, the thing is, I didn’t really want a fancy cookie. I just wanted something simple and sweet and crunchy. And when I remembered Oatmeal Scotchies, one of my favorite, favorite cookies, I suddenly couldn’t justify making anything but those.

Oatmeal Scotchies

This is a back-of-the-bag recipe – sometimes, those are the best kind. There’s something so comforting about recipes like these, ones that you’ve made a dozen times before. You barely have to look at the ingredient list to know – two sticks of butter, softened, three-quarters of a cup white sugar, three-quarters of a cup brown sugar, two eggs, one at a time. Like a mantra from your childhood. The first thing you helped your mother make once you’d graduated from boxed cake mix. The recipe you wrote for your “how-to” paragraph in first grade. Also, one of the few recipes you make where the time it takes to preheat the oven is all the time you need. Twenty minutes after you’ve started, you’re eating the first cookie, still so hot that the molten butterscotch chips in the middle burn the tip of your tongue. The first cookie eaten on it’s own, standing over the oven, the second one sitting at the table with a cold glass of milk. You spoil your dinner, and feel a little sick from eating one too many spoonfuls of dough. It’s a welcome ritual at the end of a long week.

These are one of my dad’s favorites, too, and when I eat them, I think of him standing at the counter, sneaking just one, OK maybe two more from the cat-shaped cookie jar. My family is away this week – in Colorado and New Mexico for my baby brother’s spring break – but maybe when they come back I’ll make another batch, to share with them. After all, it’s such an easy way to show your love.

Oatmeal Scotchies

Oatmeal Scotchies

Recipe from Nestle Toll House. Makes 48 cookies.

  • 1 c. (2 sticks) butter, softened
  • 3/4 c. white sugar
  • 3/4 c. brown sugar
  • 2 eggs
  • 1 tsp vanilla
  • 1 1/4 c. flour
  • 1 tsp baking soda
  • 1/2 tsp cinnamon
  • 1/2 tsp salt
  • 3 c. oats
  • One 11-oz bag butterscotch chips
  1. Preheat the oven to 375°F. In a large bowl, cream together butter and both sugars until light and fluffy. Beat in eggs one at a time, until fully incorporated. Stir in vanilla to incorporate.
  2. In a separate, smaller bowl, whisk together flour, baking soda, cinnamon, and salt. Stir into the wet ingredients until the dough has an even, slightly sticky texture. Stir in the oats and the butterscotch chips.
  3. Drop rounded spoonfuls of dough (a little more than a tablespoon each) onto a baking sheet to form cookies. Bake for 7-8 minutes for chewy cookies, or 9-10 minutes for crispy cookies.

10 March 19, 2013 Cookbook

Book Club: Vegetable Literacy // Soba Noodles with Kale, Sesame, and Slivered Brussels Sprouts

Soba Noodles with Kale, Sesame and Slivered Brussels Sprouts {Katie at the Kitchen Door}

One of the most buzz-worthy cookbooks released so far this spring is Vegetable Literacy, Deborah Madison’s information-packed ode to cooking with vegetables. Since I’m already planning for the gardening season ahead and dreaming of what to do with all of our fresh, home-grown vegetables, I was thrilled to receive a copy to augment my daydreaming.

This book is wholly centered around the plant kingdom. The chapters are organized by plant family, e.g. the knotweed family – sorrel, rhubarb, and buckwheat, or the nightshade family – potatoes, eggplants, peppers, and tomatoes. Within each chapter, each vegetable is given a lengthy introduction that mixes history, culture, biology, and even linguistics into a tale of the vegetable that is guaranteed to teach you something. (I’m still utterly fascinated by what I learned about Belgian endives – they grow on these massive roots, but in the dark!) Then the narrative moves on to discuss the best varieties (which reminds me of Tender), using the whole plant, kitchen wisdom, good flavor companions (which reminds me of The Flavor Bible), and how-tos (how to roast peppers, how to freeze garden-fresh swiss chard), before presenting us with the recipes that showcase that vegetable.

Soba Noodles with Kale, Sesame and Slivered Brussels Sprouts {Katie at the Kitchen Door}

That may sound like a lot of information for every vegetable – and it is! Vegetable Literacy doesn’t follow the current trend of having pretty pictures with every recipe (although when there are pictures, they’re lovely, just not the focus), or having fun graphics and sidebars – this cookbook is all about the words. Even visually it’s about the words – there are entire two-page spreads that are simply four columns of text. But it’s well written, highly informative, and horizon broadening – it’s easy to read and easy to learn from.  The recipes themselves are creative and unabashedly healthy, and would provide any avid home-gardener with years worth of dishes to try using their home produce in. I already can’t wait for my peas to come up so I can try the Peas with Baked Ricotta and Bread Crumbs, and I’m intrigued by combinations such as Corn Cookies with Almonds and Raisins, and Tomato and Cilantro Soup with Black Quinoa. There’s plenty of new ideas to hold my attention as a cook.

Soba Noodles with Kale, Sesame and Slivered Brussels Sprouts {Katie at the Kitchen Door}

Coming back from a weekend of traveling and indulging with my girlfriends, I needed something fresh and simple to help re-balance my system. There were plenty of choices of fresh, delicious meals in Vegetable Literacy, but March is actually a tough season for local vegetables in New England – root vegetables are tired and everyone’s minds are on spring, but the first homegrown peas are still months away. So I went for a year-round staple, kale, and settled on this Soba Noodle Salad with raw kale, raw brussels sprouts, and a sesame-soy dressing. I liked that the noodles made the dish filling but the veggies remained uncooked, keeping as much of their nutrition as possible. It was easy to make and tasty, and I can definitely see adding a little bit of this or that (shredded carrot? raw red peppers?) as the seasons change.

The bottom line: Vegetable Literacy is a well-written and highly informative cookbook that offers both healthy, veggie-focused recipes and a wealth of information on the history, culture, and biology of the plants we find on our plates. Truly, it straddles the line between cookbook and encyclopedia. I’d recommend this book to anyone with an interest in gardening or vegetarian cooking, as it will likely expand your horizons on both topics.

Disclaimer: I was sent a review copy of Vegetable Literacy by Ten Speed Press, but I was not otherwise compensated for writing this review and all opinions are my own.

Soba Noodles with Kale, Sesame and Slivered Brussels Sprouts {Katie at the Kitchen Door}

Soba Noodles with Kale, Slivered Brussels Sprouts and Sesame Dressing

Adapted slightly from Vegetable Literacy. Serves 3-4.

  • 8 oz. soba noodles
  • 8 tsp sesame oil, divided
  • 1 bunch Tuscan kale OR one 5-oz box baby kale
  • sea salt
  • 8 Brussels sprouts
  • 1 clove garlic
  • 1 TBS brown rice wine vinegar
  • 1 tsp soy sauce
  • 1 TBS sesame seeds, toasted in a dry skillet until golden
  • 2 pinches red chile flakes
  • handful of slivered chives or scallions
  1. Bring a large pot of salted water to a boil, then cook the soba noodles according to package directions. Drain, then toss with 3 tsp of the sesame oil.
  2. While the noodles are cooking, prepare the veggies. Wash and dry the kale. If using large, Tuscan kale, remove the leaves from the stems, then, working in batches, stack the leaves, roll them up tightly, and slice into thin ribbons. Place the ribbons in a large bowl. If using baby kale, simply put the clean dry leaves into the bowl. Add 2 tsp of the sesame oil and 1/4 tsp sea salt, then massage with your hands until the leaves have started to shrink and glisten.
  3. Remove the outer leaves from the Brussels sprouts, cut off the bottom stem, then slice them as thinly as possible, using a mandoline (carefully!) if you have one. Cut the slices into slivers, then toss with the kale.
  4. Pound the garlic into a paste with 1/8 tsp salt in a mortar and pestle. Whisk in the rice vinegar, then the remaining 3 tsp sesame oil, then the soy sauce, until you have a smooth dressing. Pour over the kale and Brussels sprouts and toss to coat. Toss with the cooked noodles, sesame seeds, and red chile flakes. Finish with chives or scallions, and serve at room temperature or chilled.
  • « Go to Previous Page
  • Go to page 1
  • Interim pages omitted …
  • Go to page 31
  • Go to page 32
  • Go to page 33
  • Go to page 34
  • Go to page 35
  • Interim pages omitted …
  • Go to page 57
  • Go to Next Page »

Primary Sidebar

Subscribe!

Get creative recipes and menu ideas delivered straight to your inbox.

Most Popular

A House // Sweet Potato and Coconut Milk Soup with Brown Rice and Lentils

Monthly Fitness Goals: July // Homemade Spinach Wraps with Chopped Greek Salad

A New Job // Classic Seven-Layer Bars

Butternut Squash Carbonara with Fried Sage and Caramelized Onions

Happy Birthday, Trevor! // Peanut Butter Fudge

Cookbook Review and Giveaway: Home Made Winter

Drizly

Please note!

Full disclosure: if you purchase anything at Amazon using the above links or any other links to Amazon on this site, I will receive a small commission. Just so you know!

Copyright© 2025 · Cookd Pro Theme by Shay Bocks

This site uses cookies: Find out more.