Full of Flavor
The Book: Full of Flavor: How to Create Like a Chef is a book that was released back in the spring – I’m not sure how I missed it the first time around, since the author, Maria Elia, is one of my favorite chefs. Her first book, The Modern Vegetarian, was one of the first cookbooks I purchased, and it’s still one of my favorites. But I’ll try to keep this post about this book, instead of my mini-chef crush on Maria. Full of Flavor attempts to capture and teach you Maria’s creative recipe development and cooking process, not only the final output. Each of the 18 ingredient-focused chapters opens with a cartoon “mind map” that associates different flavors and textures with the main ingredient of that chapter, and for many of her recipes she offers variations and ideas for making the recipe your own. I love the spirit of the book – open, passionate, sharing – and that she doesn’t take on that braggy tone that some chefs do when talking about their own recipes. Also, I’m a big fan of the flavor profiles that Maria uses in her recipes – they’re creative and exciting and slightly exotic without being too difficult or “out there.” I think it’s telling that she can write a great vegetarian cookbook, and then turn around and write a book where the first 8 chapters are all about meat and fish. As icing on the cake, the design of this book is a fun mix of drawings and photos, and the lovely pictures are straightforward, uncluttered, and richly colored, truly showing off the brilliant recipes.

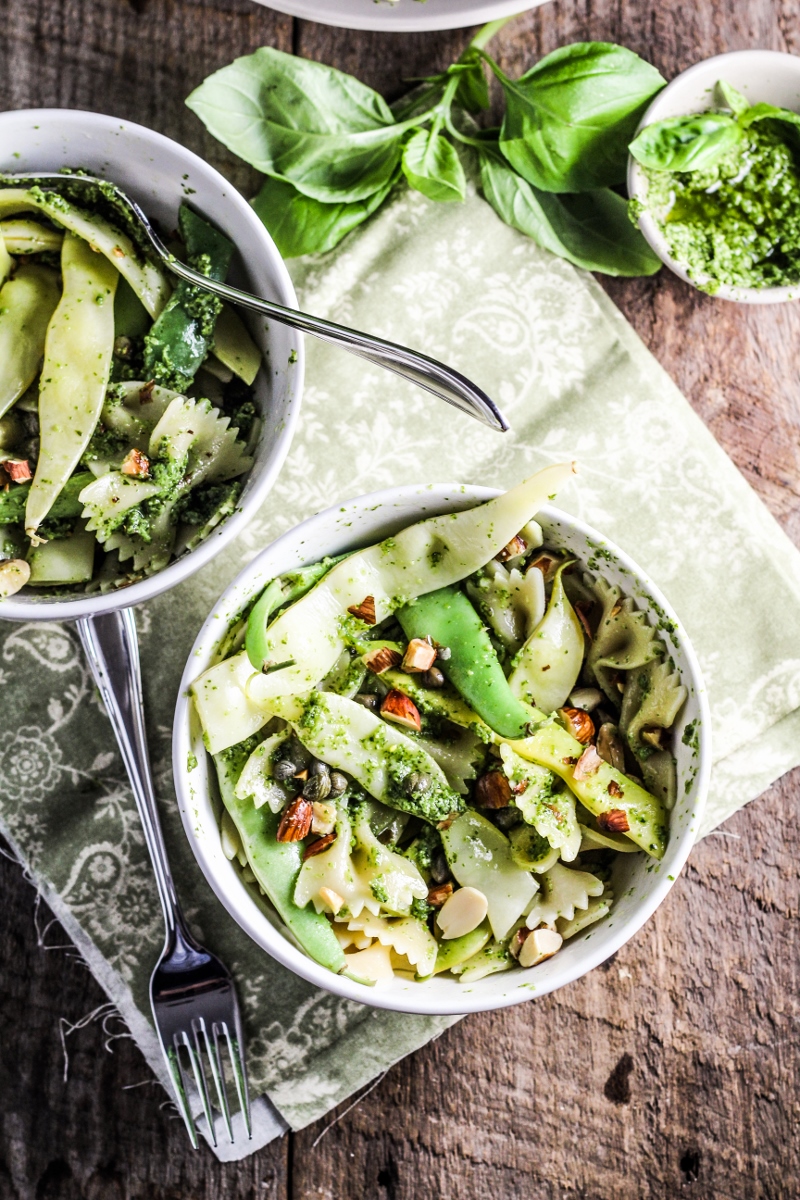
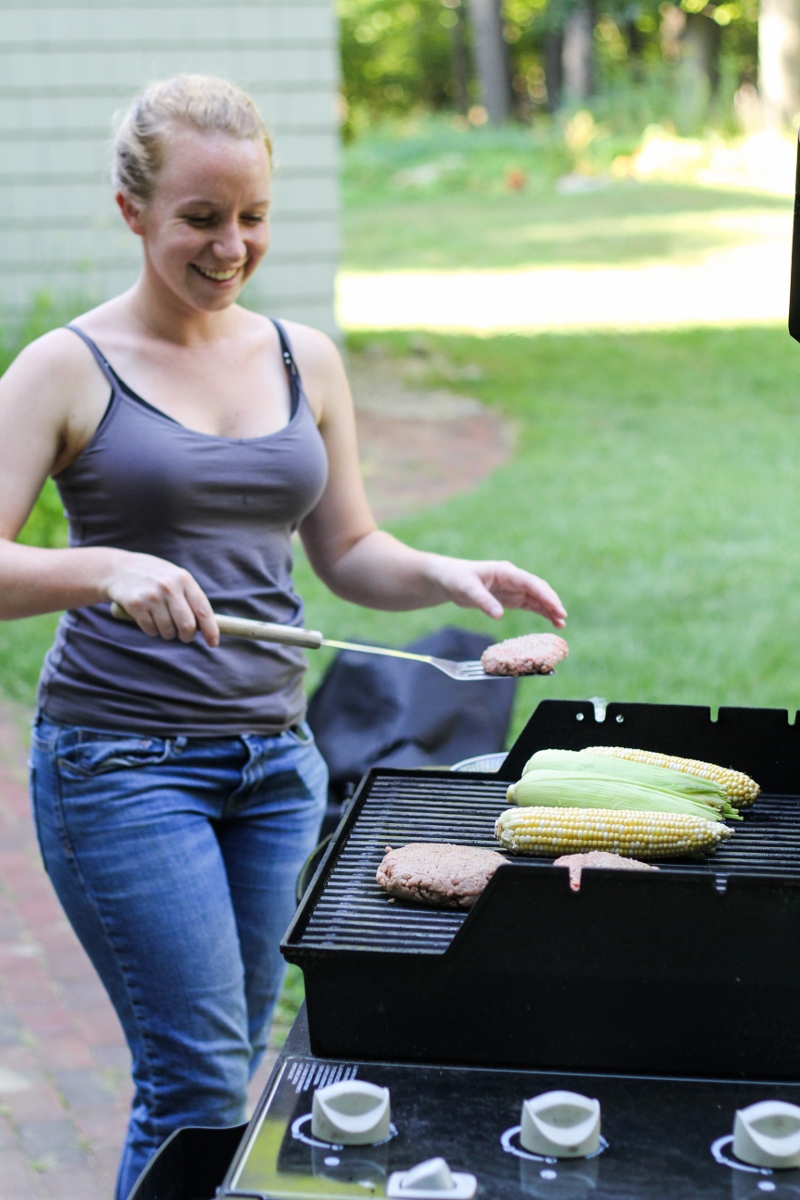
The Food: The first recipe we made from this book was the Duck, Pineapple, and Coconut Curry. I’ve experimented quite a bit with homemade curry recipes, and it’s really difficult to achieve the depth and balance of flavors that most Thai/Indian/Vietnamese restaurants do. This recipe, which uses a fresh, homemade curry paste made from Thai chilies, lemongrass, ginger, and whole spices, is a really good one. The spiciness of the curry paste, richness of the coconut milk and the duck, and sweet acidity of the pineapple play really well off each other, resulting in a thick and balanced curry that will make you proud of your new-found international cooking skills. Maria offers two shortcuts here – buying pre-cooked Chinese style duck, and using homemade curry paste. I think the pre-cooked duck is a good idea if you’re short on time, but definitely make the curry paste yourself. It’s worth it. Scroll down for the recipe.
Recipe Shortlist: Italian Sausage, Red Wine, Chestnut, and Cabbage Risotto; Moroccan Lentils with Salmon and Avocado Cream; Butternut Squash Falafel; Carrot, Dill, Almond, and Feta Baklava; Green Olive Gnocchi; Bircher Muesli with Grated Apple; Pear Beignets with Rosemary Sugar and Creme Anglaise
Vedge
The Book: Vedge is the new cookbook from the chefs of the vegan Philadelphia restaurant of the same name. Like the restaurant, the book is full of creative and elegant vegan recipes, but the chefs urge you to think of it as “vegetable cooking,” making the recipes about the food, instead of the diet or ethics. There are a range of cuisines and flavors represented, many dishes clearly having been inspired by their travels, and I really like the little themed menus that pop-up throughout the book. Although I’m not a vegetarian or a vegan, I did find it a little bit disappointing that so many of the recipes called for vegan dairy substitutes – vegan mayo, vegan sour cream, vegan butter, etc. I would just make these recipes with the real versions, but there must be other non-dairy ways to add richness to recipes. It’s also worth pointing out that a handful of novel, sophisticated, and intriguing cocktail recipes – like the “Elder Sage” martini and the “Sherry Temple” – are included in the book. I’m guessing that vegans and vegetarians will find this book truly inspiring – and all the rest of us will find ourselves with an exciting new repertoire of healthy vegetable side dishes.
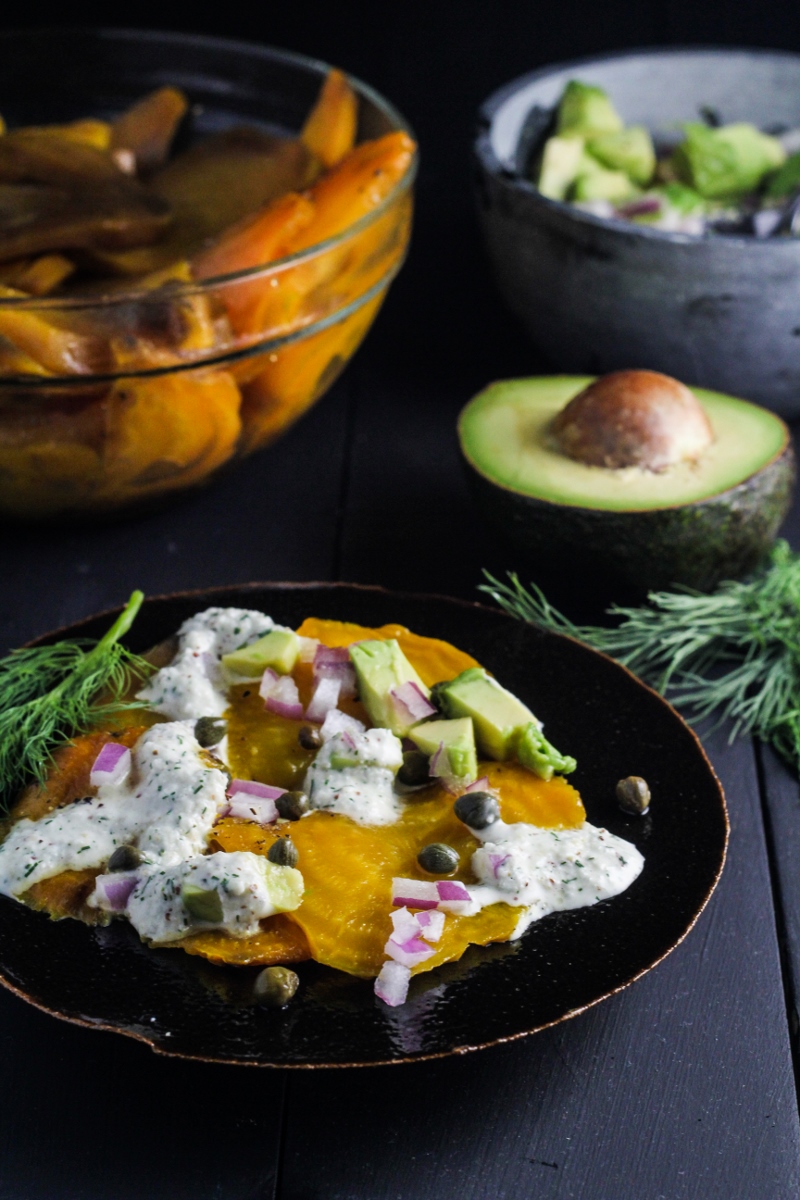
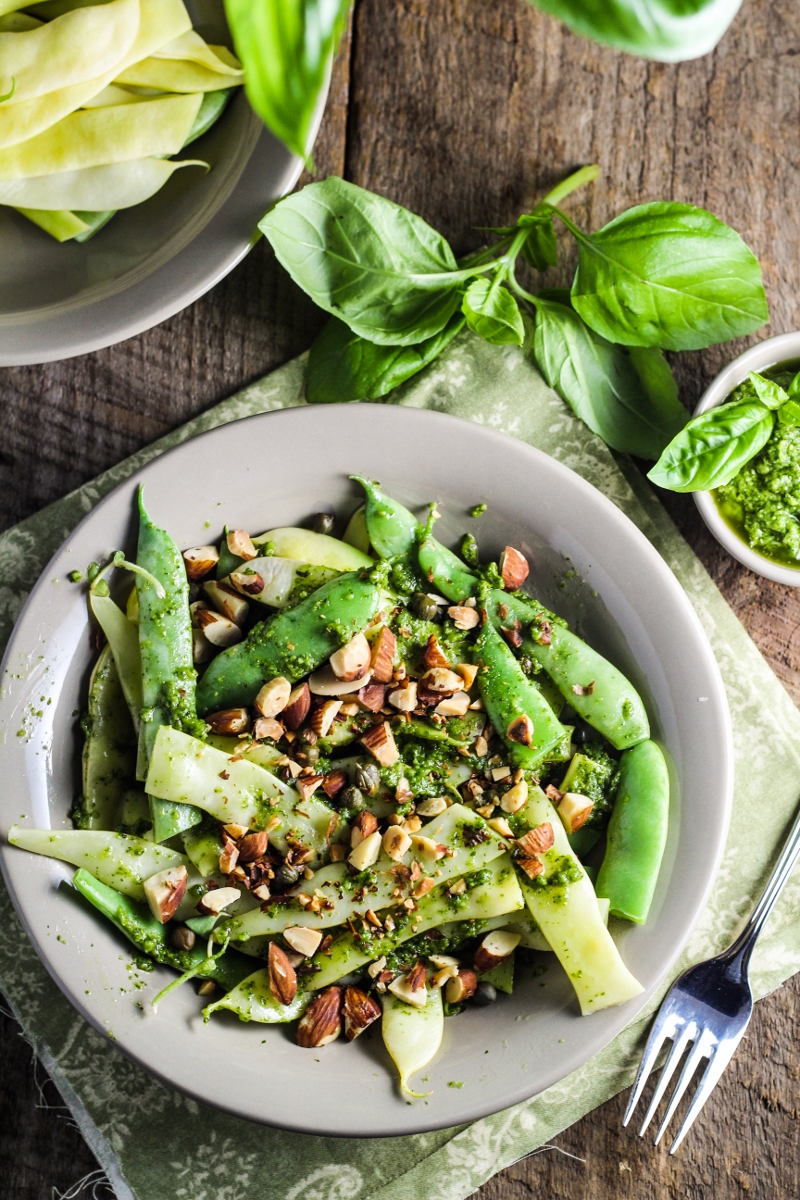
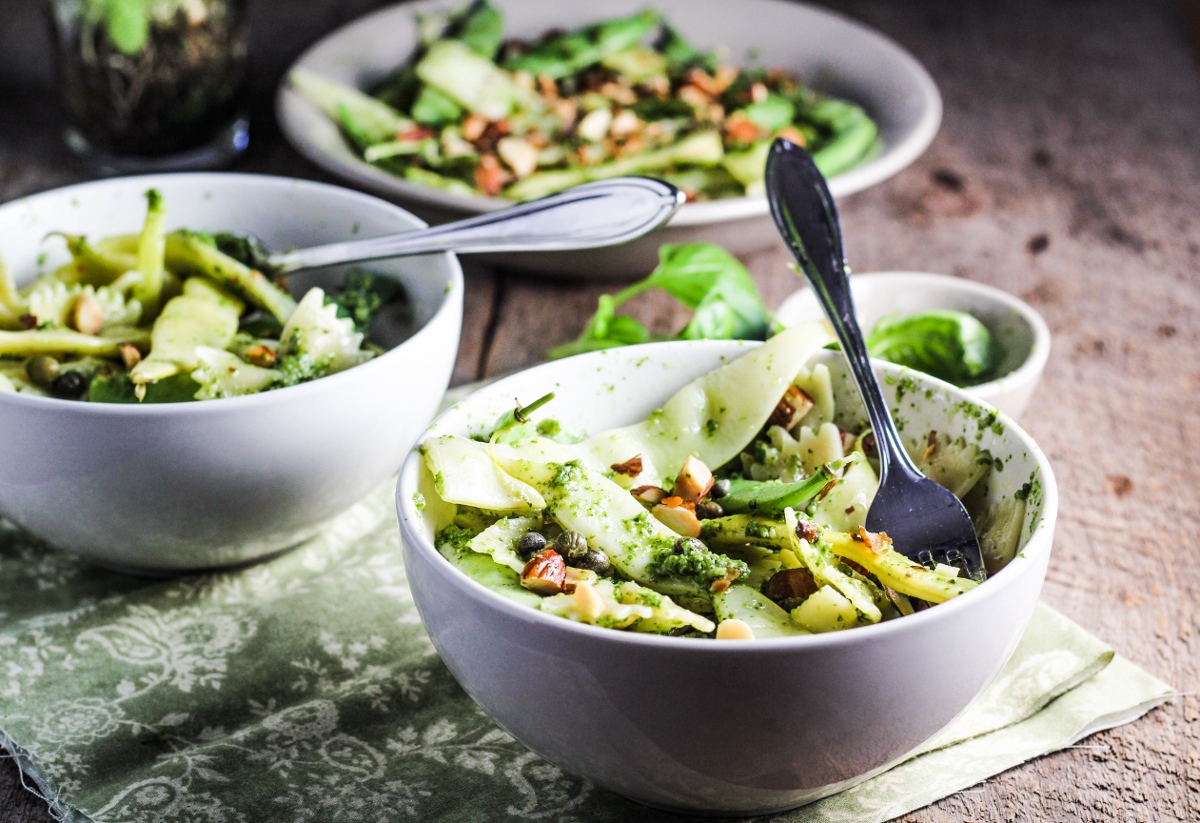
The Food: Trevor and I used this book to cook dinner for his dad and his dad’s wife a few weeks ago. They are both vegetarians, and are moving to a mostly vegan, mostly gluten-free diet as part of a cross-fit challenge as well, so this book was a bit of a blessing in terms of finding recipes that would still be delicious and interesting but would satisfy their dietary requirements. For dinner, we made Salt-Roasted Golden Beets with Dill, Avocado, and Capers (a visual play on cured salmon), and “BLTs,” with the last of our beautiful heirloom tomatoes from the garden, and crispy fried mushrooms in place of the bacon. Both dishes went over really well, and we liked the beets so much that we made them again at home to share here. There’s a ton of flavor and texture in this recipe, and while I suppose it’s possible that I mostly like it because it has mayo, avocado, and capers in it (three very craveable foods in my book), I think that all of the elements go really well together. The bright, contrasting colors also make it a very pretty appetizer. Scroll down for the recipe.
Recipe Shortlist: Saffron Cauliflower Soup with Persillade; Squash Empanadas with Green Romesco; Portobello and Celeria Shepherd’s Pie with Truffle; Parsnip and Chestnut Bisque with Mulled Wine Onion Confit
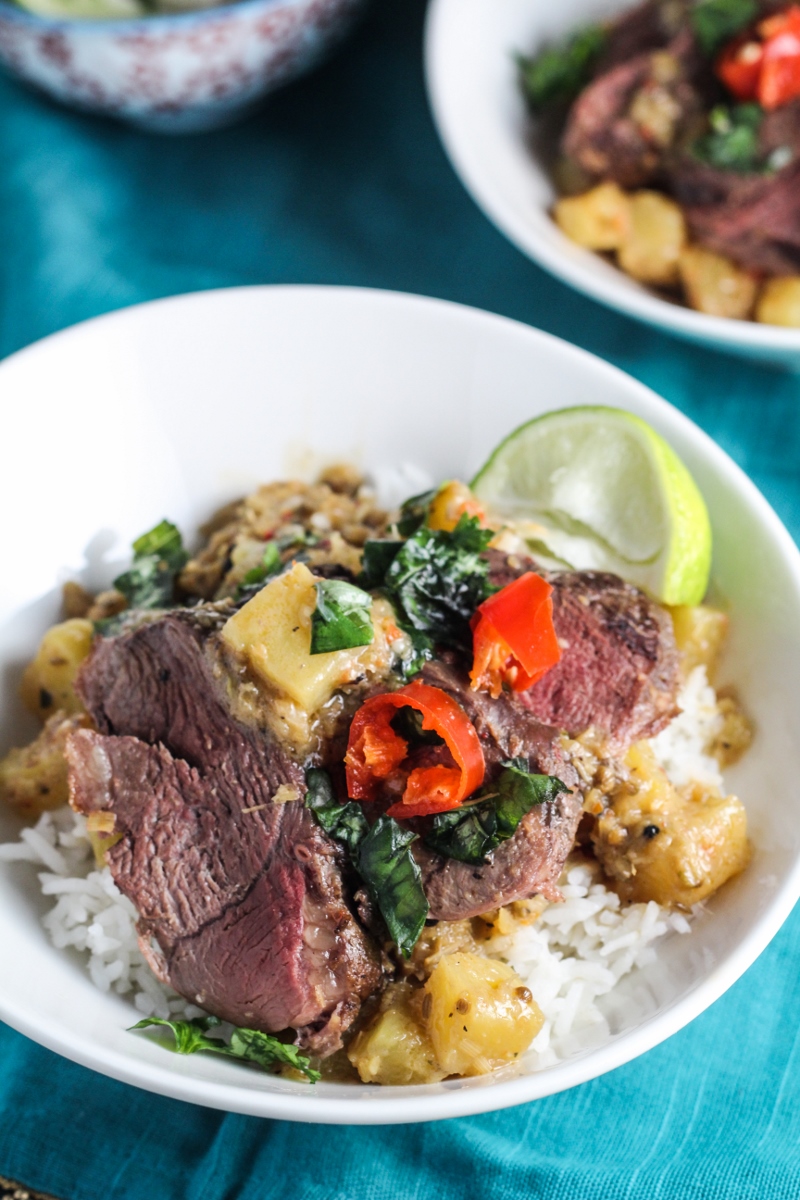
Duck, Pineapple, and Coconut Curry
Recipe from Full of Flavor. Serves 6.
For the curry paste:
- 1 TBS whole coriander
- 1 tsp whole cumin
- 4 red bird’s eye (Thai) chilies
- 2 shallots, peeled and finely sliced
- 3 garlic cloves, peeled and finely chopped
- 1 1/4 in. piece of ginger, peeled and thinly sliced
- 2 sticks lemongrass, tough outer leaves removed and interior finely sliced
- 2 lime leaves, finely chopped
- 6 cilantro roots, finely chopped, or 1/2 bunch fresh cilantro, finely chopped
- 1 tsp cardamom pods
- 1 tsp sea salt
- 1 tsp whole green peppercorns, or freshly ground pepper
- Add the coriander and the cumin to a dry frying pan and toast over medium heat for 2-3 minutes or until fragrant, shaking the pan to prevent them from burning.
- Add the toasted seeds and the next 10 ingredients (chilies through green peppercorns) to a food processor and blend into a smooth paste. Set aside.
For the curry:
- 4 duck breasts (about 2 lbs.), fat lightly scored
- sea salt and black pepper to taste
- 2 cans (14 oz. each) of unsweetened coconut milk
- 2 whole lime leaves
- 2 TBS palm sugar or brown sugar
- 1 lb. 2 oz fresh pineapple, diced
- 2 TBS fish sauce
- leaves from 1/2 bunch cilantro
- 1 red chili, thinly sliced
- handful of Thai basil leaves
- 1 or 2 limes, cut into quarters
- Season the duck with the salt and pepper. Heat a large saute pan (that has a lid) over medium heat and add the duck to the pan, fat side down. Sear on high heat until browned all over. Pour off extra fat and set duck aside.
- Scoop the coconut cream off the top of the cans and add to the pan along with the curry paste. Cook for about 2-3 minutes or until fragrant, stirring frequently to prevent burning. Add the rest of the coconut milk plus 1 cup of water, and bring to a boil. Reduce to a simmer and add the seared duck. Cover and cook over low heat for about 15 minutes or until the duck is tender. Uncover and add the lime leaves, palm sugar, and pineapple. Simmer for another 10 minutes. Skim the fat from the dish and discard, and finish the curry with the fish sauce and cilantro. Remove the duck breasts from the curry and slice them, then return to the sauce. Serve over rice, with the sliced chilies, basil leaves, and lime quarters.
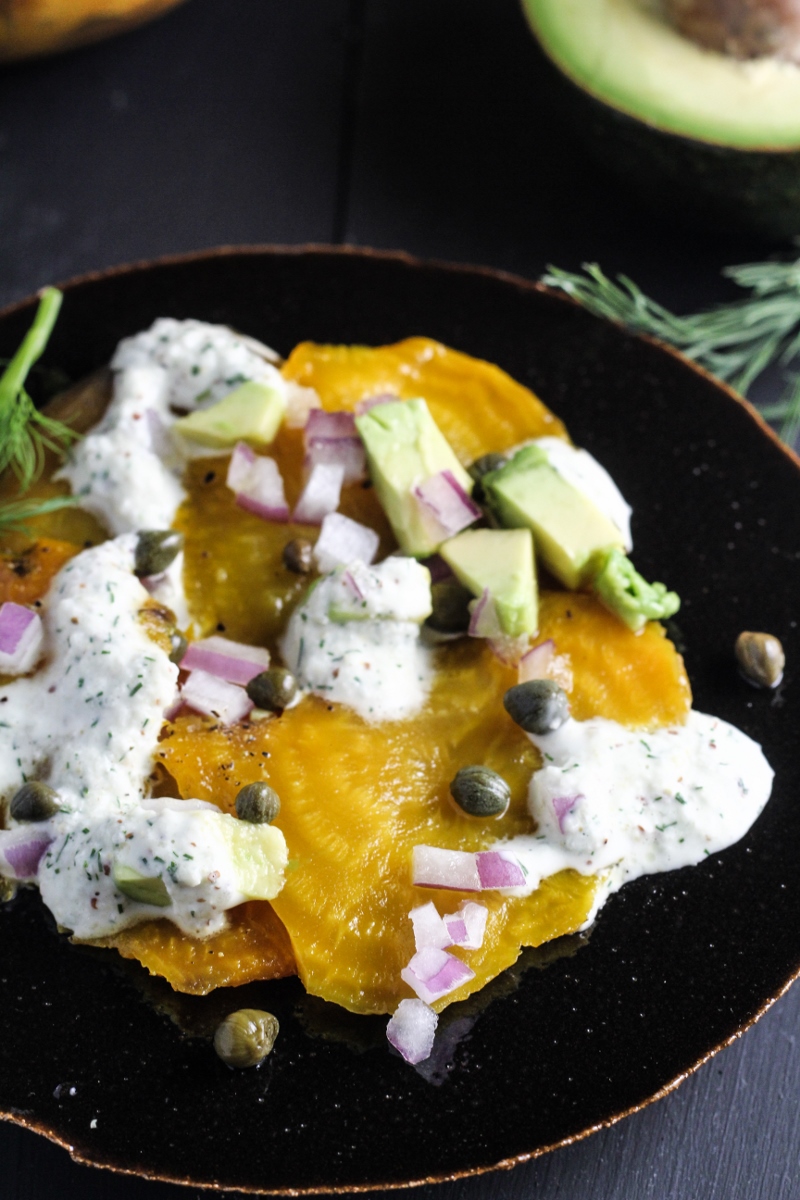
Salt-Roasted Golden Beets with Dill, Avocado, Capers, and Red Onion
Recipe from Vedge. Serves 4 to 6.
- 2 c. coarse kosher salt
- 5 lbs. golden beets (no greens)
- 2 TBS olive oil
- 1 TBS sherry vinegar
- 2 tsp freshly ground black pepper, divided
- 1 1/2 c. peeled, seeded, chopped cucumber
- 3/4 c. vegan mayo
- 1/2 c. loosely packed dill fronds
- 1 TBS Dijon mustard
- 1/2 tsp salt
- 1 avocado, pitted, peeled, and diced
- 1/4 c. capers, drained
- 1/4 c. finely diced red onions
- Preheat the oven to 300°F. Place the kosher salt in an even, thick layer on a large baking sheet. Arrange the beets in a single layer on the salt. Roast until fork-tender, about 2 hours. The skins will look very dark, almost burnt. Let the beets cool until you can comfortably handle them, then peel the beets. Slice the peeled beets as thinly as you can. Toss the beet slices in a large bowl with the olive oil, sherry vinegar, and 1 tsp of the black pepper. Let marinate in the fridge for at least 30 minutes, and up to 24 hours.
- Place the cucumber, mayo, dill, mustard, 1/2 tsp salt, and the remaining 1 tsp of black pepper in a food processor. Pulse into a smooth sauce, then set aside.
- Fan the sliced, marinated beets out on a large platter. Garnish with the avocado, capers, and diced red onion, and a spoonful of the cucumber sauce.
Disclaimer: I received review copies of Vedge from The Experiment and Full of Flavor from Kyle Books free of charge, but was not otherwise compensated for writing this review.