• Skip to primary navigation
  • Skip to main content
  • Skip to primary sidebar
  • Home
  • Recipes
  • Features
    • Cookbook Reviews
    • Ingredient of the Week
    • Sunday Dinner
    • Fitness Goals
  • Travel
  • About
    • Privacy Policy
    • Cookie Policy
  • Work With Me

Katie at the Kitchen Door

Globally-inspired, seasonal recipes

Blog Page

1 November 10, 2014 Fall

Sausage, Apple, and Cheddar Mac’N’Cheese

Sausage, Apple, and Cheddar Mac'N'Cheese {Katie at the Kitchen Door}

Sausage, Apple, and Cheddar Mac'N'Cheese {Katie at the Kitchen Door}

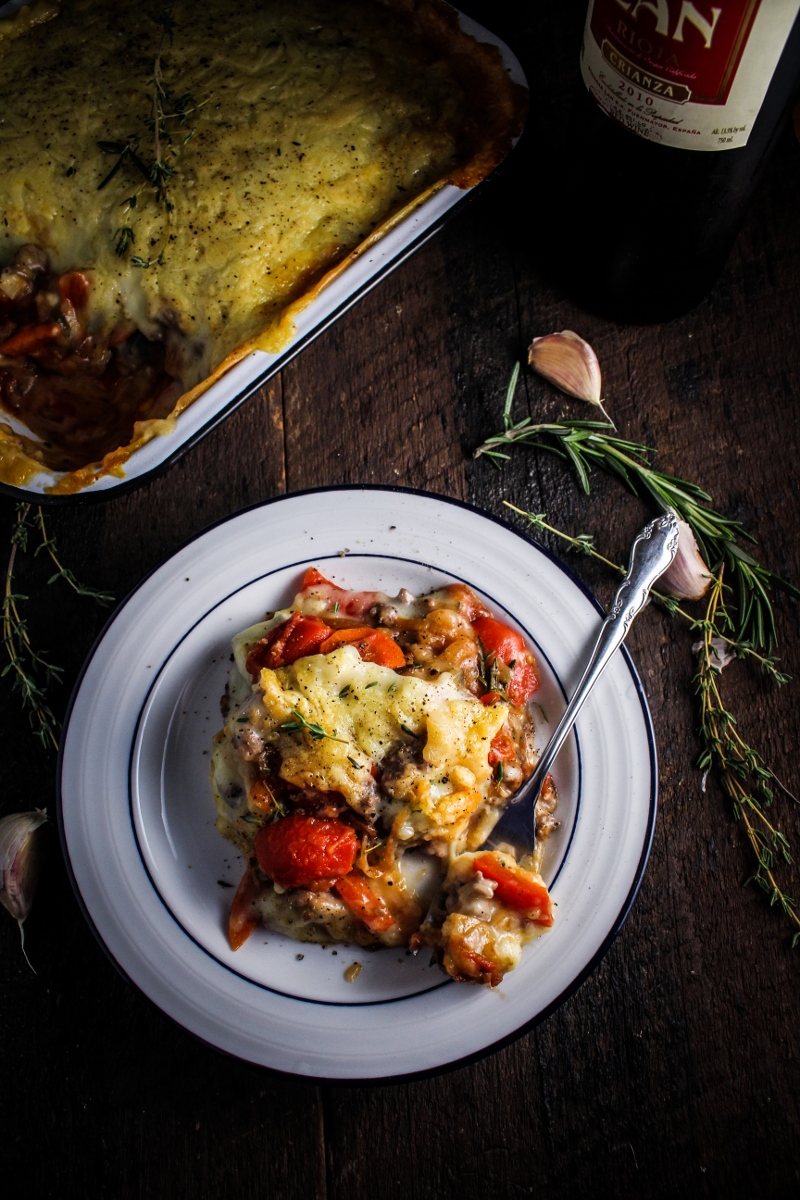
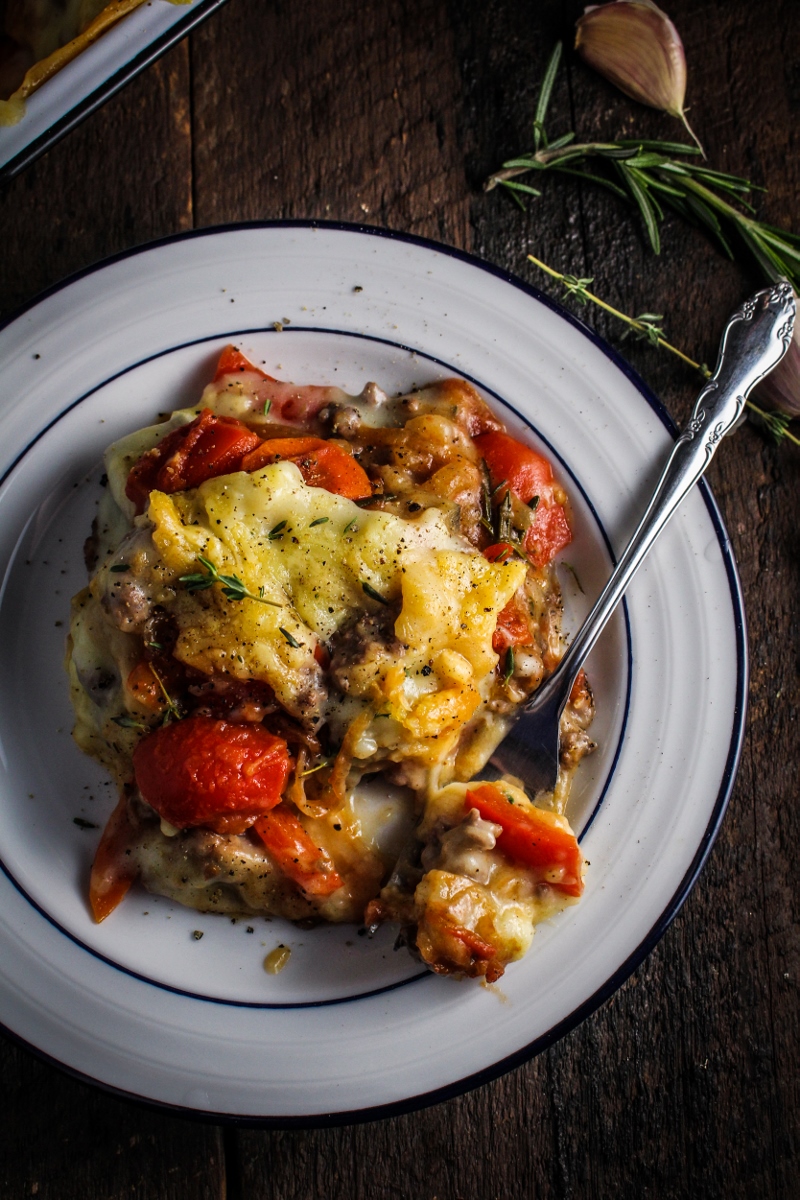
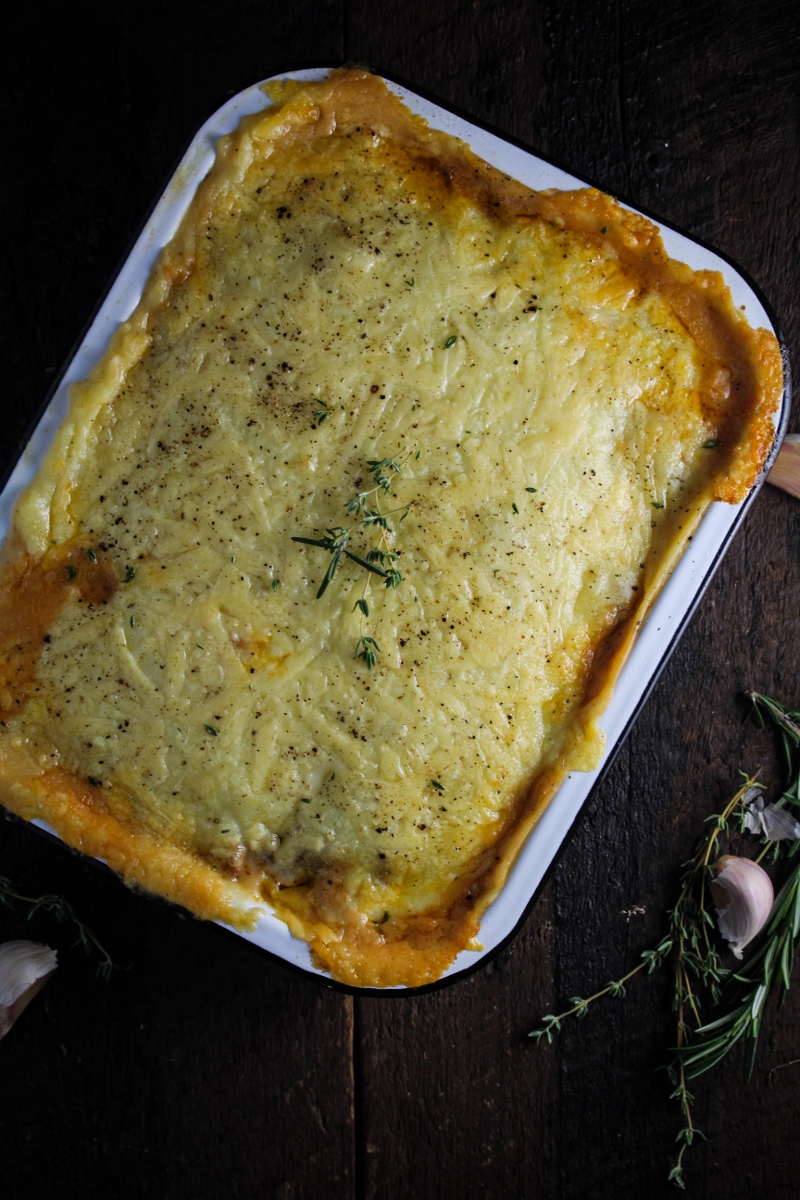
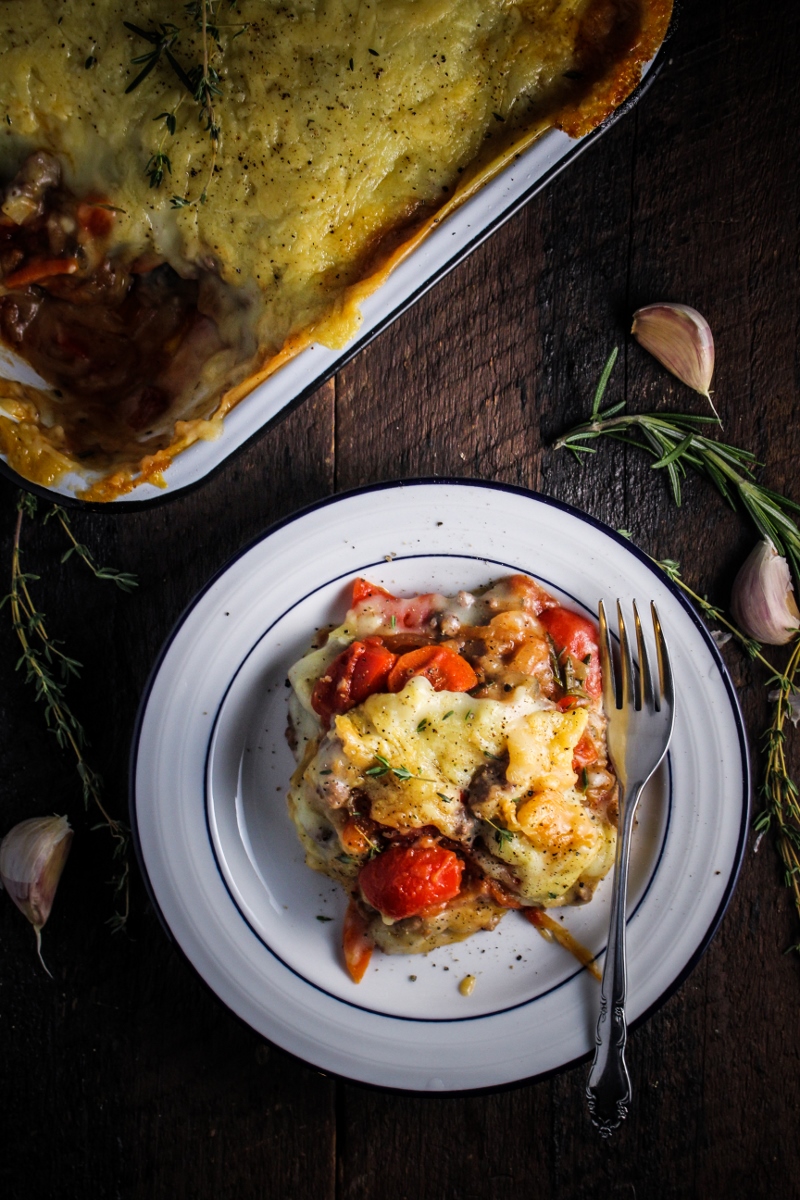
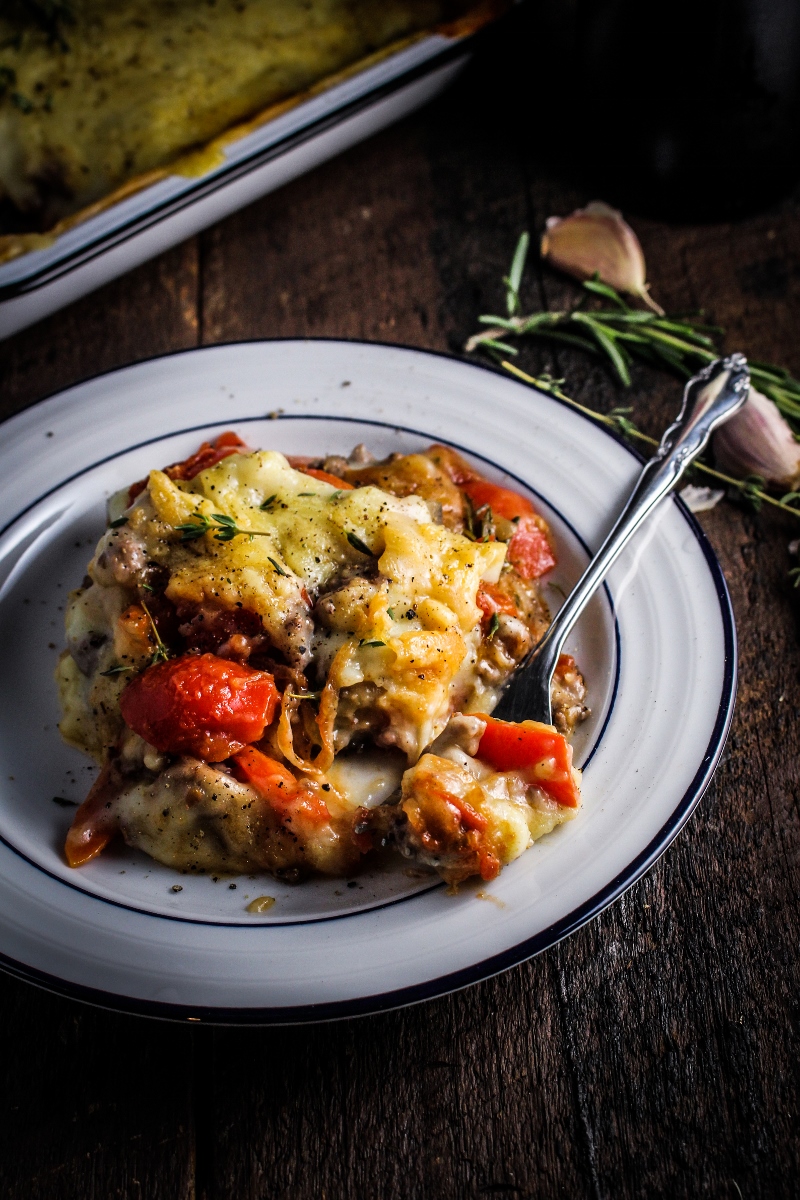
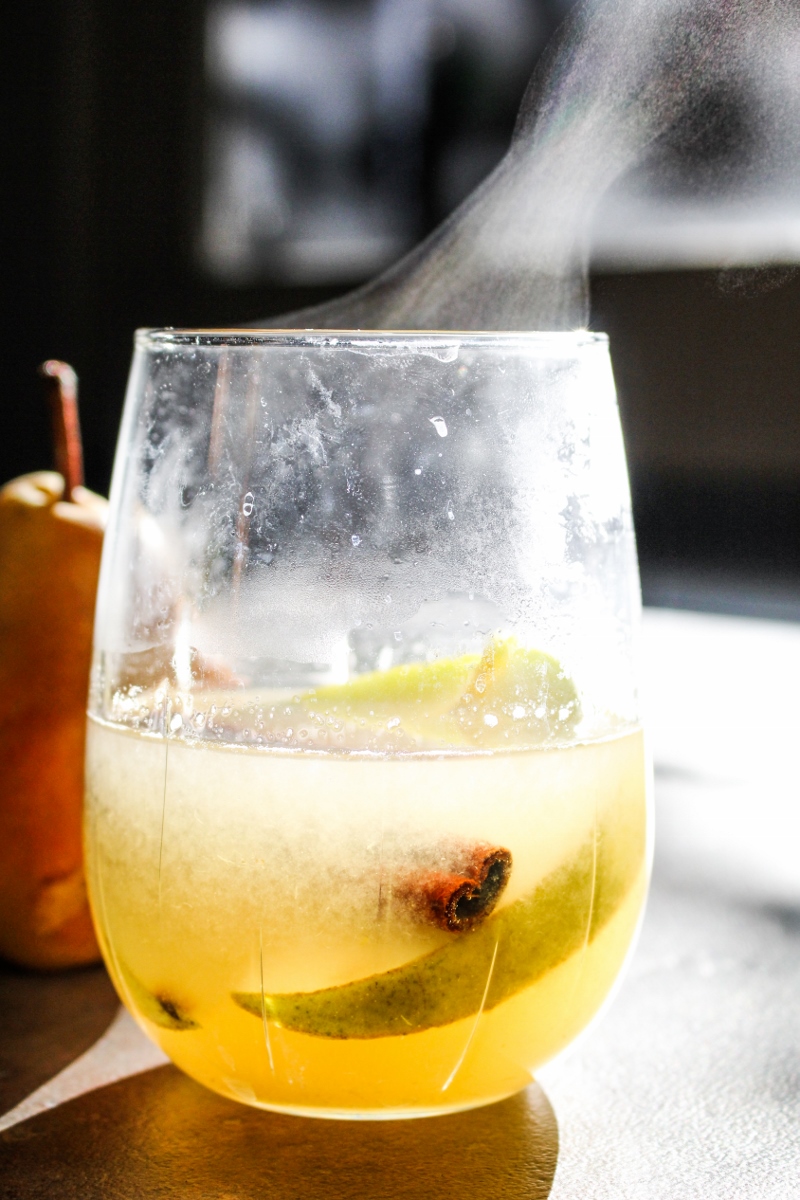
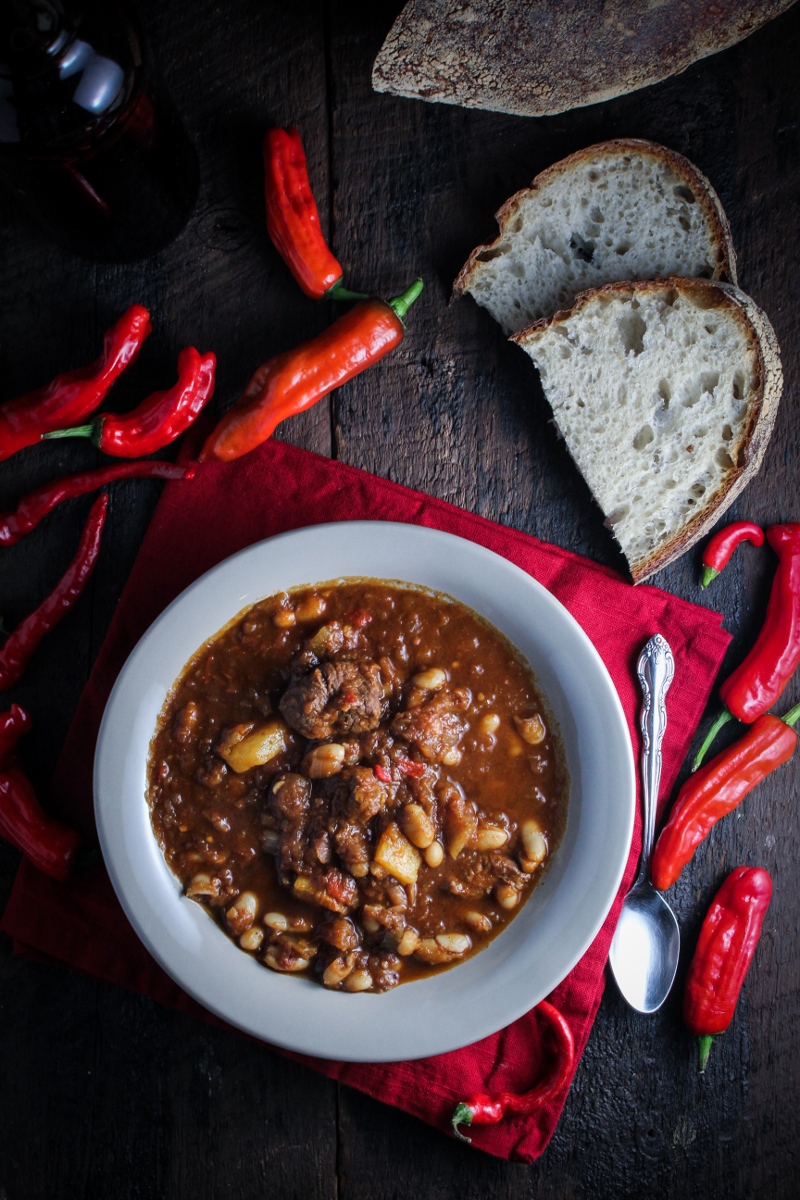
I’ve been tinkering around with mac’n’cheese recipes lately, which I’ll admit, is a dangerous thing to be tinkering with, waistline-wise. But we’ve entered that season where a bowl of extremely cheesy, creamy macaroni covered with crunchy golden-brown breadcrumbs is more perfect than just about any other kind of food, and I’m willing to run a few extra miles each week in the name of finding a great recipe to get us all through the colder months.

Sausage, Apple, and Cheddar Mac'N'Cheese {Katie at the Kitchen Door}

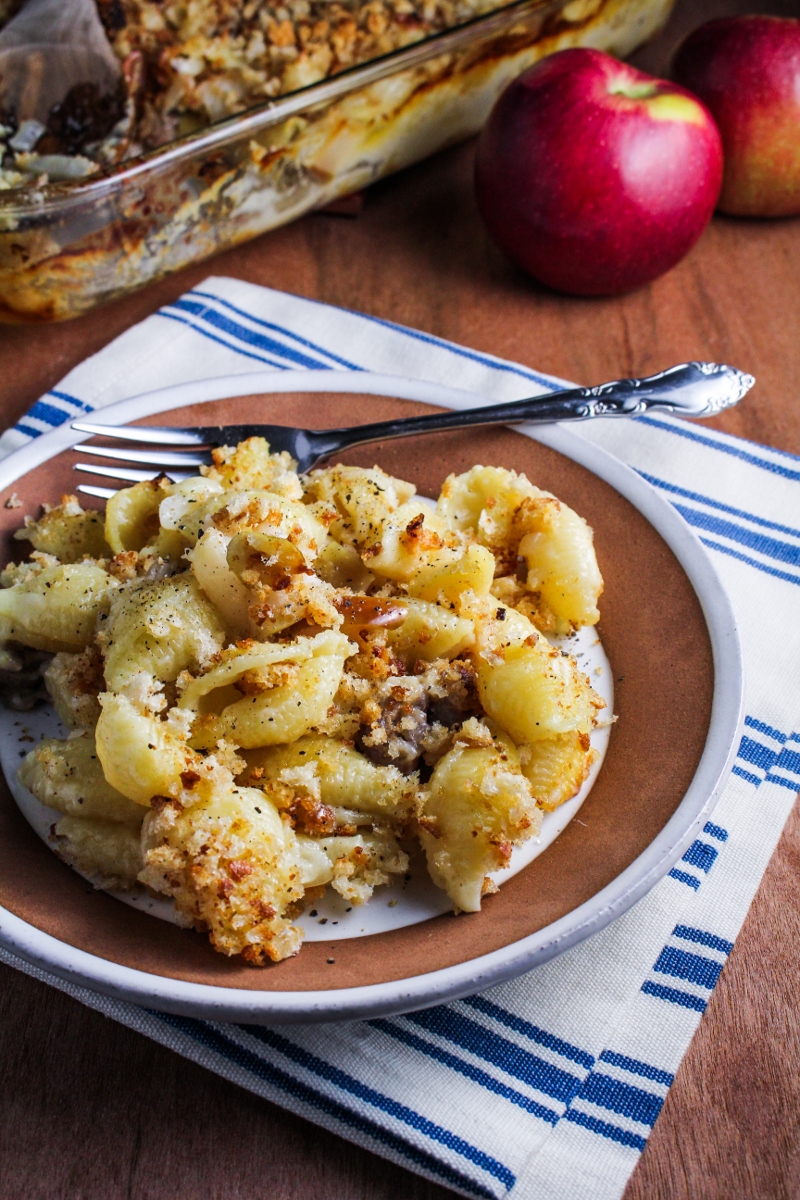
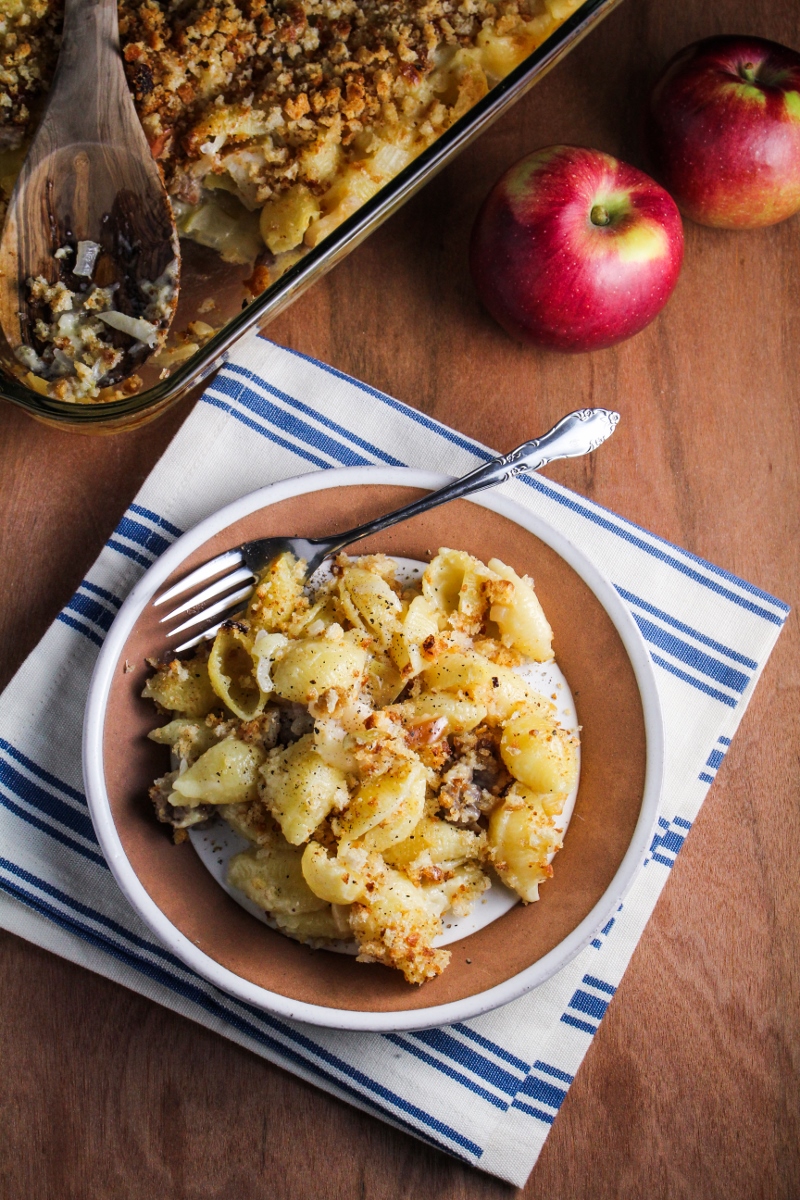
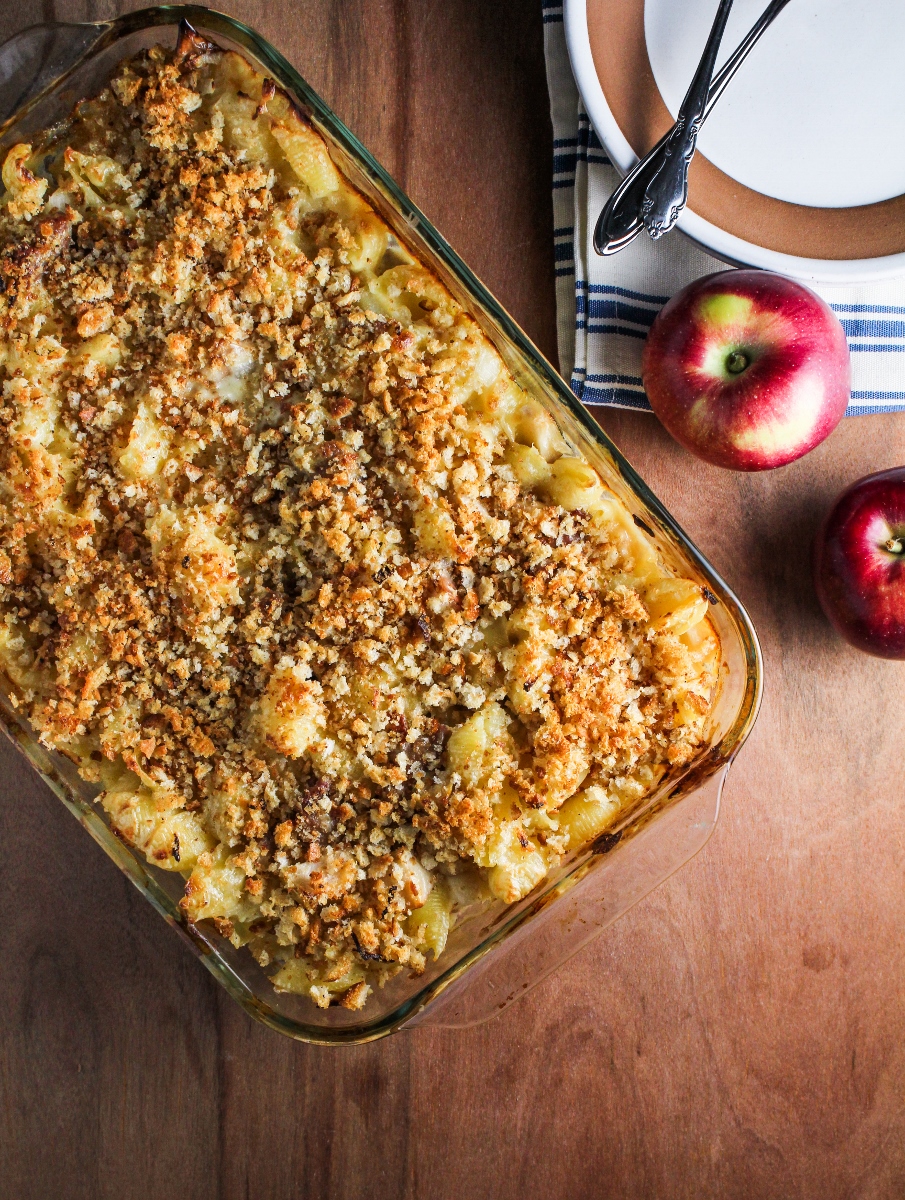
I’m not going to go so far as to claim that this is the perfect mac’n’cheese recipe, because I know that’s just going to open up all kinds of room for debate. What I will say, is that this is a really, really good mac’n’cheese recipe, and one that I would be happy to devour any day of the week. I’ve added just enough sweet Italian sausage and sauteed apple and onion to add a bit of textural interest and flavor contrast, but not enough to detract from the main event, which is of course, cheesy noodles. This recipe really lets the cheddar cheese shine – it’s the only cheese in the sauce, and is enhanced by a smidge of nutmeg and a spoonful of mustard, both flavors that go well with cheddar, apple, and sausage independently. And please, go the extra mile and make your own buttery, toasted breadcrumbs from scratch – it’s really easy and completely worth the extra 5 minutes it will take you. Now go add these ingredients to your grocery list – it’s officially comfort food season!

Like what you just read? Subscribe to Katie at the Kitchen Door on Feedly or Bloglovin‘, or follow along on Facebook, Twitter, Pinterest, Instagram, or Google+. Thanks for reading!

Sausage, Apple, and Cheddar Mac'N'Cheese {Katie at the Kitchen Door}

Sausage, Apple, and Cheddar Mac’N’Cheese

A Katie at the Kitchen Door original recipe. Serves 6.

  • 3/4 lb. sweet Italian sausage
  • 1 large onion, peeled and finely diced
  • 2 apples, cored and cubed into 1/2 inch pieces
  • 3/4 lb. medium pasta shells
  • 1 1/2 c. milk
  • 4 TBS flour
  • 6 TBS butter, divided
  • 10 oz. sharp cheddar cheese, grated
  • 1/4 tsp ground nutmeg
  • 2 tsp mustard
  • 1/2 medium baguette
  • salt and pepper to taste
  1. Preheat the oven to 350°F. Heat a large saute pan over medium heat. Squeeze the sausage meat out of its casings, and use the back of a wooden spoon to break up into bite-sized pieces. Cook the sausage until browned all over and fully cooked through, stirring frequently. Use a slotted spoon to remove the sausage from the pan, and place it in a 9×13 inch glass casserole dish.
  2. Drain all but 3 TBS of the sausage grease from the pan. Add the diced onion and the cubed apples to the saute pan with the remaining sausage grease, and saute over medium heat, stirring frequently, until the onions and apples are soft, about 8-10 minutes. Scrape the apples and onions into the casserole dish with the sausage, and season the apples, sausage, and onions to taste with salt and pepper. Remove the saute pan from the heat, carefully wipe clean, and set aside.
  3. Cook the pasta shells according to package directions, then drain and set aside.
  4. Warm the milk in the microwave or in a saucepan over low heat until it is just steaming but not yet simmering. Place 4 TBS of the butter in the saute pan and melt over medium-low heat. Once melted, add the flour and stir to fully coat with the butter. Cook the flour-butter roux until just beginning to turn golden brown, about 2 minutes. Do not let it burn. Once the roux is golden brown, slowly drizzle the warm milk into the pan, stirring as you do so. When all the milk is added, cook the sauce until it is thick enough to coat the back of a spoon, then remove from the heat. Add the grated cheese to the sauce a handful at a time, stirring until it is melted (do not add the cheese while the sauce is still on the heat, as this will cause the sauce to break!). Once all the cheese is incorporated, stir in the nutmeg and the mustard, then season to taste with salt and pepper. Add the cheese sauce to the pasta shells and stir to coat, then add the pasta to the casserole dish with the other ingredients. Stir to evenly mix the ingredients in the pan.
  5. Break the baguette into large chunks and quickly process in a food processor or blender to form medium-size bread crumbs. Add the remaining 2 TBS of butter to the saute pan and melt over medium heat, then add the bread crumbs to the melted butter. Saute, stirring frequently, just until the bread crumbs are golden brown, about 3-4 minutes, then remove from the heat and season to taste with salt and pepper. Sprinkle the bread crumbs evenly over the top of the casserole dish. Place the casserole dish on a baking sheet (to catch any drips), then place in the oven and bake until the top is golden brown and the sauce is bubbling, about 30 minutes. Remove from the oven and serve warm.

1 November 7, 2014 Fall

Monthly Fitness Goals: November // Crispy Brussels Sprout, Lemon Chicken, and Pomegranate Rice Bowl

Crispy Brussels Sprouts, Lemon Chicken, and Pomegranate Rice Bowl {Katie at the Kitchen Door}

Crispy Brussels Sprouts, Lemon Chicken, and Pomegranate Rice Bowl {Katie at the Kitchen Door}

I totally spaced on October’s fitness goal. I didn’t have a particularly bad month, health-wise, it was just such a whirlwind that setting a new goal, sticking to it, and writing about it just didn’t happen. It didn’t help that I spent 12 days out of the country, 8 in Malaysia and 4 in Ireland, and that exercise while traveling is usually a take-what-you-can-get situation for me (20 minutes on the treadmill between meetings and team dinner? Sold!). But so far November looks quiet, and as we move into the season of holiday parties, big family meals, and shorter, colder, darker days, I want to be especially diligent about working out and eating right and finish the year out strong.


I was originally going to do a sort-of-vague, sort-of-boring goal relating to increasing my number of weekly workouts. I do want to be sure that I’m working out frequently enough, as it’s so much harder to motivate myself to get out of bed for those early morning runs when it’s 40°, but I’m not as good as sticking to goals when they don’t excite me. Then last weekend while Trevor was out with friends, I found myself having one of those sort-of-secret mini-dance parties I tend to have when I’m home alone (just me? no?) and thought, what better way to ensure that I get into the habit of winter workouts than to dance more? So my goal for November is to get to at least 6 (hopefully more!) dance classes throughout the month. Not only is this goal a lot more fun than counting miles or sets of crunches, but I’m hoping that I find a few new classes to keep me energized during those icy weeks when outdoor exercise isn’t even an option. Of course, I’ll still be running throughout the month – 6 workouts in total certainly wouldn’t cut it – but I’ll be making dance class a priority.

Crispy Brussels Sprouts, Lemon Chicken, and Pomegranate Rice Bowl {Katie at the Kitchen Door}

And let’s not forget the food! My diet these past few weeks has definitely been missing a fresh element. Again, the 8 days of delicious Malaysian curries and 4 days of potatoes and Guinness did not lend themselves to the most commendable eating habits. I came up with this rice bowl, which combines warm, comforting ingredients with fresh, bright ones to try and find a balance between the stick-to-your-ribs food I crave at this time of year and the need to continue consuming fruits and vegetables. I love roasted Brussels sprouts, and my favorite part are the leaves that fall to the side and get wonderfully crunchy and caramelized, so I sliced the brussels sprouts thinly to encourage that effect. They combine wonderfully with the brown rice, a super simple lemon creme fraiche sauce that gets tossed with rotisserie chicken, and fresh pomegranate seeds for sweetness and crunch. It’s nothing earth-shattering in the creativity department, but it’s easy, flavorful, and nourishing, which is about as much as I can ask for in a healthy recipe at this time of year.

Past Fitness Challenges

January: 10 Visits to the YMCA; Recipe: Gluten-Free Olive-and-Feta Corn Muffins
February: One vegan meal every day; Recipe: Pakistani Chickpea Pulao with Sweet-Hot Date-Onion Chutney
March: Run 40  miles in 20 days; Recipe: Chocolate-Dipped Almond Butter Cookie Bites
April: Walk 8,000 steps a day; Recipe: Herb-Flecked Spring Couscous
May: 180 minutes of Nike Training Club; Recipe: Warm Arugula Salad with Maple Mustard Dressing
June: Fresh fruit/veggies at every meal; Recipe: Chickpea Crepes with Grilled Curried Chicken and Mango Salsa
July: 8 different types of exercise; Recipe: Homemade Spinach Wraps with Chopped Greek Salad Filling
August: Relax; Recipe: Green Tea and Zucchini Noodles with Honey Ginger Sauce
September: Average mile pace below 8’10”; Recipe: Potato, Poblano, and Chard Enchiladas with Salsa Verde

Like what you just read? Subscribe to Katie at the Kitchen Door on Feedly or Bloglovin‘, or follow along on Facebook, Twitter, Pinterest, Instagram, or Google+. Thanks for reading!

Crispy Brussels Sprouts, Lemon Chicken, and Pomegranate Rice Bowl {Katie at the Kitchen Door}

Crispy Brussels Sprout, Lemon Chicken, and Pomegranate Rice Bowl

A Katie at the Kitchen Door original recipe. Serves 4.

  • 1 1/2 c. uncooked brown rice
  • 1 tsp butter
  • 1 1/2 lbs. large brussels sprouts
  • 3 TBS olive oil
  • sea salt and pepper
  • 1 1/2 c. cooked, shredded, rotisserie chicken
  • 1/2 c. creme fraiche
  • juice from 1/2 fresh lemon
  • 1/2 tsp freshly ground black pepper
  • 2 tsp minced fresh chives
  • 1 c. fresh pomegranate seeds
  1. Rinse the rice in cold water and drain well. Place the rice in a saucepan and add 3 cups of cold water and the butter. Bring to a simmer over medium heat, then reduce the heat to low, cover the pan, and simmer for 35-45 minutes, or until the rice has absorbed all the water and is tender. Remove from the heat and leave covered.
  2. Preheat the oven to 400°F. Remove the stems and outer leaves from the brussels sprouts and discard. Slice the trimmed brussels sprouts into round about 1/4 inch think and place the slices on a large rimmed baking sheet. Add any leaves that have fallen off to the pan as well. Drizzle the brussels sprouts with the olive oil, then sprinkle generously with sea salt and freshly ground black pepper and use a spatula to flip the sprouts so they are evenly coated with the mixture. Roast until golden brown and crispy on the edges, about 20-25 minutes, flipping once about halfway through.
  3. In a small bowl, whisk together the creme fraiche, lemon juice, black pepper, and chives until evenly combined. Season to taste with sea salt. If your rotisserie chicken is still warm, simply toss the creme fraiche sauce with the chicken to thoroughly coat. If the chicken is cold, reheat the chicken in the microwave or on the stovetop, and then toss with the sauce.
  4. Mix together the rice, chicken, roasted brussels sprouts, and fresh pomegranate seeds. Serve warm.

7 November 3, 2014 Beef

Book Club: French Comfort Food // Ratatouille Shepherd’s Pie

Ratatouille Shepherd's Pie {Katie at the Kitchen Door}

Ratatouille Shepherd's Pie {Katie at the Kitchen Door}

The Book: When Hillary Davis reached out to me about reviewing her newest book, French Comfort Food, it was the middle of summer, and the days when I’d be craving French Onion Soup and Coq au Vin seemed almost too distant to imagine. Now that we’ve seemingly catapulted from fall straight into mid-winter (Snow? On Novemebr 2nd? The worst) though, French comfort food seems like exactly the sort of thing I want to be pulling out of my oven, and I’m glad to have a copy of this book to turn to. These are classic recipes – nothing fancy or convoluted here. Many of them will be familiar to the average American cook: cheese souffles, leek and potato soup, croque madames, bouef bourguinon. For many, these are the dishes that first come to mind when we think of French cooking – in a way, the dishes feel almost retro, meals that would have been a hit in upscale restaurants during the 80s. But of course, they have all been timeless classics in France for centuries. For classic bistro food that will stick to your ribs without complicated preparations or expensive ingredients, this book is a great resource.

Ratatouille Shepherd's Pie {Katie at the Kitchen Door}

The Food: The first recipe I made from French Comfort Food was a vegetarian shepherd’s pie that used a ratatouille sauce instead of ground beef as the flavor base. I made it mostly because it was a time when our fridge was overflowing with tomatoes and eggplants and it seemed as good a way as any to use some up. I added the ground beef back in, used our freshly harvested potatoes, and didn’t skimp on the cheese. It turned out great – we ate half in the first day, and froze the second half for a rainy day. I was planning on featuring a different recipe for this post, because shepherd’s pie just isn’t that French, and I’d already made it so I thought I should branch out. But then, last weekend turned out to be that rainy day, and the reheated leftovers were so good that I knew I had to share the recipe with you. So here it is: not particularly French, not particularly vegetarian, but definitely comfort food. Make a big batch while there are still eggplants and peppers hanging out at the markets and be sure to freeze some for that unknown future time when you’ll really need it. I do have to note – while I usually try to stick to the letter on recipes when doing book reviews, I took all kinds of liberties with this one to suit my tastes. I’m telling you this so that you know that it’s a forgiving recipe, so feel free to adjust a bit here and there. That said, the brilliance of this recipe – using a meaty vegetarian ratatouille sauce as the base instead of beef – is all Hillary’s.

Recipe Shortlist: Ramekins of Salmon, Wine and Shallots; Caramelized Onion and Roquefort Clafoutis; French Rolled Omelet with Cherry Tomatoes and Parmesan; Perigord Garlic and Chicken Soup; Normandy Pork Chops with Apple Brandy Cream Sauce; Gascony Roast Leg of Lamb with Anchovies and Garlic

Like what you just read? Subscribe to Katie at the Kitchen Door on Feedly or Bloglovin‘, or follow along on Facebook, Twitter, Pinterest, Instagram, or Google+. Thanks for reading!

Disclaimer: I received a review copy of French Comfort Food from Gibbs Smith, but I was not otherwise compensated and all thought and opinions are my own.

Ratatouille Shepherd's Pie {Katie at the Kitchen Door}

Ratatouille Shepherd’s Pie

Adapted from French Comfort Food. Serves 6-8.

  • 3 TBS olive oil
  • 2 medium onions, peeled and thinly sliced
  • 4 large cloves garlic, peeled and thinly sliced
  • 1 large red bell pepper, stem and seed removed
  • 3 sprigs fresh rosemary
  • 2 sprigs fresh thyme
  • 1 medium carrot, finely diced
  • 1 medium eggplant, stem removed, chopped into 1/2-inch cubes
  • 1 (14.5 oz) can of chopped canned tomatoes, or 3 small fresh tomatoes, cored and cubed
  • 2 TBS tomato paste
  • 2 TBS flour
  • 6 medium yukon gold potatoes, peeled and quartered
  • 2 TBS butter
  • 1/2 cup whole milk
  • 1 1/2 cups grated Gruyere or sharp cheddar cheese, divided
  • sea salt and pepper to taste
  • 1 1/2 lb. ground beef
  1. Heat the olive oil over medium heat in a large saute pan. Add the onions and garlic and saute, stirring frequently, until soft and fragrant, about 6-8 minutes. Add the bell pepper, leaves from the rosemary and thyme, carrot, and eggplant and saute until beginning to soften, another 5 minutes. Add the tomatoes and season to taste with salt and pepper. Mix the tomato paste and flour together in a small bowl, then stir into the ratatouille mixture until fully incorporated. Let sauce cook until eggplant is tender, about 20 minutes.
  2. While the sauce is cooking, place the quartered potatoes in a saucepan and cover with cold water. Season generously with salt, then bring to a boil over medium heat. Boil until tender, about 10 minutes, then drain potatoes. Add butter and milk to potatoes and mash or blend potatoes until very smooth but still stiff enough to hold their shape, then season to taste with salt and pepper. Add more milk if you’d like the potatoes to be smoother. Stir 1 cup of the grated cheese into the potatoes and set aside.
  3. Preheat the oven to 400°F and lightly oil a 9×13 casserole dish. Spoon the sauce evenly over the bottom of the dish. Wipe out the saute pan and return to medium heat, then add the ground beef to the pan. Cook until browned all over, about 8-10 minutes. Drain the grease from the pan, then spoon the cooked beef evenly on top of the sauce. Next, spread the mashed potato mixture evenly over the top of the beef, using a spatula to smooth it out to meet all the edges. Sprinkle the remaining 1/2 cup of cheese on top of the casserole, then place the casserole dish on a baking sheet (to catch any bubble ups) and place in the oven. Bake until golden brown and bubbling, about 30 minutes. Let cool for 5 minutes, then serve.

0 October 31, 2014 Dessert

Pumpkin Creme Brulee with Garam Masala Pumpkin Seeds

Pumpkin Creme Brulee with Garam Masala Pumpkin Seeds {Katie at the Kitchen Door}


If halloween were a more elegant holiday than it is, this is what I would serve at halloween parties – smooth, silky creme brulee with a hint of roasted pumpkin and fall spices, topped with spicy garam masala pumpkin seeds. As it is, we’ll save this for fancier events and stick to the garish chocolate and peanut butter combinations tonight. I’m a creme brulee fiend – I can never resist ordering it for dessert when we’re out for dinner – so when Trevor made this amazing version at home he won me over all over again. This recipe is all him, so I’ll let him tell you its story…

A couple of months ago, when we started cutting into our very first home-grown Sugar Pie pumpkins, I decided I really wanted to do something besides endless pies with them. My first thought was ‘Oh! pumpkin creme brulee!’ The pumpkins we grew have a lot of natural sweetness, and would be perfect for a light creme brulee. A quick google, however, revealed that I wasn’t the first, or even the fifth person to think of it. The internet is full of pretty well-established pumpkin creme brulee recipes.

Pumpkin Creme Brulee with Garam Masala Pumpkin Seeds {Katie at the Kitchen Door}

Pumpkin Creme Brulee with Garam Masala Pumpkin Seeds {Katie at the Kitchen Door}

Demoralized, I decided to play with the flavors of roasted pumpkin seeds. Rather than salt and oil, I settled on the sweet, caramel-y flavors of Indian spices with a little kick. Cumin, masala, and chili powder paired nicely with the sweetness of the ginger and the nutty seed flavor. So I made these once, and they were gone in about a day, (mostly my fault).

I figured that the crunchy, crystallized seeds would be the perfect garnish for a bruleed crust, and would add a little something different to the pumpkin creme brulee recipes that were already out there. So with the seeds as a starting point, I threw some darker, intense spices into the milk while making the custard. Adding too much pumpkin to a creme brulee recipe is problematic for the final set of the custard, so the autumn flavor really has to come from the spices. The amounts aren’t enough to hit you over the head, but it’s definitely more than your classic vanilla bean dessert. It turned into a classy dessert with a little something extra, and I think it made Katie pretty happy. So it’s all good.

Like what you just read? Subscribe to Katie at the Kitchen Door on Feedly or Bloglovin‘, or follow along on Facebook, Twitter, Pinterest, Instagram, or Google+. Thanks for reading!

Garam Masala Pumpkin Seeds {Katie at the Kitchen Door}

Garam Masala Pumpkin Seeds

Makes 1 cup of seeds.

  • 1 cup pumpkin seeds
  • ½ cup granulated sugar
  • ⅛ tsp cumin
  • 1 tsp garam masala
  • ⅛ tsp ginger
  • ½ tsp chili powder
  • 1 tsp sea salt
  • 1 ½ tbsp canola oil
  1. Preheat oven to 350°F. Combine sugar, salt and spices.
  2. Combine pumpkin seeds and oil in a separate bowl, stirring to coat seeds completely. Add half of the sugar mixture to the seeds and stir to coat.
  3. Spread the seeds evenly over  a baking sheet and bake for 30 min, stirring every 8-10 minutes, until the seeds just begin to brown, and become crunchy.
  4. Before the seeds begin to cool, add the remaining sugar mixture, and stir to coat.

 Pumpkin Creme Brulee with Garam Masala Pumpkin Seeds {Katie at the Kitchen Door}

Pumpkin Creme Brulee

Serves 4. Adapted from The Fundamental Techniques of Classic Pastry Arts.

  • 1 ½ cups heavy cream
  • ½ cup whole milk
  • ⅛ tsp ground ginger
  • 3 whole cloves
  • ⅛ tsp ground cardamom
  • ⅛ tsp ground cinnamon
  • ½ cup granulated sugar
  • 4 egg yolks
  • ¼ cup pumpkin puree
  • 4 cups boiling water
  • ⅓ cup white sugar (for sprinkling)
  • ⅓ cup turbinado sugar (for sprinkling)
  1. Preheat the oven to 325°F. Combine milk and cream along with the spices in a small sauce pan and heat over medium heat until the mixture begins to steam heavily and give off a nutty aroma. Do not let the mixture come to a boil.
  2. Remove from heat and allow the milk to steep for 15 minutes. In a small bowl, combine the granulated sugar and egg yolks and whisk until smooth.
  3. Strain the whole spices and any skin that formed from the milk mixture. Add the strained milk to the egg yolks and sugar, stirring constantly. Once combined, add the pumpkin puree and mix until smooth.
  4. Divide the mixture between four creme brulee dishes, and set in a large baking dish. Fill the baking dish with boiling water so that the water reaches to just below the lip of the creme brulee dishes. Bake in the oven for 30-40min, checking after 30 minutes for done-ness. The custards should be firm, but jiggly. Refrigerate for 3 hours or overnight, covering with plastic wrap, but ensuring the wrap does not touch the surface of the custard.
  5. Combine the two sprinkling sugars in a small bowl, and remove the dishes from the refrigerator, uncovering them carefully. Spread the sugars evenly in an ⅛” layer over the top of the custard, taking care not to disturb the surface.
  6. Move a lit pastry torch over the surface of the creme brulee such that the tip of the blue flame is about 1 ½” away from the surface of the sugar. Keep the torch moving over the sugar until it begins to bubble slightly and turn a light brown.
  7. Allow the sugar to cool. Sprinkle masala pumpkin seeds over the top and serve immediately.


2 October 26, 2014 Drink

Salted Caramel Chai Latte

Salted Caramel Chai Lattte {Katie at the Kitchen Door}

Salted Caramel Chai Lattte {Katie at the Kitchen Door}

Apologies for the radio silence around here the last few weeks! It’s been a busy month, and I seem to have inadvertently taken a 2-week break from blogging. This week in particular was a whirlwind – we spent last weekend away on our first official food-writing assignment (I can’t wait to share details with you this winter!), and then we dove head first into a long, rainy week piled with work-work, school-work, and freelance-work. I’m getting on a flight to Ireland today, too, so I’m still a bit in heads-down mode, but with a clear break in sight. Trevor and I did manage to spend some solid time in the kitchen yesterday, so we have several exciting recipes to share over the next few weeks (lots of pumpkin and caramel and cheese) to prevent another accidental hiatus.

Salted Caramel Chai Lattte {Katie at the Kitchen Door}

I’ve been taking an economics course after work this semester, and I’ve learned that sitting through a two hour lecture after a full day of work is a lot harder than sitting through a two hour lecture when it’s the only thing you have to do that day (college students, take note!). Since I can’t drink coffee after 2pm if I want to have a shot at a good night’s sleep, I’ve taken to picking up a chai latte and a few chocolate-covered graham crackers as an incentive for sitting through class. It’s been a while since I drank chai regularly, and I forgot how much I love it’s spicy sweetness. Although a regular chai is a treat in itself, I decided that mixing in a healthy dose of salted caramel and topping it off with whipped cream and, yep, more caramel, would make it a real indulgence, worthy of sharing here. I took the approach of making a light syrup from brewed black tea, fresh ginger, whole spices, and salted caramel, then mixing that syrup with steamed milk. The benefit of this method is that you can store any leftover chai syrup in the fridge for the next time you need a quick pick-me-up, then just mix it with a fresh batch of milk. Hopefully we don’t have another week of weather like last week any time soon, but if we do, I’ll be prepared to curl up at home with one or two of these.

Like what you just read? Subscribe to Katie at the Kitchen Door on Feedly or Bloglovin‘, or follow along on Facebook, Twitter, Pinterest, Instagram, or Google+. Thanks for reading!

Salted Caramel Chai Lattte {Katie at the Kitchen Door}

Salted Caramel Chai Latte

Serves 4.

  • 4 bags black tea
  • 3 inch piece fresh ginger, peeled and diced
  • 1 cinnamon stick
  • 1 tsp whole black peppercorns
  • 10 whole cloves
  • 6 whole cardamom pods, lightly crushed
  • 1 whole star anise
  • 1/3 c. salted caramel, plus more for drizzling (I used this recipe but added 1 cup heavy cream instead of 1/2 cup)
  • 1/4 c. white sugar
  • 2 cups whole milk
  • whipped cream for serving
  1. Bring a pot of water to a boil. Pour 1 1/4 cup of boiling water over tea bags in a heatproof bowl, then let tea steep for 10 minutes. Discard tea bags, squeezing out any extra liquid you can with a spoon.
  2. Add brewed tea, fresh ginger, cinnamon stick, peppercorns, cloves, cardamom, star anise, salted caramel, and sugar to a small saucepan. Bring to a simmer over medium-low heat, then simmer on low for 10 minutes. Mixture should have the consistency of a very thin syrup. Let steep 5 minutes longer, then strain through a fine-mesh strainer into a jar, discarding solids.
  3. Heat milk until it is just barely bubbling over low heat or in a microwave, then use a milk frother to froth. Divide chai syrup between four glasses, then add 1/2 cup milk to each glass and stir to combine. Top with whipped cream and a drizzle of caramel, and serve immediately.

0 October 14, 2014 Asian and Indian

Date Night with Uncommon Goods // Curried Tomato-Gruyere Fondue with Indian-Spiced Arancini

Indian-Spiced Arancini and Curried Tomato-Gruyere Fondue {Katie at the Kitchen Door}

Date Night with Uncommon Goods {Katie at the Kitchen Door} #sponsored

After a long business trip, it always takes a few days to shake off the whirl of travel and settle back into my routine. While I’m out on the road, every day is a long mix of work and exploration, and I often lose sense of the boundaries I have between my work and personal lives when I’m at home. Of course, the one piece of my life that I’m truly missing when I’m away is Trevor, and the first thing I want to do when I walk in the door (well, maybe after a shower) is to just spend time being together.

Indian-Spiced Arancini and Curried Tomato-Gruyere Fondue {Katie at the Kitchen Door}

Last week I returned from a 10 day trip to Malaysia, and although it took me a bit longer than usual to get over the jet-lag and general plane-induced malaise, by Sunday I was feeling like myself again. Although some might argue that when you live together and don’t have kids, every night is date night, in my book it’s nice to set aside time that’s solely about spending time with one another. So I declared Sunday night an official date night, and we set about brainstorming recipes (because in our house, date night almost always means cooking). This particular date night was spruced up a bit by some new kitchenwares from Uncommon Goods, an ethically-minded retailer for unique and unusual gifts. Part of Uncommon Goods’ mission is to support independent artists and designers, as well as to feature American-made goods, and it’s easy to get lost browsing the resulting collection of products they’ve curated. Of course, although they carry a broad range of items, the section I’m drawn to the most is dining and entertaining, especially the wine (here) and kitchen gadget (here) collections.

Date Night with Uncommon Goods {Katie at the Kitchen Door} #sponsored

Indian-Spiced Arancini and Curried Tomato-Gruyere Fondue {Katie at the Kitchen Door}

When Uncommon Goods offered to send some of their products our way for us to try out, we quickly agreed. We’re constantly breaking our wine glasses, so choosing some new ones from their collection of fun designs was high on our wishlist. We ended up going for this set of stemless aerating wine glasses, in addition to this very classy wine carafe. And despite Trevor’s protests about how cheesy it was (pun intended), I couldn’t resist adding this mini fondue pot for two to our shopping list as well. New kitchenwares in hand, we set about putting them through their paces for our date night – wine was decanted, glasses were set out, and we whipped up a curried tomato and gruyere fondue, kept steaming hot in the tiny tea-light powered fondue pot. Never ones to be satisfied with something too simple, we passed on the bread and crudites for dipping and instead fried up a batch of Indian-spiced rice balls stuffed with mushrooms, carrots, chiles, and peas. The combo of the crispy rice balls and the rich and spicy cheese sauce was spot on, and we polished off the whole batch in one sitting (although I’ll admit that we may have been helped along by the generous glasses of wine we poured).

Indian-Spiced Arancini and Curried Tomato-Gruyere Fondue {Katie at the Kitchen Door}

Sometimes when I’m doing a post for the blog, I get so wrapped up in getting the right shots and taking notes that I forget to enjoy what we’re doing. This was not one of those times – sitting around the tiny fondue pot, joking about cheesy rice balls, taking goofy pictures of each other, and drinking (gulp) the whole bottle of pinot, it really felt like date night, not just a photoshoot of date night. It was fun. A lot of fun. So, corny as it may sound, I genuinely want to thank Uncommon Goods, not only for supplying us with some great new products for our kitchen, but for inspiring us to get in the kitchen and create and laugh and enjoy each other’s company. Definitely hop over to their site to see if anything inspires you!

Like what you just read? Subscribe to Katie at the Kitchen Door on Feedly or Bloglovin‘, or follow along on Facebook, Twitter, Pinterest, Instagram, or Google+. Thanks for reading!

Disclaimer: This post is sponsored by Uncommon Goods, a retailer for unique and unusual gifts. All opinions are honest and my own.

Indian-Spiced Arancini and Curried Tomato-Gruyere Fondue {Katie at the Kitchen Door}

Curried Tomato-Gruyere Fondue with Indian-Spiced Arancini

A Katie at the Kitchen Door original recipe. Serves 3-4 as an appetizer.

For the arancini:

  • 2 c. cooked Basmati rice
  • 2 TBS olive oil
  • 2 tsp grated fresh garlic
  • 2 tsp grated fresh ginger
  • 2 jalapenos, seeded and stemmed, finely diced
  • 2 small carrots, peeled and finely grated
  • 10 crimini or button mushrooms, stems removed, very finely diced
  • 1/3 c. frozen peas
  • 1/4 tsp ground ginger
  • 1/2 tsp ground turmeric
  • 1/8 tsp cayenne powder
  • salt and pepper, to taste
  • 2 eggs. lightly beaten
  • vegetable oil for frying
  1. Heat the olive oil in a large frying pan over medium heat. Add the grated garlic, grated ginger, and diced jalapenos and saute, stirring frequently, until fragrant, about 1-2 minutes. Add the carrots, mushrooms, and peas and saute, stirring frequently, until vegetables are soft, about 3-5 minutes. Add cooked rice, ground ginger, ground turmeric, and cayenne powder and stir to thoroughly combine, fully coating rice in spices. Season to taste with salt and pepper. Remove from heat and let cool to room temperature.
  2. Add the beaten eggs to the rice mixture and stir to combine. Form the rice into golf ball sized balls, pressing firmly to remove any excess liquid, and set aside on a plate. Heat 1/2 an inch of vegetable oil over medium-high heat in a deep frying pan. Once the oil is hot (test it by adding a small piece of rice to the oil and seeing if it sizzles immediately), fry the rice balls in batches, about 1-2 minutes per side, then drain the rice balls on a paper-towel lined plate. Serve immediately.

For the curried tomato fondue:

  • 1 TBS butter
  • 2 tsp grated ginger
  • 2 tsp grated garlic
  • 1 c. crushed tomatoes
  • 1 1/2 tsp curry powder
  • 1/2 lb. gruyere cheese, roughly grated
  1. Heat the butter in a small saucepan over medium heat. Add the grated ginger and grated garlic and saute until fragrant, about 1-2 minutes. Add the tomatoes and curry powder and stir to combine. Cook tomatoes, stirring frequently, for about 3 minutes, then lower heat to low and add the grated cheese. Stir the cheese into the tomatoes until completely melted and just beginning to bubble around the edges, then transfer immediately to prepared fondue pot. Keep warm in fondue pot and serve with Indian-spiced arancini, crusty bread, or other foods for dipping.

2 October 11, 2014 Breakfast

Book Club: Green Kitchen Travels // Ricotta and Polenta Almond Cake

Green Kitchen Travels

The Book: Like many, I’m a long time fan of Green Kitchen Stories, the wonderfully vibrant blog written by David Frenkiel and Luise Vindahl. David and Luise are masters of inspired, healthy cooking, making fruits and vegetables shine in new ways with every post. I loved their first book, Vegetarian Everyday, which was released in the states last year (you can see my full write up here), and it quickly became a go-to book for me when I needed something fast and healthy, as evidenced by this baked pistachio falafel, these savory corn muffins and this baked blackberry oatmeal. When they announced that they were writing a second book, this one based on their travels around the world, I immediately knew I had to have a copy. And Green Kitchen Travels, now safely nestled into my cookbook shelf, does not disappoint.

Ricotta and Polenta Almond Cake {Katie at the Kitchen Door}

This is one well-traveled family: together with their four year old daughter, Elsa, they have been everywhere from Spain to Mexico to Morocco to Thailand, picking up new flavors and inspiration in every corner of the globe. The recipes they’ve included to mark their travels are not meant to be recreations of authentic local dishes, but instead are healthy recipes in the unique GKS style influenced by the flavors, ingredients, and techniques they’ve found around the world. It’s fusion at its finest – adopting whatever works from each cuisine and blending it with an existing style to create something balanced and new. I was particularly taken by the chapter dedicated to soups: Vietnamese pho and Indian dal and Italian ribollita all in the same few pages! Of course, the pictures are stunning, as anyone who reads their blog already knows. The travel theme just gives the couple the green light to add to their colorful collection of food pictures with jawdropping landscapes from around the world, market scenes dripping with color and life, and of course, their adorable daughter in exotic locales worldwide. I do love the feeling that in a way, this book is a love letter to Elsa, as you see and hear her influence on their journeys and cooking style throughout the pages – this book is very much a family affair.

Ricotta and Polenta Almond Cake {Katie at the Kitchen Door}

Ricotta and Polenta Almond Cake {Katie at the Kitchen Door}

The Food: The day I left for my recent trip to Malaysia, I felt like cooking just because. Knowing that I wouldn’t be around to eat whatever I made, I flipped through the pages of Green Kitchen Travels looking for something that I could leave behind for Trevor. I quickly settled on this light Italian cake, which felt like the perfect accompaniment to an afternoon espresso on a warm fall day. The cake is gluten-free, made from a combination of polenta and almond flour, and uses only honey as a sweetener, so you can cut yourself a big slice without too much guilt. I’ve had hit or miss results with “healthy” cakes, and in particular cakes made with ricotta, but this one was very good. It was moist and not overly crumbly, with a delicate flavor of lemons, almonds, and honey. It’s not very sweet, so while I’m not sure I’d serve it for dessert, it’s the perfect thing for an afternoon break or an indulgent breakfast.

Recipe Shortlist: Mexican Breakfast Salad; Rye and Chocolate Croissants; Halloumi Veggie Burgers; Sweet Vietnamese Cucumber Salad; Harira Soup (Tomatoes, Chickpeas, and Dates); Baked Eggplant Rolls; Berber Tagine; Sweet Potato and Eggplant Moussaka; Turmeric Lassi

Like what you just read? Subscribe to Katie at the Kitchen Door on Feedly or Bloglovin‘, or follow along on Facebook, Twitter, Pinterest, Instagram, or Google+. Thanks for reading!

Disclaimer: I received a review copy of Green Kitchen Travels from Hardie Grant, but I was not otherwise compensated and all thought and opinions are my own.

Ricotta and Polenta Almond Cake {Katie at the Kitchen Door}

Ricotta and Polenta Almond Cake (Torta di Ricotta e Polenta)

Recipe from Green Kitchen Travels. Serves 8.

  • 1/2 c.(100g) butter, at room temperature
  • 1/2 c. clear honey
  • finely grated zest of three small lemons
  • 1/2 tsp vanilla or almond extract
  • 4 eggs, separated
  • 1 1/4 c. (5 oz) almond flour, or whole almonds, ground into flour in food processor
  • 1 c. (4 1/2 oz) fine ground polenta
  • 1 c. (9 oz) ricotta, preferably creamy
  • 1/2 c. flaked almonds
  • powdered sugar, for dusting (optional)
  1. Preheat the oven to 325°F. Line the base of an 8 inch springform tin with parchment paper and set aside.
  2. Place the butter, half of the honey, the lemon zest, and the vanilla extract in a large bowl and beat until creamy, using an electric mixer if you have one. Add the egg yolks and continue to beat until fully incorporated and creamy. Add the almond flour, polenta, and ricotta and fold everything together using a spatula.
  3. In a separate bowl, beat the egg whites until soft peaks form. Still beating, drizzle in the remaining honey and continue to beat the egg whites until medium peaks hold and the honey is fully blended in. Gently fold the egg whites into the rest of the batter.
  4. Pour the batter into the prepared cake tin and sprinkle the flaked almonds evenly over the top. Bake for 40-50 minutes or until a toothpick inserted in the center comes out clean. Let cool completely before removing from the tin. Dust with powdered sugar before serving if desired.

9 October 2, 2014 Czech Republic

Horká Láska (Hot Love)

Horka Laska - Vanilla Ice Cream with Hot Raspberry Sauce {Katie at the Kitchen Door}

I’ve been trying to write this post for four years. I’m not exaggerating. For the past four years, when September rolls around, I put this post on my calendar, waiting for the raspberries at my parents’ house to ripen. And for the past four years, our raspberries, which are gorgeous and achingly sweet and juicy, have been 100% infested with raspberry fruitworms. It’s devastating. The anticipation of opening up a perfectly ripe, deep red, juicy berry, hoping beyond hope that there will be no squirmy white bugs inside, and then to have all your hopes dashed in an instant – heartbreaking. This year, I’d had enough – I was going to buy my raspberries, make this dessert, and satisfy this particular September craving.

Horka Laska - Vanilla Ice Cream with Hot Raspberry Sauce {Katie at the Kitchen Door}

Horka Laska - Vanilla Ice Cream with Hot Raspberry Sauce {Katie at the Kitchen Door}

When the weather starts to turn cooler, I begin daydreaming of Prague, although the longer I spend away from my one-time home the fainter the daydreams become. Cold, gray days in particular pull back memories tinged with longing: the long winding tram ride from my apartment to school; my daily afternoon snack of mulled wine and candied almonds, eaten with gloved fingers standing on the cobbled corners; wandering the rose gardens on top of Petrin hill, with nowhere else to be for hours; the Christmas markets in all their splendor, filled with warm light and the smell of sausages and potatoes; hiking through falling snow in the far corners of the country, feeling like we were the only people for miles and miles. I could go on and on, but really, I should just go back. I want to take Trevor there and share that city with him, relive some of my old memories and create new ones. Although I’ve traveled many places since Prague, it still holds a special place in my heart – sometimes I wonder if it’s better to have a few places you really love than to travel all over the world in search of you’re not quite sure what.

Horka Laska - Vanilla Ice Cream with Hot Raspberry Sauce {Katie at the Kitchen Door}

Horka Laska - Vanilla Ice Cream with Hot Raspberry Sauce {Katie at the Kitchen Door}

When my family came to visit me in Prague, being able to order something called “hot love” was one of my 11 year old brother’s greatest pleasures. It’s a dessert that goes by more than one name: Horká láska. Hot love. Horké maniny. Piping hot raspberries smothering a scoop of vanilla ice cream. Although it’s name may be suggestive, the dessert itself is pure, simple and completely sublime. A staple of most Czech menus, horká láska is not just a dish of ice cream with raspberry sauce, it is a dish of juicy, steaming-hot raspberries with just enough ice cream on top so that it has completely melted into the berries by the time you are 3/4 done with the dish.  The trick is all in getting the right ratio and remembering that it’s called “hot raspberries” and not “ice cream with raspberries” for a reason. I did find one traditional recipe (in Czech) that I used for guidance in recreating this classic dessert, but it’s a pretty straightforward concept that doesn’t need to be overthought. The addition of framboise and a pat of butter take the sauce up another level, but you don’t want either to overwhelm the taste of raspberries. It’s a perfect dessert for early fall, with the contrast of hot with cold and fresh with creamy satisfying both summer and fall cravings.

Like what you just read? Subscribe to Katie at the Kitchen Door on Feedly or Bloglovin‘, or follow along on Facebook, Twitter, Pinterest, Instagram, or Google+. Thanks for reading!

Horka Laska - Vanilla Ice Cream with Hot Raspberry Sauce {Katie at the Kitchen Door}

Horká Láska – Hot Raspberries with Ice Cream

Serves 2.

  • 12 oz. (1 1/2 cups) fresh raspberries
  • 1/4 c. sugar
  • 1 TBS framboise or other raspberry liqueur
  • 1/2 TBS salted butter
  • 2 scoops vanilla ice cream
  1. Add the raspberries and sugar to a small saucepan and heat over medium heat. Cook the raspberries, stirring occasionally, until they are broken down and juicy and the sauce is steaming, about 5-7 minutes. Add the framboise and salted butter, stir to combine, then remove from heat. Spoon a generous amount of raspberry sauce over each scoop of vanilla ice cream and serve immediately.

3 September 27, 2014 Drink

Mulled Pear Sangria

Mulled Pear Sangria {Katie at the Kitchen Door}
The weekend has arrived! Although I had a brief skirmish with the cold Trevor’s been fighting all week on Thursday, a pot of spicy chicken noodle soup and a solid 9 hours of sleep nipped it in the bud, so I’m ready to make the most of the gorgeous weather that we’re supposed to have here in New England. First and foremost, I’ll be celebrating the wedding of my friends Tim and Sofia, and I can’t wait to dance the night away and toast to them with all our college friends. Besides that, I’m going to spend as much time outside enjoying the fall-ness and snuggling with Trevor as I can, before getting on a long series of flights for a 10-day trip to Malaysia Sunday night.
Mulled Pear Sangria {Katie at the Kitchen Door}
 To kick things off, I whipped up a batch of this mulled pear sangria, a re-imagination of a cocktail I had at Sip last weekend. I’m using the term sangria very loosely, as I’m making it with a spiced fruit purée and serving it warm instead of over ice (although I’m guessing it would be just as good served cold, if that’s more your style). It has all the right components for a sangria – fruit, wine, and a bit of booze – just warmed up and spiced with cinnamon and cloves for the season. Call it whatever you want, but be sure to give it a try! And although I’m not really looking forward to winter, I am pretty excited that this post marks the kick-off of winter-cocktail season. Mulled drinks just might be the best part of cold weather.
Like what you just read? Subscribe to Katie at the Kitchen Door on Feedly or Bloglovin‘, or follow along on Facebook, Twitter, Pinterest, Instagram, or Google+. Thanks for reading!
Mulled Pear Sangria {Katie at the Kitchen Door}
Mulled Pear Sangria
A Katie at the Kitchen Door original recipe. Serves 4.
  • 2 ripe pears, plus extra slices for serving
  • 1/3 c. sugar
  • 1 c. water
  • 1 whole cinnamon stick
  • 5 whole cloves
  • 4 oz. maple liqueur
  • 1 bottle white wine
  1. Peel and core the pears and roughly chop into cubes. Place the pear cubes, sugar, water, cinnamon stick, and cloves in a medium saucepan and bring to a simmer over medium heat. Simmer until the pears are soft, about 8-10 minutes. Use a slotted spoon to remove the cinnamon stick and cloves and discard. Puree the pear and syrup mixture until smooth, in a regular blender or using a hand blender.
  2. Put the pear syrup back in a saucepan. Add the liqueur and wine and heat over low heat until just steaming. Remove from the heat and ladle into pre-warmed glasses (to prevent cracking. Garnish each glass with a few slices of pear, then serve.

2 September 23, 2014 Fall

Lamb, Butternut Squash, and White Bean Chili.

Lamb, Butternut Squash, and White Bean Chili {Katie at the Kitchen Door}

Last weekend we got up to the White Mountains for a hike, something I’ve been aching to do since the first hint of coolness crept into the air. The weather wasn’t great – low gray clouds and cold – but I just wanted to get out there, so we went anyways. It’s so refreshing to be somewhere so quiet and fresh, and the four hours we spent walking up the misty slopes, and meandering down along the brook were exactly what I needed. The hike was invigorating, but with temperatures in the low 40s at the bottom and high 30s at the top, I was daydreaming about a big bowl of chili and a hot toddy before we even made it to the summit. It was 30° warmer back in Boston, but I already had my heart set on chili, so chili it was. I’d been brainstorming all the way home, and I knew I wanted a lamb, roasted butternut squash, and fresh tomato base with hints of sweetness and chocolate from cocoa powder and our home-brewed Russian Stout beer.

Lamb, Butternut Squash, and White Bean Chili {Katie at the Kitchen Door}

This chili came out even better than I wanted it to. I was kind of winging it, taking a few tricks out of other recipes I make as I went. – cocoa powder and allspice from our favorite steak rub, red wine vinegar and a splash of beer from my mom’s chili recipe, and roasting the squash with smoked paprika before adding it to the chili the way I do with pretty much all vegetables.Rich and saucy and slightly sweet, with just a hint of lip-tingling spice, it blows every chili I’ve made (except maybe my mom’s vegetarian chili, which is a completely different animal) out of the water. For me, at least, the slightly gamey, tender chunks of lamb are so much better than beef. I know there’s all kinds of debates raging about what qualifies as chili and what doesn’t, but in my book, this is chili and it’s damn good.

Lamb, Butternut Squash, and White Bean Chili {Katie at the Kitchen Door}

I’m also sharing this over on Instagram today for the Huckle and Goose #InstaPotluck. Huckle and Goose is a meal-planning service that provides truly inspired menus to your inbox once a week, with a focus on finding creative ways to use the vegetables you’re finding at the farmer’s market or in your CSA box that week, both the common ones (tomatoes, corn), and the stranger ones (hubbard squash, radicchio). In addition to creating their own seasonal recipes, they also license recipes from a group of really talented bloggers, and I’m thrilled to have some of my own recipes included in their meal plans from time to time. Seeing the recipes they use from other bloggers actually inspires me to create more original recipes that utilize whatever I’m picking in my garden or grabbing at the farmer’s market that week, rather than defaulting to old standbys – there are so many things you can do with fresh tomatoes besides caprese and tossing them with pasta!  If you’d like to give Huckle and Goose a try, you can use the code “INSTAPOTLUCK” to get 50% off any annual subscription (code valid today only, 9/23/2014) or sign-up for the two week free trial.

Like what you just read? Subscribe to Katie at the Kitchen Door on Feedly or Bloglovin‘, or follow along on Facebook, Twitter, Pinterest, Instagram, or Google+. Thanks for reading!

Lamb, Butternut Squash, and White Bean Chili {Katie at the Kitchen Door}

Lamb, Butternut Squash, and White Bean Chili

A Katie at the Kitchen Door original recipe. Serves 4-6.

  • 1/2 large butternut squash, peeled, seeded and cut into 1/2 inch cubes (about 4 cups cubed)
  • 3 TBS + 2 TBS olive oil, divided
  • sea salt
  • 1 tsp smoked paprika
  • 1 lb. cubed boneless lamb (cut for stew)
  • 1 large onion, peeled and diced
  • 4 cloves garlic, peeled and diced
  • 1 serrano chile pepper, stemmed, seeded and finely minced
  • 1 red bell pepper, stemmed, seeded, and diced
  • 1 1/2 tsp chili powder
  • 1 tsp ground cumin
  • 1 tsp cocoa powder
  • 1/4 tsp allspice
  • 1 bay leaf
  • 2 c. water
  • 2 TBS tomato paste
  • 3 c. chopped fresh tomatoes, about 2 large (cores and stems discarded)
  • 1 TBS red wine vinegar
  • 1 (15 oz.) can of canellini beans, rinsed and drained
  • 3/4 c. dark beer, such as stout
  • grated cheddar cheese, for serving (optional)
  • sour cream, for serving (optional)
  1. Preheat the oven to 400°F. Toss the butternut squash with 3 TBS of olive oil, a generous sprinkling of sea salt, and the smoked paprika until evenly coated. Spread in a single layer on a baking sheet and roast until tender when poked with a fork, about 30 minutes (stir/flip the cubes once after about 15 minutes). Remove the butternut squash from the oven and set aside.
  2. Add the remaining 2 TBS of olive oil to a large stockpot and place over medium-high heat. Generously season the lamb with sea salt, then add to the stockpot and brown on all sides, which should take about 5 minutes (1-2 minutes per side). Use a slotted spoon to remove the lamb from the pot and set aside.
  3. Add the onion, garlic, serrano, and bell pepper to the pot and saute, stirring frequently, until soft, about 5 minutes. Add the chili powder, cumin, cocoa powder, and allspice, and stir to coat the vegetables. Saute for 2 minutes longer, then return the lamb to the pot and stir to combine with the vegetables and spices. Add the bay leaf, water, tomato paste, chopped fresh tomatoes, and half of the roasted butternut squash, stir to combine, and bring to a simmer. Cover the pot and let simmer for 1 hour.
  4. Remove the lid from the pot and continue to simmer the chili until it is thick and saucy. About 15 minutes before you plan to serve, add the red wine vinegar, canellini beans,the remaining half of the squash, and beer (add the beer slowly, as it will bubble up!). Stir to combine and taste for seasoning. Simmer for 15 minutes longer, to heat beans through, then serve immediately with grated cheddar cheese and sour cream.

  • « Go to Previous Page
  • Go to page 1
  • Interim pages omitted …
  • Go to page 15
  • Go to page 16
  • Go to page 17
  • Go to page 18
  • Go to page 19
  • Interim pages omitted …
  • Go to page 57
  • Go to Next Page »

Primary Sidebar

Subscribe!

Get creative recipes and menu ideas delivered straight to your inbox.

Most Popular

A House // Sweet Potato and Coconut Milk Soup with Brown Rice and Lentils

Monthly Fitness Goals: July // Homemade Spinach Wraps with Chopped Greek Salad

A New Job // Classic Seven-Layer Bars

Butternut Squash Carbonara with Fried Sage and Caramelized Onions

Happy Birthday, Trevor! // Peanut Butter Fudge

Cookbook Review and Giveaway: Home Made Winter

Drizly

Please note!

Full disclosure: if you purchase anything at Amazon using the above links or any other links to Amazon on this site, I will receive a small commission. Just so you know!

Copyright© 2025 · Cookd Pro Theme by Shay Bocks

This site uses cookies: Find out more.