It’s mother’s day! Which means every one of you should do something nicer than usual for your mom today. I’m lucky to be able to see my parents almost every week, something that I appreciate far more than I would ever have guessed at the end of high school when I couldn’t wait to flee the state of Massachusetts. It’s so nice to have an escape from the day-to-day only a short-ways a way, somewhere I can spend quiet afternoons outside (in a yard!) and sit down to family dinners with my parents, little brother, and Trevor. Although lots of other parts of the country (and world) appeal to me as destinations, the biggest deterrent to moving somewhere else permanently is being away from my family. Who knew I’d turn out to be such a momma’s girl?

On my visit home yesterday, I brought my mom a batch of these scones, baked fresh that morning, because she really likes scones. We used to go to high tea for special occasions when I was little, and although I couldn’t bring my mom a personal waiter in black tie for the day, I could bring some sweet and flaky baked goods. These particular scones are peach and Bourbon flavored, because not only is my mom sweet and loving and adorable, she’s also a lot of fun, and never one to turn down a margarita or a glass of sangria at the end of a summer’s day. I love that we can now share a drink (and a cackle) and gossip about family and work and friends while rocking back and forth on the porch swing. It’s easy to be friends with my mom.
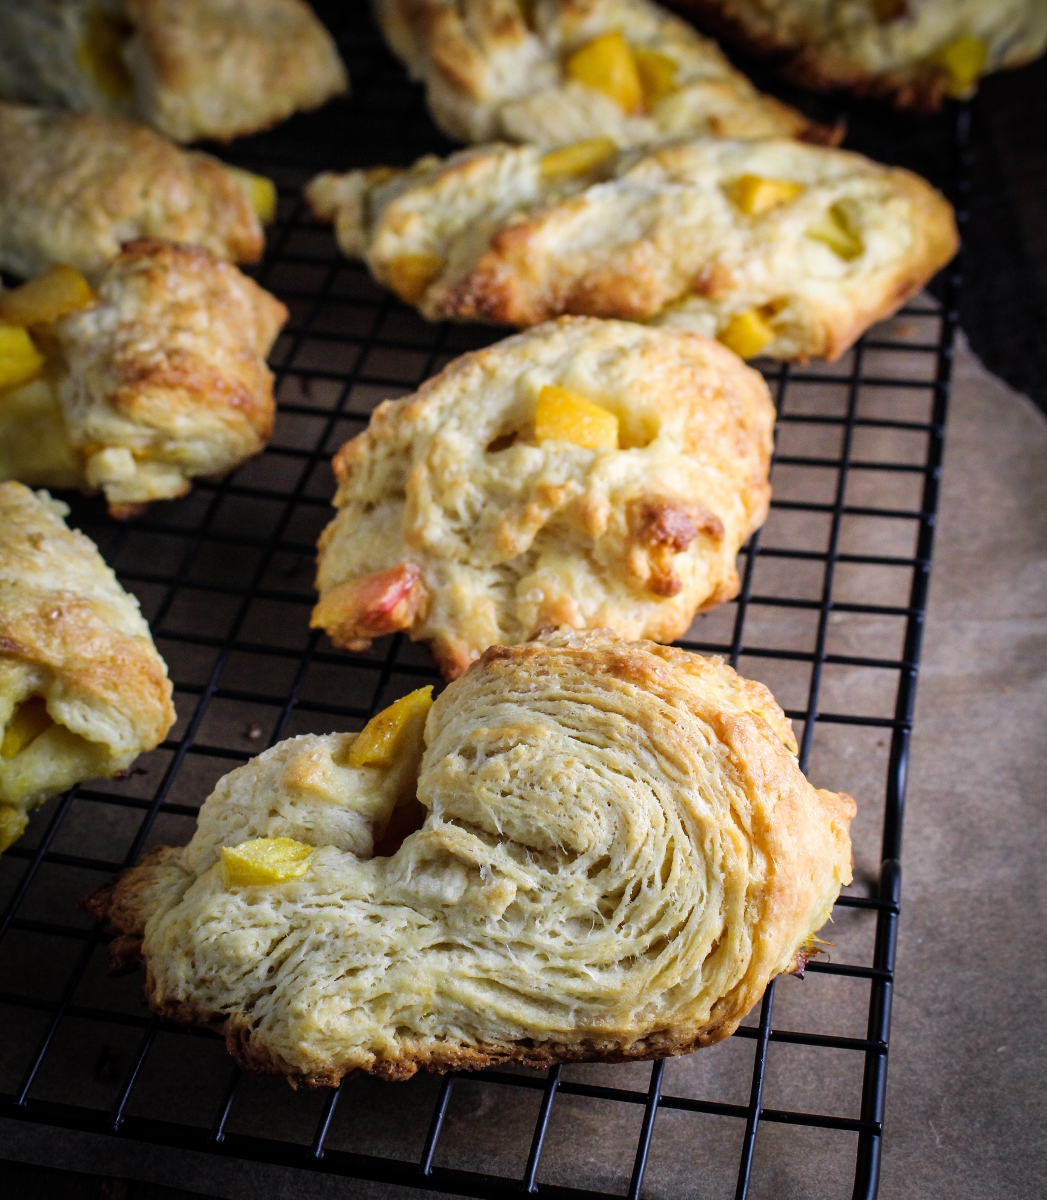
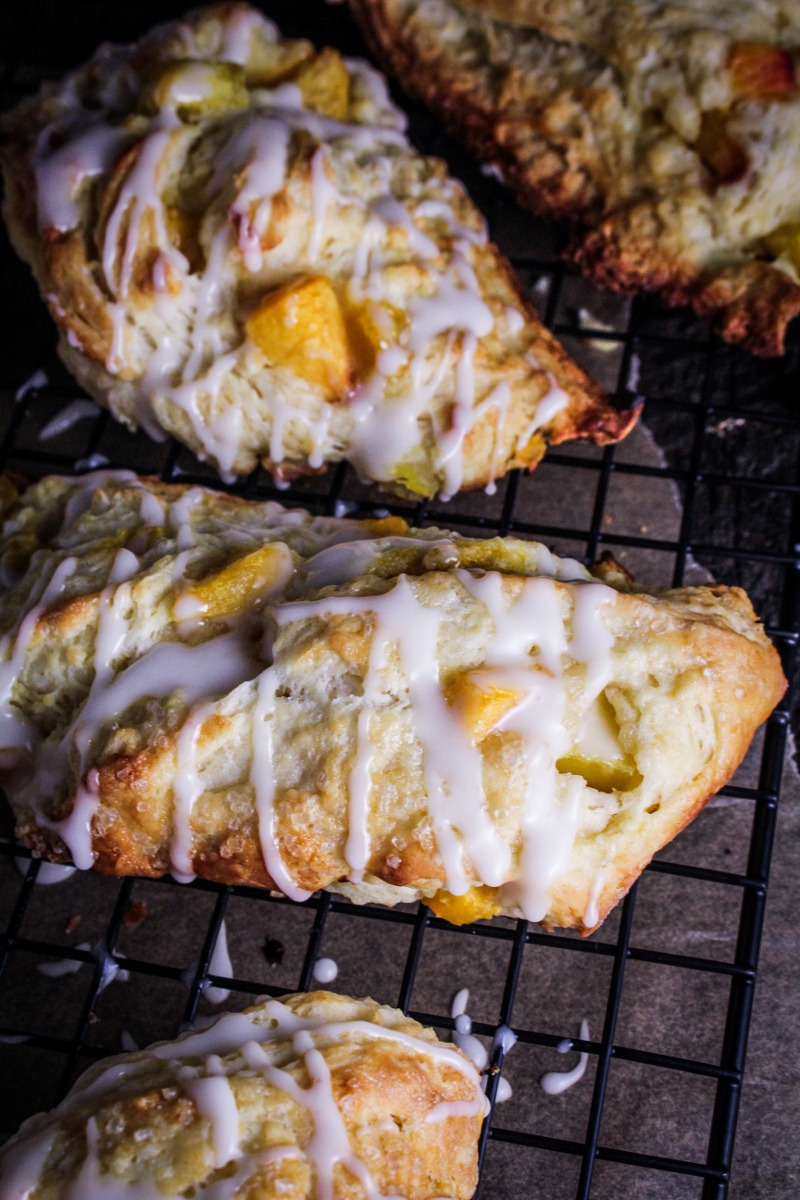
These scones are quite different than others that I’ve had – whereas I usually think of scones as being a bit dry and crumbly and best served with gobs of jam and cream, these are more like flaky bites of pie crust, already soft and moist and flavorful without the addition of any condiments. I think the crumbly kind of scone has a lot going for it, namely its affinity for jam and cream, but these are a welcome addition to my ever-broadening definition of scones. One thing to note – don’t skip the Bourbon glaze, it’s essential for bringing out the best in these little pastries.
So, Happy Mother’s Day to all the mother’s out there, but especially to mine! I love you, mom.
Like what you just read? Subscribe to Katie at the Kitchen Door on Feedly or Bloglovin’, or follow along on Facebook, Twitter, Pinterest, and Instagram. Thanks for reading!
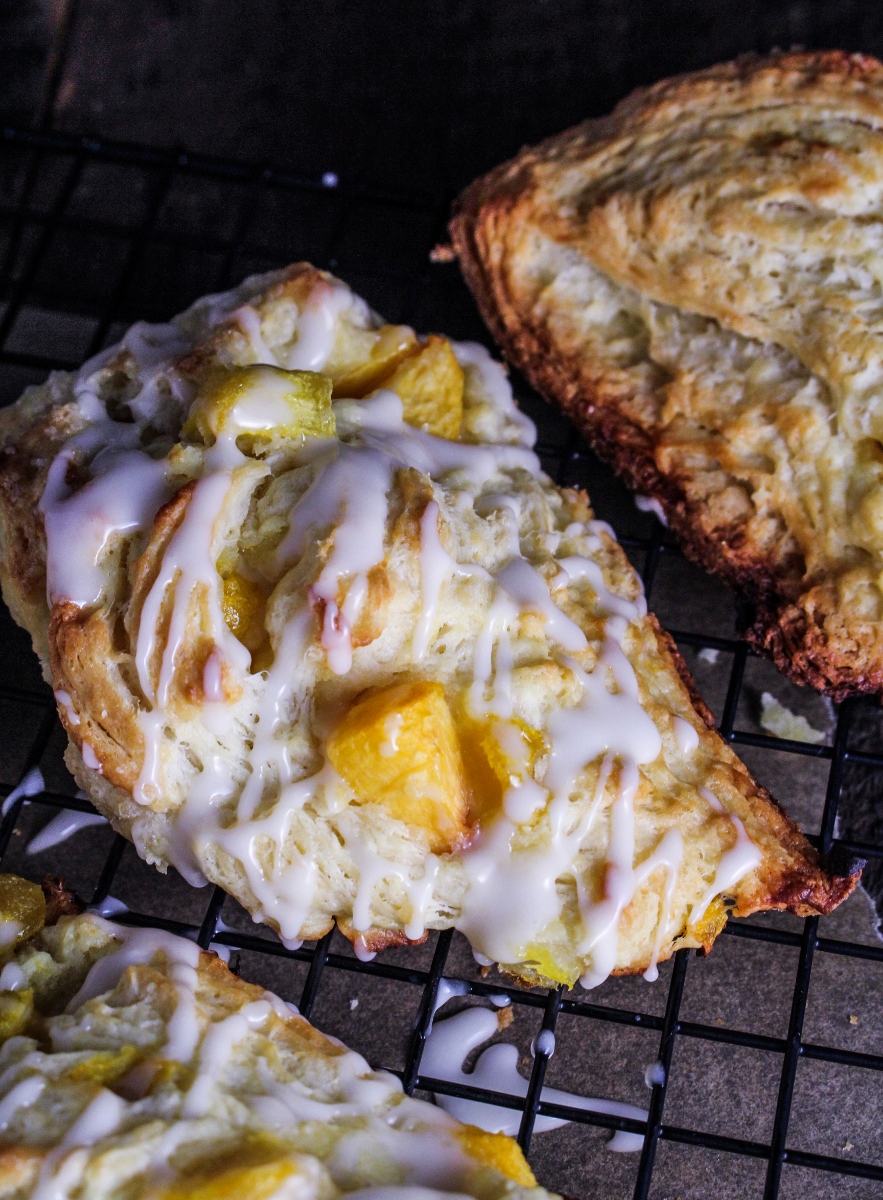
Peach Scones with Bourbon Glaze
Adapted from Cook’s Illustrated via The Vanilla Bean Blog. Makes 10-12 scones.
- 2 c. flour
- 1 TBS baking powder
- 2 TBS sugar
- 1/2 tsp salt
- 12 TBS butter, frozen
- 1/2 c. creme fraiche
- 1 tsp vanilla
- 2 eggs
- 1 1/2 c. diced frozen peaches (in 1/4 inch cubes)
- 1/4 c. heavy cream for brushing
- 1 TBS turbinado sugar for sprinkling
For the glaze:
- 1 c. powdered sugar
- 4 tsp heavy cream
- 4 tsp Bourbon
- Preheat the oven to 400°F. Line a baking sheet with parchment paper and set aside.
- In a large bowl, whisk together flour, baking powder, 2 TBS of sugar, and salt until evenly combined. In a separate medium bowl, whisk together creme fraiche, vanilla, and eggs until evenly combined.
- Grate the frozen butter over the large holes of a box grater. Add the grated butter to the flour mixture, and use your hands to toss the mixture until all the butter pieces are fully coated with flour. Add the creme fraiche mixture to the butter and flour and use a spatula to stir just until flour is fully moistened – avoid overmixing.
- Lightly flour a work surface, and dump the dough onto it. Knead gently just until it forms a loose ball. Using a floured rolling pin, roll the ball into a 12 inch square, then fold the dough in thirds. Fold in thirds again in the other direction, leaving you with a tall, 4 inch square. Place on a plate and chill in the freezer for 5-10 minutes, until cold to the touch.
- Once dough is chilled, return it to your work surface and roll out into a 12 inch square. Sprinkle the diced peaches over the surface, pressing them down lightly into the dough. Roll the dough into a log (like a jelly roll), then use the rolling pin to flatten the log into a 4 inch by 12 inch rectangle. Cut into 5 or 6 rectangles, then cut each rectangle in half, resulting in 10 to 12 triangular scones. Place scones on prepared baking sheet, and brush each generously with heavy cream, then sprinkle with turbinado sugar. Bake for 18-25 minutes, until scones are golden brown on the top. Transfer to a wire rack and let cool.
- To make the glaze, whisk together the powdered sugar, 4 tsp of heavy cream, and Bourbon until smooth. Glaze should be a good drizzling consistency. If it’s too thick, add a splash more Bourbon; too thin, add a few tablespoons of powdered sugar. Once the scones are cool, use a fork to drizzle the glaze over the scones in thin lines. Let set for 10-15 minutes, then serve.