• Skip to primary navigation
  • Skip to content
  • Skip to primary sidebar
  • Home
  • Recipes
  • Features
    • Cookbook Reviews
    • Ingredient of the Week
    • Sunday Dinner
    • Fitness Goals
  • Travel
  • About
    • Privacy Policy
    • Cookie Policy
  • Work With Me

Katie at the Kitchen Door

Globally-inspired, seasonal recipes

Blog Page

Happy 4th of July! // Berry Sangria Slushies

1 July 4, 2014 Drink

Happy 4th of July! // Berry Sangria Slushies

Berry Sangria Slushie {Katie at the Kitchen Door}

Berry Sangria Slushie {Katie at the Kitchen Door}

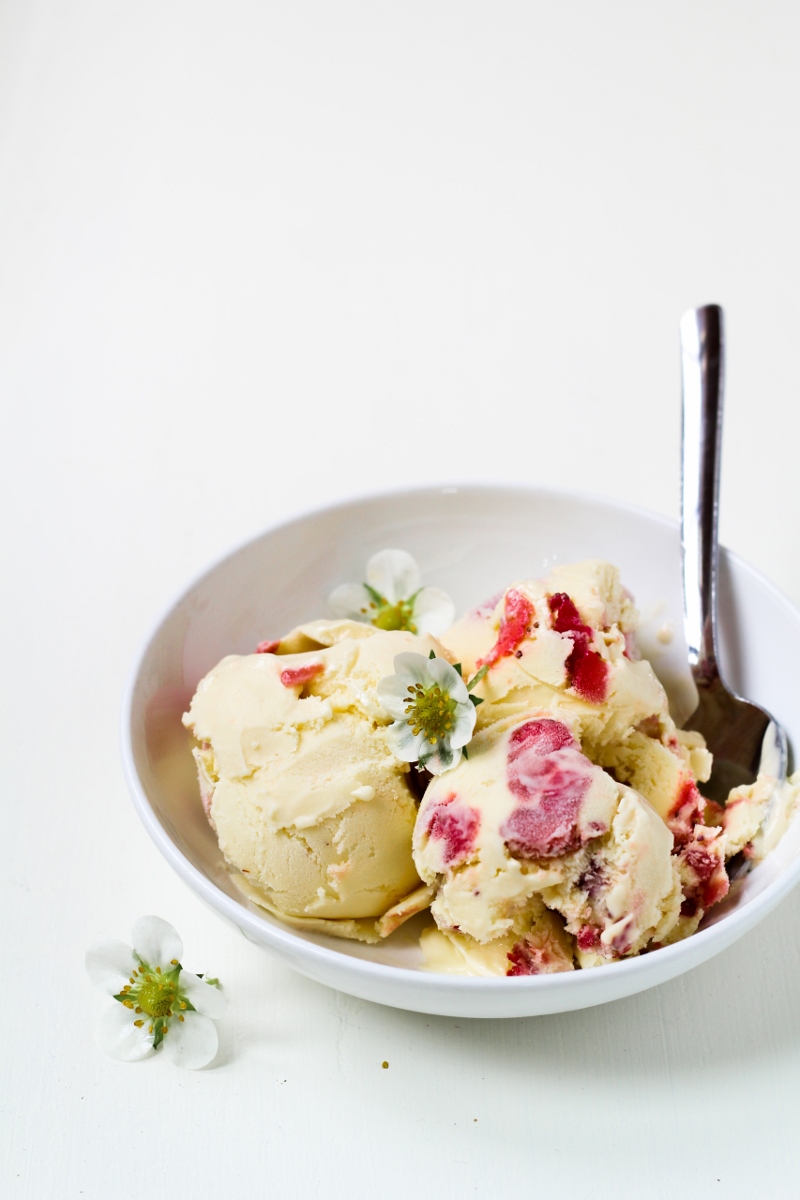
I’ve been absolutely luxuriating in summer for the past week. Long afternoons spent sunning on the raft, hikes up and over hard rock and pine needle floors, piping hot fried fish sandwiches eaten overlooking the ocean, runs timed to coincide with brilliantly colored sunsets, early morning boat rides with thermoses of coffee to watch the harbor seals and pretend to fish, massive ice cream sundaes taking the place of lunch, reading a book on the season’s inaugural sail, and giant burgers topped with blue cheese and spicy onions and grilled to perfection. One of my new year’s resolutions was to engage more, live more, do more – or perhaps, to put it in the reverse, to spend less time doing nothing, or nothing-like things like worrying and regretting and waiting. And as nebulous as that sounds, I feel like I’ve been achieving that, especially during perfect weeks like this last one.

Berry Sangria Slushie {Katie at the Kitchen Door}

Berry Sangria Slushie {Katie at the Kitchen Door}

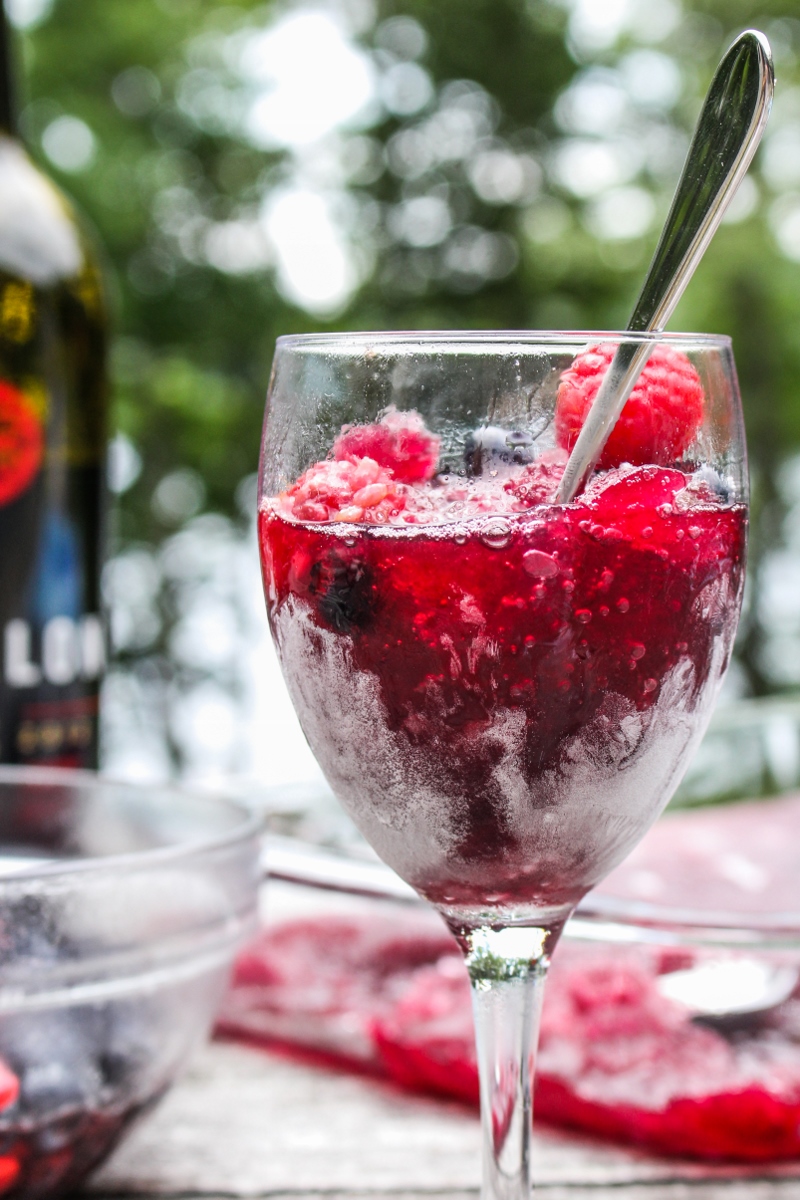
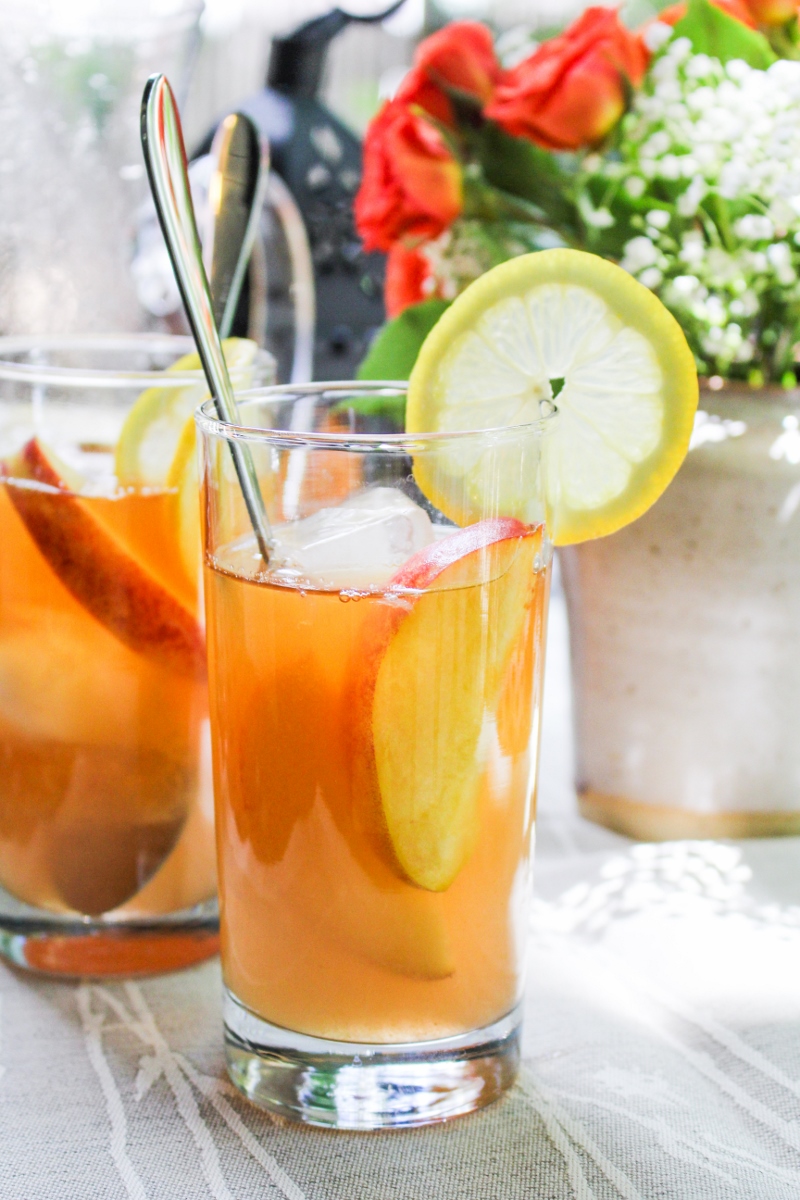
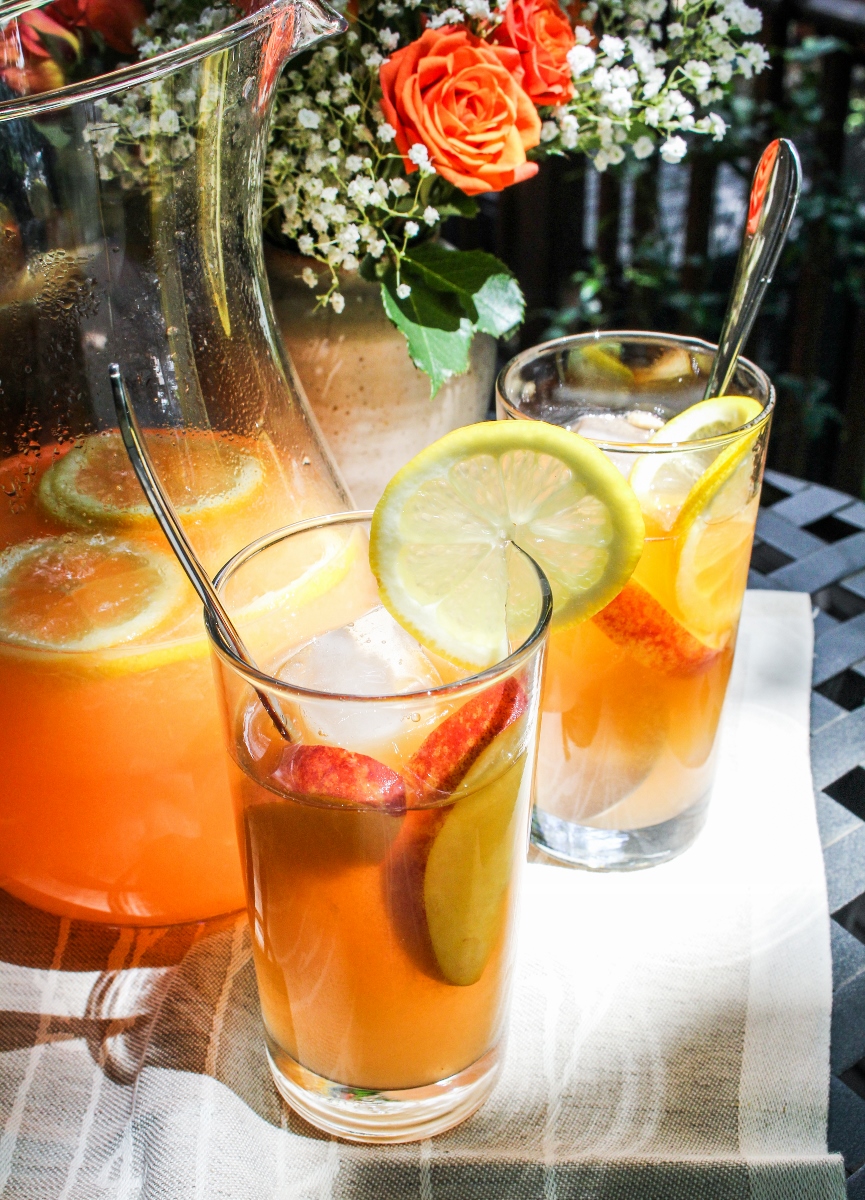
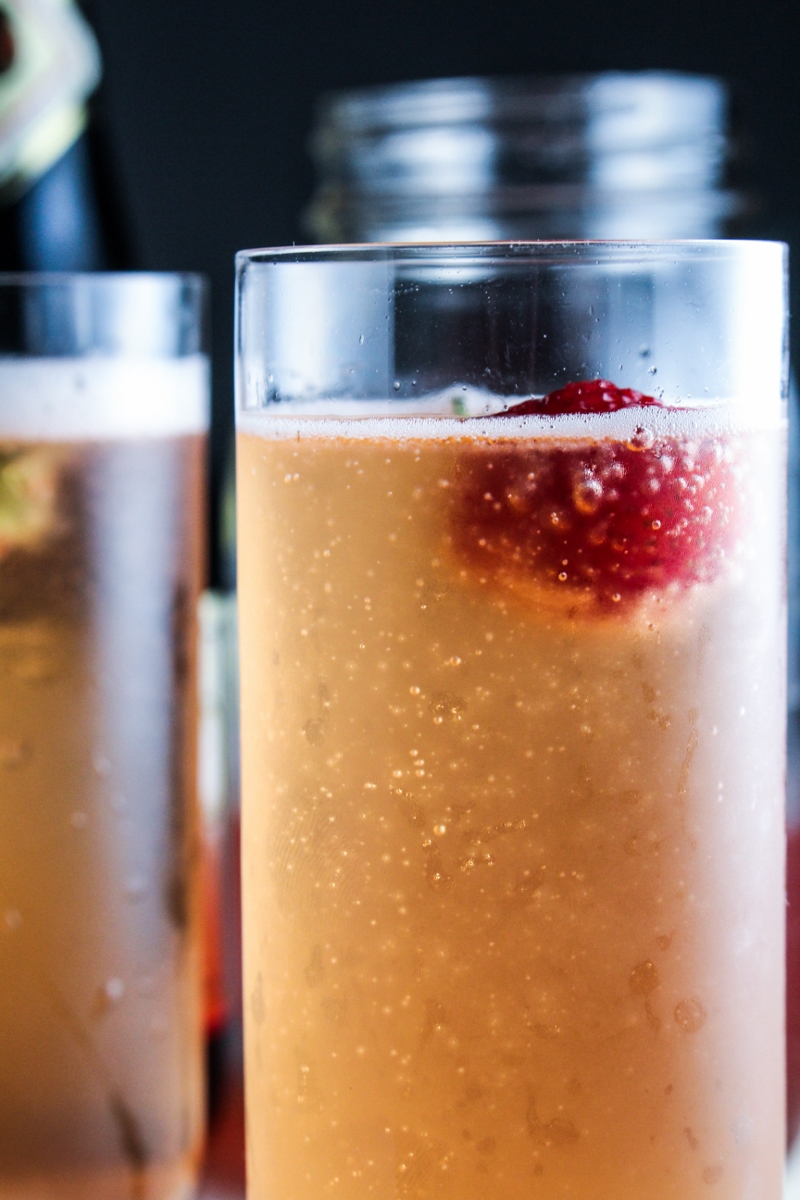
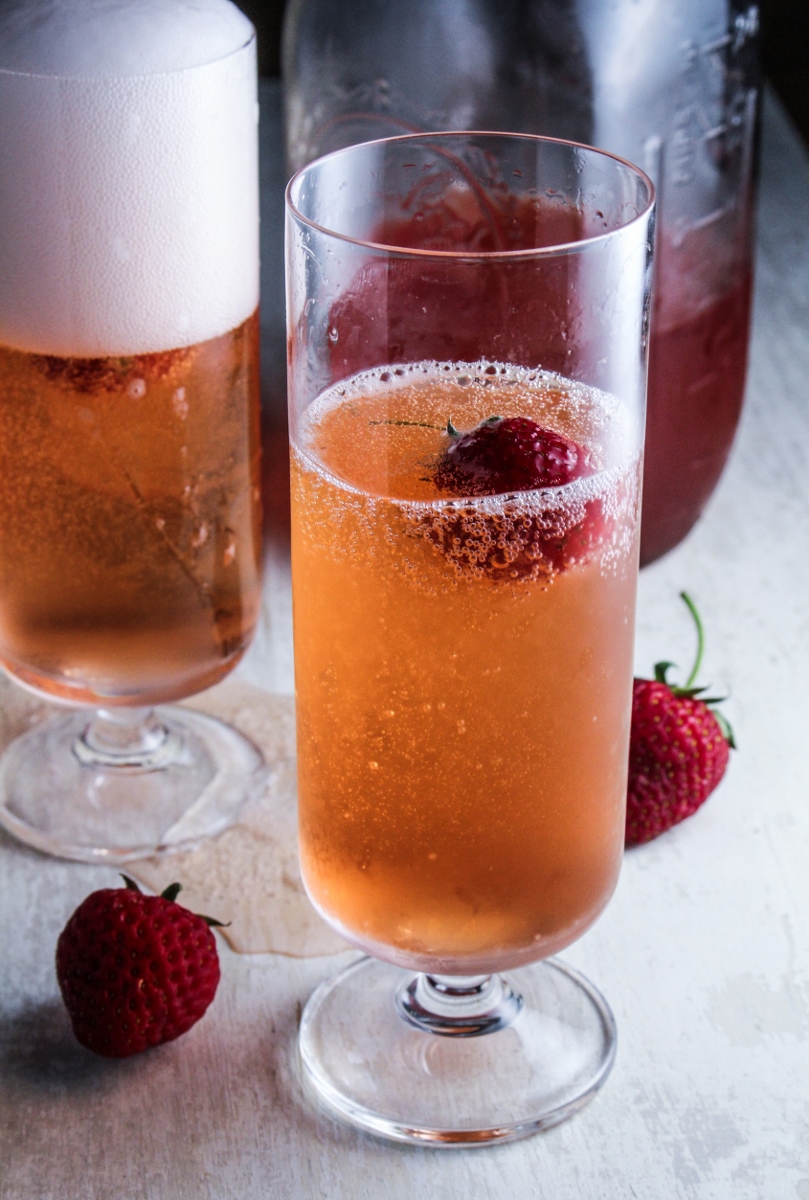
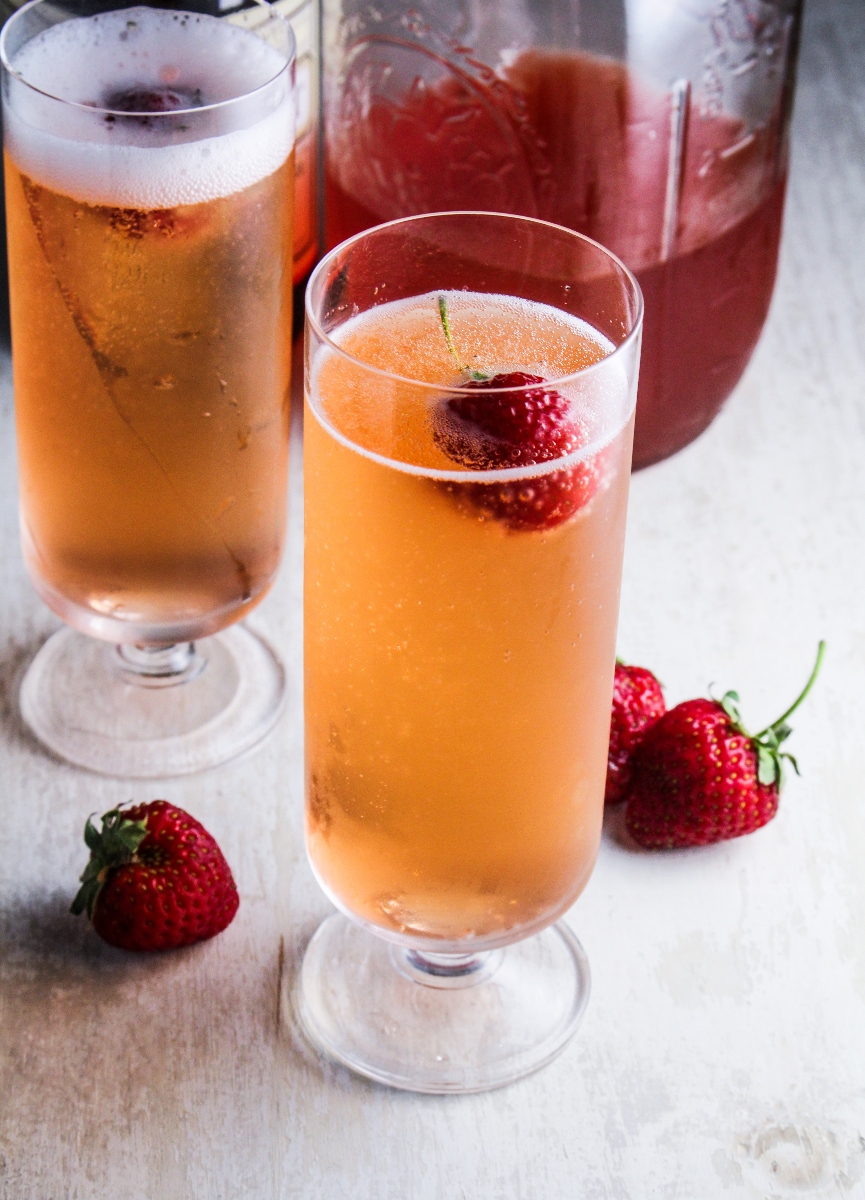
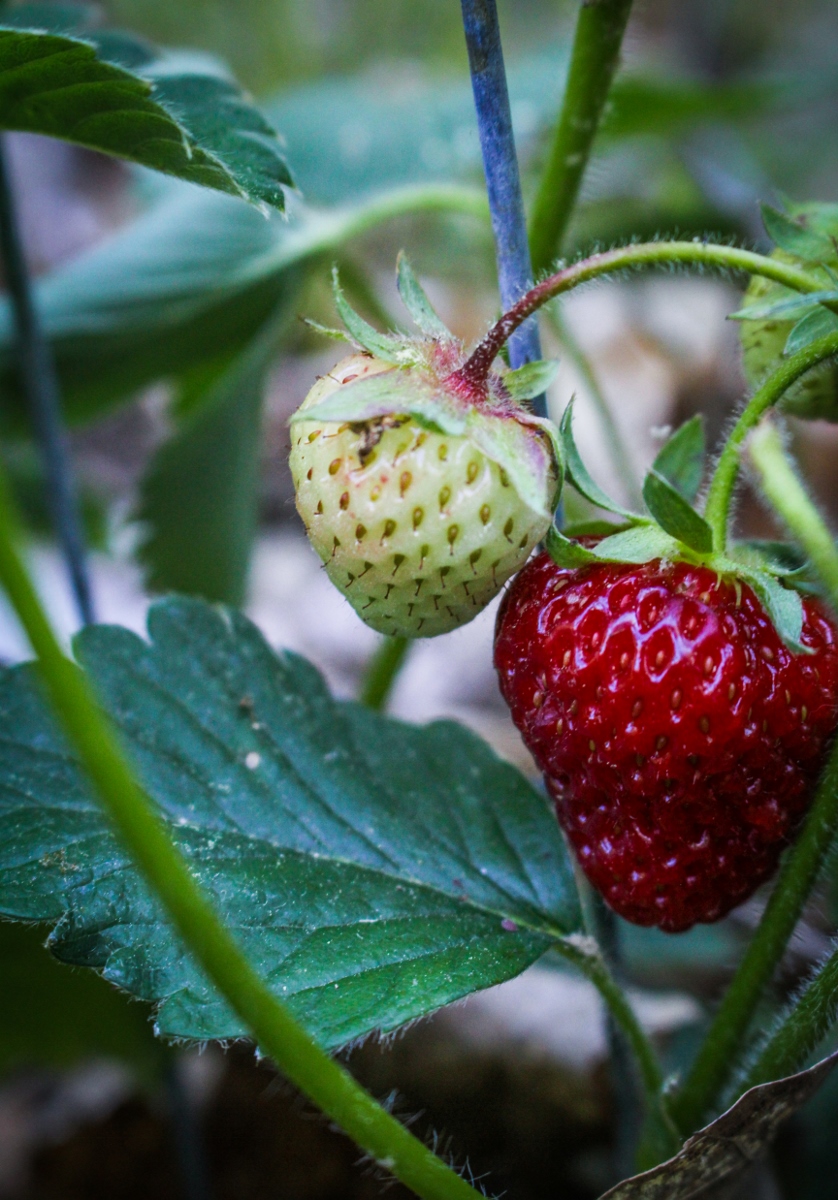
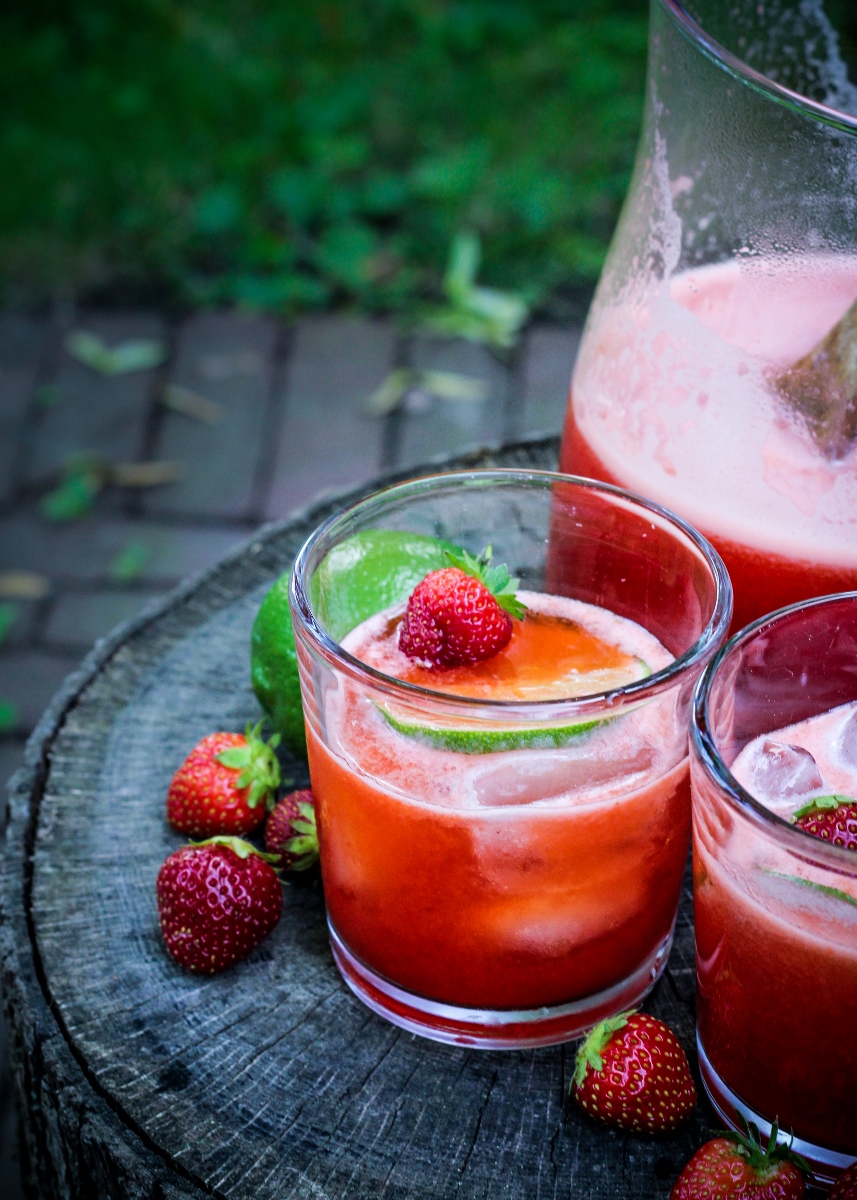
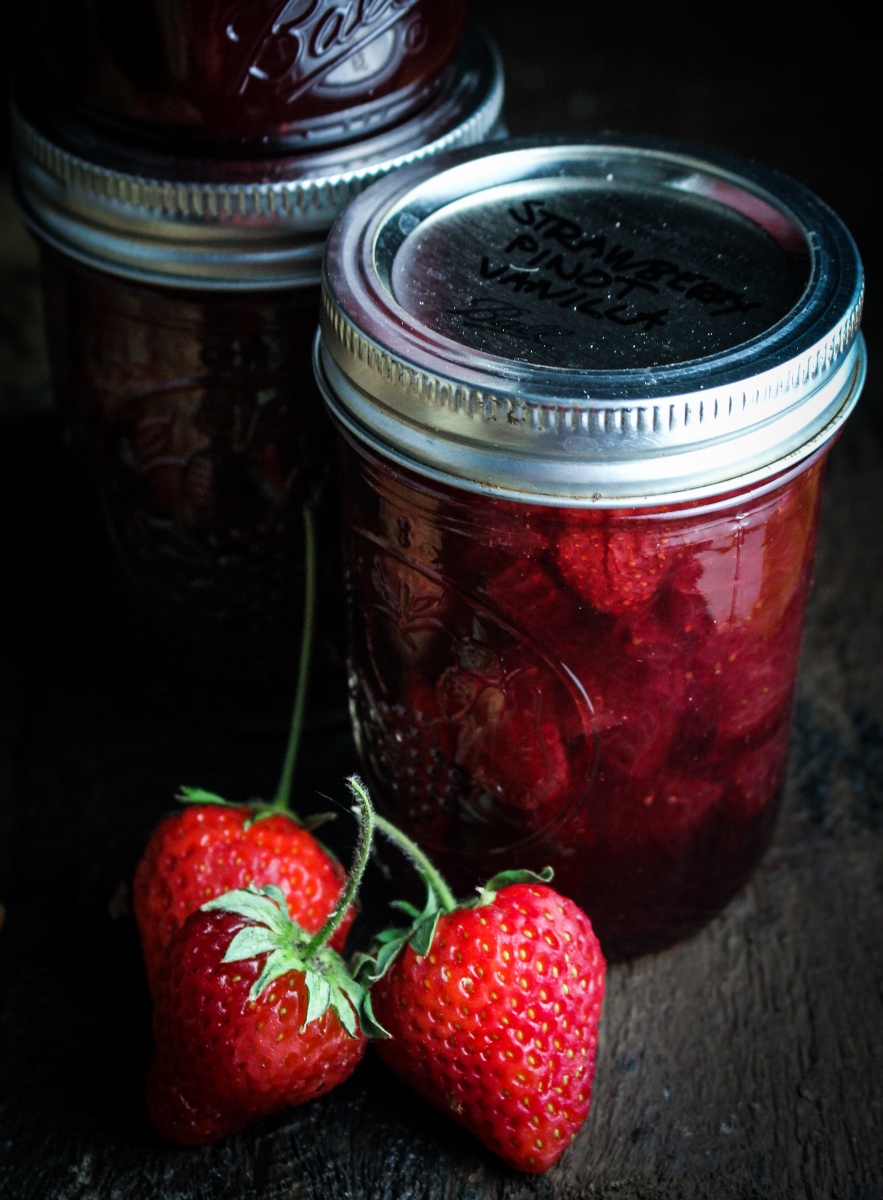
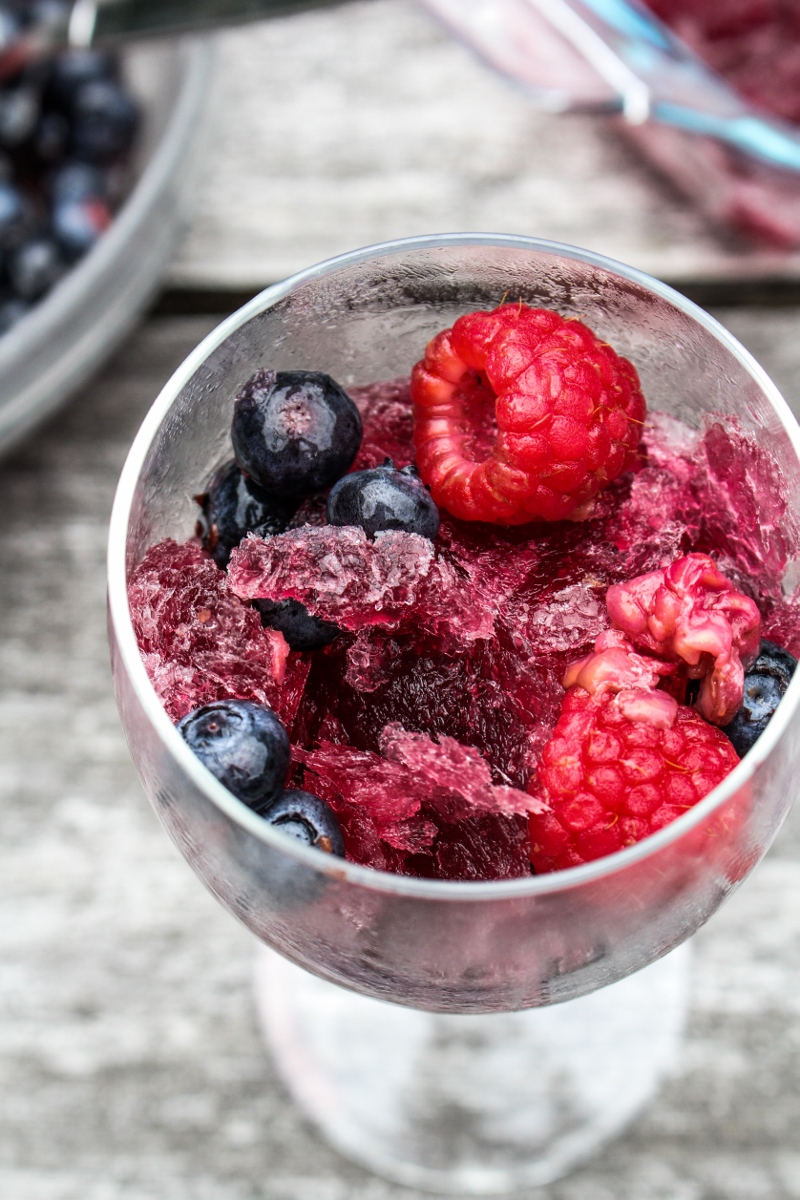
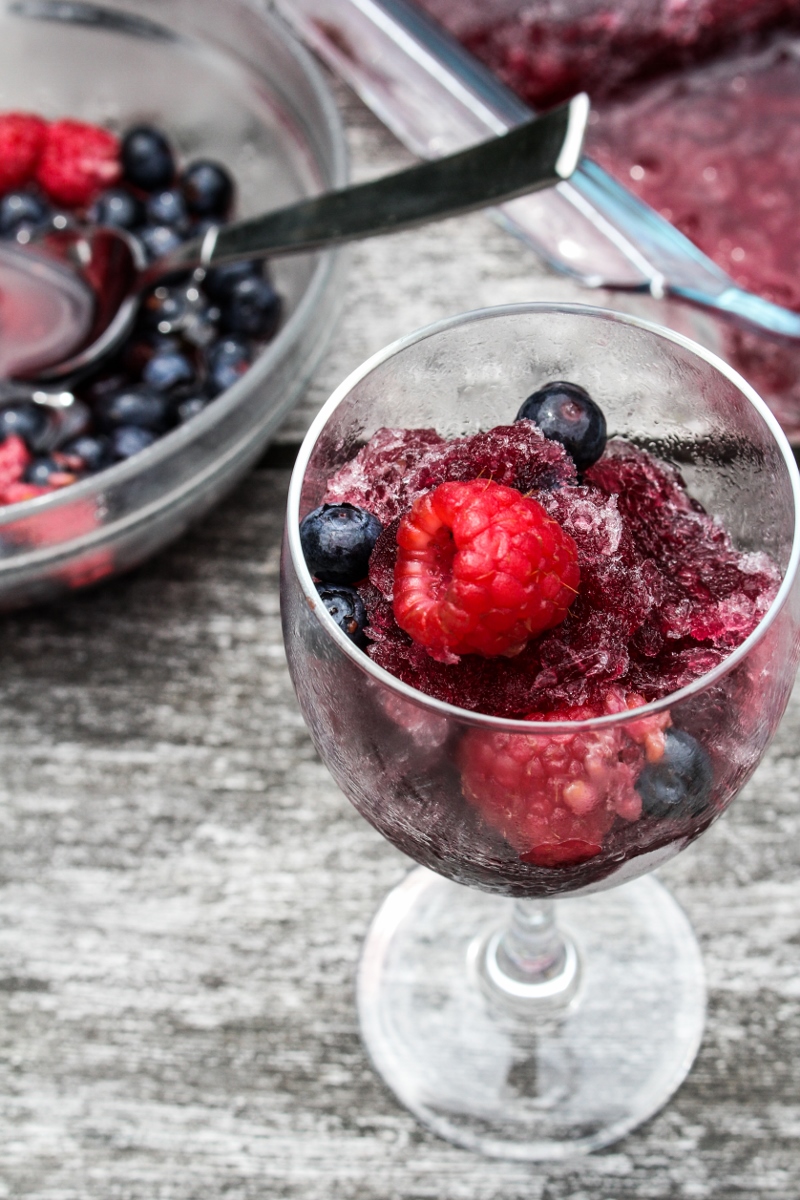
Celebrating the 4th as a cap to this week feels just right – I’m refreshed and energized and ready to celebrate this beautiful country and the gloriousness of summer. As I travel more and more, I’ve actually come to value being an American citizen more highly – sort of the opposite of what I expected, but this year I’m feeling especially grateful to live here in the good old US of A. Our celebration here in Maine will be small, but Trevor’s doing ribs, we’ll have some potato salad and grilled veggies, and I made a batch of sangria slushies with lots of fresh berries. Sangria slushies are an idea I’ve been sitting on for a long time, since I happened upon a company selling pre-made sangria slushie mix at an art fair in Denver a few years back. I thought it was a great idea, and have been meaning to try it at home ever since, but somehow never got around to it. I’m getting around to it now, though. The slushies are sweet and winey and ice cold, and topped with boozey fresh berries – they make an already delicious summer drink just a little more fun.

Like what you just read? Subscribe to Katie at the Kitchen Door on Feedly or Bloglovin‘, or follow along on Facebook, Twitter, Pinterest, Instagram, or Google+. Thanks for reading!

Berry Sangria Slushie {Katie at the Kitchen Door}

Berry Sangria Slushies

Serves 4. Loosely based on Betty Crocker.

  • 2 c. mixed fresh berries
  • 1/2 c. fresh orange juice
  • 1/2 c. sugar
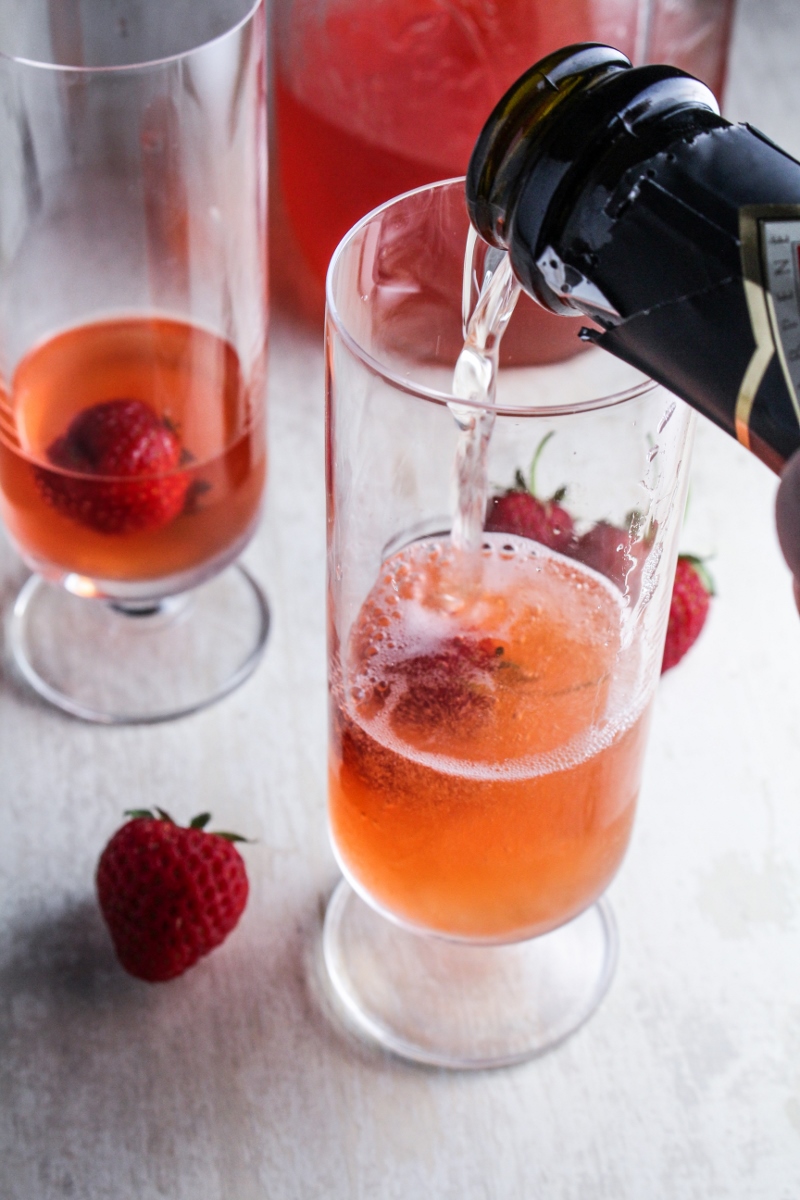
  • 1 bottle (750ml) of red wine
  • 1 c. water
  • 1/2 c. brandy
  1. Add the berries, orange juice, sugar, and wine to a large pitcher. Stir for a minute to dissolve the sugar, cover, and let sit at room temperature for 3-4 hours to allow the flavors to meld.
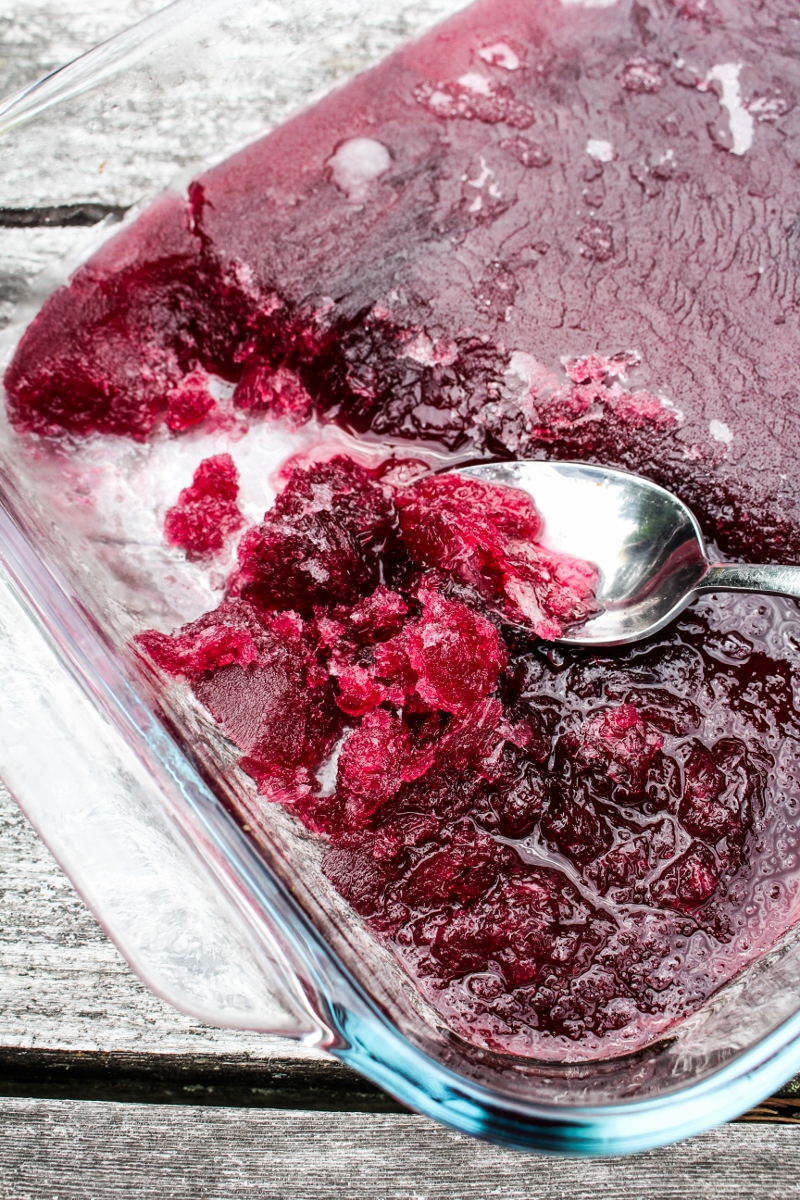
  2. Strain the wine into a large glass baking pan, reserving the berries. Add the water to the wine, stir briefly, cover with plastic wrap, and place carefully in the freezer. Freeze until solid, at least 12 hours.
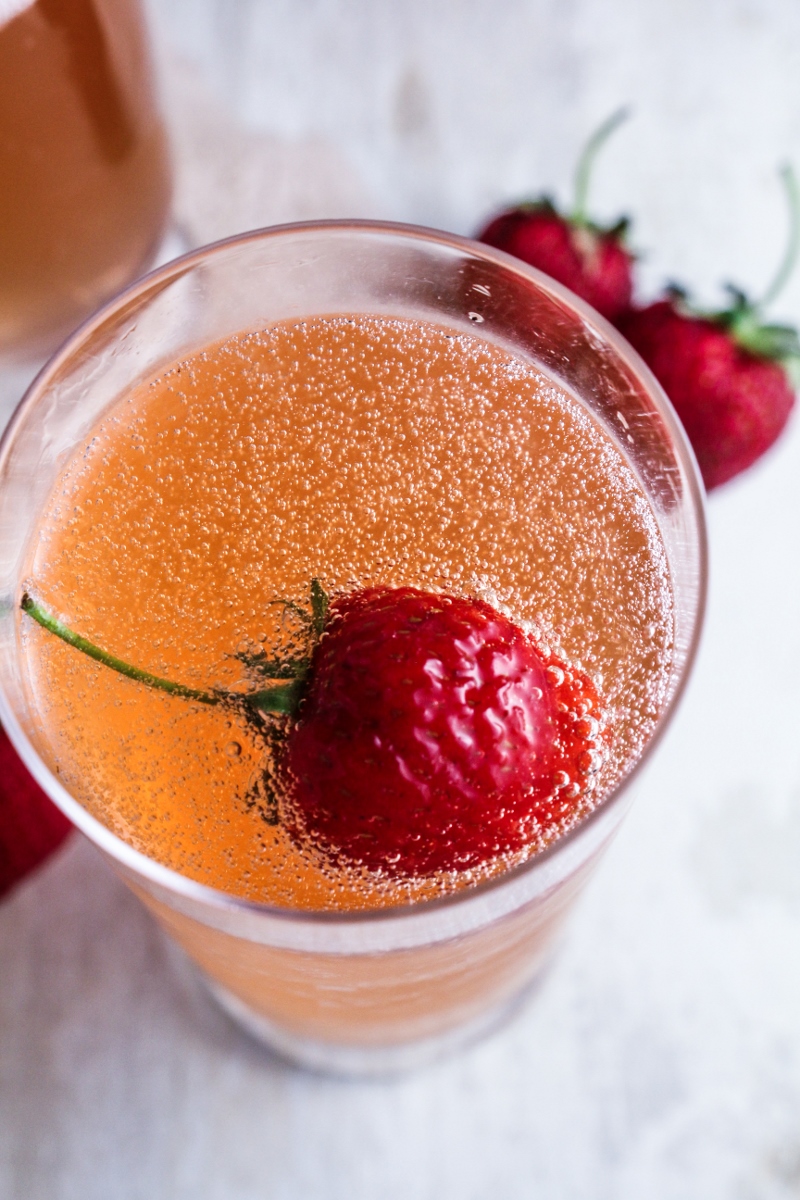
  3. Add the brandy to the reserved berries. Cover and let soak in the fridge until ready to serve.
  4. Just before serving, remove the frozen sangria from the freezer. Use a fork to scrape the top of the sangria and flake it into slush. Spoon into wine glasses, top with the brandy-marinated berries, and serve immediately. Return any extra sangria to the freezer.
Smoked Salmon, Creme Fraiche, and Caper Rotini on Cup of Jo

2 July 2, 2014 Food

Smoked Salmon, Creme Fraiche, and Caper Rotini on Cup of Jo

Smoked Salmon, Creme Fraiche, and Caper Rotini {Katie at the Kitchen Door}

Home Smoked Salmon {Katie at the Kitchen Door}

Home Smoked Salmon {Katie at the Kitchen Door}

I’m so thrilled to be back on Cup of Jo today. When Joanna and her team first reached out to me last year about contributing a recipe, I had heard of her blog but only glanced at it once or twice. Since then, I’ve become a loyal reader – and I mean I actually read all her posts, not just skim through the pictures like I do with so many blogs. It’s almost always the first blog I click on when I open up my reader, and reading her posts makes me feel like I’m chatting with a slightly older, slightly wiser, really sweet girlfriend. Making strangers feel like that over the internet takes a whole lot of talent. But enough with the fangirling – on to the food! Last year I shared my favorite recipe for guacamole with Joanna and her readers, and I’m flattered to be returning with a super simple, three ingredient pasta dish that’s perfect for summer eating.

Smoked Salmon, Creme Fraiche, and Caper Rotini {Katie at the Kitchen Door}

Wild Sockeye Salmon {Katie at the Kitchen Door}

July is really the perfect time for quick dinners – less time in the kitchen means more time outside soaking up the sunshine, or laying on the floor in your underwear as close to your AC unit as you can get, depending on where you live. Of course, I took my three ingredients – smoked salmon, creme fraiche, and capers – and decided that I should make two of the three from scratch, defeating the simplicity point a little bit. Creme fraiche is super easy to make at home – all you need to do is add a few tablespoons of buttermilk to a cup of heavy cream, stir it up, cover it, and let it sit on the counter until thick, usually about 24 hours. Smoking your own salmon takes a bit more effort, but it’s a fun project and totally doable. Trevor did most of the hard work, stoking and tending the fire and keeping the temperature just right as the fish smoked, so I can’t take too much credit here, but the end result was really delicious. The pasta gets well coated with the tangy creme fraiche, the salmon is incredibly rich and slightly sweet from a maple syrup brine, and the capers add some much-needed piquancy. Even with all store-bought ingredients, this recipe is a winner for summer nights. Head over to get the full recipe on Cup of Jo.

Smoked Salmon, Creme Fraiche, and Caper Rotini {Katie at the Kitchen Door}

Thanks to both Joanna and Caroline for featuring this recipe!

Note: we used the following three sources for info on hot-smoking salmon at home. We’re still perfecting our technique, but once we do, maybe we’ll have our own recipe to share.

Alton Brown
Hunter Angler Gardner Cook
Epicurious 

A Summer Lunch, and Micropayments for Bloggers with CoinTent

0 June 30, 2014 Blogging

A Summer Lunch, and Micropayments for Bloggers with CoinTent

Turkey Pesto Avocado Club {Katie at the Kitchen Door}

Peach Arnold Palmer {Katie at the Kitchen Door}

This post is sponsored by CoinTent, a micropayment system that allows bloggers to monetize premium content.

There’s something a little different about today’s post: CoinTent, a new service with the goal of providing bloggers and other internet content creators a way of directly monetizing their content through small pieces of premium content sold at a price between $0.05 and $1, has asked if I would test out their plugin. So, you’ll notice that in today’s post, one recipe is visible but the other two are hidden behind a paygate. As I’m sure many of you know, bloggers put a lot of time and effort into their little pieces of the internet, first and foremost because it’s something we truly love to do. But sometimes, when you’ve worked a 50 hour week at your regular job and you’re facing a Saturday with three recipes to cook and shoot, you wonder if it’s worth it. Being able to earn a little side income helps us rationalize the amount of effort we put in, and also helps pay the grocery/prop/photo equipment bills. Some bloggers have figured out how to make what they love a full time job (see these incredibly helpful income posts from Pinch of Yum, if you haven’t already), but for most of us, we’re still trying to work through that part of the blogging equation. If successful, a direct monetization tool like CoinTent could be a really interesting way to create income – as well as feel validated by your primary consumers, your readers, and not just third party advertisers and brands.

S'Mores Tartlet {Katie at the Kitchen Door}

S'Mores Tartlet {Katie at the Kitchen Door}

I’d like to ask you guys a big favor (and no, it’s not to click through the paygate, although if you choose to do that, thank you so much for your support!). What I would really love is to hear everyone’s thoughts on the potential of CoinTent. As a reader, would you be willing to pay directly for content? Because of the content itself? Because you’d like to support the bloggers you like the most? If not, why not? And since I know many of you are bloggers, too, what do you see as the advantages of using a system like CoinTent for monetization? The drawbacks? I’d love to discuss all of this with you, so please, if you have any thoughts, leave them in the comments.

Peach Arnold Palmer {Katie at the Kitchen Door}

S'Mores Tartlet {Katie at the Kitchen Door}

And now, if you’re not here for a diatribe on blogging and income, here’s the regular part – the food! I put together this menu with the idea of an easy summer lunch to make for family or friends on vacation. Nothing is difficult or requires much time in the kitchen, and everything makes the most of summer produce and flavors. As the main event, we have a turkey pesto club with goat cheese-pesto spread, crispy  bacon, super ripe tomatoes, and mashed avocado, a combination that’s good on homemade slider buns, biscuits, or any other good bread you have. In my opinion, nothing beats a really good sandwich for a perfect lunch. To wash them down, I made a big batch of fresh peach Arnold Palmers – half iced tea, half lemonade, with a generous dose of sweetened fresh peach puree, this is the most refreshing summer beverage I’ve tried this year. And as for dessert, I’ve taken the ooey gooey goodness of s’mores and turned them into individual-sized tartlets, with chocolate graham cracker crusts, a warm chocolate ganache filling, and a marshmallow meringue on top. So good. Seriously.

Turkey Pesto Avocado Club {Katie at the Kitchen Door}

Turkey Pesto Club

Serves 4.

  • 8 slices bacon
  • 2 TBS pine nuts
  • 1 clove garlic, peeled and chopped into large pieces
  • 4 oz. goat cheese
  • 3/4 c. packed fresh  basil
  • 4 buns, biscuits, or 8 slices of bread
  • 2 avocados
  • 1/2 lb. sliced turkey
  • 1 large heirloom tomato, thickly sliced
  1. Fry the bacon over medium heat until crispy. Drain on a paper towel-lined plate and set aside.
  2. In a food processor, pulse the pine nuts and garlic until finely chopped. Add the goat cheese and pulse until smooth, then add the basil and blend until smooth. Set aside.
  3.  Slice the buns in half and toast until golden brown, in a toaster or in a dry skillet. Spread the bottom of each half with 1-2 TBS of the goat cheese and pesto spread. Cut the avocados in half and scoop the flesh into a bowl. Mash roughly with a fork, then spread on the other half of the buns. Place 2 slices of bacon on top of the goat cheese spread, then top with turkey and a slice or two of avocado. Top with the avocado covered buns and serve immediately.

[cointent_lockedcontent title=”Get the recipes for S’Mores Tartlets and Peach Arnold Palmers for $.50 with CoinTent” subtitle=”Your support helps keep Katie at the Kitchen Door going” post_purchase_title=”Thank you for your support!”]

Peach Arnold Palmer {Katie at the Kitchen Door}

Fresh Peach Arnold Palmer

Serves 8-10.

  • 3/4 c. fresh lemon juice (from 3-4 lemons)
  • 3/4 c. + 1 c. sugar
  • 4 black tea bags
  • 2 fresh peaches, pitted and sliced
  1. In a large pitcher, stir together the lemon juice and 3/4 c. of the sugar until the sugar is dissolved. Add 4 cups of cold water and set aside.
  2. Bring a pot of water to a boil. Place the tea bags in a heatproof container, preferably with measurements marked on the size (quart-sized mason jars work great). Pour 4 cups of the boiling water over the tea bags. Let steep for 5-10 minutes, then remove the tea bags, cover the tea, and place in the fridge to chill.
  3. In a small saucepan, place the sliced peaches, the remaining 1 cup of sugar, and 1 cup of water. Bring to a simmer, and simmer until peaches are very soft and fragrant, about 8 minutes. Remove from the heat, let cool slightly, then puree with an immersion blender. Add the peach puree to the pitcher of lemonade, and place in the fridge.
  4. When ready to serve, mix the peach lemonade and the iced tea together in one pitcher. Serve in tall glasses over ice.

S'Mores Tartlets {Katie at the Kitchen Door}

S’Mores Tartlets

Makes 6 small tartlets

  • 8 whole graham crackers
  • 1 TBS cocoa powder
  • 4 TBS melted butter
  • 3 egg whites, divided into batches of 1 and 2
  • 8 oz. bittersweet chocolate chips
  • 1/3 c. heavy cream
  • pinch cream of tartar
  • 3 TBS sugar
  • 3/4 c. marshmallow fluff
  1. Preheat the oven to 350°F. In a food processor, pulse graham crackers until finely ground. Pour into a small bowl and whisk in the cocoa powder, then stir in the melted butter. Lightly beat one of the egg whites, then add to the graham cracker crumbs and stir until crumbs are all well moistened. Divide the crumbs between six 3-inch tartlet pans with removable bottoms, and press crumbs firmly into bottom and along sides with your fingers. Bake for 8 minutes, then remove from oven and let cool.
  2. In a small saucepan over low heat, combined the chocolate chips and the heavy cream. Heat, stirring constantly, until all of the chocolate chips have just melted, then remove from the heat immediately and divide the chocolate mixture between the six tartlet shells, filling each about 3/4 of the way up. Chill the tartlets until firm, at least 30 minutes.
  3. Just before serving, preheat the oven to broil. In a large bowl, use an electric beater to beat the remaining 2 egg whites until frothy. Sprinkle the cream of tartar over the top, then beat until soft peaks form. At this point, continue beating while slowly sprinkling the 3 TBS of sugar over the top. Beat until stiff peaks form, then add the marshmallow fluff and beat until fully combined and stiff. Spread a dollop of the fluff meringue on top of each tartlet, then broil on high until golden brown in spots, about 4 minutes. Remove from oven and serve immediately. Refrigerate any leftovers, reheating quickly before serving.

[/cointent_lockedcontent]


Ingredient of the Week: Strawberries // Strawberry Champagne Shrub

1 June 27, 2014 Drink

Ingredient of the Week: Strawberries // Strawberry Champagne Shrub

Strawberry Champagne Shrub {Katie at the Kitchen Door}The only downside to homegrown strawberries is their extremely short shelf life. Almost as soon as you pick them, they begin to soften, and by day three in the fridge you’re well on your way to jam (which is at least better than the whole batch succumbing to a bit of unnoticed mold overnight – so devastating). Since we can only get out to the “farm” to pick once a week, I usually find myself scrambling to use them up in this short window. A person can only consume so many strawberries though, so come day four, it’s time to find a preservation method or chuck them in the compost, the former obviously being the preferable choice.

Strawberry Champagne Shrub {Katie at the Kitchen Door}

Facing this dilemna last week, asleep on my feet after a long day and without much of a plan, I chopped up the remaining 2 cups of strawberries and threw them in a bowl. I was planning on dousing them with sugar and using them in my yogurt for the next few days, but decided to look up how you make fruit shrubs before doing so. I had been explaining the concept of a shrub, a fruit and vinegar syrup often used to flavor cocktails, but sometimes drunk on it’s own, to Trevor a few days earlier, but had never actually tasted one.

Strawberry Champagne Shrub {Katie at the Kitchen Door}

Strawberry Champagne Shrub {Katie at the Kitchen Door}

Turns out, the first step to making a shrub is to douse your fruit in sugar and let it sit around in the fridge for a few more days, so I proceeded with my original plan, adding a handful of lemon peels that Trevor had conveniently prepared for cocktails and left in the fridge. After a day or two of maceration, the juices get mixed with an approximately equal amount of cider vinegar, and popped back in the fridge. Now, 10 days later, I have a jar of intensely sweet-and-sour pink juice that can be added to anything that needs a flavor boost. I actually really like it on its own, although only in small doses, but since today is the first day of my Maine vacation (!), I decided to make a celebratory champagne cocktail with it. A little of the shrub, a dash of bitters, top the glass of with champagne, and you have a sophisticated and not-too-sweet twist on champagne and strawberries.

This recipe is not precise in any sense of the word, so don’t feel constrained by it. Mix up the fruit, mix up the type of vinegar, let sit in the fridge for longer, mix it with something other than champagne… experiment and see what works for you.

Like what you just read? Subscribe to Katie at the Kitchen Door on Feedly or Bloglovin‘, or follow along on Facebook, Twitter, Pinterest, Instagram, or Google+. Thanks for reading!

Strawberry Champagne Shrub {Katie at the Kitchen Door}

Strawberry-Lemon Shrub

Based on the instructions on Serious Eats. Makes about 2 cups.

  • 2 c. hulled and quartered fresh strawberries
  • 1 c. sugar
  • peel from 2 lemons, white pith completely removed
  • 1 c. apple cider vinegar
  1. Stir together the chopped strawberries, sugar, and lemon peel in a large bowl. Cover tightly and let sit in the fridge for 2-3 days, stirring briefly every 24 hours.
  2. Strain the juice from the fruit mixture. Stir the juice together with the apple cider vinegar. Place the juice-vinegar mixture in the fridge in a covered jar. Let sit in the fridge for at least 4 days before tasting – the flavors will mellow with time. Will keep in the fridge for several weeks.

Strawberry Champagne Shrub

Serves 1.

  • 3 TBS strawberry-lemon shrub, recipe above
  • 2 dashes cranberry bitters
  • 3/4 c. chilled champagne or prosecco
  • 1 small strawberry, for garnish.
  1. Add the shrub and bitters to a tall glass. Top off with prosecco, drop a strawberry in, and serve immediately.
Ingredient of the Week: Strawberries // Strawberry Recipe Round-Up

0 June 26, 2014 Breakfast

Ingredient of the Week: Strawberries // Strawberry Recipe Round-Up

Strawberries {Katie at the Kitchen Door}

I’m taking a quick break from new strawberry recipes tonight to dig up some strawberry-themed posts from the archives. It’s been a long week, and I’m feeling a little short on words, so I’m going to let the pictures do most of the talking here. Hopefully if you picked a few pounds more berries than you know what to do with, this will provide some inspiration!

Drinks

Strawberry Lime Agua Fresca {Katie at the Kitchen Door}

Strawberry-Lime Agua Fresca

An incredibly refreshing drink for a hot summer day, it’s also a little bit gorgeous.

Strawberry Rosewater Lassis {Katie at the Kitchen Door}

Strawberry and Rosewater Lassis

Strawberries, buttermilk, cardamom, and rosewater come together for a Middle-Eastern take on a milkshake. Not too sweet, but still feels like dessert.

Savory Strawberries

Strawberry Balsamic Salad with Goat Cheese and Candied Pecans {Katie at the Kitchen Door}

Strawberry Balsamic Salad with Candied Pecans and Goat Cheese

This salad is almost like dessert, it’s so sweet and delicious. For times that you need to trick yourself into consuming raw spinach.

Fried Halloumi with Spring Veggies and Strawberry-Basil Gastrique {Katie at the Kitchen Door}

Fried Halloumi with Spring Veggies and Strawberry-Balsamic Gastrique

An unusual appetizer that packs a lot of flavor into a little bite. Perfect for that moment in March when you get prematurely excited about spring produce, but are still craving foods like fried cheese.

Breakfast and Baking

Waffles with Strawberry Sauce {Katie at the Kitchen Door}

Waffles with Strawberry Sauce

The only acceptable breakfast on my birthday…

Strawberry Sage Muffins {Katie at the Kitchen Door}

Strawberry-Sage Muffins

My favorite basic muffin recipe, with the unusual (but delicious) pairing of sweet juicy berries and fresh sage leaves.

Strawberry Cornmeal Breakfast Cake {Katie at the Kitchen Door}

Strawberry Cornmeal Breakfast Cake

A quick one bowl cornmeal cake, perfect for snacking on or for serving mid-morning with a steaming cup of tea.

Strawberry-Bourbon Bread Pudding with White Chocolate Sauce {Katie at the Kitchen Door}

Strawberry Bourbon Bread Pudding with White Chocolate Sauce

Ridiculously rich and addictive dessert. Carb-y and boozy, it’s terrible for you but oh so satisfying.

Other Sweets

Strawberry-Rhubarb Meringue Pots {Katie at the Kitchen Door}

Strawberry-Rhubarb Meringue Pots

A quick and simple spring dessert, lighter than a pie and without the hassle of making crust.

Strawberry Sour Cream Ice Cream {Katie at the Kitchen Door}

Strawberry Sour Cream Ice Cream

Still the best ice cream I’ve ever made, and maybe the best I’ve ever eaten. Incredibly rich, but worth every calorie.

Strawberry, Chocolate, and Whipped Mascarpone Parfait {Katie at the Kitchen Door}

Strawberry, Chocolate, and Whipped Mascarpone Parfaits

Layers of creamy sweetness, fresh sweetness, and crunchy chocolate sweetness. Pretty and elegant.

Strawberry Almond Cream Tart {Katie at the Kitchen Door}

Strawberry Almond Cream Tart

A classic, and deservedly so. All your friends will ooh and ahh when they see it, as an added bonus.

Like what you just read? Subscribe to Katie at the Kitchen Door on Feedly or Bloglovin‘, or follow along on Facebook, Twitter, Pinterest, Instagram, or Google+. Thanks for reading!

Strawberries {Katie at the Kitchen Door}

Ingredient of the Week: Strawberries // Un Fraisier

0 June 26, 2014 Dessert

Ingredient of the Week: Strawberries // Un Fraisier

Classic French Fraisier {Katie at the Kitchen Door}

I first had un fraisier 5 years ago, in Paris.  Trevor and I spent a week there in May, at a time when we had just barely realized that this might be more than just flirtation and sneaky late night makeout sessions.  I still can’t believe that I actually took that trip – me, who needs months to plan a weekend getaway, won’t pay a dollar more than I have to for anything, and approaches almost everything with caution.  As a sophomore in college, I probably spent a third of my life’s savings on that trip, going with someone I’d only officially been with for less than a year, although I’d known him for much longer.  And it was very worth it.

Classic French Fraisier {Katie at the Kitchen Door}

We didn’t have a huge budget for eating out, so we did a lot of picnicking and bakery-visiting.  Which, in a way, is a perfect way to experience Paris.  We got to practice our french in the boulangeries and fromageries, sit in the beautiful parks and watch Les Parisiens go about their lives, and enjoy french food at it’s most elemental.  We stayed in an apartment along Rue Montorgueil, one of the premier food-shopping streets in the city, so it was quite easy to eat this way, and to eat well.  One afternoon we splurged after seeing a gorgeous display in a little patisserie on our way back to our apartment, and picked up a few treats.  One of them, was a slice of fraisier, a delicate strawberry, pastry cream, and marzipan cake.  Although I don’t remember exactly, we most likely ate it with a glass of kir royal, because that’s pretty much all we drank that week, after discovering the syrupy goodness of 4€ creme-de-cassis.

I don’t think I’ll ever forget that slice of cake.  Or associate it with anything other than springtime, happiness, and love. I’ve been meaning to make it every spring sense, but every time I look at the recipe for a traditional version, I get scared off by how much work it takes. This year, though, I finally did it, and now that I’ve done it the proper way I can start coming up with ways to make it easier.

Classic French Fraisier {Katie at the Kitchen Door}

Classic French Fraisier {Katie at the Kitchen Door}

This is not an everyday cake. Not only does it require multiple components – a sponge cake, a pastry cream which is then turned into a mousseline, fresh strawberries and marzipan – and careful assembly, but making the sponge cake itself is a workout. If you make a proper sponge cake, you have to spend a full 20 minutes vigorously whisking your eggs and sugar to make a sort of zabaglione that is the base of the batter.  That said, with a little planning it’s totally doable, and so gorgeous for a special occasion. And, if you like to bake, it’s extremely rewarding to pull this cake off – I swelled up with pride when I pulled a gorgeously light and golden sheet of sponge from the oven. I am a little disappointed with the slight messiness of the final product (but maybe just because Trevor was making fun of it – feel free to yell at him for me), but I was not at all disappointed with the taste. Although The Fundamental Techniques of Classic Pastry Arts cautioned that if I put my marzipan-coated cake in the fridge with the marzipan, it would be “rendered unusable,” I did it anyway and it’s much prettier and easier to slice after a few hours in the fridge. I almost re-shot these pictures, but then I just ate the cake instead.

Like what you just read? Subscribe to Katie at the Kitchen Door on Feedly or Bloglovin‘, or follow along on Facebook, Twitter, Pinterest, Instagram, or Google+. Thanks for reading!

Classic French Fraisier {Katie at the Kitchen Door}

Classic Fraisier

Recipe adapted slightly from The Fundamental Techniques of Classic Pastry Arts. Makes one 8-inch cake.

For the cake:

  • 110g cake flour (3/4 c. + 1 TBS)
  • 1 tsp baking powder
  • 2 oz. whole milk (1/4 c.)
  • 1 oz. unsalted butter, at room temperature (2 TBS)
  • 3 large whole eggs, at room temperature
  • 3 large egg yolks, at room temperature
  • 175g sugar (3/4 c. + 1 TBS)
  1. Preheat the oven to 350°F. Line an 17 x 11 inch baking sheet with parchment paper and set aside.
  2. Sift the flour and baking powder together in a small bowl so that they are evenly combined. Add the milk and the butter to a small saucepan, and heat over low heat just until the butter is melted, about 2 minutes. Remove from heat and set aside.
  3. Set up a double boiler – fill a large saucepan with water and bring to a boil, then immediately turn off the heat. In a heatproof bowl that fits snugly into the saucepan without touching the hot water, briefly whisk together the eggs, egg yolks, and sugar. Place the mixture over the hot water, being sure it is not touching the water. Whisk the eggs and sugar vigorously for 10 minutes, or until the mixture reads 110°F on an instant thermometer and has become pale yellow.
  4. Remove the bowl from the hot water, and continue whisking vigorously or another 10 minutes, until the mixture has tripled in volume and forms a ribbon when lifted from the bowl.
  5. Use a rubber spatula to fold the flour mixture into the whipped egg mixture in three additions, making sure that the dry ingredients do not clump. Fold each addition in while the batter is still slightly streaky from the previous addition. Do not overfold or you will deflate the batter.
  6. Once the flour mixture is incorporated, fold 3/4 c. of the batter into the warm milk mixture so that the milk mixture has a similar consistency to the batter, than fold the milk mixture back into the batter, until juts combined. Pour the batter into the prepared sheet pan, smoothing gently with the spatula. Immediately place in the preheated oven and bake for 10 minutes, until surface of cake springs back when touched and the top is golden brown. Remove cake from oven, let cool on a cooling rack, then invert the pan and carefully peel off the parchment paper. Set cake aside, wrapping tightly and refrigerating if you will not be using it immediately.

For the mousseline:

  • 2 large egg yolks, at room
  • 1 large whole egg
  • 3 TBS cornstarch
  • 1/2 c. + 2 TBS sugar
  • 2 c. whole milk
  • 1/2 vanilla bean, split lengthwise
  • 7 oz. unsalted butter, at room temperature (14 TBS / 1 3/4 sticks)
  1. Whisk together the egg yolks, egg, cornstarch, and sugar in a medium bowl, whisking until well blended.
  2. Place the milk in a saucepan. Scrape the seeds from the vanilla bean into the milk, and add the vanilla pod to the pan. Bring to a simmer over medium heat, then remove from the heat. Temper the eggs – while whisking the eggs vigorously, slowly drizzle 1 cup of the hot milk mixture into the eggs, then, now whisking the milk, pour the tempered egg mixture back into the hot milk. Continue whisking vigorously as you return the pan to medium heat. Cook until the mixture thickens, about 3-5 minutes, stirring and scraping the bottom as you cook. Once thickened, remove from heat and let cool so that it is just above room temperature. Remove the vanilla bean.
  3. Add the slightly warm pastry cream to a mixer, and begin beating on low. Add the room temperature butter 1 TBS at a time, beating as you go, until the mixture is very light and fluffy, like a buttercream. If the butter melts immediately upon contact with the pastry cream, let the pastry cream cool further before continuing. You want the butter to get whipped slightly as it is incorporated into the pastry cream. If mixing by hand, beating a few TBS of butter until fluffy and then incorporating the pastry cream a little bit at a time is helpful. Repeat until all the butter and pastry cream is used up. Use the buttercream as soon as possible after it’s prepared.

To assemble:

  • 1 recipe sponge cake (above)
  • 1/4 c. simple syrup (prepared from 1/4 c. water + 1/4 c. sugar, simmered just until sugar dissolves)
  • 1 recipe mousseline (above)
  • 20-30 fresh strawberries of a similar size, hulled
  • 2 oz. pale green Marzipan
  1. Using a 6-inch cake ring or springform pan as a guide, cut two circles out of the sponge cake. Store the rest of the cake in the fridge or freezer for another use.
  2. Place one of the cake circles inside your cake ring of springform pan, and brush the top generously with simple syrup.
  3. Place half of the mousseline in a piping bag, and pipe a thin line around the edge of the cake. Cut the strawberries in half lengthwise, and place them cut side out in a circle around the edge of the cake. Try to use strawberries of a similar size. Pipe mousseline in the middle of the cake such that it comes halfway up the inside of the strawberries. Top this layer of mousseline with more cut strawberries, this time placed cut side down, so that you have a layer of mousseline and strawberries that is an even height.
  4. Use a spatula to spread more mousseline on top of the strawberry layer so that it is covered by about 1/2 an inch, smoothing the top out with the spatula. Place your second cake circle on top of this mousseline layer, and brush with simple syrup. Top with a thin layer of mousseline.
  5. Refrigerate the cake for at least 3 hours. When ready to serve, roll your marzipan out into a thin sheet. Carefully remove your cake ring or springform pan from the cake. Use this as a guide to cut a circle out of the marzipan. Place the marzipan circle on top of the cake, top with a few whole strawberries, and serve.
Ingredient of the Week: Strawberries // Black Pepper Buttermilk Biscuits with Strawberry Pinot Noir Jam

0 June 24, 2014 Breakfast

Ingredient of the Week: Strawberries // Black Pepper Buttermilk Biscuits with Strawberry Pinot Noir Jam

Black Pepper Buttermilk Biscuits with Strawberry Pinot Noir Jam {Katie at the Kitchen Door}

Strawberry, Pinot Noir, and Vanilla Jam {Katie at the Kitchen Door}

The first thing I did with our strawberries was make jam. I know that for many people, jam is sort of a last resort thing, something they turn to when they’ve run out of ideas and their fruit is on its last legs. But I’ve been dreaming about filling my pantry with jars of strawberry jam, made from our very own strawberries, since the middle of winter, so for me getting a batch of jam on the shelves was my first priority. Canning still makes me a little nervous, but with every batch of preserving I get a bit more confident. This time around, I veered ever so slightly from the recipe I was using (Paul Virant’s Strawberry Pinot Noir Jam recipe from The Preservation Kitchen), adding a little bit more sugar (which, from what I understand, is basically always safe to do), and a whole vanilla bean. The resulting jam is sweet but not saccharine, loose but not runny, and very elegant. I only wish 2 pounds of strawberries made more than 3 little pint jars! It’s going to be torture to wait until fall to open the others, even though I know I’ll appreciate them much more when the prospect of meals based mainly on kale and sweet potatoes starts looming.

Black Pepper Buttermilk Biscuits with Strawberry Pinot Noir Jam {Katie at the Kitchen Door}

Of course, as delicious as jam is out of the jar, it’s still a condiment, and you typically need to serve it on something. As I waited for my canning jars to seal, my mind wandered off somewhere along the lines of “If you give a moose a muffin…” until it settled on black pepper buttermilk biscuits as the most appropriate companion for my strawberry pinot jam. Upon comparing a number of different biscuit recipes, I determined that the basic, accepted buttermilk biscuit recipe uses approximately the following ratio: 2 cups flour + 2 tsp baking powder + 1/2 tsp baking soda + 1 stick butter + 1 c. buttermilk, with a bit of variation from author to author. I followed this general guideline, used the frozen grated butter trick and added a few hefty teaspoons of freshly ground black pepper, and the resulting biscuits nearly stole the show from my poor jam. But really, they’re best together – cold and sweet strawberry jam filling in the nooks and crannies of hot and flaky buttery biscuits. And if for some strange reason you get tired of that combo, my next recommendation is to use these biscuits as a vehicle for bacon-egg-avocado sandwiches, with vanilla ice cream and strawberry jam for dessert, of course. Really, you can’t go wrong.

Like what you just read? Subscribe to Katie at the Kitchen Door on Feedly or Bloglovin‘, or follow along on Facebook, Twitter, Pinterest, Instagram, or Google+. Thanks for reading!

Strawberry, Pinot Noir, and Vanilla Jam {Katie at the Kitchen Door}

Strawberry, Pinot Noir, and Vanilla Jam

Adapted from The Preservation Kitchen. Makes 3 half-pint jars.

  • 2 lbs fresh strawberries, hulled and quartered
  • 1 1/4 c. plus 2 TBS sugar
  • 1/2 (750ml) bottle of Pinot Noir
  • juice from 1/2 lemon
  • 1/2 vanilla bean
  1. In a wide, heavy-bottomed saucepan, combine the strawberries, sugar, wine and lemon juice. Split the vanilla bean down the middle, scraping the seeds into the berry mixture, then adding the bean pod. Bring the mixture to a boil, then reduce the heat slightly and simmer for 10 minutes, until the sugar is dissolved and the strawberries have released some of their juices. Cool to room temperature, cover, and refrigerate overnight or for up to 3 days to allow the berries to continue macerating.
  2. On the day you will can the jam, fill a large pot or canner with water and bring to a simmer. Scald 4 half-pint jars in the hot water to sterilize, leaving them there and a gentle simmer until you are ready to can. Soak your lids and rings in hot water to soften the seals, and sterilize your other equipment.
  3. Strain the juices from the berries into a large pot, reserving the fruit on the side. Place the juices over medium high heat and cook until they have reduced by half and have reached a temperature of 215°F, about 25 minutes. Add the fruit back to the juices and continue to cook, skimming any foam off the surface with a ladle, until the mixture has reached 212°F, another 15-20 minutes. If you don’t have a thermometer, test the consistency of a jam by dropping a few drops of liquid on a frozen plate – if the chilled liquid gels, then your jam is ready.
  4. Drain the hot water from your jars, and place the hot jars on the counter. Use a funnel to fill the hot jars with the hot jam, leaving a 1/2 inch space between the top of the jam and the rim of the jar. Wipe the rim with a clean paper towel, then place the lids on the jars, and screw the rings on until snug but not tight. Use canning tongs to transfer the jars back into the simmering water, increase the heat to a boil, then boil the jars for 10 minutes. Turn off the heat and leave the jars in the water for a few minutes, then remove the jars from the water and let cool completely. Listen for a pop as you remove the jars from the water – that indicates a seal has properly been formed. Note: Do not process any jars that are only partially full – it is only safe to process full jars. Any partially full jars should be stored in the fridge and eaten within a few weeks.

Black Pepper Buttermilk Biscuits with Strawberry Pinot Noir Jam {Katie at the Kitchen Door}

Black Pepper Buttermilk Biscuits

Makes 12-15 biscuits.

  • 2 c. AP flour
  • 2 tsp baking powder
  • 1/2 tsp baking soda
  • 1/2 tsp coarse sea salt
  • 1 1/2 tsp freshly ground black pepper
  • 1 stick salted butter, frozen
  • 1 c. cold buttermilk
  1. Preheat the oven to 425°F. In a large bowl, whisk together flour, baking powder, baking soda, salt, and pepper. Grate frozen butter over the coarse holes of a box grater, then add the grated butter to the flour mixture. Use your fingers to gently toss the grated butter with the flour, fully coating the butter.
  2. Pour the buttermilk into the flour mixture, and use a fork to gently mix them together, just until the dough is moistened. Don’t overmix. Lightly flour a work surface and turn the dough out onto it. Knead the dough 2-3 times, just until it comes together, then flatten into a disk that is 1/2 an inch thick. Use a round cookie cutter (about 2-inches in diameter) to cut out biscuits, pressing the scraps together when you’ve run out of room to create a smaller disk. Place the biscuits on a baking sheet lined with parchment paper.
  3. Chill the biscuits in the fridge for 20 minutes, then transfer to the preheated oven. Bake until puffed and golden brown on the top and sides, about 15-18 minutes. Remove from the oven and serve immediately.
Ingredient of the Week: Strawberries // Strawberry Gazpacho with Grapes and Goat Cheese

0 June 23, 2014 Current Feature: In Season

Ingredient of the Week: Strawberries // Strawberry Gazpacho with Grapes and Goat Cheese

Strawberry Gazpacho with Grapes and Goat Cheese {Katie at the Kitchen Door}

Strawberry Gazpacho with Grapes and Goat Cheese {Katie at the Kitchen Door}

It’s been ages since I’ve done an Ingredient of the Week series, mostly because it’s been ages since we’ve had any hint of life in our garden. But even though the garden is several weeks behind where it was last year, thanks to the weirdly cold spring we had, it’s finally starting to move out of that frustrating stage where everything’s tiny and you use all your time weeding and waiting, into that lush, productive stage I dream about during the depths of winter.

The first crop to really come into its own this year was the strawberries. We planted 75 little plants last spring, and although it was torture to pick off the blossoms last summer, allowing the plants to establish themselves but forgoing the chance of fruit, we’ve been rewarded several times over for our patience, with pounds of fruit ripening on an almost daily basis this summer. In just a little over a week we’ve already picked over 8 pounds of gorgeous berries, which is a lot for just two people. I’ve done a little canning, a little baking, and a little drink-making, but we still have a lot of berries to work through, so we’re going to do strawberry week – i.e. I’ll be posting new strawberry recipes here every day this week, until you all are completely sick of hearing about them.

Strawberry Gazpacho with Grapes and Goat Cheese {Katie at the Kitchen Door}

Although strawberries are usually recognized for their sweetness, we’re kicking things off with a savory recipe. Strawberry gazpacho is not a new idea, but it is certainly a good one, as the balance of acid and sweetness in fresh strawberries  is actually pretty similar to the balance in a very ripe tomato. I did a little research on strawberry gazpacho recipes, but ultimately decided that none of the recipes out there had quite the mix of flavors I was looking for, so I came up with my own. Fortunately, I was really pleased with how well it turned out. It has a little bit of everything red in it – strawberries, tomatoes, red pepper, red onion and red chilies, plus a bit of cucumber, garlic, and basil (not red, but very necessary). Marinated in olive oil and champagne vinegar, then pureed into a smooth and frothy soup, it’s well-balanced and refreshing.  I topped it with red grapes, for sweetness, a goat cheese cream, for richness, and a handful of toasted pine nuts. I liked it so much I had some for breakfast yesterday – it definitely meets my serving of fresh fruit or veggies at every meal requirement, so that’s an added bonus. It’s also super easy, so I imagine we’ll be blending up several more batches of this before the summer is over.

Strawberry Gazpacho {Katie at the Kitchen Door}

Past Ingredients of the Week

Rhubarb: Rhubarb-Prosecco Spritzer; Rhubarb Custard Fool; Rhubarb Recipe Round-Up; Persian Rhubarb and Beef with Rice; Rhubarb-Ginger Bars

English Peas: Smashed Pea, Dill, and Feta Crostini; Green Pea Fritters with Herbed Creme Fraiche; English Pea Recipe Round-Up; Green Pea Rum Cooler; A Salad of Bacon, Peas, and Fennel

Carrots: Savory Carrot, Feta, and Almond Baklava; Carrot Cake Crepe Cake; Carrot, Grapefruit, and Mango Smoothie; Moroccan Carrot Panini with Olive Tapenade

Like what you just read? Subscribe to Katie at the Kitchen Door on Feedly or Bloglovin‘, or follow along on Facebook, Twitter, Pinterest, Instagram, or Google+. Thanks for reading!

Strawberry Gazpacho with Grapes and Goat Cheese {Katie at the Kitchen Door}

Strawberry Gazpacho with Grapes and Goat Cheese

A Katie at the Kitchen Door original recipe. Serves 4-6.

  • 3/4 lb. fresh strawberries, hulled and sliced (about 2 1/2 c. sliced)
  • 1/2 medium red onion, chopped (about 3/4 c. chopped)
  • 1 large red bell pepper, seeded and chopped (about 2 c. chopped)
  • 1 small cucumber, peeled, seeded, and chopped
  • 1 large heirloom tomato, cored and roughly chopped (about 3/4 lb.)
  • 2 medium cloves garlic, peeled and crushed
  • 1-3 tsp red fresno chili, seeded and finely chopped (taste for heat and adjust amount accordingly)
  • 1/2 c. packed fresh basil leaves
  • 1/2 c. olive oil
  • 1/4 c. champagne vinegar
  • 1 TBS sea salt
  • 2 oz. goat cheese
  • 1/4 c. heavy cream
  • 1 small bunch grapes
  • 2 TBS pine nuts, lightly toasted in a dry skillet
  1. Combine first 11 ingredients (strawberries through salt) in a large bowl and stir to coat all ingredients with the oil and vinegar. Cover and let marinate at room temperature for three hours. Transfer to a blender and blend on high until smooth and frothy. Serve at room temperature or chill in the fridge for 30 minutes.
  2. Just before serving, whisk together the goat cheese and heavy cream until smooth. Pour the gazpacho into bowls and top each with a swirl of the goat cheese cream, a handful of grapes, and a few toasted pine nuts. Serve with crusty bread.
Book Club: The Vibrant Table // Peach and Avocado Summer Rolls

0 June 21, 2014 Cookbook

Book Club: The Vibrant Table // Peach and Avocado Summer Rolls

The Vibrant Table

The Book: Even before I got to the recipe section of Anya Kassoff’s new book, The Vibrant Table, I knew I would like it. Discussing her healthy eating philosophy in the introduction, Anya writes that she creates “recipes that utilize the most nourishing ingredients in the tastiest ways possible… without feeling confined or making too many rules.” I sometimes struggle with my feelings about diet labels – vegan, raw, gluten-free, paleo, whole 30, etc. On the one hand, at their most basic level, they all encourage eating more whole foods and vegetables, a principle that’s hard to argue with. But move beyond the basic principles, and I get really frustrated with the focus on excluding “bad” things instead of eating more “good” things, as well as by the diet-shaming communities that unfortunately seem to pop up around popular diets (loved Shanna’s post about that a while back). Personally, I like to think I’m of the “everything in moderation” camp, and I would never sacrifice flavor for health, so it was refreshing to hear those feelings echoed in a book with the tagline “Recipes from my always vegetarian, mostly vegan, and sometimes raw kitchen.”

Peach and Avocado Summer Rolls {Katie at the Kitchen Door}

Peach and Avocado Summer Rolls {Katie at the Kitchen Door}

Anya and her daughter Masha are the writer/photographer team behind the popular blog Golubka, and they’ve managed to translate the same helpful and friendly tone and gorgeous photography that have mad their blog a success into this cookbook. The Vibrant Table will inspire you for every meal of the day, with as many healthy breakfast recipes and snacks as savory lunch and dinner ideas. Since I’m a bit of a Russophile, the dishes with a strong Russian influence hold special appeal to me, and I loved getting glimpses of Anya’s memories into summer days at their dacha, foraging for mushrooms and berries. Most of the recipes require a medium effort level: they’re not extremely simple, nor are they overly complex. There also aren’t too may “out there” ingredients (by which I mean the dairy and meat replacements and weird alternative powders that some vegetarian/vegan recipes rely so heavily on, and really turn me off as an omnivore). Instead, the focus is on whole foods and natural flavors you’ll be able to find fairly easily. True to the title, the food really is vibrant, and I love that the photography, which is light-filled and richly colored, compliments the bright and healthy feel of the food so gorgeously.

Peach and Avocado Summer Rolls {Katie at the Kitchen Door}

The Food: I cooked dinner from this book the same day it arrived in the mail – I was so inspired by it that I went out to the store just so I could make the Chickpea Crepes with Mango Salsa that night. I later adapted that recipe to have more Indian flavors and served it with grilled curried chicken (recipe here!), and I’m sure it’s one of many recipes inspired by this book that will enter my regular dinner rotation. For this post, I’m sticking to a recipe that I didn’t feel the need to adapt in the slightest – these beautiful, refreshing Peach and Avocado Summer Rolls. These summer rolls are packed with an astounding number of bright, juicy flavors. Even though they’re one of the main ingredients, the peaches feel unexpected with each bite, when gorgeous little bursts of peach juice mix with the creamy avocado and toothy rice paper. The sauce, too, is intense and delicious, with both the sourness of the tamarind and the saltiness of the soy making it mildly addictive. I will certainly be making these again – they make a filling summer dinner that’s not heavy in the slightest – but I’ll definitely need to practice my wrapping technique (i.e. please excuse the messy styling in these pictures).

Recipe Shortlist: Cacao Buckwheat Granola; Apple and Carrot Breakfast Salad; Zucchini, Chocolate, and Blueberry Pancakes; Marinated Stuffed Poblano Chiles; Golden Gazpacho; Lazy Sweet Potato Dumpling Soup; Beet and Buckwheat Gnocchi; Zucchini Spaghetti with Nectarines and Pumpkin Seed Pesto; Fresh Fig Cupcakes; Earl Grey Poached Pears with Hazelnut Panna Cotta

Like what you just read? Subscribe to Katie at the Kitchen Door on Feedly or Bloglovin‘, or follow along on Facebook, Twitter, Pinterest, Instagram, or Google+. Thanks for reading!

Disclaimer: I received a review copy of The Vibrant Table from Roost Books, but I was not otherwise compensated and all thought and opinions are my own.

Peach and Avocado Summer Rolls {Katie at the Kitchen Door}

Peach and Avocado Summer Rolls

Recipe from The Vibrant Table. Makes 15 rolls.

  • 4 TBS smooth almond butter
  • 2 TBS tamarind paste
  • 1 TBS maple syrup
  • 1 TBS grated fresh ginger
  • 1 tsp soy sauce [Note: I used 3 TBS to get the sauce to a good consistency, and the flavor was still good]
  • 2 medium ripe avocados, peeled, pitted, and sliced
  • 1 lime
  • 3/4 c. pistachio nuts, chopped
  • 1 TBS plus 1 tsp hazelnut oil
  • sea salt
  • 3-4 oz. baby spinach
  • 15 rice paper wrappers
  • 3 medium peaches, pitted and thinly sliced
  • 1 c. mixed fresh basil and mint leaves
  1. To make the sauce, whisk together the almond butter, tamarind paste, maple syrup, ginger, and soy sauce until smooth. You may need to increase the amount of soy to get a thinner sauce if using very thick almond butter. Taste, and adjust balance if necessary.
  2. Place the avocado slices in a shallow dish and squeeze the lime juice over them. In a small bowl, mix the pistachios with 1 tsp of the hazelnut oil and a pinch of sea salt (only if using unsalted pistachios) and set aside. In a large bowl, combine the spinach leaves with the remaining 1 TBS of hazelnut oil and toss gently with your hands to coat the spinach.
  3. Fill a large flat dish (such as a pie plate) with slightly warm water. Soak the rice paper wrappers in the warm water one at a time, submerging each wrapper evenly and soaking until soft. As you remove each wrapper from the water, fill it immediately: place 1-2 peach slices in the middle, top with 2-3 avocado slices, a handful of spinach leaves, a few basil or mint leaves, and a small spoonful of pistachios, followed by 1 more peach slice. Don’t overfill the wrapper, as it will be difficult to roll. To roll it, fold the bottoms of the wrapper up over the filling on both sides, then roll to close. Repeat until all your filling is used. Serve immediately with the dipping sauce.
The First Harvest // Garlic Scape Tempura with Goat Cheese Dip

1 June 18, 2014 Food

The First Harvest // Garlic Scape Tempura with Goat Cheese Dip

Garlic Scape Tempura with Goat Cheese Dip {Katie at the Kitchen Door}

Saturday was our first harvest, the first of many moments that I’ve been longing for since burying our seeds in tiny pop-up pots in the depths of February. The moment I daydreamed about while stabbing at still-frozen ground with my turning fork in March. The moment I finally believed might happen this year when the first tender sprouts poked their heads out of the ground at the end of April. Summer is really coming.

Garlic Scapes {Katie at the Kitchen Door}

This week’s haul was modest – a few handfuls of the sweetest green peas, a world away from the starchy peas that even the best grocery stores carry; the twisty turny garlic scapes that shot up in a matter of a few days; and 3 pounds of the most beautiful bright red strawberries, the result of two years of patience as the plants developed their roots and spread across the ground. This week we came home with a few snacks, but from here it only gets better, until it’s the end of August and we’re hauling home more tomatoes than we can even imagine eating, begging friends to take our extra cucumbers and squash, and sweating over the stove as we can jar after jar of tomato paste and pickles, trying to save it all to brighten our winter shelves.

Garlic Scape Tempura with Goat Cheese Dip {Katie at the Kitchen Door}

Garlic Scapes {Katie at the Kitchen Door{

I’m saving the strawberries for next week (hint hint), so this week we’re talking scapes. For those of you who have never seen one, they look like curly, flexible scallions that come out of the middle of garlic plants. If you let them grow, they eventually flower, but most farmers and gardeners clip them to send the energy that would otherwise be used to create flowers into creating bigger bulbs. Since the scapes themselves are edible, trimming them off seems like a win-win. The most common thing to do with them is make pesto, although pickling them, grilling them, and using them in soup come in as close seconds. Since there are already tons of recipes for those things out there, I decided to try something less common – giving the scapes a quick dip in a seltzer batter and frying them to make garlic scape tempura. Even a little bit of heat mellows out the garlicky bite in these, so don’t worry that munching on them whole will be too intense. There are two tricky parts to making tempura – one, getting the consistency of the batter just right, and two, keeping the oil at a temperature that is not so hot as to burn your tempura, but hot enough to cook it quickly and keep the coating airy. After a little trial and error, I got the hang of it, and you will too. I served these with a goat cheese and sour cream dip flecked with chives – it was intense and delicious, but it overwhelmed the delicate flavor of the tempura a little bit. Go light with the dip, or try something thinner or less salty if you’re looking to change it up.

Like what you just read? Subscribe to Katie at the Kitchen Door on Feedly or Bloglovin‘, or follow along on Facebook, Twitter, Pinterest, Instagram, or Google+. Thanks for reading!

Garlic Scape Tempura with Goat Cheese Dip {Katie at the Kitchen Door}

Garlic Scape Tempura

Serves 3-4 as an appetizer.

  • 8-10 garlic scapes
  • vegetable oil, for frying
  • 2/3 c. flour
  • 1/4 tsp baking soda
  • 2/3 c. + 2 TBS seltzer
  • sea salt, to taste
  1. Wash your scapes and cut into 3-4 inch pieces. Some people choose not to eat the flower bulb end, but if your scapes are young and tender and the bulb is small, it won’t make much difference.
  2. Pour vegetable oil into a wide heavy-bottomed pan, filling to a depth of about 1 1/2 inches. Heat over medium heat, to a temperature of 375°F.
  3. Whisk together the flour and baking soda. Immediately before you begin frying (i.e. when your oil is hot enough), whisk the seltzer into the flour until a light smooth batter forms. Dip your scapes into the batter to fully coat, then carefully place in the hot oil. Only put as many scapes as can fit with plenty of room between them in each batch – you don’t want to crowd them. Fry for 1-2 minutes, until just beginning to color, then remove from the oil with a skimmer and let drain on a paper towel. Immediately shake sea salt over the hot tempura. Repeat until you have used all the scapes. Serve immediately.

Goat Cheese and Sour Cream Dip

Makes about 1/2 cup.

  • 2 oz. goat cheese
  • 1/4 c. sour cream
  • 1/4 tsp black pepper
  • 1/2 tsp minced fresh chives
  • salt, to taste
  1. Put the goat cheese in a medium bowl and beat with a fork until mostly smooth. Add the sour cream and mix together until evenly combined. Stir in the black pepper and chives. Taste, and season to your liking.
  • « Previous Page
  • Page 1
  • …
  • Page 17
  • Page 18
  • Page 19
  • Page 20
  • Page 21
  • …
  • Page 57
  • Next Page »

Primary Sidebar

Subscribe!

Get creative recipes and menu ideas delivered straight to your inbox.

Most Popular

A House // Sweet Potato and Coconut Milk Soup with Brown Rice and Lentils

Monthly Fitness Goals: July // Homemade Spinach Wraps with Chopped Greek Salad

A New Job // Classic Seven-Layer Bars

Butternut Squash Carbonara with Fried Sage and Caramelized Onions

Happy Birthday, Trevor! // Peanut Butter Fudge

Cookbook Review and Giveaway: Home Made Winter

Drizly

Please note!

Full disclosure: if you purchase anything at Amazon using the above links or any other links to Amazon on this site, I will receive a small commission. Just so you know!

Copyright© 2018 · Cookd Pro Theme by Shay Bocks

This site uses cookies: Find out more.