• Skip to primary navigation
  • Skip to main content
  • Skip to primary sidebar
  • Home
  • Recipes
  • Features
    • Cookbook Reviews
    • Ingredient of the Week
    • Sunday Dinner
    • Fitness Goals
  • Travel
  • About
    • Privacy Policy
    • Cookie Policy
  • Work With Me

Katie at the Kitchen Door

Globally-inspired, seasonal recipes

Blog Page

0 April 22, 2010 Recipe

Overdue Granola

I have a confession to make.  I made and photographed this granola on April 8th.  Yes, that was two full weeks ago.  Yes, there is still some granola in my cupboard (and  yes I plan on eating it because I am a college student and college students don’t believe in food going bad).  I even had this whole post planned about my mom, and how she makes this incredible granola that my dad thinks she should sell, and how she just came to visit me and we had a fabulous time hiking in Western North Carolina… but then what happened was I got too busy actually doing the hiking in Western North Carolina (and the sitting in our private hot tub afterward).  And then I got home and had five major engineering assignments to complete in as many days.  And then suddenly Trevor was here and we were celebrating my 21st birthday with a pitcher of sangria in the Duke Gardens and although we did make some delicious things – french toast with cinnamon syrup, farfalle salad with pesto and kalamata olives, lemon squares, and, uh, duh, sangria – I was not about to spend that precious three days attempting to get the lighting on those lemon squares perfect.  And then finally I sat down last night to write about the stupid granola and I was suddenly overwhelmingly excited about falafel.  Life.  It happens.

But now you know all of the things I was going to say!  To recap: mom is awesome, hiking is awesome, birthdays are awesome, Trevor is awesome, granola is awesome.  Everything else you need to know is in the recipe below.  Oh, and even if you don’t make this granola, make your own granola.  It’s about 8 billion times better than anything you can get at the store.  Even than what you can get in the grain bins at Wholefoods.  Promise.

Granola

  • 2 c. oats
  • 1/2 c. sweetened, flaked coconut
  • 1 c. nuts (chopped if desired)
  • short 1/2 c. canola oil
  • full 1/2 c. honey
  • 1 c. dried fruit
  1. Preheat the oven to 300°F
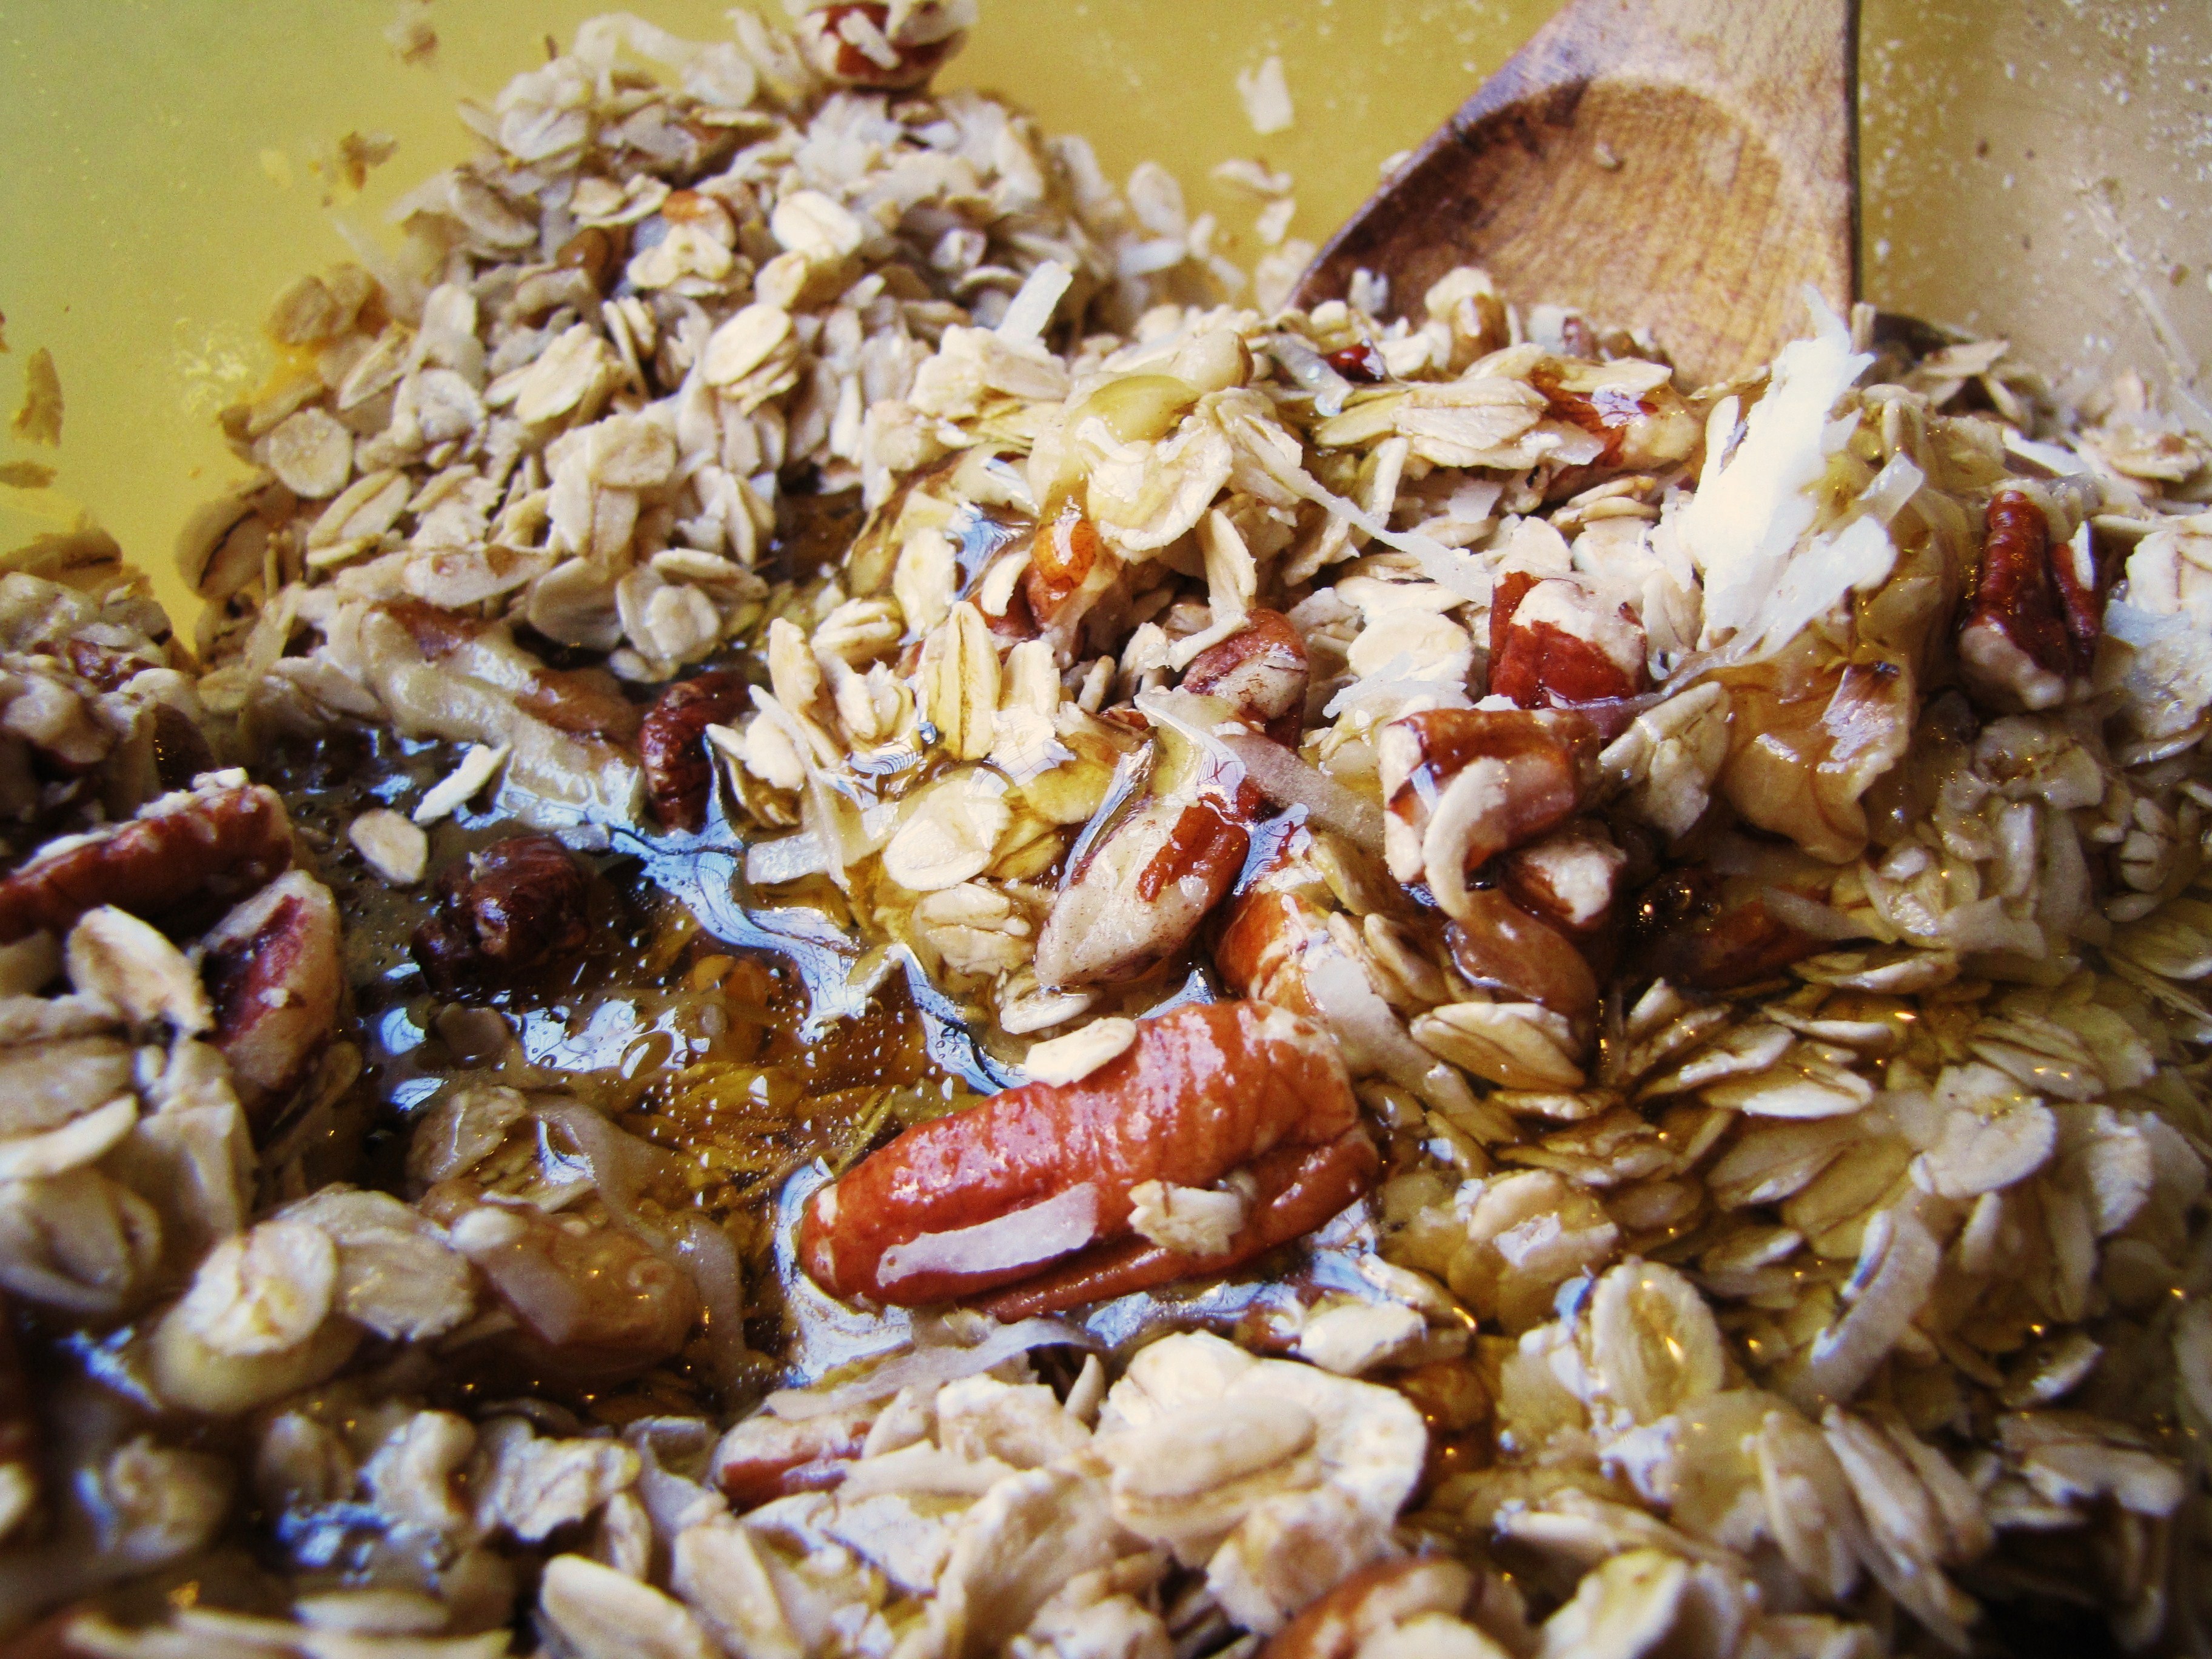
  2. Mix together oats, coconut, and nuts in a large bowl.  Measure oil and stir in.  Measure honey in same cup (makes the honey slide out more easily) and stir in until evenly coated.  The more honey you use, the bigger your granola clumps will be.  You should use slightly more honey than oil.
  3. Spread granola evenly on a baking sheet with sides.  Bake for 12 minutes, remove from oven, and stir to keep from burning.  Return to oven and continue baking for 12 minutes.
  4. Remove from oven, and put back in bowl.  Stir in dried fruit and let cool.  Store in ziploc baggies.

*I almost always use dried cherries as my fruit and walnuts and pecans as my nuts, but you can use anything.  I’m really of the opinion that the cherries are essential though.

0 April 21, 2010 Middle-Eastern

One Word Wonders

I realized that one of the things that is so appealing to me about Middle Eastern and Greek foods is the names.  Tabbouleh.  Falafel.  Mujadarrah. Melomakarona.  Tzatziki.  Baklava.  They’re just these great, exotic words that roll deliciously around your mouth.  And, where many contemporary American recipes read something like Mini-Rack of Lamb with Nutty Beluga Lentils and Sauteed Garlic Spinach or Frisee and Endive Salad with Warm Brussel Sprouts and Toasted Pecans, these exotic sounding words are just that – words.  One single word that conjures up a complete flavor profile and emotion all at once, rather than the “sum of parts” tactic that the long, ingredient-listing naming convention employs.  I like that conciseness.  I like hearing “baklava” and getting this complete association something along the lines of “honey flaky nutty crunchy yum pastry sunny sticky.”  Not that the long names aren’t useful – you can build up the flavors and textures and even temperatures listed in your mind until you’ve reached your idea of the final product, and in some ways it allows more room for imagination.  But I think overall I’m really more partial to the use of a single, perfect word.

Falafel is a word that has many associations for me.  I hear it and I see tiny window counters with brightly colored signs popping out of ancient cobbled walls.  I feel a warm paper wrapper in my hands, heavy with food.  I hear the crunch of lettuce and fried batter with a background of fast, loud interjections in a musical language that I don’t understand.  And most importantly I taste warm, crispy chickpeas and bright, tangy tzatziki and crunchy, pickled turnips and soft, floury pita.  Oh yum.  Street falafel.

Although I no longer live in a world where street falafel is available, thankfully falafel is very easy to make.  If someone who has only been cooking for about a year can have staples, falafel is one of my staples.  I.e.  I’ve made it 3 times in the last 3 months: once for a dinner with Justin (that time I went all out and made Deb’s homemade pita which was SO good, if a bit labor intensive), once with Trevor for his dad and step-mother (for a dinner during which I drank one entire bottle of red wine from a juice tumbler to save it from certain death by way of the kitchen sink), and once today, when I suddenly decided that it was the only thing I could imagine eating.

I only have a few tips for getting crispy-on-the-outside-but-soft-on-the-inside falafel. One, you want there to be some chunks in the falafel dough, so process the onions, garlic, herbs, and spices very finely before adding the chickpeas.  Then you can pulse the mixture with the chickpeas just until the dough is mostly smooth with a few larger chickpeas pieces.  Two, dry all of your ingredients off to the best of your ability before processing them.  This will help the dough to stick together while it’s being fried. Three, you don’t need to fry these in 3 inches of oil to get crispy brown falafel, as the original recipe suggests.  However, do make sure that the bottom of the frying pan is substantially covered.  And four, the refrigeration step is optional.  I’ve done it both ways, and while the falafel balls do stay together better if you refrigerate them first, if you’re starving and can’t wait the final product won’t suffer much if you just plop them in the pan as soon as they’re blended.

Falafel

Adapted slightly from “The Foods of Israel Today” via epicurious

  • 2 c. cooked chickpeas (or canned chickpeas, drained)
  • 2-4 cloves garlic
  • 1/2 medium onion, quartered
  • 1/2 c. loose parsley leaves
  • 1/2 c. loose cilantro leaves
  • 1/4 tsp red pepper flakes
  • 2 tsp cumin
  • 1 – 2 tsp salt
  • 1 tsp baking powder
  • 4 – 6 TBS flower
  • vegetable oil for frying
  1. Place the onions, garlic, parsley, cilantro, red pepper flakes, cumin, and salt in a food processor.  Blend until finely minced.
  2. Add chickpeas, patted dry, to the food processor, and blend using short pulses, until the mixture is mostly smooth with some larger chickpea pieces.
  3. Turn dough out into a bowl and stir in baking powder and flour.  You have added enough flour when the dough forms a ball without sticking to your hands.  Cover dough and refrigerate for at least 1 hour.
  4. Cover bottom of large frying pan with oil and heat for 2-3 minutes over medium-high heat.  Working in batches, form small balls of dough and drop into hot oil.  Allow to fry for 3-4 minutes, then turn balls to expose fried part and continue frying.  Keep frying until you have fried most of the falafel surface.  Remove from pan and drain on paper towels.  Serve warm in a pita stuffed with lettuce, tomatoes, pickled turnips, and tzatziki.

0 April 6, 2010 Dessert

A Kosher Easter Dinner

Due to the 93° weather and the thick layer of yellow pollen covering everything, including  me on my walk to school every morning, I am not celebrating spring in quite the same way I was last weekend.  I could celebrate a thunderstorm.  I could celebrate the pool opening.  I could celebrate the discovery of running clothes with built in air-conditioning.  Spring’s not cutting it anymore though.

I did, however, have several things to celebrate recently.  Last night Duke won the NCAA Men’s Championship for the first time since 2001 and it was a great game.  (We did not, however, get school off, as had been cruelly rumored.)  And, of course, Easter.  That’s a big one.  It always makes me a little sad not being with my family on Easter weekend, so I decided to have a little dinner party for all my friends who didn’t have plans.  Tuns out 75% of them were Jewish.  :-)

It wasn’t really on purpose, but the entire meal ended up being Kosher.  Which I found a little but funny.  But it was really, really a delicious meal.  See, when you can’t use flour, you end up using a lot more butter, cream, eggs, and cheese (although I guess you could go the other way and use a lot more vegetables … oh well).  And regardless of your cooking ability, butter, cream, eggs, and cheese make pretty much everything taste good.  The amount of leftovers of all this delicious dairy-full food that we have (had) is either great news or really bad news.  Withholding the verdict.

So, what did we eat?  Fruit salad with the most perfectly ripe nectarines, an egg casserole full of feta cheese, sun-dried tomatoes, and basil, scalloped potatoes, an Easter staple, updated with sage and thyme, and a flourless chocolate torte, which is really the main subject of this post.

This torte, it is really good.  And it is really bad for you.  But one slice (and you can easily get 16 slices out of one torte) satisfies my deepest chocolate cravings, voiding the need for me to continually reach my hand into the chocolate chip bag that I keep open just inside the cabinet for some unknown, slightly sadistic reason.  I’ve made it several times and it comes out well no matter what mistakes I make while making it.  This time, my largest round pan was a little too small and it took about 15 minutes longer to bake than it usually does.  Not a problem, right?  Generally, unless you put the cake in exactly 42 minutes before you had to leave for church on Easter Sunday and you’re forced to choose between an underdone cake and being 20 minutes late to Mass.  I chose the cake; I’m offering a piece up to God in apology

I’ve adapted the cake recipe very slightly from Bon Appetit, and pretty much make up the glaze as I go depending on how much time I have.  The first time I went all out and made the coulis ahead of time and then did the glaze the next day and it was way more effort than it was worth.  Especially since the coulis recipe made about 3 cups and then the glaze only called for 2 tablespoons.  So now I just throw some frozen fruit, chocolate chips, sugar, and a pat of butter in a pan, mash the fruit and chocolate together, and dump it on the cake.  Unceremonious, perhaps, but it tastes great.

Two serving suggestions: it’s the best straight out of the fridge and a dollop of whipped cream really pulls all the flavors together.  So enjoy!  And next time I’ll try and write about something that’s not dessert.

Dark Chocolate Torte with Raspberry Glaze

Adapted from Bon Appetit, April 2006

For the cake:

  • 1 2/3 c. semisweet chocolate chips
  • 3/4 c. salted butter
  • 1/4 c. cocoa powder
  • 1 tsp. cinnamon OR instant espresso powder
  • 5 large eggs
  • 1 c. sugar
  1. Preheat oven to 350°F.  Line 9 inch round pan, preferably a springform, with parchment paper (the paper is essential for presentation if not using a springform pan.  If presentation doesn’t matter, just butter and flour the pan and leave the torte in there to serve).
  2. Melt chocolate chips and butter in a medium saucepan over medium heat, stirring regularly, until smooth.  Whisk in cocoa, remove from heat, and let cool for10 minutes.
  3. Using an electric mixer, beat eggs and sugar together on medium speed until thick, 4-6 minutes.  Fold cooled chocolate into egg and sugar mixture, blending well.
  4. Pour batter into prepared pan, and bake until dry and beginning to crack on top, about 40-50 minutes.  Toothpick test should come out with some moist crumbs, but not wet.
  5. Let torte cool in pan for about an hour, then invert onto serving plate (removing sides first if using a springform pan).  Let cool completely.

For glaze:

  • 1 c. frozen raspberries or other frozen berries
  • 3 T sugar
  • 2 T water
  • 3/4 c. chocolate chips
  • 2 T butter
  1. Stir fruit, sugar, and water in saucepan over medium heat, until syrupy, mashing berries with spoon.  Add chocolate and butter, and stir just until smooth.  Remove from heat.
  2. Allow glaze to cool 10 minutes, than pour over top of cake.  Spread on top and push over sides.  Put cake in fridge until glaze is set, about 30 minutes.  Serve cold, with whipped cream.

0 March 27, 2010 Dessert

Celebrating with Lemons

Color has returned to the world!  And with it comes the promise of never-ending sunshine, bare feet in wet grass, pitchers of ice-cold lemonade, road trips with the windows down, drippy ice cream cones, gauzy sundresses, fresh cherries in a bowl on the counter, and all the other beautiful gifts of summer.  Since the above list contains some of my favorite things in the world, I have decided that a small celebration involving me, my kitchen, and lemons is in order.

I spent Monday night browsing Tartelette and La Tartine Gourmande fantasizing about what sort of beautifully and elegant spring dessert I wanted to make the next weekend and drooling over their beautiful pictures of their summers at childhood homes in Southern France.  One day I will have been born in Southern France and spend my summers at my ancestral home making tarts from the fresh currants in my garden and sipping cassis at my ancient stone table while looking out over the fields of lavender from underneath an olive tree… until then I will read and re-read Peter Mayle’s A Year in Provence and watch Russell Crowe do what, rightfully, I should be doing in A Good Year.   (Actually I highly recommend both the novel and the film – they are literary/cinemographic floo powder to France.)  I toyed with the idea of an elegant version of strawberry shortcake, because strawberries are on sale everywhere right now, or perhaps a trifle-like dish with strawberry and raspberry mouses between layers of almond flavored angel food cake, or maybe a blackberry and mascarpone tart…  And then Tuesday morning, it hit me – all I’d ever wanted was lemon cupcakes with a tart lemon frosting and little bits of candied lemon peel.  Love at first thought.  Maybe this was my brain’s way of saving me from disappointment – whipping cream by hand – as I would have needed to for almost any light and fluffy dessert I was craving – is something I just do not have the patience for.  I tried it, once, in Prague, and after 20 minutes of whisking I had three quarters of a cup of droopy whipped cream and a very sore forearm.  I folded some chocolate into it and it was still delicious, but believe me, I did not share that mousse-like creation with anyone.  (“Who will help me eat this chocolate mousse?” said the Little Red Hen…)

So lemon cupcakes!  The decision was made.  Spring would be celebrated with little tart mouthfuls of lemony goodness.  And now the search for a recipe was on.  Did I want fluffy cupcakes or pound cake-esque cupcakes?  A buttercream or something lighter?  A lemon curd filling, or no?  Did you know there were so many things to think about when making cupcakes?  Yeah, me neither.  I decided fairly quickly that I wanted to try the cream cheese frosting, just because I always feel slightly sick when eating a buttercream that I made myself – if I don’t actually see the three sticks of butter go into the mixer, I’m fine, but if I put them there myself there’s no escaping them.  And cream cheese is slightly better than butter, right?  Right?  I’m going with it.  And in sort of the same vein of thinking, I decided on the angel food cake version, mostly because I’d really like my shorts to continue to fit (start fitting again?) and because fluffy light lemon cupcakes just sound divine.

I have to admit one thing though.  I bought a hand mixer.  Yes, after that little “whipped desserts are too hard I’m making cupcakes!” tangent, I just bought one anyway.  It was $9.99.  The price was right.  I could whip anything now.  But I’m still making cupcakes.  Albeit with the mixer.  Whatever!

A few notes: the frosting came out exactly exactly how I wanted it, with the perfect balance of lemony tang and sweetness, but it was pretty runny.  I wasn’t willing to sacrifice flavor for consistency, so I let my cupcakes be a bit drippy, but I’d recommend sticking the frosting in the fridge for around an hour before using it.  Also, there was enough frosting to frost about 30 cupcakes (I only made 12)… so be aware of that I suppose.  Not that there’s any harm in leftover frosting.  The cake recipe was good – the consistency was just right – but there was hardly any lemon flavor in the cupcakes, even though I added extra lemon juice and zest.  Next time I might try adding the juice of an entire lemon, but I’m not sure what it would do to the batter consistency.

All that being said … cupcakes!

Lemon Angel Food Cupcakes

For the candied lemon peel:

  • 1 lemon
  • 1/3 c. sugar
  • 1/3 c. water
  • granulated sugar
  1. Thoroughly wash the lemon.  Using a vegetable peeler, carefully peel strips of the lemon zest off of the lemon.  Avoid getting any of the white part (the pith) with your peel strips as it has a very bitter flavor and may ruin the final product.
  2. In a small saucepan, make the simple syrup: bring the water and sugar to a gentle simmer.  Add the lemon peel and simmer, stirring constantly, until peel is shiny and translucent, about 5 minutes.  Remove the peel from the syrup and place on wax paper.  Let cool slightly, then roll in granulated sugar.

Great demo here.

For the cupcakes: (adapted very slightly from Baking Bites.)

(Makes 12 cupcakes)

  • 5 large egg whites
  • 3/4 c. sugar, divided
  • 1/2 c. cake flour
  • pinch cream of tartar
  • pinch of salt
  • 1 tsp vanilla
  • zest of 1 lemon
  • juice of 1/2 lemon (about 3 tsp)
  1. Preheat oven to 350°F.  Line muffin tin with 12 baking cups.
  2. Separate eggs while cold, placing egg whites, completely yolk free, in large mixing bowl.  Allow to come to room temperature.
  3. Meanwhile, sift together 1/4 c. sugar and 1/2 c. cake flour.
  4. Beat room temperature egg whites on high until they become foamy.  Add cream of tartar and salt and continue to beat on high.  While beating, gradually add remaining half cup of sugar to the whites.  Beat until soft peaks form.
  5. Mix vanilla, lemon zest, and lemon juice into whites.
  6. In 2 or 3 batches, gently fold flour/sugar mixture into whites, mixing just to combine.
  7. Spoon batter into cups.  Cups should be full.  Bake cupcakes for 16-18 minutes.  When they are done, tops will be golden brown and cupcakes will be slightly springy to the touch.

For the frosting:

  • 1 8 oz. package of cream cheese, room temperature
  • 1 1/3 c. powdered sugar
  • juice of 1 lemon

Beat cream cheese on medium until soft.  Gradually add powdered sugar and lemon juice while continuing to beat.  Frosting will be creamy and slightly runny when done.  (For stiffer frosting, increase amount of powdered sugar.)  Refrigerate before using.

*Final notes:  To make the peel, cupcakes, and frosting, you need two lemons – the zest of 1 for the peel, the zest of the other for the cupcakes, the juice of one for the frosting, and the juice of the other for the cupcakes.  Lemons without their peel will not last as long in the fridge, so if you make extra peel, be sure to use the lemons within a few days.

http://marxfood.com/how-to-candy-citrus-peel/

10 March 17, 2010 Beef

Miluju tě, Prahou.

I love you, Prague.

I miss it.  Flying seems to be the perfect breeding ground for nostalgia – remembering waking up to watch the sun rise over Paris from your tiny oval window, kissing your boyfriend goodbye for the hundredth time as the taxis whiz past, stepping down onto the tarmac and being overwhelmed by the thick, humid air of some magical tropical place.  During my flight back to Durham on Monday night that nostalgia took the form of a remembered vision of snow-covered spires receding out the window as I headed back to the States, melancholy at leaving my temporary home, but bubbling with the excitement of seeing Trevor and my family again.  It’s been exactly 3 months since I got back, and even though spring is jumping all over North Carolina, I think I’m allowed to dedicate a little space to the cold and beautiful city that was so good to me.

Most of all, I miss the trams, and I miss the details of my morning commute.  Walking briskly around the block to the tram stop, head tucked against the cold.  Waiting quietly with the other Czechs for the shiny red number 12 to pull up, then climbing in and sitting in the warm compartment, always slightly or more than slightly odorous from so many bodies.  Snaking along the river while looking out the glass and across to the city, watching the spires and the cupolas slowly shift as we moved past.  And then getting off the tram, stepping back into the brisk air, walking across the bridge each morning and looking out towards the Charles Bridge.  Every day the skyline is the same, the same as it has been for centuries, and yet it feels different and new and wonderful.  Then, suddenly, you’re in the heart of the city, trying to cross the street in the fleeting three seconds that the light is with you, avoiding trams and buses and cars and horse-drawn carriages all at once.  The smooth-walled buildings tower over the narrow, cobbled streets, busy with tourists headed into Old Town Square, but if you enter the grocery store just before the square you’ll find yourself in line with 20 other Czechs, picking up their fresh spinach pastries.  A few more blocks, warm, flaky pastry in hand, and you’re in Malé Nàměstí , stepping into the centuries old building where you go to school.  I’m not sure how anything as simple as going to school could be more exhilarating.

I miss so many other things too.  Running for hours in the nearly empty park.  Riding to the end of the tram line and finding myself in a different world, one full of pine forests and rock towers.  Walking home from the grocery store in the afternoon, thrilled about some new food word I’d learned.  The weight of crowns in my hands.  The way the butcher on the corner across from my apartment smelled.  Having friends sit around our kitchen table every night just to talk and laugh.  Stopping for svařak – hot mulled wine – and candied almonds on the way home from school.  The few times my Czech exchanges were simple enough that no one knew I was American.  Five hour bus rides to forgotten corners of the country, where I could traipse through farmland and climb among sandstone towers and order meat by the platter.  Feeling like I could go anywhere by myself for almost no cost.  Going to the opera for $5.  Hot chocolate the consistency of pudding at Cafe Louvre.  The excitement of discovering something new.  Sunset over the castle.  Going out on trips just to take photographs.  Eating goulash in smoky pubs.  I could go on indeterminately…

But I’ll refrain, and leave you with the goulash, because if you’ve made it through my poetic waxing, that is what I have for you: an attempt at Czech goulash.  The kind that you find in smoky pubs.  That is served with fluffy bread dumplings and Pilsner Urquell.  That is so good on a cold afternoon.  I wanted to have it.  I’ll say up front that my attempt was really just that, and the result was not exactly what I was searching for, but is definitely a good starting point.  I cooked based on the average of several recipes, some in English, some in Czech, and didn’t measure or time, so the recipe I will share is only a good approximation.  From what I’ve read, the flavors that make Czech goulash distinctively Czech are that of marjoram and coriander, so be sure to include those if seeking the flavor you had in Prague.  Also, use sweet Hungarian paprika – I used a different variety and could taste the difference.  I had a bottle going sour on the counter, so I added a little red wine to my gravy, but this isn’t traditional so I’ve omitted it from the recipe here, although I did like what it added to the overall flavor.  And with all that said…

Czech Goulash

  • 1lb. beef, cubed (chuck or stew beef)
  • 1 onion, roughly chopped
  • 3 T butter
  • 2-3 T sweet Hungarian paprika
  • 1-2 tsp marjoram
  • 1-2 tsp coriander
  • 1-2 tsp black pepper
  • 2 cloves garlic, minced or 1-2 tsp garlic powder
  • 1 c. water
  • 2-3 T flour
  • salt to taste
  1. Melt butter in dutch oven over medium-high heat.  Sautee onions in butter until beginning to soften.
  2. Add beef and paprika to butter and onions, brown beef on all sides.
  3. Add marjoram, coriander, black pepper and garlic, and stir well.
  4. Add water and reduce heat to a simmer.  Cover and cook until meat is tender, 10-15 minutes.  Check meat for doneness.
  5. Uncover and allow sauce to reduce to desired amount.  Add flour 1 tablespoon at a time and stir, allowing sauce to thicken before adding more flour.  Stop adding when sauce reaches desired consistency.
  6. Season with salt.  Do this after sauce has reduced to avoid over-salting.

Goulash is usually served with bread dumplings, not potatoes, as the airy bread slices soak up the sauce very well.  Any light bread will do.  It is also sometimes served with pickled red cabbage…. two recipes I’ll be looking into!  Dobrou chut!


5 March 8, 2010 Dessert

Adventures in Austrian Pastry – Kardinal Schnitten

Just because I haven’t been writing doesn’t mean I haven’t been cooking.  I have.  I made my first ever baguettes, which came out pretty well despite the fact that I didn’t use bread flour.  I made this delicious quinoa for breakfast and thoroughly enjoyed it even though it was the cause of a full half cup of milk to burn onto my stove (cooking in the morning takes a special kind of person).  I made blueberry muffins with my new muffin tins (thank you family).  I tried a new curry recipe, I made extra saucy and spicy black beans, and I made the this very easy and yummy banana bread.  I even went health-nut (for me at least) and had stir-fried quinoa with kale and jicama.  The kitchen has not been lonely.  Nor has my stomach.  But this blog may have been, and now that midterms are over and my immune system is back on it’s feet I have returned.

I’m home for spring break, meaning a lot of good things: I can sit in the sun for hours without thinking about math, I can have picture-perfect picnics with Trevor, and I have full (when my mother’s not home) use of our beautiful kitchen… and her mixer!  Since I don’t have a mixer and whipping cream by hand drives me nuts, I decided to undertake a whipped-cream-intensive project I’ve been mulling over for a long time – Kardinal Schnitten.  Kardinal Schnitten, which is called Vatican Cake in English, is a light, coffee-flavored cream and meringue dessert that I discovered in Austria.  The first and only time I had it was over fall break on a day trip from Vienna to a small Austrian town called Melk.  Melk is the home to Melk Abbey, a beautiful Baroque compound that dominates a hillside over-looking the Danube.  Despite being followed through town by some confused middle-aged Texan women (“Do y’all speak a lil English?”), our trip was really lovely.  The three highlights?  The abbey library straight out of Beauty and the Beast, the most beautiful chapel I saw during my four months in Europe, and the Kardinal Schnitten.

Here is the story of the schnitten – After finishing our tour of the Abbey, we had about an hour to kill before our train back to Vienna was due.  So we sized up the local establishments and decided on a tiny but bustling little coffeeshop.  We sat at a table in the warmly lit back-room, sipping Viennese coffee and snacking on pastries while we unabashedly observed the long table full of old Austrian ladies gossiping and noshing.  It was the perfect European coffeeshop experience, one we had been looking for but had been unable to find in any of the big cities.  And the schnitten?  Delicious.

The delicate flavor of that cake was not one that left my mind quickly, but finding a recipe for it proved to be difficult.  None of the German cookbooks in my local library featured it, and Google only returned one English-language result.  So I took that and the adventure started.  First, I went about converting the measurements, which were in grams, to cups.  Then, I attempted to decipher the cryptic, translated instructions.  Standing by the counter with my dozen eggs and pint of whipped cream, I was excited, but skeptical.

The process was a bit bumpy, but as I baked, I learned all sorts of things about egg whites and meringues and cream.  For example, even the tiniest bit of yolk really will keep all your whites from stiffening.  Faced with a batch of droopy meringue batter I had to decide whether or not to start over – I ended up deciding to keep going because I couldn’t bear to waste so any eggs, and the meringues were still OK.  The end result was not exactly photogenic, but it was good, and fairly close to what I remembered loving in Melk.  With a little tweaking for better presentation, it would make an elegant and unexpected dessert at any party.

Kardinal Schnitten

Adapted from the Wiener Zucker Website

  • 7 eggs
  • 1 1/4 c. granulated sugar
  • 1/2 c. powdered sugar
  • 1/2 c. flour
  • 2 c. whipping cream
  • 2 TBS instant coffee powder
  • 2 tsp vanilla extract

What I Did This Time:

  1. Preheat oven to 340°F.
  2. Separate 5 of the 7 eggs.  Whip 5 egg whites until they begin to stiffen.  Gradually add granulated sugar to whites.  Continue to whip until stiff.  Spoon into 8 strips on baking sheet and bake 23 minutes. (These are the meringues.)
  3. To the 5 egg yolks, add 2 whole eggs, a full half cup of powdered sugar, and a scant half cup of flour.  Whisk until foamy.  Pour into greased 9×13 pan and bake 25 minutes.  Let cool slightly and cut into strips. (This is the cake.)
  4. Whip cream with instant coffee and vanilla until very stable, with the consistency of clotted cream.
  5. Realize your meringues are sort of disastrous when the top layer completely crumbles off.  Decide that individual pastry squares are not in your future.  Rethink.
  6. Place cake strips on a platter.  Top with most of whipped cream.  Crumble meringue bits on top of whipped cream.  Place intact meringue insides on top of whipped cream.  Repeat whipped cream and meringue layers.

Thoughts about next time:

  • Whip cream with Kahlua or Bailey’s instead of instant coffee for a stronger flavor.
  • Double the cake part in order to have two complete cake-cream-meringue layers.
  • Tinker with the meringue size and baking time so they remain intact.

0 February 22, 2010 Recipe

Red and Roasted

It’s a wine at 4:30 sort of day.  Nothing really bad happened, but I just can’t seem to get today right.  I forgot my umbrella and had to walk home in the rain without it.  I tried to heat up some leftover gnocchi for lunch but accidentally put uncooked gnocchi in the sauce which resulted in cheesy dough.  Duh.  I dropped a pile of sage on the floor along with pretty much every kitchen utensil I used.  The vacuum cleaner actually expelled dirt instead of sucking it up.  You know, that kind of thing.  I need to snuggle.  But since snuggling is not an option until next Friday when I get to go home again (for eleven whole days!) I will go with the next best thing – soup and my king-sized fleece blanket and maybe a movie.  And another glass of wine?  Wow, I’m really living it up for a Monday.

I think I eat too much soup.  Yesterday I had 3 bowls of kale soup in between the hours of 5 and 9.  It was just one continual dinner.  And I still have half a batch of vegetarian chili in the freezer yet I’m making another tomato based soup tonight.  It’s just that soup is so great.  It’s quick.  It has a tremendous range of flavor.  It’s the best way to get vegetables.  It’s warm.  It’s comforting.  And you can slurp it.

Tonight’s soup is roasted red pepper and (roasted) tomato.  The only other ingredients are garlic (also roasted), onion (yep, roasted), and vegetable broth.  Plus a little kosher salt and oil but I’m not sure those really count as ingredients.  The last time I made this was over Christmas vacation, when I spent 5 blissfully peaceful days in Maine with my family and Trevor.  Trevor and I got the green light to plan a meal, which is always super fun but also undoubtedly a production, and this was our first course.  I’m not really a tomato person, so I was surprised that I liked this so much – enough to eat the leftovers within 24 hours.  It was inspired by 101 Cookbooks, one of my absolute favorite food blogs, but I seriously adjusted the ratios to get more sweet red pepper flavor.

Making this soup is easy – just roast and blend.  If the veggies by themselves are too mild for you, a little kosher salt goes a long way towards punching up the flavor of the soup, but that’s really all it needs.  Mmm, veggie goodness.  Okay I lied, I also put a little gorgonzola on top but it doesn’t really need it, I’m just kind of a cheese addict.  And the final perk of this soup – spending a few hours roasting vegetables can really improve a Monday.

Roasted Red Pepper and Tomato Soup

  • 3 red peppers, whole
  • 3 tomatoes, quartered
  • 5-10 cloves garlic
  • 2 medium onions, quartered
  • 1-2 c. stock (vegetable or chicken)
  • olive oil
  • kosher salt
  • paprika and gorgonzola for garnish
  1. Roast peppers – Place clean peppers whole on baking tray under broiler (on high).  Keep a close eye on them, turning them frequently with tongs.  They are done when the skins are blackened all around the pepper.  Remove from oven and place immediately in an airtight container – a covered bowl or plastic bag – for 15 minutes to allow steam to loosen skins.  When cool, peel skins from peppers.  Then, cut off stems and remove seeds.  Cut peppers in half and drizzle with oil.
  2. Preheat oven to 375°F.  Place quartered onions and tomatoes in pan.  Drizzle with oil and sprinkle with kosher salt.  Roast for 45-55 minutes.  Tomatoes should be on the verge of falling apart.  Onions should be starting to caramelize – turn them halfway through to prevent burning.
  3. Once tomatoes are in oven, place garlic cloves, unpeeled, in tinfoil.  Drizzle with a small amount of oil and close foil over top.  Place on oven rack next to roasting pan and roast for approximately 30 minutes.  Cloves should be soft inside peels.
  4. When all the veggies are ready, blend them together in batches with a small amount of stock.  Place blended ingredients in saucepan over medium heat and add stock, salt, and paprika until the consistency and flavor are as desired.  Garnish each bowl with gorgonzola and paprika.

0 February 20, 2010 Pasta

Sweet Potato Gnocchi

I had a friend in Prague named Violeta.  Violeta is Argentinean.  Violeta’s mother is a caterer.  Violeta’s brother is a chef.  Violeta is the best cook I have ever met.  She is just one of those people with an intuition for food – no recipes and everything always turns out better than I thought food could taste.  Living down the hall from her?  Major perk.  That room always smelled great, and if you went by around dinnertime looking for an extra egg or a homework assignment you could usually steal a bite of whatever she had made.

My first experience with homemade gnocchi was through Violeta.  She decided to host a dinner party in our dorm, Osadni.  The menu was homemade gnocchi with either meat sauce or vegetable sauce.  The size of the guest list was eighty.  EIGHTY.  Homemade gnocchi for eighty people??  Major undertaking.  But she pulled it off and of course everything was delicious and after eating our resident band The Relatives played a very intimate concert in one of the piano rooms and Prauge is just a magical place.

Sweet potatoes also have a special Prague story.  It’s very short: you can’t get them.  There are a lot of foods that are still very hard to find in Prague, even if you can find them in Germany, Austria, Hungary, and Poland.  The Czech Republic is still a bit more closed than it’s neighbors.  At first this was a major source of frustration for me, but it ended up forcing me to explore the city in search of things like cranberries and cilantro.  And sweet potatoes.  Which I never found.  But my neighbor Steph did.  As Thanksgiving approached everyone got a little bit anxious about how Thanksgiving would be so far away from home (it was great – Violeta cooked) and people began to scramble to put together their favorite dishes, which is why Steph went to the TESCO hypermarket and bought their entire supply of sweet potatoes.  Which I think was about six.  They were delicious, and oh so American.

These sweet potato gnocchi are not specifically something I ate in Prague, but they definitely remind me of it a bit, which makes any food better.  At least for me.  But for everyone who is not me, these were also easy and fun and very tasty.  Gnocchi have a reputation for being difficult to get right, but these came together very well on the first try.  Of course, that could be because they’re not traditional potato gnocchi.  Or it could just be because I’m awesome.  But it’s most likely because it’s a very good basic recipe.

Here’s the gist of the recipe, originally from Bon Appetit: cook 2 or 3 sweet potatoes in the microwave and let them cool.  I was impatient and tried to scrape them out hot, which resulted in pain (I would say minor burns but I would be exagerrating too much).  If you’re really in a hurry, wrap the bottom of the potato in a towel to protect yourself.  Scrape all of the insides of the potatoes out and mash with a fork.  Don’t worry too much about chunks of potato that won’t mash – as long as they’re not too big they won’t affect the final consistency of the gnocchi.  Mix ricotta and grated parmesean into the sweet potato mash, followed by brown sugar and salt.  Stir, stir, stir.

Once you have an even mixture, begin incorporating flour by the half cup.  I used 2 1/2 cups of flour for 3 medium sized sweet potatoes, and probably ended up incorporating another cup during the rolling process so that I had a workable dough.  I was worried that my dough would be too flour-y, but it turned out fine.  Divide the dough into six equal pieces and roll them into worms about an inch thick.  I had so much fun doing this – it was like being in elementary school art class.  I almost made a coil pot out of one worm but I refrained.  Don’t play with your food, unless it’s in the recipe instructions.  Cut your worms into 20 or so equal sized pieces.  They look like little pillows, and they have a great fluffy texture too.  If you’re feeling fancy, gently press a fork onto the top of each pillow for that true gnocchi look.  And once you’ve done that – boil them!  The recipe says to cook them in batches and then leave them out on the counter until you’re ready to re-heat them in whatever sauce you are going to serve them in, so that’s what I did.  I was wondering though if you could refrigerate the dough for 24 hours or so and cook them the next day, or if it would be better to cook them and then refrigerate them.  Thoughts?  The only problem I had with leaving them out on the counter already cooked was that every time I walked by I popped one into my mouth, so I had about 20% less at dinner time then I did at 4PM.  Oh well.

I served these in a sage-gorgonzola sauce adapted from Gretchen’s Cookbook.  It was delicious!  Margie (my roommate from Prague, just so many connections) came over and Megan was home and the three of us ate 2/3 of this recipe.  The other 1/3 was in the freezer so we couldn’t eat that.  I would say that this recipe makes 5 dinner sized servings, but people who eat less than me (i.e. regular amounts) might get 6 or 7 servings out of it, especially if you skipped the 20% reduction on the counter. =D

Sweet Potato Gnocchi in Sage-Gorgonzola Cream Sauce

makes 5-6 large servings

For the gnocchi:

  • 2 lbs. sweet potatoes
  • 12 oz. ricotta cheese, drained for 2 hours
  • 1 c. parmesan cheese, grated
  • 2 tsp. salt
  • 2 T brown sugar
  • 1/2 tsp nutmeg
  • 2 1/2 c. flour, plus more for rolling

For the sauce:

  • 3 T butter
  • 10-20 leaves sage
  • 1 clove garlic, peeled
  • 1 c. heavy cream
  • 1/2 c. crumbled gorgonzola
  • black pepper

Sweet Potato Gnocchi

  1. Wash the sweet potatoes and poke all over with a fork.  Microwave on high until tender, about 7 minutes per side.  Cut in half and allow to cool.
  2. Scrape the potato out of the skin into a large bowl.  Mash with fork.  Add ricotta cheese and stir until well-blended.  Add parmesan cheese, brown sugar, salt, and nutmeg, and stir until mixture is even.
  3. Add the flour a half cup at a time, incorporating slowly, until a soft dough is formed.  Turn the dough out onto a well-floured counter.
  4. Divide the dough into 6 equal portions.  Roll each portion between your palms and the floured surface until it is a log with thickness of about 1 inch.  Cut each log into 20 pieces.  Gently press the tines of a fork into the tops of pieces.  Place pieces on a floured pan to prevent sticking.
  5. Bring a large pot of water to a boil.  Once boiling, add about 2 T of salt, and return to boil.  Boil the gnocchi in batches until tender – they are done cooking when they float to the surface of the pot.  Re-salt between batches.  Return cooked gnocchi to a clean, lightly oiled pan, and allow to stand at room temperature for up to 4 hours.

Sage-Gorgonzola Cream Sauce

  1. Melt butter in a large skillet over low heat.  Add sage leaves and garlic clove and allow to stand 2 to 3 minutes.
  2. Add cream, gorgonzola, and black pepper to taste, and stir until cheese is melted.
  3. Add gnocchi to skillet and coat with sauce, cooking until heated through.

1 February 19, 2010 Recipe

This stuff is good for you.

Kale.  It’s a superfood.  Superfoods are all the rage – they can make you thin in like, minutes, I think.  At least that’s what SELF.com promised me.  But even if it doesn’t, it’s OK, because I actually like kale, at least when served in a bowl with tomatoey broth and potato chunks and sausage, a concoction generally known as kale soup.

My family first had kale soup at a restaurant in Provincetown, MA, after our kind-of-annual whale watch.  I don’t actually remember this meal beyond a sort of hazy image of the restaurant-front and the dock and that it was definitely a gray day, and I definitely didn’t eat the original kale soup because at the age of 7 my diet consisted of exactly three foods – pasta, potatoes, and chicken fingers.  I’m so glad that’s changed.  But my mother was impressed, snagged the recipe, which is Portuguese in origin, and the soup was officially introduced into the family repertoire.  Now that I’m old enough to appreciate food groups besides white starch, I request this soup fairly often.  It’s got a great, hearty flavor, which is even better the next day, and is definitely qualified to be a member of the healthy meals category.  I love it when the healthy meals category includes sausage.

Kale Soup

  • 1 lb. linguica (or kielbasa), sliced
  • 1 c. ground carrots
  • 1 c. ground onion
  • 2 potatoes, diced
  • 2 cloves garlic, minced
  • 1 28 oz. can crushed tomatoes
  • 1 48 oz. can chicken broth
  • 1 T ground cumin
  • 1 bunch fresh kale, chopped, or 12 oz. box frozen kale*
  • 1 can kidney beans

This one’s easy:

Combine the first 9 ingredients in a large pot.  Bring to a boil.  Simmer for 45 minutes.  Add beans and cook until heated through.  Done.

*If you use fresh kale, you may want to up the liquid content, as the frozen kale releases more water and takes up less volume than the fresh stuff.

4 February 8, 2010 Recipe

Chicken Curry for the Slowly Dying

At exactly 9:28 last night I contracted the flu.  And I’m only exaggerating a little bit – this thing is sudden and lethal.  OK well not lethal.  But I did spend the hours between 10 and 6 sleeping today.  It is now 7 and I’m ready for bed.  Fortunately, that seems to be the only thing this flu requires – that all of your waking hours be spent asleep.  There’s no horribly upset stomach or maddeningly sore throat or anything.  Unfortunately, I am not psychic and so ate all of the leftovers in the house yesterday before 9:28.  Except for the raspberry coffeecake which seems to be disappearing imperceptibly on my counter but I don’t think that has the appropriate nutritional value for the seriously ill.

I also did not have the foresight to buy things like canned soup, jello, and gatorade, which mothers seem to produce magically upon the first signs of flu.  And the grocery store is dauntingly far away from my bed.  I did, however, happen to have chicken and chickpeas in my freezer, coconut milk, canned tomatoes, and lots of root vegetables in my fridge.  This prompted me to decide that chicken curry is the perfect dish for someone sick and without a mother in the same state for the following reasons: it takes 20 minutes to put together, which is exactly the amount of energy I have, it involves one pan, which is only one more pan than I want to wash (maybe my roommate will do it…), the heat is good for clearing your head, and you can load it up with potatoes, tomatoes, carrots, and other vitamin C rich veggies that might be lying around your vegetable bin.  Also, on the off chance that I make it to class tomorrow, this totally solves the problem of lunch.

I originally found this recipe on AllRecipes but have ended up adding twice as many ingredients as are in the original recipe, and taking out half the things that were in the original recipe.  So I don’t really think it’s the same recipe anymore.  It’s also not authentic in the slightest, nor does it have particularly complex flavors, but it is easy, cheap, and delicious.

Coconut Chicken Curry

(makes 4 dinner sized servings)

  • 2-3 boneless skinless chicken breasts, cubed
  • 2 T olive oil
  • 1/2 medium onion, diced
  • 2-3 T curry powder
  • 2 cloves garlic, diced
  • 1 can (14 oz.) diced tomatoes
  • 1 can coconut milk
  • 2 carrots, thinly sliced
  • 1 yukon gold potato, diced
  • 1 c chickpeas, canned or pre-cooked
  • 3 T sugar (optional)
  • salt, pepper to taste
  1. Heat the oil in a large skillet or dutch oven over medium heat.  Add curry powder and sautee 1 to 2 minutes.  Then add onions, and sautee 3-5 minutes, until beginning to soften.
  2. Add chicken strips and garlic to curry-onion mixture and cook for 5-8 minutes, until chicken is just cooked through (it will continue cooking in the tomato and coconut juices; overcooking at this stage will make it very tough).
  3. Add coconut milk (don’t forget to shake before opening!), tomatoes, carrots, potatoes, and chickpeas.  Simmer, covered, until potatoes and carrots are cooked through, about 30 minutes, stirring occasionally to prevent bottom from burning.  Season with salt, pepper, and sugar if desired.  Serve over rice.

*Some notes:

  1. I hate chopping garlic because it makes your hand smell for days.  Literally.  So I almost always use crushed or minced garlic and plop 1 teaspoon of it into whatever I’m cooking for each clove of garlic called for.  Feel free to do this.
  2. This is just a story about Corelle dishware.  So the second half of my onion was sitting quietly in one of my new Corelle bowls, when it inexplicably jumped off the counter.  Eyes squeezed shut in anticipation of shattered dish everywhere (exactly what you do not want when 19 of your 20 minutes of energy have already been used), I waited for the sound of cracking.  But there was none.  Opening my eyes, I saw onion pieces all over the floor, but the dish was not so much as chipped.  Kudos, Corelle.
  • « Go to Previous Page
  • Go to page 1
  • Interim pages omitted …
  • Go to page 54
  • Go to page 55
  • Go to page 56
  • Go to page 57
  • Go to Next Page »

Primary Sidebar

Subscribe!

Get creative recipes and menu ideas delivered straight to your inbox.

Most Popular

A House // Sweet Potato and Coconut Milk Soup with Brown Rice and Lentils

Monthly Fitness Goals: July // Homemade Spinach Wraps with Chopped Greek Salad

A New Job // Classic Seven-Layer Bars

Butternut Squash Carbonara with Fried Sage and Caramelized Onions

Happy Birthday, Trevor! // Peanut Butter Fudge

Cookbook Review and Giveaway: Home Made Winter

Drizly

Please note!

Full disclosure: if you purchase anything at Amazon using the above links or any other links to Amazon on this site, I will receive a small commission. Just so you know!

Copyright© 2025 · Cookd Pro Theme by Shay Bocks

This site uses cookies: Find out more.