• Skip to primary navigation
  • Skip to main content
  • Skip to primary sidebar
  • Home
  • Recipes
  • Features
    • Cookbook Reviews
    • Ingredient of the Week
    • Sunday Dinner
    • Fitness Goals
  • Travel
  • About
    • Privacy Policy
    • Cookie Policy
  • Work With Me

Katie at the Kitchen Door

Globally-inspired, seasonal recipes

Blog Page

0 January 15, 2011 Pasta

Simplicity and a New Year

One year ago today, I wrote my first blog post.  It was a recipe for an omelette, which, lets be honest, no one really needs a recipe for. It did not include any pictures, which, lets be honest again, is 70% of the reason most people visit food blogs.  And it has this sad undertone that’s so characteristic of the way I used to feel at Duke pretty much all the time – this underlying longing to be home.

Fast forward one year.  I can honestly say I’m happy at Duke – I’ve dealt with the reasons I felt so lonely, decided to stop worrying so much about friends and parties and things, and hit my groove.  Yes, I still have sad days.  Yes, I still feel lonely sometimes.  But I have wonderful friends, a lovely place to live, and new opportunities almost every day.  This year has easily been the best one yet, and while I can’t say that I’ll be sad to graduate (I am so excited to graduate!), I’m not going to leave Duke resentful.

And this blog – I am much better at it then I was a year ago.  Sometimes I find blogging so fulfilling – like when friends approach me to say they tried and liked a recipe.  And sometimes I find it kind of a chore – like when I’m feeling uninspired and guilty about not posting.  But fulfilling definitely wins out over the chore part, so I’m gonna stick with it.  Over the past year I’ve learned a ton about both food and the culture surrounding it, and I’ve tried dozens of new foods.  When I first started cooking I always wanted to try the most complicated, ingredient-laden recipes I could find, for the challenge of it.  Lately, though, I’ve been the most intrigued by simple recipes.  Recipes with only a few ingredients that enhance each other perfectly.  How to cook mushrooms so that they taste even more like mushrooms.  Recipes that are so simple they could actually be considered techniques.  So this year, I want to explore simplicity.

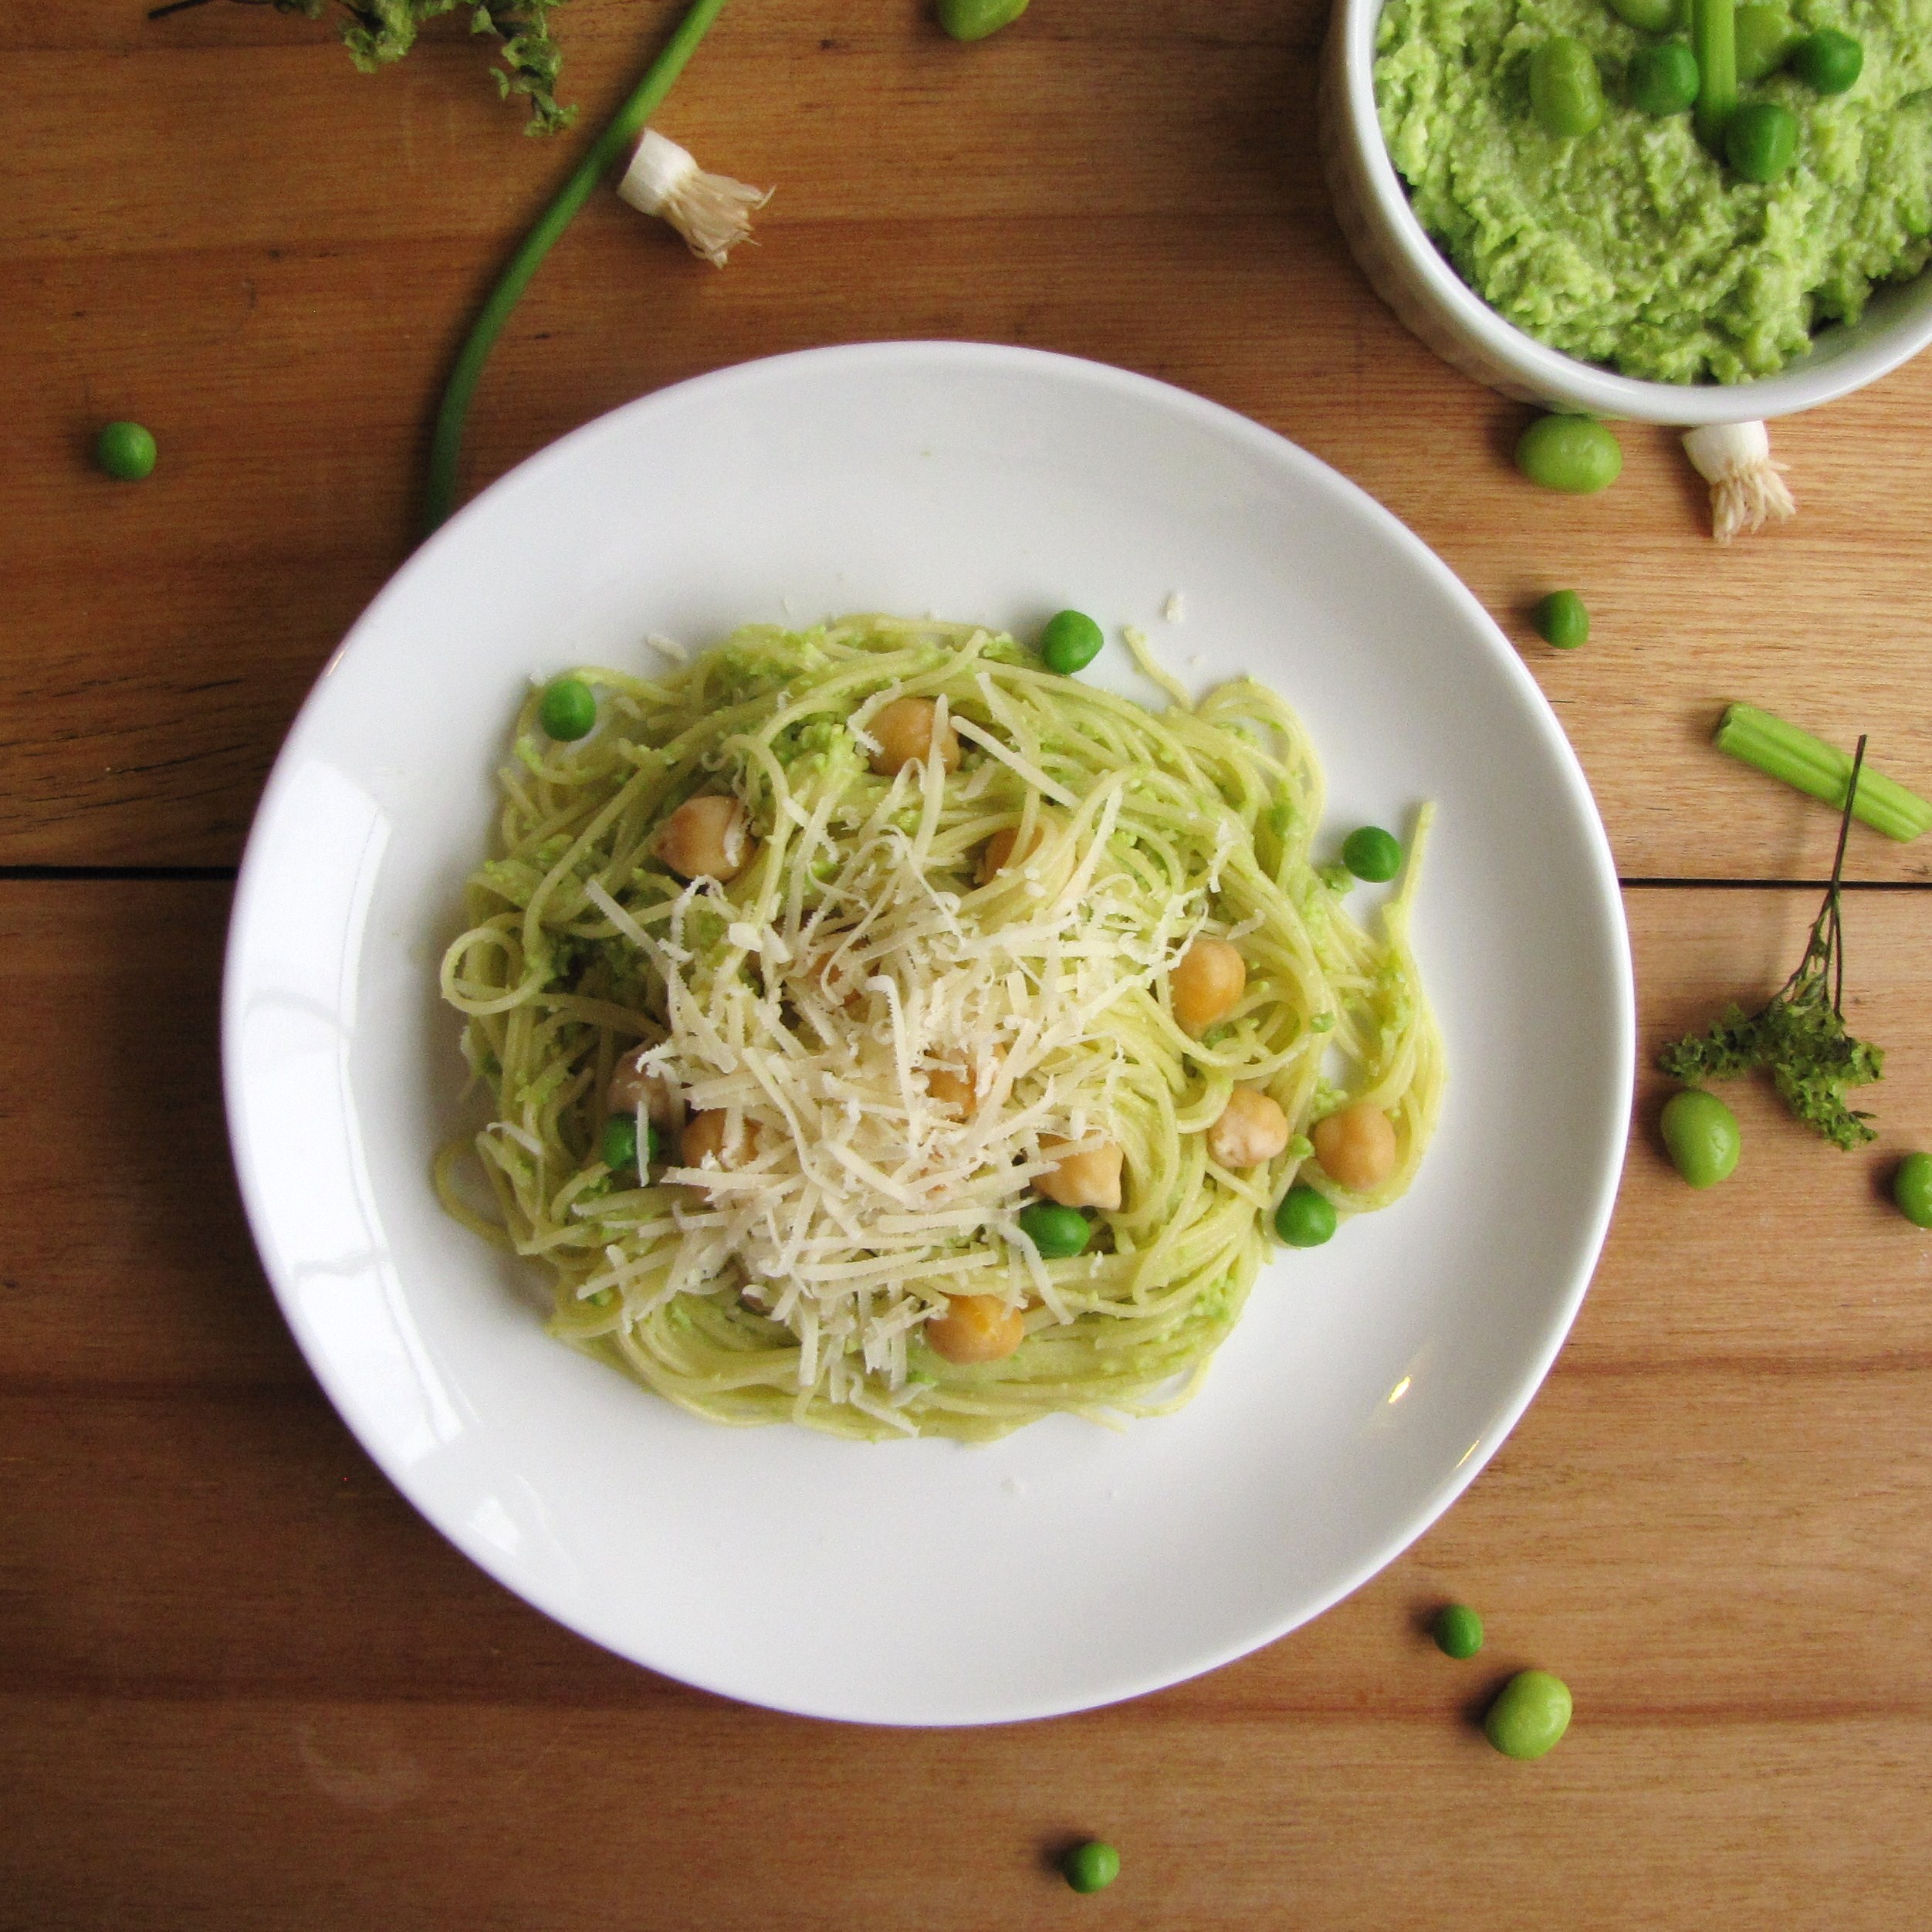
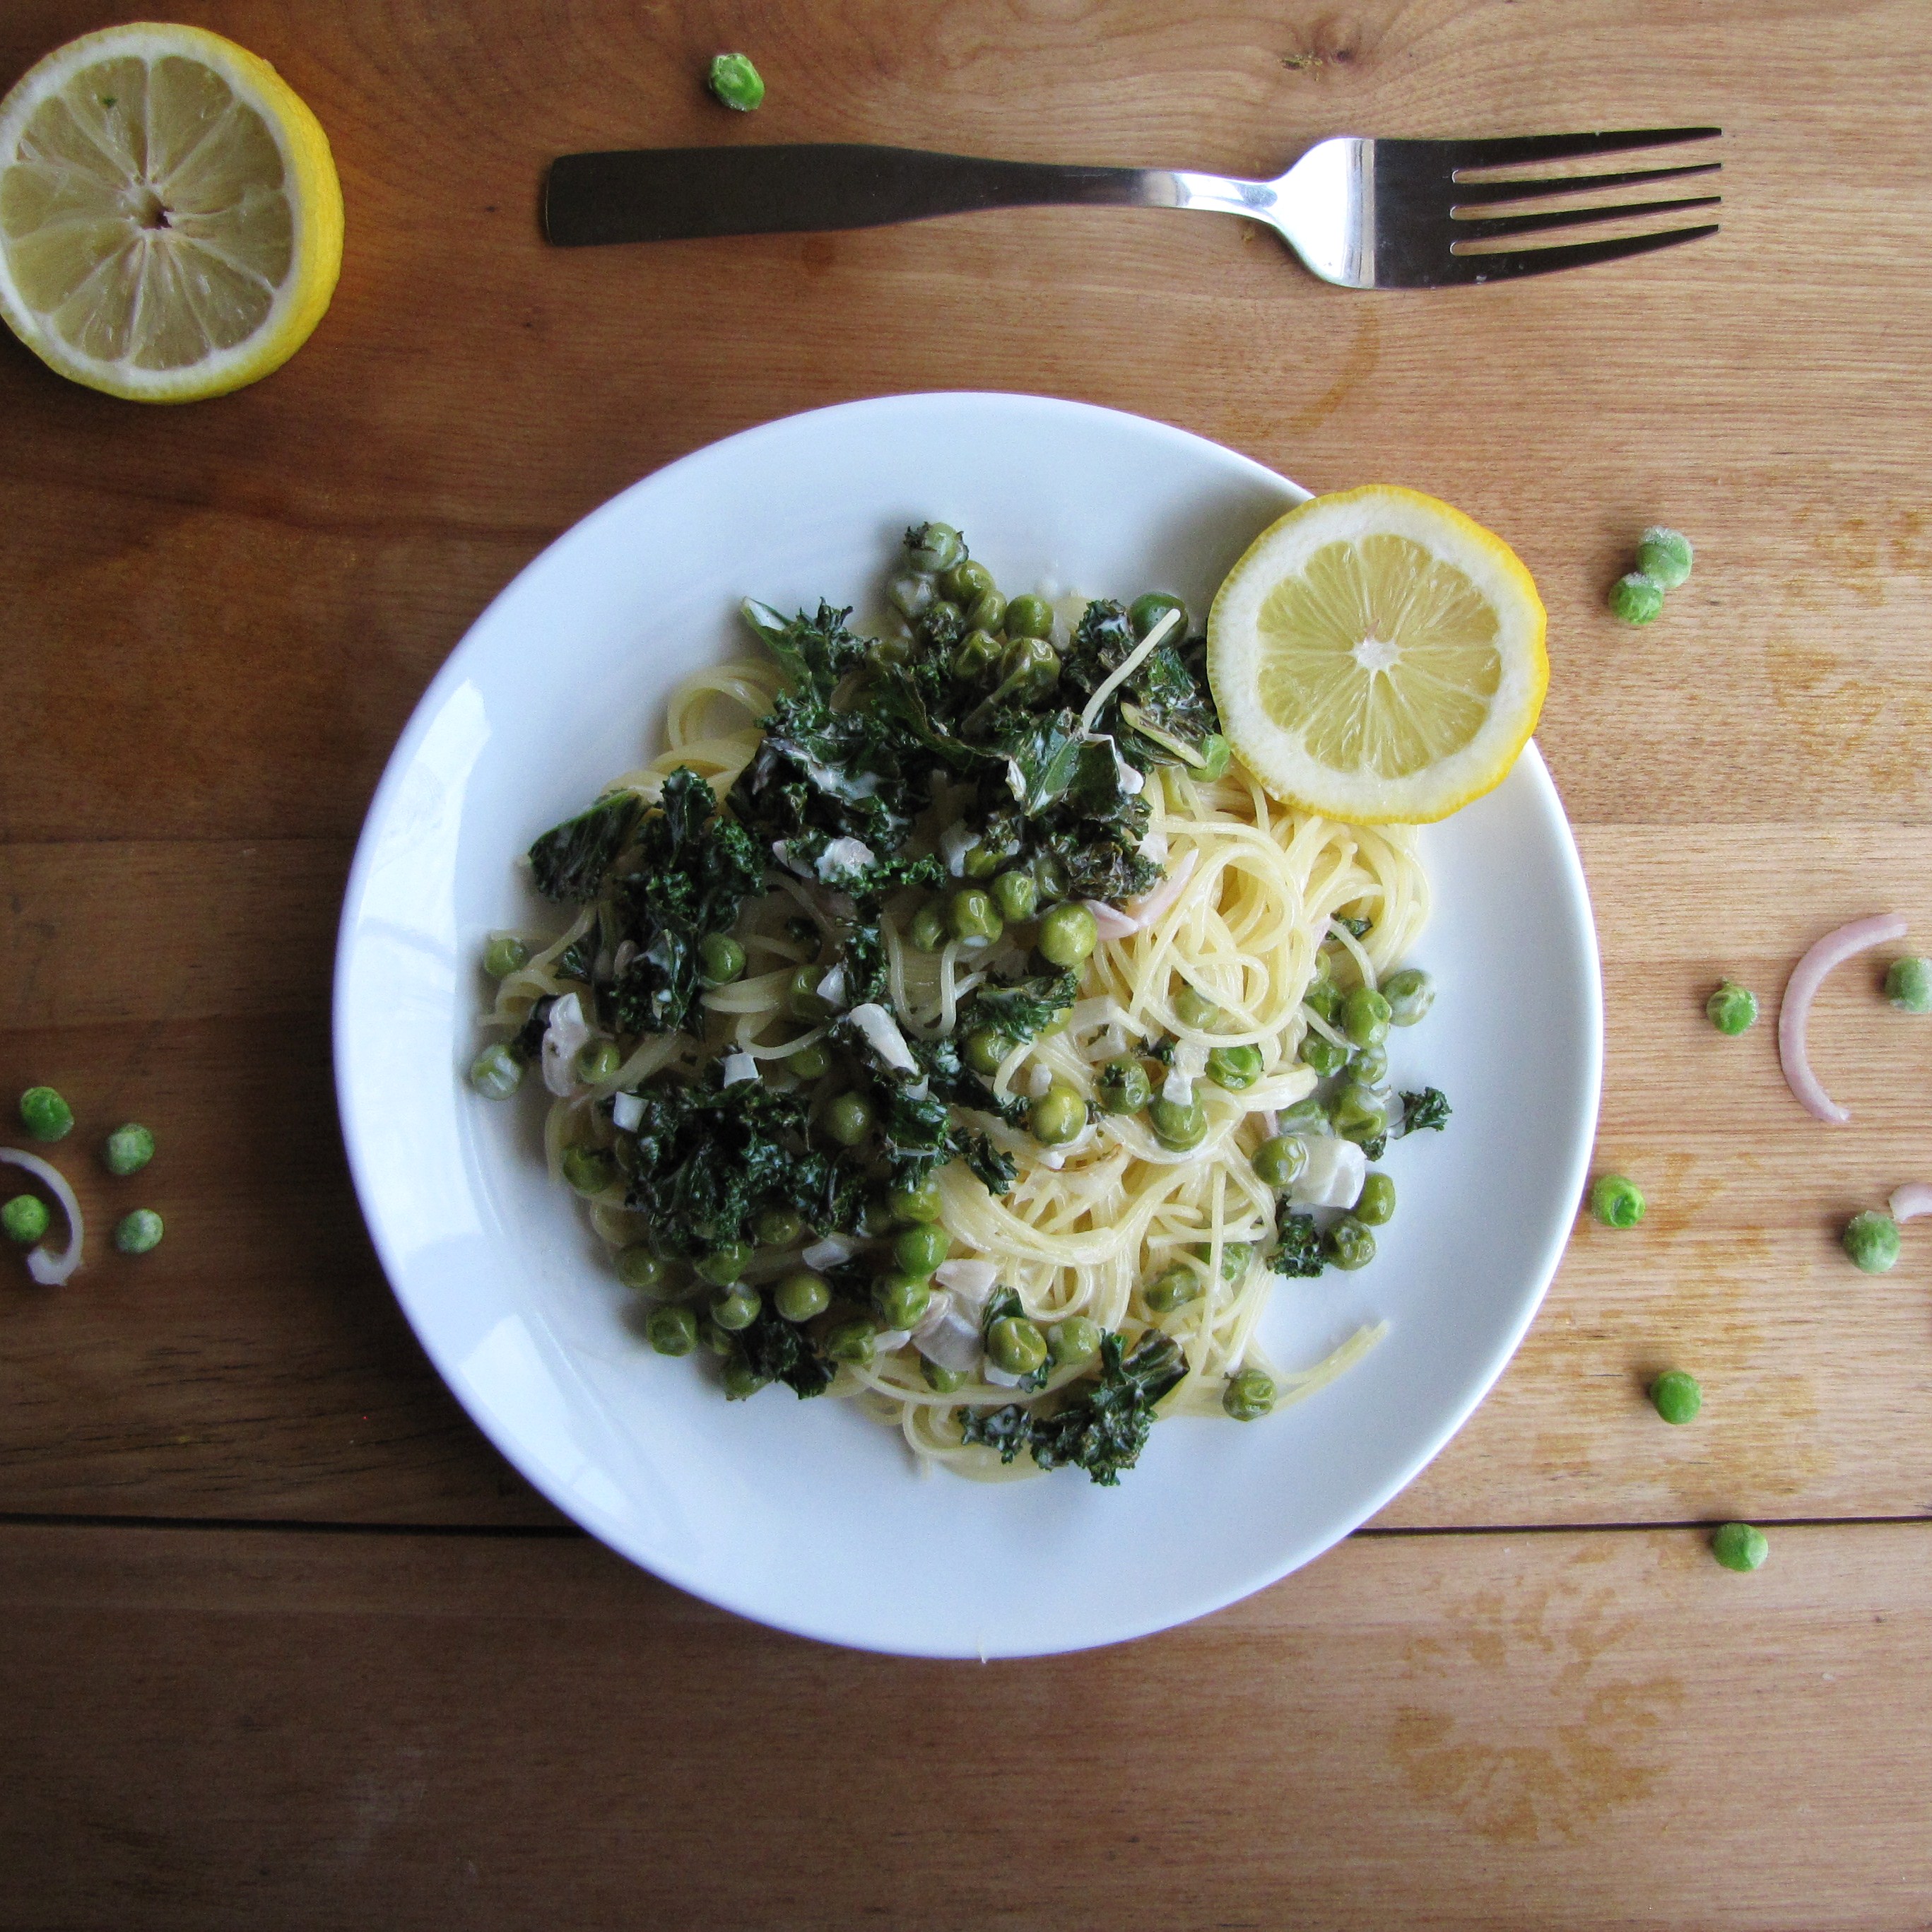
This pasta recipe is a perfect example of ingredients combining to enhance one another without losing their integrity.  The sauce is simple – butter, shallots, lemon, cream, and salt.  Together, the cream tastes sweeter than it would on its own, the lemon brighter and more savory, the shallots just releasing their pungency.  The kale and peas are cooked just long enough that they begin to mellow in the sauce.  Pour over pasta and voila, the perfection of simplicity.  Really, it’s so good.

Lemon Cream Sauce with Kale and Peas

Serves 2-3.

  • 1 TBS butter
  • 1 shallot, finely diced
  • 1/4 c. heavy cream
  • juice from 1 lemon
  • 2 c. chopped kale
  • 1 c. frozen peas
  • sea salt to taste
  • 1/2 lb. angel hair pasta
  1. Bring a large pot of salted water to a boil.
  2. In a large pan, melt butter, and sautee shallot for 2-3 minutes.  Add cream and lemon juice and stir to incorporate.  Add chopped kale and frozen peas and cook for 3-4 minutes, until kale has begun to soften and peas are heated through.  Add salt to taste.  Lower heat to very low.  (Note: I add lemon until it’s on the verge of being too lemony, and then add salt to bring the flavors together.  It works perfectly and is addictively flavorful.)
  3. Cook angel hair according to package directions.  Drain.  Pour sauce over pasta and serve hot.

0 December 30, 2010 Uncategorized

Epic Feats of Civil Engineering

What else are two civil engineering degrees good for?

Gingerbread House Recipe

From my mother.

  • 2 ½ C packed dark brown sugar
  • 1 ½ C heavy or whipping cream
  • 1 ¼ C molasses
  • 9 ½ C flour
  • 2 T baking soda
  • 1 T ground ginger

1. In a very large bowl, with wire whisk beat brown sugar, cream and molasses until sugar lumps dissolve and mixture is smooth. In medium bowl, combined flour, soda and ginger. With spoon, stir flour mixture into cream mixture in 3 additions until dough is smooth.
2. Divide dough into 4 equal portions; flatten each into a rectangle to speed chilling.  Wrap each piece well with plastic wrap and refrigerate at least 4 hours or overnight, until dough is firm enough to roll.

Roll dough
1. Grease and flour large cookie sheets. Roll out dough, 1 rectangle at a time, on each cookie sheet to about 1/8 inch thickness (put damp paper towels under cookie sheets to keep them from shifting while you roll).  If dough is too crumbly, add water a tablespoon at a time until it is elastic.
2. Trim excess dough from sheet; wrap and reserve in refrigerator. Chill rolled dough on cookie sheet for 10 minutes.
3. Place floured cardboard patterns on dough and cut pieces making sure to leave 1 ¼ inches between pieces for expansion. Combine and reroll as necessary.

Bake dough
1. Preheat oven to 350°F.
2. Brush pieces lightly with water before baking. Bake 25 to 30 minutes or until pieces are firm to the touch – don’t overbake.
3. While gingerbread is warm, place pattern pieces on top and re-trim if necessary.

Momma’s note: I basically ignore the “Roll dough” section and just roll it out on a counter (cold soapstone helps here), cut the pieces, transfer and reshape on the sheet and bake. I think the key is to let them harden for a day before constructing.


Royal Icing

  • 1 leeb confectioner’s sugar
  • ½ tsp. cream of tartar
  • 3 egg whites

In bowl of electric mixer mix all ingredients until combined. Set speed on high and beat at least 7 minutes. Store in airtight container.

0 December 18, 2010 Pasta

Make-believe.

So here’s the deal.  It’s the tail end of finals week.  I’ve been cooped up in my apartment for the better part of ten days.  It’s barely gotten above 30° since I got back from Thanksgiving break.  We had an ice storm on Thursday.  And it’s snowing, again.  I thought I lived in the South.  I was under the impression that it wasn’t supposed to snow here.  Ever.  Or maybe once in a while in a fluke extreme weather event.  I know I used to live in the South, because during finals week of fall semester freshman year I didn’t study because I was tanning.  Tanning.  In a sundress.  On the lawn.  In December.  And now I am not studying because I’m staring out the window at the snow trying to keep full-on depression from setting in.

The solution?  Pretending.  Pretending that it is not December.  Pretending that it is not finals week.  Pretending that it is summer, and I am on a picnic at the Eno, and I have no commitments, and I am eating lovely, summery, picnic food.  And watching the deer graze and the turtles bask.  And finding relief from the intense heat under a beautiful, freezing cold waterfall.

That day, which I am pretending now but which really happened once upon a time, was really wonderful.  Finding the Eno was something of a turning point for me.  I’d gone through the past three years not exactly hating Durham, but pretty convinced that it couldn’t offer me anything that I really wanted.  Like nature, and peace, and quiet, and beauty, and the exhilaration of being in a perfect place.  I tried the quarry – it was a bit warm and mucky and overcrowded for me.  The Duke golf course is like almost being in nature but being constantly reminded that you aren’t really.  And then I found the Eno.  It’s pristine.  The water is fresh and cold.  After months of either sweating outside or being bombarded with stale, air conditioned air inside, the feeling of being both cool and in fresh air was incredible.  There were actually herds of deer grazing nearby.  Trails meandered along the river.  Families swam in the amazingly cold water and laughed and the sun was warm and people like us had picnics and salamanders skittered about on the rocks and trout lurked in shadowy pools.  I stepped on a crayfish.  I played with the clay.  I relaxed.  I was so happy there.

Back to reality.  There is one part of that day that I can more than just imagine – the food.  On our picnic, we brought homemade baguettes and cannelini dip and camembert and poached pears and cookies and this wonderful pea and edamame bruschetta spread.  It was all delicious.  But the pea and edamame spread was especially delicious.  It’s the loveliest shade of green, it’s fresh and bright and creamy, and it screams “I am summery!  I am delicious!”  So I made some.  While it snowed.  And just the color made me feel a little better.  Instead of serving it on a baguette I like to have it like pesto, mixed in with some angel hair pasta and sprinkled with chickpeas and grated parmesan cheese.  It’s lovely.  I feel better.  Please come over if you would also like to pretend it’s not December.

Pea and Edamame Pesto

Adapted from Inspired Taste.  Makes about 2 cups of pesto.

  • 1-1/2 c. frozen edamame
  • 1/2 c. frozen peas
  • 4 oz. parmesan cheese, roughly cubed
  • 4 cloves garlic, peeled
  • 2 scallions, ends removed
  • 1/8-1/4 c. olive oil
  • 2 tsp. lemon juice
  • salt and pepper to taste
  1. Cook edamame and peas according to package directions, or boil edamame in salted water for 4 minutes, adding peas for last minute.
  2. In a food processor, pulse parmesan, garlic, scallions, and 2 TBS olive oil until smooth.  Add edamame, peas, and lemon juice and pulse to combine.  Taste.  Add salt, pepper, or more cheese to adjust seasonings to your liking.  Add olive oil until you reach the consistency desired.  Serve on pasta, on toasted bread, or stirred into eggs.

0 December 15, 2010 Recipe

Good foodie.

So, the friendly people over at Marx Foods recently asked the internet-at-large “What have you done to be a good foodie this year?”  And, being a member of the internet-at-large, I felt compelled to answer them.  It would’ve been rude not to, right?

And so I began pondering.  Pondering and musing.  This was my first year blogging, and I’m getting the hang of it.  My second year cooking for myself, and people seem to think I’m alright at that.  My 21st year eating, and I consider myself a master at that.  So I have some experience with food.  But what about this year made it different?  Seeing as how it’s finals week and I’m a senior in college and I’ve been having all sorts of deep thoughts about the value of a good education and how college has changed me and what on earth I am going to do in the real world, the answer came to me pretty quickly.

Learning.  This year, in the realm of food and in pretty much all the other realms of my life, the thing that has been most significant throughout my experiences has been learning.  In terms of food and blogging and eating, I’ve learned a ton.  Big things and little things.  Big things like how to take a decent food photo, how huge the difference is between high quality and cheap ingredients, and how much work (but oh how rewarding too!) blogging can be.  Little things like how to like mushrooms and tomatoes, two foods I was convinced I hated a year ago, how incredible slices of fresh avocado can taste, that cardamom is what makes danish pastries taste like danish pastries and not just any other baked good, and how to consistently make good pasta dough.  I’ve tried countless new recipes, ordered meals I wouldn’t have touched as a kid, and discovered incredible websites.  On any given day I probably spend a good hour or two thinking about food and recipes and menus – sometimes actively, but sometimes passively, like when I’m sitting in class and realize that half of my notebook is filled with flavor combinations rather than steel code stipulations like it should be.  And I like it.  I hope I can find a way to make this learning continue and deepen.

In the non-food portion of my life I’ve learned a lot too.  Probably too much to say.  So I’ll just touch on the big stuff… like how to take care of my own finances.  How to dress and talk and smile for job interviews.  How to be rejected from said job interviews.  How much I truly love to dance.  How to stop crying and pull yourself together when you’ve been dumped and your world feels shattered.  How frustrating research is.  How good independence feels.  How important being with other human beings on a daily basis is.  How little I know about what I want in my life.  How much time I have to figure it out.  How to save your last tailgate.  And on and on.

And there you have it.  That’s what’s made me a good foodie, and a good student, and good at being myself this year.  And since I couldn’t leave you without a recipe, in the spirit of learning to like new things and those friendly people over at Marx Foods, I decided to try their Hungarian Mushroom Soup.  They posted it a few weeks ago, and although they aren’t flavors I usually work with, the recipe really intrigued me.  Maybe it’s the time of year.  Maybe it’s my recent mushroom kick – now that I know I like them, I want to eat them!  Maybe it’s my inner Eastern European.  Who knows.  But I made it, and although I was apprehensive beforehand, I liked it more with every bite.  It tastes very authentic (although you should know that my only authority in that matter comes from one week in Hungary last year), and rich and the dill really comes through in a great way.  It also took 30 minutes to come together, including 20 minutes of time soaking the mushrooms, so that was a nice surprise.  Everyone loves a 10 minute meal.  The only thing that put me off about it was the chewiness of the reconstituted mushrooms – next time I would either chop them up into smaller pieces pre-soak, or blend the soup when it was finished.

One last thing… Since they asked, the gift I would most like to receive if a stocking full of edible goodies happened to arrive on my doorstep from Marx Foods would be saffron threads.  Why?  Honestly, because they are way out of my weekly food budget range, and they have such a lovely flavor and I keep having to not make recipes where they are a key ingredient.

Hungarian Mushroom Soup

Reposted from Marx Foods, scaled down to serve 2.

  • 1/2 oz. dried mushooms
  • 1 TBS butter
  • 1/2 c. diced onion
  • 1 TBS flour
  • 1 c. milk
  • 1 tsp. paprika
  • 1/2 c. stock or water
  • 2 TBS sour cream
  • 1 tsp lemon juice
  • 1/2 tsp. dill
  • 1/2 tsp. salt
  • 1 tsp. vinegar
  1. Pour boiling water over mushrooms to cover.  Let stand 20 minutes.
  2. In a medium saucepan, sautee onions in butter until translucent.  Add flour and cook for another 2 minutes, stirring constantly.
  3. Add mushrooms and their soaking water and stir until thickened.  Add milk and paprika and cook 2-3 minutes.
  4. Add 1/2 c. stock, sour cream, lemon juice, dill, salt, and vinegar and stir until all incorporated.  Cook 2-3 minutes more to let flavors combine.  Serve hot with a dollop of sour cream.

0 December 11, 2010 Dessert

Addiction.

In an ideal world, I would have time to bake 10 different kinds of Christmas cookies, and then come Christmas day lay out a beautiful plate of differently shaped and colored and flavored treats.  (Yes, this is actually something I fantasize about.  I also fantasize about normal things like inheriting a villa in Italy and spending all day in a king-sized hotel bed with 15 pillows, but occasionally I fantasize about having perfect displays of baked goods.  C’est juste moi.)  In the real world, I have time to bake exactly 0 kinds of Christmas cookies, meaning that I will probably end up making 2 to 3 different kinds at odd hours of the morning when I should be studying for my steel final or writing the research term paper that I’ve been procrastinating literally since September.  Oops.

I can’t decide how much of a problem my tendency to use baking as a form of procrastination is.  I don’t really think it’s normal – most people are content with facebook and reruns of Modern Family – but at least it’s semi productive.  Or at least that is how I would like to justify it to myself.  For example, the night before fall break while working on yet another impossible matrix structural analysis problem set (yeah, I’m trying to impress you with the names of my classes), I decided at midnight to make 2 different kinds of apple muffins to bring with me to Tim’s house the next morning.  A nice, really poorly timed idea.  Then, the night before my steel midterm, which I began studying for at 9pm, I made an executive decision at 11pm that making banana bread would take approximately 5 minutes and be a great study break.  If you are ever thinking of making the same executive decision here are a few notes.  Note 1: making banana bread takes more than 5 minutes.  Note 2: once you make the banana bread you might find that it’s 11:45 and you feel kind of like taking a shower.  Note 3: after your shower it will be 12:15 and you will need time to eat 4 slices of banana bread.  Note 4: after eating too many slices of banana bread you will fall asleep, fat and happy and totally unprepared for your steel midterm.  Note 5: you will now need to do exceptionally well on your steel final and abstain from absolutely all baking for the 24 hours beforehand.  Period.

Occasionally, however, I behave like a responsible human being and set aside an hour or two of weekend time to bake.  For example, this morning.  When I made these shortbread cookies because shortbread is this month’s challenge over at Have the Cake.  I actually got really excited when I saw this challenge, especially since I haven’t been able to participate for a few months and I knew something as simple but changeable as shortbread would get me in the kitchen stat.  There were several shortbread recipes I wanted to try, and I might still try the savory parmesan-rosemary recipe I found, but in the end I decided to go with these lime and white chocolate shortbreads because they seemed festive enough to fit the bill of my first holiday cookie.

I think I would give these cookies a 3.5 out of 5 – there’s room for improvement.  I liked the flavors of the cookie and topping, but the texture of the lime zest in the cookie threw me off.  It made the cookies a bit crunchier than I thought they should be.  These cookies are also fairly crumbly, but since this is my first time making shortbread, I’m not sure how much of that is because of my technique and how much because of the recipe.  I would like to try these again omitting the lime zest from the cookie and using concentrated lime oil or lime extract instead of the almond extract, as I think that would give the cookies more flavor and a better texture.  I would keep the topping the same, as it was quite yummy and went well with the buttery cookie.

Lime Shortbread Cookies with White Chocolate and Almonds

Adapted from Bon Appetit.  Makes 24 cookies.

  • 2 c. flour
  • 1/2 c. powdered sugar
  • 1/2 tsp. salt
  • 2 sticks chilled, unsalted butter
  • 3 TBS lime zest, divided
  • 1 tsp. almond extract
  • 4 oz. white chocolate
  • juice from 1 lime
  • 1/3 c. sliced, blanched almonds, toasted until golden then chopped
  1. Preheat oven to 325°F.  Butter a 13×9 metal baking pan.
  2. In a large bowl, mix together flour, powdered sugar, and salt.  Mix in 2 TBS of lime zest and almond extract.  Cut cold butter into flour in small pieces, then use pastry cutter or hands to blend until even and can be pressed together into a loose ball.
  3. Press dough evenly into prepared pan.  Use a fork to poke holes all over dough.  With a sharp knife, cut evenly sized triangles into dough, cutting all the way through dough.  Bake cookies for 35-45 minutes, or until golden brown and firm.  Upon removal from the oven, immediately use knife to recut through earlier markings.  Let cookies cool in pan on rack.  When cool, carefully remove from pan.
  4. Bring a medium pot of water to a gentle simmer.  In a smaller pot, place white chocolate, remaining 1 TBS of lime zest, and lime juice.  Melt chocolate over simmering water, stirring all the while.  When thin enough, use a fork to drizzle lime-chocolate mixture over cookies, then top cookies with toasted almonds.

3 December 6, 2010 Asian and Indian

Indian Comfort

Over the summer I picked up a cookbook called Cooking with My Indian Mother-in-Law, written by Simon Daley.  I love Indian food, but I’ve struggled with several things when trying to cook it for myself – finding authentic and flavorful recipes, balancing the spices properly, and achieving that wonderful combination of sour, spicy, and warm that is so characteristic of many Indian dishes I’ve tried.  Glancing through this book, I was intrigued by the simple recipes and the idea of learning home recipes from a woman who has cooked these dishes every day of her life; it’s true that the simplest, most comforting, yet also most wonderful Indian food I’ve eaten has always been prepared by someone’s Indian mother.  So I checked the book out and began to read.

First, the book demystified the ingredients and techniques essential to Indian cooking.  I learned about the process of tempering whole vs. ground spices, how to ready-fry onions, how to make a basic garlic-ginger-chilie paste, what kind of tomatoes are best to use in sauces, and how to identify when a masala pools.  Then I looked through the recipes, and found myself confronted with a lot of excellent sounding dishes with very long ingredient lists.  The one that attracted me most, however, was a simple-ish recipe for Chickpea Dumplings.  It took me about 6 weeks from the time I first saw the recipe to the time I first made it.  To a lot of people, this may seem like a long time.  To  people who, like me, hoard recipes in word files, scans, clippings, and scribbled notes, it should seem fast.  At least it does to me.

This recipe absolutely lived up to my expectations.  I went all out and bought all the spices from the bulk spice section in Wholefoods. (Side note: I literally cannot get enough of the bulk section in Wholefoods.  Every time I come back with little baggies of grains and nuts and spices for super reasonable prices I show Megan and say things like “Look!  Three pounds of couscous only cost $4!  They had asafoetida!  And dried lemon balm!  Look how many pinto beans I have!”  And she looks at me like I have 3 to 4 heads.  Actually, I kind of can’t get enough of Wholefoods in general.  Like, every time I go I’m a little bit tempted just to start living there and subsisting off of cheese samples.  Not kidding.  Side note over.)  I even used those San Marzano tomatoes that food bloggers rave about all the time and are ridiculously expensive, at least for canned tomatoes.  I actually only bought them because I read the price tag wrong and thought they were a good deal.  The weren’t.  But they were good.  One day when I’m employed I will buy quality ingredients regularly.  Until then I love me some store brand staples.  I don’t even know what I’m talking about anymore.  I should move on.  I’m just gonna start this paragraph over.

This recipe absolutely lived up to my expectations.  The best way to describe it would be as an Indian version of pasta with tomato sauce – comforting, warm, tangy, hearty.  The dumplings were perfectly spiced and kind of fun to make.  To do so, you boil water with a ginger-garlic paste and then dump in some chickpea flour and stir until it forms a ball of dough.  Then you roll the dough out as quickly as possible and cut it into little diamonds.  Yes, this is fun for me.  The dumplings themselves are addictive.  I would estimate that both times I’ve made them I consumed one fourth of them before even starting the sauce.  After simmering them in a tomato-yogurt sauce, you have the kind of meal you can’t stop shoveling into your mouth after a long day – unpretentious, filling, flavorful, good.

Chickpea Dumplings in Tomato-Yogurt Sauce

Adapted from Simon Daley’s Cooking with My Indian Mother-in-Law. Serves 3-4.

For the chickpea dumplings:

  • 3 cloves garlic
  • 1 inch ginger, peeled
  • 1-2 jalapenos, stemmed and seeded
  • 1 tsp. salt
  • 1/2 tsp cumin seeds
  • 1 1/2 c. water
  • 2 tsp. canola oil
  • 2 c. chickpea flour
  1. Peel the garlic.  Slice peeled ginger and seeded jalapeno into large chunks.  In a mortar and pestle, grind garlic, ginger, jalapeno, salt, and cumin seeds into a paste.
  2. Oil a large cutting board and rolling pin.  Set aside.
  3. In a medium pot, bring 1 1/2 c. water and ginger-garlic-pepper paste to a boil.  Turn vent on as steam may sting eyes.  When water is boiling.  Add 2 tsp. oil and stir.  Add chickpea flour, reduce heat, and cook for 2 minutes, stirring constantly, until dough comes together in a ball.  Turn the dough out onto oiled board and let stand 1 minute.  Then quickly roll dough out to about 1/2 inch thickness.  Slice dough into diamonds, and set dumplings aside.

For the masala:

  • 1 tsp. cumin seeds
  • 1 tsp coriander seeds
  • 1 tsp. chili powder
  • 1/2 tsp turmeric
  • 2 TBS canola oil
  • 1 tsp. mustard seeds
  • 1 tsp. cumin seeds
  • 1/2 tsp asafetida
  • 1 onion, sliced
  • 14 oz. canned plum tomatoes, preferably San Marzanos
  • 4 cloves garlic crushed into a paste with 1 tsp. salt
  • 2 TBS cilantro stems
  • 1 1/2 c. plain yogurt
  • 1 c. warm water
  • 1 recipe chickpea dumplings, above
  1. Mix 1 tsp. cumin seeds, coriander, chili powder, and turmeric in a small bowl. Set aside.
  2. Heat oil over medium-low heat.  Add mustard seeds and remaining 1 tsp. cumin seeds and cook for 1 minute.  Add asafetida and onion and sautee 2 minutes, until onion is beginning to soften.  Add garlic paste and sautee an additional 1 minute.  Add spice mixture from step 1, tomatoes, and cilantro stems.  Simmer over low heat until oil pools around edges of pan.
  3. Mix yogurt with 1 c. warm water in large bowl.  Add 1 c. of hot tomato mixture to yogurt, stirring yogurt constantly, to temper yogurt and keep it from curdling.  Slowly add yogurt to remaining tomato mixture in pan, stirring constantly.  Bring to a slow boil, add dumplings, and cook 2-3 minutes to heat dumplings through.  Season with additional salt if necessary.  Serve hot.

1 December 4, 2010 Poultry

Rotisserie Chicken Chronicles #3

Aha!  I got you.  You thought that after I posted the first two installments in this so-called series 3 months apart I would either get my act together and post with some continuity or give up like a respectable human being and stop with the chicken thing.  But you were wrong.  Because it’s been another 3 months, and I’m back with more lovingly-roasted-by-someone-else-chickens.  Get excited.

I’ve known for a while that the 3rd installment in my rotisserie chicken series was going to be a pizza.  Chicken on pizza is stellar.  It’s actually been on my menu for the past 5 weeks in a row… it’s just that I ran out of pizza dough, and making pizza dough without a stand mixer?  Huge pain in the ass.  I did it once last spring and made enough for 5 pizzas, but I ate those 5 pizzas and the 45 minute kneading process required to make more dough should definitely be categorized as an aerobic workout.  Maybe anaerobic.  And who likes exercise anyways.

The other problem is the chicken itself – if I don’t get at it right away, while it’s still warm, it’s a goner.  Cold rotisserie chicken that’s been in the fridge for two days and has congealed in the bag?  Not my favorite thing to pick apart.  And if I do manage to tackle the chicken as soon as I get back from the grocery store then there’s the problem of trying to make stock at night and getting really exhausted before it has time to cool properly.  Whine whine bitch moan.

But I’ve been really wanting this pizza.  And the prospect of having pizza dough in the freezer again is highly appealing.  So I buckled down.  I’d like to say that the stars just aligned and I woke up this morning totally jazzed to knead dough and boil chicken carcasses and then have the energy to photograph my lunch before snarfing it.  But no, I actually just had to make myself do it.  But it was totally worth it.  Especially because as I was taking my pictures it started to snow.  And not only is it the first snow of the season, I’ve actually never seen it snow like this in Durham.  We had one really heavy, really brief, really nasty storm last January and no one could figure out how to drive for 2 and a half weeks, but this is like… beautiful, perfect snow.  The kind of snow I actually like.  All the freshmen from Texas/Florida/Southern California are probably freaking out like they do every year.  Anyway, I just sat by the window and ate my pizza and watched the snow and didn’t think about anything other than how lovely it was, and it was really nice.

Back to pizza.  This was just like I wanted it to be – pizza is one of those sum of its parts things.  In a good way.  If you use quality ingredients that you like, and you have some idea of how to combine them, your pizza will be good.  Like this.  Besides the dough-making process it was also really quick to throw together.  If you already had dough in the fridge/freezer this could be ready to eat in 20 minutes.  And now I no longer have to be tempted by the frozen California Pizza Kitchen pizzas in Kroger, cuz I can do it myself. :-)

.

.

Want More Chicken?

  • Rotisserie Chicken Chronicles #1 – Asian Pesto Chicken Salad
  • Rotisserie Chicken Chronicles #2 – Fettucine, Mushrooms, and Chicken in a Mustard Cream Sauce

Thai Chicken Pizza

Serves 2-3.

  • 1/5 basic pizza dough recipe, below
  • 2 TBS minced fresh ginger
  • 1/2 c. peanut butter
  • 1/2 c. water
  • 2 TBS soy sauce
  • 3 TBS hoisin sauce
  • 1/4 tsp. red pepper flakes
  • 1 c. shredded cooked chicken from rotisserie chicken
  • 3/4 c. mozzarella cheese
  • 3 scallions, sliced
  • 1 carrot, grated
  • 1/2 c. sprouts
  • 1/2 c. chopped cilantro
  1. Preheat oven to 425°F.  Roll pizza dough out to 1/4 inch thickness.  Sprinkle baking pan with a teaspoon or two of cornmeal to prevent the bottom from burning and place dough on pan.
  2. In a small bowl, mix together ginger, soy sauce, water, peanut butter, hoisin sauce, and red pepper flakes until smooth.  Spread 2/3 of the mixture evenly over the pizza dough.  Add the remaining 1/3 of the peanut sauce to the chicken and stir to coat.  Sprinkle cheese over the sauce/dough, and then place chicken pieces on top.  Bake for 15 minutes.
  3. When pizza is cooked, remove from oven and allow to cool for 1 or 2 minutes.  Then sprinkle the top with the scallions, shredded carrot, sprouts, and chopped cilantro.  Slice and serve.

Basic Pizza Dough

This is my mom’s calzone dough recipe.  It’s very simple and actually takes significantly less time than 45 minutes to knead, so I’m glad I have it now.  It also gets a great rise, and extra can be frozen after it has risen and been punched down.  This recipe makes enough for 5 individual sized pizzas or calzones.

  • 2 c. skim milk
  • 1/4 c. very warm water
  • 1 TBS active dry yeast
  • 1/4 c. olive oil
  • 1 tsp. salt
  • 5 1/2 – 6 c. flour
  1. Proof yeast – sprinkle yeast over 1/4 c. warm water and allow to stand for 5 minutes.
  2. Heat milk in the microwave for 2 minutes, until quite warm but not bubbling.
  3. In a large bowl, mix together 4 c. of flour, salt, and olive oil.  Add milk and yeast mixture and stir with a wooden spoon until well incorporated.  Add remaining flour half a cup at a time until the dough comes together and is not too sticky.
  4. Dump dough on lightly floured surface and knead for 10 minutes until smooth and elastic, adding flour as needed.
  5. Place in a lightly oiled bowl and allow to rise for 1 hour.  Once risen, punch down and break into five equal portions.  Freeze portions in individual ziploc bags or use within 1-2 days.

0 November 24, 2010 Recipe

Elegant Endives

So it’s Thanksgiving.  And the food blogosphere has been inundated with sweet potatoes, cranberries, pie crusts, and 4-day turkey brining processes.  Which is all great and mouthwatering and exciting, except that I’m not in charge of Thanksgiving.  And I’m the kind of person who actually loves Stove Top stuffing and plain old mashed potatoes once a year.  So I’m not contributing any fancy new dishes to our table or experimenting with pie fillings or scouring cookbooks for stuffing recipes.

Instead, I’m going to do whatever my mother tells me I can do to help.  And the first of these things was to help her with the shopping.  Which I did.  But then amongst the acorn squash and fresh cranberries and bags of shallots, I found endives.  For a price that was significantly less than the ridiculous $4 a piece they cost in the Durham Wholefoods.  And since I’ve been meaning to share this endive recipe pretty much since the creation of this blog, I decided to buy them.

And that, my friends, is how it came to pass that I’m sharing a light, summery appetizer with you on the day before Thanksgiving, completely bucking national food blogging trends.  Although they would make a good cocktail party appetizer.  And it is kind of the start of cocktail party season.  And candied pecans are actually pretty seasonal too.  So maybe I’m not as far off the mark as I thought.  Either way, I really enjoy these.  They’re simple, and elegant, and well-balanced, and infinitely variable too.

A few notes about candying nuts: I fell in love with candied nuts in Prague, where you can buy them on every street corner as soon as the weather turns cold.  I’d frequently run down to the square between classes for a little paper packet of sugared almonds and a cup of hot wine (man, talk about living the life, right?)  As a result of this, I ended up craving them all the time, and so I’ve experimented with several ways of getting the perfect, warm, crispy, sugared nut.  You can either do them on the stove top or in the oven: they’ll be done more quickly on the stove top, and you only need water and sugar, but your technique is more important – if you don’t stir constantly you’ll end up with a caramel mess and soggy nuts.  They take longer in the oven, your results will be consistently good.  I think I prefer the end result of the oven roasted nuts better, so if you have the time, do them in the oven!

Elegant Endives

Recipe from epicurious.  Serves 6-8 as an appetizer.

  • 2 belgian endives
  • 4 oz. crumbled blue cheese
  • 3/4 c. candied pecan pieces, see recipe below
  • honey

Slice off the bases of the endives.  Remove small and damaged outer leaves.  Carefully separate leaves from the base so that they remain intact.  Fill the white part of the endive with crumbled cheese and pecan pieces.  Arrange on platter and drizzle with a small amount of honey.

Candied Pecans

Technique adapted from AllRecipes.

  • 2 c. pecan halves and pieces
  • 1 egg white
  • 1 TBS water
  • 1/4 tsp. vanilla
  • 1/2 c. sugar
  • 1 tsp. cinnamon
  • 3/4 tsp. salt
  • 1/2 TBS butter
  1. Preheat oven to 250°F.  Use butter to grease a baking pan.
  2. Beat egg white with water and vanilla until frothy.  In a separate bowl, mix together sugar, cinnamon, and salt.
  3. Mix pecans with egg white mixture until they are all moistened.  Then transfer to the sugar mixture and stir until pecans are fully coated.  Spread pecans on greased pan in a single layer and bake for 1 hour, stirring every 15 minutes.

0 November 11, 2010 Pasta

Kale Recovery

So the beginning of November did not go so hot for me – I unexpectedly got a staph infection that was complicated by an allergic reaction to the antibiotic they put me on.  It took 12 days, 3 doctor’s visits, and 5 prescriptions for me to start getting better.  And in the meantime I had to take 3 midterms with kind of disgusting, fully bandaged right hand, and continue to go to class and to work and do my dishes and I didn’t have anyone to take care of me.  And then on top of that they canceled tailgate, but that’s a story for another day.  Basically, it was exceedingly frustrating.  However, thanks to a beautiful thing called steroids, I’ve finally regained use of my hand/feel like a normal, non-disfigured human being again.  And now, if you notice me looking particularly jacked in the next 3 weeks or winning the Feaster Five, you’ll understand why.

Needless to say, cooking/blogging was not really a priority when the average amount of time it took me to do everything had doubled.  However, one night last weekend I did find this incredible recipe, that I’m crediting in part for Sunday being the turn-around point of my recovery.  Having made several trips to Rite-Aid in the recent past, which happened to necessitate 15 minutes of standing around in the aisles, and additionally happened to coincide with the week after Halloween, my cupboard had somehow been filled with a large amount of half-price off-brand halloween candy.  Saturday afternoon I found myself mindlessly eating peppermint patties one after the other, and my thought process after realizing what I was doing went something like this: Man, this is probably not helping my body do it’s thing.  But I can’t use my hand to do much beyond stir, and I can’t wash anything that won’t go in the dishwasher.  And I really just want some cheesy pasta.  But that has no nutritional value either.  And I really should use up all those vegetables I bought in the hope that consumer guilt would force me to eat them.  I’m going to stop thinking about this and mindlessly browse the internet like I’ve been doing all day.  Oh, what Heidi of 101 cookbooks, you just made a meal that requires all of one pot and one dishwasher safe blender that was a sauce of blanched kale and goat cheese served over whole wheat pasta?  Does that not fill exactly all of the requirements that I just mentioned?  Are you an angel?

Keep in mind that I was not searching for recipes that used kale, or that were simple, or that involved cheese and pasta.  I literally just clicked the little 101 cookbooks button on my sidebar and BAM.  Serendipity.  I made it immediately, ate it immediately, and loved it a lot.  Since I’m pretty sure kale has magical properties it’s so nutritious, I decided that the fact that I woke up feeling about 150% better Sunday morning had to be attributed in part to that sauce, which I’m passing on to you all, with a few revisions: the original recipe called for olive oil, but I thought it drowned out the freshness of the kale, so I omitted it this time.  I also think this would be really stellar/even more healthifying with a little bit of ginger in it for kick, so I plan on trying that soon… In the meantime, all hail kale.

Creamy Chevre and Kale Pasta

Adapted slightly from 101 Cookbooks. Serves 2-3.

  • 6 cloves garlic, peeled
  • 1/2 large bunch of fresh kale, washed, stemmed, and very roughly chopped
  • 3 oz. goat cheese
  • 1 1/2 tsp lemon juice
  • 1/4 tsp. red pepper flakes
  • kosher salt and pepper to taste
  • 1/2 box rotini
  1. Bring a large pot of heavily salted water to a boil.  Add garlic cloves and boil for 2-3 minutes.  Add kale and blanch for 15 seconds (don’t overcook!) then remove kale and garlic to a blender with a slotted spoon.  Reserve blanching water.
  2. Add goat cheese, lemon juice, and red pepper flakes to blender.  Add 1/2 c. of blanching water.  Blend.  Add more water until consistency is as desired.  Season to taste with salt and pepper.
  3. Return blanching water to a boil.  Add rotini and cook according to package  directions.  Drain, mix with sauce.  Serve warm, sprinkled with more goat cheese.

0 October 30, 2010 Dessert

Iron Chef: Duke Edition

When Becky forwarded me an email announcing that Duke would be hosting its own version of Iron Chef this fall, I was too excited for words.  I’ve never really participated in any events at Duke, and this was clearly going to be my shining moment.  The competition announcement stated that competitors would need to work in teams of two, and that they would have one hour to create and serve two dishes, one sweet and one savory, that incorporated the “secret” ingredient of the year: pumpkin.  I immediately ran through all of the people that I would want to work with and pretty quickly concluded that Justin was my first choice sous-chef.  When I asked him he agreed but questioned my choice, reminding me that he doesn’t really cook.  Yes, I explained, I know, but you have discerning taste when it comes to food, you’ve eaten at a lot of excellent restaurants, and you’re passionate about perfection. (I don’t think I stated these things this eloquently in real life, but it’s what I meant.  Really.  And as a side-note Margie was my second choice because she was an extremely reliable onion chopper throughout our Prague rooming experience and she’s really good at doing what I tell her to.)  So it was settled:  Justin and I were going to enter.

Although the competition wasn’t until October 29th, we were required to submit our recipes for consideration by October 6th, giving us only one weekend from when we decided to compete until the deadline.  Despite having 2 midterms and 4 problem sets due the next week, I dedicated that Sunday to playing with pumpkin.  As we only had one hour to complete two dishes, and no access to an oven, roasting our own pumpkin was out of the question.  With a little help from Trevor, Justin’s sister-in-law, and The Flavor Bible (which, serendipitously enough, we both happened to own, so we could discuss flavor combinations at length over the phone), we decided that our starring flavor combination was going to be that of pumpkin and ginger.  I already knew what I wanted to do for the dessert – a version of these Pumpkin Cheesecake Pots with gingersnaps and ginger-infused whipped cream – but was less sure about the savory dish.  A soup felt too boring, a classic sage-pumpkin-gorgonzola take too, well, classic.  Then Justin came through with the idea of a curry, but not in the traditional way.  Rather, he wanted a pumpkin ravioli in a curry sauce, but not too Indian of a curry sauce.  More like a Thai curry sauce.  I was sold.  I knew I picked him for a reason.

So we hit up Kroger, where we were almost defeated when they told us they didn’t carry pumpkin, only to have a nice lady chase us down the aisle waving cans of pumpkin at us a few minutes later.  Thank you, Kroger lady, you saved my shining moment.  We headed back to my kitchen, and made some cheesecake pots, and some curry sauce, and some ravioli filling, and realized that neither of us really likes pumpkin.  Oh well.  We tweaked here and there, cleaned up, snapped a couple pics, submitted the recipes, and called it a day.

A week and a half later we got an email saying that we were one of four teams accepted by the professional chef judges to compete – thrilling!  Our out-of-box-flavor-bible thinking had paid off.  Even more exciting – I now had a legitimate excuse to buy the pasta machine that’s been in my Amazon cart for 5 months.  I see many, many ravioli in this blog’s future.

The competition was a blast.  It was probably the fastest an hour of cooking ever went by in my life.  Tons of people came out to cheer, and we even had President Broadhead doing a fist pump in support of our team, the New Jersey Fist Pump-Kins.  No, I’m not from New Jersey.  Yeah, we kinda rule.  At first we were nervous about how our food was going to turn out – things weren’t coming out quite as well as they had when we practiced them.  But then we started getting positive feedback from the crowd, and people who were interviewed kept choosing our parfait as their favorite so far.  It was kind of really super exciting to have that many people trying and excited about our food.  We managed to get everything out on time and looking decent, and then we sat back, covered in pumpkin, and waited while the judges ate.  When it came time for the announcer to ask the judges what their favorite savory dish was, we were thrilled that 2 out of the 3 judges chose our ravioli, and all 3 chose our parfait as their favorite side/dessert dish!  Despite the positive feedback, we ended up taking 2nd place.  One of the judges came by afterward and said that if taste alone had been the judging criteria, our food would have won hands down, but that it didn’t do as well in the healthiness category.  A fair point – both our dishes were lacking in fresh produce compared to the other contestants’.  It was so nice to have people react so positively to our food though, and the crowd and atmosphere made the whole experience a blast.

Thank you SO much to everyone who came out and cheered for us, and to Duke Culinary Society for running such a great competition.  Also, thank you Justin for competing with me – you were definitely not a sous chef.  And thank you to Tim for coming up with a sweet name/theme for us even though you’re lame and didn’t come watch.  Finally, thanks to Carissa, Megan, and Alice for the photos.  Recipes for both our dishes are below, if you’re interested in checking them out!

Ginger-Pumpkin Cheesecake Parfaits

  • 1  14 oz. can 100% pumpkin puree
  • 8oz neufchatel cheese
  • 1/3 c. sugar
  • 1/2 c. brown sugar
  • 1/2 tsp cinnamon
  • 1/4 tsp allspice
  • 1/4 tsp ground cloves
  • 1/4 tsp ground cardamom
  • 1 tsp. vanilla extract
  • 1/2 lb. gingersnap cookies
  • 2 TBS salted butter, melted
  • 1/2 pint heavy cream
  • 1 inch piece fresh ginger
  • 1/8 tsp cream of tartar
  • 3 TBS sugar
  1. In a blender or large food processor, combine pumpkin, neufchatel, sugars, spices, and vanilla.  Pulse until smooth.
  2. In a large plastic bag, crush gingersnap cookies into crumbs with a rolling pin.  Mix with melted butter.  Toast for 2-3 minutes over medium heat in a large saucepan.  Set aside.
  3. Peel ginger.  Crush into a paste in a mortar and pestle, or pulse until smooth with a food processor.
  4. In a large bowl, beat cold heavy cream with cream of tartar until stiff.  Whisk in sugar and ginger paste to taste.
  5. Assemble parfaits by layering in the following order: pumpkin custard, gingersnap crumbs, pumpkin custard, whipped cream, ginger snap crumbs.  Serve cold.

Spiced-Pumpkin Ravioli in a Thai Curry Sauce

For the sauce:

  • 2 tsp canola oil
  • 1 inches fresh ginger, peeled
  • 6 cloves garlic, minced
  • 1 can coconut milk
  • 1 1/2 TBS Thai red curry paste (Thai Kitchen brand)
  • 1 TBS lime juice
  • 1 c. chicken broth
  • kosher salt to taste

For the pasta dough:

  • 2 c. flour
  • 3 large eggs
  • 1 tsp salt
  • 2 TBS extra virgin olive oil + extra for brushing

For the ravioli filling:

  • 1 (14 oz.) can 100% pumpkin puree
  • 1/4 c. light brown sugar
  • 1/3 c. finely ground unsalted cashews
  • salt and black pepper, to taste
  • 1/4 tsp. cardamom

Ravioli Filling:

  1. Mix all ingredients together, season to taste.

Ravioli dough:

  1. Mix together flour and salt.  Mound flour on a large, clean surface.  Form a large well in the middle of the mound.  Add eggs and olive oil to well, and beat gently to break yolks.  Using a fork, pull flour from edge of mound into center of well.  Do your best not to break the well, but it’s kind of inevitable.  Continue to gently incorporate the flour into the eggs/oil until it begins to come together.  At this point it is easiest to knead the dough by hand.  Knead for at least 5 minutes, until the dough is uniform and beginning to develop some elasticity.  Wrap the dough in plastic wrap brushed with olive oil and let it relax for 30 minutes.
  2. Roll the relaxed dough out into a square about 1/2 inch thick.  Cut this into rectangular sheets and feed through pasta machine as instructions direct.  If you are not going to form the ravioli immediately, cover pasta sheets with plastic wrap to keep them from drying out.
  3. Fill a small bowl with water.  Take a sheet of pasta and place a tsp of pumpkin filling in the center of one side.  Brush the edges around the filling with water (I use my finger usually).  Fold the edge over (lengthwise) and press the edges together to seal.  Cut through the sealed edge on one end so that the rest of the pasta sheet length is free from the newly formed ravioli.  Continue to work your way down the pasta sheet.
  4. Bring a large pot of salted water to a boil.  Cook the ravioli in batches, for about 2-3 minutes each.  If your boil is gentle, you will know your ravioli are done when they float to the top.  In a rapid boil they tend to float instantly.  Two minutes is generally a safe amount of time to cook them.  Remove with a slotted spoon and set aside, or in the sauce they will be served in.

Sauce:

  1. Crush peeled ginger into a paste in mortar and pestle or blender.  Heat canola oil in a large saucepan over medium heat.  Add garlic and ginger paste, sautee for 1-2 minutes, until fragrant and ginger begins to soften.  Add curry paste, sautee for an additional minute.
  2. Add coconut milk, chicken broth, and lime juice.  Simmer gently to reduce to desired consistency.  Season to taste with salt.
  3. Add cooked ravioli.  Simmer gently to heat through.  Serve hot, sprinkled with large crystal sea salt and cashew pieces.
  • « Go to Previous Page
  • Go to page 1
  • Interim pages omitted …
  • Go to page 50
  • Go to page 51
  • Go to page 52
  • Go to page 53
  • Go to page 54
  • Interim pages omitted …
  • Go to page 57
  • Go to Next Page »

Primary Sidebar

Subscribe!

Get creative recipes and menu ideas delivered straight to your inbox.

Most Popular

A House // Sweet Potato and Coconut Milk Soup with Brown Rice and Lentils

Monthly Fitness Goals: July // Homemade Spinach Wraps with Chopped Greek Salad

A New Job // Classic Seven-Layer Bars

Butternut Squash Carbonara with Fried Sage and Caramelized Onions

Happy Birthday, Trevor! // Peanut Butter Fudge

Cookbook Review and Giveaway: Home Made Winter

Drizly

Please note!

Full disclosure: if you purchase anything at Amazon using the above links or any other links to Amazon on this site, I will receive a small commission. Just so you know!

Copyright© 2025 · Cookd Pro Theme by Shay Bocks

This site uses cookies: Find out more.