• Skip to primary navigation
  • Skip to content
  • Skip to primary sidebar
  • Home
  • Recipes
  • Features
    • Cookbook Reviews
    • Ingredient of the Week
    • Sunday Dinner
    • Fitness Goals
  • Travel
  • About
    • Privacy Policy
    • Cookie Policy
  • Work With Me

Katie at the Kitchen Door

Globally-inspired, seasonal recipes

Blog Page

Garden: Roast Eggplant, Pesto, Whipped Goat Cheese, Wheat Berries,

0 September 24, 2012 Boston

Garden: Roast Eggplant, Pesto, Whipped Goat Cheese, Wheat Berries,

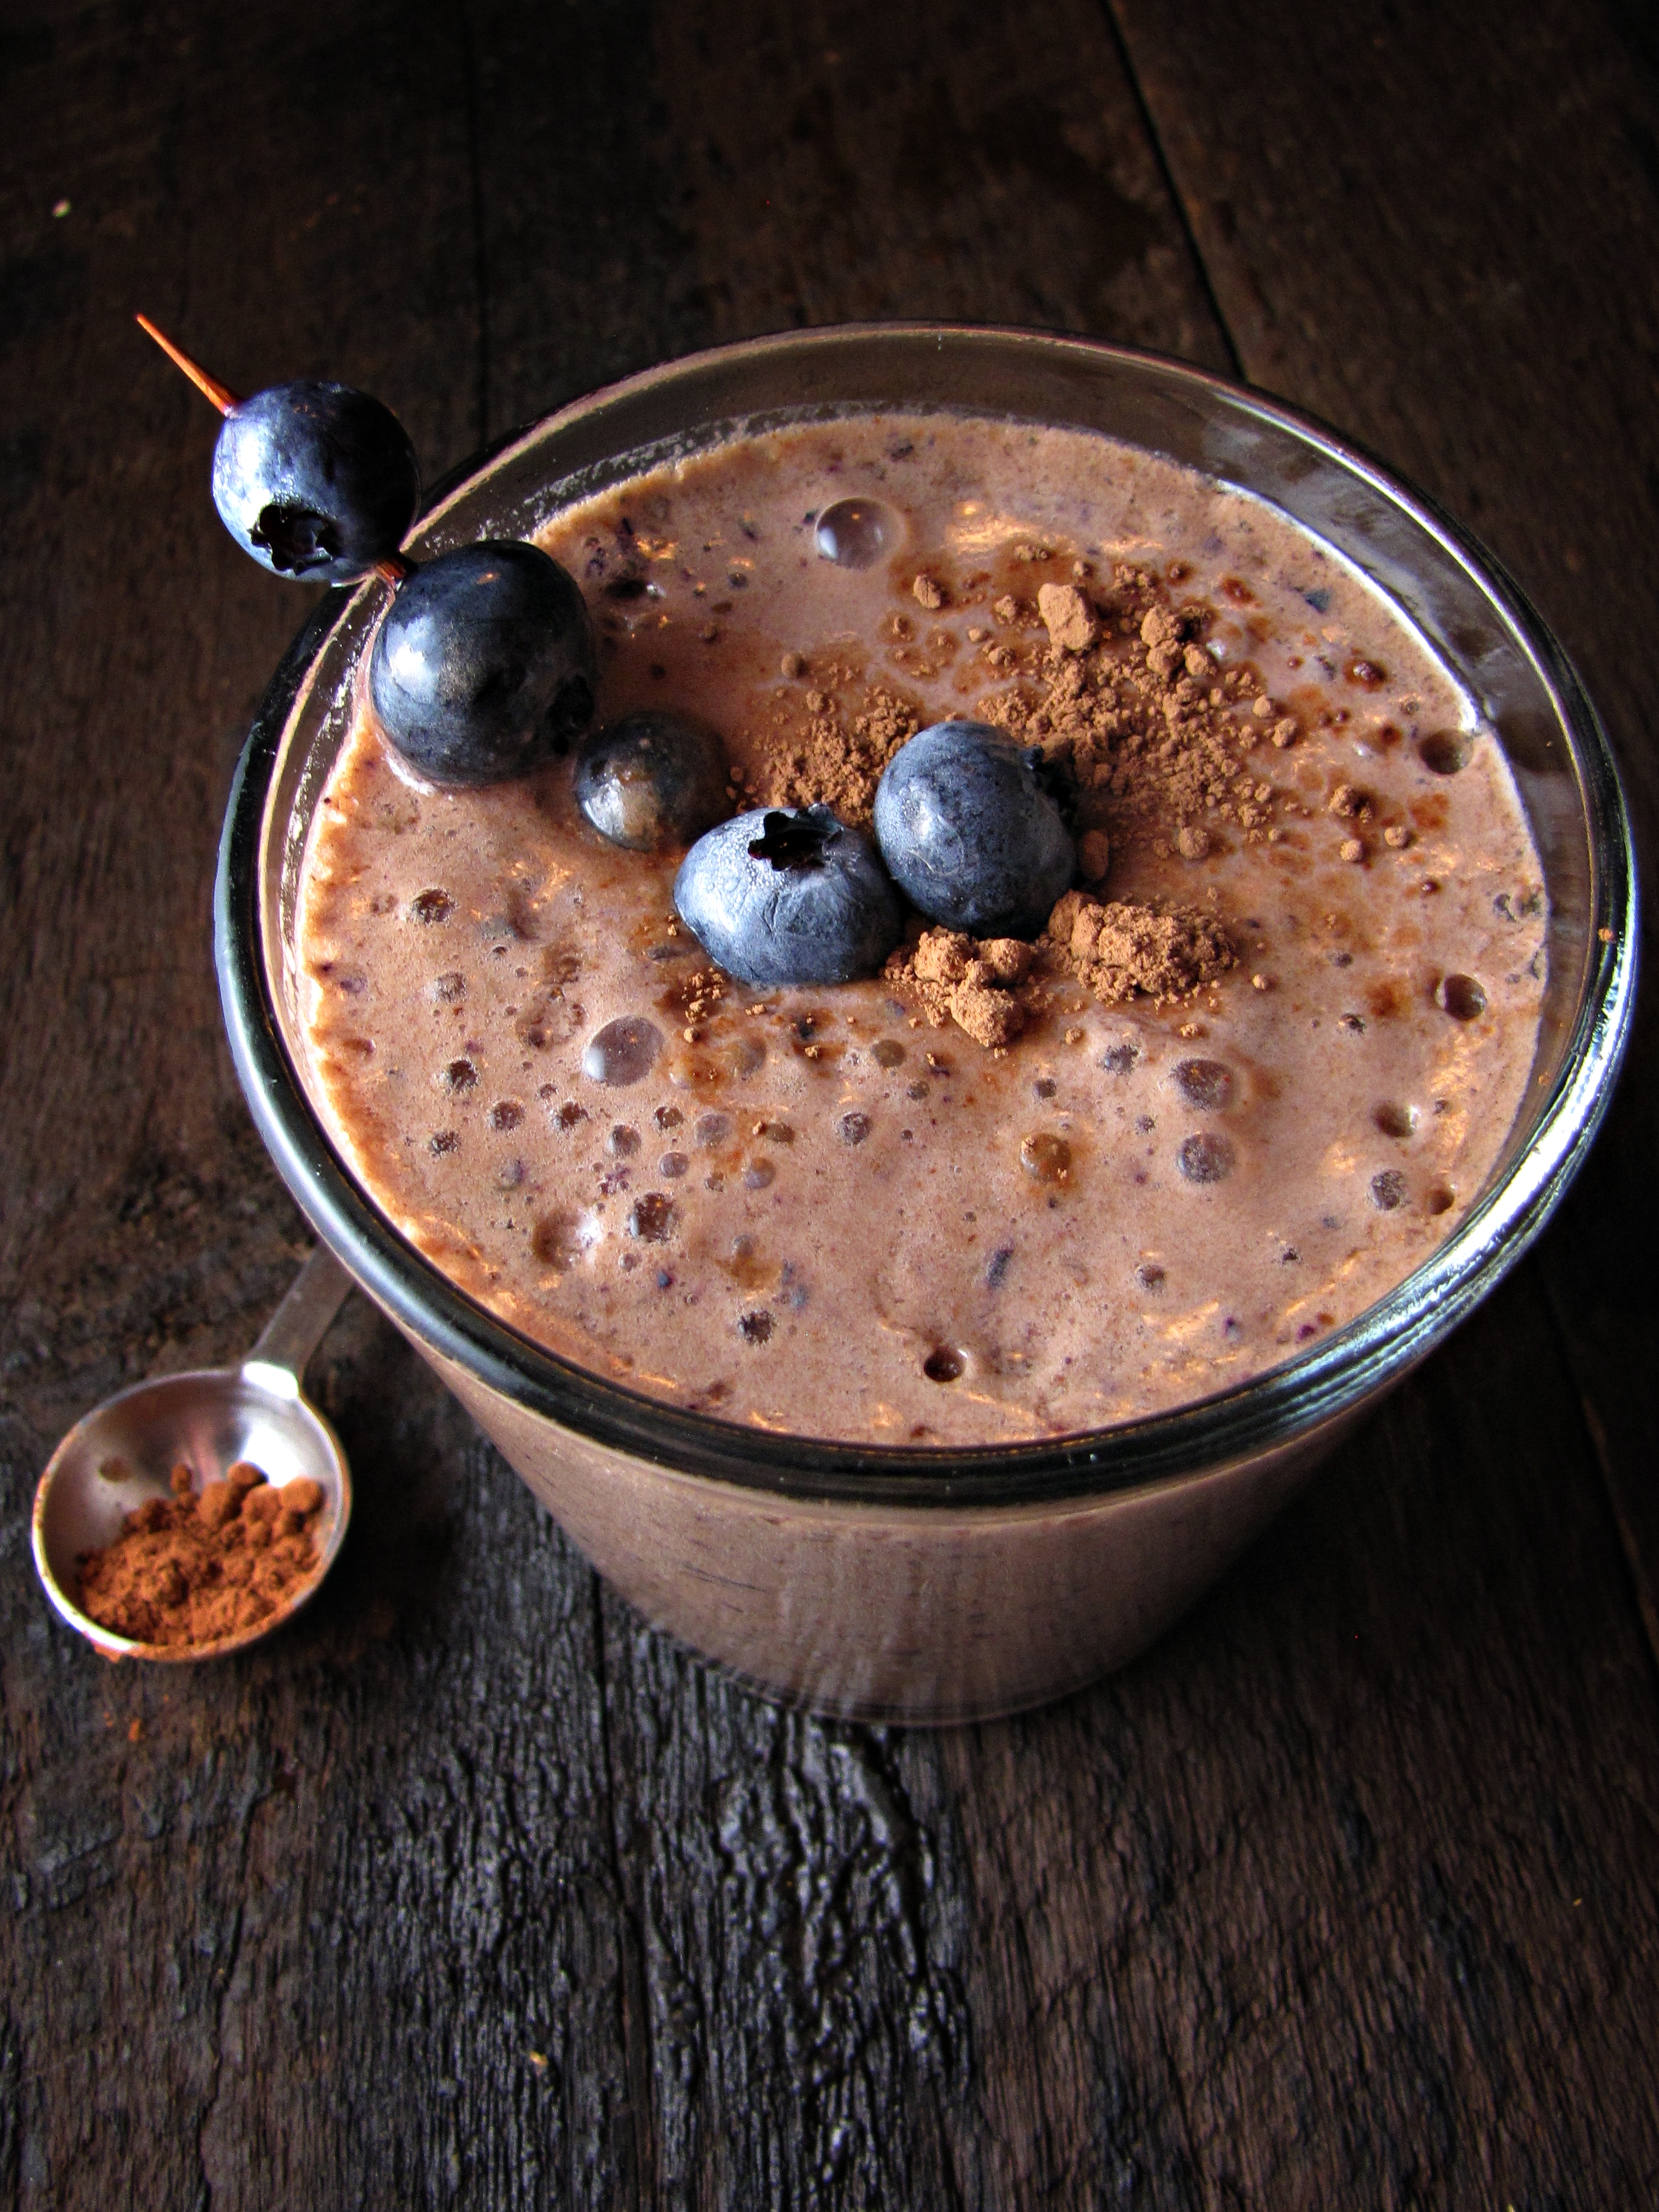
Gardening  season is winding down.  Our raised bed is barely getting 3 hours of sun a day, the last few tomatoes are ripening, and while I’m still hoping for the brussels sprouts to actually produce their sprouts, I’m not holding my breath.  It’s a little bit sad, but we’re already taking notes and daydreaming about everything we’re going to do next year.

This first year of gardening has been a roller coaster, if you can believe me that gardening qualifies as something in which I have a large enough emotional investment to describe it as a roller coaster.  It’s had extremely fulfilling moments – snacking on super-sweet sun-ripened grapes on my way out the door in the morning; moments of defeat – pulling the umpteenth San Marzano off the vine with more blossom rot; and moments of triumph – a flush of new growth on my lovely lemon tree, despite it having been close to death from a mealybug infestation a month before.  Our most successful crop was probably the cucumbers, which took over the raised bed, climbed up and over the 8 foot fence, and produced at least a dozen mammoth cucumbers.  Our least successful?  The broccoli, as it was the only crop that produced nothing at all, despite some hopeful moments early on.

Success or failure, I think it’s safe to say that both Trevor and I derived a lot of satisfaction from the whole experience.  So much satisfaction, in fact, that we’re upgrading.  My dad has (so nicely!) agreed to share the cultivation of his “back 40” with us.  There’s already a sizable vegetable plot, a dozen or so fruit trees, a raspberry patch, well-established grape vines, and blueberries, with plenty of sunshine and room for expansion.  Since my family spends the majority of the growing season in Maine, having us around to take care of the garden means they might get more than one measly peach and a glut of over-sized kale each year, and for us, well… owning land is not something that we are close to accomplishing, so having a spacious plot to play around with is the equivalent of winning the garden lottery.  Needless to say, we’re excited.

We’ve spent the last 7 or 8 Sundays at the Andover garden, getting a handle on things and caring for a fall crop of beans, peas, beets, and carrots.  Spending a few hours outside working in the dirt – sometimes dripping sweat as you shovel and rake, sometimes peacefully pulling weeds from between the carrots – is deeply satisfying.  It’s also a great way to be with Trevor, working quietly side by side, each with our own task but the same ultimate goal.  I’ve wondered once or twice if gardening is just a fad for me – will I still be this enthused next year? – but it seems so natural to work with the earth that it’s hard to imagine moving on.

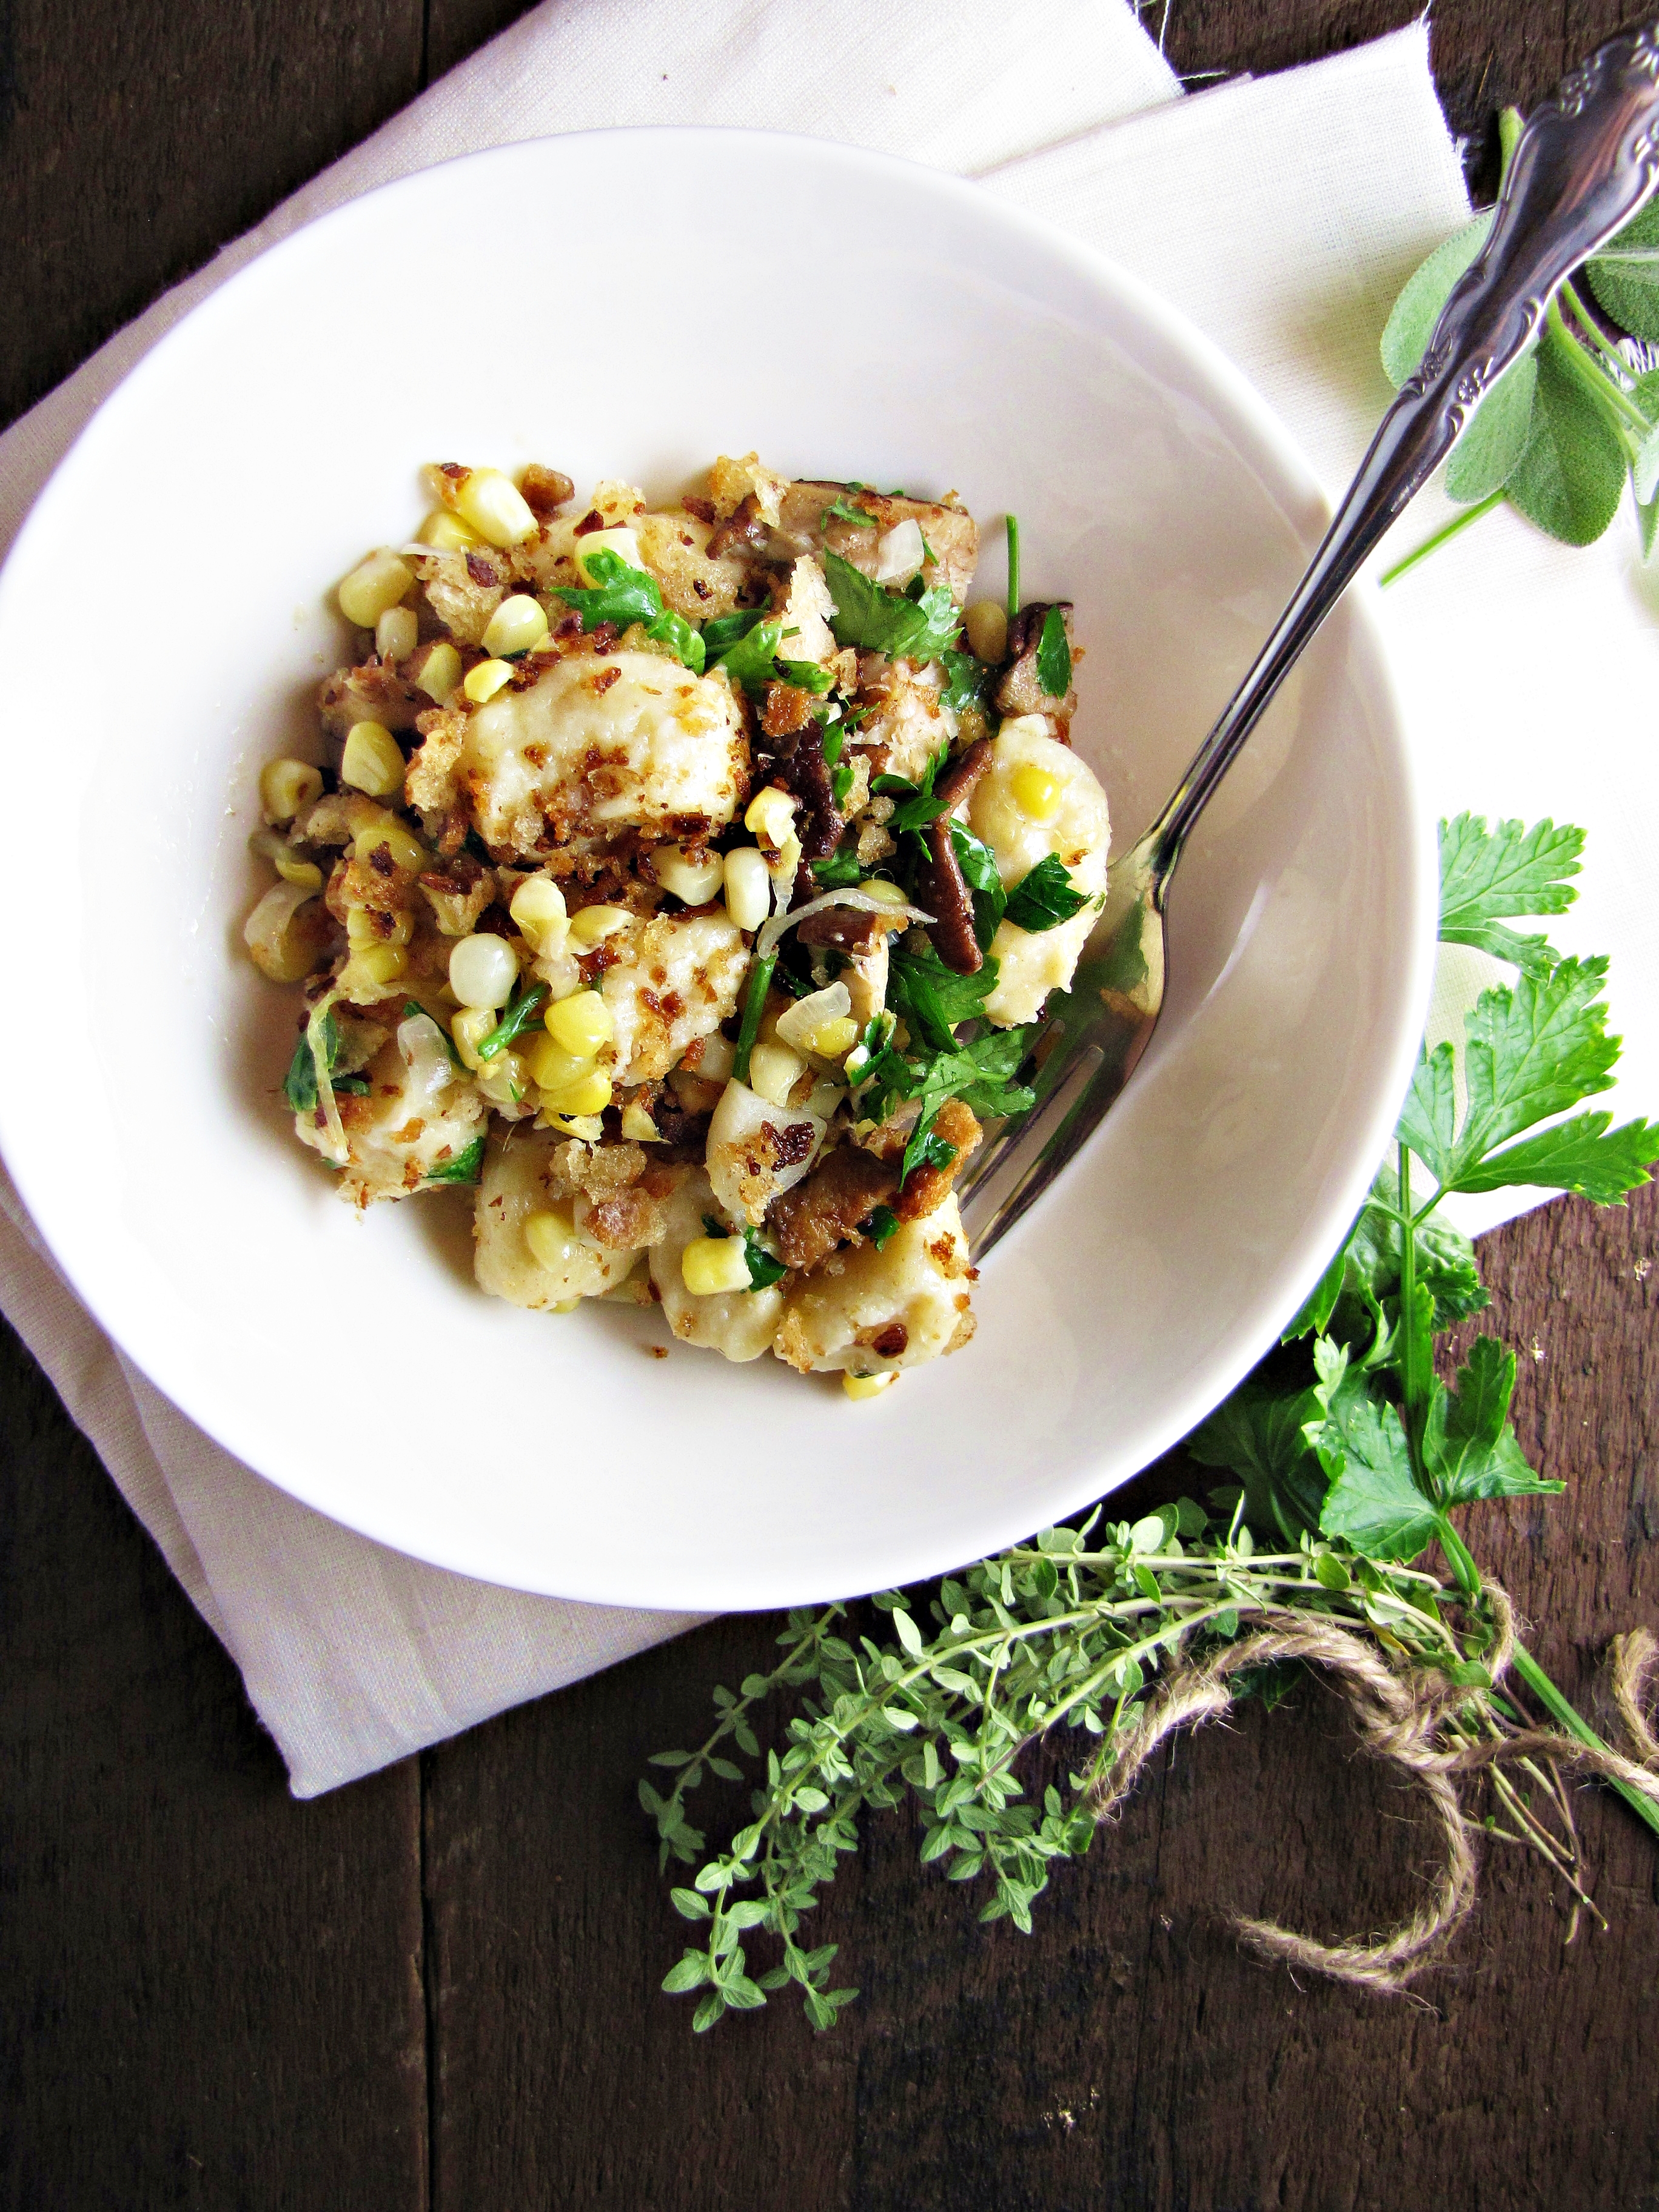
Plans for next year are a constant source of conversation – should we add a melon bed?  What structures need to be replaced?  Do we want to add more fruit trees? – but for the time being we’re mostly concerning ourselves with clean up and harvest.  In particular, we’ve had a bumper crop of eggplants (which is in no part due to our efforts, as my dad put them in long before we showed up), and I’ve been struggling to eat my share.  I’ve had my eye on a recipe for Lamb and Eggplant Stew with Farro, Parsley, and Harissa in Sunday Suppers at Lucqes for a while now, but every time it comes down to it, I’m just too busy to put together the multi-day recipe.  Instead, I used the flavors of that dish and a little inspiration from Tender to put together this quicker, vegetarian version.  Eggplant gets roasted with a chile-garlic oil, then added to nutty wheat berries, parsley pesto, and a bit of whipped goat cheese.  It’s balanced in both flavor and texture, and makes an interesting and healthy vegetarian main course.  Feel free to play around with the components – would feta be a better counterpart, or perhaps a traditional basil pesto?  Should the wheat berries be dressed in a chile-paste to amplify the heat? – to see what works for you.  And let me know if you try any variations!  Or if you can think of a better name than I could…

Roast Eggplant, Parsley Pesto, Goat Cheese, and Wheat Berries

Serves 3-4.

  • 2 large globe eggplants
  • 1/3 c. + 1/4 c. olive oil
  • 7 cloves garlic, peeled
  • 1/2 tsp harissa or chile powder (may need more or less depending on the heat level of your chile powder_
  • sea salt
  • 2 c. uncooked wheat berries, cooked according to these directions
  • 3 c. fresh parsley leaves
  • 1/4 c. pine nuts or walnuts
  • 4 oz. soft goat cheese
  • 1/2 c. heavy cream
  1. Wash and dry the eggplants, then slice into 1 inch thick rounds.  Salt both sides and set on a baking pan for 15 minutes.
  2. Preheat the oven to 425°F.  In a food processor, blend 6 cloves of the garlic, 1/3 c. oil, and harissa until a smooth paste is formed.  Use a paper towel to wipe salt and liquid from the eggplant slices, then cut the slices into 1 inch cubes.  Brush the eggplant with the chile-garlic oil, coating all pieces, then sprinkle with salt.  Roast for 40 minutes, stirring eggplant pieces about half way through.
  3. Cook your wheat berries while the eggplant is roasting according to directions in link.
  4. Make the pesto: In a food processor, blend 1/4 c. olive oil, remaining 1 clove garlic, and nuts to form a paste.  Add parsley and blend until fully combined.  Taste and season with salt if desired.
  5. Place the goat cheese in a bowl and use a whisk or fork to break it up.  Add the heavy cream, and whisk together until a smooth, thick cream is formed.
  6. Place a scoop of wheat berries in each bowl.  Top with a few spoonfuls of pesto, a scoop of roast eggplant, and a dollop of whipped goat cheese.  Serve hot.
Pumpkin Cheddar Muffins

18 September 20, 2012 Breakfast

Pumpkin Cheddar Muffins


September has gotten off to a really busy start.  (Is it OK to say “start” when you’re two thirds of the way through the month??)  Busy in a good way – two trips back down to Durham for recruiting – and for snagging a quick lunch with Marco; a quick weekend in Chicago to run my first ever half marathon and see Steph; a visit from the lovely Phoebe; celebrating the arrival of my friends Dave and Noah in Boston with not one, not two, but three different parties; a tequila-pairing dinner at Lolita with out-of-this-world-good food; visits to Andover to work on the “farm” (more on that soon!); and all the other regular things that make life busy.  I’m not at all complaining, but I am glad that the next few weeks will be a little bit quieter and give me time to enjoy the beginning of my favorite season.

One thing that I’ve been meaning to do since the beginning of the month is make these muffins.  As soon as that crisp note filled the air and pumpkin beers started to line the shelves of every liquor store, I thought about them.  Sweet and savory at the same time, with just the slightest hint of heat from the cayenne, these might just be my favorite muffins ever.  (Well, maybe not better than my mom’s pumpkin muffins… I don’t think I’ve ever eaten less than four of those in a sitting.  Hey, they’re small.  I should get the recipe for you guys.)  These are great either for breakfast – I’ve even used them as the “sandwich” around a fried egg – or for a mid-afternoon snack, with a hot cup of coffee.  The recipe is adapted from Baked Explorations, and makes me think that Matt Lewis and Renato Poliafito might just be geniuses.  In fact, now that it is decidedly baking season again (my coworkers are gonna be so excited), I’m hoping to try a few new recipes from this gem of a book.  Caramel apple cake, anyone?

Pumpkin Cheddar Muffins

Adapted slightly from Baked Explorations.  Makes 12 muffins.

  • 1 c. canned pumpkin puree
  • 3 TBS sour cream
  • 2 eggs
  • 1 stick butter, melted, then cooled slightly
  • 2 c. flour
  • 1 tsp black pepper
  • 1 1/2 tsp baking powder
  • 1/4 tsp cayenne
  • 1/2 c. brown sugar
  • 5 oz. extra sharp or raw milk cheddar cheese, grated
  1. Preheat the oven to 375°F.  Line muffin tin with paper muffin liners and set aside.
  2. Mix together pumpkin and sour cream until evenly combined.  Whisk in eggs and butter until mixture is smooth, and set aside.
  3. Whisk together flour, pepper, baking powder and cayenne until evenly combined.  Whisk in brown sugar, then pour wet ingredients into dry and stir to combine.  Batter will be fairly thick, not runny.  Stir in 3/4 of the grated cheese.
  4. Spoon batter into muffin cups, filling to the top.  Sprinkle each muffin with some of the remaining cheese.  Bake for 17-20 minutes, until golden-brown on top and a toothpick inserted into the middle comes out clean of any batter (it may have melty cheese on it, but you don’t want still wet batter).  Let cool for 5 minutes, then remove from pan.  Serve warm!
Greatist Collaboration: Chocolate Blueberry “Decadence” Smoothie

2 September 12, 2012 Breakfast

Greatist Collaboration: Chocolate Blueberry “Decadence” Smoothie

When the folks over at Greatist asked if I’d be interested in coming up with a healthified version of a chocolate milkshake to celebrate National Chocolate Milkshake Day, this recipe immediately popped into my head.  From Lucid Food, which I reviewed earlier this year, this “surprisingly refreshing” (to quote the bf) drink manages to mimic a chocolate milkshake without the primary ingredient – chocolate ice cream.  Instead, it uses cocoa powder and skim milk for a super chocolaty milk base, made frothy and cold by the addition of frozen blueberries.  Chocolate and blueberries may not be a classic combination, but I’m a fan, as evidenced by this chocolate and blueberry galette I made a few years ago.  Finished off with cinnamon, nutmeg, vanilla, and a touch of maple syrup, this smoothie makes a perfect healthy dessert or post-workout treat.

In other healthy, Greatist-worthy news, I finished my first half-marathon this past weekend!  Given that I only had 6 weeks to train, I’m quite proud of myself (and Trevor too).  Point of pride number one – I finished, and I only walked for about a minute, less than on any of my (much shorter) training runs.  Point of pride number two – my time, 2:03:51, was way faster than expected, and not too shabby at all.  It helped that I ran the first 7 miles with Trevor, and also that it was a beautiful, slightly breezy morning running up Lakeshore Drive with stunning views of Chicago just after sunrise.  I won’t lie, the last few miles felt like they took a year, my brain buzzing with that singular focus that exhaustion brings and my lower shins and knees twinging with every step, but I did it!  The next challenge?  Keeping up my mileage base and staying injury-free so I can do even better at the Newburyport half I’m running with my mom in 2 months.  Also losing 10 pounds so that I can be just that much faster.  You’d think that it would be super easy to lose weight when you more than double the amount of running you’re doing every week – it’s not.  Maybe the trick is swapping out the post long-run Sunday brunch for something lighter – perhaps a chocolate blueberry smoothie?  I’ll keep you posted.

Head on over to Greatist for the smoothie recipe.  And while you’re over there, let me know if you find any half-marathon training inspiration!

M3 Davis Square and a Pickled Watermelon Salad

0 September 10, 2012 Boston

M3 Davis Square and a Pickled Watermelon Salad

A few weeks ago, my 9 mile training run was rewarded with a special treat – a tasting brunch at M3 Davis with the Boston Brunchers.  It had been a while since I last got together with the Brunchers for an event – the last one I joined was for the Farm School, back in March.  When I saw that they were headed to the new Southern place in Davis, I signed up right away – I’d really been wanting to try this place, and it’s only a 10 minute walk from my house.  Which was about all I could manage after my run, anyway.

Somerville has had a spat of awesome new restaurants opening in the past 6 months or so: the new falafel bar, the tequila bar and Mexican restaurant Painted Burro, the speakeasy style Saloon, and the surprisingly classy i-Yo cafe and fro-yo shop, to name a few.  Actually, Davis in general feels much hipper, cleaner, and more bustling than it did even a year ago – it’s definitely a good place to be.  M3 joins the ranks of classy Davis eateries as a representative of the classic “Meat and Three” concept that grounds Southern dining.  Although it has a small interior, it’s bright and trendy, with most of the surfaces covered in chalkboard paint – bring your creative side with you as there’s plenty of chalk provided (I could only imagine this gets really fun when settling in for a night of drinking).  The atmosphere is super relaxed – fun, young, and casual.

The folks at M3 served us a little bit of what seemed like practically everything on their brunch menu.  Pickled watermelon and goat cheese salad, scotch quail eggs, pomegranate mimosas, chicken and biscuits, fried chicken and cherry-pecan waffles, blueberry-ricotta pancakes, bloody mary’s, texas french toast with chocolate-covered bacon… by the time we left M3, I could barely move.  In a good way, if that’s possible.  I didn’t love all of the dishes – the pancakes, for instance, were a little dry (but then again, my pancake standards are pretty high), and the scotch egg was nothing to write home about, but the bloody mary, french toast, and chicken and waffles were all delicious.  Not delicious in an innovative high-end way, but delicious like your mom just made you a bunch of your favorite breakfast foods, and it’s a cool fall Saturday, and you’ve got all day in front of you to play, and you just can’t help taking seconds of everything.  If that makes any sense at all.  I guess what I mean is it’s good homey food, with just a little bit of twist to make it interesting.  This time around we received brunch gratis, but the price point is about what I’m looking for, with most of the brunch items in the $8-12 range.  I’ll likely be heading back soon – I think it’s going to make a great neighborhood spot.

Since I know most of you aren’t from around here, and because restaurant reviews aren’t really my niche anyway, I decided to recreate one of our brunch treats to share with you.  This pickled watermelon salad wasn’t my favorite dish (although I did like it quite a bit), but it was the one I felt I could recreate most reliably (the perfect bloody mary mix was going to be a lot more challenging).  This is a light and refreshing summer starter, with a bit of tang and lots of juice.  My version isn’t quite as good as the one at M3 – but it’s a starting point!

Disclaimer: M3 provided us with a tasting brunch free of charge, but all opinions included here are my own.

Pickled Watermelon and Goat Cheese Salad

Pickled watermelon recipe adapted from Bon Appetit.  Serves 4.

  • 1/4 of a large seedless watermelon, cut into 1 inch cubes (about 3 c. cubes)
  • 1 small shallot, minced
  • 1/4 tsp ground coriander
  • juice from 2 medium limes
  • 1 tsp honey
  • 1/4 c. white wine vinegar
  • 1/4 c. olive oil
  • kosher salt
  • black pepper
  • 1 large cucumber, peeled and thinly sliced lengthwise
  • 4 oz. fresh goat cheese
  1. Make the dressing: vigorously whisk together honey, vinegar, olive oil, shallot, coriander, lime juice, and honey.  Taste, and season with salt and pepper as desired.  Pour over cubed watermelon in a large bowl, cover, and refrigerate for 1 hour.
  2. Lightly salt cucumber slices and place in a strainer over a large bowl.  Let sit for 20 minutes, then wipe dry.
  3. To assemble salad, place watermelon cubes on each of 4 plates, then top with slightly curled slices of cucumber.  Dot each plate with 1 oz. goat cheese, then sprinkle with fresh black pepper.


Summer Bucket List Update and a Fig and Almond Tart

0 September 4, 2012 Boston

Summer Bucket List Update and a Fig and Almond Tart

As the official end of summer is upon us, it’s high time I post an update on my summer bucket list from June.  While in my mind summer’s not over until tomatoes leave the farmer’s market and the water’s too cold to go swimming, it is true that the number of nice days left in the season is quickly shortening, and I better make the most of what’s left!

  1. Go to the Cape.  While I haven’t done this yet, I haven’t given up on it, either.  Shoulder season on the Cape might even be nicer than the height of summer, who knows?
  2. Pick berries.  Blueberries, raspberries, blackberries, even a few straggler strawberries on my landlord’s tiny plants – berries have been picked.  Sadly, the backyard raspberry patch season was ended early by raspberry fruitworms – I will get you next year, worms.
  3. Learn to grill.  I did light the grill one or two times… and even flip things over on it… but I still haven’t done it myself, so I’m not checking it off yet.  What are some recipes that will entice me to grill?
  4. Make Cassis.  Success!  After much searching, Trevor secured enough black currants to make a batch of homemade creme de cassis and it came out perfectly.  I’m so glad I have enough to last me through several evenings of Kirs.
  5. Visit the Harbor Islands.  Ditto the Cape.  We actually tried to go to the Harbor Islands – as in, we went all the way to the dock, waited in line for tickets, only to find that tickets were mostly sold out for that day.  Thankfully, the ferry keeps running on weekends until October 8th, so perhaps an early fall picnic is in order.
  6. Ride my bike.  You would think this was an easy one, right?  Wrong.  Apparently I have some sort of anxious relationship with my bike – I own a bike, but have managed to draw out the process of getting ready to ride it for over a year.  First the lock, then the helmet, then finding a pump to put air in the tires – easy things, took me forever.  Anyway, as of today it’s all set to go – I haven’t actually gotten on it yet, but I’m for sure doing it this week, so I’m crossing it off anyway.
  7. Train for a half marathon.  I’m 100% surprised that this is one of the things I actually managed to accomplish this summer.  When my friend Steph suggested that Trevor and I join her and her boyfriend in Chicago for a half, I said yes and registered without too much thinking ahead, only to realize immediately after that I had only 6 weeks to whip my butt into shape.  But with Saturday’s 10-mile run under my belt, I’m feeling almost ready to hit the pavement – next weekend!  If that one’s a bust though, I’ve a bit longer to keep training for the Newburyport half with my mom – which isn’t until the beginning of November.
  8. Do a producer interview.  Still an idea I like, just haven’t gotten around to it!
  9. Plan a trip.  Fail, Katie.  We are going to Chicago, but that’s not exactly the trip I had in mind.  I’ll keep you posted.
  10. Make at least 3 kinds of ice cream.  Well this one was super easy – making and consuming ice cream has never been much of a challenge for me.  I started the summer off with cherry-chocolate ice cream, proceeded to Bailey’s fudge ripple ice cream, and most recently popped a batch of super-easy and surprisingly healthy plum sorbet in the freezer.  Now that pumpkin beer has started to show up in stores, I’ve had a custardy pumpkin ice cream on my mind – ice cream has no season!

So 5 for 10.  Not too terrible, not too great.  It’s still possible I’ll finish all of them before the end of September, but if not, it was fun to do the things I did.  And as for the tart you’re seeing here, it’s included because the arrival of figs at the market is a sure sign that summer is slowly shifting into fall.  Figs aren’t my favorite fruit, but even I liked this custardy almond tart with caramelized figs and almond brittle enough to have a big slice.  After that, I handed it over to Trevor to finish off our first dinner in his new house.

Fig and Almond Custard Tart

Adapted from Sunday Suppers at Lucques.  Serves 8.

For the pate sucree (crust):

  • 2 TBS cold heavy cream
  • 1 egg yolk
  • 1 1/2 c. flour
  • 3 TBS sugar
  • 1/8 tsp salt
  • 1 stick cold butter
  • 2 TBS ice cold water
  1. Whisk together flour, sugar, and salt in a large bowl.  Cut butter into 1/2 inch chunks and add to flour mixture.  Use a pastry cutter to cut butter into flour until dough resembles coarse meal, with even pieces about the size of a pea.  In a small bowl, beat together egg yolk and cream until even in color.  Slowly drizzle egg mixture into dough while stirring with a wooden spoon.  Then add ice water 1 TBS at a time, stirring at the same time.  At this point, dough should hold together loosely when pressed.
  2. Wrap dough in plastic wrap and chill for 10 mintues.  Remove from fridge and turn out onto a lightly floured surface.  Roll out into a 10 inch circle about 1/4 inch thick, then carefully lift over top of tart pan.  Press crust into edges of tart pan, and chill crust in pan for 1 hour.
  3. Preheat oven to 400°F.  Prick the bottom of the chilled crust 4-5 times with a fork.  Line chilled tart crust with parchment paper, then fill with pie weights.  Bake for 15 minutes, then remove parchment paper and pie weights, and bake for another 15 minutes, until golden brown.  Set aside to cool for at least 20 minutes.

For the filling:

  • 18 black mission figs, de-stemmed and quartered
  • 3 TBS butter, divided
  • 1 tsp vanilla extract
  • 10 TBS sugar, divided
  • 1/2 c whole blanched almonds
  • 2 eggs
  • 1 c. heavy cream
  • 1 tsp almond extract
  • 1 TBS cognac
  1. Caramelize the figs: add 2 TBS butter to a large frying pan and heat over medium heat.  When butter begins to foam, add 3 TBS sugar, then swirl/stir until sugar has dissolved.  Add quartered figs, and cook, stirring, until figs have released their juices and are coated in sugar.  Remove from heat and stir in vanilla extract.  Set half of the fig mixture aside.  Spread the other half over the bottom of the pre-baked tart pan.
  2. Wipe out the pan used to caramelize the figs and add remaining 1 TBS of butter and 3 TBS of sugar and stir to dissolve.  Add almonds, and caramelize, stirring frequently, until almonds are a toasty golden brown and sugar has begun to caramelize on them.  Remove from pan onto wax paper and let cool, then break almond brittle into bite sized pieces.
  3. In a large bowl, whisk together eggs, remaining 4 TBS of sugar, cream, almond extract, and cognac until evenly combined.  Pour custard over fig mixture in tart shell, then bake for 30 minutes (still at 400°F), until custard is set and slightly puffed.  Let cool on a rack for 10 minutes, then top with remaining fig mixture and almond brittle.  Serve warm or after chilling in the fridge.

Greatist Collaboration: Breakfast Polenta with Honeyed-Yogurt

0 August 29, 2012 Breakfast

Greatist Collaboration: Breakfast Polenta with Honeyed-Yogurt

The raspberries at my parents house are out of control.  It’s an unruly patch out way behind the house, that’s difficult to get into but so worthwhile.  Picking from that patch is my ideal berry picking experience – fingers stained red, jammy berries just barely this side of overripe, some already with a hint of yeasty fermentation, easily picking quarts of berries at a time, taking home just enough to last a week, until the next time I’m there.  A precious treat the rest of the year, raspberries now adorn most breakfasts and desserts – cereal, oatmeal, smoothies, ice cream, cake – and this breakfast polenta.

A steaming bowl of creamy polenta, a handful of fresh raspberries, a cup of hot coffee… as we get into the cooler mornings of fall, a hot breakfast while wrapped up in your favorite sweatshirt becomes infinitely appealing.  In fact, I can’t get enough of the weather right now: fresh, chilly mornings followed by warm, dry days… there’s a reason fall is my favorite season!

Although I’ve always thought of it as a dinner food, polenta is a filling and satisfying way to start off your day.  During the week, 1/2 a cup of instant polenta, some skim milk, and a few minutes of stirring gets you a hot breakfast that still gets you to work on time.  On the weekend, use traditional polenta and whole milk for a creamier, more luxurious version.  Inspired by Ancient Grains for Modern Meals, I topped this batch with greek yogurt, honey, and raspberries; the next day, I took the leftovers in a savory direction, adding some shredded cheddar, chopped basil, and a fried egg.  Both were delicious and kept me full until lunch – which can be a challenge!  Head on over to Greatist for the recipe, and give it a try.

Cookbook of the Month: Sunday Suppers at Lucques

6 August 27, 2012 Cookbook

Cookbook of the Month: Sunday Suppers at Lucques

It’s been a while since I’ve managed to publish one of these things in the month that it’s supposed to be in, but I’m ready this time, and with a few days to spare before we move into September (September!  Already?).  Perhaps I’m more on top of things because this month’s book, Sunday Suppers at Lucques, is one of my absolute favorites, and cooking from it all month has been anything but boring.  It’s up there with Antojitos and In the Sweet Kitchen as a cookbook that I turn to again and again, always producing great results, always exciting and inspiring.  I get the feeling that I could cook every single recipe from this book and be amazed by the results every time.

Written by Suzanne Goin, owner of the prestigious California restaurant Lucques, Sunday Suppers at Lucques is the ultimate entertaining cookbook for an ambitious home cook.  Organized into seasonal menus with 4 dishes per menu, the recipes are not simple or quick, but they are certainly inspired.  The five or six recipes I’ve tried have all been jam-packed with flavor, color, and texture.  Each menu tends to have a lot of different elements in it, but as long as you’re not in a hurry and you go into it ready to enjoy the process, the techniques are simple and rewarding.  And even though this book was published almost 7 years ago, none of the menus are tired or overdone.  For example, one spring menu has you start with an Endive, Meyer Lemon, Fava Bean, and Olive Salad, followed by Hawaiian Snapper with Green Rice and Cucumbers, a Leg of Lamb with Chorizo Stuffing, and finished off with Vanilla Semifreddo and Rhubarb Compote.  In the winter, you may find yourself itching to try the menu that starts off with a Broccoli, Burrata, and Pine Nut Salad and ends with a Meyer Lemon and Chocolate Tart.

I thought it was only appropriate to share the first recipe I made from Sunday Suppers at Lucques, a dinner I made over two years ago when my aunt and cousins were visiting us in Maine.  Now, making homemade gnocchi for 8 is not necessarily something I would recommend unless you really like making gnocchi, but making this meal when you have a little bit of extra time on hand and someone to impress is definitely recommended.  If you’ve never tried them before, ricotta gnocchi will be a delightful change from traditional potato gnocchi – they are incredibly light and fluffy, a little bit sweet and rich from the cheese, and not too difficult to work with.  Sauteed with some mushrooms, sweet corn, and a bunch of summer herbs (as well as a copious amount of salty butter), they make the perfect late summer meal.

I’m far from done experimenting with this book.  In fact, I’m planning on putting together a full menu from the summer section of this book this weekend – if it’s successful, I’ll be back with more recipes.  Come fall, I’ve got a bunch more recipes flagged to try, including Tunisian Lamb-and-Eggplant Stew with Farro, Cranberry-Walnut Clafoutis with Bourbon Whipped Cream, and Grilled Duck Breasts with Roasted Grapes and Potato-Bacon Gratin.  Sounds luxurious, doesn’t it?  In the meantime, give this one a try, or check out some of the other ones I’ve shared in the past.

More from Sunday Suppers at Lucques:

  • Roasted Beet and Fried Chickpea Salad with Ricotta and Olives
  • Molasses Chews and Plum Sorbet (for ice cream sandwiches)
  • First-of-the-Season Summer Succotash

Ricotta Gnocchi with Mushrooms, Sweet Corn, and Sage Brown Butter

Recipe adapted slightly from Sunday Suppers at Lucques.  Serves 6.

For the gnocchi:

  • 2 eggs
  • 2 c. flour
  • 1 lb. whole milk ricotta, drained of excess liquid
  • 3 TBS olive oil
  • salt and pepper
  1. Beat the eggs together in a small bowl.
  2. Whisk together flour, 1 tsp salt, and 1/4 tsp pepper in large bowl.  Add the ricotta, and use two butter knives to cut the ricotta into the flour.  When they are evenly mixed, make a well in the middle of the bowl and add the eggs.  Use a fork to slowly incorporate the eggs into the flour/ricotta by dragging a small portion of the eggs out into the flour, mixing gently, then returning to the center.  Once eggs are fairly well mixed in, use your hands to briefly knead the dough, just until it comes together into a ball.  If it is too moist to work with, add a bit more flour (careful, too much flour or kneading will make it tough).  Turn dough out onto a lightly floured cutting board, cut into eight equally sized pieces, and cover with a kitchen towel.
  3. Bring a large pot of salted water to a boil.  One at a time, take dough pieces out from under towel and roll out into a 1-inch thick rope on a floured work surface.  Gently cut the rope into 1 inch slices and sprinkle with flour.  If you’re feeling fancy, roll the gnocchi over the tines of a fork, but this step is purely decorative.
  4. In batches, cook the gnocchi in the boiling water for a few minutes.  Once they rise to the surface, they need to cook for about 1 minute more before they are done.  The whole cooking time should be less than 5 minutes per batch.  Transfer the gnocchi to a large baking sheet and toss with olive oil.  You may make the gnocchi ahead of time and refrigerate or freeze if using later in the week.

For the sauce:

  • 1 recipe gnocchi, see above
  • 1 1/2 c. fresh breadcrumbs
  • 4 TBS olive oil
  • 7 TBS butter
  • 1 lb. mushrooms, preferably wild, cleaned and sliced into uniform pieces
  • 1 TBS thyme leaves
  • 1 TBS sliced sage leaves
  • kernels from 4 ears fresh corn
  • 2 large shallots, finely diced
  • 1.2 c. chopped flat-leaf parsley
  • salt and pepper
  1. Heat 2 TBS olive oil in a large saute pan over medium-high heat.  Add the breadcrumbs and stir to coat with oil.  Cook, stirring occasionally, until breadcrumbs are toasted and golden brown.  Remove from pan and set aside.
  2. Add remaining olive oil plus 1 TBS of the butter to the pan, and heat until the butter foams.  Add the mushrooms, thyme, 1/2 tsp salt, and pepper.  Saute the mushrooms about 5 minutes, until golden brown and beginning to crisp.  Don’t move them around in the pan too much – let them begin to caramelize on each side before turning.  Remove mushrooms from pan and set aside
  3. Add remaining 6 TBS of butter to the pan and cook until the butter begins to brown and smell nutty.  Scrape the brown bits from the bottom of the pan, then add sage, cook for 1 minute or until it sizzles, then add corn, shallots, 1 tsp salt, and pepper.  Saute quickly, stirring the whole time, until corn is tender, about 2-4 minutes.  Add prepared gnocchi to pan and toss to coat gnocchi with butter.  Add mushrooms, parsley, and breadcrumbs, and heat the whole dish through if necessary.
  4. Remove from heat and season to taste.  Serve hot.
Homemade Cassis

14 August 22, 2012 Dessert

Homemade Cassis

Once upon a time, Trevor and I spent two weeks in France.  It was three entire years ago, which makes me think we must have barely known each other, but then again, we did a lot of flirting in high school – that had to count for something in the getting-to-know-you department.  We stayed in a little Ikea-furnished apartment on Rue Tiquetonne in Paris, where we mainly walked and ate baguettes and croissants and went to museums right when they became free for the evening and soaked it all in.  Then we headed South, to the town of Cassis, where we swam at deserted beaches and climbed through the calanques on hot dusty days.  We also discovered Cassis, the drink, early on in the trip, and didn’t stop drinking it once we’d started.  The sweet, musky liqueur came with us from Paris to Cassis and back again, upgrading our €4 bottles of white wine to elegant Kir cocktails.  Ever since, the drink has been a bit special for us – a memento of a time and a place.

[Before I move any further with this post, I would like to share that looking for pictures of that trip has had two unusual effects on me: 1) the immediate and unbidden singing of “Paris, paris combien, Paris tout ce que tu veux” which we used to sing ad nauseam with Dr. Odjo.  A surprisingly effective French-teaching method. And 2) browsing through a lot of memories from that year and kind of wishing I could do junior year again and move back to Prague.  Also wishing I was still that skinny.]

After returning to the U.S. and learning that it’s almost impossible to get fresh black currants in New England, I of course decided that I had to have some.  Specifically, I had to have some to make my own homemade cassis.  At the time when I decided that this was one of my goals, I think I was operating under the assumption that it would be cheaper than buying the store-bought kind, and also infinitely hipper.  Two and a half years later, I’m definitely sure that it’s not cheaper, and hipness has lost some of its importance to me, but the idea stayed with me and I was determined to accomplish it.  I was unsuccessful in locating black currants last year, so I added it to my summer bucket list this year, just to hold myself a little more accountable.

Enter Wilson Farms and my extremely amazing boyfriend.  Trevor took me to Wilson in early July, just when all the stone fruits were starting to get good.  We were there mostly just to wander around and debate buying more fruit trees, but while we were there, Trevor asked them if and when they might be getting some black currants.  They told him that they would be getting a shipment, and that it was likely to arrive in about a week.  This was both good news and bad news – good in that they would be there, bad, because I was just about to leave for a 10 day vacation in Maine.  Trevor immediately offered to check back for them every day on his way home from work.  I assured him that this was overkill and that I could live without black currants.  Still, about a week later, he called me at 5 in the afternoon, sounding urgent:

“Katie.  I’m at Wilson.  There are 8 boxes of black currants here and they’re only getting one shipment this year.  There’s several other people on their ‘call when black currants arrive list.’  They’re $7 per box.  How many do you need?”

And that, my friends, is the sign of a boyfriend you should hang on to.

With black currants acquired, I proceeded to wash, stem, and sugar them, before pouring them into pint jars filled with vodka and setting them on a sunny windowsill for a month.  A lot of anticipation for one drink, no?  But after opening and straining the jars this weekend and tasting the fruity, boozy, cinnamony liqueur, I’ve decided it was worth it.  Maybe next time I will use the much cheaper, frozen currants sold here, but I can definitely see there being a next time.

Of course, to be thorough in my consideration of how worthwhile this whole thing was, I had to do a little side-by-side taste test between my homemade version and a decent $25 bottle I got at the store.  I was actually expecting to like the store-bought version more, but to my surprise, I liked them both equally.  Both were sweet, slightly syrupy, and delicious on their own or in a Kir, but the tastes were quite different.  The homemade version was fruity, bright, and summery, while the store bought brand was much muskier, darker, and wine-y.  I would use them at different times, for different things.  Of course, by the time I had drawn all of these conclusions, I’ll admit I was a little drunk.  In fact, I was tispy enough that I decided spur of the moment to throw the leftover vodka-soaked currants in a saucepan with some of the cassis and fresh blueberries, and eat it over a bowlful of vanilla frozen custard – a perk of the homemade variety being the boozy leftover fruit.

So – the cassis experiment has been accomplished, and deemed a success!  Another item crossed off the bucket list, and another delicious ingredient added to my pantry.

Homemade Creme de Cassis

Recipe from Figs, Bay & Wine.  Makes a little less than 1 quart.

  • 1 1/2 lb. fresh or frozen (and thawed) black currants, washed and stemmed
  • 3 c. vodka
  • 2 1/4 c. sugar
  • 1 cinnamon stick, cracked in half
  1. In a large bowl, crush the black currants with your hands, the back of a spoon, or a pastry cutter, until most of the berries are releasing juice.  Add the sugar, cinnamon stick, and vodka and stir to combine.  Pour the mixture into clean mason jars and seal.
  2. Place the jars in a warm, sunny place and let sit for a month, gently shaking the jars once or twice a week.
  3. After the month has passed, strain the mixture through a fine mesh strainer.  If you want a really clean liqueur, line the strainer with a cheesecloth.  Catch the juice in a bowl, then pour into a bottle and enjoy!  Reserve the vodka-soaked fruit in your fridge or freezer and enjoy over ice cream, or in blueberry-cassis sauce.

Greatist Collaboration: Plum Sorbet

0 August 15, 2012 Cookbook

Greatist Collaboration: Plum Sorbet

It’s been a hot summer.  Maybe it seems hotter because it’s my first full summer in the city, where I’m pretty much a sticky mess topped with a fine layer of dust by noon, but according to the news, there’s more to it than the heat island effect – it’s been unusually hot all over the country.  There’s even a wikipedia page about it, so it must be true.  But having a scorcher of a summer isn’t all bad – it means happy tomatoes, extra-refreshing dips in the pond, and an excuse to eat even more ice cream than I normally might.

Making at least three kinds of ice cream was on my summer bucket list this year (stay tuned for an update soon!), and this plum sorbet makes three.  Not that that means there won’t be one or two more batches before the weather turns :-).  I was surprised by the simplicity and wholesomeness of this recipe – all you do is toss some plum halves with a bit of sugar and honey, blend, then freeze, and you have a gorgeously purple, refreshing, smooth sorbet.  Actually, the texture of this sorbet is easily the best of any homemade ice cream I’ve made – it doesn’t melt on contact with your spoon, and it has just enough airy-smoothness for my taste.  It’s another winning recipe from Suzanne Goin’s Sunday Suppers at Lucques, a book in which not a single recipe I’ve tried has been disappointing.  Suzanne suggests pairing this sorbet with these molasses cookies to make ice cream sandwiches, something I didn’t try this time around but definitely will in the future.

Counting sorbet as a “health” recipe for Greatist may seem a little suspect, but everyone needs a little something sweet sometimes – why not satisfy your cravings with a relatively light treat packed with fresh fruit?  You could even reduce the sugar somewhat, although your sorbet will freeze harder and be less creamy if you do so, as the sugar is one of the main things that keeps ice cream from freezing (read more here).  Head on over to Greatist for the recipe, and while you’re over there, check out their fun ice cream infographic.  (See, I’m not the only one who thinks ice cream has a place on health websites!)

Other tasty ice cream recipes from here…

  • Lemon basil sorbet
  • Cherry-chocolate ice cream
  • Lemon buttermilk ice cream
  • Roasted cinnamon ice cream
  • Bailey’s fudge ripple ice cream

… and around the blogosphere

  • Chocolate pretzel frozen custard from A Spicy Perspective
  • Grapefruit and rosemary granita from In Sock Monkey Slippers
  • Blackberry-cabernet sorbet from Gimme Some Oven
  • Caramel brownie chunk nutella ice cream from Brave Tart
  • Goat cheese ice cream with roasted strawberries from Heather Homemade
  • Basil olive oil gelato from Cookie Talk
Plum, Blackberry, and Cassis Galette

0 August 13, 2012 Dessert

Plum, Blackberry, and Cassis Galette

Trev and I had a little BBQ at my place this weekend – just a few good friends who all happened to be in town at the same time.  One is starting up at Harvard Law, another passing through between summer camp in Maine and hut-keeping on the AMC.  My roommate joined in as a study break, and a good friend from work stopped by as well.  It was the sort of crowd that caused minimal stress, and the sort of messy, hand-held food you should only eat with people you’re not trying to impress – ribs slathered in tangy sauce, Mexican-style grilled corn rolled in mayo and chili-flecked parmesan cheese, chocolate-stout cupcakes with a mess of espresso frosting, and this galette, sliced and served like pizza.

The galette was a bit of a last minute decision.  Initially I had planned to make a much fancier puff-pastry based tart, but the frozen puff pastry at Wholefoods was $10 a package.  Ten dollars!  I might as well just buy a pie for that price.  Anyway, with a bag of plums and a carton of blackberries I picked in Andover last week both languishing in the fridge, I went simple and rustic and it was just right for a casual Saturday afternoon.  A drizzle of creme de cassis in the filling added some depth.  I managed to snag a few pictures before I got distracted by good company and cold Blue Moon beer, so I thought I’d share it with you.

Anyway, just a quick hello.  Hope everyone’s week got off to a good start, and I’ll be back on Wednesday with a delicious frozen treat that’s also healthy enough to be featured on Greatist.

Plum, Blackberry, and Cassis Galette

A Katie at the Kitchen Door original.  Serves 6.

  • 1 1/4 c. flour
  • 1/4 tsp salt
  • 1 stick very cold butter
  • 6-8 TBS ice cold water
  • 1 1/2 lb ripe plums, pitted and thickly sliced
  • 1 c. fresh blackberries
  • 1/2 c. sugar
  • 2 TBS cornstarch
  • 1/2 tsp lemon juice
  • 1/3 c. creme de cassis
  1. Make the pie crust: whisk together the flour and the salt in a medium bowl.  Cut in the cold butter, and blend with a pastry cutter until the mixture is coarse with lumps no larger than a pea.  Add the water 1 TBS at a time, stirring with a fork between additions, until the dough comes loosely together.  Turn the dough out onto a piece of plastic wrap and wrap tightly.  Refrigerate for 1 hour.
  2. Preheat the oven to 425°F.  In a large bowl, mix the plums, blackberries, sugar, cornstarch, lemon juice, and creme de cassis.  Let sit 5 minutes.  Roll out the dough into a large oval on a well-floured surface, then transfer to a baking sheet.  Pile the plum filling into the middle of the galette, leaving at least an inch around the edges on all sides.  Fold the edges of the dough over the filling and press down.  Bake at 425 for 20 minutes, then lower the heat to 350°F and continue baking for 25-30 minutes longer, until filling is bubbly and crust is golden brown.  Don’t worry if the filling bubbles out somewhat – it’s that kind of dessert!
  • « Previous Page
  • Page 1
  • …
  • Page 38
  • Page 39
  • Page 40
  • Page 41
  • Page 42
  • …
  • Page 57
  • Next Page »

Primary Sidebar

Subscribe!

Get creative recipes and menu ideas delivered straight to your inbox.

Most Popular

A House // Sweet Potato and Coconut Milk Soup with Brown Rice and Lentils

Monthly Fitness Goals: July // Homemade Spinach Wraps with Chopped Greek Salad

A New Job // Classic Seven-Layer Bars

Butternut Squash Carbonara with Fried Sage and Caramelized Onions

Happy Birthday, Trevor! // Peanut Butter Fudge

Cookbook Review and Giveaway: Home Made Winter

Drizly

Please note!

Full disclosure: if you purchase anything at Amazon using the above links or any other links to Amazon on this site, I will receive a small commission. Just so you know!

Copyright© 2018 · Cookd Pro Theme by Shay Bocks

This site uses cookies: Find out more.