• Skip to primary navigation
  • Skip to content
  • Skip to primary sidebar
  • Home
  • Recipes
  • Features
    • Cookbook Reviews
    • Ingredient of the Week
    • Sunday Dinner
    • Fitness Goals
  • Travel
  • About
    • Privacy Policy
    • Cookie Policy
  • Work With Me

Katie at the Kitchen Door

Globally-inspired, seasonal recipes

Blog Page

Chestnut Potato Soup & A Foodie Gift Guide

November 23, 2012 Cookbook

Chestnut Potato Soup & A Foodie Gift Guide

I know that by the time I publish this, some of you will have been up for hours, standing in long lines and snagging amazing deals on everything from that perfect pair of riding boots to new televisions and cameras. I take my hat off to you, since I plan on being in bed all morning,  nibbling on leftovers and looking forward to having a bowl of this lovely soup for lunch, all while taking advantage of Black Friday via my favorite shopping vehicle – the internet.

Online shopping – it’s a beautiful and terrifying thing.

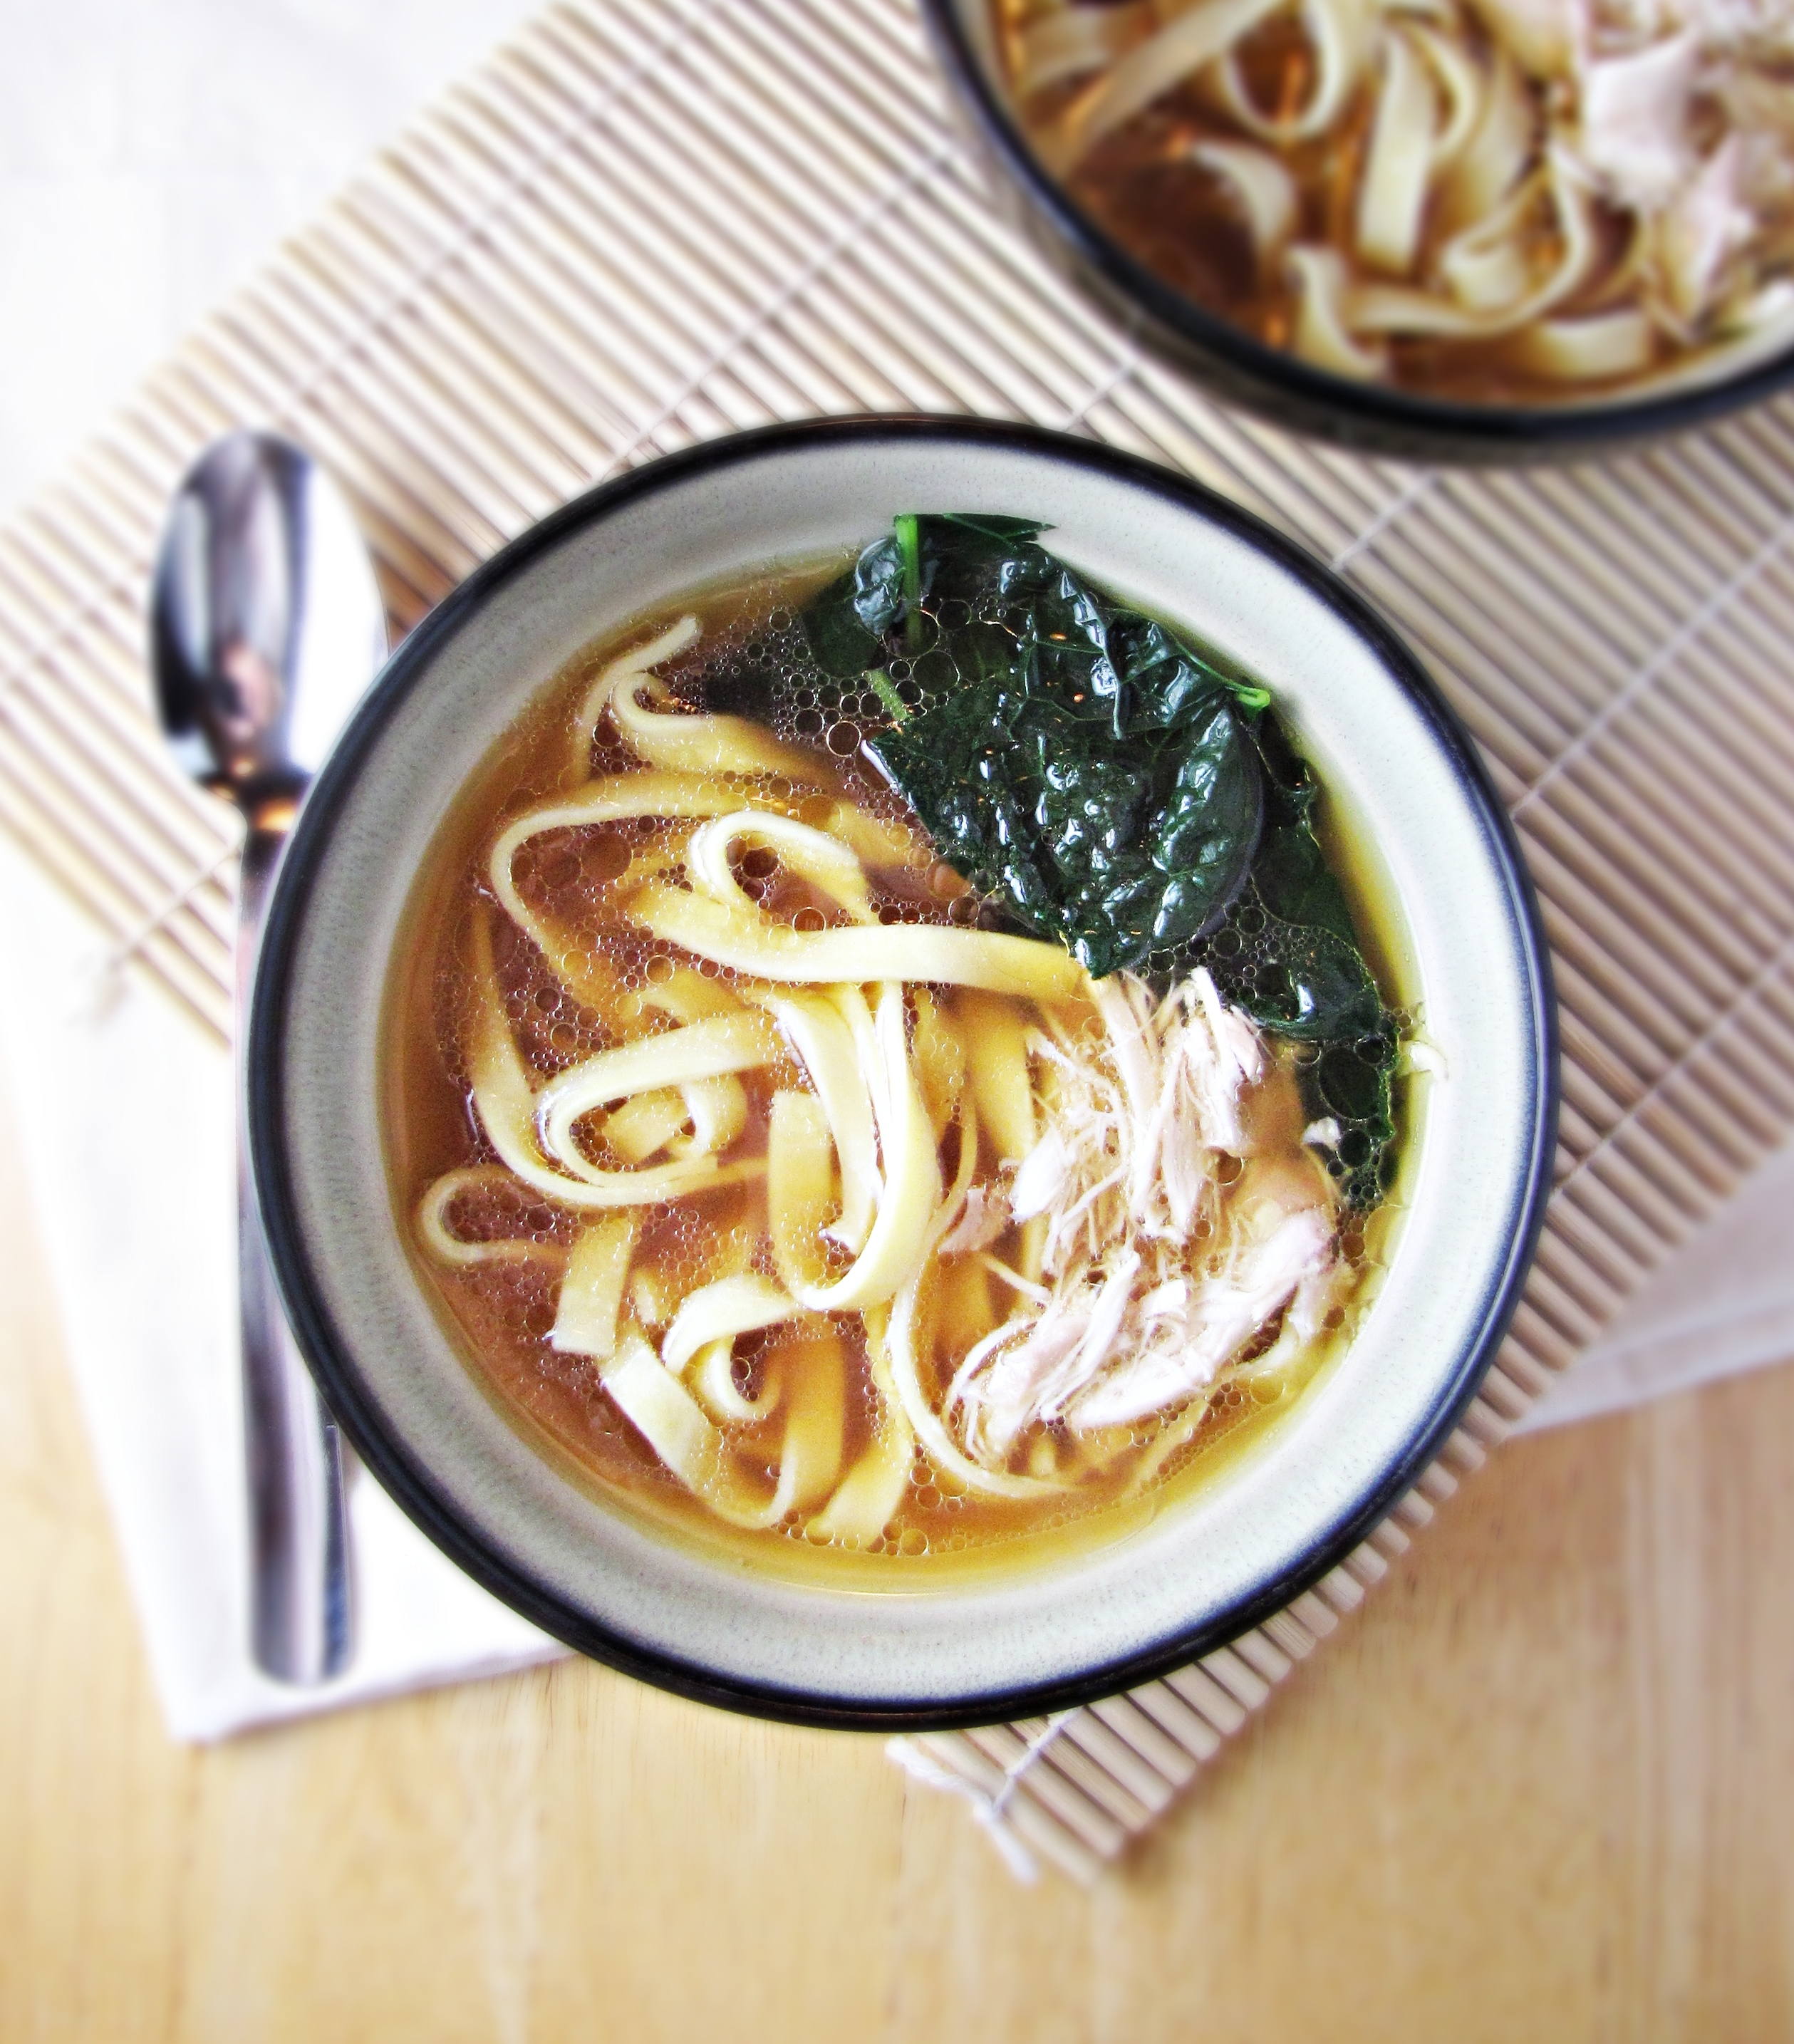
But while I’m lying here clicking away, I thought I’d take a moment and, in the spirit of consumerism, share some of my favorite holiday picks for the food-lovers in your life. If you’re only interested in the soup pictured above (one of my favorites, a sweet-nutty-creamy blend of roasted chestnuts, potatoes, and thyme, topped with a smidgen of goat cheese), skip on down to the bottom for the recipe.

A quick note – I really like themed gifts. I’d typically much rather give (and get!) a bunch of little things that all go together than one big thing. I think it’s fun, so most of the ideas below reflect that. I also tried to keep everything within a price range that wouldn’t have made my heart skip a beat when I was in college – sometimes the small, thoughtful gifts are the best! Also, I had a lot of fun putting this together, but I know it’s a bit different from what I usually post – if you found this helpful, or if you think I should stick to the recipes, I’d appreciate you letting me know in the comments.

1) For the Coffee Lover
This is a version of a gift I got for Trevor a few years ago. Maybe this is a memorable gift for me because I’m still benefiting from it – namely in the form of piping hot lattes served to me in bed. The Bialetti is a great little espresso maker – my family always has one with us!

1) Bialetti Stovetop Espresso Maker; 2) AeroLatte Milk Frother; 3) Espresso Cups; 4) Coffee Grinder; 5) The Blue Bottle Craft of Coffee; 6) Sugar Bowl

2) For the DIY-er
I’m kind of obsessed with the “do it the way your great-grandmother would have” movement back towards creating our own kitchen staples through various forms of preserving. It’s not always practical, but if you have the inclination, it can be a lot of fun! Below are some of my favorite resources for making your own bread, pasta, cheese, and canned goods – most of which I own or have given to friends in the past few years.

1) Baguette Pan; 2) Local Breads; 3) Pizza/Artisan Bread Stone; 4) Pasta Maker; 5) Pastry Wheel/Ravioli Cutter; 6) Artisan Cheese Making at Home; 7) The Preservation Kitchen; 8) Canning Basket; 9) Canning Tools

3) For the Cookbook Collector
There were a lot of cookbooks released this fall. I’ve been reviewing and giving away a bunch of them over the past month or so, but there’s so many I haven’t gotten to yet. If the food-lover in your life stays current with the cookbook scene, here are some of the most exciting books from this fall. (It’s so great to see that some of the best books are coming from bloggers, too!)

1) Burma: Rivers of Flavor; 2) Jerusalem: A Cookbook; 3) Gran Cocina Latina (see my review); 4) The Smitten Kitchen Cookbook; 5) Small Plates & Sweet Treats; 6) What Katie Ate; 7) Baked Elements; 8) Japanese Farm Food (see my review); 9) Bouchon Bakery

4) Stocking Stuffers – My Favorite Kitchen Gadgets
Given that the little presents are my favorite kind, it might come as no surprise to you that stockings are my favorite part of present opening. These are some of my favorite everyday kitchen gadgets that are small enough to fit inside a stocking. Also, this can opener? It will change your life. Mine was a gift from my parents and my roommates are so amazed by it. And I know that the pastry brush is marketed to kids – I just like that it’s silicone, and a fun color.

1) OXO Can Opener; 2: Silicone Pastry Brush; 3) Microplane Grater/Zester; 4) Cherry Pitter; 5) Pastry Cutter; 6) Garlic/Ginger Press

Note: I feel it’s especially important to disclose in a post like this that if you buy anything through the Amazon links provided in this post, I’ll get a small commission from the sale. If you’re not cool with that but interested in the items recommended, just don’t use the link! And if you do use the link, I appreciate it!

And now for the soup! If you can get your hands on some fresh chestnuts, please do try this – in my mind, it’s one of the ultimate seasonal treats.

Roasted Chestnut and Potato Soup with Goat Cheese

Adapted from Cannelle et Vanille. Serves 2-3.

Note: Buy more chestnuts than you think you’ll need. Fresh chestnuts are very perishable, and I always end up with at least a few that have gone moldy inside. Others just never come out of their shells, so leave yourself some wiggle room. And when you’re at the store, try to pick nuts that still feel completely firm – any mushiness may be a sign that they’ve begun to mold.

  • 20 chestnuts, roasted and peeled
  • 1 TBS butter
  • 1 small leek, trimmed, washed, and sliced into thin rounds
  • 1 small onion, peeled and finely diced
  • 2 small russet potatoes, peeled and roughly chopped
  • 4 c. chicken stock
  • 1 tsp fresh thyme leaves
  • 1 c. skim milk
  • 2 oz. fresh goat cheese, crumbled
  • salt and pepper to taste
  1. Heat the butter in a medium saucepan over low heat. Add the leek and the onion and saute until soft and translucent, about 5 minutes. Add potato and saute for another 5 minutes. Add stock, thyme leaves, and roasted chestnuts, and bring to a boil.
  2. Lower the heat, cover the pot, and simmer for 20-30 minutes, until potatoes and chestnuts are tender. Carefully ladle hot soup into a blender (or use an immersion blender) and blend into a smooth puree. Add the cup of milk and blend to combine. Season to taste with salt and pepper, and ladle into bowls. Top each bowl with some of the crumbled goat cheese. Serve hot.
Greatist Collaboration: Brussels Sprout, Sweet Potato, and Chorizo Hash

November 21, 2012 Breakfast

Greatist Collaboration: Brussels Sprout, Sweet Potato, and Chorizo Hash

The big day is almost here! I’m headed home for the holiday (and bringing this cake and this salad with me), but I wanted to say a quick hello first and share with you this yummy little recipe I’ve put together for Greatist. When you all come out of your turkey and mashed potato comas, give this hash a try. It’s got brussels sprouts, sweet potatoes, roasted chestnuts, chorizo, and goat cheese – in other words, health and flavor. The perfect thing to ease you back into normal eating habits without depriving you of deliciousness. Just please don’t forget a sunny-side up egg to top it off – the runny yolk oozing into the warm hash lifts this dish from good to great. You can find the full recipe here.

Wishing you all a Happy Thanksgiving!

Monday Morning Resolutions & A Mango, Satsuma and Black Rice Salad

November 19, 2012 Food

Monday Morning Resolutions & A Mango, Satsuma and Black Rice Salad

Last week I wrote about a new little thing I’m trying – making a week-long resolution relating to health and trying to stick with it all week. The trick is that you have to make the resolution specific enough that it’s not mentally daunting, e.g. “No chocolate from the candy box at work” instead of “No dessert at all.” Doing something for a week is challenging enough to feel like an accomplishment when you’ve finished, but not so challenging that you give up after three days. If, at the end of the week, you’re glad that you were able to keep your resolution for the week, try to keep that one going for another week and add a new one as well.

So far, I’ve completed two weeks of these little resolutions, and I’m feeling pretty good about it so I’m going to try and keep it up, at least for a little while. This week, I’m going to try and do 10 minutes of strength training and stretching every day. Strength training is something I do sporadically, at best, but I know that doing it regularly will both help me feel better about how I look, and help my balance and coordination in ballet. If you’re interested in joining me, I’d love to hear your own resolutions in the comments – and if you commented last week, let me know if you were successful!

To keep track of my resolutions so far…

  1. Week one: No chocolate from the chocolate box at work – Success for week one and week two! This is huge.
  2. Week two: Walk to or from Park St. to work at least once each day – Success! I even went in the rain.
  3. Week three: Do ten minutes of strength training/stretching every day

And now for the food. Trevor and I took a trip to Wholefoods this weekend and, silly me, I went without a list. This resulted in a lot of impulse purchases, like camembert, Haitian mangoes, blackberries, satsuma oranges, and clementines. None of it local, all of it too tempting to pass up. I was originally tempted to use all the fruit in a mango-cream tart, but since this week is such a big eating week, and since I had just made a batch of chocolate cookies, I managed to talk myself into a healthier option – mango, satsuma, and black rice salad.

When I realized that I had bookmarked this salad from multiple sources, I knew it was about time that I tried it. Strangely, this salad seems both like summer food and winter food – summer food because it’s light and fruity and healthy, and winter food because it’s bright and citrusy and nutty. I doctored the original up a little bit, adding sour cherries and increasing the amount of orange. Feel free to play with the ratios to get it the way you like – an extra handful of peanuts, all scallions instead of the red onion, etc. It’s an easy and forgiving recipe!

Mango, Satsuma and Black Rice Salad

Adapted from Bon Appetit. Serves 4-5 as a side.

  • 1 1/2 c. black rice, rinsed and drained
  • 2 c. water
  • 1/4 tsp salt
  • 3 satsuma tangerines or 1 c. canned mandarin oranges, drained, plus 1/4 c. of the drained juice
  • 3 TBS fresh squeezed lime juice (from 1 large lime)
  • 2 TBS canola oil
  • 1 mango, peeled, sliced, and cut into 1/2 inch cubes
  • 1/2 c. fresh cilantro, chopped
  • 1/2 c. red onion, finely chopped
  • 1/2 c. roasted salted peanuts
  • 4 scallions, white and dark green parts removed, sliced
  • 2 jalapenos, seeded and finely chopped
  • 1/4 c. dried cherries
  1. In a medium saucepan, combine rice, water, and salt. Bring to a boil, then reduce heat, cover, and simmer until water is absorbed and rice is tender, about 25 minutes. Remove from heat and let sit, covered, for 15 minutes longer.
  2. If using fresh tangerines, peel tangerines, remove as much of the white pith as possible, and separate into segments. Using a small knife, carefully slice along the skinny length of each tangerine segment, then use your fingers to remove the skin/membrane of the tangerine. Save the membranes with the little pieces of fruit attached (some staying attached is inevitable). Squeeze the membranes over a bowl and collect the juice – you should have about 1/4 – 1/3 of a cup. If you have less, squeeze one or two of your tangerine segments into the bowl to make up the difference. If you’re using canned mandarin oranges, you can skip this step, just be sure to save 1/4 c. of the juice.
  3. Whisk together the tangerine juice, lime juice, and oil. Pour over the black rice and let cool.
  4. Stir the tangerine segments, mango, cilantro, red onions, peanuts, scallions, jalapenos, and dried cherries into the salad. Taste and adjust the seasoning with more salt or lime juice if desired. Serve chilled or at room temperature.
Double-Chocolate Cookies from Finale

November 17, 2012 Boston

Double-Chocolate Cookies from Finale

I was going to write about Thanksgiving today. Probably make some delicious stuffing or tricked out pie or some other Thanksgiving-y recipe. But then, as I browsed through the hundredth roundup of Thanksgiving recipes, I just got overwhelmed. I mean, I know Thanksgiving is the biggest American food holiday of the year, but there’s a lot of information circulating about it out there. Dozens of magazines dedicated to it, thousands of blog posts about it, whole books and TV shows trying to break it down into little tiny pieces. And it’s just one day! I mean, it’s a great day, but still, it’s only one day. Then I realized that there are probably a lot of people out there like me – people who love Thanksgiving just as much as the next girl, but who just aren’t cooking it. Because their mom, or grandmother, or father-in-law, or best friend’s boyfriend is taking care of that, and at most they’re bringing a pie, and their relatives and friends are kind of picky traditionalists who will complain if it’s not the pumpkin pie recipe from the back of the can. Or maybe there are people out there who are hosting Thanksgiving, but they’ve had their menu planned for weeks, if not months, and, given all the choices out there, they probably had a hard enough time deciding what to make in the first place.

So for those of you who need a break from the Thanksgiving madness, I have a recipe that’s good in any season, at any time of day – double chocolate cookies. And not just any chocolate cookies – these are based on a recipe from Finale, which is one of my favorite Boston lunch spots. There’s one close to my office, and I’m a frequent customer, partly for the great baked goods but also for the amazing turkey-avocado-bacon-chipotle mayo sandwich that I wish was healthy enough to eat every day. Plus, I’m a sucker for any place that includes a free brownie bite with your meal – lunch should always end with just a little bit of chocolate.


These cookies, like all Finale’s desserts, are great. They have a crinkly brownie-like crust and a gooey-fudgy middle, plus they’re super chocolaty, and easily cure even the worst chocolate cravings. With or without chocolate chips, they’re seriously yummy. Just be careful not to over-bake them, and be sure to plan ahead – the batter needs to rest for a few hours before baking.
Double Chocolate Cookies
Recipe adapted from Finale Desserterie via WHDH News. Makes 18 cookies.
  • 2 eggs
  • 2/3 c. + 2 TBS sugar
  • 1 tsp vanilla
  • 1/3 c. salted butter
  • 2 oz. bittersweet chocolate, chopped into small pieces
  • 6 oz. semisweet chocolate, chopped into small pieces
  • 1/3 c. flour
  • 1/4 tsp baking powder
  • 1 c. bittersweet chocolate chips, optional
  1. Whisk together eggs, sugar, and vanilla until light and frothy.
  2. In a double boiler, melt together butter and the bittersweet and semisweet chocolate pieces, stirring. Once melted, remove from heat and pour into egg mixture, whisking to combine.
  3. In a small bowl, whisk together the flour and baking powder, and gently fold into the chocolate-egg mixture. If using, mix in the chocolate chips at this stage as well. Batter will be fairly liquidly.
  4. Cover bowl and let sit at room temperature for 3 hours, at which point batter should have firmed up, then preheat oven to 350°F. Line a baking sheet with parchment paper, then place rounded spoonfuls of batter into pan, about 3 inches apart. Bake for 10-15 minutes, until top is cracked and center springs back lightly at the touch. Remove to a cooling rack and let cool slightly. Best served warm, within a day or two.

Gran Cocina Latina

November 15, 2012 Cookbook

Gran Cocina Latina

At 902 pages, I think that Gran Cocina Latina may be the only cookbook I own that can truly be referred to as a tome. It’s massive, exhaustive, focused – and incredibly exciting.

I won’t lie, I’ve been a little bit daunted by this cookbook. It sat on my bedside table for a few weeks, teasing me, during which time I opened it four or five times, flipped through it, drooled  a little bit, and then got nervous. I’ll save it for when I have more time, I kept telling myself, for this is a cookbook that clearly needs time. When I received my copy of Home Made Winter, I spent a lovely sunny Saturday morning in bed with it, drinking coffee and taking notes. Three hours later, I felt like I really knew the cookbook – I had bookmarked all the recipes I wanted to make, read every word Yvette had written, and absorbed the style and message of the book. I was satisfied. This book would take 3 dedicated weeks, if not more, to feel the same way. But I don’t want to scare you off! This book deserves the time. And besides, it’s the kind of cookbook you’ll have on your kitchen shelf for the next 20 years, so you don’t have to rush things.

Maricel Presilla is not your average cookbook author – she’s a scholar. And so, this book is not your average cookbook. It’s not about pretty pictures and glossy pages – it’s about learning. Learning how to cook truly authentic Latin American cuisine from the ground up. It’s literally packed with information – from how to select and prepare quintessential Latin ingredients such as plantains, yuca, and passionfruit, to the difference between avocado varieties, to deconstructing the infamous mole type sauces in order to master the technique for making them. Beyond the kitchen, there are legends and histories of the various countries as Maricel takes you from country to country, from the past to now. As a testament to the thoroughness of the education that this book will give you: the first 200 pages of the book barely make it through the flavor-building essential sauces and condiments that authentic cooking requires; every recipe is given a thorough head note, is broken down into manageable steps, and is clearly written; when an ingredient may be unfamiliar or a technique difficult to explain, simple black and white sketches serve to illustrate the process. Clearly, this book has been a long time in the making, and it shows.

The recipes themselves run the gamut, from the simplest of the simple, such as Simple Boiled Quinoa, to well-known classics, like Tres Leches Cake, to exotic and enticing recipes that would be a reach in difficulty for even a seasoned home cook, like Quinoa and Broccoli Rabe-Stuffed Calamari with Panca Pepper and Pisco Sauce. You’ll find almost every country and island on the continent well represented – Peruvian Purple Corn Punch, Brazilian Feijoada, Argentinian Beef Empanadas, Ecuadorian Shrimp Cebiche with Peanuts, even Puerto Rican Salt Cod Fritters. You could easily cook your way up and down the continent several times over, and probably find several new favorite meals along the way.

To get over my intimidation of this book, I opened it to the middle, read through 20 pages of recipes, and started cooking the recipe that inspired me the most. (Please note, this is extremely unorthodox for me. I like list-making and being methodical. Don’t expect such brash behavior from me in the future.) The recipe? Rice with Corn, Chickpeas, Green Beans, and Chorizo. Yes, I kind of just picked a recipe with five ingredients that I love in the name. This recipe also happened to be a two-fer, since you had to prepare the Green Beans with Bacon recipe separately to be included in the rice dish. Two done, 998 to go. (I made that up, but I wouldn’t be surprised…). Both recipes were solid – well-balanced flavors (and nutritional profiles), simple techniques, easy to execute quickly and well. The kind of things I’d make on a weeknight when I wanted something warm and filling and delicious but without any fuss. And these two are just a start… I can’t wait to cook my way through the rest of this book.

The bottom line: Gran Cocina Latina is an authoritative, exhaustive, and incredibly educational cookbook – think of it as The Joy of Cooking for Latin America. If you enjoy cooking or eating Latin food, this is a book that will likely be close at hand in your kitchen for the next 20 years. Typically I recommend cookbooks I like to a particular audience I think will enjoy them. This book is an exception – if you cook at all, do yourself a favor and buy this book. It’s a great resource for any level of cook and the information and recipes you’ll find within are more than worth the $25 you’ll pay on Amazon.

Disclaimer: W.W. Norton provided me with a review copy of this book free of charge, but as usual, all opinions are my own!

Rice with Corn, Chickpeas, Green Beans, and Chorizo

Recipe from Gran Cocina Latina. Serves 6-8 as a side.

  • 2 c. long grain rice
  • 3 TBS achiote-infused olive oil [I subbed regular olive oil this time around]
  • 6 oz. Spanish chorizo, sliced into 1/4 inch rounds
  • 3 garlic cloves, peeled and finely chopped
  • 1 medium onion, peeled and finely chopped
  • 1 green bell pepper, cored, seeded, deveined, and finely chopped
  • 4 medium plum tomatoes, fresh or canned, peeled if fresh, drained if canned, and finely chopped either way
  • 1 c. fresh or frozen corn kernels
  • 1 15 oz. can of chickpeas, drained and rinsed, or 2 c. plain cooked chickpeas
  • 4 oz. Green Beans with Bacon [see below]
  • 3 1/2 c. chicken broth
  1. Rinse the rice in cold water, swirl with your hand, then drain in a sieve. Repeat several times, until water runs clear. Set rice aside.
  2. Heat the oil in a saucepan over medium heat. Add the chorizo and saute until golden brown, about  5 minutes. Then add the onion, green peppers, and garlic, and saute until the onion is translucent, another 5 minutes. Add the diced tomatoes, corn, chickpeas, green beans, rice, and broth and bring to a boil over high heat. Once the mixture is boiling, reduce the heat to medium and simmer, uncovered, until the liquid is mostly absorbed. At this point, fluff the rice gently, cover, lower the heat, and cook on the lowest possible setting for an additional 15-20 minutes. Remove from heat and let sit, still covered, for 10 minutes. Remove the lid and fluff the rice again before serving.

Green Beans with Bacon

Recipe from Gran Cocina Latina. Serves 4 as a side.

  • 3 tsp salt
  • 1 lb green beans, trimmed and sliced on a bias into 1 inch lengths
  • 1 TBS olive oil
  • 8 oz. bacon, cut into 1/4 inch dice
  • 3 cloves garlic, peeled and minced
  • 1 small yellow onion, peeled and finely chopped
  • 3 medium plum tomatoes, peeled, seeded, and coarsely chopped [I used drained canned whole San Marzano tomatoes with good results]
  • 1 TBS minced fresh flat-leaf parsley
  • 1/4 tsp ground black pepper
  • 1/8 tsp ground nutmeg
  1. Add 2 tsp of the salt to a large pot of water and bring to a boil over high heat. Add the green beans and blanch for 2-3 minutes, until bright green. Drain, and immediately place the green beans in ice water to stop the cooking process.
  2. Heat the oil in a large frying pan. Add the bacon and cook until golden brown and crispy. Add the onion and saute until soft, about 5 minutes. Add the garlic and cook an additional 1 minute. Add the tomatoes, parsley, pepper, and nutmeg, and cook for a few minutes just to meld the flavors. Stir in the green beans, then season with remaining tsp of salt. Serve immediately, or use in other recipes as required.
Monday Morning Resolutions & A Cranberry-Pear Crisp

November 12, 2012 Dessert

Monday Morning Resolutions & A Cranberry-Pear Crisp

Every new situation in life comes with potential pitfalls to your health habits. Going away to college? Erratic sleep schedules and frequent hangover binges. Summer vacation with the family? Your dad handing you a margarita every night at 5 on the dot. Breakup with your boyfriend?  Pity pints of Ben & Jerry’s and many bottles of Merlot. First job? That dratted chocolate box, free “bonding” dinners, and sitting in one spot all day.

The result? Pounds creep on. Crash diets are picked up, then dropped. We try to make sweeping changes to our lifestyles and it’s hard, even unrealistic. Changing a bunch of habits at once is a real mental challenge, which is why I’m trying something new. Smaller. Make one resolution each week and write it down – a specific, easy to follow resolution with no loopholes or room to argue with yourself. Stick to it all week. The next week, if you were successful, add one more resolution, and try to keep the old one, too. If you were unsuccessful, try the first one again. And try not to worry about everything else! If you said “no chocolate” this week, don’t eat chocolate, but don’t also try to give up everything sweet or indulgent – it’ll be so much easier to defeat yourself if you try for too much all at once! Taking small steps towards forming the best habits will eventually add up.

I started this out last week with the most troubling problem in my health-at-work life – the chocolate box. Now, I’m not ever going to give up chocolate. But the constantly full chocolate box located approximately 5 feet from my desk is a real self-control issue for me. I hear everyone open and close the box, unwrap their chocolate, and it’s like a little bomb goes off in my brain, exclaiming “chocolate time!” And once I’ve had the first piece, I go back maybe 4, 5, 6 times before stopping. Something about the combination of there being an unlimited supply and being constantly reminded that it’s there by everyone else really does a number on my willpower. And 6 pieces of chocolate a day is no laughing matter!

So week one’s resolution was “no chocolate from the chocolate box at work.” And I was successful! Wednesday afternoon was hard, but I managed to power through and stick it out for the whole week. I’m going to try and stick with it this week, and add a resolution for week two – walking the extra mile to the red line at least once per day. To recap:

  1. Week one: No chocolate from the chocolate box at work – Success!
  2. Week two: Walk to or from Park St. to work at least once each day

Anyone want to join me and make a small resolution for this week? The more the merrier! And, if you get through the whole week without lapsing, you should then join me in a little homemade celebratory indulgence – like this cranberry-pear crisp. The not-too-sweet cranberry filling and crispy sugary crust made a pretty good reward for going all week without chocolate. It might also be the perfect dessert for Thanksgiving, if you’re looking for alternatives to the classics – festive and bright, palate-cleansing and not too heavy, any Thanksgiving table would benefit from the addition of this crisp!

Cranberry-Pear Crisp

Adapted from The Preservation Kitchen. Serves 4-6. If you’re making for a crowd, double the recipe and the pan size!

  • 2 pears, peeled and thinly sliced
  • 2 1/2 c. cranberries, washed and picked over
  • 3/4 c. plus 1/3 c. sugar, divided
  • 3/4 c. flour
  • 6 TBS cold salted butter, cut into small pieces
  • 1/2 tsp ground ginger
  1. Preheat the oven to 350°F. Layer half of the pear slices on the bottom of a 9-inch pie pan. Cover with the cranberries, and sprinkle 1/3 c. sugar over the berries. Layer the remaining pear slices on top of the cranberries.
  2. In a mixing bowl, whisk together the flour, the remaining 3/4 c. sugar, and the ground ginger. Use a pastry cutter or a fork to cut the cold butter into the flour, until a crumbly mixture with chunks no larger than a pea is formed. Sprinkle the crumble mixture on top of the fruit.
  3. Place the pie pan on a baking sheet to catch any drips, and place in the preheated oven. Bake for 45-55 minutes, until the top of the crisp is golden brown and the fruit is bubbly. Serve warm or at room temperature, topped with fresh whipped cream or vanilla ice cream.

The Country Cooking of Greece: Greek-Style Baked Sausages

November 10, 2012 Beef

The Country Cooking of Greece: Greek-Style Baked Sausages

I have a good friend at work who is Bulgarian, and who argues staunchly that every food attributed to Greece is actually Bulgarian in origin. This moussaka I brought in last week? Bulgarian. Those yummy little Greek cookies? Bulgarian.  Greek yogurt is her biggest pet peeve, and my coworkers and I kinda enjoy getting her riled up about it (although I will say, her argument that the back of Greek yogurt lists “Bulgarsko culture” as an ingredient is pretty convincing). I had a lot of fun running some of the potential recipes for this post by her and listening to her stories of how her mother makes the best version of each of the dishes I mentioned.

Whatever the true origin, Greek food is delicious, so I was excited to snag a review copy of The Country Cooking of Greece. If you’re an avid cookbook collector/nerd, you may remember that The Country Cooking of Ireland won the James Beard cookbook of the year award in 2010. I didn’t know it until recently, but there are two other books in this “series” – The Country Cooking of Italy and The Country Cooking of France. Such a fun collection! Here’s hoping they do somewhere dear to my heart, like the Czech Republic (or Russia!) next. But back to Greece.

This book is a beautiful compendium of traditional Greek recipes.  Although a Greek grandmother will probably always be your best bet for learning the secrets of Greek cuisine, this book – with 200 recipes, full-page photographs for the majority of the recipes, and dozens of sidebars on Greek ingredients, traditions, and cooking techniques – makes a suitable substitute.  I actually learned quite a bit from the sidebars, like that ouzo may be distilled from grain, grapes, potatoes, or a combination, or that there are 3 techniques for making avgolemono but the ratio is always the same – 2 eggs, 1 lemon, 1 quart of hot liquid.

The recipes in this book are a cut above the dishes you’ll find at your favorite Greek diner.  Classic pastitsio gets updated to include a citrus and fennel scented shrimp sauce, moussaka goes vegetarian and is made with artichokes and caramelized onions, and saganaki gets rolled in pistachios before being fried.  However, while I’m excited to have added a whole slew of totally new recipes to my to-try list, I’m a little disappointed that this book doesn’t have definitive recipes for some of my favorite Greek-American staples, like souvlaki, falafel, and baklava – I’ll have to keep looking for those.

Like other rustic agricultural cuisines, vegetables get plenty of attention from traditional Greek recipes. In fact, I was just reading an article about the incredible longevity of Greeks on the island of Ikaria, due in part to their vegetable and olive-oil heavy diets.  Intrigued?  There are recipes for Ikarian Zucchini, Chard, and Herb Pie, Ikarian Zucchini Fritters with Fresh Oregano and Mint, and Smothered Summer Vegetables from Ikaria included in this book – you, too, can live forever.  Much like Japanese Farm Food, gardeners and CSA-members will find plenty of new ways to use up their eggplant, zucchini, tomatoes, and greens.

So far, I’ve tried two recipes from this book – the Pupmkin and Sweet Potato Moussaka I made last weekend (which I admit to adapting significantly) and these Smyrna-Style Baked Sausages.  (I seem to be choosing recipes without the signature Greek food health benefits, huh?)  Both recipes were scrumptious – flavorful, interesting, and comforting.  These sausages reminded me of the gently-spiced sausages my mom makes on Christmas morning.  Together with the tangy tomato sauce, I tried them both on plain rice and whole wheat pasta with parmesan cheese – the pasta won hands down and was the most satisfying thing I’ve eaten all week.  I will say that both the recipes I tried took a bit of time – they weren’t complex, but both required making and then combining multiple components, which resulted in great flavor… but lots of dishes.  Other recipes on my shortlist that you may see around here in the future include Braised Lamb with Chickpeas and Tomato Sauce, Santorini Tomato Fritters, and Pan-Fried Semolina Cake.

The bottom line: The Country Cooking of Greece is a well-researched and beautiful book that will take you beyond the popular Greek-American classics to the food that’s been cooked in home kitchens for centuries.  Although recipes for some well-known classics are missing, the range and variety of recipes that are included more than makes up for it.  You’re sure to find at least one or two completely new ideas, and if you’re looking to recreate the meal you had in that tiny village restaurant in Greece… this might just be the place to start looking.

Disclaimer: Chronicle Books provided me with a review copy of this book free of charge, but as usual, all opinions are my own!

Smyrna-Style Baked Sausages

Recipe from The Country Cooking of Greece by Diane Kochilas. Makes 10 small sausages.

Note: Diane suggests serving this over rice or bulghur, but I liked it best over whole wheat spaghetti with a little bit of parmesan. If you plan to use it as a pasta sauce rather than a side dish, you should double the sauce quantities that are written below.

For the sausages:

  • 1 1/2 lb ground beef
  • 1/3 c. coarsely chopped white onion
  • 1 garlic clove, minced
  • 1/4 tsp ground allspice
  • 1/4 tsp ground nutmeg
  • 1 1/2 tsp paprkia
  • 1/2 tsp cinnamon
  • 2 1/2 tsp cumin
  • salt and pepper to taste
  • 1 egg
  • 2 TBS dry white wine
  • 1/4 to 1/2 c. dry bread crumbs (making your own is best!)
  • 2 TBS olive oil + some for frying
  • flour for dredging

For the sauce:

  • 2 TBS olive oil
  • 1/2 small red onion, finely chopped
  • 1 garlic clove, minced
  • 1/4 c. dry red wine
  • 1 28 oz. can whole plum tomatoes, roughly chopped and their juice
  • 1 tsp sugar
  • 1/2 tsp red pepper flakes
  • 1 tsp butter
  • salt and pepper to taste
  1. Make the sausages: In a large mixing bowl, stir together the onions, garlic, and spices. Add the ground beef and use your hands to mix together. Add the egg and wine and knead well to combine. Add just enough of the bread crumbs so that if you form a ball with your hands it stays together. Mix in the olive oil, then cover and refrigerate for 30 minutes.
  2. While the sausages are chilling, make the sauce. Heat the olive oil in a large saucepan over medium heat. Add the onion and cook until soft, about 3-4 minutes. Add the garlic and cook for 1 minute longer. Add the wine, chopped tomatoes, sugar, and red pepper flakes, and stir. Bring to a boil, then reduce heat and simmer, uncovered, until slightly thickened, about 10-15 minutes. Remove from heat and stir in butter, then season to taste with salt and pepper. Set aside.
  3. Preheat the oven to 350°F. Heat a thin layer of olive oil in a large saucepan over medium-low heat. Form the chilled sausage mixture into small sausages about 3 inches long and 1 inch thick. Place some flour on a plate and roll the sausages in the flour, then fry the sausages in batches, turning over gently part way through cooking to brown on all sides. Once cooked, place the sausages in a single layer in a baking pan, then cover with the tomato sauce. Cover tightly with foil and bake for 40 minutes. Serve hot, with starch of your choice.
Greatist Collaboration: Quinoa Salad with Broccoli and Avocado Pesto

November 7, 2012 Food

Greatist Collaboration: Quinoa Salad with Broccoli and Avocado Pesto

Trevor gets mad when I post this sort of recipe.  “Haven’t you already posted a variation of that, like, 20 times?” he asks.  And he would be right on that front.  But I never get tired of eating my favorite green things blended up with cheese in various combinations, and it’s my blog, so I’m sharing another non-traditional pesto dish.  Because it’s easy, healthy, and I love it. Also, I was really needing to get some green in me.

As some of you may know, I ran my second-ever half-marathon this past Sunday.  I was kind of dreading it.  In September, I ran my first half-marathon with Trevor in Chicago.  I had only trained for 6 weeks, and I showed up at the start line excited and pumped full of adrenaline, with no idea what to expect.  The first seven miles passed in a blur, with the two of us keeping a lively pace of 9:15.  Then Trevor pulled ahead and the last 6 miles felt like I was slowly dying.  You know that feeling of pure exhaustion, when you’re just barely holding off defeat, but not out of any rational part of your brain?  That feeling as you push yourself through the last 1/2 mile of a really competitive 5k, lungs burning, brain protesting with every stride?  That’s what the last 6 miles of that first race felt like.  I started crying tears of relief when I crossed the finish line.

This time around, with the memory of that last, painful finish burned into my mind, I was not looking forward to running.  Despite my increased training, and the fact that I now knew I was capable of finishing, I didn’t want to do it again.  I sometimes fantasized about tripping during my long runs, and I was mildly excited when I felt feverish the day before the race.  But I woke up Sunday morning feeling refreshed, focused, and energetic.  I called my mom (my running-mate this time around) and told her I wasn’t wimping out after all.

My goal in training between the two races was to find a way to feel strong for the last few miles.  I put myself into situations where I felt shitty and still had to run 2-3 miles before calling it quits, and I upped my distance runs to 11+ miles.  And I’m happy to say… it worked!  It was a beautiful fall afternoon in Newburyport, the air was crisp and the views of rolling farmland, frolicking horses, and sparkling lakes were peaceful.  The course had just enough small hills to keep me awake, and although I kept prepping myself for feeling bad and allowing myself to take a break at mile 8, mile 9, mile 10, I entered mile 12 feeling about as good as I had at mile 5!  I finished in 2:05, 2 minutes slower than in Chicago (and 3 minutes slower than my mom – you go momma! I hope I’m as fast and awesome as you are when I’m 50), but feeling infinitely better and stronger than I had at the finish in Chicago.  So maybe I won’t be giving up on half marathons like I thought…

Still, running that kind of race takes it’s toll on you.  Sunday night I popped a few ibuprofen to appease my complaining muscles and fell asleep at 9.  Monday, I was still totally exhausted, and I came home craving something green and filling and easy – which is where this recipe came into play.  With only a few minutes of prep, this meal managed to satisfy all my cravings at once – rich avocado, starchy quinoa, salty cheese, and nutritious broccoli.  I think I must have really needed all those nutrients!  If you’re inspired, head on over to Greatist for the full recipe.

Pumpkin & Sweet Potato Moussaka

November 3, 2012 Beef

Pumpkin & Sweet Potato Moussaka

Does it feel like pumpkin has been all the rage a little bit more than usual this fall?  It does to me – I’ve even seen complaints about the internet overdose of pumpkin: “Find a new darling ingredient!” and “What about cranberries, guys??”  So, yes, I know some of you are over pumpkin.  And frankly, it’s not my favorite ingredient of all time (although who doesn’t love the occasional pumpkin muffin?).  But when I saw this recipe for Pumpkin and Sweet Potato Moussaka, I knew I had to try it out anyway.  It’s so… different.  In the best sort of way.

The first time I had moussaka I was in Budapest.  While I was studying abroad in Prague, we had a 10 day fall break during which we could travel independently.  Most people in the program took off on a city-hopping tour of Europe, trying to hit as many major cities as possible in the short time.  My roommates and I took the opposite approach, visiting only two cities, both accessible by train – Vienna, and Budapest.

I have never felt more out of place than I did in Budapest.  Don’t get me wrong – I loved the city.  Beautiful, old-world, twisty-turny, and a little bit hipster.  But I could not say a single word in the language – not even “thank you.”  I’ve never had that experience before, and I felt completely helpless.  We managed to get by for the most part, but it was embarrassing!  The next time I’m there I’ll be prepared.

Anyway, one night we decided to go out to a Greek restaurant near our apartment (we’d already had plenty of chicken paprikash).  It was like being transported – whitewashed walls with bright blue murals, two brightly lit lofts with stone arches, waiters with Greek accents, etc.  It was one of the stranger dining experiences I’ve ever had – they actually used a dust-buster to vacuum off the table between courses!  But the food was delicious, and moussaka will always remind me of that little place in Budapest, and of the whole lovey trip, for that matter.

Originally, this post was meant to double as a review of The Country Cooking of Greece.  But as I began writing my grocery list and assembling ingredients, I made too many changes to the original recipe to really make it a fair “review” recipe.  You can’t judge a cookbook on a recipe you’ve changed!  The original recipe was vegetarian, but I couldn’t imagine having moussaka without ground beef – the salty, meatiness of it is the perfect counterpoint to the creamy bechamel and the sweetness of the roasted veggies.  Then, the grocery store didn’t have any eating pumpkins, so I used sweet potatoes and butternut squash instead of all three orange veggies.  I also had to play with the ratios a bit – I had way too much squash/sweet potato for the amount of bechamel I had made.  By the end, it wasn’t really a fair representation of the original recipe – but it was super delicious.  So you’ll have to hold out for the cookbook review, but you should try this adapted recipe in the meantime.

Pumpkin and Sweet Potato Moussaka

Adapted from The Country Cooking of Greece.  Serves 6-8.

For the bechamel:

  • 4 TBS salted butter
  • 1/4 c. flour
  • 4 c. milk, slightly warmed (on the stove or in the microwave)
  • 2 eggs, beaten
  • 1 c. crumbled feta cheese
  • 1/2 c. grated parmesan cheese
  • pepper to taste
  • 1/2 tsp nutmeg

For the filling:

  • olive oil
  • 3 large red onions, peeled and diced
  • 1 1/2 lbs ground beef
  • 2 large sweet potatoes (about 2 lbs), peeled and sliced lengthwise into 1/4 inch thick slices
  • 1 medium winter squash or pumpkin (about 2 lbs), peeled and sliced lengthwise into 1/4 inch thick slices
  • flour, for dusting
  • 1/2 c. chopped fresh mint
  • 1/2 c. chopped fresh parsley
  • salt and pepper, to taste
  1. Make the bechamel: Melt the butter in a large pot over medium heat.  Add the flour and whisk to combine so there are no lumps.  Cook for 1 minute, until lightly browned.  Slowly pour in warm milk, whisking continuously.  Whisk the mixture non-stop until it thickens, about 10-12 minutes.  (Note, to save a bechamel that’s not thickening, melt a little extra butter (2 TBS) in the microwave and mix with an equal amount of flour – add to the bechamel to restart the thickening process).  Once thickened, pour a ladleful of the hot mixture over the beaten eggs, whisking the eggs vigorously, to temper the eggs.  Pour the egg mixture back into the bechamel, whisking the whole time, and remove from the heat.  Stir in the cheeses, and season with pepper and the nutmeg.  Set aside.
  2. Prepare the filling: heat 2 TBS of olive oil in a large frying pan over medium heat and cook diced onions in it for 10 minutes, until soft.  Add ground beef and brown thoroughly.  Remove from heat, and use a slotted spoon to scoop beef and onion mixture into a bowl.  Season with salt and pepper, and set aside.
  3. Heat enough olive oil to rise a 1/4 inch up the side of the pan in a large frying pan.  Use medium heat, and let oil heat fully before beginning frying.  Test the temperature by dipping a piece of squash in the oil – if it sizzles immediately, the oil is ready.  Dredge the squash slices lightly in flour, then fry in the oil until lightly browned on both sides.  Remove to a paper-towel lined sheet pan to drain.  You will need to do this in batches.  Once the squash is done, lightly fry the sweet potato slices (you do not need to flour these) until golden brown.
  4. Preheat the oven to 350°F and assemble the moussaka: In a 9×13 roasting pan, place a single layer of sweet potatoes along the bottom such that they overlap slightly.  Sprinkle with half the mint and half the parsley, then top with half of the beef and onion mixture and half of the bechamel.  Cover these layers with a layer of the squash, then sprinkle remaining mint and parsley on top, as well as remaining beef and onion mixture.  Spread the rest of the bechamel on top, spreading out to the edges of the pan if possible.
  5. Bake for 40-50 minutes, until bechamel is puffed and golden.  If the top is not browning, broil it on low for 2-3 minutes and then remove.  Let rest for 10 minutes before slicing.  Serve warm.
Cookbook Review and Giveaway: Japanese Farm Food

October 28, 2012 Asian and Indian

Cookbook Review and Giveaway: Japanese Farm Food

Update: Giveaway now closed! Congrats to Andrea on winning the book (sorry, Mom, maybe next time!). Thanks to everyone for entering and leaving your favorite dishes – I have so many great Japanese recipes to try now – sounds like katsu curry and okonimyaki are must tries.

I don’t cook a lot of Asian food.  Sure, your occasional super-Americanized stir-fried rice, or a little chicken cooked in soy sauce, but rarely anything traditional.  It’s out of my comfort zone.  I have a lot of friends who are enamored with various Asian cultures, or who are part of an Asian culture and still very much tied to their family’s traditions and roots, but I’ve always been more drawn to Western food cultures – Italian, French, Irish, Polish, Czech.  It’s more accessible to me – closer to home.

This is precisely why Nancy Hachisu’s beautiful new cookbook “Japanese Farm Food” was such a wonderfully eye-opening book for me.  Just the introduction is full of new information – the best type of miso to buy for everyday use, how to grind tofu, and what, exactly, a suribashi is (it’s basically a grooved mortar and pestle for grinding seeds and nuts, if you’re wondering).  In fact, there were so many new words and ingredients and techniques in the opening chapter that I was almost a little intimidated.

I shouldn’t have worried – simplicity turned out not to be a problem.  Many of the recipes are simple, some shockingly so – like “edamame and sea salt,” or “raw egg on hot rice,” both of which are exactly what they sound like.  This level of simplicity is typically not my cup of tea in cookbooks – as someone who spends a lot of time cooking and thinking about cooking, I don’t need a book to instruct me in truly simple preparations.  However, in this book it seems appropriate.  Japanese food is simple by nature, and it is in preparing the simplest meals that technique truly counts.  There are also plenty of recipes a bit more complicated, like Chicken and Miso Meatballs or Egg Custard Squares with Crab and Spinach.  Some ingredients, such as yuzu, miso, and fresh wasabi, may be hard to find, but once you’ve sourced them, they’re used over and over again.

For anyone who grows their own vegetables or frequently finds themselves with an abundance of produce, you will find many new ways to prepare them in this book – a major plus.  Between Fried Eggplant Halves with Sweet Miso, Smashed Cucumber Pickles with Garlic, and Zucchini Coins with Roasted Sesame, I’ve taken plenty of notes on what to do with next year’s end-of-summer produce.  I should also note that the recipes in this book are intrinsically healthy, as much of traditional Japanese cuisine is.  Very few recipes call for dairy or wheat, the majority are vegetable based, and the techniques are such that the ingredients maintain most of their nutritious qualities.  If you’re looking to change your diet and lifestyle (and you like Japanese food, of course), this book may be a great source of inspiration.

But this book is not just about the food.  A big part of its charm are the short vignettes, little glimpses into Nancy and Tadaaki’s life in their Japanese farmhouse.  At first it seemed strange to me that the stories were somewhat disconnected, and not a continuous tale of Nancy’s integration into Japanese life, but I think they ended up being my favorite part.  The wannabe farmer buried inside me loved imagining the first taste of a fresh pecan grown from seed 20 years earlier, or of midsummer edamame just pulled from the bush, served hot and salty with a cold beer, the way Americans might enjoy corn on the cob.  I think any armchair traveler with the slightest interest in Japan will revel in this book.

This is a book that was very clearly assembled with a lot of thought and love.  It is not haphazardly thrown together, nor is it repeating material and recipes that those of us who consume food literature at a rapid pace have seen a hundred times.  But before I can truly condone any cookbook, I have to test out a few recipes to see if they’re worthwhile.  In this case, I started with the homemade ramen.  Ramen is a food so steeped in mystique and tradition, I was curious to see how it would turn out at home.  The answer?  Worth every minute of the 3-hour preparation.  The long-simmered chicken broth is clear and nourishing, the home rolled noodles puffy and tender, the half-boiled egg creamy and full of the broth’s flavor.  It is exactly what I want to be slurping on any cold and dreary afternoon. It definitely takes some planning ahead, and the noodles were a little bit tricky to work with, but I would absolutely make it again on a lazy Saturday.  I still have a few more recipes to test, but so far, this book passes the recipe test.

The bottom line: Japanese Farm Food is a ground-up introduction to traditional Japanese food, packed with simple, technique-focused recipes.  Nancy’s voice is strong and her stories intimate – resulting in a beautiful book that is clearly a labor of love.  I’d strongly recommend it to anyone looking to expand their repertoire of healthful (or vegetarian) recipes, learn new methods for cooking fresh produce, or to anyone with any interest in the culture and food of Japan.

Giveaway:  Thanks to the folks over at Andrews McMeel Publishing, I’m giving away one copy of Japanese Farm Food.  To enter, leave a comment below, answering the question: What is your favorite Japanese (or generally Asian, if you’ve never had Japanese food) dish?  Have you ever made Japanese food at home?  (P.s. I loved hearing your answers about your favorite winter dish – seems a lot of you love beef stew and chicken pot pie!)  For one additional entry, you can subscribe to Katie at the Kitchen Door via email or RSS, and leave a separate comment letting me know you have (you can also do this if you’re already a subscriber).  One winner will be picked at random at midnight on Friday, November 2nd.  Be sure to include your email in the comment form so I can get in touch with you!  If the winner doesn’t respond to me within 48 hours, they forfeit their winnings and I will pick a second winner.  US only, apologies to my international readers! Giveaway now closed!

Disclaimer: I was sent a free review copy of Japanese Farm Food by the publisher, Andrews McMeel, but all thoughts and opinions shared here are honest and my own.

Ramen at Home

Recipe from Japanese Farm Food, by Nancy Hachisu.  Serves 4.

For the broth:

  • 2 carrots, cut into 1 inch lengths
  • 2 small Japanese leeks, or 4 scallions, trimmed and cut into 1 inch lengths
  • 1 inch fresh ginger, peeled and thinly sliced
  • 4 bone-in chicken thighs (or 8 wings)
  • 1 tsp sea salt
  • 2 TBS rapeseed or sesame oil

For the noodles:

  • 2 TBS sesame oil
  • 2 c. flour
  • 2 eggs, at room temperature
  • 2 egg yolks, at room temperature

For the toppings:

  • 4 eggs
  • 1 small bunch chopped bitter greens, such as bok choy or kale
  • 3 TBS finely chopped Japanese leeks or scallions
  • 1 sheet nori, cut into eights
  • Soy sauce, miso, or sea salt (to taste)
  1. Make the broth.  Preheat the oven to 450°F.  Place carrots, leeks/scallions, ginger, and chicken thighs in a roasting pan, and toss with salt and oil.  Roast for 40 minutes.  Pour chicken, veggies, and all the juices into a large stockpot, and cover with 16 cups of cold water.  Bring to a boil, then lower heat and simmer, covered, for 1 hour.  After 1 hour, remove the lid.  Take out 2 of the chicken thighs and place in a small bowl.  Cover the thighs with hot broth and let cool to room temperature, then shred.  Continue simmering the remaining broth for another 30-60 minutes, until it is reduced to about 8 cups.  Strain broth into a clean pot and keep warm over low heat.  Discard vegetables and remaining chicken thighs.
  2. Make the noodles: mix 2 TBS of the sesame oil into the flour with your fingers until it is crumbly.  Add eggs and egg yolks and stir with your hand until incorporated, then knead on a flat, clean surface for 5 minutes until the dough is pliable but stiff.  The dough takes some force to really work it into a pliable piece.  Let dough rest 10 minutes.
  3. Roll out the noodle dough to a thickness of about 1/8 inch using a pasta machine or a heavy rolling pin.  Cut into noodles by hand or using pasta machine.  Nancy recommends skinny linguine-shaped noodles, but we made thick ones because the dough wasn’t workable enough to make the smaller noodles – the thick ones worked great for us!
  4. Prepare the toppings: bring a large pot of water to a boil over high-heat.  Add the eggs and boil for exactly 7 minutes, then remove with a strainer and place directly into a bowl of ice-cold water.  Let cool, then peel.  In the boiling water, blanch the bitter greens until just tender, then add to the cold water with the eggs.  Keep the water boiling – you will use it to cook your noodles just before serving.
  5. Once the broth, noodles, and toppings are ready, prepare the bowls: add a small amount of miso, soy sauce, or salt to each bowl (according to diner’s preference) and pour a ladelful of hot broth over the seasoning.  Stir the broth into the seasoning.  Divide the shredded chicken amongst the bowls.  Drop the noodles into the boiling water and cook for 2 minutes – they will float up to the top when they are done.  Remove the noodles with a strainer and divide among the bowls.  Top off each bowl with a few more ladlefuls of hot broth, 1 egg cut into halves, a handful of the cooked grens, some of the nori pieces, and a sprinkling of scallions.  Serve very hot, with extra seasoning as desired.
  • « Previous Page
  • Page 1
  • …
  • Page 36
  • Page 37
  • Page 38
  • Page 39
  • Page 40
  • …
  • Page 57
  • Next Page »

Primary Sidebar

Subscribe!

Get creative recipes and menu ideas delivered straight to your inbox.

Most Popular

A House // Sweet Potato and Coconut Milk Soup with Brown Rice and Lentils

Monthly Fitness Goals: July // Homemade Spinach Wraps with Chopped Greek Salad

A New Job // Classic Seven-Layer Bars

Butternut Squash Carbonara with Fried Sage and Caramelized Onions

Happy Birthday, Trevor! // Peanut Butter Fudge

Cookbook Review and Giveaway: Home Made Winter

Drizly

Please note!

Full disclosure: if you purchase anything at Amazon using the above links or any other links to Amazon on this site, I will receive a small commission. Just so you know!

Copyright© 2018 · Cookd Pro Theme by Shay Bocks

This site uses cookies: Find out more.