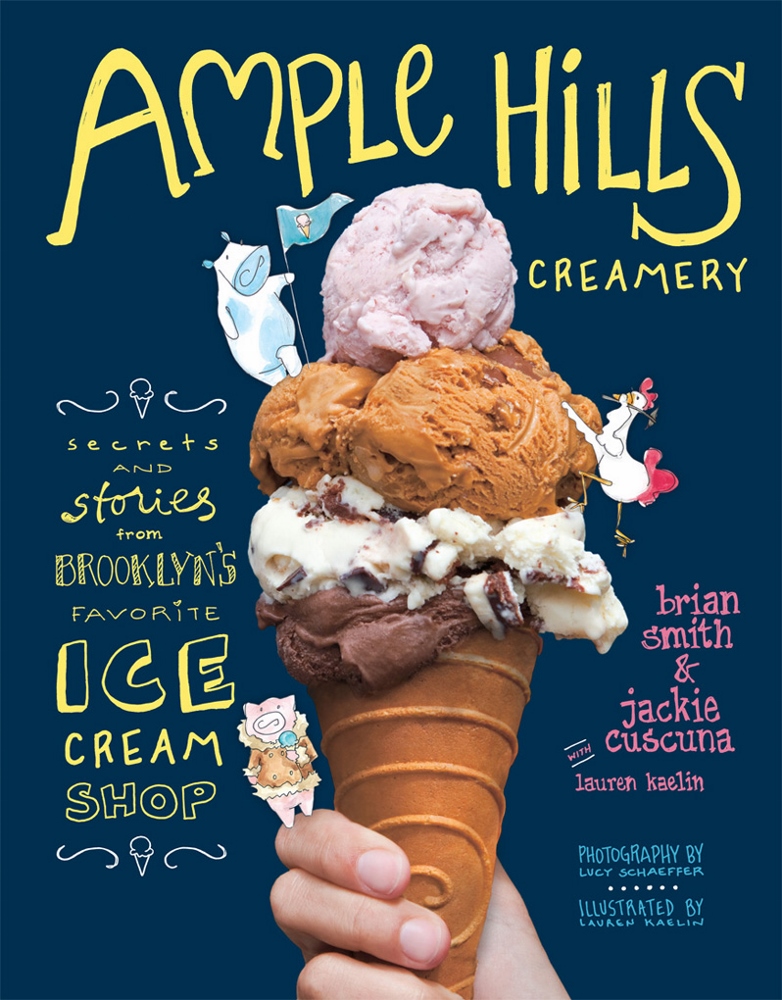
The Book: Now that we’re in the thick of ice cream season (although, who am I kidding, it’s always ice cream season in my house), it’s time for me to share the first of this summer’s crop of ice cream cookbooks – Ample Hills Creamery. Ample Hills is an ice cream shop in Brooklyn, where the owners, Brian and Jackie, churn out whimsical flavors like Breakfast Trash (Cereal Milk and Froot Loops), Drunken Thanksgiving (Pumpkin Bourbon with Molasses Cookie Bits), and “I Want to Marry This!” (Maple with Chocolate-Covered Bacon Bark). Like the flavors, their new cookbook is playful, filled with cartoons of the three Ample Hills mascots, hand-lettered picture annotations, bright colors, and even bingo boards and instructions for drawing Walt the Cow (one of the mascots). The end result isn’t corny at all, just fun and well-integrated into the overall design. Brian and Jackie’s story is also woven into the pages of the book, and it’s an inspiring story – they took a big risk, followed their dream, and are now enjoying huge success. And their ice cream flavors are great. I love ice cream (like, really love it) and you’d be hard-pressed to find a flavor in most shops that I wasn’t excited about, but some of the inclusions in this book have me just itching to clean out the ice cream that’s already in my freezer to make room for more. There are also recipes for homemade cones, toppings (mmm whiskey butterscotch!) and mix-ins like brownies and cookie dough.
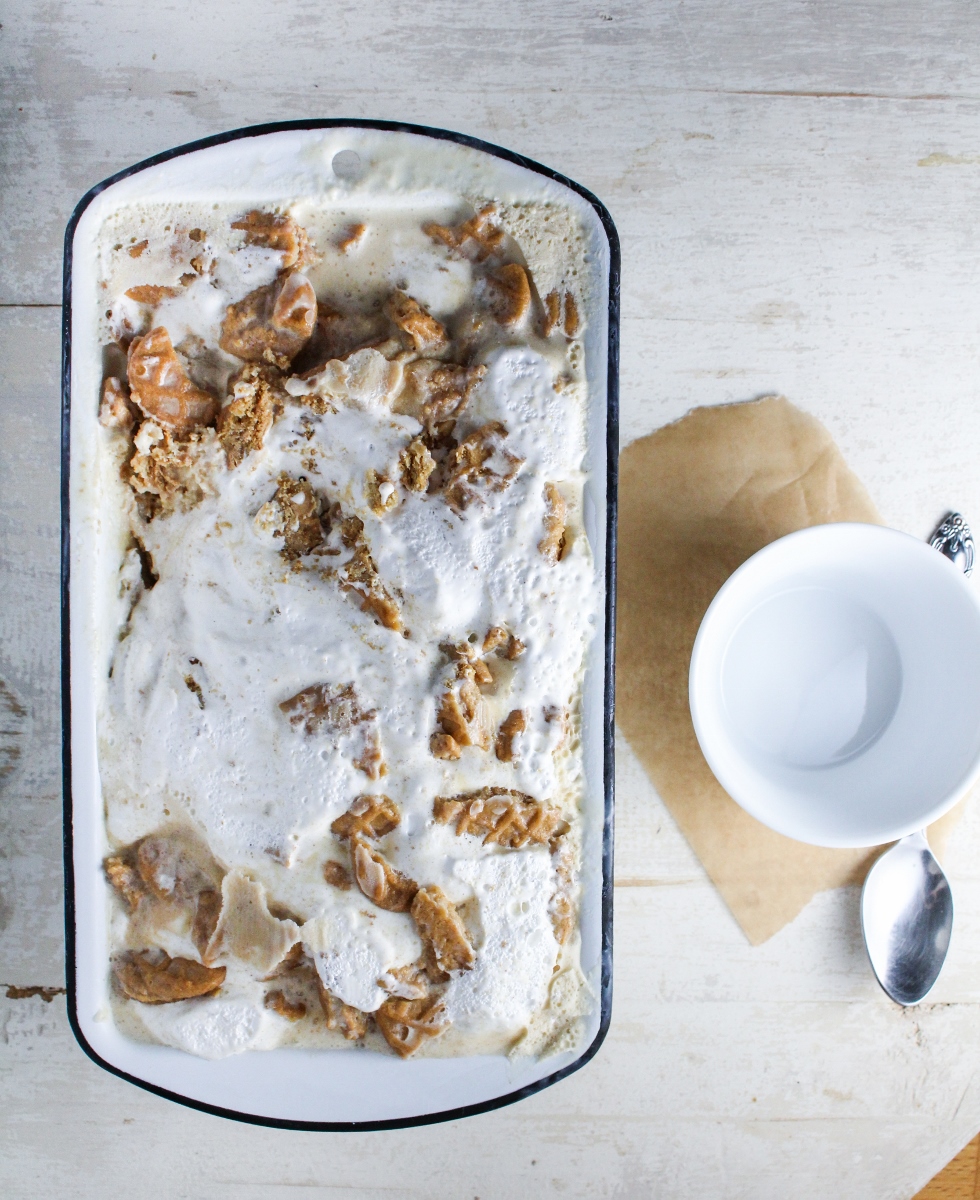
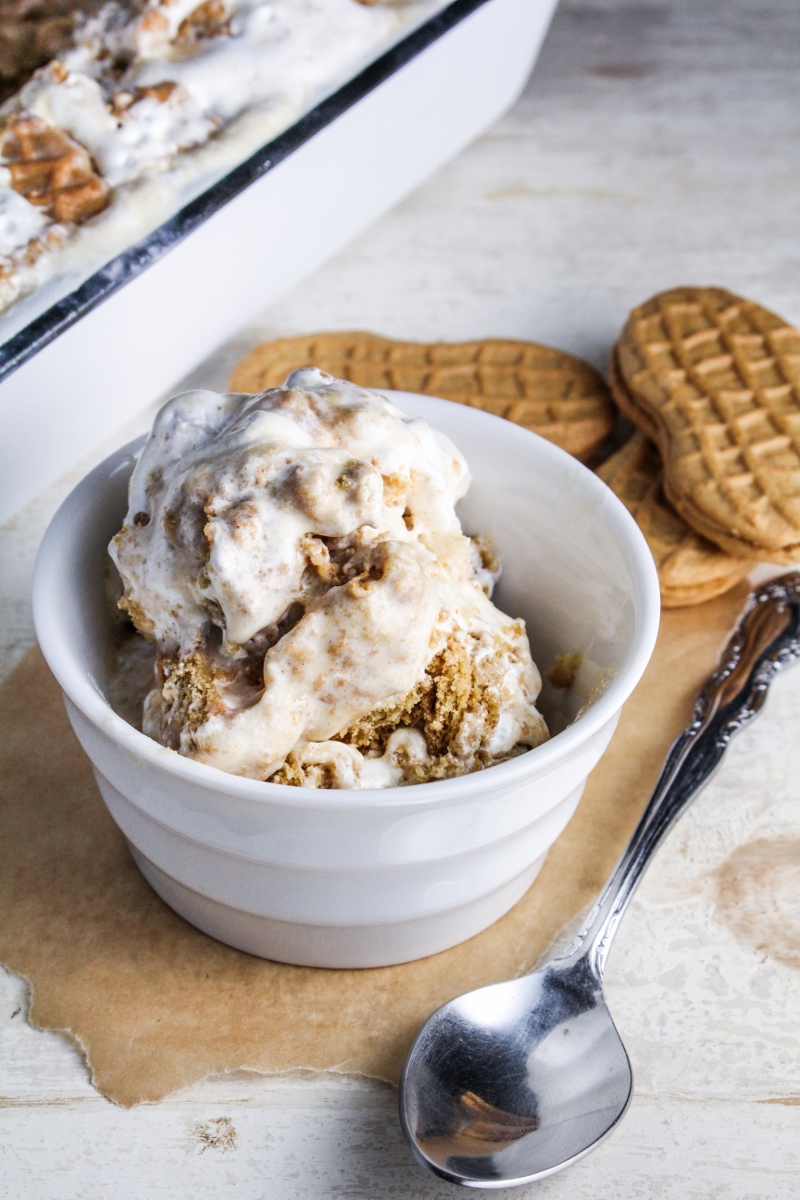
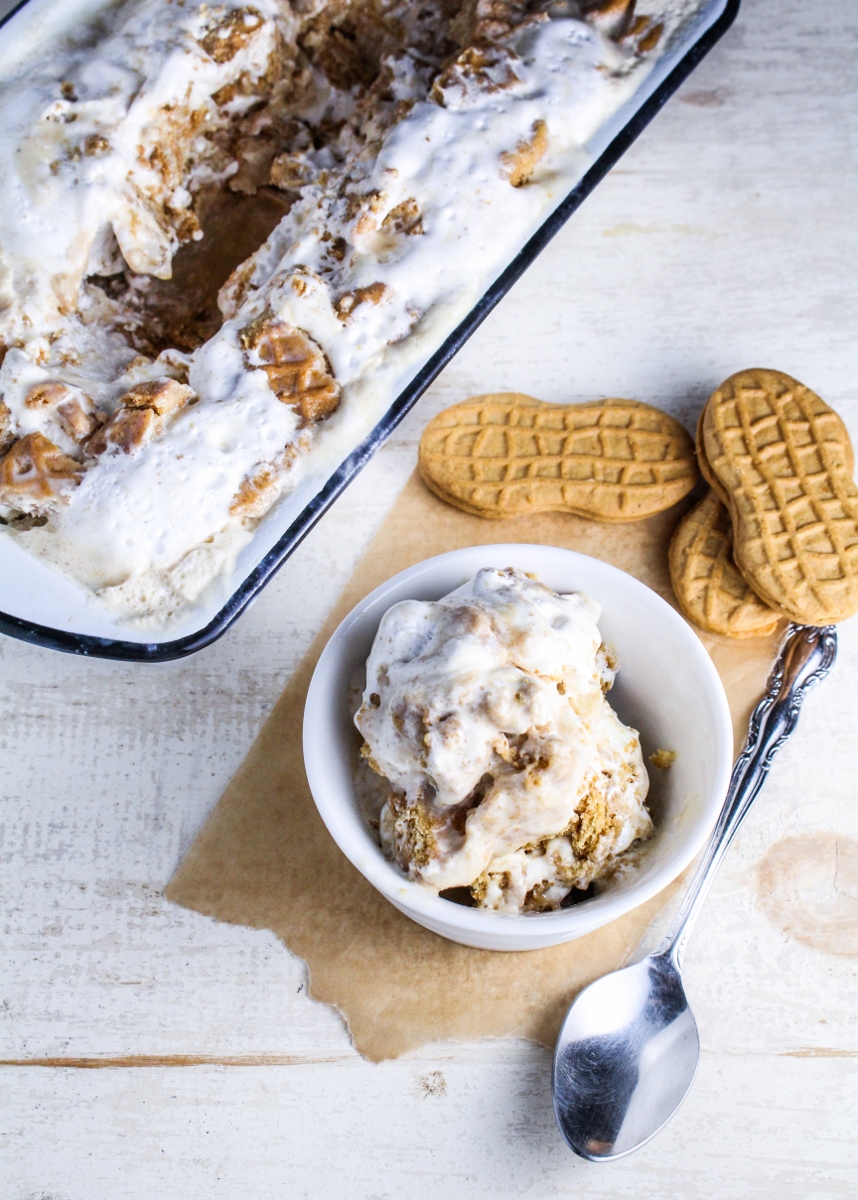
The Food: Most of the recipes in Ample Hills use a basic sweet cream ice cream recipe (called “Walt’s Dream”) as their starting point. This base is different from others I’ve used, as it includes skim milk powder, which apparently helps keep the ice cream creamy by reducing the water content you have when using regular milk, and ultimately allowing you to use a lower cream to milk ratio. I followed all the instructions, even buying the (pricey) organic cane sugar and (pricey) organic skim milk powder that it called for, but I can’t say the base turned out more creamy than others I’ve tried. Before freezing, the base was very thin, and even after churning it was pretty soupy and needed a solid 24 hours in the freezer to firm up. They do recommend using a hand crank machine, as they get colder faster, but that seems like a lot of extra work to me. Personally, I think I prefer using base recipes with more egg yolks and cooking them to the point of a custard. So, I’m not sure if I’ll use the base recipe again, but I’ll certainly be using the flavor combinations as inspiration for future batches, as they go above and beyond in an effort to cram as many delicious ingredients as possible into one flavor. Our first batch was called “PB Fluff’n’Stuff” – a mix of peanut butter ice cream, nutter butters, and fluff. I opted not to make the homemade fluff (after all, the home of fluff is right here in Somerville… so it’s local?), and oh man is it good. This stuff will not be lingering in our freezer. There’s nothing subtle or elegant about this ice cream – it’s the kind of flavor that would be the highlight of the day at a seven year old’s birthday party, hitting you over the top of the head with simple sugary sweetness, It’s delicious, all sweetened creamy peanut butter, crunchy cookies and airy fluff. If you like peanut butter desserts, you will love it.
Recipe Shortlist: Raspberry Blonde (White Chocolate Ice Cream with Raspberry Jam and Malted Blondie Bits); Sweet as Honey (Sweet Cream with Honeycomb Candy); Monkey Bread; Daddy’s Sundae (Bourbon Ice Cream with Brownies and Salted Fudge Caramel); Salted Crack Caramel; Four More Years (Beer Ice Cream with Honeycomb Candy)
Like what you just read? Subscribe to Katie at the Kitchen Door on Feedly or Bloglovin‘, or follow along on Facebook, Twitter, Pinterest, Instagram, or Google+. Thanks for reading!
Disclaimer: I received a review copy of Ample Hills Creamery from Stewart, Tabori & Chang, but I was not otherwise compensated and all thought and opinions are my own.
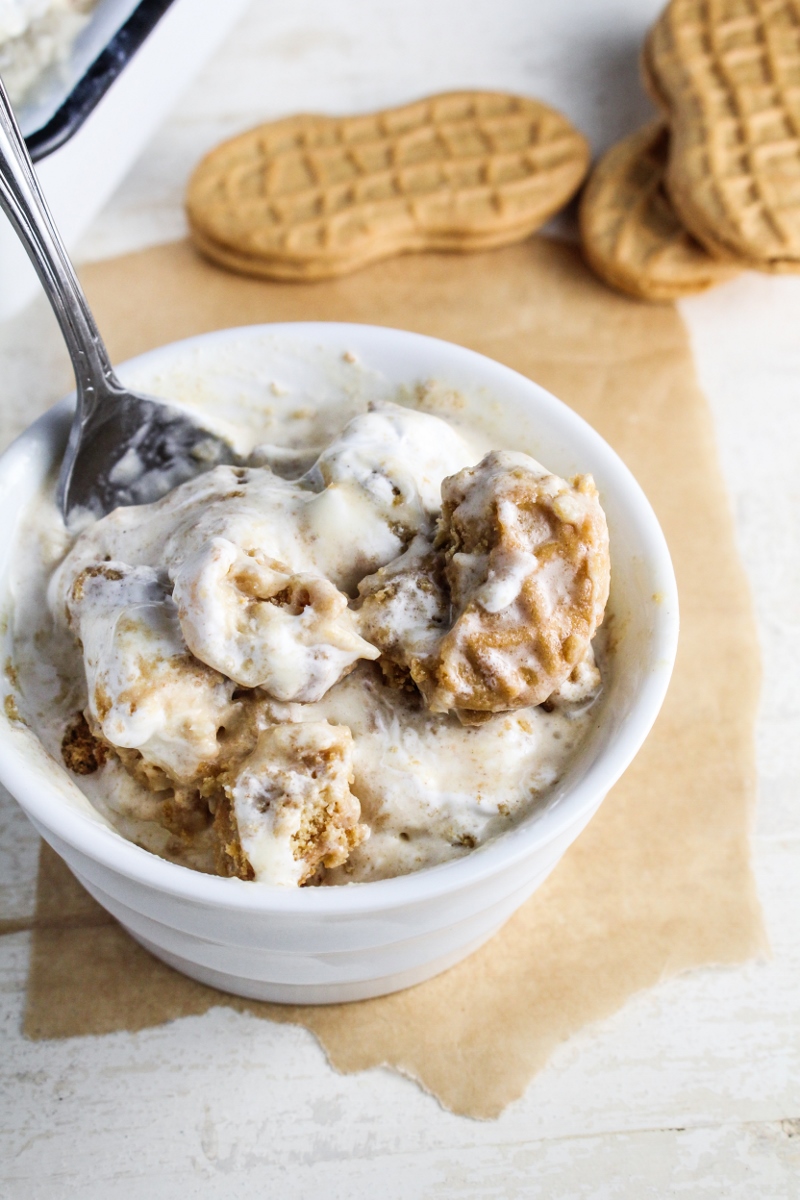
Peanut Butter and Fluff Ice Cream
Recipe from Ample Hills Creamery. Makes about 6 cups of ice cream.
- 3/4 c. organic cane sugar
- 1/2 c. skim milk powder
- 1 2/3 c. whole milk
- 1 2/3 c. heavy cream
- 3 egg yolks
- 1/2 c. natural peanut butter
- 2 tsp vanilla extract
- 12-oz. box of peanut butter sandwich cookies
- 3 c. marshmallow fluff (store-bought or homemade)
- Prepare an ice bath in a large heatproof bowl. Set aside. In a medium saucepan, combine the sugar, milk powder, and whole milk. Whisk until smooth, making sure the skim milk powder is fully dissolved. Stir in the cream.
- Place the saucepan over medium heat and heat the milk mixture, stirring often, until it reaches 110°F, which will take 5-10 minutes. Once it reaches this temperature, remove it from the heat.
- Whisk the egg yolks together in a medium bowl. While whisking, slowly pour 1/2 cup of the hot milk mixture over the eggs, beating them vigorously to temper the eggs. Repeat with another 1/2 cup of hot milk, then pour the eggs back into the remaining milk mixture, still whisking to prevent any scrambling. Return the pan to heat, and cook until it reaches 165°F and forms a thin film on a wooden spoon, about 5-10 minutes longer.
- Remove from the heat and stir in the peanut butter and vanilla, then pour the ice cream base through a wire mesh strainer into a bowl, and cool in the ice bath for 15 to 20 minutes. Chill the ice cream base in the fridge for at least 2 hours, but preferably overnight, until it is completely cold.
- Churn the ice cream according to your ice cream maker’s directions. While it is churning, break up the peanut butter cookies into bite-sized pieces. Transfer the churned ice cream to the storage container, and quickly but gently fold in the cookies and the marshmallow fluff. Don’t overmix, or the fluff may dissolve. Freeze ice cream for at least 4 hours before serving.