• Skip to primary navigation
  • Skip to content
  • Skip to primary sidebar
  • Home
  • Recipes
  • Features
    • Cookbook Reviews
    • Ingredient of the Week
    • Sunday Dinner
    • Fitness Goals
  • Travel
  • About
    • Privacy Policy
    • Cookie Policy
  • Work With Me

Katie at the Kitchen Door

Globally-inspired, seasonal recipes

Blog Page

Captain’s Table Superbowl // Captain’s Lime Shandy

7 January 31, 2014 Drink

Captain’s Table Superbowl // Captain’s Lime Shandy

Captain's Lime Shandy {Katie at the Kitchen Door} #captainstable #superbowl

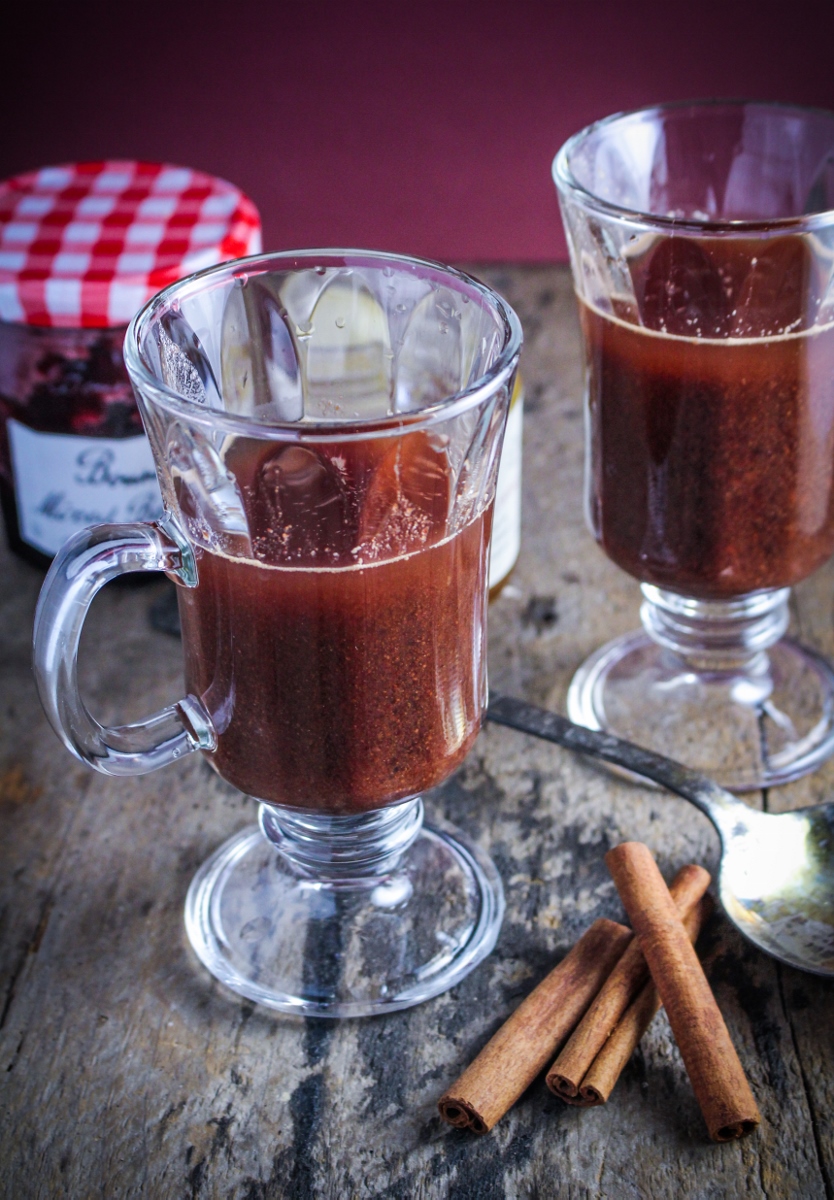
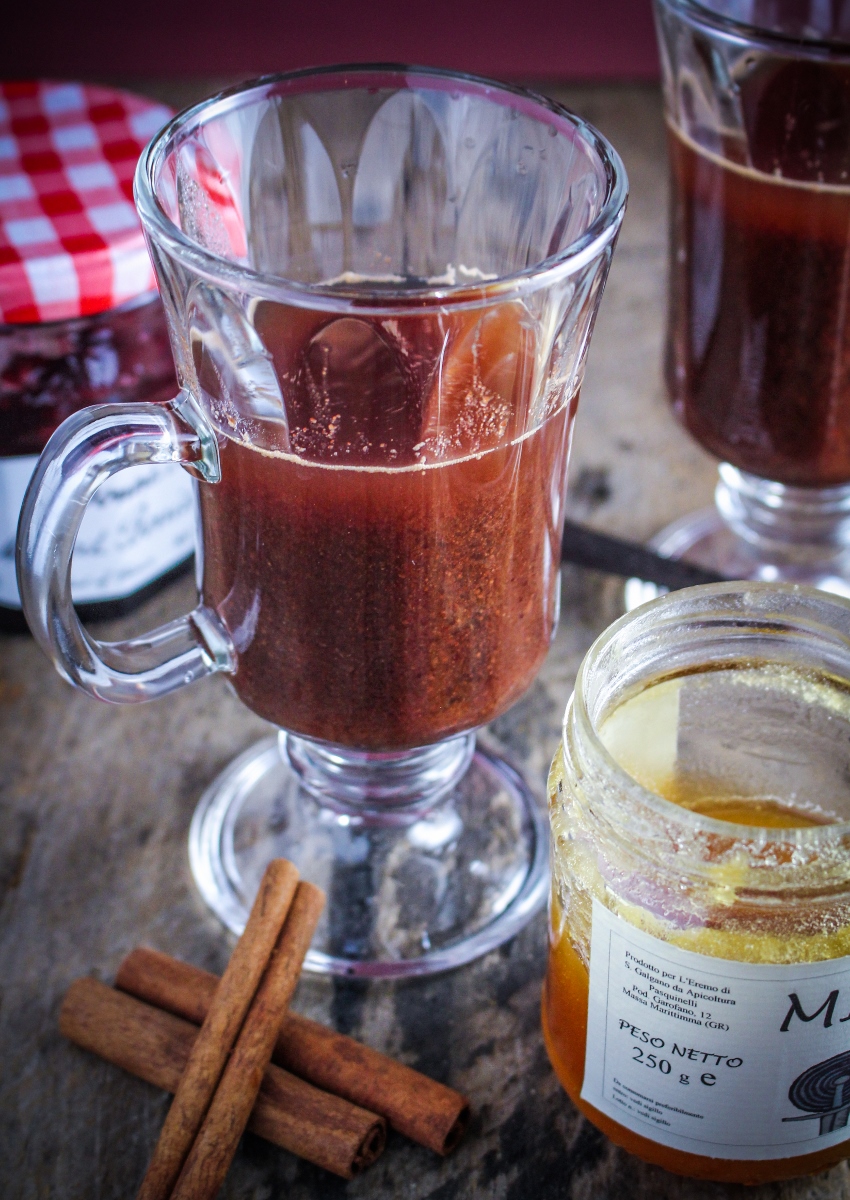
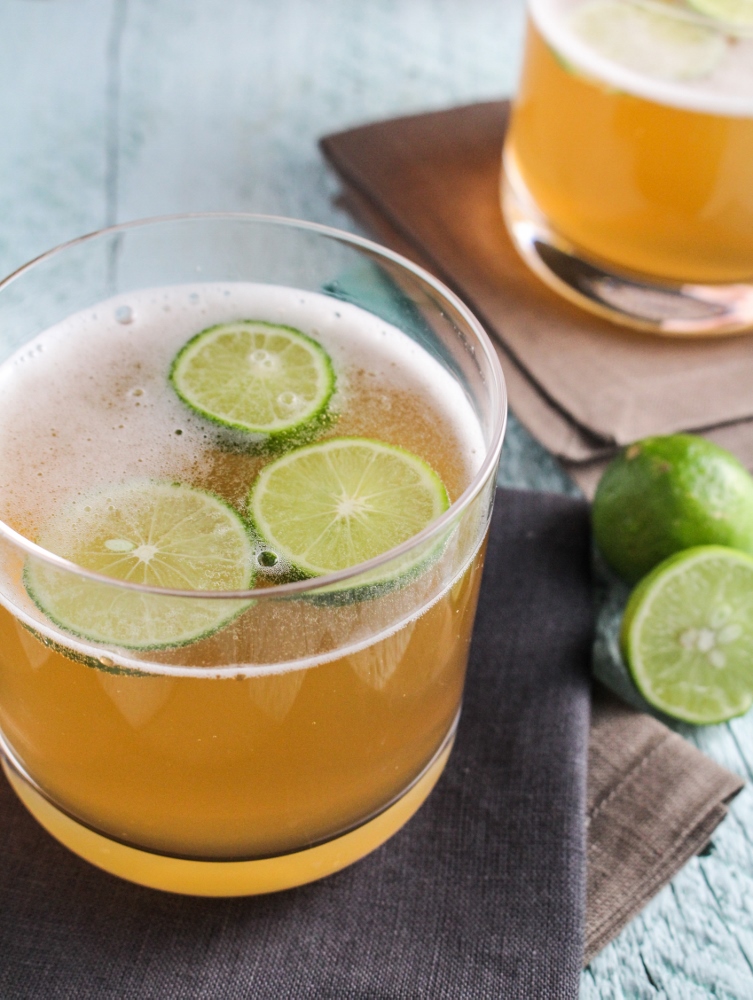
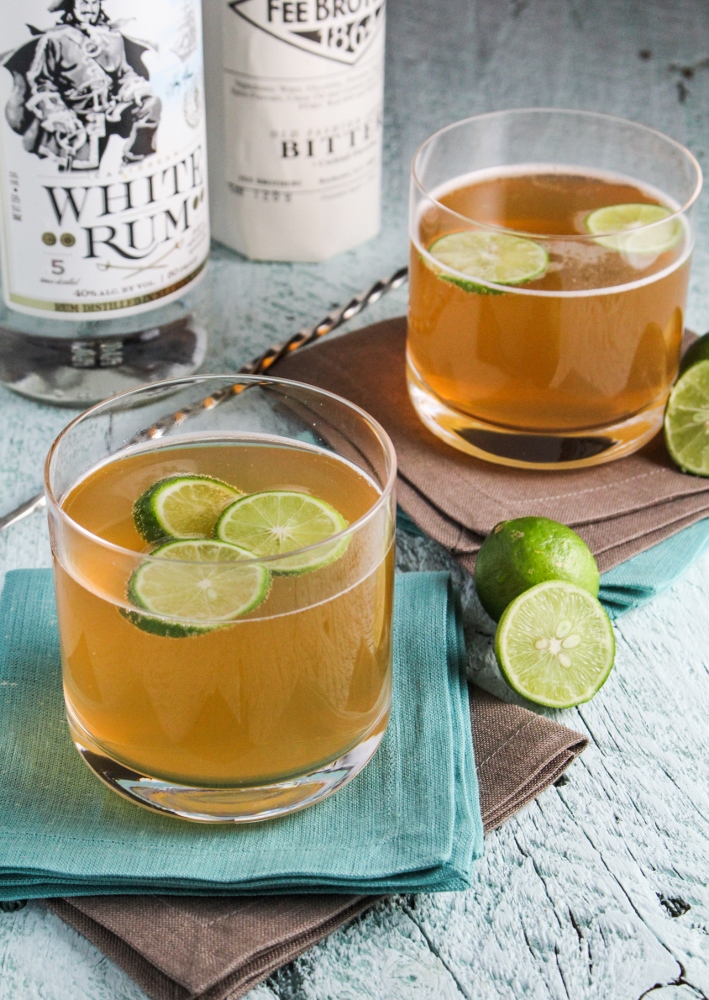
It’s time for our very last Captain’s Table Challenge recipe – a drink suitable for enjoying during the big game this Sunday. I’m not really much of a football fan (understatement; I actually don’t watch sports at all), but I am a fan of parties, whether they revolve around football or not. And although I don’t know much about the sport, I do know that people like to drink beer while watching it, so our contribution to this edition of the challenge is a classy beer cocktail, the Captain’s Lime Shandy. A classic shandy is typically a mixture of light beer and sparkling lemonade, but we upped the potency with a shot of Captain Morgan White Rum, and played off the tropical, lime-y flavors in the rum with a slightly sweetened clarified key lime juice in place of the lemonade. A dash of bitters  added a hint of sweetness and complexity, and we had ourselves a drink worth watching football for. Not too sweet, not too bitter, these perfectly combine the drinkability of a beer with the more nuanced flavors of a good cocktail.

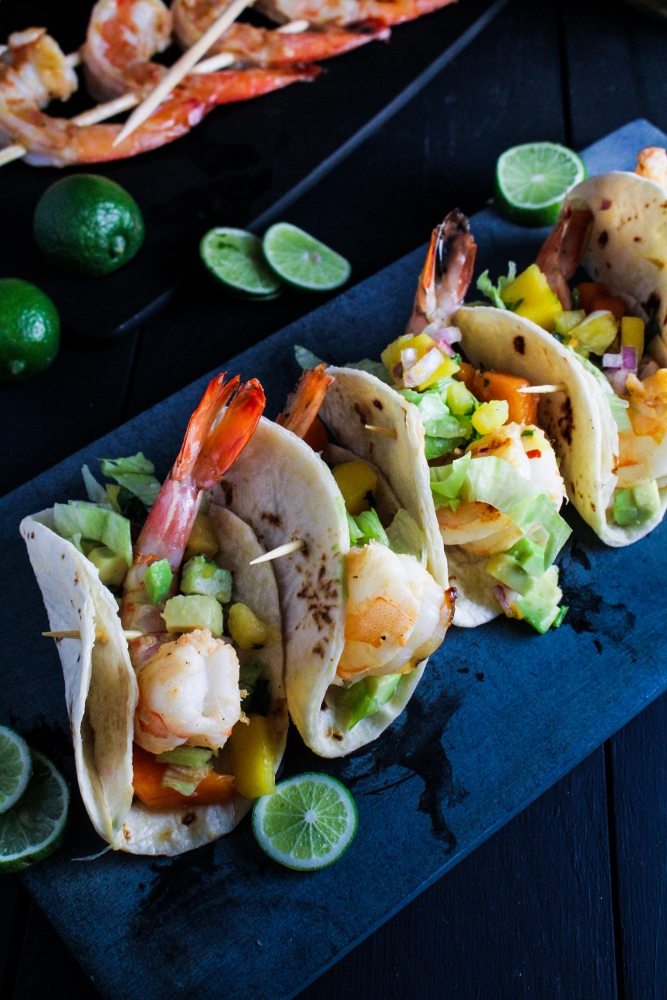
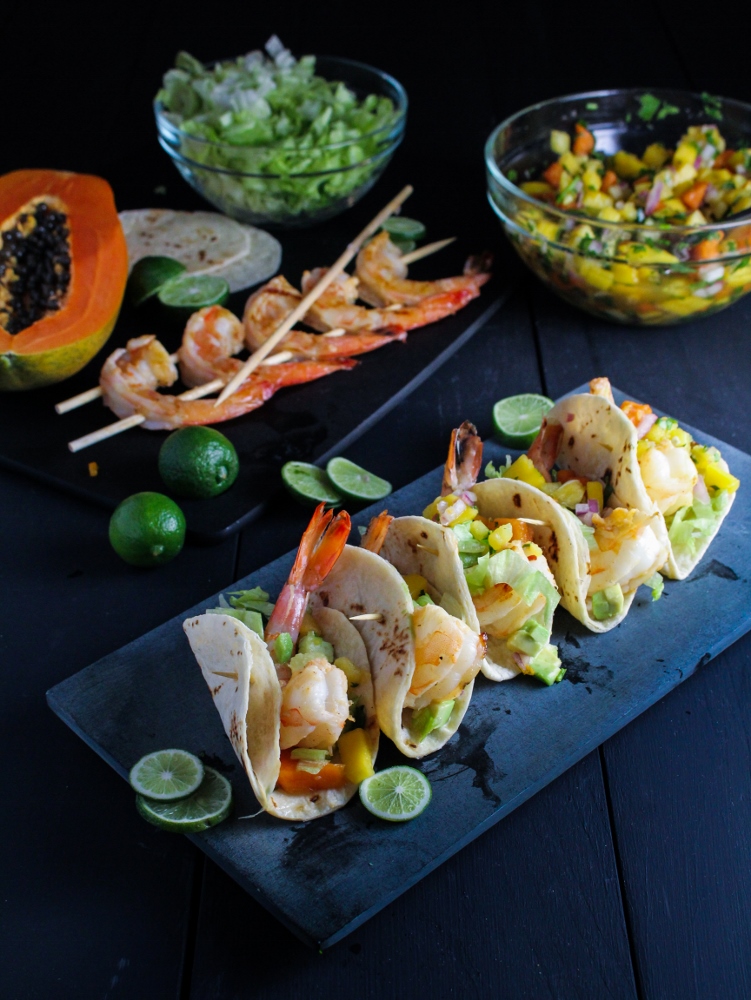
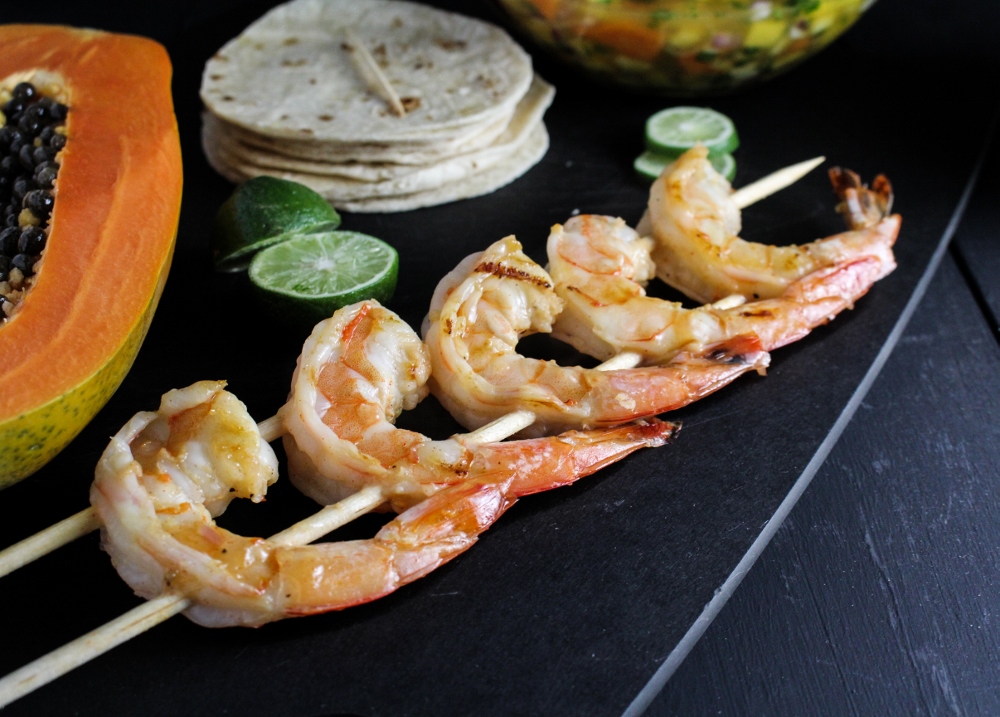
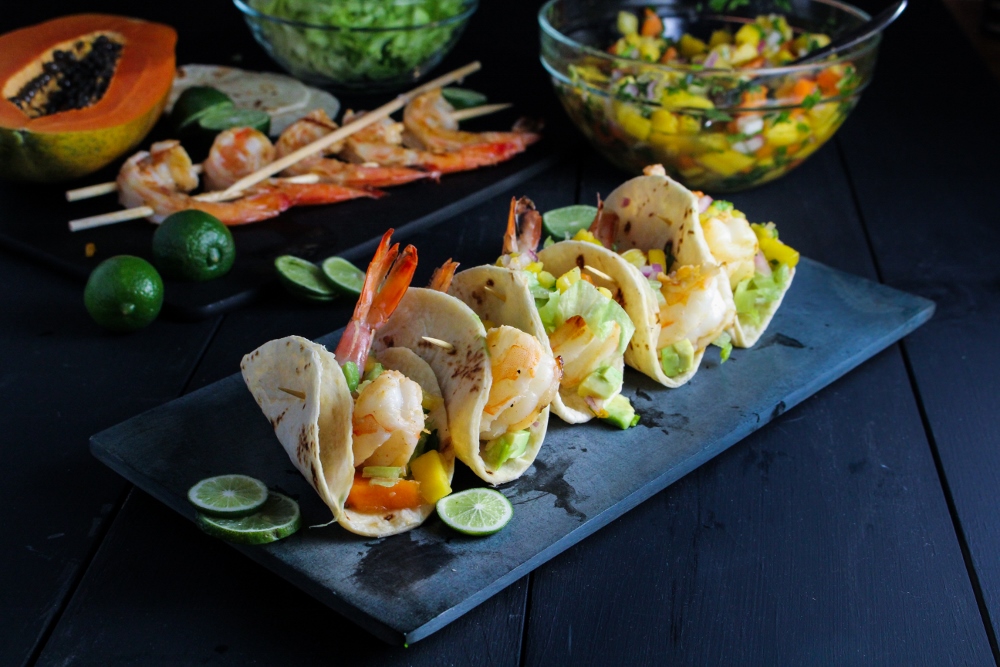
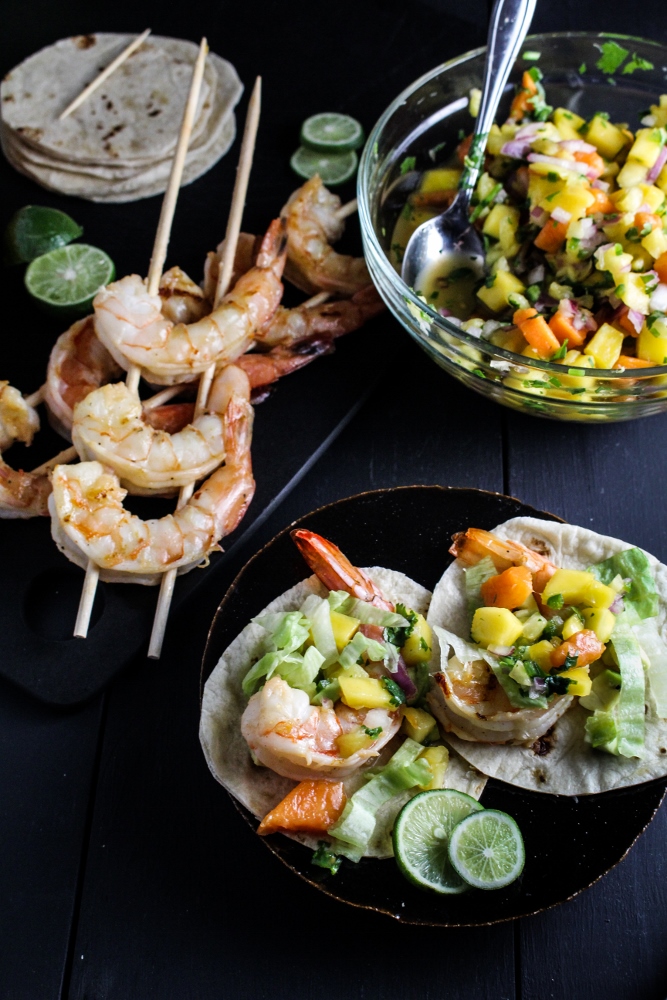
But be careful, these are highly drinkable! A fact we discovered last night when we found ourselves inadvertently tipsy while recipe testing. Perhaps if we had been noshing on these Mini Shrimp Tacos at the same time we would have been better off.

Like what you just read? Subscribe to Katie at the Kitchen Door on Feedly or Bloglovin’, or follow along on Facebook, Twitter, Pinterest, and Instagram. Thanks for reading!

Captain's Lime Shandy {Katie at the Kitchen Door} #captainstable #superbowl

Captain’s Lime Shandy

Serves 2.

  • 2 shots (1 1/2 oz. each) Captain Morgan White Rum
  • 1 shot ( 1 1/2 oz.) Clarified Key Lime Juice (available at WholeFoods, or use a mix of fresh key lime juice and sugar)
  • 4 dashes Fee Brothers bitters
  • ice
  • 1 bottle light bodied beer, chilled
  • sparkling lime soda, chilled
  • key lime slices, for garnish
  1. Add the rum, key lime juice, bitters, and ice to a cocktail shaker. Shake vigorously for 30 seconds, then strain into two Old-Fashioned or juice glasses. Pour the beer over the liquor to fill the glasses almost to the top, then top each glass off with a splash of sparkling lime soda. Stir briefly to mix, serve immediately.
Captain’s Table Superbowl // Mini Rum-Glazed Shrimp Tacos with Boozy Tropical Salsa

0 January 28, 2014 Food

Captain’s Table Superbowl // Mini Rum-Glazed Shrimp Tacos with Boozy Tropical Salsa

Mini Rum-Glazed Shrimp Tacos with Boozy Tropical Salsa {Katie at the Kitchen Door} #captainstable #superbowl

I forgot how soul-sucking winter is. Maybe I purposefully blocked it out. The only mental note I seem to have left for myself from last winter was “plan a warm vacation for February or March, you’ll need it.” And I did that, we’re going to Ecuador in March and I can’t wait, but still: soul-sucking. The cold has turned my usually pleasant 15 minute walk to the subway into 15 minutes of breath-stealing torture. The other day my breath was actually freezing on my eyelashes and then melting onto my face every time I blinked. The other Bostonian commuters and I have been reduced to a pair of eyes surrounded by layers of black wool, and that small open part of my cheeks that my scarf doesn’t cover are perpetually windburnt. So even though we try our best to stick with root veggies and dried beans and hearty winter greens in January, last weekend the only solution to the cold was to turn to fantasy, and go all out with tropical flavors.

Mini Rum-Glazed Shrimp Tacos with Boozy Tropical Salsa {Katie at the Kitchen Door} #captainstable #superbowl

Mini Rum-Glazed Shrimp Tacos with Boozy Tropical Salsa {Katie at the Kitchen Door} #captainstable #superbowl

Two mangoes, one papaya, and a whole pineapple later, we were successfully pretending that we live somewhere with greenery, sunshine, and brightly-colored birds. These Mini Shrimp Tacos are our contribution to the Superbowl edition of the Captain’s Table Challenge. They’re glazed with Captain Morgan’s newest product, Captain Morgan White Rum, which is lighter and slightly fruitier than their spiced rums. The glaze also has honey, lime, bell pepper, and smoked paprika, for a pleasant mixture of sweet, tangy, and smoky. Wrapped in mini tortillas and topped with avocado, lettuce, and a bright pineapple-papaya-mango salsa (that also has a bit of rum in it for good measure), they’re great football-watching finger food that will also help cure your winter blues.

Mini Rum-Glazed Shrimp Tacos with Boozy Tropical Salsa {Katie at the Kitchen Door} #captainstable #superbowl

For anyone who’s been stopping by here for a while, you might have noticed that these tacos have the honor of being the first seafood recipe I’ve ever shared on this blog. Yep, the 1st post out of 333. I’ve never been much of a seafood-eater (in fact, as my parents can attest to, it absolutely disgusted me as a kid), but the past year or so I’ve been trying to get myself to come around to it. I can honestly say that I like smoked salmon, but shrimp is still a bit of a stretch – I ate one of these and liked it OK, but Trevor did some leftover shredded chicken in the same rum glaze, and that was much more my speed. Still, it’s progress! But whether you make these tacos with shrimp or chicken, for a football party or for sitting on your couch at home and watching rom-coms, I promise they’ll be a bright spot in your week.

Like what you just read? Subscribe to Katie at the Kitchen Door on Feedly or Bloglovin’, or follow along on Facebook, Twitter, Pinterest, and Instagram. Thanks for reading!

Mini Rum-Glazed Shrimp Tacos with Boozy Tropical Salsa {Katie at the Kitchen Door} #captainstable #superbowl

Mini Rum-Glazed Shrimp Tacos with Boozy Tropical Salsa

Makes 10 mini-tacos.

  • ¼ c. red onion
  • 2 T honey
  • juice of ½ lime
  • ¼ c. orange juice
  • ½ c. Captain Morgan White Rum
  • ¼ c. chopped bell pepper
  • 2 tsp sea salt
  • ¼ tsp smoked paprika
  • 1 tsp red pepper flakes
  • 2 cloves garlic, smashed
  • ground black pepper to taste
  • 1 ½ tsp cornstarch
  • 10 10-15 ct. shrimp
  • 10 mini-tortillas (we cut circles out of small tortillas)
  • 1 c. shredded romaine lettuce
  • 1 avocado, peeled, seeded, and cut into small cubes
  • 1 c. boozy tropical salsa, recipe below
  1. Finely chop the red onion, and bell pepper (I used orange bell peppers because they’re attractive), then combine everything except the cornstarch and shimp in a medium-sized bowl. Whisk together the ingredients, making sure the honey is fully dissolved in the marinade. Taste it before you add the shrimp! Make sure it’s delicious.
  2. Devein shrimp and remove shells up the tail. Add the shrimp to the marinade and let them rest for an hour in the refrigerator.
  3. Preheat your grill or pan to medium-high heat. Take the shrimp out of the refrigerator and skewer them (this isn’t strictly necessary, but I find their easier to handle this way), reserving about a cup of the marinade.
  4. In a small bowl, add about a tablespoon of the marinade to the cornstarch, whisking briskly until no lumps remain. Brush the shrimp on both sides with the reserved marinade. Grill the shrimp for about a minute on each side, flipping them every 30 seconds and brushing the hot side with the reserved marinade after flipping, until they are bright pink and slightly charred.
  5. Remove the shrimp from the skewers. Place one shrimp on top of each mini-taco, then top with lettuce, avocado, and salsa. Fold them in half and use a toothpick to secure. Serve immediately.

Boozy Tropical Salsa

Makes about 3 cups.

  • 1 c. finely cubed fresh papaya
  • 1 c. finely cubed fresh mango
  • 1 c. finely cubed fresh pineapple
  • 1/2 c. finely diced red onion
  • 1 jalapenos, seeded and finely diced
  • juice from 4 key limes (about 2-3 TBS)
  • 1 TBS Captain Morgan White Rum
  • 1 TBS orange juice
  • 2 TBS finely minced cilantro
  • 1/2 tsp sea salt
  1. Add all of the ingredients to a large bowl and toss gently to combine. Taste and adjust seasonings (juices, cilantro, salt, jalapeno) as desired. Keeps in the fridge for a few days.
Winter Cleanse 2014: Week Two

0 January 26, 2014 Food

Winter Cleanse 2014: Week Two

Winter Cleanse Recipes 2014

I’m not gonna lie, I’m excited to go back to posting non-health-food recipes here. I’ve been enjoying a lot of delicious, good-for-you food, with a handful of not-so-good-for-you indulgences, and I plan to keep eating well, but writing solely about salads and soups etc. is getting a little boring. But before we jump ahead to brownie sundaes and boozy milkshakes (can you tell what I’m craving?), I have the plan for the second week of this year’s winter cleanse to share with you.

You can read a bunch more about the idea behind this cleanse, why I even call it a cleanse, and find the plan for week one over on last week’s post. I should also note that this second week plan relies heavily on leftovers from week one, so if you’re going to play along, you’ll probably want to start there anyways. In the link below, you’ll find the daily menu, grocery list, and prep tips for week two, and at the bottom of this post links to all the new breakfast/lunch/dinner recipes for this week. And if you’re one of the stalwart few who plans to continue your diet resolution into February, you can find four more weeks of meal plans in these cleanse posts from 2012 and 2013 (also, good for you!).

Happy eating!

Winter Cleanse 2014: Week Two – Grocery List, Meal Plan, and Prep Tips

New Recipes for Week Two

Healthy Winter Recipes - Baked Herb and Pistachio Falafel

Baked Herb and Pistachio Falafel

Healthy Winter Recipes - Roasted Kale and Broccoli Caesar

Roasted Broccoli and Kale Caesar Salad

Healthy Winter Recipes - Bulghur with Butter-Roasted Almonds and Chicken

Bulghur with Butter-Roasted Almonds and Cinnamon Chicken

Healthy Winter Recipes - Roasted Carrot and Tahini Soup

Roasted Carrot and Tahini Soup with Chickpeas

Healthy Winter Recipes - Greek Egg and Lemon Soup with Brown Rice, Chicken, and Chickpeas

Greek Egg and Lemon Soup with Brown Rice and Chickpeas

Healthy Winter Recipes - Quinoa Puttanesca

Quinoa Puttanesca

Healthy Winter Recipes - Kale and Pecorino Salad

Kale and Pecorino Salad

Healthy Winter Recipes - Strawberry Balsamic Salad with Candied Pecans and Goat Cheese

Strawberry Balsamic Salad with Candied Pecans and Goat Cheese

Healthy Winter Recipes - Whole Wheat Fruit and Nut Pancakes

Whole Wheat Fruit and Nut Pancakes

Healthy Winter Recipes - Apple Pie Oatmeal

Apple Pie Oatmeal

Baked Herb and Pistachio Falafel

0 January 22, 2014 Food

Baked Herb and Pistachio Falafel

Baked Herb and Pistachio Falafel with Quick-Pickled Turnips {Katie at the Kitchen Door}

Baked Herb and Pistachio Falafel with Quick-Pickled Turnips {Katie at the Kitchen Door}

Falafel is kind of a health-food poser. Sure, it has nutritious ingredients like chickpeas and herbs, and healthy fast-food chains like Pret a Manger and Sweetgreen put them on top of salads, but really, eating falafel feels kind of indulgent. It’s certainly better for you than a grilled cheese sandwich or pasta carbonara or fried dough or a lot of other things, but at it’s heart, it’s fried street food. Delicious. Just not that good for you.

However, falafel can be easily transformed into something healthier – just nix the oil and trade the soft, floury pita for a crunchy cabbage wrap, and your craveable Middle-Eastern snack has become downright virtuous. David and Luise of Green Kitchen Stories have done just that with their Baked Herb and Pistachio Falafel, a flavor-and-nutrition-packed recipe from their book, Vegetarian Everyday (one of my favorites). These falafels are about 50% chickpeas and 50% pistachios, a combo that gives them a wonderful and unexpected creamy sweetness. Baked instead of fried, nestled into a crisp leaf of cabbage, drizzled with lemon-honey tahini sauce, and topped off with bright pink beet and turnip pickles, they make a filling and delicious meal that’s vegan and gluten-free. And you’d never know from the taste how much your body will thank you for giving it all those good things.

Baked Herb and Pistachio Falafel with Quick-Pickled Turnips {Katie at the Kitchen Door}

P.S., one of my first posts ever was about falafel, too. 2010! So many years ago! Does having been a food blogger for four years mean I’m getting old? Also, reading that post reminds me that those polka dot plates that I kind of hate are also four years old, and it really would not be a crime if I got some newer, more attractive ones. They have been used well, and served their purpose. I’m totally just trying to justify that I might spend a good portion of my snow day online shopping for kitchen things. I mean working.

Like what you just read? Subscribe to Katie at the Kitchen Door on Feedly or Bloglovin’, or follow along on Facebook, Twitter, Pinterest, and Instagram. Thanks for reading!

Baked Herb and Pistachio Falafel with Quick-Pickled Turnips {Katie at the Kitchen Door}

Baked Herb and Pistachio Falafel

Recipe adapted slightly from Vegetarian Everyday. Makes about 24-30 falafels, serves 4-5.

  • leaves from 8 sprigs of mint
  • leaves from 8 sprigs of parsley
  • 2 c. shelled raw pistachios (8-1/2 oz.)
  • 2 garlic cloves
  • 1/2 medium onion, peeled
  • 3 TBS olive oil
  • 2 c. cooked chickpeas (or drained, canned chickpeas)
  • 1 tsp ground cumin
  • 1 TBS buckwheat flour (or another gluten-free flour)
  • 1 tsp baking soda
  • sea salt
  • 1 small head green cabbage
  • lemon-honey tahini sauce (recipe below)
  • quick spicy beet-and-turnip pickles (recipe below)
  1. Preheat the oven to 375°F. Place the mint and parsley leaves in a food processor and process for about 30 seconds. Add the pistachios, garlic, onion, and olive oil and process until all ingredients are well minced and combined, about 30-60 seconds. Add the chickpeas, cumin, flour, and baking soda and blend for about 15 seconds at a time, stopping to scrape the mixture down the sides of the processor as needed, until the mixture is fairly uniform but not smooth – you want the mixture to still have some chunks of chickpea and pistachio in it.
  2. Remove the mixture from the processor and season to taste with salt. Form the mixture into 24-30 small balls, about the size of a ping pong ball. Line a baking sheet with parchment paper and place the falafel balls on the sheet. Bake for 15-20 minutes, using tongs to turn the balls over every 5 minutes so that they brown evenly.
  3. Slice off the end of the cabbage with a sharp knife. Remove the large outer leaves and rinse them individually. Pat them dry, then fill with the baked falafel. Serve with lemon-honey tahini sauce and spicy beet-and-turnip pickles. Baked falafel balls are also delicious tossed with a green salad with some avocado and feta cheese.

Lemon-Honey Tahini Sauce

  • 3 TBS tahini
  • 1 TBS honey
  • juice from 1/2 a lemon
  • 1/4 c. water
  1. Stir all ingredients together in a small bowl until smooth. Refrigerate until ready to use.

Quick Spicy Beet and Turnip Pickles

Technique adapted from Eating Well and Cook for Good. Makes two 1-pint jars of pickles.

  • 1 medium turnip, peeled
  • 1 medium beet, peeled
  • sea salt
  • 1/2 medium red onion, peeled and very thinly sliced
  • 1 jalapeno, stem and seeds removed, thinly sliced
  • 1 c. white wine vinegar
  • 1 c. water
  • 1 TBS sugar
  • 1/2 tsp salt
  • 20 whole  black peppercorns
  1. Cut the turnip and the beet into quarters, then slice each quarter as thinly as you can (use a mandoline if you have one). Layer the slices in a colander, with a sprinkling of sea salt between each layer. Place over a bowl and let sit for 10-15 minutes, then toss and squeeze with your hands to remove some of the excess liquid. Repeat this process until the vegetable slices feel a bit limp, about 30-45 minutes. Rinse the slices under cold water to remove the salt and then drain.
  2. Toss the beet and turnip slices with the sliced red onion and sliced jalapeno. Divide the vegetable mixture between two clean glass pint jars.
  3. In a small pot, mix vinegar, water, sugar, 1/2 tsp salt, and peppercorns. Heat over medium-low heat, bringing just to a gentle simmer. Stir to dissolve sugar and salt, then remove from heat and pour through a funnel into the two veggie packed jars. Cover the jars with lids and shake a few times to distribute the brine. Put the pickles in the fridge and let sit for at least 3-4 hours. Will keep in the fridge for up to two weeks.
Apple Pie Oatmeal

2 January 19, 2014 Breakfast

Apple Pie Oatmeal

Easy Apple Pie Oatmeal {Katie at the Kitchen Door}

Back in September, I did a little recipe development for the California Almond Board, after which I found myself with a lot of leftover almonds and a huge tub of almond butter sitting in my pantry. I’ve always been a faithful peanut butter lover, but I started playing around with the almond butter, adding a little bit to my various breakfast recipes to see how I liked it. I quickly stumbled upon a combination that I couldn’t get enough of – oatmeal flavored with thick pieces of cooked apple, a sprinkling of cinnamon and brown sugar, and a healthy tablespoon of almond butter swirled in at the end. It was sweet, it was creamy, it was filling, and it satisfied my autumnal cravings for a hot breakfast without the guilt of some of my other hot-breakfast staples. I dubbed it “Apple Pie Oatmeal,” and proceeded to make all my coworkers jealous of the warm, sweet-smelling breakfast I was enjoying every morning. Yes, my coworkers, because one of the best things about this recipe is that it’s portable – you can assemble all the ingredients for this in a tupperware before you leave for work, microwave it for 2 minutes once you’re there, and have a warm, delicious breakfast to savor at your desk. Believe me, it really brightens up a dreary morning. After four months of eating this for breakfast at least once a week, it has become a tried and true favorite, and I figured it was high time I shared it with you.

I want you to know: I’ve experimented a lot with this recipe. I’ve swapped out the apples for frozen blueberries and raspberries. I’ve used maple syrup instead of brown sugar. I’ve replaced the almond butter with peanut butter and tried omitting the cinnamon. However, nothing is as good as that initial combo: oats, milk, apples, brown sugar, cinnamon, almond butter. It’s perfect. That said, you should feel free to play around with it on your own! Just don’t be surprised if you find yourself coming back to the original, too.

Like what you just read? Subscribe to Katie at the Kitchen Door on Feedly or Bloglovin’, or follow along on Facebook, Twitter, Pinterest, and Instagram. Thanks for reading!

Easy Apple Pie Oatmeal {Katie at the Kitchen Door}

Apple Pie Oatmeal

Serves 1.

Note: I prefer making this in the microwave – it’s faster, less messy, and the apples get softer. However, it’s also good on the stovetop if you prefer to make it that way. I’ve included instructions for both, below.

  • 1/2 c. oats
  • 1 c. skim milk
  • 1 small apple, cored and cut into 1/2 inch cubes
  • 1/2 tsp cinnamon
  • 1 TBS almond butter
  • 1 TBS brown sugar
  • 1 TBS sliced almonds, toasted in a dry skillet (optional)
  1. If making in the microwave: combine all ingredients except the sliced almonds in a microwave-safe tupperware or bowl. Cover loosely with a lid or paper towel, and microwave on high for one minute. Remove, stir, and return to microwave. Microwave in 30 second intervals until oats and apples are cooked and slightly soft, stirring in between intervals in the microwave. It usually takes only two or three 30 second intervals to finish the oatmeal. Careful – if you cook it too long it might overflow from the bowl, so watch it closely! Sprinkle the toasted almonds over the top, and serve.
  2. If making on the stovetop: combine oats, milk, and apple in a small pot. Cook over medium-low heat, stirring frequently, until oats and apples are soft, about 5-8 minutes. Remove from heat, and stir in cinnamon, almond butter, and brown sugar until fully incorporated. Sprinkle with toasted almonds and serve.
Winter Cleanse 2014: Week One

0 January 15, 2014 Food

Winter Cleanse 2014: Week One

Winter Cleanse 2014 - 14 Healthy, Seasonal, and Delicious Recipes from Katie at the Kitchen Door

Welcome to the 2014 winter cleanse! This is the third year that I’ll be creating, following, and sharing a two-week plan for healthy, seasonal, “clean” eating here on the blog. The first year, I was inspired in part by the Bon Appetit Food Lover’s Cleanse and in part by my parents’ experience following the eating plan in the book Clean. I started out ambitious: no gluten, no dairy, no alcohol, no coffee. Mostly salad. All those changes at once sustained for two weeks proved to be a little bit too much for me, and I quickly gave in to dairy and gluten cravings.  I also learned that preparing 3 healthy meals and a healthy snack for 14 days in a row is a lot of work, and requires making a game plan ahead of time. Armed with this knowledge, I tackled last year’s cleanse a little differently, and had better results sticking with it. I’ve built in even more flexibility for myself this year, and there’s more on those adjustments below, but first, why do I call this non-scientific, not that diet-y, healthy meal plan a “cleanse”?

Every year, I write that I hesitate to call this two-week healthy eating plan a “cleanse.” And it really does make me a little bit uncomfortable. Especially at this time of year, the media is so full of cleanses and health tips and detoxes and diets that I find it super overwhelming. I read things like “I’m a really indulgent eater – I start every day with a green smoothie and an egg white omelette, and I eat an entire bowl of sorghum with my poached salmon and mustard greens at dinner. The 17 day juice cleanse that I do every other month really helps me press the reset button.” and I want to scream a little bit. Who eats like that?? Are you real people?? What do you you do when you want, say, an entire pint of New York Super Fudge Chunk? Just have a single dried fig and feel satisfied? I feel like these people must be lying, and are secretly eating an entire pizza every day at lunch. Am I the only person out there who has, oh, say, infinity less self control than these people? This introduction/loosely-disguised-rant is just to warn you that my “cleanse” is not based on re-balancing your acidity levels or drinking only fresh juices or raw foods for two weeks. It’s much, much less hard core than that. Really, it’s just a collection of common-sense healthy recipes – more veggies, less fat, whole grains, but still with the occasional sprinkling of cheese or piece of bacon. I like eating. I like flavor. And I like feeling good. But I don’t like denying myself. So that’s what these recipes aim to give you – a flavorful, satisfying, sustainable approach to healthy eating. Hopefully, you’ll find healthy recipes that might even make it into your all-year dinner rotation.

I’m approaching the cleanse a little bit differently this year. Instead of forcing myself to adhere to a strict schedule, I’m outlining the breakfasts, lunches, dinners, and snacks that are on the menu for the week, and then I pick and choose from these options based on what I feel like. This helps me look forward to each meal – instead of dreading going home to a salad on a 20° day, I can decide at lunchtime that I’m going to make a hot pot of soup and anticipate it for the rest of the day. It also allows me to be flexible with the excess of leftovers I find myself with when doing all this cooking – if my fridge is full, new recipes get put on hold and leftovers (pre-approved on the week’s menu) get put to good use. I do find it helpful to outline dinner, lunch, and an afternoon snack the night before, so that I have a plan of action for packing my bag in the morning. I’ve still included a daily plan in the document below for those of you who prefer a schedule, but you should feel free to mix it up. Also included in that little document is a shopping list, and some tips for how to plan ahead for the extra time in the kitchen.

So, without further ado, here’s the goods: in the body of this post, the 5 breakfasts, 7 lunches/dinners, and 4 snacks on week one of the cleanse menu, and in the attached word document, your shopping list, daily meal plan, and prep tips. Get cooking, friends!

Winter Cleanse 2014: Week One – Grocery List, Meal Plan, and Prep Tips

Breakfast/Brunch Recipes

Winter Cleanse 2014: Healthy Breakfast Recipes - Shakshuka {Katie at the Kitchen Door}

Shakshuka

Winter Cleanse 2014: Healthy Breakfast Recipes - Sweet Green Smoothie {Katie at the Kitchen Door}

Green Smoothie

Winter Cleanse 2014: Healthy Breakfast Recipes - Baked Blackberry Oatmeal {Katie at the Kitchen Door}

Baked Blackberry Oatmeal

Winter Cleanse 2014: Healthy Breakfast Recipes - Raspberry-Maple Breakfast Quinoa {Katie at the Kitchen Door}

Raspberry Maple Breakfast Quinoa

Winter Cleanse 2014: Healthy Breakfast Recipes - Brussels Sprout and Sweet Potato Hash {Katie at the Kitchen Door}

Brussels Sprout and Sweet Potato Hash

Lunch/Dinner Recipes

Winter Cleanse 2014: Healthy Dinner Recipes - Roasted Beet and Spinach Salad {Katie at the Kitchen Door}

Roasted Beet and Spinach Salad with Goat Cheese, Almonds, and Pomegranate

Winter Cleanse 2014: Healthy Dinner Recipes - Sesame Chicken Bowl {Katie at the Kitchen Door}

Sesame Chicken Bowl

Winter Cleanse 2014: Healthy Dinner Recipes - Mushroom and Olive Veggie Burgers {Katie at the Kitchen Door}

Mushroom and Olive Veggie Burgers (served with 1/2 roasted sweet potato)

Winter Cleanse 2014: Healthy Dinner Recipes - Roasted Brussels Sprouts and Bacon Salad {Katie at the Kitchen Door}

Roasted Brussels Sprout and Bacon Salad with Avocado Vinaigrette

Winter Cleanse 2014: Healthy Dinner Recipes - Roasted Poblano and Black Bean Soup {Katie at the Kitchen Door}

Roasted Poblano and Black Bean Soup

Winter Cleanse 2014: Healthy Dinner Recipes - Quinoa and Black Bean Stuffed Peppers {Katie at the Kitchen Door}

Quinoa and Black Bean Stuffed Peppers

Winter Cleanse 2014: Healthy Dinner Recipes - Soba Noodles with Kale and Slivered Brussels Sprouts {Katie at the Kitchen Door}

Soba Noodles with Kale and Slivered Brussels Sprouts

Snack Recipes

Winter Cleanse 2014: Healthy Snack Recipes - Gluten Free Corn Feta-and-Olive Muffins {Katie at the Kitchen Door}

Gluten-Free Corn Muffin with Feta and Olive

“Snack Bag” – 1/4 c. nuts, 2 TBS chocolate chips, 1/4 c. dried cherries

Avocado Tartine – 1/2 an avocado mashed on one piece whole wheat toast

Winter Cleanse 2014: Healthy Snack Recipes - Apple Quinoa Cake {Katie at the Kitchen Door}

Apple Quinoa Cake

One disclaimer: I am not a dietitian, nutritionist, doctor, or medical professional of any sort.  I simply wanted to share my personal menu and goals for healthy eating, so please realize that I have tapered this plan to what I feel my own nutritional needs are, and carefully consider your own health needs/consult your doctor before following any diet, cleanse, or detox plan!

6 Tips for Tasty Green Smoothies

29 January 11, 2014 Drink

6 Tips for Tasty Green Smoothies

6 Tips for Tasty Green Smoothies {Katie at the Kitchen Door}

I’ve been sort of slow to come around to the idea of green smoothies being worth drinking. The first few I tried were not pleasant. This is not a smoothie, I thought, this is poorly blended, slightly chewy spinach water! Thankfully, I kept trying, and after much trial and error, I genuinely love starting my day with a green smoothie. My friends and coworkers are still skeptical, and I figured some of you might be as well, so I wanted to put together a list of tips I’ve discovered through experimentation. Hopefully, this gives some of you the encouragement you need to keep blending up those greens.

Tips for making tasty green smoothies…

  • Use sweet fruits and juices when you get started. I tried to make my first few smoothies with just a banana, spinach, and some milk or water. They were not good, and I ended up adding several tablespoons of sweetener to them. I quickly realized that I needed at least half a cup of orange or apple juice along with sweeter fruits like peaches or mango to make myself really enjoy a smoothie – even though juices can be pretty sugary, the trade-off of consuming a salad’s worth of fresh greens before I start work is worth it to me!
  • Start out with mild tasting greens, like spinach, and work your way up towards more intensely flavored greens like parsley and kale. Smoothies made with even a generous amount of spinach will still taste like their other main ingredients (banana, mango, strawberry, etc.). You will notice the flavor of kale in your smoothie, so work more intense greens in in stages (adding a little bit of kale to your spinach smoothie, working up to 50/50, then going all-out kale).
  • If you find yourself chewing your smoothies, take the extra 2 minutes to strain them through a fine mesh strainer before drinking them. You’ll have to scrape the edges of the strainer with a spoon as you strain to get as much liquid as possible through, but having a smoothie that’s actually smooth will make the whole experience so much more pleasant.
  • Make sure to include something creamy in your ingredient list – it will make a big difference in the final texture. Bananas are the most obvious choice, but if you’re not a banana lover, peaches and pears will also add creaminess (although not quite as much as a banana), or if you’re up for something different, try using half an avocado.
  • Follow a recipe for your first five smoothies. Take it from someone who’s tried a lot of times – the results of “winging it” can be pretty gross when it comes to smoothies. Over time, you’ll learn to balance sweetness, the amount of liquid, and the intensity of “green” flavor in your own combinations, but practice some basic recipes first.
  • If you want your smoothie to look vibrantly green and appetizing, stick with other ingredients that are light in color – oranges, bananas, peaches, mango, apple, etc. If you don’t care what it looks like, throw in those blueberries! Just be warned that it’s going to look like brown sludge.

I’ve included a recipe for my favorite green smoothie  below – it’s fairly basic, but super creamy, sweet, and energizing. It’s also delicious with frozen peaches instead of frozen mango. I won a Vitamix this fall, and I’m a little bit obsessed with it, but the ingredients in this smoothie will get blended up just fine in a regular blender. And since no one wants to have the exact same breakfast every day, I’ve rounded up some other delicious-looking smoothies from around my favorite food blogs. Any other favorite smoothie recipes? Please share them in the comments! I’d love to give them a try.

Other delicious looking smoothies to try…

Persimmon and Tangerine Smoothie with Turmeric - The Bojon Gourmet

Persimmon and Tangerine Smoothie with Vanilla, Ginger, and Turmeric by The Bojon Gourmet

Fig and Grape Oat Milk Smoothie - Golubka Kitchen

Fig and Grape Oat Milk Smoothie by Golubka Kitchen

Kale Ginger Detox Smoothie - Oh My Veggies

Kale-Ginger Smoothie by Oh My Veggies

Like what you just read? Subscribe to Katie at the Kitchen Door on Feedly or Bloglovin’, or follow along on Facebook, Twitter, Pinterest, and Instagram. Thanks for reading!

6 Tips for Tasty Green Smoothies {Katie at the Kitchen Door}

Sweet Spinach-Mango Smoothie

Serves 1.

  • 1 c. orange juice
  • 1/2 c. water
  • 1 banana
  • 1 c. frozen mango pieces
  • 2 c. fresh baby spinach
  1. Add all the ingredients to blender in order listed and blend on high until smooth and thick. If your blender is not powerful enough to fully blend the spinach, strain the smoothie through a fine mesh sieve for a finer texture. Drink immediately, or keep in the fridge for up to 24 hours, stirring before serving.
Roasted Brussels Sprout and Bacon Salad with Avocado Vinaigrette

7 January 8, 2014 Fall

Roasted Brussels Sprout and Bacon Salad with Avocado Vinaigrette

Roasted Brussels Sprout and Bacon Salad with Avocado Vinaigrette {Katie at the Kitchen Door}

Roasted Brussels Sprout and Bacon Salad with Avocado Vinaigrette {Katie at the Kitchen Door}

Guys, so far the first 8 days of 2014 have been a huge success, health-wise. I’m not going to get too excited, since 8 days is a really short period of time to maintain motivation in the grand scheme of things, but still, it’s nice to remember how rewarding taking care of yourself can feel. I’ve done two solid treadmill sessions, two strength training sessions, spent an afternoon rock climbing (and made it to the top of the wall for the first time!), and gone to a great ballet class. I downloaded the Moves app to try and trick myself into walking more every day, and dragged the dusty scale out from under the bed. We stocked the fridge up with veggies and have been noshing on green smoothies, homemade minestrone, big roasted beet salads, and this carrot and tahini soup (which I had forgotten is really, really delicious). And tonight, as soon as I publish this post, I’m getting out of bed and doing one of those killer Nike Training Club butt workouts. I swear. Getting out of bed is a realistic aspiration. I’m going to do it. I know everyone’s on the straight and narrow right now, but let’s see if we can make it last!

One of the tasty, healthy things we’ve been eating is this salad, which contains several of my favorite ingredients, namely bacon, avocado, and brussels sprouts. I’m not the best at putting together inspiring salads – put me in front of a salad bar and I get kind of overwhelmed and end up with a bunch of weird things that don’t really go together, finished off by a healthy sprinkling of bacon bits, no matter what the other ingredients are. However, I’ve recently discovered that pretty much any green salad is drastically improved by including a warm, craveable element: crispy spiced chickpeas, shredded rotisserie chicken, salty chunks of pancetta, or whole roasted brussels sprouts. So when I saw a recipe for spinach and bacon salad with avocado dressing in Diane and Todd’s new cookbook, and then saw a recipe for bacon-roasted brussels sprouts immediately after, my mind started turning, and a salad that I could actually look forward to eating was born. I like that this salad is fairly simple but still feels like a complete meal – it’s much more put-together than a boring bowl of dressed greens, but doesn’t have 20 separate components to be prepped in order for it to taste good, like a Cobb salad does. It’s also seasonal, filling, and… it has bacon. What’s not to love?

Like what you just read? Subscribe to Katie at the Kitchen Door on Feedly or Bloglovin’, or follow along on Facebook, Twitter, Pinterest, and Instagram. Thanks for reading!

Roasted Brussels Sprout and Bacon Salad with Avocado Vinaigrette {Katie at the Kitchen Door}

Roasted Brussels Sprout and Bacon Salad with Avocado Vinaigrette

Inspired by Bountiful. Serves 2.

  • 1 lb. fresh Brussels sprouts
  • 4 TBS olive oil, divided
  • sea salt
  • freshly ground black pepper
  • 4 strips bacon
  • 1 avocado
  • 1 1/2 tsp champagne vinegar
  • 1 1/2 tsp fresh lemon juice
  • 4 large handfuls of fresh baby spinach
  1. Preheat the oven to 400°F. Cut the white end off the base of each brussels sprout, remove the outer leaves, and then slice in half lengthwise. Toss the halved brussels sprouts with 2 TBS of olive oil, sea salt, and freshly ground black pepper to taste. Spread on a roasting pan and roast for 25-30 minutes or until tender with crispy golden-brown spots, flipping with a spatula after the first 15 minutes.
  2. While the brussels sprouts are cooking, cook the bacon until crispy, drain on paper towels, and then roughly chop.
  3. Cut the avocado in half, remove the pit, and scoop out the flesh. Place half of the avocado in a mason jar and mash up with a fork. Add the remaining 2 TBS of olive oil, the vinegar, and the lemon juice to the jar, close the jar, and shake vigorously to mix up the dressing. Season to taste with salt and pepper. Cut the remaining half an avocado into rough chunks.
  4. Divide the spinach between two bowls. Top each with some avocado pieces, crumbled bacon, and a generous helping of warm brussels sprouts. Spoon some of the avocado vinaigrette over each salad and toss to coat. Serve immediately
Cold Weather Cocktails: Sbiten

0 January 3, 2014 Drink

Cold Weather Cocktails: Sbiten

Sbiten: Russian Mulled Rum with Honey and Jam {Katie at the Kitchen Door}

After 11 days of vacation, I had to go back to work… for all of 5 hours. Then we had our first Nor’easter of the year, they closed my office, and now I’m back on vacation for another 3 days. So far, 2014 hasn’t been too strenuous. Sadly, Trevor had to drive off into the snowy wilderness to go to work today, but he made this nice warm Russian drink and wrote this post for you to help those of you who are in the same boat warm up:

I’m especially pleased with the way Christmas and New Years came in 2013. It’s been like having a string of one day weeks for us around here, and work has been pretty low-key for everyone. I feel like I’ve had enough large meals and beer to hibernate at least through to March, and the bitter cold has kept us reading in bed until late in the mornings for quite a few days in a row. That being said, work is starting again in earnest, and most Bostonians are battling the first Nor’easter of the new year. For me, when I’m shoveling in the dark after a long day of work, the thought of a nice warm (alcoholic) beverage is pretty much the only thing that makes it bearable. [Edit: I swear Trevor isn’t a sad, lonely alcoholic. Also, I sometimes help with the shoveling.]

I discovered this drink while looking for ideas for the Captain’s Table Challenge, that Katie and I have been participating in (results for the second round are imminent).  With Katie traveling to Russia so often, it seemed like a good place to look for bracing beverages for the darkest depths of winter. At any rate, Sbiten, (according to the internet) it one of Russia’s versions of the hot, spiced, mulled winter drinks that cure what ails you. It stood out to me because the use of jam and honey make it so thick and hearty and give you a lot of control over the flavor. I’ve tried the recipe using a red wine base, as well as a rum-water base, and both turned out very nicely.

Like what you just read? Subscribe to Katie at the Kitchen Door on Feedly or Bloglovin’, or follow along on Facebook, Twitter, Pinterest, and Instagram. Thanks for reading!

Sbiten: Russian Mulled Rum with Honey and Jam {Katie at the Kitchen Door}

Sbiten: Russian Mulled Rum

Serves 2.

  • 1 c. water
  • ½ c. spiced rum (plus one shot, optional)
  • 2 T jam of choice
  • 1 T honey
  • ½ t ground ginger
  • 1 t ground clove
  • ½ t ground cinnamon
  • ½ t ground nutmeg
  1. Heat the water and ½ c. rum over medium heat in a small pot. When the mixture is just boiling add the jam and honey and simmer for 5 minutes.
  2. Add the rest of the spices, and stir to mix. Strain into mugs and add a dash of rum to each, if desired, for a stiffer drink.

Note: For a red wine-base, replace water and rum with ½ c. water and 1 c. red wine.

Monthly Fitness Goals: January // Gluten-Free Olive-and-Feta Corn Muffins

0 January 2, 2014 Breakfast

Monthly Fitness Goals: January // Gluten-Free Olive-and-Feta Corn Muffins

Savory Feta-and-Olive Corn Muffins #glutenfree #healthyeating {Katie at the Kitchen Door}

Although I know making a big long list of resolutions is somewhat out of vogue, it’s something I still enjoy doing. Even if I don’t accomplish everything (or anything) on my list, I like to sit down and reflect on what I want out of the year, to think purposefully about change and direction. Plus, I just like making lists. I’m happy with 2013, and I’m excited for 2014, but one area of my life I’m going to need to be diligent about is fitness. I know it’s cliche to make health and fitness resolutions at New Year’s, but hey, anytime you can recommit to healthy living is a good time. Last year I was really good about exercising for the first half of the year – I was consistently working out 5 times a week, was loving my Nike Training Club strength workouts, and even got my 5K time under 24 minutes for the first time in years. Then July happened, we moved (away from my lovely bike path running route), I started going to Russia every month, and exercising just fell by the wayside. I haven’t gained any weight back since then but my fitness levels are just abysmal – doing 10 push-ups makes my ribcage ache and and I’ve been defaulting to pathetically short 2 mile runs instead of my typical 3 or 4. So, it’s time to bite the bullet and get back into it – even though I know the first few weeks are going to be torture, I also know how great being in shape again will feel.

Savory Feta-and-Olive Corn Muffins #glutenfree #healthyeating {Katie at the Kitchen Door}

Instead of making one big weight-loss or fitness goal for the whole year, which is an easy way to throw yourself under the bus with overly aggressive or too-distant goals, I’ve decided to commit to giving myself an achievable but challenging fitness goal every month this year. And, going against that not-so-tiny, lazy voice in the back of my head, I’m going to share them here for added accountability. Plus, I know you all like healthy recipes and this means I’ll post at least one a month. For January, my goal is to make it to the Y at least 10 times. I have a two-month trial membership there, but I have a history of paying for these things and then never using them. I’ve been an outdoor runner since I was 13, and going to the gym instead always feels a little bit like torture, but in January and February in Massachusetts, it’s really the only option, since I know from experience that convincing myself to go for a run after work, in the dark, in freezing temperatures, is much harder in practice than in theory.

Savory Feta-and-Olive Corn Muffins #glutenfree #healthyeating {Katie at the Kitchen Door}

In the vein of fitness and taking care of your body, I’m also gearing up for this year’s winter cleanse. Finding healthy snacks that will really fill me up in the afternoons is always a challenge, so I’ve been on the lookout for recipes that will make a satisfying replacement for my typical latte and chocolate cookie. I tried out these savory corn muffins from Vegetarian Everyday without letting my hopes get too high – while it’s a great cookbook, gluten-free baking can be really hit or miss in my experience. Luckily, these were a happy addition to the “hit” category. While certainly not calorie-free, these are pretty virtuous for muffins – no gluten, no butter, no sugar – and they have tons of flavor without being dry or crumbly. I’m warning you now that these are going to feature prominently in this year’s cleanse – as a mid-morning treat to have if my green smoothie leaves me hungry (usually), crumbled on top of hearty soups, toasted up for salad croutons, and of course, tucked away in my purse to satisfy those 3PM cravings.

So wish me luck with my exercise goals! Do you have any fitness-related goals for the new year? Please share if you do, and here’s to kicking off a happy, healthy 2014.

Like what you just read? Subscribe to Katie at the Kitchen Door on Feedly or Bloglovin’, or follow along on Facebook, Twitter, Pinterest, and Instagram. Thanks for reading!

Savory Feta-and-Olive Corn Muffins #glutenfree #healthyeating {Katie at the Kitchen Door}

Gluten-Free Olive-and-Feta Corn Muffins

Adapted very slightly from Vegetarian Everyday. Makes 15 muffins.

  • 2/3 c. raw millet
  • 1 c. cornmeal
  • 1 c. rice flour
  • 2 tsp baking powder
  • 1 tsp baking soda
  • 1 tsp coarse sea salt
  • 3 large eggs
  • 1 c. Greek yogurt (about two 5-oz containers)
  • 1/2 c. olive oil
  • One 6-oz. container of crumbled feta cheese
  • 25 pitted kalamata olives, halved
  • 2 TBS fresh thyme leaves
  1. Preheat the oven to 350°F. Bring a small kettle of water to a boil, then pour 1/2 c. of boiling water over the millet in a large bowl. Let sit for 5 minutes, then drain the millet and rinse with cold water. Add the cornmeal, rice flour, baking powder, baking soda, and salt to the millet and whisk to combine thoroughly.
  2. In a separate bowl, beat the eggs until fluffy. Beat in the yogurt and olive oil until thick and smooth. Pour the wet ingredients into the dry ingredients and stir to combine thoroughly. Add the feta cheese, olives, and thyme leaves and stir to combine.
  3. Grease a 12-cup muffin tin or line with paper liners. Spoon batter into cups to fill just to the top. Bake the muffins for 20-22 minutes, until golden brown and crusty on top. Best served warm.

<

p style=”text-align:center;”> 

  • « Previous Page
  • Page 1
  • …
  • Page 22
  • Page 23
  • Page 24
  • Page 25
  • Page 26
  • …
  • Page 57
  • Next Page »

Primary Sidebar

Subscribe!

Get creative recipes and menu ideas delivered straight to your inbox.

Most Popular

A House // Sweet Potato and Coconut Milk Soup with Brown Rice and Lentils

Monthly Fitness Goals: July // Homemade Spinach Wraps with Chopped Greek Salad

A New Job // Classic Seven-Layer Bars

Butternut Squash Carbonara with Fried Sage and Caramelized Onions

Happy Birthday, Trevor! // Peanut Butter Fudge

Cookbook Review and Giveaway: Home Made Winter

Drizly

Please note!

Full disclosure: if you purchase anything at Amazon using the above links or any other links to Amazon on this site, I will receive a small commission. Just so you know!

Copyright© 2018 · Cookd Pro Theme by Shay Bocks

View Mobile Site
This site uses cookies: Find out more.