I’ve recently had a change of heart about sandwiches. See, I used to firmly believe that there was no way a vegan sandwich could ever taste good. Sandwiches are for cheese, and deli meat, and mayo, and bacon. Not for vegan things. Then I tried a bite of Trevor’s “Vegan Pressed” sandwich from our local bakery, The Biscuit, and now I’m obsessed. It’s got roasted sweet potatoes, portobello mushrooms, caramelized onions, and some kind of amazing tahini spread, that almost tastes better than cheese when it’s all warmed up, if you can believe that. It may even have topped Finale’s California Turkey (bacon, turkey, avocado, chipotle mayo), and Diesel’s Pilgrim (thick slices of turkey, hot stuffing, cranberry sauce, and cream cheese) on my list of all-time favorite sandwiches. OK, not the Pilgrim. But still! It’s really good.

All of this is just to prime you for the fact that I’m sharing a non-traditional sandwich here, and I want you to keep an open mind about it. Ever since I saw this on Ranjani’s blog, over a year ago, I’ve been intrigued. No, I probably wouldn’t order the “carrot panini” at a deli either, but hear me out. The carrots are thinly sliced, then marinated in a sweet, Moroccan-spiced dressing. You quickly blend up a fresh olive tapenade, layer it on bread with a few thin slices of feta cheese, stuff the middle with the carrot strips, and pan-grill it until it’s hot and melty. It’s a satisfying mix of sweet, salty, and carby, like any good sandwich, but with no bacon in sight. Take a chance on it. I don’t think you’ll be disappointed.

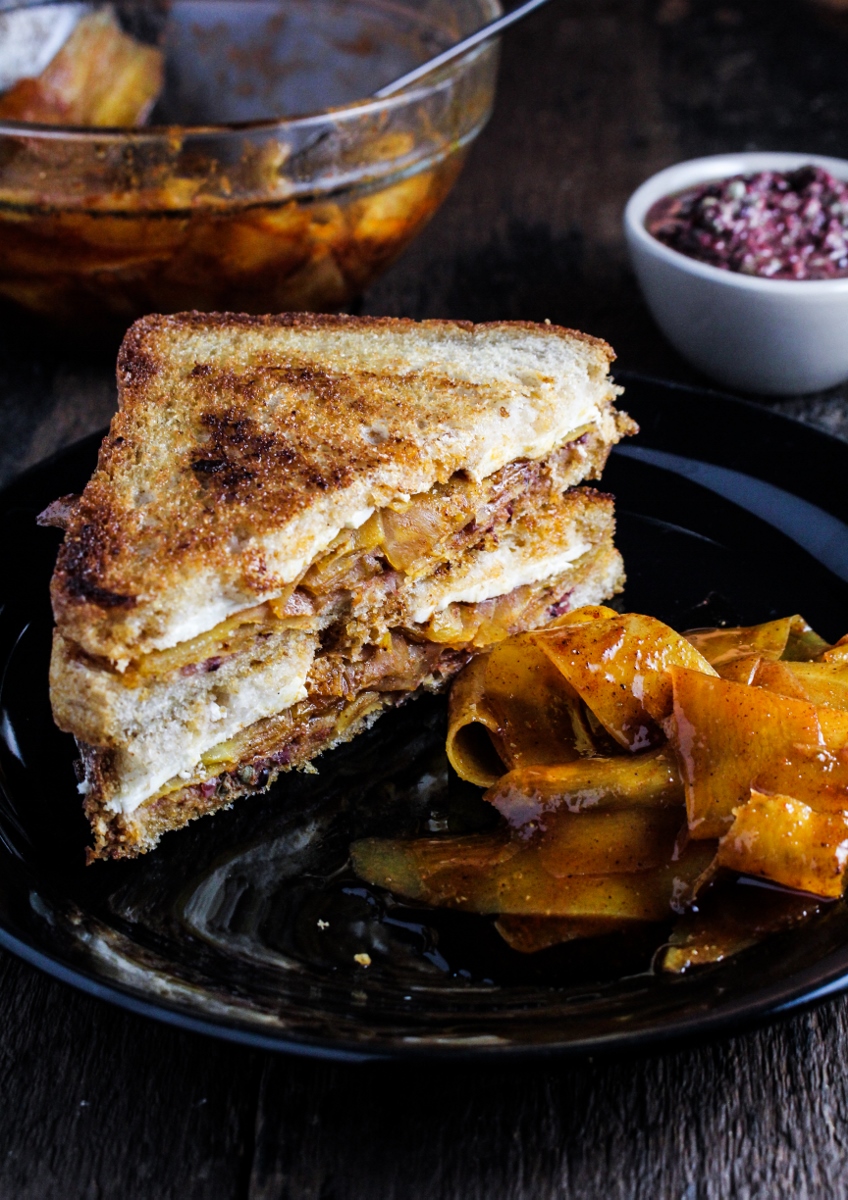
Moroccan Carrot Panini with Olive Tapenade
Adapted from Gourmet via 4 Seasons of Food. Serves 4.
- 6 medium carrots
- 2 TBS sugar
- 2 TBS lemon juice, divided
- 2 tsp sweet paprika
- 1 tsp ground cumin
- 1/2 tsp ground cinnamon
- 1/4 tsp chile powder
- 1 tsp sea salt
- 1/4 c. + 2 TBS olive oil, divided, plus more for the pan
- 3/4 c. pitted kalamata olives
- 2 TBS capers, drained
- 1 anchovy fillet
- 1/4 tsp freshly ground black pepper
- 8 slices bread
- 4 oz. of feta cheese, thinly sliced
- Bring a medium pot of salted water to a boil. Peel the carrots and discard the peel. Use the peeler to create thin, wide slices of the carrots. Drop the carrot slices in the boiling water and blanch for one minute – they should be crisp-tender. Drain immediately.
- Whisk together the sugar, 1 TBS of the lemon juice, the paprika, cumin, cinnamon, chile powder, and sea salt in a medium bowl. Add 1/4 c. of the olive oil and whisk until smooth. Add the blanched carrots and toss to coat in the dressing. Refrigerate for at least 4 hours, and up to 2 days.
- To make the tapenade, add the olives, capers, and anchovy to a food processor and pulse until finely chopped. Add the remaining 2 TBS of olive oil and pulse a few more times.
- Assemble the sandwiches: Place 1 oz. of feta cheese on each of four slices of bread. Spread a tablespoon of the tapenade on the remaining 4 slices of bread. Divide the carrots in to four portions and layer on top of the cheese. Top with the tapenade-covered bread. Heat a thin layer of olive oil on a griddle or in a frying pan. Place the sandwiches in the pan, and cook until golden brown on each side and cheese is melty, flipping after about 3-4 minutes. Serve immediately.