• Skip to primary navigation
  • Skip to content
  • Skip to primary sidebar
  • Home
  • Recipes
  • Features
    • Cookbook Reviews
    • Ingredient of the Week
    • Sunday Dinner
    • Fitness Goals
  • Travel
  • About
    • Privacy Policy
    • Cookie Policy
  • Work With Me

Katie at the Kitchen Door

Globally-inspired, seasonal recipes

Blog Page

IFBC 2013: Eating, Drinking, and Exploring Seattle

0 September 24, 2013 Food

IFBC 2013: Eating, Drinking, and Exploring Seattle

Seattle Waterfront at Sunset {Katie at the Kitchen Door}

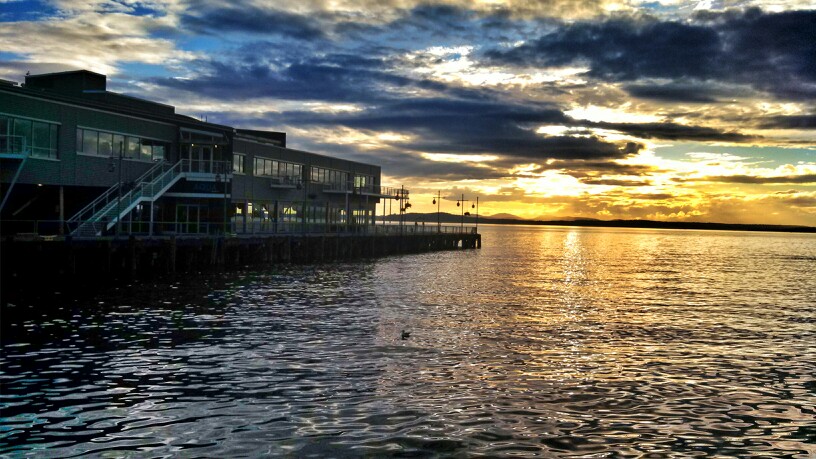
I just got home from a whirlwind four days in Seattle, where I ate and drank my way through the city as part of the sixth IFBC. In addition to attending the conference sessions, I had plenty of time to explore the city, hang out with my little brother, and work off some of those calories in long runs on the waterfront. Although I’m by no means an expert on the city, I wanted to share some notes and tips about the food, wine, and activities that I most enjoyed during my four days there.

Eating and Drinking

10-Course UrbanSpoon Dinner at RN74 Seattle

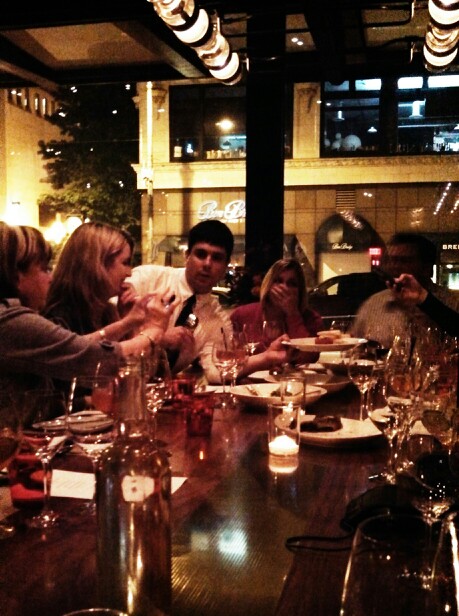
RN74 – As part of the conference, UrbanSpoon arranged a series of small blogger dinners at some of the best restaurants in Seattle. My group was sent just a few blocks from the hotel to RN74, where we were served an amazing 10 course dinner. Highlights included the muhsroom tempura, dungeness crab spaghetti with lemon and poppy seed, 45-day dry-aged beef with duck fat fries, olive oil cake with lemon curd sherbet, and an Au Bon Climat chardonnay that was one of the best wines I’ve ever tasted.

Lecosho – Wanting to get out of the hotel for a little bit on such a beautiful weekend, I met new blog acquaintances Diana, Garrett, and Rachael (and Diana’s husband and adorable 8-month old baby) for lunch at Lecosho on Friday. It was the perfect lunch spot – right downtown, with delicious soups, salads, and sandwiches. I had a grilled ham and cheese with spicy mustard, and fresh cream of mushroom soup. Very reasonably priced, too.

Beecher's Mac'n'cheese - Seattle

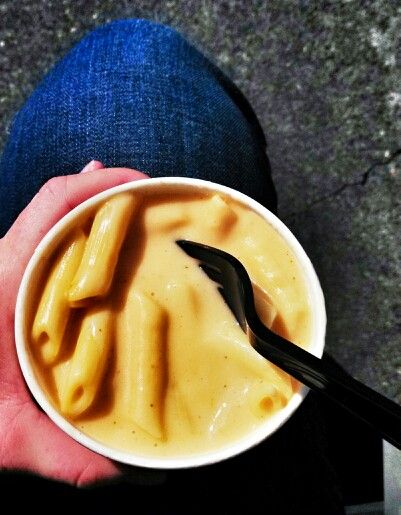
Beecher’s – Initially curious about the long line of people waiting outside the small storefront, I did a little bit of research on Beecher’s, a handmade cheese store in Pike Place Market, and decided to give this landmark restaurant a try. The super creamy, perfectly cheesy mac’n’cheese is 100% worth the hype. Try it.

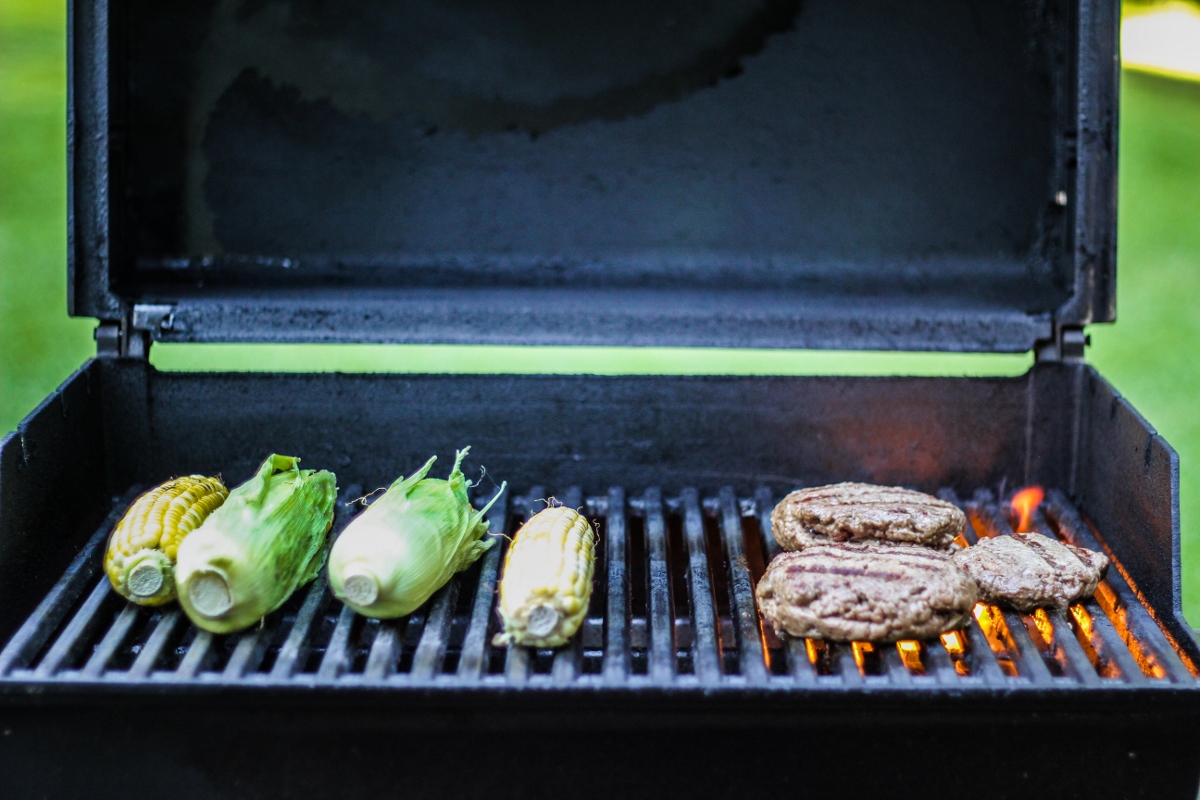
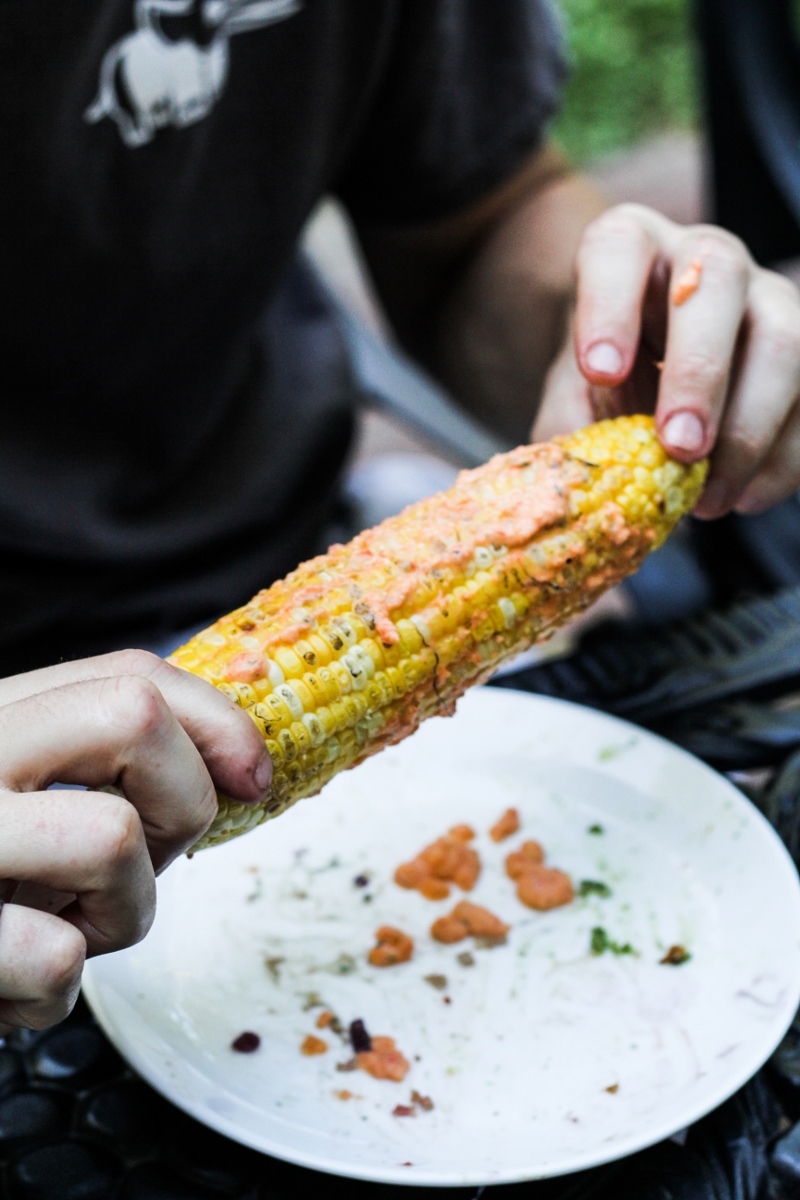
Blue C Sushi – I’m not sure it’s on their regular menu, but the baked potato sushi roll with caviar was my favorite small bite from the conference food expo on Friday night. Think nori, stuffed with baked potato, a crumble of bacon, sour cream, and a spoonful of caviar on top. So clever – and so good! Good enough that next time I think I’ll check out their full menu.

White Bean Cassoulet with Duck Confit at Luc - Seattle

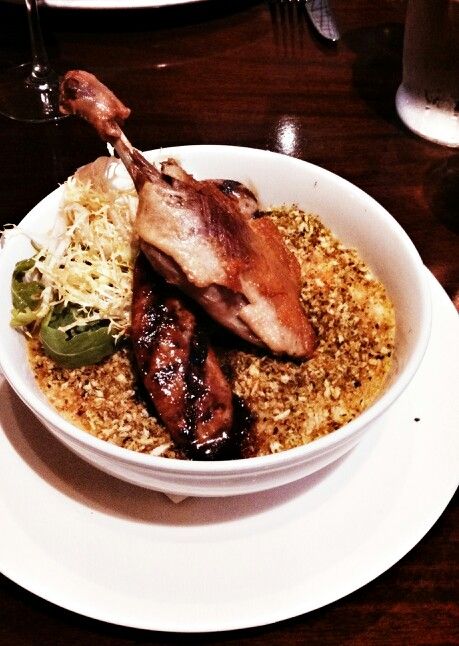
Luc – As we waddled out of the UrbanSpoon dinner at RN74, we were handed gift bags with even more goodies, including gift certificates to another charming restaurant, a french place called Luc. Since she was leaving the next day, my dinner buddy Karli was kind enough to give me her card, so Ryan and I headed there for a farewell dinner Sunday night. Since I was still a bit chilled from our damp hike earlier that afternoon, I ordered the hearty white bean cassoulet with duck confit. Um, yum. Ryan also devoured his moules marinieres, and we finished the meal off with the best chocolate pot de creme I’ve ever had – it was so silky and just chocolaty enough. A fabulous ending to my visit.

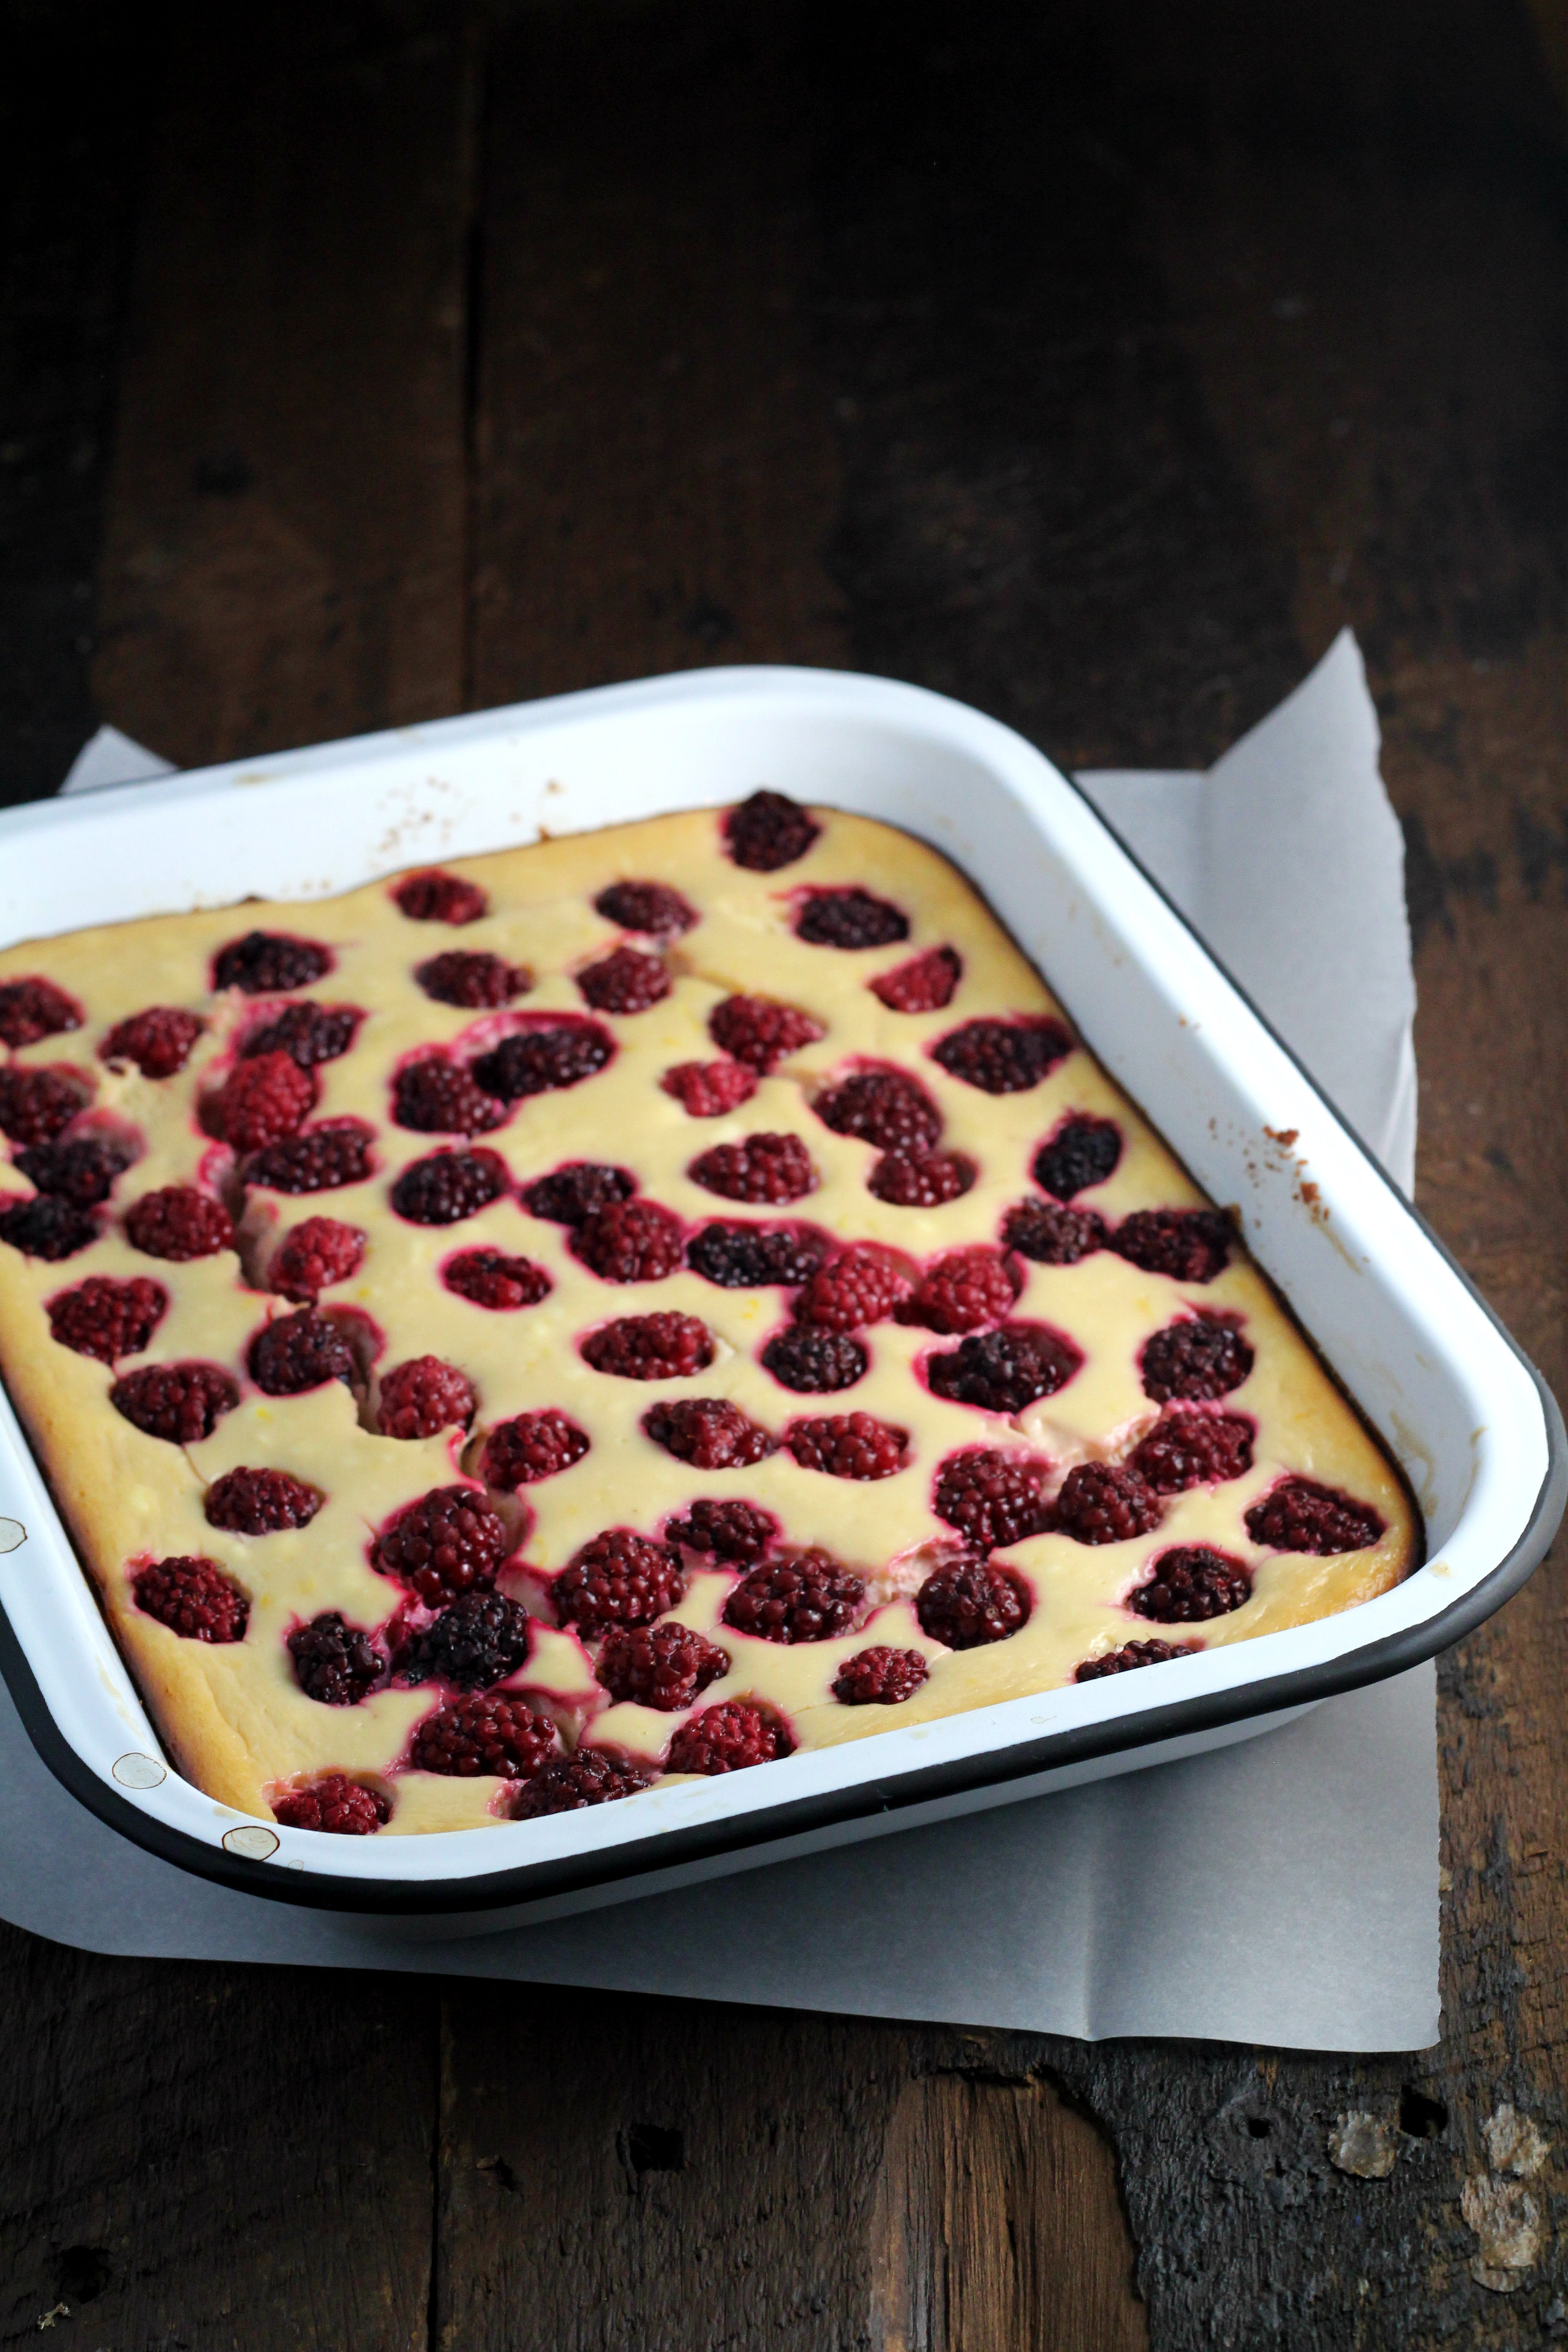
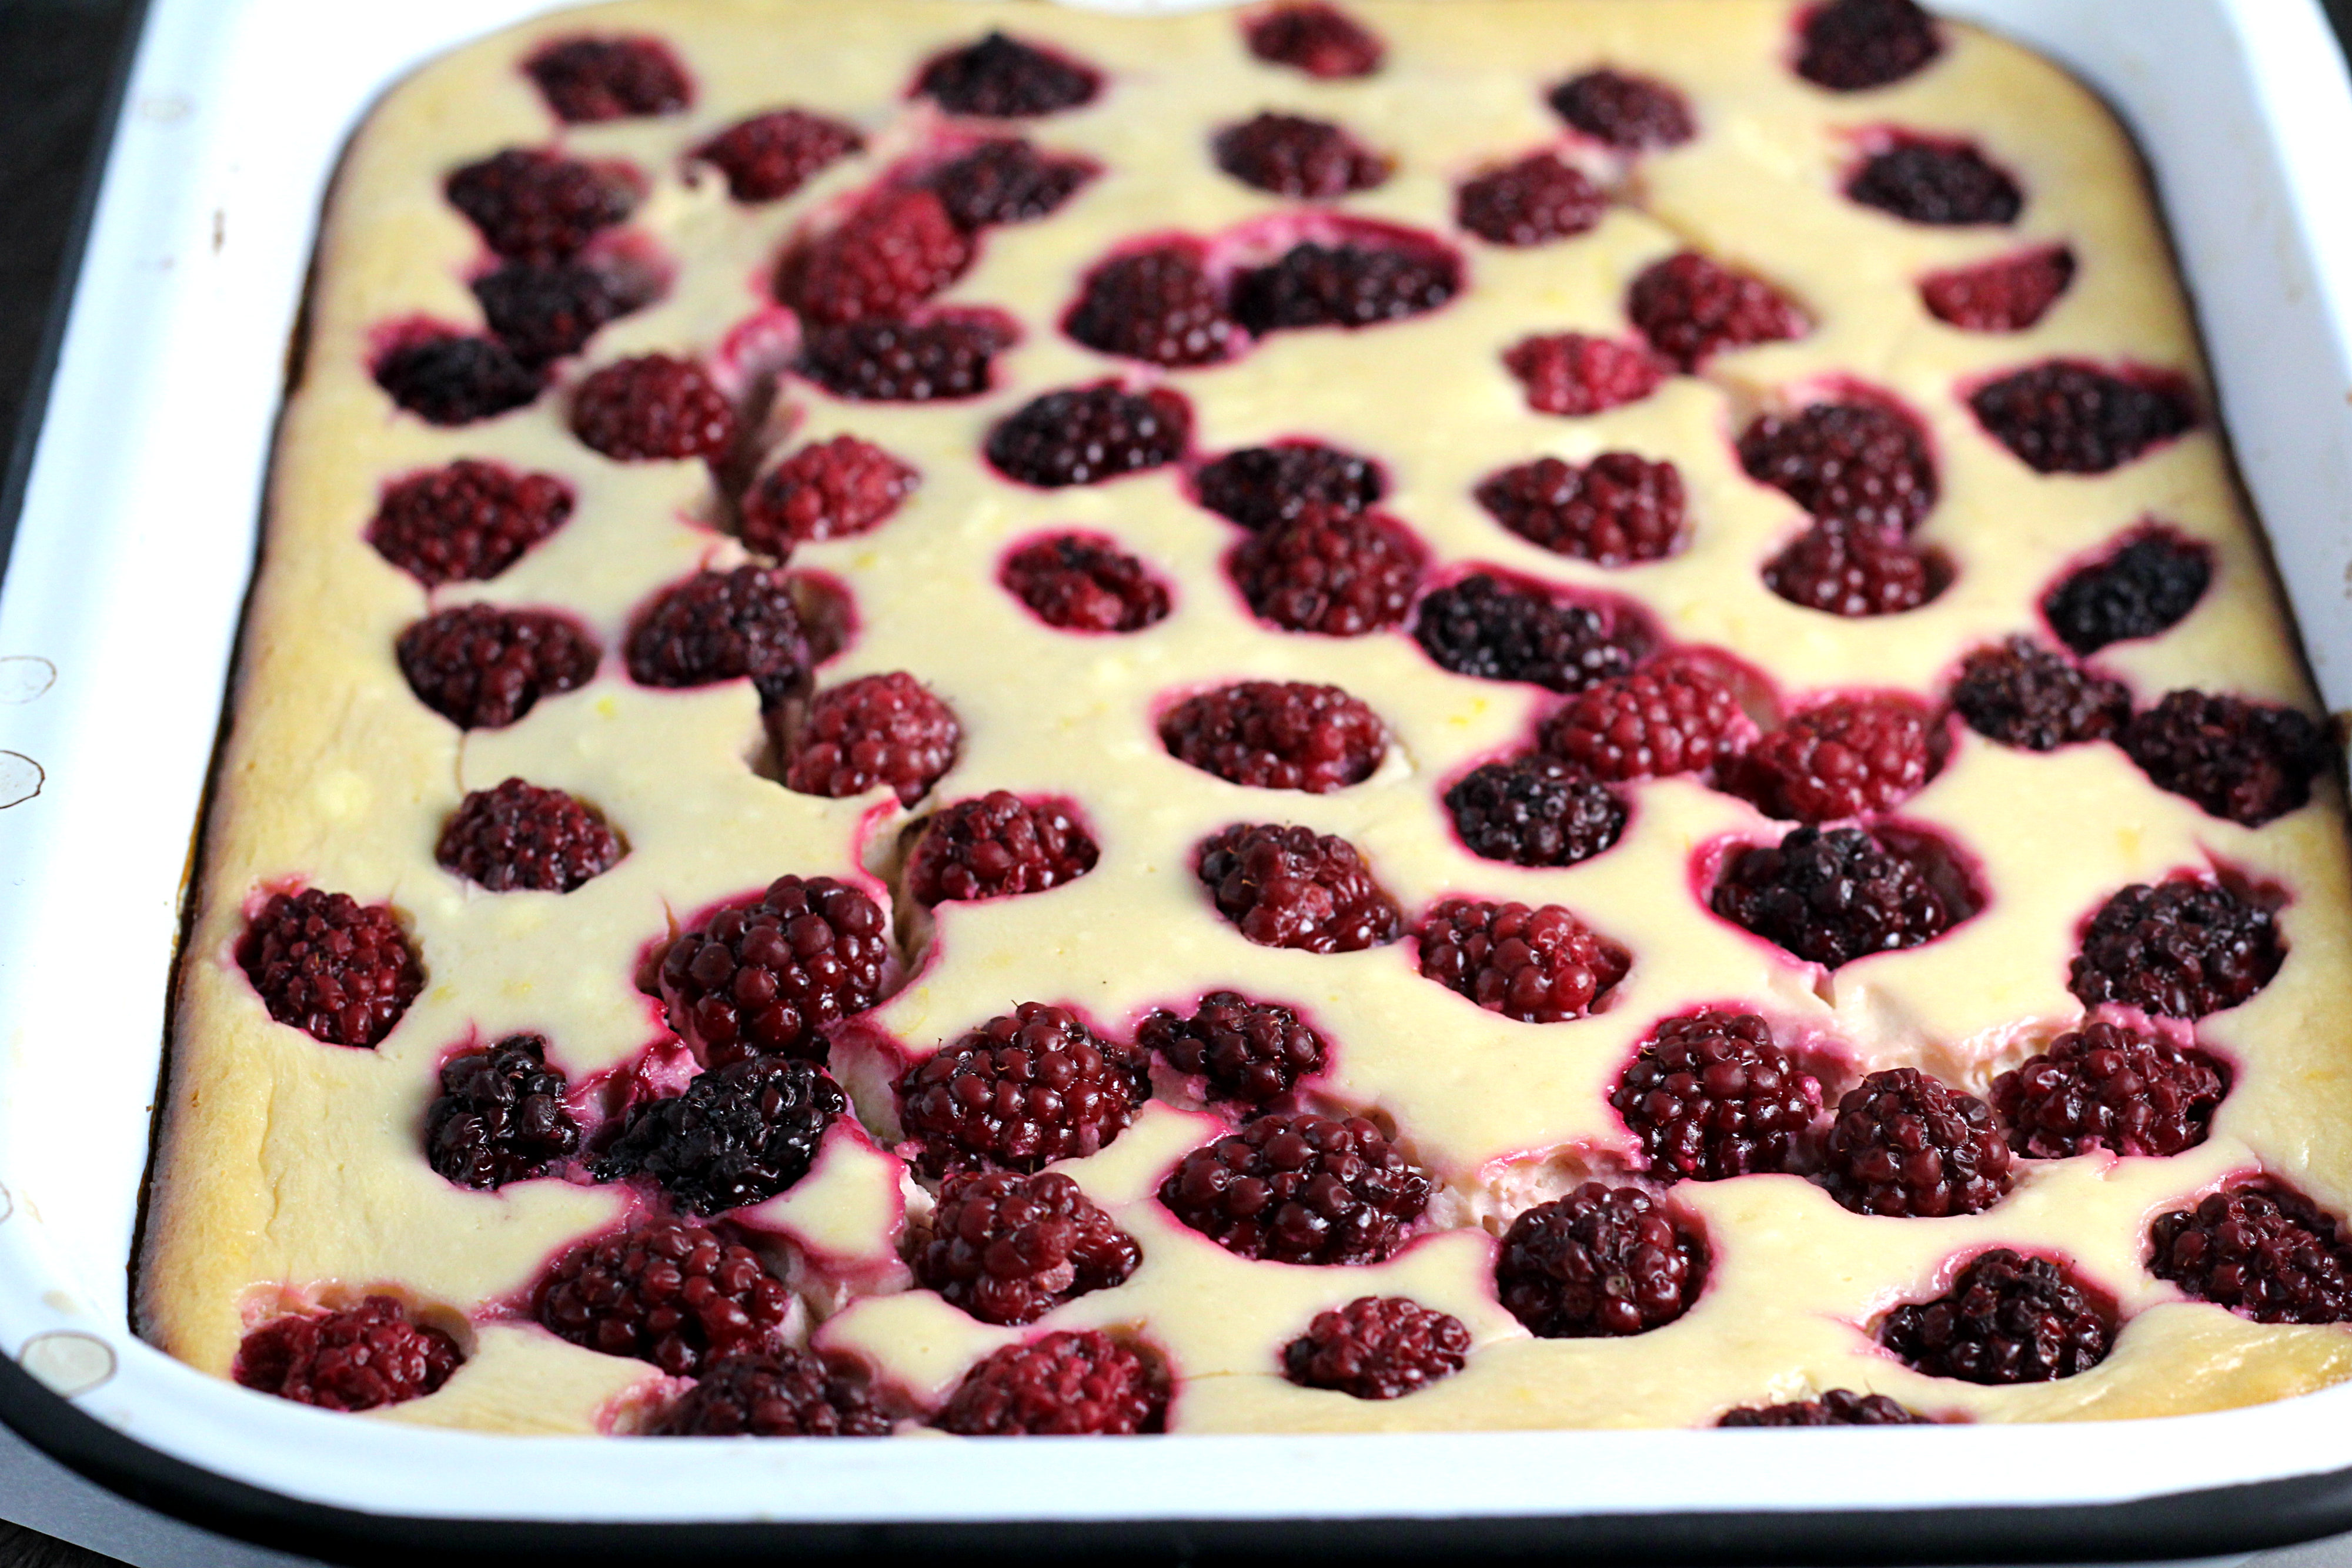
Cupcake Royale – Cupcake Royale was one of the hosts of the Fresh Bloggers party I went to on Thursday night. I didn’t eat much there since I was pretty full from the previous event, but I’m so glad I tried a granny smith and salted caramel cupcake before I left, because then I was able to immediately consume three more. These are really good cupcakes. And I’m pretty picky about cupcakes.

Chateau Ste Michelle - Seattle

Chateau Ste Michelle – Touring the Chateau Ste Michelle winery in Woodinville was an optional excursion associated with IFBC, and I’m glad I opted in. It was a gorgeous, warm, sunny afternoon when our tour bus pulled up to the winery, which is about 30 minutes away from downtown Seattle, and we were immediately greeted with chilled glasses of a lovely sparkling rosé. A whilrwind tour of the bottling and fermenting facility followed (all the grapes are grown way out in Eastern Washington, so we didn’t see any of those), before we were ushered into a dining room where John Sarich led us through a quick wine tasting with several super tasty small bites to accompany it. I loved all the food (especially, surprisingly, the cured salmon), and the Eroica Riesling was a remarkable wine. I’d definitely head back out to Woodinville to taste more wines on my next trip.
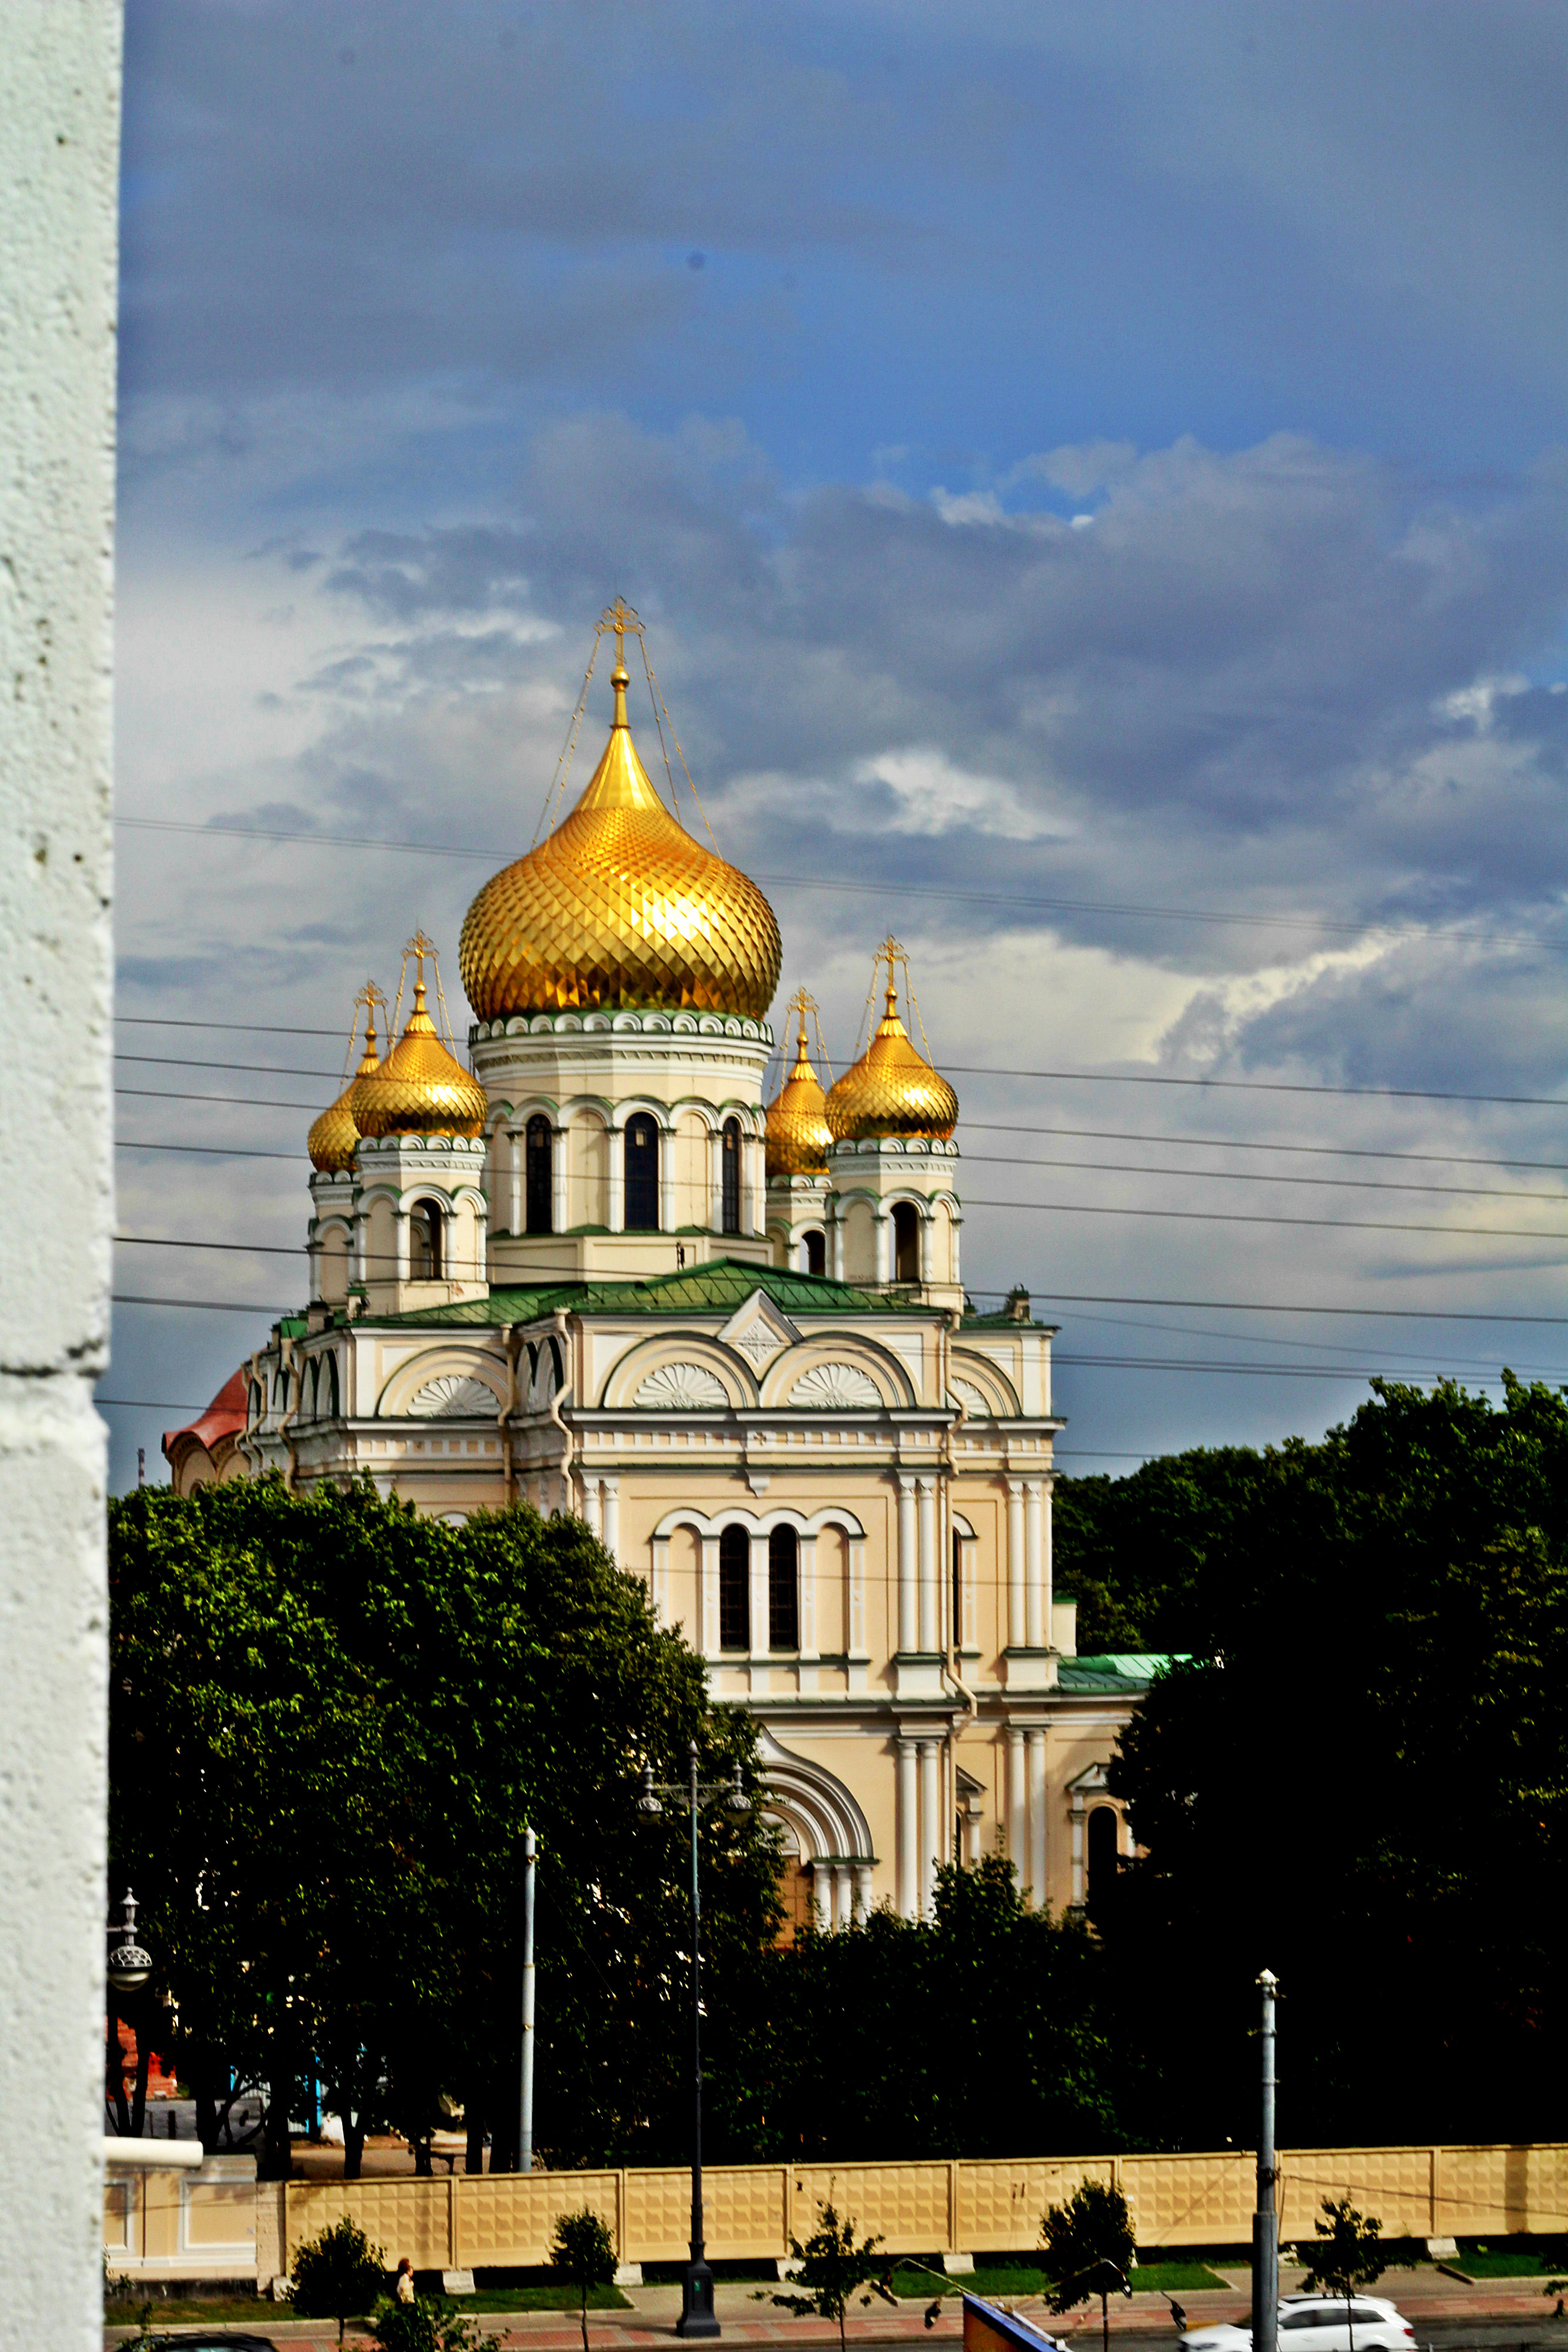
Exploring

Pike Place Market, Seattle {Katie at the Kitchen Door}

Flowers at Pike Place Market, Seattle {Katie at the Kitchen Door}

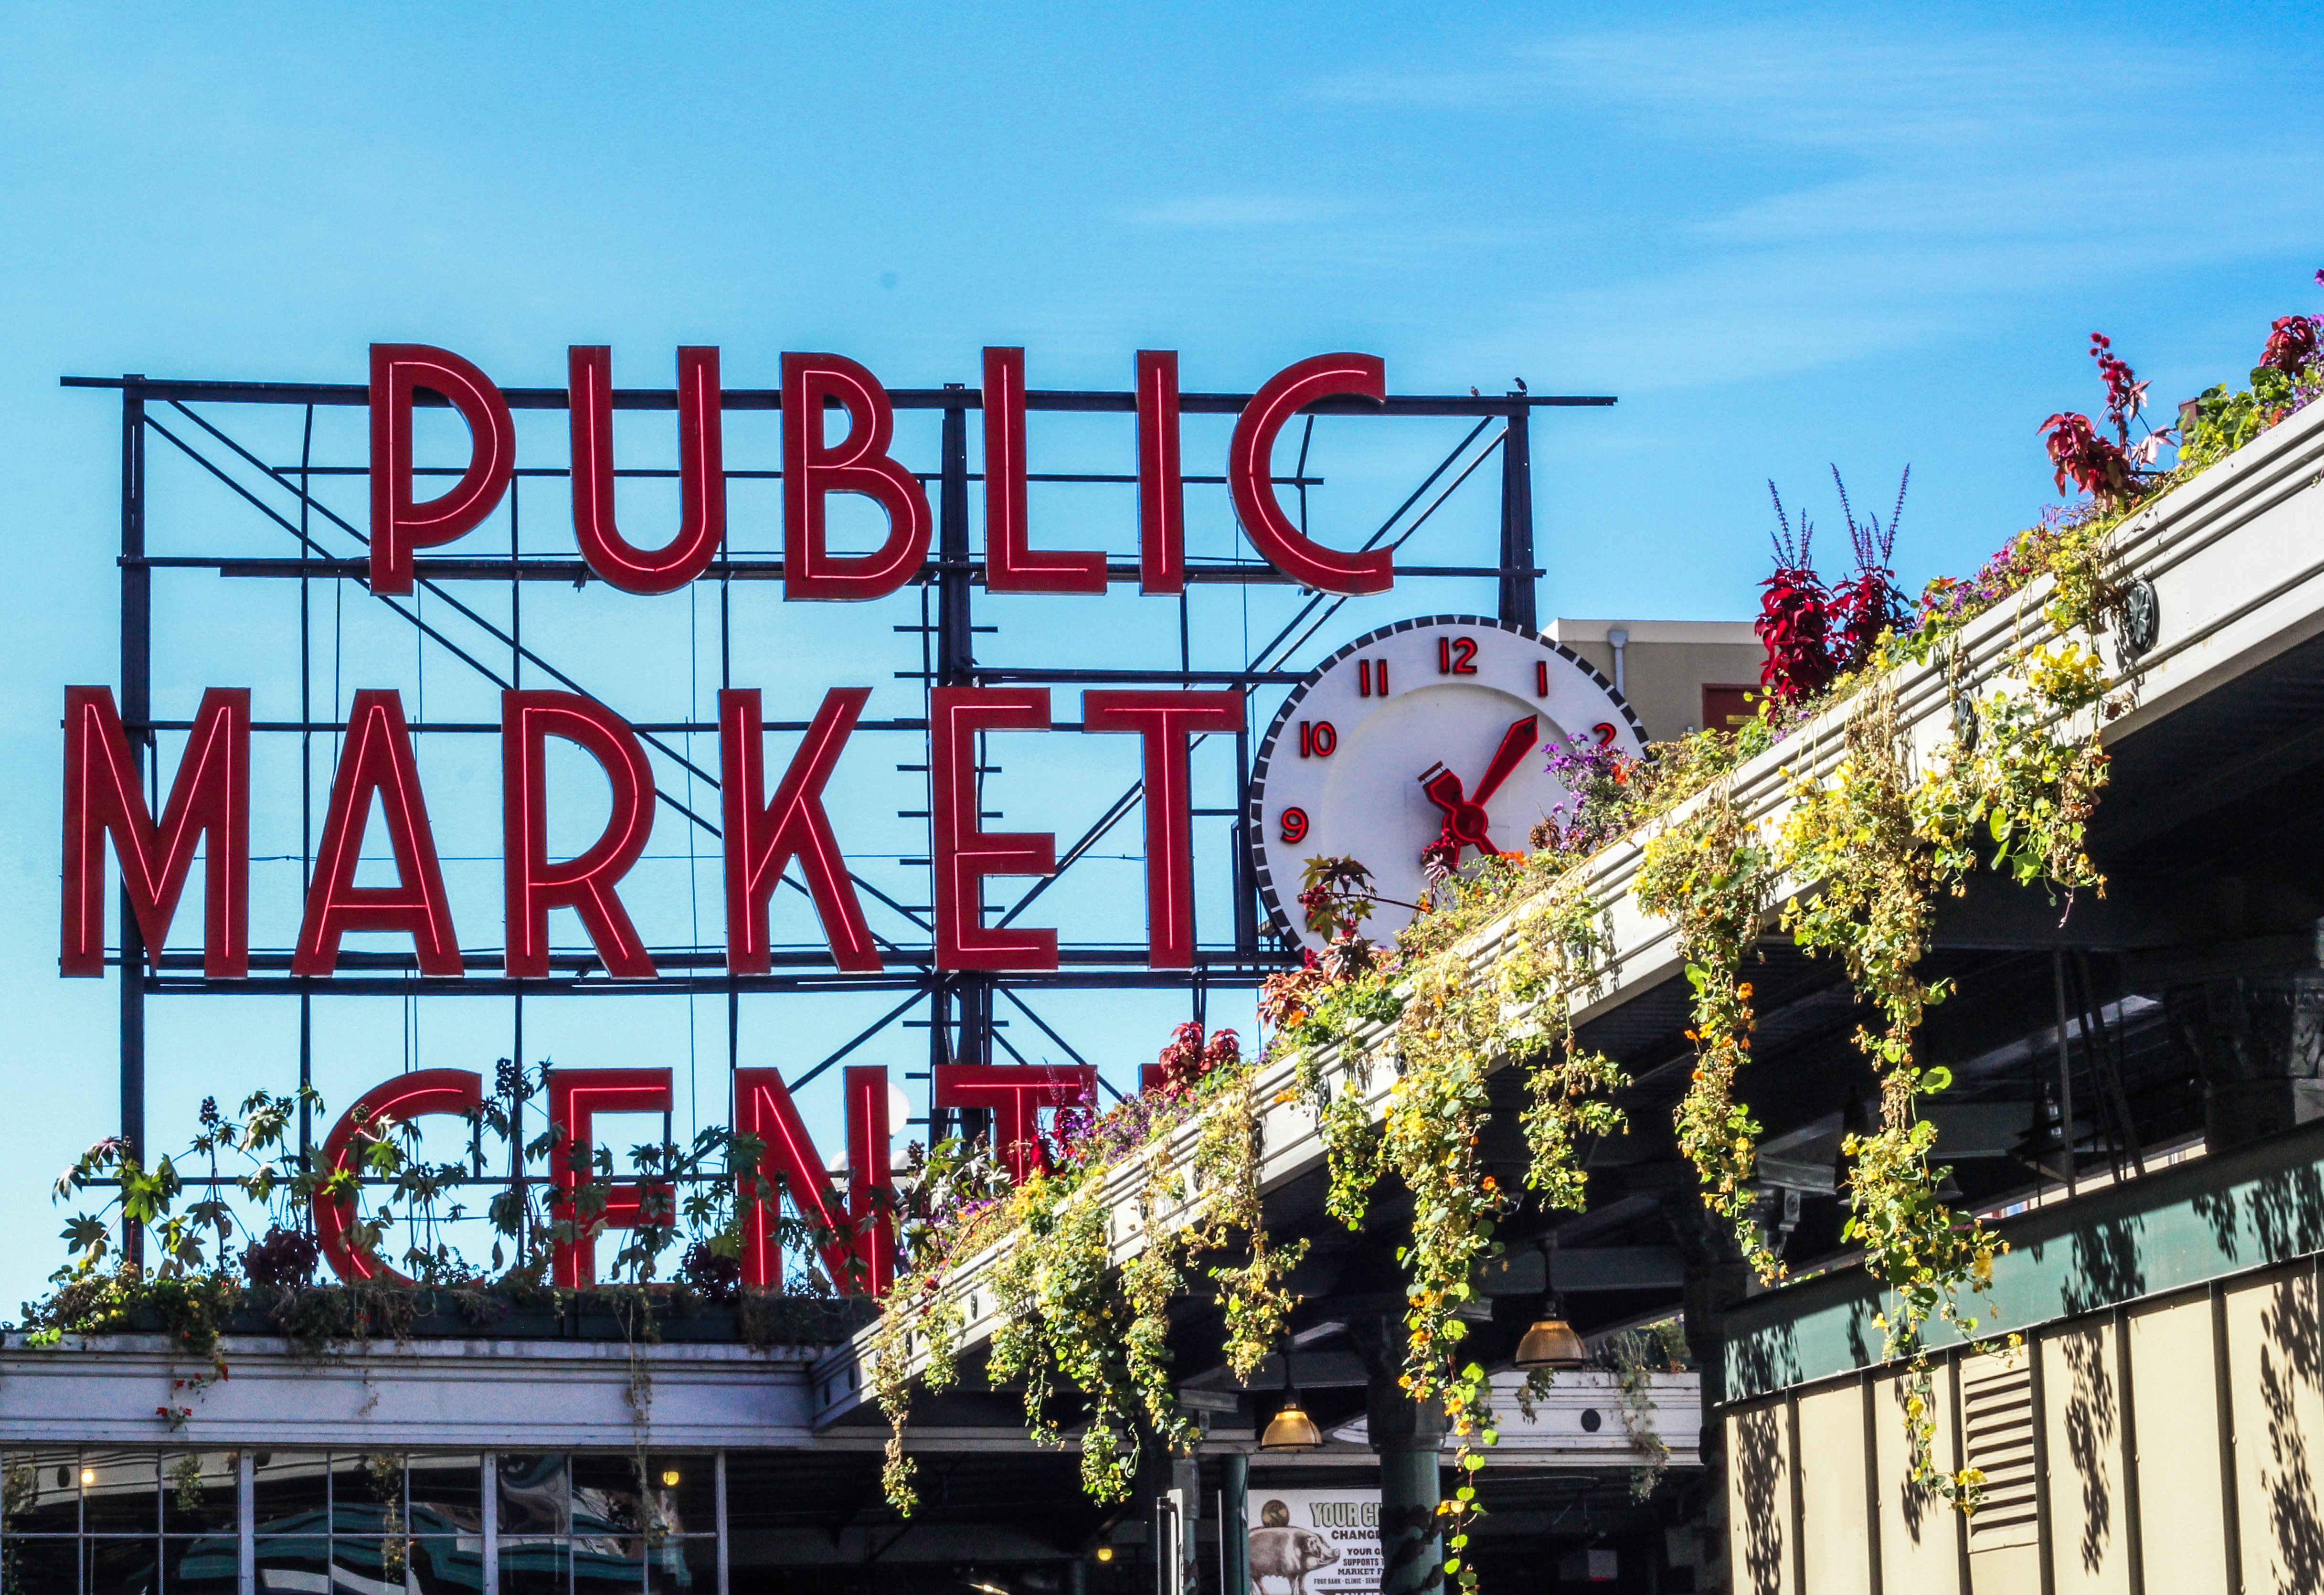
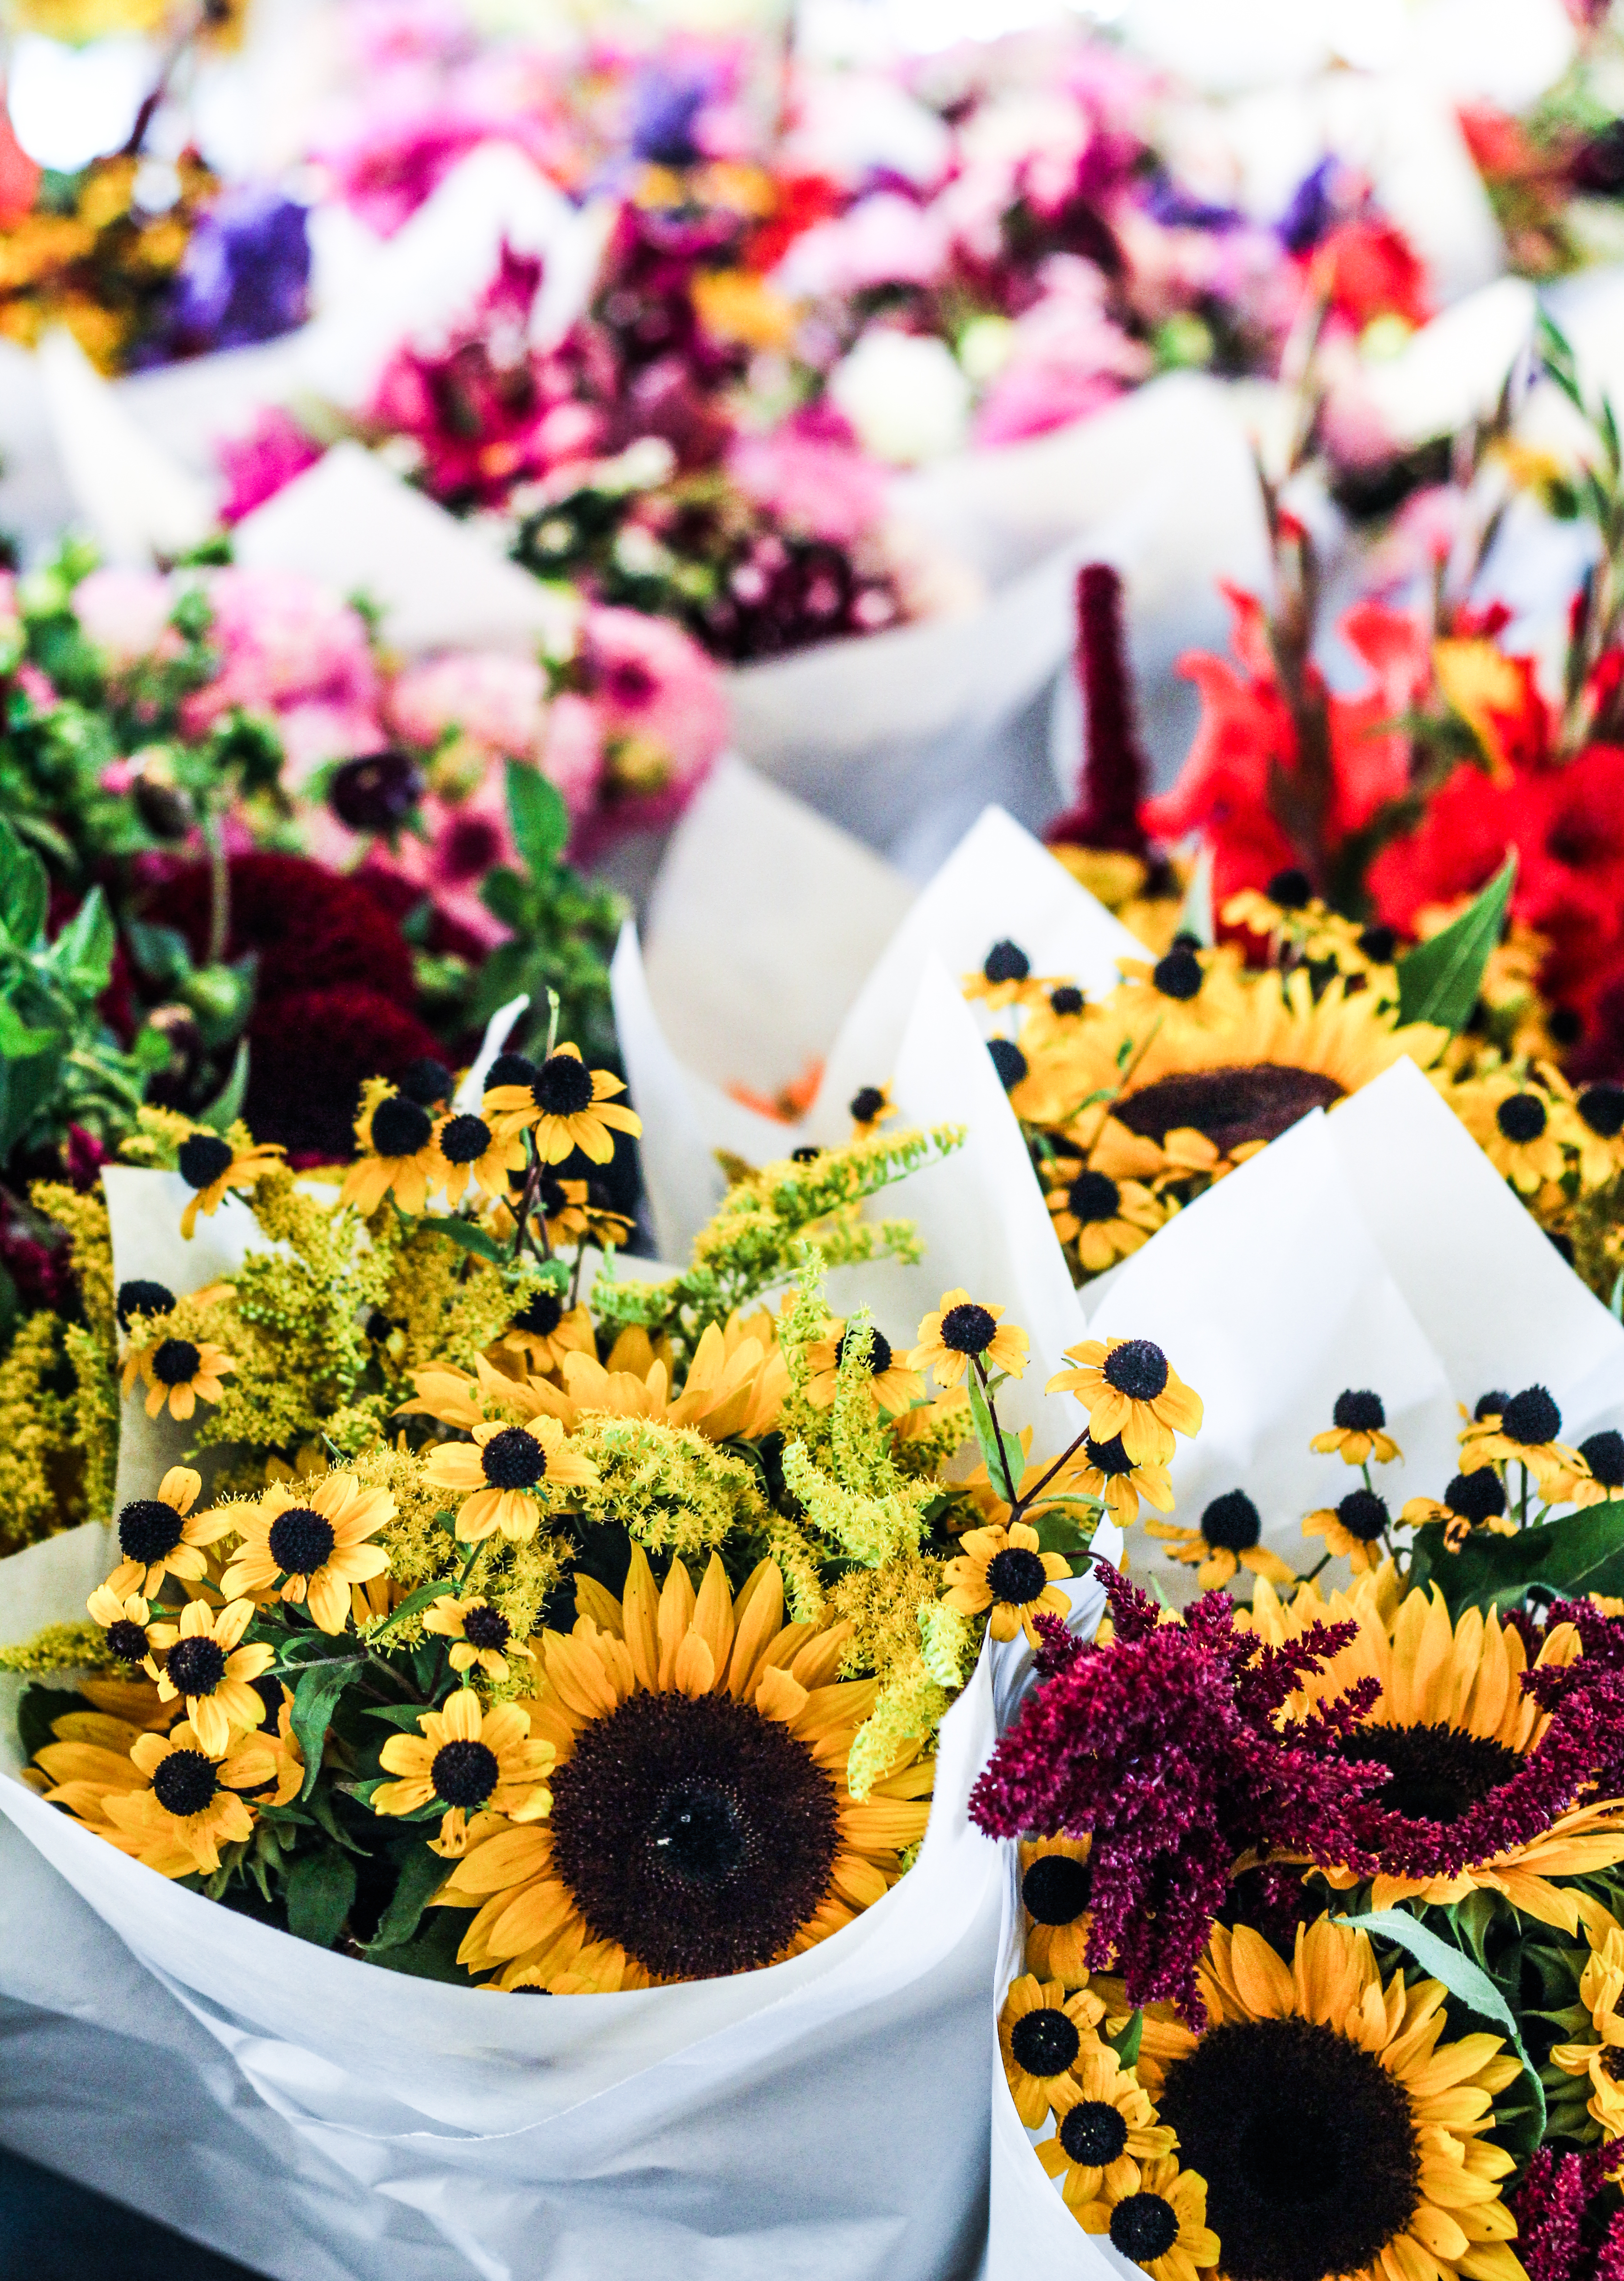
Pike Place Market – Although probably the most famous activity in Seattle (or at least tied with the Space Needle), wandering through Pike Place Market is a must. It’s full of vibrant colors, sounds and smells – fresh produce, beautiful flowers (and so cheap, if I lived in Seattle I’d have flowers all the time), buskers and barbershop quartets, and dozens of restaurants, selling everything from coffee to mac’n’cheese to Russian meat pies. And if you wander all the way down to the end, there’s a lovely little park with great views of the sound where you can sit and enjoy all your market goodies.

Beach along the Elliott Bay Trail - Seattle {Katie at the Kitchen Door}

Sunset Run along the Elliott Bay Trail - Seattle {Katie at the Kitchen Door}

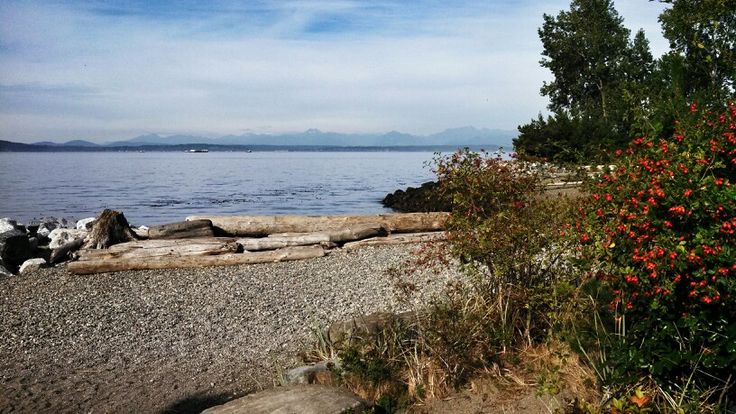
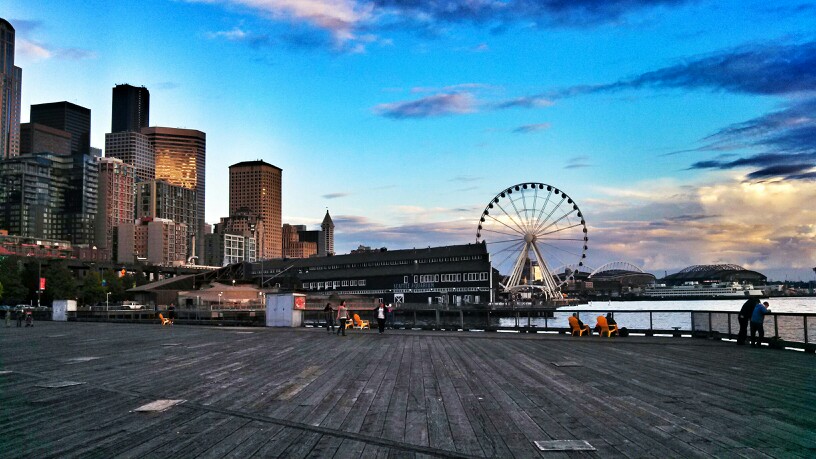
Running on the Elliott Bay Trail – One of my favorite ways to explore a new city is by going for a jog, and Seattle is a great place for this. If you’re staying downtown, head down to the waterfront and run North along the docks (Alaskan Way on the map) until you get to Myrtle Edwardrs Park, where the Elliott Bay Bike Trail winds through grassy lawns along the beach. It’s a great, mostly flat run – I managed to fit in 5 miles both Friday and Saturday (taking a lot of photo breaks as I ran).

Hiking Cougar Mountain Park - Seattle

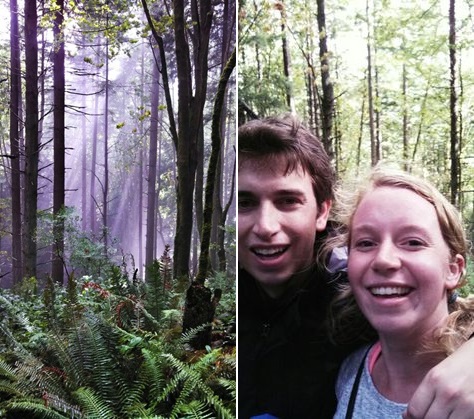
Cougar Mountain Regional Park – Fitting in a hike with my brother was a must-do on my list, rain or shine. Although it had been sunny all weekend so far, when my brother arrived to pick me up, there was a heavy, blowy rain falling. Still, I suited up in a poncho and we started our walk through the Cougar Mountain park, starting at a trailhead only a few miles from his house (in Bellevue). After about 30 minutes, the rain stopped and the sun started to break through the clouds, leading to gorgeous, sun-streaked mist filling the rainforest. The hike we chose was an easy 4 mile loop with little elevation gain – more of a walk in the woods than a true hike – but it was great to be outside and exploring new terrain.

Space Needle - Seattle

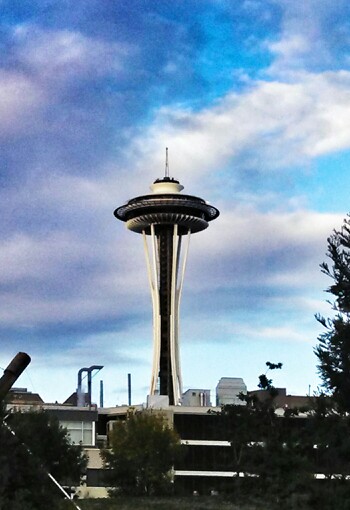
Since I’m sure I’ll be back to Seattle somewhat frequently to visit my brother, I’ve already started keeping a list of other things I’d like to do there – like ride up in the Space Needle, go on a whale watch, do some more serious hiking, and take a ferry to Victoria. Plus, there’s a lot more great restaurants to try. With the promise of all that, I’m sure I’ll be back soon!

Note: In order to received the discounted active blogger rate at IFBC, all participating bloggers were required to write three posts about their experience at the conference.

IFBC, Cake Journal, Chocolate-Toffee Cookies with Caramel Centers

0 September 19, 2013 Dessert

IFBC, Cake Journal, Chocolate-Toffee Cookies with Caramel Centers

Chocolate-Toffee Cookies with Caramel Centers (Katie Morris for Cake Journal)

Thick Caramel (Katie Morris for Cake Journal)

I’m writing this to you from way up over Canada, en route to Seattle for the 2013 International Food Blogger Conference, better known as IFBC. I’m pretty excited – four days of wining and dining, schmoozing with other bloggers and food professionals, and hopefully learning a ton from the speakers and break-out sessions. Not to mention, I’ll get to explore Seattle and hang out with my baby brother, who just moved here last month. It’s gonna be good.

I’ll be tweeting and instagramming from all the events (take that as an invitation or a warning, whichever you prefer), and when I get back I’ll be sure to write a few posts to share what we learned (and ate) at the conference. In the meantime, I want to direct your attention over to Cake Journal, where I’m sharing these sinful chocolate-toffee cookies with caramel centers. They’re a riff on my favorite double-chocolate cookie, amped up with toffee bits and homemade caramel. They’ll pretty much satisfy any chocolate craving. I may be contributing more original dessert recipes to Cake Journal in the future, so keep your eyes peeled!

Chocolate-Toffee Cookies with Caramel Centers (Katie Morris for Cake Journal)

Oh, and if any of you will be attending IFBC, shoot me a note! I’d love to say hi. Also, I’ll have some time to explore (and eat!) on my own – any recommendations for Seattle favorites would be welcome. And if you’re not going to be in Seattle, I hope you have a fantastic weekend. Talk to you soon!

Click here for the cookie recipe.

Note: In order to received the discounted active blogger rate at IFBC, all participating bloggers were required to write three posts about their experience at the conference.

Book Club: True Brews // Blackberry Wine, Homemade Sake, and Watermelon Soda

2 September 17, 2013 Cookbook

Book Club: True Brews // Blackberry Wine, Homemade Sake, and Watermelon Soda

Home-brewed blackberry wine, watermelon soda, and cloudy sake {Katie at the Kitchen Door}

I’m teasing you a little bit with this headline: you don’t get recipes for all three home brews in this post, only the soda. For the other two, you’re going to have to go out and get a copy of Emma Christensen’s True Brews. And it’s not because I don’t want to share, I do. It’s just that I couldn’t make the daunting process of brewing your own beverages at home seem nearly as clear and easy as Emma does, so I want to leave most of the explaining to the expert. Because that’s exactly what Emma is, and True Brews is a fantastic (and fun) resource for anyone looking to get their hands dirty with fermenting their own soda, kombucha, kefir, cider, beer, mead, sake, or fruit wine. Certainly, you could find much larger tomes dedicated solely to the science behind brewing any one of these beverages, but for someone who just wants an easy introduction or who likes to dabble, True Brews is the perfect starting point.

Home-brewed Watermelon-Mint Soda {Katie at the Kitchen Door}

This review has been a long-time in the making. For three months there have been buckets of brews bubbling away in our new house, turning rice into sake, blackberries into blackberry wine, and homegrown watermelon into fizzy soda. Now that all three recipes are finished, it’s time to have some friends over for a tasting party – that is, before we get started on our next project! (Cranberry mead, if you’re curious).  Like most DIY food projects – cheese-making, charcuterie, bread-baking, canning – home-brewing takes time, practice, patience and a small investment in the necessary equipment. I have to say, so far, brewing is a bit more rewarding than the other projects we’ve tried – it’s less labor-intensive and the results are faster and more consistent. Plus, drinking a glass of mead that’s a little too dry is a lot more enjoyable than trying to eat a piece of cheese that didn’t cure properly.

Home-brewed Sake {Katie at the Kitchen Door}

True Brews both clearly covers the basics for all kinds of brewing, and provides a number of appealing recipes to get you started. I’m really impressed by how not-daunting this book makes the whole process. Any questions we’ve had have been explicitly answered, and all three of our recipes worked out, even though Trevor wanted to start with the “advanced” sake recipe, which requires feeding the sake a little specially prepared rice every few days for almost two weeks. I started more simply, with the watermelon-mint soda, which was a snap to make – 24 hours after cutting up the watermelon, I was sipping a super fizzy, refreshing, slightly sweet soda. I can’t wait to make a few more varieties; it’s really the best soda I’ve ever tried. And the blackberry wine was enjoyable too, in a completely different way – it’s sort of thin and has a bit more tang than most wines, but with a pleasant aroma of ripe berries and a uniqueness that makes you want to finish the glass. Not to mention, it’s a gorgeous, gorgeous color, and completely translucent. I’m not really a sake drinker, but the sake is OK too – it’s breadier than sake is supposed to be, but a chilled glass is still good, if not craveable. Because the first three recipes were successful, I’m eager to try more recipes – besides the cranberry mead, I have my eye on the Sweet Spiced Apple Cider, the Jamaican Ginger Beer, and the Apricot Wheat Ale. I feel like my drinking choices just got a whole lot more awesome.

Home-Brewed Blackberry Wine {Katie at the Kitchen Door}

The bottom line: True Brews is an excellent primer on fermenting your own home-brews, both alcoholic (cider, beer, mead, sake, wine) and kid-friendly (soda, kombucha, and kefir). Emma covers the basics clearly and succinctly, making home-brewing accessible, appealing, and fun. The recipes are diverse and turn out impressively, and the enticing photography and clean design make this book the complete package. This may be a little light on new and detailed information for a seasoned brewer, but for someone just starting out, it’s perfect.

Disclaimer: I received a review copy of True Brews from Ten Speed Press, but was not otherwise compensated for writing this review. All opinions are my own, as always.

Home-brewed Watermelon-Mint Soda {Katie at the Kitchen Door}

Watermelon-Mint Soda

Recipe from True Brews. Makes 2 liters.

  • 4 pounds seeded, cubed watermelon (from a 6 pound watermelon)
  • 1/2 c. packed fresh mint leaves
  • 1/2 c. freshly squeezed lime juice (from 4-5 limes)
  • 1 cup water, plus more to fill the bottle
  • 9 TBS white sugar, plus more to taste if needed
  • pinch of salt
  • 1/8 tsp dry champagne yeast (purchase at your local home-brew store)
  1. To make soda you will need a clean, 2-liter plastic soda bottle, a blender, a fine-mesh strainer, and a funnel. Make sure all of your equipment is clean before you start.
  2. Combine the watermelon, mint, and lime juice in a large bowl and set aside. Place 1 cup of water in a small saucepan and bring to a boil. Remove from the heat, add the sugar and a pinch of salt, and stir to dissolve. Pour the hot syrup over the watermelon, stir briefly to coat all fruit in the syrup, and let stand for 10 minutes.
  3. In batches, blend the watermelon mixture into a smooth puree, then strain the puree through a fine-mesh strainer into a clean bowl, stirring the puree to allow as much juice as possible to run into the bowl without pushing any of the solids through the strainer. If you want a very smooth soda, line your strainer with a piece of cheesecloth.
  4. Pour the juice into the the clean 2-liter soda bottle. Add water to almost fill the bottle, leaving around 1 inch of headspace at the top. Taste, and add a little more sugar or lime juice if desired.
  5. Add the yeast to the bottle. Screw on the cap and shake the bottle to dissolve and distribute the yeast. Let the bottle sit at room temperature out of direct sunlight for 12 to 48 hours – the soda will ferment more quickly in a warmer room. When the bottle feels rock solid, with very little give, the soda is ready. Place it in the fridge overnight or for up to two weeks. Open slowly over a sink to release the pressure (sodas can easily overcarbonate). You can transfer to pretty glass bottles to serve the soda, but always store it in the plastic bottle to prevent explosions.
Spicy Fresh Tomato-Basil Soup with Caraway-Cheese Toasts

0 September 14, 2013 Fall

Spicy Fresh Tomato-Basil Soup with Caraway-Cheese Toasts

Spicy Fresh Tomato Soup with Caraway-Cheese Toasts {Katie at the Kitchen Door}

This soup came about as a result of the confluence of two forces – an end-of-summer head cold, and an overdue fridge clean out. Perhaps it’s just that all of the travel and hubbub of the summer have caught up to me, but my body is telling me that it needs a few days of doing nothing before it begins cooperating with me again. So I’m taking it easy at home (especially since I want to be in fighting form for my trip to IFBC this week! Will I see any of you in Seattle?) and eating comforting, nourishing things. As for the fridge, it’s really not so bad, but we’ve hidden lots of garden produce away in it’s drawers and it’s easy to forget about it – and there’s nothing sadder then seeing something that you’ve grown from seed go to waste. We still have a glut of tomatoes, and since we also had half a container of stock, I decided that soup was the perfect solution to both my problems.

Spicy Fresh Tomato Soup with Caraway-Cheese Toasts {Katie at the Kitchen Door}

This turned out just right for the situation and the weather – a little spicy to clear my head, smooth and comforting on a sore throat, warming on a cool fall day, but still packed with the fresh taste of summer. I wrote down there that this recipe serves 2 to 3, which it could, but I’m not going to lie to you – I ate the whole pot in one go, bowl after bowl, sitting on my couch and watching chick flicks. It helped a lot. Of course, I added a healthy dose of heavy cream to the pot after pureeing, and the mix of the bright acidic tomatoes and rich cream was too much for me to resist. Since I didn’t bother to peel the tomatoes before throwing them in the pot, the strained puree was quite thin – almost drinkable – but you could thicken it up with a bit of couscous, rice, or some croutons if you wanted. I chose to serve it with a slice of homemade sourdough toasted with grated parmesan and caraway seeds – an open-faced grilled cheese of sorts. It was a perfect comfort meal – I might even make it again tomorrow.

Spicy Fresh Tomato Soup with Caraway-Cheese Toasts {Katie at the Kitchen Door}

Spicy Fresh Tomato-Basil Soup

Adapted loosely from Stir. Serves 2-3.

  • 2 TBS butter
  • 1/2 medium onion, diced
  • 3/4 tsp red chili flakes
  • 3 cloves garlic, peeled and diced
  • 5 medium tomatoes, cored and quartered
  • 2 cups chicken stock
  • 1/3 c. heavy cream
  • 8-10 leaves fresh basil, chiffonaded
  • salt
  1. Add butter to a large saucepan and melt over medium heat. Add onions and chili flakes and saute for 6-8 minutes, stirring occasionally, until onions are soft and translucent. Add diced garlic to pan and saute until fragrant, about 1 minute longer.
  2. Add the tomatoes and chicken stock to the saucepan and bring the mixture to a boil. Lower the heat to a simmer, and simmer, uncovered, for about 30 minutes, or until the tomatoes have fully broken down. Carefully puree the hot soup in a blender, then strain through a colander or mesh strainer back into the pot to remove the seeds and skins (if you use a colander, you will have a thicker soup with some seeds; a mesh strainer will result in a thin soup with no seeds). Add the heavy cream and basil to the soup, season to taste with salt, and heat over low heat for 1 minute, just to fully warm the soup. Serve hot with Caraway-Cheese Toasts, recipe below.

Caraway-Cheese Toasts

Inspired by Stir. Serves 3.

  • 1 tsp caraway seeds
  • 1/2 TBS butter
  • 3 slices fresh sourdough bread
  • 1/3 cup grated parmesan cheese
  1. Heat a large frying pan over medium-low heat. Add the caraway seeds to the dry pan and toast until fragrant, about 1-2 minutes. Add the butter, melt it, and swirl it around the pan. Place the 3 slices of bread in the pan, and toast in the butter until golden brown on both sides, flipping each piece once or twice.
  2. Remove the bread from the pan and set aside. Turn the heat down to low. Sprinkle the cheese directly onto the hot pan in the size and shape of the three pieces of bread. Allow the cheese to melt and crisp for 20-30 seconds, then place the slices of bread on top of the cheese and press down. Wait 20 seconds, then carefully flip the slices of bread over without disturbing the cheese layer (using a fork or your fingers is probably your best bet). Serve hot. (You could also do this more easily in the oven under the broiler, sprinkling the grated cheese on top of each slice of bread and broiling until melted, but I didn’t want to get more than one pan dirty!)
Green Bean Farfalle with Pesto, Capers, and Almonds

1 September 10, 2013 Food

Green Bean Farfalle with Pesto, Capers, and Almonds

Green Beans with Pesto, Capers, and Almonds {Katie at the Kitchen Door}

The idea for this pasta came to me after reading a post on Not Without Salt that had absolutely nothing to do with green beans, or pasta, or pesto. The post was about apricot pie, and it’s a beautiful post and a beautiful pie, but the sentence that stuck with me was the one about what preceded the pie – “a picnic dinner with steak sandwiches, horseradish butter, pesto laden green beans with capers and an onion-spiked salad of tomatoes and peaches.” A) I was reading this on a plane, and even though I got to fly business class for the first time and the food was quite good, (and I totally took advantage of every single offer of champagne), that picnic meal made me want to run off that plane and drive immediately to an idyllic country house and picnic in a meadow. B) Pesto-laden green beans with capers? What an amazing idea. We’ve had pounds and pounds of beans come out of the garden, and have tried several yummy recipes (we especially liked this one with romesco sauce), but this one sounded like it could top them all.

Green Bean Farfalle with Pesto, Capers, and Almonds {Katie at the Kitchen Door}

Perfect Pesto {Katie at the Kitchen Door}

This is my first batch of pesto this summer – sadly, our basil plants never really took off this year. I usually make pesto by throwing the five ingredients – pine nuts, parmesan, garlic, olive oil, and basil – into the food processor all at once, blending, then tasting, usually adding more cheese, and blending again. The thing is, I’m never quite happy with the results – it’s inconsistent, and it’s never as good as my mom’s pesto. So this time, I did a little research into “best pesto” recipes, and take a more methodical approach. Two recipe caught my eye – this one, by The Best Remedy for A Cup of Jo, and this classic Marcella Hazan recipe. The two recipes aren’t so different from one another, so I followed the Marcella Hazan recipe and borrowed The Best Remedy’s idea of toasting the pine nuts first. The extra steps – grating the cheese by hand and stirring it in at the end, pre-chopping the garlic, and the little bit of butter added to the final product – made a huge difference. It really was perfect pesto. Tossed with the quickly blanched green beans, a few spoonfuls of capers, lightly toasted almonds, and hot pasta, it was a perfect and light summer lunch. And a really good way to use up some green beans.

Green Bean Farfalle with Pesto, Capers, and Almonds {Katie at the Kitchen Door}

Green Bean Farfalle with Pesto, Capers, and Almonds

Pesto recipe adapted from Marcella Hazan. Green Beans inspired by Not Without Salt. Serves 4.

  • 2 cups fresh basil leaves, tightly packed
  • 1/2 c. olive oil
  • 3 TBS pine nuts
  • 2 garlic cloves, peeled
  • salt
  • 1/2 c. finely grated parmesan cheese
  • 3 TBS butter at room temperature
  • 2 lbs. green beans, ends trimmed, sliced in half on the diagonal
  • 1 lb. farfalle
  • 1/3 c. almonds, roughly chopped
  • 1/3 c. capers
  1. Wash the basil gently, then pat completely dry with a paper towel.
  2. Toast the pine nuts until they are fragrant in a dry skillet over medium heat. Stir frequently to prevent them from burning.
  3. Finely chop the garlic by hand.
  4. Add the basil, olive oil, pine nuts, garlic, and a pinch of salt to a food processor. Blend until smooth and creamy. Stir in the parmesan cheese by hand, then stir in the butter.
  5. Bring a large pot of salted water to a boil. Blanch the green beans until bright green, then remove with a slotted spoon and set in a large bowl. Add the farfalle to the boiling water and cook according to package directions, then drain.
  6. Lightly toast the chopped almonds in a dry skillet over medium heat until they are golden brown and fragrant. Stir frequently to prevent them from burning.
  7. Toss together the green beans, pesto, farfalle, capers, and almonds, until everything is equally coated. Serve hot.
Book Club: Live Fire // Blue-Cheese Stuffed Burgers and Grilled Corn with Red-Pepper Butter

1 August 31, 2013 Beef

Book Club: Live Fire // Blue-Cheese Stuffed Burgers and Grilled Corn with Red-Pepper Butter

Blue-Cheese Stuffed Burgers with Red Onion Marmalade {Katie at the Kitchen Door}Live Fire is a cookbook that I’ve had sitting somewhat forlornly on my bedside table all summer, begging me to cook from it. It’s a book about grilling, but not just grilling – it’s about cooking with fire in all its forms. As I’ve mentioned, grilling, or any live flame cooking is not my area of expertise, and I even included learning to do it on my summer bucket list for the second year in a row this year, which is precisely why Live Fire was so enticing to me. But between moving (to a house without a grill), ballet camp, and spending most of July and August away from home, I hadn’t had a chance to cook from it at all. So two days before my third trip to Russia (where I am right now), Trevor and I combined our weekly garden trip with a little cookout on my parents’ grill, and I finally got a chance to test out this book.

Summer Grilling

To be honest, the design and message of this book are a little intense for my taste – it’s a large book, with big blocky text and “aged” paper, trying maybe a little too hard to be not-feminine. And while I think it would be completely awesome to roast an entire lamb on an iron cross or a 20 lb. turkey on a spitjack, I just don’t think that I’m going to pull that off in the tiny, grass-less yard of my new apartment (but if you think you might want to do that, or throw other show-stopping meat-centric events, then this is the book for you). But there are things that I like a lot about this book – Michael’s clear passion for cooking with fire that comes through on every page; how informative it is, especially for a grilling/fire newbie/scaredy-cat like me; and how personal and infused with love and memories the book is.

Summer Grilling

The book is broken up into seven sections by cooking method – grill, hearth, plancha, fire pit, hot box, rotisserie and embers. Obviously some of these methods are more accessible to home cooks than others, but I like that it pushes the envelope on what’s achievable in your own kitchen or yard (or even fireplace). Many of the recipes in these sections list alternative methods for preparing the same foods in your oven or on your stovetop, which on one hand kind of defeats the point, but on the other hand lets you see how versatile your grill can be (cooking pasta on the grill? Yep!). Some of the recipes are part of big menus, like the harvest dinner, the burger bash, and the backyard camping breakfast, but others stand-alone. High on my list? The Lemon-Garlic Chicken with Kalamata Tapenade Cooked Under a Brick, the Salt-Baked Potatoes with Mascarpone and Prosciutto Bits, the S’Mores with Espresso Marshmallows, and the Grilled Zinfandel Sangria.

Blue Cheese Stuffed Burgers

And the recipes I’ve already tried? Blue-Cheese Stuffed Burgers with Red Onion Marmalade and Grilled Corn on the Cob with Roasted Red-Pepper Butter. Both were a success – there’s nothing like a big, juicy burger with molten blue cheese oozing out of the middle, at least in my book. But for me, more important than the success of the flavors was the success of the process. I lit the grill, by myself. I prepped the burgers, by myself. I cooked the burgers, by myself, (OK, with Trevor’s supervision), and I didn’t even drop them when I flipped them. These sound like small accomplishments, but I get super nervous around the grill (fire, gas, burns, explosions…), and squeamish about cooking meat via any method other than braising it for hours and hours, so I was pretty proud of myself. And I’m grateful to Live Fire for enticing me to just get out there and do it.

Summer Grilling

Blue Cheese Stuffed Burgers

So for those of you in the States this Labor Day weekend, enjoying one more USA-sanctioned grilling holiday this year, consider adding either of these recipes to your menu. And although September is all about getting ready for fall and going back to school, it’s still kind of summer. Summer enough to keep grilling, at least. Don’t stash them away yet!
The bottom line: Live Fire is a book that teaches seven methods of cooking over flames, from grilling to using a plancha to cooking with a rotisserie. Some of the recipes are impractical for the average cook, but it’s an adventurous book with a strong sense of passion for the process of cooking with fire and a healthy dose of fun. I’d recommend it for cooks looking to move beyond the grill when it comes to outdoor cooking (or hoping to throw an over-the-top themed dinner party), but it’s probably not the best choice for someone looking for quick “just throw it on the grill” dinner recipes.
Disclaimer: I received a review copy of Live Fire free of charge from Chronicle Books, but was not otherwise compensated for writing this review. All opinions are genuine and my own.
Blue Cheese Stuffed Burgers
Blue Cheese-Stuffed Burgers with Zin-Onion Marmalade
Recipe from Live Fire. Serves 6.
  • 2 medium red onions
  • 1/4 c. olive oil
  • 1/2 tsp sea salt
  • 1/4 tsp freshly ground black pepper
  • 2 tsp finely chopped fresh thyme
  • 2 c. zinfandel, or other red wine
  • 3 pounds ground chuck
  • 3/4 c. crumbled blue cheese
  • coarse sea salt and pepper to season burgers
  • 6 sourdough rolls, cut in half
  1. To make the marmalade: peel the onions, then slice in half end-to-end. Slice into thin half moons. Heat the olive oil in a wide saucepan over medium heat. Add the onions, salt, and pepper, and cook, stirring occasionally, until the onions are soft and beginning to caramelize, about 10 minutes. Add the chopped thyme and cook one minute longer, then pour in the wine and cook util the sauce has reduced by about two-thirds, about 5 minutes longer. Remove from the heat and let cool while you prepared the burgers. (Can also be made in advance and refrigerated until ready to serve).
  2. To prepare the grill: Turn a gas grill to high or ignite charcoal. When the grill is hot, clean the rack with a grill brush. Decrease the temperature to medium high.
  3. To make the burgers: Shape the ground beef into 12 thin patties about 4 inches wide and 1/4 to 1/2 inch thick. Set aside 6 patties as your “top” patties, and 6 patties as the “bottom” patties. Spoon 2 TBS of the blue cheese on top of each of the 6 bottom patties, leaving 1/2 inch around the edge of the patty free of cheese. Lightly cover the bottom patties with the top patties, and gently press the edges together to seal. Season both sides of the burgers with sea salt and freshly ground black pepper.
  4. Grill the burgers for 5-6 minutes per side with the lid of the grill closed. Two minutes before the burgers are done, add the buns, cut side down, to the grill rack to toast. Serve the burgers on the toasted buns with the red onion marmalade.

Grilled Corn with Roasted Red Pepper Butter

Grilled Corn on the Cob with Red Pepper Butter

Recipe from Live Fire. Serves 8.
  • 3 medium red bell peppers, roasted and peeled
  • 2 tsp olive oil
  • 2 tsp minced garlic
  • 2 tsp chopped fresh oregano
  • 1 tsp balsamic vinegar
  • 1 tsp coarse sea salt
  • 1/8 tsp freshly ground black pepper
  • 2 sticks unsalted butter, softened
  • 8 ears fresh corn, in their husks
  1. Coarsely chop the roasted red peppers and place in a food processor. Heat the olive oil in a small saute pan over medium heat, then add the minced garlic and saute for 1-2 minutes, until fragrant and just barely colored. Remove from the heat and stir in the oregano.
  2. Add the vinegar, sea salt, and pepper to the food processor with the red peppers, and pulse until smooth. Pour in the warm garlic-olive oil, and pulse a few times to blend. Add the softened butter, and process until the mixture is smooth with a consistent color. Refrigerate the red pepper until ready to use. If desired, roll into a log once it’s chilled and wrap in tin-foil.
  3. Prepare the corn: pull out all the corn silk from the ears without removing the husks. To do this, pull the husks down the corn without removing them, then tug the corn silks out and discard. Smooth the husks back over the corn. Soak the corn in cold water (easiest in a bucket), for 15-30 minutes before putting over the fire.
  4. Start your grill and set to medium-high. Place the corn on the grill and grill, turning occasionally, until the husks are brown and slightly charred, about 10-15 minutes. Test one ear to see if it’s done inside. Serve with the red pepper butter.
Garden Update // Tomato Panzanella with Mozzarella and Basil

6 August 28, 2013 Food

Garden Update // Tomato Panzanella with Mozzarella and Basil

Homegrown Heirloom Tomatoes {Katie at the Kitchen Door}

Heirloom Tomato Panzanella with Mozzarella and Basil {Katie at the Kitchen Door}

As you might imagine, a lot has changed in our not-so-little garden since I last wrote about it in May. Now we’re in the thick of things, and walking through the vegetable garden, where perhaps we were a bit too aggressive with our plant spacing, is like being in a jungle. The tomatoes tower over my head, the beans brush against my legs, and the whole space is filled with the hum of busy pollinators.

The Vegetable Garden

We’ve had a number of huge successes this year. Starting in May, the rhubarb has been prolific, so much so that I’d have to bake three pies a week just to use it up. In July we were picking blackberries by the gallon off our one sprawling bush, with enough leftover after baked oatmeal and blackberry cheesecake bars to make a huge, bubbling batch of blackberry wine that we’ll savor all winter. Cucumbers seem to ripen by the dozen, and pounds and pounds of green beans fill our fridge. Last weekend alone, we picked 20 pounds of tomatoes, which have already been turned into canned sauce, pickled cherry tomatoes, and gifts for coworkers. The lesson the garden seems to be telling us, is go with what what works. Blackberries and rhubarb? They grow easily in New England with no care at all. Green beans and cucumber? Same story. Tomatoes are known to be fussier, but they do fantastically in my dad’s soil.

Tomato Season {Katie at the Kitchen Door}

Harvest

On the other hand, there have been disappointments. Perhaps it’s only because we set our hopes so high this year, but it does feel as though this season has had more than it’s fair share of setbacks. It seems as if every week I say to Trevor, maybe next year, as we discover another failed crop. Every single peach (of dozens!) picked off the trees one by one by raccoons or possums or some other critter a week before they were ripe.  No flowers on the apple trees. A measly pound of fava beans from 20 plants. Daily flowers on the pumpkin but no baby pumpkins to speak of. A broccoli harvest of approximately .15 pounds. All but one bunch of grapes falling off the vine. Of course, with every failure comes a wealth of knowledge, but in the moment, that doesn’t dampen the sting of disappointment.

Blackberry Picking

But whether or not a crop is successful does little to dampen our enthusiasm for the process. I feel so much joy when I’m in the garden – all this childhood energy and excitement comes rushing over me when I’m standing outside in our gorgeous clearing on a beautiful summer morning or sunny afternoon. I feel connected to my surroundings, to my dad, to Trevor, and maybe most importantly, to myself. I’m engaged and moving and living. I love it. And it’s given me so much respect for the people who do this everyday, who struggle with the same challenges we have but grossly multiplied, who grow enough food not just to feed themselves, but the whole country. A part of me thinks that everyone who touts the local/free-range/organic lifestyle should have to try growing their own food, just to more fully understand the effort that goes into creating that resource. If three people with a fairly generous supply of time, money, and land, struggle to raise enough food to make a few weeks’ worth of summer meals, imagine the challenge for those with no land, no time, and limited finances. My thoughts are getting away from me – I truly don’t have well-formed opinions on these matters, but they’re worth thinking about. And also, they make me want to read The $64 Tomato. A fascinating concept.

Black Krim Tomato

Heirloom Tomato Panzanella {Katie at the Kitchen Door}

And that brings us back to something that I do know something about – tomatoes. Eating them, cooking with them. What to do when you have 20 pounds of them. Besides the sauce, and the toss-everything-in-a-pan-pastas, and the pickled cherry tomatoes, I also  made this beautiful panzanella, a salad of toasted bread and fresh tomatoes, tossed with salt, olive oil, basil, and fresh mozzarella. It’s both filling and fresh, a burst of summertime flavor in every bite. I read in Nigel Slater’s Tender that his trick for the perfect panzanella is to toast the bread first, and so that’s what I did, to excellent effect. It really couldn’t be a much simpler meal, and if you use tomatoes in a variety of sizes and colors, it’s a stunning dish as well.

Heirloom Tomato Panzanella with Mozzarella and Basil {Katie at the Kitchen Door}

Heirloom Tomato Panzanella with Mozzarella and Basil 

Serves 4.

  • 6 thick (1-inch) slices sourdough bread, cut into bite-sized cubes
  • 6 TBS olive oil, divided
  • coarse sea salt
  • 2 pounds heirloom tomatoes, cut into bite-sized pieces
  • 3/4 c. small fresh mozzarella balls (cillegine)
  • 15 leaves fresh basil, torn into pieces by hand
  1. Toss 4 TBS of the olive oil with the bread cubes in a large bowl, then transfer to a wide frying pan or dutch oven, sprinkle with sea salt, and toast bread cubes over medium heat, stirring frequently, until bread is golden brown on much of it’s surface, about 5-10 minutes.
  2. Toss the warm bread cubes with the tomatoes, mozzarella balls, and torn basil. Drizzle with the remaining 2 TBS of olive oil and season to taste with sea salt. Serve at room temperature.
The Weekend! // Lemon-Rosemary Gin Fizz with Cucumber Sorbet

5 August 24, 2013 Drink

The Weekend! // Lemon-Rosemary Gin Fizz with Cucumber Sorbet

Lemon-Rosemary Gin Fizz with Cucumber Sorbet {Katie at the Kitchen Door}

This weekend feels like the first real one I’ve had in months. Looking back at my calendar, it’s clear that it’s not just a feeling – since the last week of June, I’ve either been moving, unpacking, driving, or flying to/from Russia on every single weekend. Not a lot of care-free, lazy summer days in there. But this weekend is different! Which may be why the weekend anticipation hit me so hard Friday afternoon, and I woke up this morning ready to do only things that are happy and relaxing – like making blueberry muffins, going for the first exploratory jog in my new neighborhood, hanging out in the garden, drinking wine with friends, and making up new cocktails to sip on the porch. It doesn’t hurt that the weather is absolutely perfect – clear, sunny, just chilly enough to wear a light sweater, a perfect late summer (or early fall!) day.

Lemon-Rosemary Gin Fizz with Cucumber Sorbet {Katie at the Kitchen Door}

I promised myself I would limit the time I spent glued to the internet, but blogging can be happy and relaxing, too, so I did want to share this fun dessert-cocktail. We’ve had a huge number of cucumbers come out of our garden, more than we can eat, actually, so I’ve been trying to think of things to make other than pickles that will allow us to hang on to them longer. I first saw cucumber sorbet in Martha Stewart Living, but Healthy Green Kitchen and Hugh Fearnley-Whittingstall have also published recipes for the vegetal dessert. Inspired by all three recipes, I made a batch of mint-and-gin-laced sorbet to use up some of our mongo-cukes. I decided to float a scoop in my favorite summer refresher – sparkling rosemary lemonade – and to add a shot of gin for good measure. All together, it’s a refreshing, super summery, happy way to kick off a weekend.

Lemon-Rosemary Gin Fizz with Cucumber Sorbet {Katie at the Kitchen Door}

Lemon-Rosemary Gin Fizz

Serves 6.

  • 1 c. sugar
  • 1 c. lemon juice
  • 2-3 sprigs rosemary, plus more for garnish if desired
  • ice
  • 6 c. chilled seltzer water
  • 6 shots gin
  1. Place sugar, lemon juice, and rosemary in a small saucepan. Bring to a simmer over medium heat, and simmer, stirring, for 1-2 minutes, until sugar is fully dissolved. Remove from heat, cover, and let steep for 15 minutes, then discard the rosemary from the syrup.
  2. Fill a pitcher 1/4 of the way with ice. Add the lemon-rosemary syrup, the chilled seltzer, and the gin, and stir to combine. Pour into tall glasses and garnish with a scoop of cucumber sorbet if desired (recipe below).

Cucumber Sorbet

  • 2/3 c. sugar
  • 2/3 c. water
  • 15-20 small mint leaves
  • 2 large cucumbers, peeled
  • 2 TBS lemon juice
  • 1 TBS gin
  1. Add the sugar and water to a small saucepan and bring to a simmer over medium heat. Stir until the sugar is completely dissolved, then remove from the heat and add the mint leaves. Let steep for ten minutes.
  2. Cut the cucumbers in half lengthwise, and scoop out and discard the seeds. Cut the cucumbers into quarters, and place in a blender.
  3. Add the mint syrup, lemon juice, and gin to the blender with the cucumbers, and blend until the mixture is completely smooth. Chill the mixture for at least one hour, then process in an ice cream maker according to the manufacturer’s directions.

Lemon-Rosemary Gin Fizz with Cucumber Sorbet {Katie at the Kitchen Door}

Pulled Pork Sandwich with Coleslaw and Pickles

2 August 18, 2013 Food

Pulled Pork Sandwich with Coleslaw and Pickles

Pulled Pork and Purple Coleslaw Sandwich {Katie at the Kitchen Door}

I’m back home! Only for 10 days, but I’m going to pretend it’s longer, so that I don’t start freaking out about leaving again prematurely. I got back yesterday around noon, and even though I’d been awake for almost 18 hours, I was determined to enjoy the beautiful summer Saturday, so Trevor and I went on a park picnic date, and ate crackers and cheese and did some serious people-watching. The group yoga people hanging out there were especially entertaining – think three people balancing one on top of the other in weird, acrobatic poses, but with yoga hands (and decidedly yoga-centric mentalities, from what we could overhear). Out of curiosity, we tried it out for ourselves this morning on the lawn – we weren’t very successful, but it was highly amusing.

Pulled Pork and Purple Coleslaw Sandwich {Katie at the Kitchen Door}

When we came back from the park, I was pretty much a zombie, but I managed to stay awake long enough to eat a big plate of the dry-rub pork ribs Trevor made for dinner. (How could I not have? The whole house smelled amazing.) The meat was pulling off the bone so easily that I immediately knew I would have to make sandwiches with the leftovers. So today, after our weekly trip to the garden, I chopped up some cabbage to make coleslaw and sliced some of our homemade pickles while Trevor toasted hamburger buns and reheated the pork in the pan, just long enough to crisp up the edges. Sandwiches were assembled and promptly devoured. Since this was a two-for-one meal (with the ribs for dinner the night before) and all the components were easy, I knew I had to share it here – it makes a pretty killer lunch. Plus, I’m very into pickles right now, (which is good, since we have about 10 mammoth cucumbers in the fridge with the threat of more being ready next week), so anything I can put them on is an instant favorite. So here’s to summer weekends, boyfriends with culinary skills, and delicious sandwiches.

Pulled Pork and Purple Coleslaw Sandwich {Katie at the Kitchen Door}

Pulled Pork Sandwiches

Serves 4.

  • 2/3 recipe of oven-roasted dry-rub ribs, recipe below
  • 1 c. purple coleslaw, recipe below
  • 2 chopped spicy dill quick pickles
  • 4 hamburger buns, toasted
  1. Remove the rib meat from the bones with a fork and shred into bite-sized pieces. Reheat over medium-low heat in a frying pan, until warm and the edges are beginning to crisp. Remove from heat.
  2. Divide the pork evenly between the four bottom hamburger buns. Top each serving with 1/4 cup of coleslaw and a few chopped pickles. Place the top bun on the sandwich and serve immediately.

Oven-Roasted Dry-Rub Ribs

Adapted from this Instructables Recipe. Serves 6, or 2 with enough for 4 leftover sandwiches.

  • 1 full rack of country-style pork ribs
  • 1 TBS + 1 tsp chili powder
  • 1 TBS ground cumin
  • 1 1/2 tsp ground coriander
  • 1 1/2 tsp sea salt
  • 1 1/2 tsp brown sugar
  • 1/4 tsp freshly ground black pepper
  • 1/4 tsp mustard
  • 6 whole cloves garlic, peeled
  • 2 jalapenos, sliced lengthwise into quarters and seeds removed
  1. Preheat the oven to 300°F. Prep the ribs by patting them dry and removing the silverskin membrane from the ribs.
  2. Mix all of the dry rub ingredients (chili powder through mustard) together in a small bowl until evenly mixed. Rub half of this mixture on each side of the ribs. Then place the rack bone-side down on a baking sheet.  Add the garlic cloves and the jalapenos to the baking sheet, and roast for one hour. After the first hour, remove the ribs and filp over, and drain the fat from the pan. Then roast them for two more hours, flipping every thirty minutes. After the full three hours of cooking time, remove the ribs from the oven and let rest 10 minutes before serving.

Purple Coleslaw

Makes 3-4 cups coleslaw.

  • 1/3 c. mayonnaise
  • 1 TBS sugar
  • 2 TBS apple cider vinegar
  • 1 tsp salt
  • 1/4 tsp celery seed
  • 1 small head of purple cabbage, shredded or thinly sliced
  • 1 Anaheim pepper, seeds removed, finely diced
  • 1/2 medium onion, finely diced
  1. In a large bowl, whisk together mayonnaise, sugar, vinegar, salt, and celery seed until smooth. Add the shredded cabbage, diced pepper, and diced onion, and toss to coat thoroughly with the dressing. Let sit, covered and in the fridge, for at least one hour before serving.
From Russia, With Love // Blackberry Cheesecake Bars

0 August 13, 2013 Dessert

From Russia, With Love // Blackberry Cheesecake Bars

View from my window, St. Petersburg

Mosaics inside the Church of Our Savior on Spilled Blood, St. Peterburg, Russia

I am writing this to you from Russia. Kind of cool, right? I’m here for work (that first photo up above is the view from my office), and I’m certainly working a lot, but with only a few nights of planned activities, I’m also totally free to explore once I leave the office. (And watch Revenge on the treadmill, but that’s probably not blog-worthy material.) Last night I wandered around snapping pictures as much as I wanted – a luxury of walking alone – stopping by a shop for a slice of cabbage pie for dinner and another, smaller slice of apricot pie for dessert. The light was beautiful, the weather cool, dry, and breezy, and even though I initially wasn’t thrilled about coming back to Russia only two weeks after my last visit, I’ve been enjoying it. I studied Russian in high school and college, but after going almost three years without practice, I feel like I’ve just barely been getting around. That is, until today, when my colleagues here decided that my Russian comprehension was good enough that all meetings would switch to being held in Russian – which is one way to very quickly remember everything you’ve been taught.

Blackberry Cheesecake Bars {Katie at the Kitchen Door}

Blackberry Cheesecake Bars {Katie at the Kitchen Door}

Since you’re all readers of food blogs, I can’t fail to mention what I’ve been eating, can I? I really enjoy the food here in St. Petersburg. They use a lot of potatoes, cabbage, cheese, pickled vegetables, salmon, mushrooms, and dill. They make these little individual casserole dishes that are super comforting and just the right size to fill one person up, delicious sweet and savory hand pies, consistently good bread, and you’re never far from a hot cup of black tea. I picked up a few Russian cookbooks, and when I’m back in my kitchen, I hope to share recipes for a few of the things I’ve been enjoying the most. But until then, how about some nice American cheesecake bars to tide you over? These were one of the few things I had time to make during my crazy first two weeks in our new apartment. They also happened to use up some of our abundance of blackberries, the remainder of which are now fermenting away in a bucket of soon-to-be blackberry wine (via a recipe from the new cookbook True Brews) that Trevor made last weekend. I cannot wait to try it. Also the mead he’s brewing, the sake he’s brewing, and the pickles he’s been making from our genuinely overwhelming supply of cucumbers. He’s a good person to know.

Blackberry Cheesecake Bars {Katie at the Kitchen Door}

Blackberry Cheesecake Bars {Katie at the Kitchen Door}

Back to the cheesecake bars. These are a very simple dessert with a very straightforward sweet flavor – the perfect sort of thing to bring to a backyard cookout when you know everyone will be craving little bites of sweet finger food after gorging themselves on watermelon and lemonade and hamburgers with melty American cheese. Or you could eat them for breakfast out of the pan, like I did on probably too many mornings last week. They are quick to mix up, and you can probably even find all the ingredients besides the blackberries at a convenience store – I did, and in the middle of our move. Do me a favor and mix up a batch of these before berries became a luxury again.

Blackberry Cheesecake Bars {Katie at the Kitchen Door}

Blackberry Cheesecake Bars

Adapted from Tyler Florence. Makes one 9×9 inch tray.

  • 1/2 stick salted butter, melted, plus extra butter for greasing
  • 3 TBS sugar
  • 1/8 tsp ground cinammon
  • 9 full-size graham crackers (one half of a standard box)
  • 16 oz. cream cheese, at room temperature
  • 2 eggs
  • 2/3 c. brown sugar
  • 1 1/2 c. fresh blackberries, washed
  1. Preheat the oven to 325°F. Grease a 9×9 inch baking tray with the un-melted butter. In a food processor, pulse the sugar, cinnamon, and graham crackers until fully ground. Pour in the melted butter and pulse a few times to combine. Press the crumbs into the pan and make a layer of even thickness. Bake for 10 minutes, until golden brown, then remove from oven and let cool.
  2. In a stand mixer or in a large bowl, combine the room temperature cream cheese and eggs and beat until smooth. If mixing by hand, this may take some effort. Add the brown sugar and beat until smooth.  Pour the mixture over the cooled crust, then scatter the blackberries on top. Bake for 35 minutes or until the center is only slightly jiggly, then remove from the oven and let cool completely, then cover and refrigerate for at least 3 hours before slicing. Serve chilled.
  • « Previous Page
  • Page 1
  • …
  • Page 26
  • Page 27
  • Page 28
  • Page 29
  • Page 30
  • …
  • Page 57
  • Next Page »

Primary Sidebar

Subscribe!

Get creative recipes and menu ideas delivered straight to your inbox.

Most Popular

A House // Sweet Potato and Coconut Milk Soup with Brown Rice and Lentils

Monthly Fitness Goals: July // Homemade Spinach Wraps with Chopped Greek Salad

A New Job // Classic Seven-Layer Bars

Butternut Squash Carbonara with Fried Sage and Caramelized Onions

Happy Birthday, Trevor! // Peanut Butter Fudge

Cookbook Review and Giveaway: Home Made Winter

Drizly

Please note!

Full disclosure: if you purchase anything at Amazon using the above links or any other links to Amazon on this site, I will receive a small commission. Just so you know!

Copyright© 2018 · Cookd Pro Theme by Shay Bocks

View Mobile Site
This site uses cookies: Find out more.