• Skip to primary navigation
  • Skip to content
  • Skip to primary sidebar
  • Home
  • Recipes
  • Features
    • Cookbook Reviews
    • Ingredient of the Week
    • Sunday Dinner
    • Fitness Goals
  • Travel
  • About
    • Privacy Policy
    • Cookie Policy
  • Work With Me

Katie at the Kitchen Door

Globally-inspired, seasonal recipes

Blog Page

Cherries for Grown-Ups

July 7, 2010 Dessert

Cherries for Grown-Ups

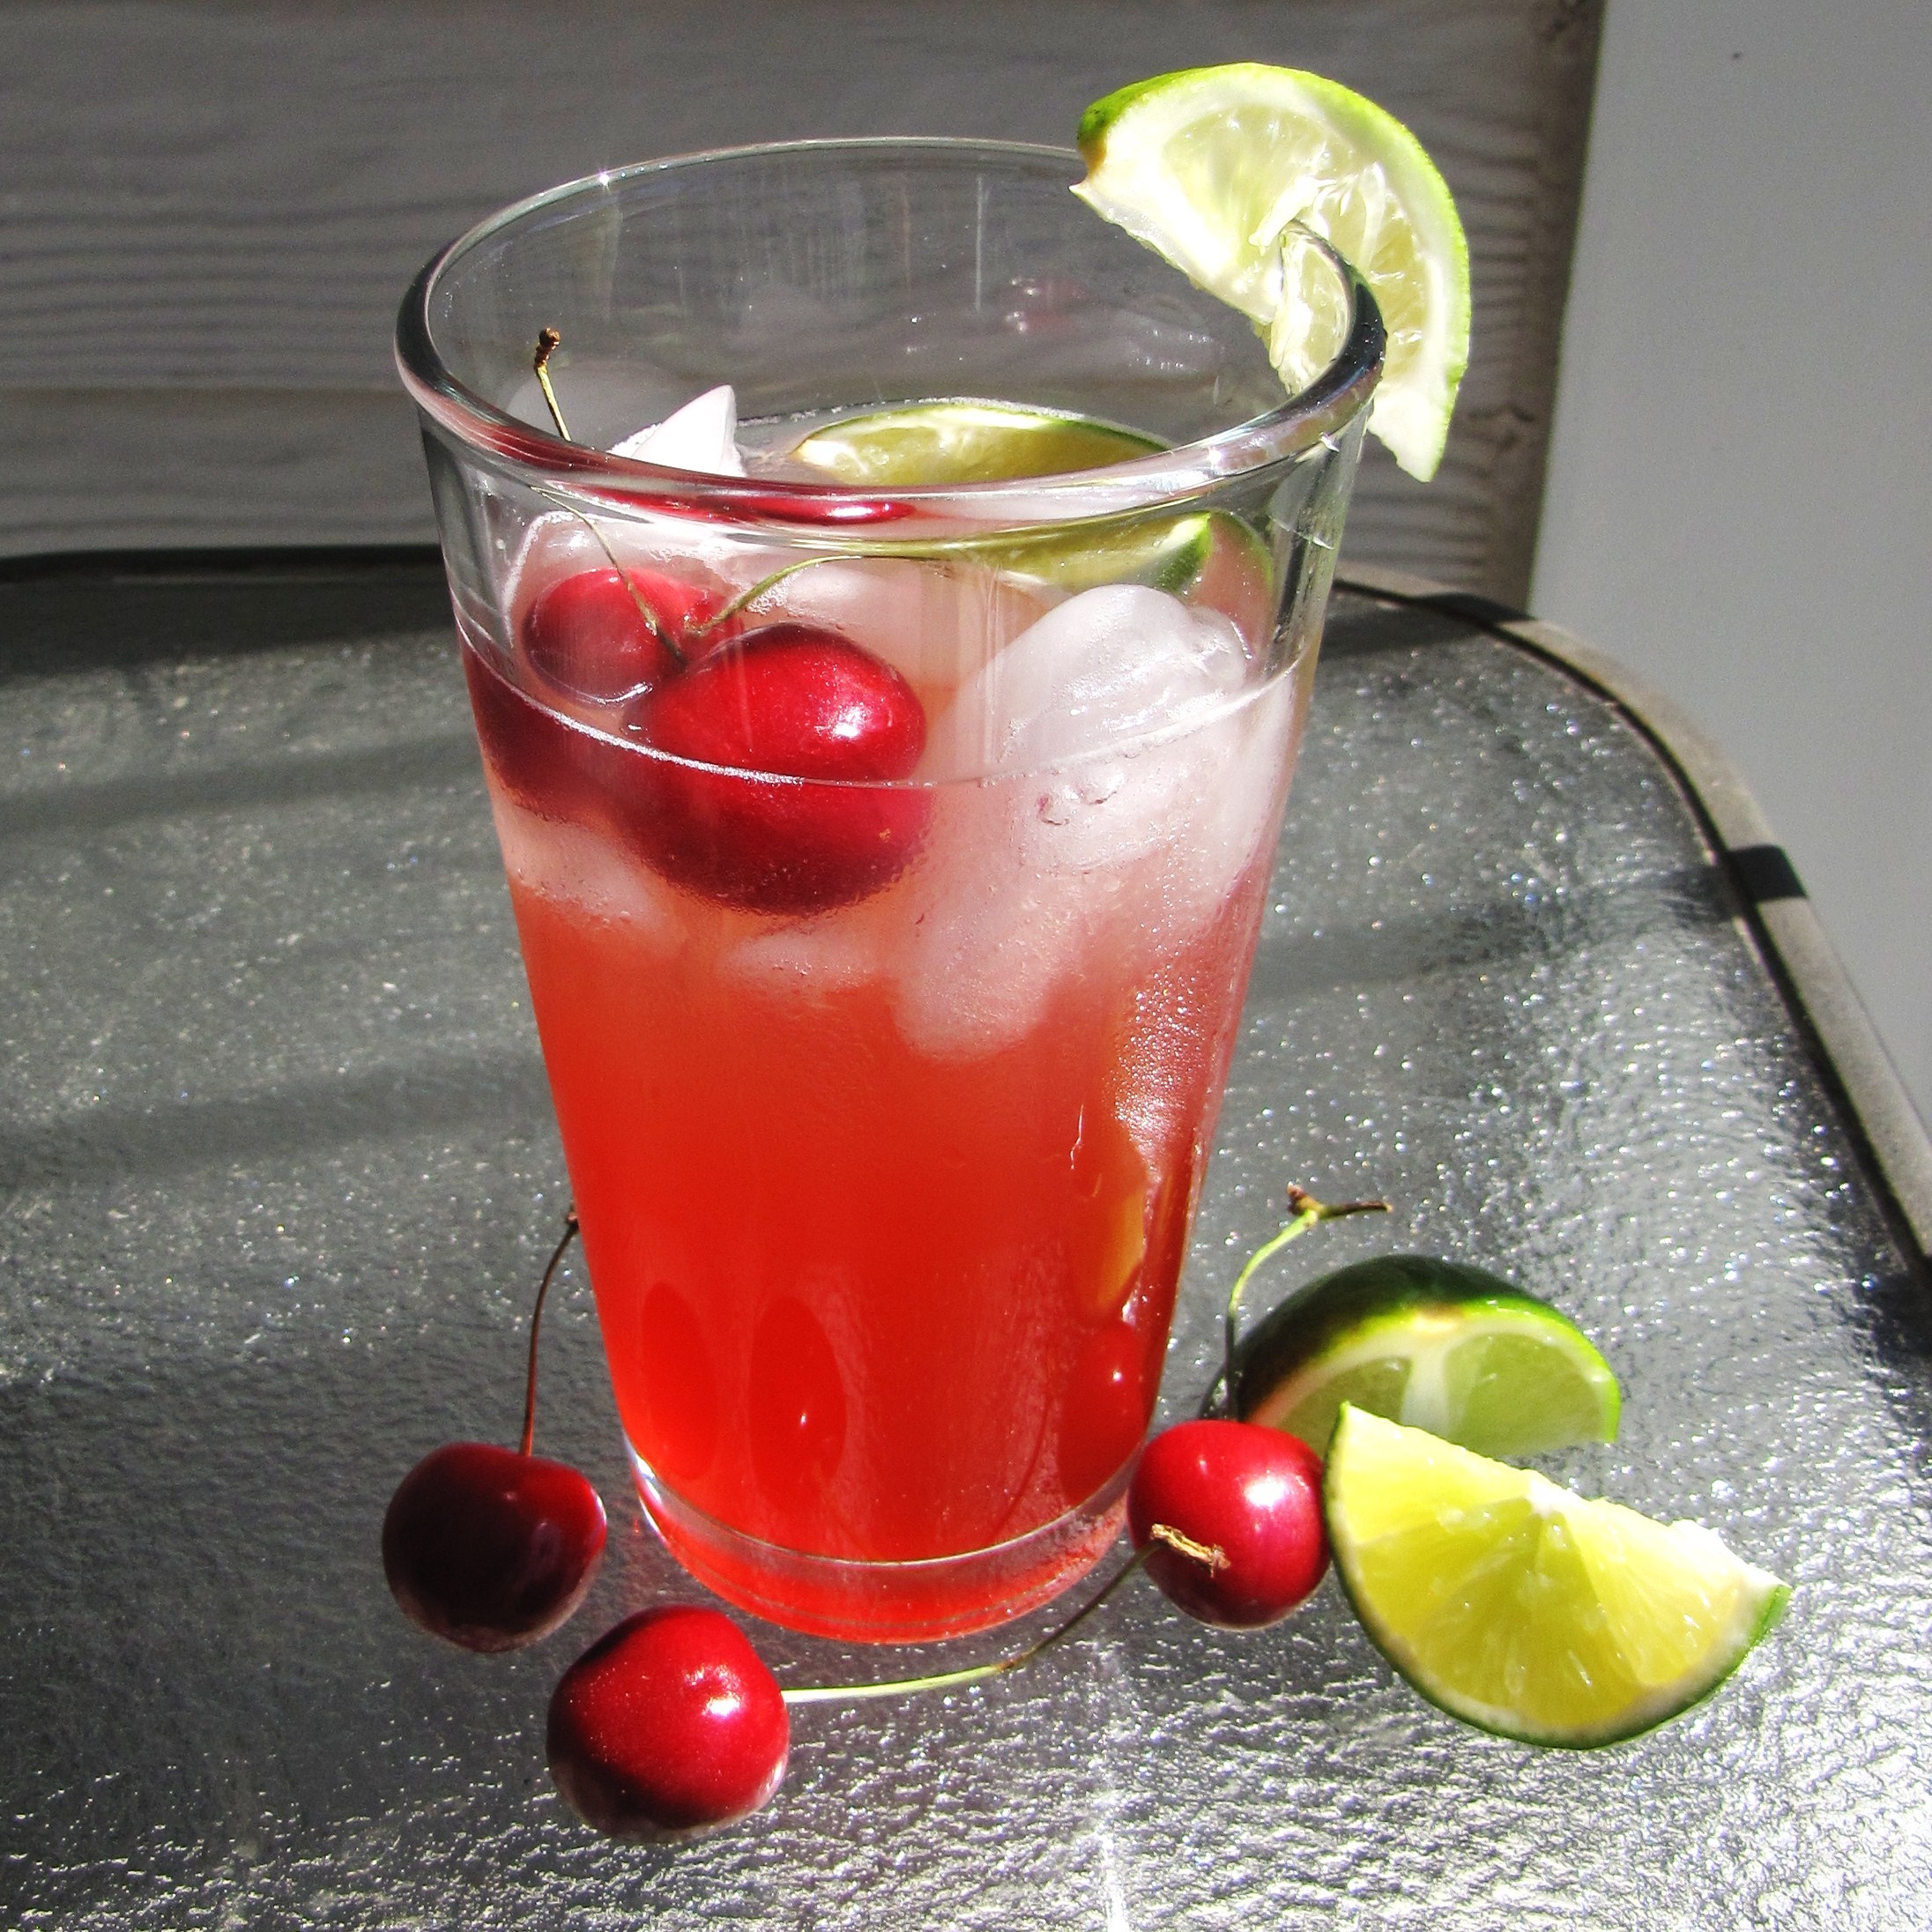
I read recently that cherries are one of the only foods that are hard to enhance beyond their natural form.  Specifically, the comment was that  “nothing captures the essence of a cherry like a cherry.”  (See Ideas in Food, one of the coolest, most inspirational sites I’ve found.)  And it’s so true, isn’t it?  Their texture and flavor are really best when eaten straight out of the fridge, and when I think of cherries, that’s what I think of – how refreshing a cold cherry is in the middle of the summer.  For weeks I’ve been thinking about this and eyeing the piles of beautiful red cherries, and last week, when I saw the $1.99/lb sign, I finally bought some.  (Although they initially rang up at $7 a pound.  Seven dollars?  Per pound?!  Thank you very much but I’d rather have two pounds of steak at that price.)  And as I ran through things I might do with them in my mind, they slowly disappeared, one after the other, into my mouth.  I mean, come on, they’re fun to eat – you get to daintily pluck them off the stems with your teeth and roll them around in your mouth before fully biting into them.  Then your mouth is full of sweet juice, and you get to undecorously spit out the pits.  And your lips and fingers get all stained with cherry juice.  And maybe it’s a little bit sexual.  I digress.

So the cherries remained in their perfect, natural form for several days.  But two pounds is a lot of cherries for one person to eat alone, and those beautiful, perfect cherries were beginning to get soft.  They needed to be used, and so I began to think.  Key to my musing was the fact that I wanted to share the goodness of cherries with Trevor, who, although he continues to eat them rebelliously, is allergic to most fruits with pits unless they’re cooked.  So I wanted to go against my better judgment and achieve the impossible – to cook the cherries while maintaining their integrity, and also enhancing their flavor.

As I browsed through cherry recipes, I found that I kept clicking recipes with titles like “Boozy Cherry Molasses,” “Red Wine and Cherry Soup,” and “Kirsch-Soaked Cherry Sauce.”  Hmmm.  There was a trend.  And just like that, I knew what I wanted. I closed all of those recipes, and I just started inventing.  Into a saucepan went stemmed and pitted cherries, then some rum, some red wine, some lemon juice, sugar, corn-starch.  I almost added black pepper but I didn’t want to push it.  I think it might work though.  I’m trying it soon.  Then the cherries, robbed of their integrity despite my best efforts, went into the blender, and back into the pan.  I tasted it – the flavor had been enhanced, decidedly.  It was one of those rare times when tinkering in the kitchen goes completely right.

Now I had a pot full of delicious, boozy, fragrant cherry puree, and it needed a stage.  What I really wanted was danish.  Cherry, cream cheese, and almond danish, but grown-up, elegant, subtle.  I was all ready to go, cherries simmering, cream cheese softening, philo sheets defrosting on the counter, when Trevor reminded me, again, that philo and puff pastry are not the same thing.  Having never used either, I get confused.  Frequently.  So the philo went back in the freezer, the cream cheese went back in the fridge, and the cherries continued to simmer.  Now what?

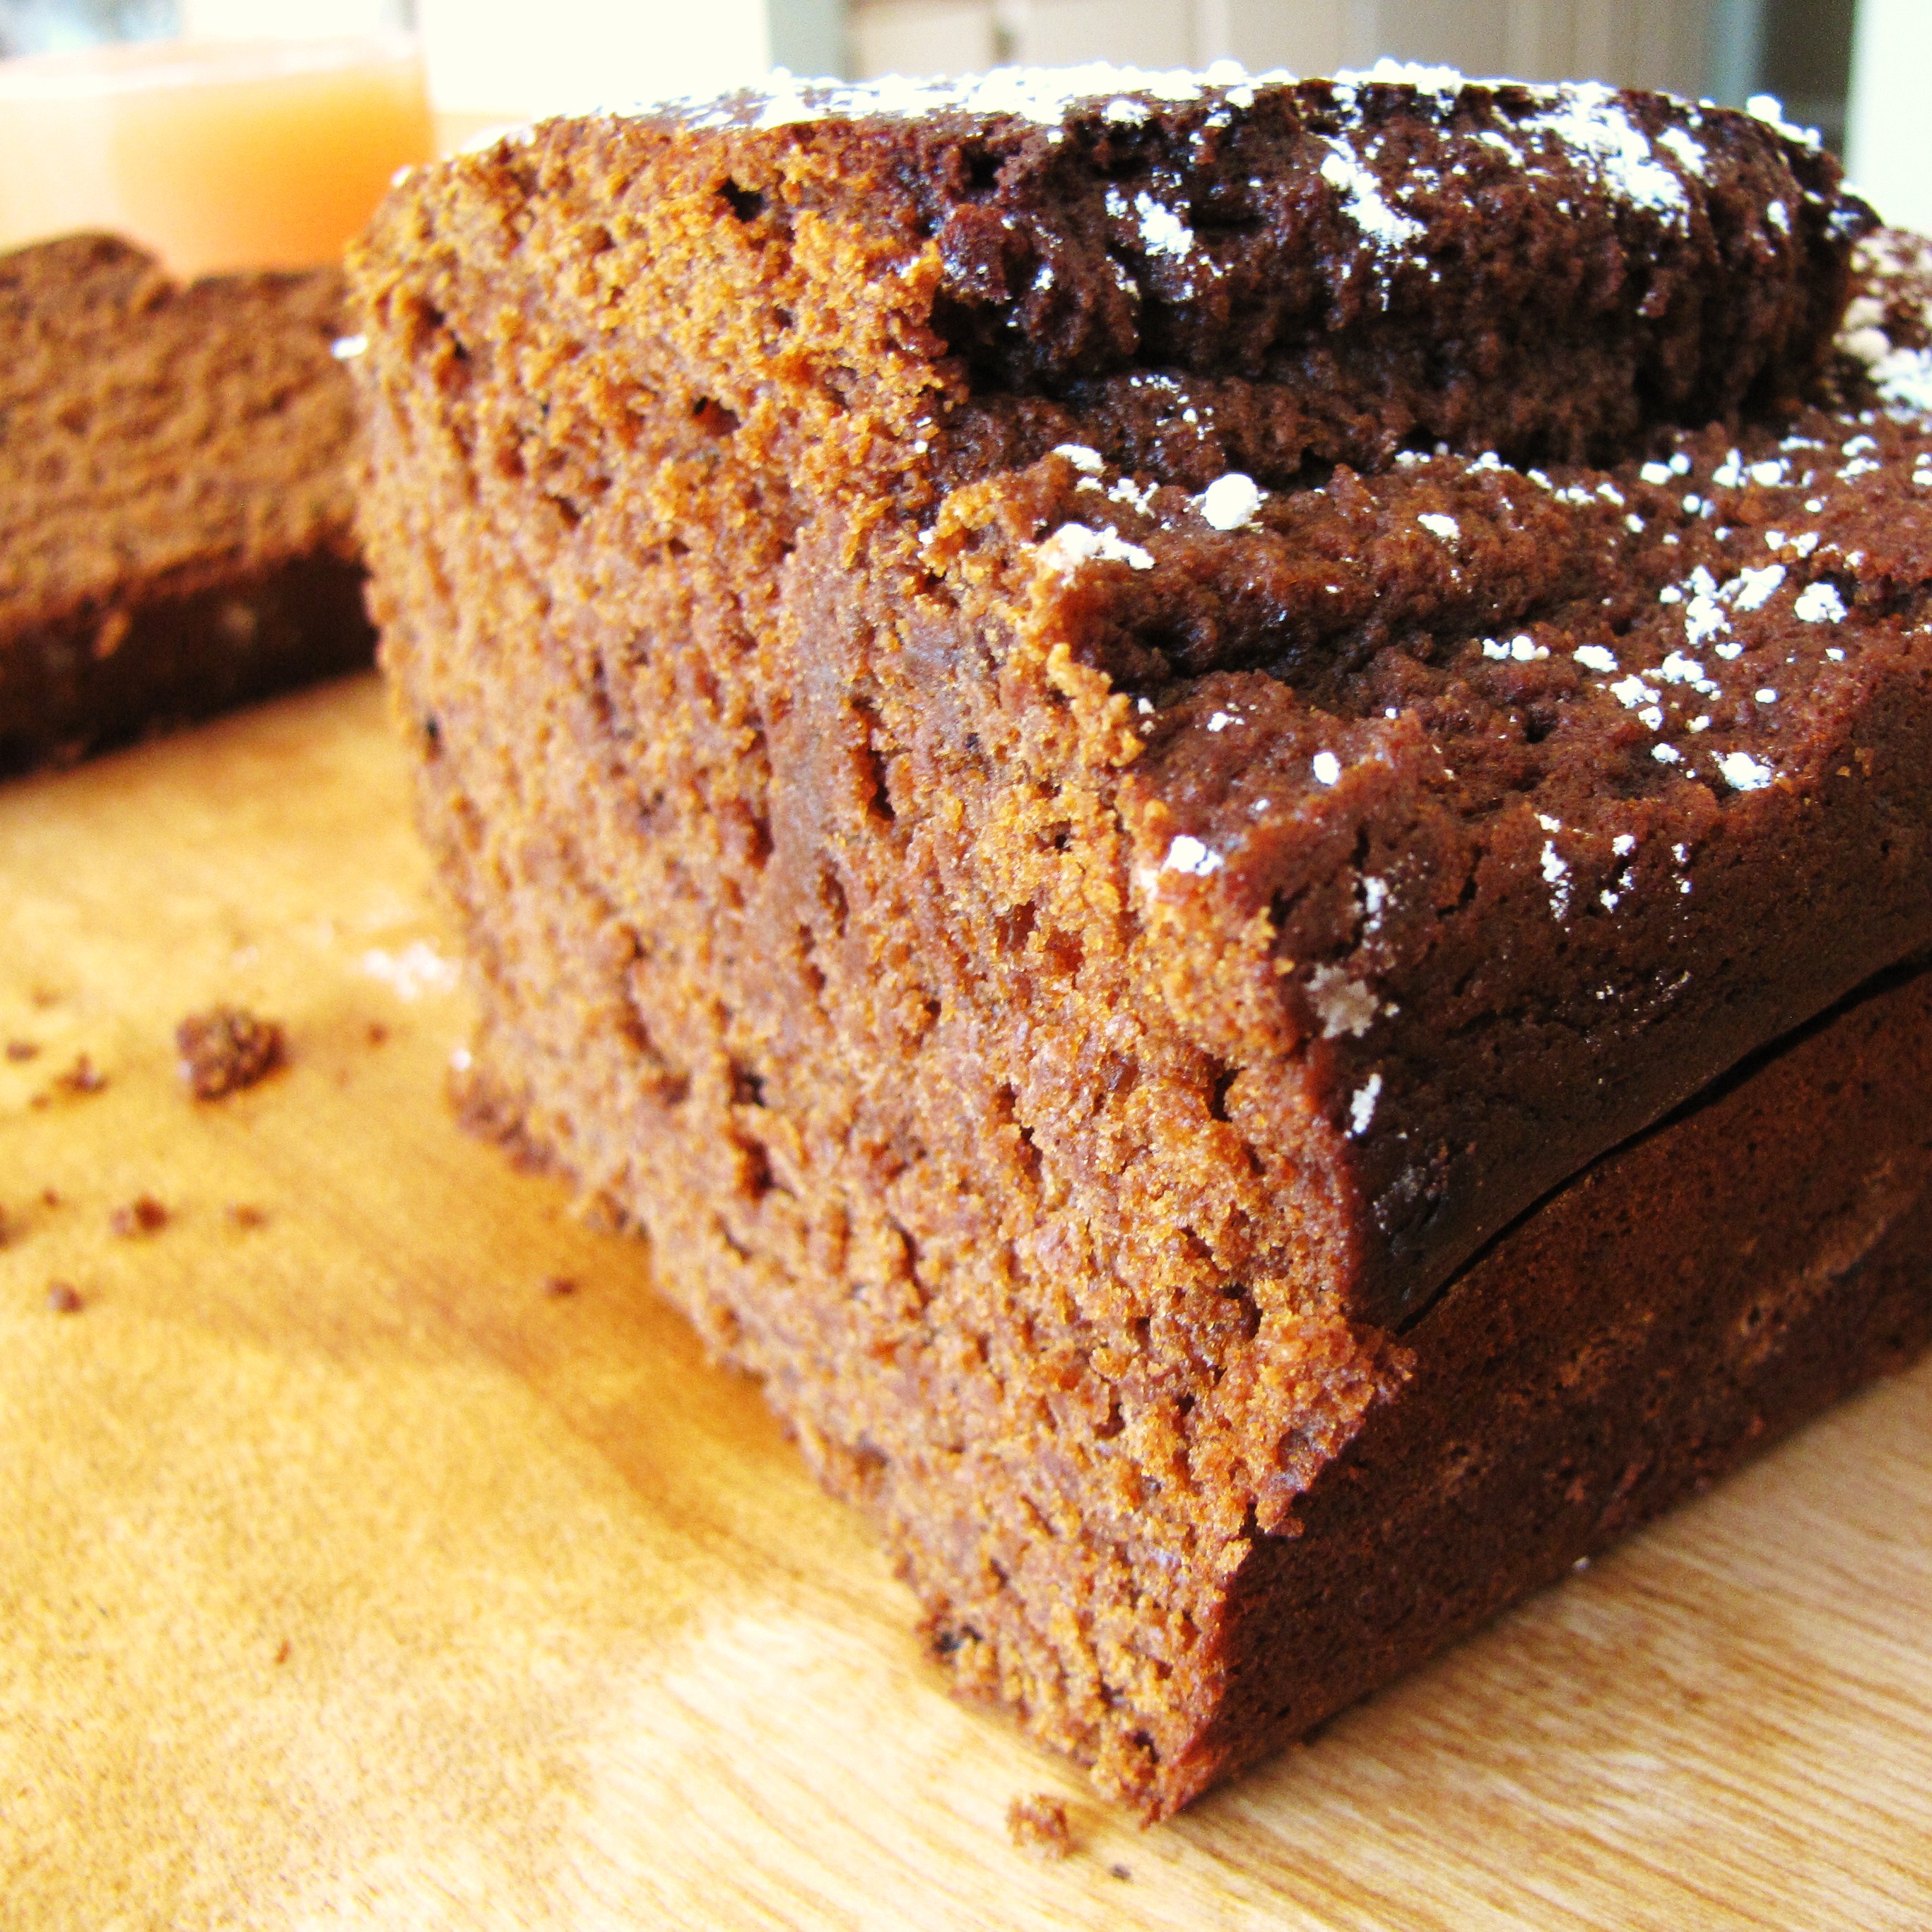
The answer came to me quickly – brownies.  Ever since I saw these brownies on 101 cookbooks, I’ve been continuously craving a cherry-chocolate brownie.  My original plan was to wait until I got around to getting some dried cherries and kirsch, and do the whole soaking thing, but I decided that this puree would have exactly the effect I wanted.  So brownies, tinged with almond flavor and swirled with cherry puree, were created.  And they were chewy, moist, chocolatey, nutty, fruity, boozy, goodness.  Things in the kitchen are going right.

P.S. I haven’t given up on the idea of the cherry danish.  As soon as I get the time to make some puff pastry it will be here.  Hopefully on Friday.  Stay tuned.


Grown-Up Cherry Puree

Makes 1 1/2 cups

  • 1 lb cherries, washed and pitted (yields around 3 cups)
  • 1/3 c. sugar
  • 6 TBS red wine
  • 4 TBS rum
  • 1 1/2 tsp lemon juice
  • 4 tsp cornstarch
  • 4 tsp water
  1. In a medium pot, combine cherries, sugar, wine, rum, and lemon juice.  Bring to a boil, then reduce to a simmer and cook for 5 minutes, stirring and pressing the cherries apart with the back of the spoon.
  2. Remove the cherries from the heat and carefully pour into blender.  Pulse 3 or 4 times, just enough to break the cherries up into small pieces.  (You want the puree to have some texture, and the fruit will break down more as it continues to cook).
  3. Return the cherries to the stove, and continue cooking over medium heat.  In a small bowl, whisk together cornstarch and water until cornstarch is fully dissolved.  Slowly pour the cornstarch into the hot cherries, stirring constantly.  Cook the cherries for another 5-10 minutes, stirring continuously, until they have started to thicken.  Depending on the desired consistency of the cherries, you may need to use more or less cornstarch.
  4. Remove from heat and allow to cool.  Keep cherry puree in airtight container in fridge.

Grown-up Cherry Brownies

  • 3/4 c. + 2 TBS cake flour
  • 1/2 tsp baking powder
  • 1/4 tsp salt
  • 4 oz. bittersweet chocolate (2/3 c. chocolate chips)
  • 1 stick butter
  • 1 1/2 c. sugar
  • 2 eggs
  • 1/2 tsp almond extract
  • 1/3 c. grown-up cherry puree
  1. Preheat oven to 350°F.  Butter and flour an 8×8 baking pan.
  2. In a small bowl, whisk together cake flour, salt, and baking powder, set aside.
  3. In a large bowl, combine butter and chocolate.  Microwave for 15 second intervals, stirring vigorously in between, until chocolate and butter form a thick, completely smooth, mixture.  Do not over-microwave or you will burn the chocolate.  This step can also be done in a double boiler.
  4. Whisk sugar into chocolate mixture.  Incorporate eggs one at a time.  Whisk in almond extract.
  5. Add flour mixture to chocolate mixture in 3 batches, gently stirring with a spatula in between additions.  When flour is fully incorporated and batter is smooth, pour into prepared pan and smooth top with spatula.  Spoon cherry puree on top of brownies and drag your spatula through the puree and brownies, swirling in large motions, as you would to marble a batter.  Smooth top as best you can.  Bake for 40-50 minutes.
Thank you, Canada.

July 4, 2010 Drink

Thank you, Canada.

The weather patterns in North Carolina have been pretty consistent so far this summer: sunny, 97°, humid, with an occasional switch to sunny, 100°, and humid.  I don’t mind that much – we have air conditioning, and there’s a rumor that the apartment complex I live in might actually open the pool now that it’s July.  However, the past few days have been a beautiful gift: it’s kinda cold.  I sat outside the other day and got goosebumps on my arms.  It’s 73°, clear, and dry, with a breeze that is so cool and strong and refreshing it must have come all the way from Canada.  So thank you, Canada.  I want to bathe in this weather.  I want to roll around outside and revel in the fact that not a single part of me is sweating.  That I don’t have to bury myself in a corner of the library next to an AC vent.  That I don’t have to unstick my pants from my legs when I get home.  I’m so, so pleased.

This weather doesn’t really make me want to eat anything in particular.  Well, except maybe a bowl of fresh cherries and seven ears of corn on the cob.  Mostly what it makes me want to do is skip.  Explore.  Swim.  Go on adventures.  Dance.  And take on huge kitchen projects like making my own mozzarella cheese.  Which is what I was going to write about… but then it didn’t really work.  I mean, the final product is definitely something more than milk, but I’m not sure as I would go so far as to call it cheese.  We’re gonna try again though, so once we find the secret, get ready for some delicious homemade cheese recipes.  Until then, I have something far simpler to share.

This is my absolute favorite summer drink.  I invented it myself and it’s infinitely refreshing.  I’ve been wanting to share it for a while, but was waiting for the perfect weather, and this is totally the perfect weather.  It’s limeade and grenadine and flavored seltzer.  Vanilla seltzer is the best, peach seltzer a close second.  Simple, bright, refreshing, beautiful.  Also, Happy Fourth of July!  I hope you’re doing something wonderful.  We’re going on a bruschetta picnic at my new favorite place in North Carolina (more on that soon…) and then to the drive-in to watch Toy Story 3 and Twilight.  Too good.  Anyway, enjoy this drink, enjoy today!

Sparkling Cherry Limeade

  • 1 1/2 c. limeade, homemade or store bought
  • 2-3 TBS grenadine
  • 1/3 c. vanilla seltzer
  • limes and cherries for garnish

Pour into a glass in the order listed for best appearance.  Drink. :-)

Longing

July 2, 2010 Recipe

Longing

Two Sundays ago we went to the NC Museum of Art, and it was very nice.  But I’ve found that even in the huge, incredible national galleries of Europe, my tolerance for looking at art is about 1 hour and 45 minutes.  No, exactly 1 hour and 45 minutes.  And then I just can’t look anymore.  Trevor, on the other hand, is an artiste, so after 1 hour and 45 minutes of deep artistic pondering I found myself sitting outside in the very beautiful, but rather warm Rodin garden, being the impatient child that you don’t want to take to art museums.  I’m a big girl though, so I decided to pass the time by calling my father to wish him a happy Father’s Day.

And then I realized, oh my goodness, they’re in Maine.  Already.  Without me.  In my Maine.  I’ll have to call him there.  Why am I not in Maine?  I bet it’s nice and cool and perfect in Maine.  I bet there’s a car with working air conditioning in Maine.  Sigh.  I’ll just call.

And so I called.  And with each ring, a different, utopian scene from Maine flashed before my eyes.  Ring.  Laying out on the swim dock with a pitcher of lemonade and my John Steinbeck anthology.  Ring.  Walking up the gravel path to camp with my little brother every morning, inhaling the scent of pine and watching the yellow sunbeams slant across the road.  Ring.  Sitting at the picnic table drinking red wine and eating cheese and playing badminton with my brothers.  Ring.  Sea spray blowing into my face as we race across the bay to Pond Island.  Ring.  Picking blueberries so ripe that they roll off the plants into your hand.  Hello, you’ve reached the Morris family, we’re unavailable at the moment but please leave a message …

Wait a minute, I know where they are.  Ha.  Hahahahaha.  They are putting the docks in.  I am not there.  Ahahahaha.  They are in their wet suits, lugging enormous metal frames and wood panels down the hill into the lake, shivering and searching for dropped bolts in the mucky water as they simultaneously support tons and tons of weight above their shoulders.  And when I arrive, I will simply walk out the back door, skip down the hill, and step gracefully onto the beautifully constructed, perfectly leveled dock.  Life is not so bad.

But to be honest, I would have gladly suffered through the yearly dock ordeal if it meant that I could spend the next four weeks in Maine.  Because Maine is tied with the city of Prague for the superlative of best place in the world.  And I can’t wait to join my family there for the last three weeks of summer.  I mean, spending the summer in North Carolina is kinda cool – there’s something old-fashioned and feminine about summer in the south.  Things really do seem to move slower, and the air is heavy with heat and the fragrance of honeysuckle and magnolia.  But there’s nothing quite like summer in Maine, at least for me.  And so I wanted to share my love for Maine with you, through food of course.

Now, Maine has two signature foods – blueberries, and lobster.  I love blueberries, but I kind of want to wait until I’m actually in Maine and can show you the tiny wild blueberries that are so sweet and perfect to write about blueberry food.  And I don’t eat seafood, so sorry, no lobster.  (Can you even get lobster in North Carolina?) Instead, I made something that really channels the experience of Maine for me. It’s not something I eat frequently in Maine, or something that is specific to Maine.  It’s just something that feels like Maine – gingerbread.  Warm gingerbread with whipped cream.

Gingerbread is the sort of thing you should eat in the morning with your tea, while you sit at the old wooden table and watch the dusty morning sunlight stream through the skylights.  It’s the sort of thing you should eat by the wood stove, while it’s on in the morning before the house has heated up.  It’s the sort of thing your mother makes while you’re still asleep, so that you wake up to a house full of spice.  It’s comforting and hearty, sweet, but not too sweet.  It’s simple and rustic, yet wonderful.  It’s a lot like Maine.  So the next time you’re craving comfort and tranquility, the calm of an early morning in a house with no internet and no cell phone reception, the relaxation of a morning by yourself with nothing to do… try this.

Gingerbread Cake

Adapted from AllRecipes

  • 1 stick butter, softened
  • 1/2 c. brown sugar
  • 1 egg
  • 3/4 c. molasses
  • 1/2 c. applesauce
  • 2 1/2 c. flour
  • 1 1/2 tsp baking soda
  • 2 1/2 tsp cinnamon
  • 2 1/2 tsp ground ginger
  • 1 tsp ground cloves
  • 1/2 tsp salt
  • 1 c. hot water
  1. Preheat oven to 350°F.  Grease and flour a large loaf pan.
  2. In a large bowl, cream together brown sugar and butter.  Beat in egg, molasses, and applesauce.  It helps to swirl a little vegetable oil in your measuring cup before pouring the molasses in – this allows the molasses to dribble out freely.
  3. In a medium bowl, whisk together dry ingredients – flour, baking soda, cinnamon, ginger, ground cloves, and salt.
  4. Add dry ingredients to wet ingredients 1 cup at a time, stirring gently between additions, until all of the dry mixture has been incorporated into the wet mixture.  At this point, add the cup of hot water and stir to incorporate.
  5. Bake for 50-60 minutes.  A toothpick inserted into the center of the loaf should come out with a few moist crumbs attached.
Puddin’

June 29, 2010 Dessert

Puddin’

Tapioca reminds me of my dad.  I’m not really sure why, as it’s been years since I’ve had it other than the sort-of-questionable snack pack version.  But I have this extremely hazy but pleasant memory of sitting in my kitchen when I was really little, about four or five, before we’d remodeled our house, watching my dad make tapioca, and then sitting on his lap and eating it.  I think I remember eating it a lot, asking for it all the time, it being my special treat, but then again, I’m not really sure.  And I don’t know whether he made it from scratch or from a box.  In any case, it’s a warm and fuzzy sorta thing.

I’ve been meaning to make homemade tapioca for a while, but I can never find the pearls anywhere.  Then, last week, Trev and I went on an adventure to the Asian market, and shelved somewhere amongst the dried mushrooms and packages of vermicelli and bottles of sesame oil I found stacks of tapioca pearls.  I bought a pack for 99 cents, and now I have tapioca, and the key to the warm, comforting custard I remember so fondly.

Since yesterday was National Tapioca Day, I thought I’d finally make some pudding in celebration.  However, I got lazy, so today we’re celebrating day after National Tapioca Day.  Close enough.  In searching for a recipe I found a huge variety of ways to cook it, most of them with intimidating instructions like “cook, stirring constantly, for two hours.”  Two hours is not an amount of time I want to spend stirring tapioca.  Or anything else for that matter.  So I cobbled together my own recipe, and it ended up taking less than an hour to make.  I was surprised at how quickly the milk and tapioca mixture became custardy – it only took about 15 minutes, whereas I’d read reviews on recipes complaining that the tapioca had never thickened, even after hours of cooking.  I’m guessing that how quickly the pudding comes together depends largely on the type of tapioca used – how fresh it is, how long it takes to dissolve, etc.  Mine began to dissolve even in the pre-soak, which is apparently a good thing.

I’m feeling a little under the weather, and the end result made me feel a little better, placing this recipe solidly in the “keeper” category.  A few notes: most people prefer tapioca cold, but I like to have mine warm, straight out of the pan.  It’s good either way.  Also, this recipe contains raw egg whites, which are only heated slightly during the cooking process.  Personally, I’ve eaten enough cookie dough in my life to be OK with raw egg (and I hate recipes with unequal numbers of whites and yolks), but if this makes you uncomfortable, you could replace the egg whites with half a cup of heavy cream, whipped, and then folded into the pudding in place of the egg. Enjoy!

Cinnamon-Vanilla Tapioca Pudding

  • 1/2 c. large pearl tapioca
  • 3 c. whole milk
  • 1/4 tsp. salt
  • 3 whole cinnamon sticks
  • 2 egg yolks
  • 2 egg whites (or 1/2 c. whipping cream, see note above)
  • 1/2 c. + 3 TBS sugar
  • 2 tsp. vanilla extract
  1. Soak tapioca pearls in 2 cups cold water for at least 2 hours.  Drain, but do not rinse.
  2. Bring milk, salt, and cinnamon sticks to a gentle boil in a medium, heavy bottomed sauce pan.  Reduce heat and add tapioca pearls.  Cook, stirring constantly, over medium heat until tapioca pearls are translucent and milk has thickened into a custard.  This may take anywhere from half an hour to an hour, depending on the type of tapioca you are using.
  3. Separate eggs.  In a medium bowl, whisk together yolks and 1/2 cup of sugar.
  4. In a different, medium bowl, whisk whites until beginning to stiffen.  Add remaining 3 tablespoons of sugar 1 tablespoon at a time, whisking in between additions.  Beat whites until fairly stiff.
  5. Temper egg yolks: when tapioca has thickened, slowly pour a thin stream of custard into egg yolks, whisking yolks vigorously at the same time.  Continuing pouring custard and whisking until you have poured about a cup of custard into yolks.  Then, still whisking, pour the yolks and custard back into the main custard pot.  Continue to cook pudding for about ten minutes, stirring frequently.
  6. When pudding is done cooking, remove from heat and stir in vanilla.  Then, gently fold in egg whites until fully incorporated.  Pour into serving dish and refrigerate until serving time.  Garnish with cinnamon and turbinado sugar.
Rotisserie Chicken Chronicles #1

June 26, 2010 Poultry

Rotisserie Chicken Chronicles #1

I just discovered rotisserie chicken, and it has solved all of the world’s (my) problems.  I’ve been flirting with these golden birds for a while.  When I was in Paris last year I was completely set on getting a chicken and pulling it apart with my fingers while sitting along the Seine and drinking cheap wine out of the bottle – I literally couldn’t imagine anything better.  But there are so many things to do in Paris and with only 5 days I never got my chicken on the Seine.  Now I have to go back.  Bummer.  Then over fall break my friends and I visited Vienna, and in the Naschmarkt they actually had a rotisserie chicken truck.  It was tantalizing.  And I had just eaten a plateful of curry.  Sigh.

But recently I bit the bullet, and I grabbed the last chicken in my ordinary old Kroger.  No Seine.  No blue chicken truck.  I’ll admit, I wasn’t thrilled.  But then I opened the bag, and realized that this was the greatest invention ever.  All I had to do to have my protein was pull the meat off with my fingers and mix it with whatever I wanted.  I didn’t have to cut through bones.  I didn’t have to worry about overcooking the breasts.  I could use the carcass to make like an entire gallon of homemade low cost low sodium chicken stock.  And the 8 bazillion meals I was going to get out of this chicken were only going to cost me $5.  VALUE ATTACK.  Sorry.

So basically, rotisserie chicken is the best.  And since it’s definitely going to become part of my regular grocery routine, I decided to start featuring some of the delicious ways you can eat a rotisserie chicken.  Probably a lot of you have known about this for years, but I’m a newbie, and I’m thrilled, and I’m going to share.  And the first thing I’m going to share is this Asian Pesto Chicken Salad from Ming Tsai.

For those of you who aren’t familiar with Ming Tsai, let me introduce you.  Ming Tsai is the owner/chef of Blue Ginger restaurant in Boston, as well as a Food Network personality.  More importantly, however, he attended my high school, Phillips Andover, then went on to study mechanical engineering at Yale, took a summer to study at Le Cordon Bleu, and now is an incredibly talented chef.  I could do that people – I’ve already got the high school and the engineering down.  Someone just needs to send me back to Paris.

Anyway, in addition to being a source of personal inspiration for yours truly, Ming Tsai has created some truly exceptional recipes.  Like, truly.  Everything I’ve ever made of his is bursting with flavor.  And this recipe was no exception.  The pesto was spicy, sweet, tangy, and herby all at once.  Mixed with the other salad ingredients, it was sublime.  Literally, I can’t explain to you how good this is.  And how easy.  And how GOOD.

So grab a chicken and some basil and make this.  Now.  Please?

* Note:  I’m posting this recipe as I made it, which was based on what I had on hand and my personal heat tolerance.  It’s fairly close to the original, and it was very good, as I’ve said, but I’m sure the original recipe is incredible for those people who can tolerate a lot of jalapeno and have a healthier mint plant than I do.
Asian Pesto Chicken Salad
Adapted from Ming Tsai
Asian Pesto:
  • 1 jalapeno chili, stemmed and seeded
  • 5 cloves garlic
  • 1 TBS sugar
  • 1 inch piece peeled fresh ginger
  • 1 c. roasted, salted macadamia nuts
  • zest and juice of 1 lemon
  • 1 c. fresh basil leaves, packed
  • 1 c. fresh cilantro leaves, packed
  • 1/3 c. fresh mint leaves, packed
  • 1/2 – 1 c. canola oil
  • salt and pepper, to taste
In a food processor, pulse jalapeno, garlic,sugar,  ginger, macadamia nuts, lemon zest, lemon juice, and some (approx 1/3 c.) canola oil until a smooth paste is formed.  In batches, add basil, cilantro, and mint, and pulse to puree.  Add canola oil, pulsing, until desired consistency is reached.  Season with salt and pepper.
Asian Pesto Chicken Salad:
  • 1 package (8 0z.) orzo, cooked according to package directions
  • meat from1 rotisserie chicken
  • 1 c. asian pesto
  • 1 pint cherry tomatoes, halved
  • 2 c. fresh spinach leaves, packed
  • 1-3 TBS lemon juice
  • kosher salt and pepper

Mix orzo, chicken, pesto, cherry tomatoes, and spinach in large bowl.  Add lemon juice, salt and pepper to taste.  Serve slightly warm or cold.


Quit Playing Games with My Heart

June 24, 2010 Dessert

Quit Playing Games with My Heart

[Disclaimer: I wrote this a month ago.  I made the cupcakes yesterday.  I am a bad blogger; forgive me.  But the story is still relevant, as the cardinal is still not cooperating, and the cupcakes are still delicious, so I encourage you not to give up on me.  Yet.]

He’s such a tease.   He’s there, tantalizingly close, and then he’s gone, just like that.  I’m this close to giving up on him completely, but some small part of me can’t let go.  If only he knew how much it would mean to me if he could just sit there, quietly, for 45 seconds.  Stupid bird.

OK, maybe I shouldn’t care so much, but I’ve been trying to get a decent picture of this bird for a full week.  Two cardinals live in the bushes behind my apartment, and they are absolutely stunning.  I’ve always thought cardinals are beautiful – they way their red coats match the berries on an iced-over holly bush can really brighten up a winter day – but I’d never seen them in the summer until I moved here.  That red against the vibrant green foliage of North Carolina in May is just incredible.  Sometimes when one of the birds flies past my window I literally catch my breath.  Just ask Trevor – several Skype conversations have been interrupted recently by a rapid head turn and exclamation of “Bird!” a la Doug from Up.  (Incredible movie.  I could watch it 100 times and laugh/cry every time.)   Once I even hung up on him to run barefoot out the door and chase the birds around the apartment complex.  And yet, where is the stunning photographic evidence of this?  Sadly, nowhere to be found. [Fortunately, I have been able to counter this lack of cardinal photography with what is hopefully stunning cupcake photography.  Cupcakes are very cooperative subjects.]

Now, I’ve been in this situation before.  Last summer, my sole mission in life was to get close enough to one of the loons of Walker Pond to take a good picture.  My brother and I took our clunky old motor boat, The Tub, across the lake to work every morning, and on the days that there was a loon in our vicinity I’d hiss “Ryan, I’ve got to get that bird!”  And like the wonderful brother he is, he would dull the engine, and steer us slowly toward the bird, with me in the front holding my breath and desperately snapping long distance pictures.  We’d almost be close enough and then, without a sound, the loon would be underwater, not even leaving a ripple on the surface.  Admittedly, a gasoline chugging motorboat is not really the ideal stealth vehicle, but taking my camera in any sort of unstable boat is not worth the hyperventilation that occurs as I envision my beautiful Canon sinking to the bottom of the lake.  So when my brother left for school a few days before I did and I was on my own on the boat front (i.e. I canoed; the Tub and I are not compatible individuals, much to my parents’ frustration), my pocket camera was all that accompanied me.  As Trevor and I canoed peacefully across the lake one orange-tinged morning, a loon popped peacefully up about 50 meters in front of us.  And then, one by one, six more popped up next to him.  We paddled silently towards them, getting so close that we could see their shiny red eyes watching us.  It was perfect: seven graceful loons drifting through small puffs of leftover fog, the whole lake silent but for the hesitant chirps of the birds.  And the only photographic evidence I have is a grainy, dull photo with seven small blobs.

And now this cardinal is playing the same game with me.  Oh we’ve had some close calls, the cardinal and I.  There was the time he landed on my drainpipe while I was waiting there, camera poised, only to realize that my shutter speed was way too high, and as I frantically spun the camera wheel, he flitted away like it was nothing.  And then, when I had the camera poised and perfectly adjusted on him resting on a distant branch, he dove out of the field of vision, leaving me with a dramatic red blur streaked across my photo.  Just the other afternoon, he landed on a cannister right outside my window, but I knew if I opened the back door he would leave in a hurry, so there will forever be the stains of my dirty window in between me and that beautiful red bird.

His wife has been more cooperative, but, no offense to her, she’s just not as attractive.  Sure, her beak is nice, and she is certainly distinctive, but she just can’t hold a candle to her male counterpart.  I have a few shots that are OK, but I’m just not satisfied.  With each frustration, the amount of respect I have for the patience that wildlife photographers have in their pursuit of nature’s rarest creatures grows.  I can barely manage standing on my own back porch for half an hour, and so I can’t imagine what standing in sub-zero temperatures for 48 hours waiting for the instantaneous migration of a rare goose in China would be like.  (Yes, someone did this, I saw the exhibit in Prague.)

So, wow, if you came here expecting food and read all of that bird-chasing-nonsense, I definitely owe you a recipe of some sorts.  Unfortunately, I do not know of any cardinal recipes.  And I already shared the only recipe I know that has the world cardinal in it here.  And as Megan just pointed out, eating a loon is probably a felony. So…

Cupcakes!  Everybody loves cupcakes, even if they have absolutely no relevance to the 800 words they just read.  And hopefully you’ve made it to this point because of the tantalizing cupcake photographs that have accompanied my bird saga.  These are cupcakes that I’ve been mulling over in my head for a while – I love the idea of spicy, chai flavored baked goods, and I just couldn’t shake the image of a chai cupcake topped with a tangy raspberry frosting.  So I made some, and they were good.  And they were very pretty.  So I’m happy.

Chai Cupcakes with Raspberry Cream Cheese Frosting

(Adapted from Sky High Cakes via Une-Deux Senses)

For the cupcakes (makes 12):

  • 2/3 c. whole milk
  • 5 bags chai tea
  • 2 whole eggs
  • 1 egg yolk
  • 1 tsp vanilla
  • 1 1/3 c. cake flour
  • 1 c. sugar
  • 2 1/4 tsp. baking powder
  • 1/2 tsp cinnamon
  • 1/4 tsp salt
  • 1 stick unsalted butter, softened
  1. Preheat oven to 350°F.  Line cupcake tin with liners.
  2. Bring milk to a low simmer over medium heat, stirring occasionally.  Add tea bags and remove from heat.  Allow to steep for 10 minutes.  Squeeze milk from teabags and discard tea.
  3. In a small bowl mix together 1/4 cup of the chai milk with the eggs, egg yolk, and vanilla.
  4. In a large bowl, sift together flour, sugar, baking powder, cinnamon, and salt.  Add butter and remaining chai milk and beat until fluffly.
  5. Add egg mixture in two batches and mix just to incorporate.
  6. Divide batter evenly among cupcake cups.  Bake for 18-22 minutes, until a toothpick inserted in the center of a cupcake comes out clean.

For the frosting (makes enough for a lot more than 12 – halve, or plan on having extra):

  • 1 8oz package of cream cheese, at room temperature
  • 3 TBS butter, at room temperature
  • 1/4 c. – 1/3 c. raspberry jam
  • 2-3 TBS grenadine or raspberry flavored syrup/liquor
  • 2 1/2 c. powdered sugar

Beat cream cheese and butter together until fluffy.  Mix in jam and syrup until desired color and flavor is reached.  Mix in powdered sugar a half cup at a time, stopping when desired consistency is reached.  Chill for an hour before using.

Shortcake Remix

June 18, 2010 Dessert

Shortcake Remix

I recently joined a baking challenge group called Have the Cake, and yep, every month they choose a cake that the members have to make and blog about.  I was really attracted to the group because it has a small-ish number of members which makes it feel more welcoming than groups like the Daring Bakers – an incredible group with a daunting number of members.  They also seem to choose very open-ended challenges, such as flan and buttermilk cake – it leaves so much room to play!

This month was my first participating in Have the Cake, and I was psyched to see that the challenge was strawberry shortcake, a birthday favorite of mine for many years.  Now, strawberry shortcake pretty much embodies perfection as it is, so I was hesitant to mess around with it.  The point of strawberry shortcake is that it’s a refreshing, simple balance of three flavors and textures that retain their integrity even as they blend.  It’s not a dessert that you really want to fancify or complicate.  That being said, however, it’s a challenge group – I wanted to get creative and find a new way to present an old favorite.

So I spent some time browsing the giant cookbook that is the internet for a recipe that would retain the simplicity of strawberry shortcake while also enhancing it.  I found several incredibly appealing recipes – the second place recipe was hazelnut shortcakes with blackberries and cassis cream.  But that seemed like too much of a departure from the original, so I passed on it, although don’t be surprised if it shows up on here soon – I’m a huge sucker for cassis.

I ended up sticking with a classic shortcake and a classic whipped cream, and only played with the filling.  Before I tell you what it was though, let me just tell you this: it was really, really good.  Like, I actually whimpered a little bit when I ate it.  And I’m not trying to brag.  I just want you to be able to whimper with gastronomic pleasure too.

The filling was rhubarb.  Rhubarb compote and lemon curd.  A bite including fluffy shortcake, tart rhubarb and lemon, and smooth, velvety cream was pretty much bliss.  The biscuit-curd-cream combo would make it an exceptionally good teatime treat, although I also plan on eating it for breakfast tomorrow as well as for dessert for as many nights as it lasts.  Basically, I would serve it to anyone, any day, at any time.  And I would expect them to love me a measurable amount more than they did 5 minutes before I served it to them.

So a great first Have the Cake experience!  I’m already stoked about next month.  And before I go, some thanks are due: thank you to Joanne over at Eats Well with Others, which is one of my absolute favorite blogs to read, for hosting this month’s challenge, and thanks as well to Rainy Day Gal for the inspiration for this dessert!

Rhubarb and Lemon Curd Shortcakes

Serves 6

For the shortcakes: (Recipe adapted slightly from Alton Brown)

  • 2 c. flour
  • 4 tsp baking powder
  • 3/4 tsp salt
  • 1/3 c. sugar
  • 2 TBS butter, chilled
  • 2 TBS shortening
  • 1 c. half and half or buttermilk
  • Melted butter to brush shortcakes

Preheat oven to 400°F.  In a large bowl, whisk together flour, baking powder, salt, and sugar.  Cut in butter and shortening in small pieces.  Mix with a pastry cutter or fork, pressing butter into flour to make a crumbly mixture.  Mix in half and half or buttermilk until fully incorporated.  Drop dough onto greased or parchment-paper lined baking sheet with a large spoon.  Brush with melted butter and sprinkle with turbinado sugar.  Bake for 15-18 minutes, until golden brown on top.

For the lemon curd:

  • 5 egg yolks
  • 1 c. sugar
  • juice and zest of 3-4 medium lemons
  • 2-4 TBS butter (optional)

Fill a medium sized pan halfway with water and bring to a low boil.  In a smaller, metal pot or bowl, whisk together egg yolks, sugar, and juice and zest of lemons.  Place egg-lemon mixture over boiling water and cook, whisking constantly, for 8-10 minutes, or until a thick curd has formed.  Remove from heat and whisk in butter a tablespoon at a time.  To store, press plastic wrap against the surface and refrigerate.

[Note:  All curd recipes call for the addition of butter at the end.  However, I completely forgot to add it this time, and didn’t notice a difference.  In fact, I liked the texture of the curd somewhat better without the butter!  So it’s completely up to personal preference whether or not to include it.]

For the rhubarb compote:

  • 4 stalks (about 1 lb.) rhubarb, washed and trimmed
  • 1/3. cup sugar
  • 1/4 c. citrus juice  or water (I used Simply Limeade)

Chop rhubarb into 1/2 inch pieces.  Mix with sugar and citrus juice or water in a medium pan.  Cook over medium heat for 10-15 minutes, stirring occasionally, until rhubarb has broken down and a compote has formed.

To serve shortcakes, slice open and spread a layer of lemon curd topped with a layer of rhubarb compote on the bottom shortcake.  Replace shortcake top and slather with homemade whipped cream.

Tamales!

June 17, 2010 Beef

Tamales!

My internet persona has been so M.I.A.  It’s just that I got distracted by real life things like moving to a new apartment and hunting down my missing research advisor and learning to live in the same 1000 sq. ft. as my not-so-long-anymore distance boyfriend.  There’s been a lot going on, but it’s been a good time.  The pictures I printed three months ago are actually on the walls now.  A working vacuum cleaner is once again within my grasp.  My herbs are thriving on their new porch.  Almost thriving.  Not dead.  We survived a night camping at an incredibly beautiful beach.  And we had a little party last night.

Parties are just the best, aren’t they?  You get to eat and drink and laugh with people that you like.  What more could you want?  And this party, this party involved a new food, a food that’s been on our list for a long time: tamales.

Mmm, tamales.  Although they were indeed served hot, I would like to clarify that they were not hot tamales.  Why are they called that anyway?  I really don’t see any resemblance between a small, red, cinnamon flavored candy and a large, steamed corn husk full of masa and chili sauce and exceedingly tender beef.  Someone in the candy industry goofed.  And now there are probably many poor lost souls who don’t know what a real tamale is.  Which is tragic, because they are really good.

However, they are a serious time commitment.  The beef needs to stew for 3 hours.  The chili sauce takes 45 minutes.  The corn husks need to soak for half an hour.  You have to assemble each tamale by hand.  And then they need to steam for an hour.  So not something you can really throw together at the last minute.  But I’m not telling you this to scare you away!  On the contrary, they’re very easy.  And they’re very social.  So if you feel like inviting some friends over and drinking sangria and tequila and having everyone play with their food, you should really go for it.  Just make sure you have many snacks to sustain the diligent tamale makers.

And make a lot.  We made a lot.  We now have a lot.  Tamales on tamales.  Tamales for days.

This is a positive thing.

Beef Tamales

Adapted from Food Network

  • 2.5 pounds beef shoulder roast
  • Salt and pepper
  • 2 onions, sliced
  • 6-12 cloves garlic, peeled and crushed
  • 6 dried New Mexico chilies
  • 2 dried ancho chilies
  • 2 TBS cumin seed, toasted
  • 2 tsp molasses, optional
  • 1 bag dried corn husks (3-4 dozen)
  • 4 c. masa flour
  • 1 TBS baking powder
  • 4 c. reserved beef broth from roast
  • 2 tsp salt
  • 1 c. shortening or lard

Timeline:  Prepare roast.  While stewing, make chili sauce and masa mixture.  When beef is done, begin soaking corn husks.  Shred cooled roast and mix with chili sauce.  Form tamales.  Steam tamales.  Eat tamales.

For the beef:

  1. Season the beef shoulder on both sides with salt and pepper.  Brown in large, heavy-bottomed dutch oven.
  2. When browned on all sides, cover roast completely with water.  Add 1 of the sliced onions and 6-10 cloves crushed garlic.
  3. Cover and simmer for 3 hours, until meat is tender enough to pull apart with a fork.
  4. Remove roast from pan and place on platter to cool.  Keep the broth – it is used to make the masa.

For the chili sauce:

  1. Cut the tops off of the dried chilies and shake the seeds out.  Slice lengthwise to open up and remove any remaining seeds and ribs.
  2. Place chilies in a medium pot.  Cover with water, add the toasted cumin, remaining onion, and remaining garlic.  Boil for 20 minutes, until chilies are very soft.
  3. Use tongs to place chilies in blender.  Ladle some of the chili water into the blender.  Puree until smooth.  Pass puree through strainer.  Add salt, and molasses if desired, tasting to check seasonings.  Keep sauce in fridge until it is ready to be used.

Note:  The original recipe instructs you to add only one ladle-ful of chili water to the blender.  However, I added all of the chili water because I wanted to get all of the cumin seeds and as much flavor as possible into the sauce.  This led to a very thin sauce, so I returned it to the pan and boiled for another 10 minutes until the consistency was as desired.  Trevor thought the sauce needed an extra dimension so I added molasses and it worked perfectly.

For the masa:

  1. In a large bowl, combine the masa, baking powder, and 2 tsp. salt.
  2. Pour 4 cups of reserved beef broth into masa a little at a time, working it in with your fingers.
  3. In a separate bowl or mixer, beat shortening until fluffy.  Add it to the masa and beat until it has a spongy texture.

Assembly:

  1. Carefully separate dried corn husks in soak in a large pan or sink filled with warm water.  When corn husks are soft and no longer fragile, drain and pat dry.
  2. Shred beef into small pieces by hand and mix with chili sauce.
  3. Take several of the corn husks and tear lengthwise into half inch “ropes.”  These will be used to tie the tamales.
  4. To form a tamale, take a corn husks and place rough side down with the narrow end pointing towards you.  Take a small handful of masa and press it into a square in the middle of the corn husk.  Their should be an inch or two free on the top and bottom of the corn husk, and an inch free on one side of the corn husk.  Place a heaping tablespoon of the beef mixture into the middle of the masa, keeping it away from the edges.  Carefully fold the sides of the corn husk together so that the edges of the masa are just touching, and wrap the extra husk around the outside.  Using the strips of corn husk, tightly tie the ends of the tamale together so that it resembles a Christmas popper.
  5. Fill a large stockpot with 2-3 inches of water and bring to a low boil.  Stand tamales up in a steamer basket or large colander and place over boiling water.  Cover tamales with a damp towel, and place lid over pot/steamer or pot/colander combination.  Steam tamales for one hour, checking occasionally to make sure the water does not boil away.
Anniversary

June 5, 2010 Dessert

Anniversary

Monday (yes, I know, today is Saturday, it’s been a long, long 4 day week), was our anniversary.  Our second anniversary to be exact.  Except it’s not very exact really, as we sort of picked it arbitrarily.  What with today’s dating ambiguities, does anyone have a real anniversary?  Probably lots of people, but shhh.

For our anniversary we cooked and ate and drank, duh.  That’s what we do best.  Dinner was just a simple tomato sauce and linguini, but dessert, dessert was special.  It was so special in fact that we ate it before dinner, then again for breakfast the next morning, and then again for dinner the next night, reaping many, many health benefits along the way.

Do you recognize that floaty, creamy, caramel-y vision?  No?  Well, it’s île flottante, it’s trés parisienne, and it’s heaven.

The reason île flottante was the dessert of choice, besides that it’s incredibly delicious, is maybe a little bit cutesy and nostalgic, but I decided that that was OK because anniversaries are supposed to be just a little bit cutesy and nostalgic.  See, last May, Trevor and I spent two wonderful weeks in France.  (In hindsight, it was perhaps not the wisest financial choice for two 20 year old college students, but you’ve gotta do stuff like that when you’re young, right?)  And, one night, we ate at a tiny restaurant down the street from our apartment, and we sat outside on the street and basked in the warm night air and drank red wine out of a carafe and our waiter was even very patient and spoke French to us the whole time. (I’m convinced he thought we were cute and naive, and also our French is not that bad…) and it was as romantic as they say it is.  When dessert rolled around, I ordered île flottante, and upon hearing that Trevor did not want anything, our waiter winked at us and said “Ah, avec deux cuillères.”  And so we happily sat on the streetside in Paris, eating our floating meringue with two spoons.  D’aw.

Île flottante has three main components – crème anglaise, meringue, and caramel sauce.  I usually play with my recipes, perhaps a bit too much sometimes, but this recipe, which comes from David Leibovitz’s The Sweet Life in Paris, was a teeny bit intimidating, and I really wanted it to be perfect, so I followed it exactly.  And perfect it was.  If you will, let me wax poetic about it, just for a minute: imagine, cold, thick, custardy crème anglaise, with a heady vanilla scent and just a little bit of sweetness.  Now add the best meringue you’ve ever had, poached, rather than baked, eggy and a bit salty, and so tender that it literally dissolves in your mouth.  Finish with a deeply burnt caramel sauce, thin and the tiniest bit smoky.  So, so good.

The only artistic license I took with it was actually not my doing, but Trevor’s.  See those incredible spun sugar toppings?  Aren’t they awesome?  Trevor rules.  Also they added the perfect burnt sugar crunch to the end product.  Just a note – if you decide to use them, which you should, especially if you want to impress someone – add them just before serving, as they begin to dissolve when they come into contact with moisture.

If I haven’t convinced you to try this yet, let me add one last comment – it wasn’t that hard.  Especially given how beautiful and delicious the final product was.  Plus, you can make all of the components ahead and the presentation won’t suffer a bit.  So, really, please, try this.  And also read The Sweet Life in Paris if you like either food or chocolate or France at all.  And now I’ll stop bossing you around and let you go on your way.

Île Flottante

from David Leibovitz’s “The Sweet Life in Paris”

(serves 4)

For the caramel:

  • 1 c. sugar
  • 3/4 c. water

Evenly spread sugar in a heavy-bottomed skillet or saucepan.  Cook over medium heat until sugar begins to liquefy.  Begin to stir gently to keep from burning.  Cook until all sugar has melted and turned a deep brown.  When it has begun to smoke slightly, remove from heat and carefully add the water, stirring.  Be warned: the water will make the hot sugar bubble fairly violently.  Return the pan to the heat and stir, breaking up any caramelized chunks, until caramel is smooth.  Cool completely, and refrigerate.  Lasts for a week.

For the crème anglaise:

  • 4 egg yolks
  • 1 1/2 c. whole milk*
  • 1/4 c sugar
  • 1 vanilla bean, split lengthwise*

*Note:  I used 3/4 c. skim milk and 3/4 c. heavy cream because that’s what I had.  I also used 1 1/2 TBS of vanilla extract rather than a vanilla bean.  Results were very good.

  1. Prepare an ice bath: place a medium-large metal bowl or pot in a large bowl filled with ice-water.  Place a strainer over the top of the pot.
  2. In a medium bowl, whisk the egg yolks.
  3. Heat the milk, sugar, and vanilla in a saucepan over medium heat until very warm.  Remove just before it begins to simmer.
  4. Gradually pour the hot milk over the egg yolks, stirring constantly to prevent egg from scrambling.  Return egg and milk mixture to pan, and cook over medium heat, stirring constantly and scraping the edges, until custard begins to thicken.
  5. Remove from heat and pour immediately through strainer into chilled bowl/pot.  Let cool completely, and then refrigerate, covered, for up to three days.

For the meringue:

  • 4 egg whites, at room temperature
  • 1/2 tsp salt
  • 6 TBS sugar
  • pinch cream of tartar, optional
  1. Preheat oven to 325°F.  Very lightly oil a 2-quart loaf pan.  Set loaf pan inside a shallow roasting pan.
  2. Beat egg whites with electric mixer on medium speed until frothy.  Add salt and cream of tartar and continue beating, on high, until the whites start to hold their shape.  Add sugar one tablespoon at a time, beating meringue until it is stiff and shiny.
  3. Spread meringue into prepared loaf pan.  Use a damp spatula to smooth the top and press out any air pockets.
  4. Fill the roasting pan about halfway full with warm water.  Bake for 20-25 minutes [Book says 25, I had great results at 20], or until a toothpick inserted into the center comes out clean.  Cool in pan on wire rack.  When cool, carefully turn out onto a large plate or platter.  Keeps in fridge for a day or two.

To assemble:

Ladle chilled crème anglaise into bowls.  Using a damp knife, carefully slice meringue loaf into rectangles and float on top of crème anglaise.  Drizzle with room temperature caramel sauce.  Top with spun sugar, or toasted almonds.

This was perfect.

May 24, 2010 Pasta

This was perfect.

And I almost never feel that way about anything I’ve made.  Good, often.  Really good, sometimes.  Perfect?  Infrequently.

I’m not gonna take much credit for it though* – the ingredients were perfect.  Sun-dried tomatoes, pine nuts, parmesan, basil, goat cheese, and fettucine?  Not my creations.  But I will be happy to use them anytime they decide to grace my kitchen.

I’m not feeling up for words today, so that’s all I’ve got.  I’m leaving you with these pictures, the recipes, and the suggestion that you try this the next time you’re craving something both bright and comforting.

*I take it back – I’m taking credit for the meatball part.  These were my creation and I’m proud.

Sun-Dried Tomato Turkey Meatballs with Sun-Dried Tomato and Goat Cheese Pesto Sauce

Sun-dried tomato turkey meatballs: (original/personal recipe, makes 15 large meatballs)

  • 1 1/4 lbs lean ground turkey
  • 1/2 c. bread crumbs
  • 1/3 c. chopped oil-packed sun-dried tomatoes
  • 1/3 c. chopped fresh parsley
  • 1/4 c. grated fresh parmesan
  • 2 cloves garlic, minced
  • 2 tsp dried oregano
  • 1/4 – 1/2 tsp red pepper flakes
  • 1 tsp kosher salt
  • 1 egg, slightly beaten
  • 3 TBS milk
  1. Preheat oven to 375°F.  Grease a baking tray with cooking spray.
  2. In large bowl, mix bread crumbs, sun-dried tomatoes, parsley, parmesan, garlic, oregano, red pepper flakes and salt, until well combined.  Crack egg into bowl and beat lightly in it’s own well, then mix with rest of ingredients.  Add milk and mix to incorporate.
  3. Add the ground turkey and combine with bread crumb mixture using your hands.  Don’t overwork with your hands.  When combined, form into medium balls and place close together on the baking tray.
  4. Bake for 26 minutes, using tongs to flip/rotate halfway through.

Sun-dried tomato pesto with goat cheese and fettucine: (recipe inspired by Perry’s Plate)

  • 1 lb. box of fettucine
  • 1/2 c. oil-packed sun-dried tomatoes
  • 1/4 c. pine nuts
  • 3 oz parmesan, cubed
  • 1 clove garlic, peeled
  • 1/2 c. basil, loosely packed
  • 3 oz. goat cheese
  1. Bring large pot of salted water to boil.  Cook fettucine according to package directions.
  2. In a food processor, combine sun-dried tomatoes, pine nuts, parmesan cheese, and garlic.  Pulse until coarse.  Add basil, as well as 3-4 TBS olive oil reserved from sun-dried tomato jar (or regular olive oil).  Continue to pulse.  Taste, and adjust ingredient ratios until flavor and texture are as desired.
  3. When pasta is done, drain, and immediately add goat cheese and 1/2 sun-dried tomato pesto to pot.  Stir to form thick sauce.  Garnish with fresh basil, and serve with sun-dried tomato turkey meatballs.
  • « Previous Page
  • Page 1
  • …
  • Page 52
  • Page 53
  • Page 54
  • Page 55
  • Page 56
  • Page 57
  • Next Page »

Primary Sidebar

Subscribe!

Get creative recipes and menu ideas delivered straight to your inbox.

Most Popular

A House // Sweet Potato and Coconut Milk Soup with Brown Rice and Lentils

Monthly Fitness Goals: July // Homemade Spinach Wraps with Chopped Greek Salad

A New Job // Classic Seven-Layer Bars

Butternut Squash Carbonara with Fried Sage and Caramelized Onions

Happy Birthday, Trevor! // Peanut Butter Fudge

Cookbook Review and Giveaway: Home Made Winter

Drizly

Please note!

Full disclosure: if you purchase anything at Amazon using the above links or any other links to Amazon on this site, I will receive a small commission. Just so you know!

Copyright© 2018 · Cookd Pro Theme by Shay Bocks

This site uses cookies: Find out more.