I had originally meant this recipe to be for my book review of Simply Ramen, a lovely new(ish) book with a great mixture of traditional and non-traditional ramen recipes by Amy of Easy Peasy Japanesey. But then I opened a bottle of sake to steam the chicken, and poured a few glasses, and Trevor and I sat down to these steaming bowls of ramen, and I couldn’t stop thinking about our time in Ise. So instead of a book review this post is the much overdo second part to our Japan travelogue, dedicated to our time in Ise, and a true review of Amy’s book will come later. (Warning: this is a long post, so if you’re just here for a delicious ramen recipe, skip to the end!)
After our magical introduction to Japan in Kyoto, we wandered a bit off the beaten track, to the Ise peninsula, a coastal area about 2 hours southeast of Kyoto. Ise is the home of the Grand Shrine complex Jingū, one of Shinto’s holiest and most visited sites. Trevor had learned about the shrine and its architecture in college and it was at the top of his list for things to see in Japan. There were plenty of other visitors in Ise, but I would guess that 99% of them were Japanese, pilgrims coming to visit the shrines. English speakers became harder to find and we became more of a curiosity.
When I think about Ise, I think about sake, and blonde wood rooms, and strangely deserted beach resorts, and 500 year old sacred Cypress trees, and our ever-smiling pink-pajamaed Ryokan room attendant. I think about getting caught in a rainstorm in the middle of a frustrating and misguided walk from one shrine to the next, somehow finding ourselves in an Italian restaurant in one of those travel moments where everything feels like it’s going wrong, only to emerge to find the sun shining and realize that we were only 10 minutes from where we wanted to be. I think about sitting in the small basement-level restaurant in our hotel, using Google Translate to attempt an interpretation of the Japanese-only menu, and somehow successfully ordering two bowls of ramen. And I think about sitting alone, naked, in a steaming, outdoor Ryokan bath late at night, with icy cold winter winds whipping around the trees and the sound of the ocean pounding below.
Oishiya Ryokan
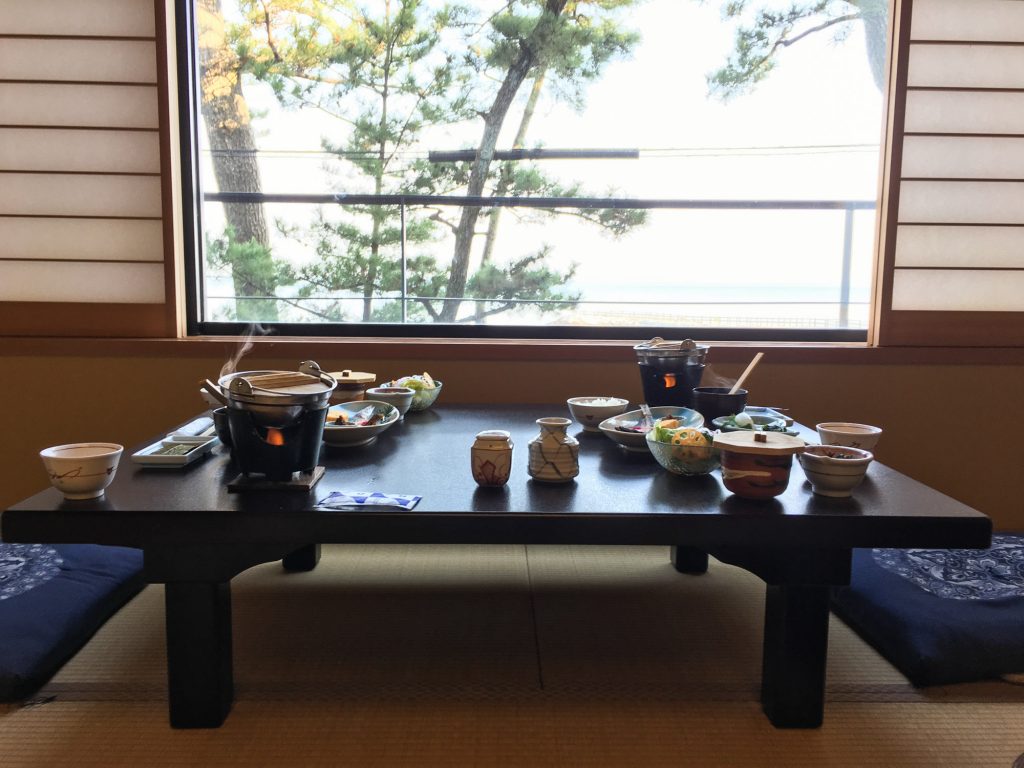
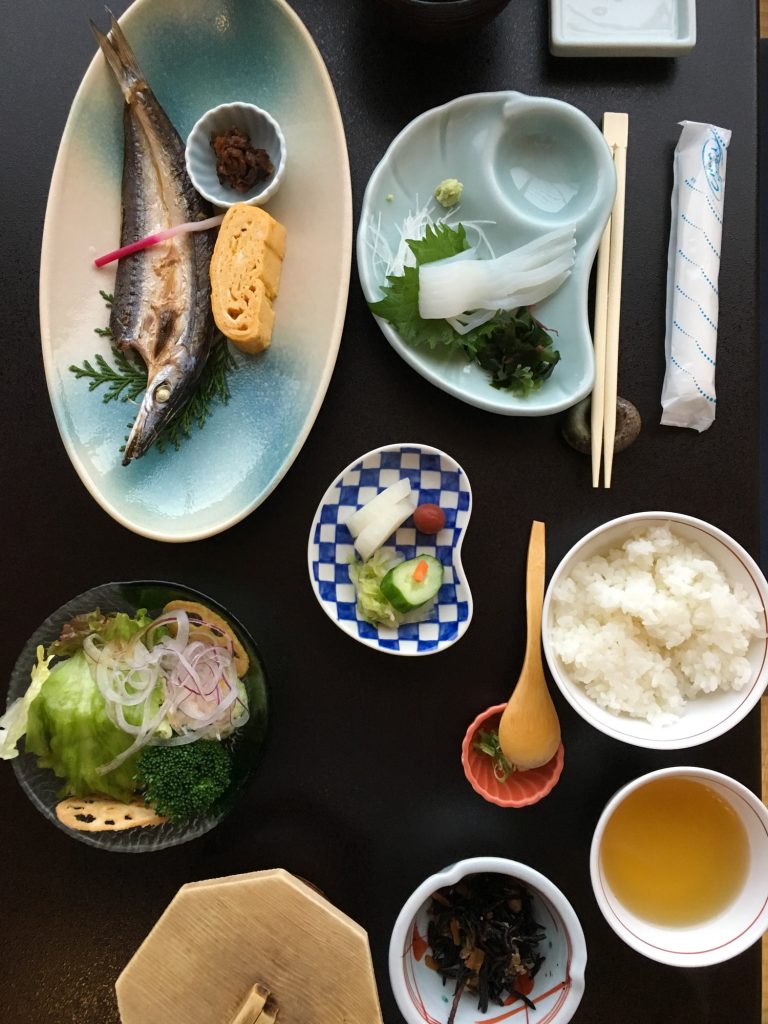
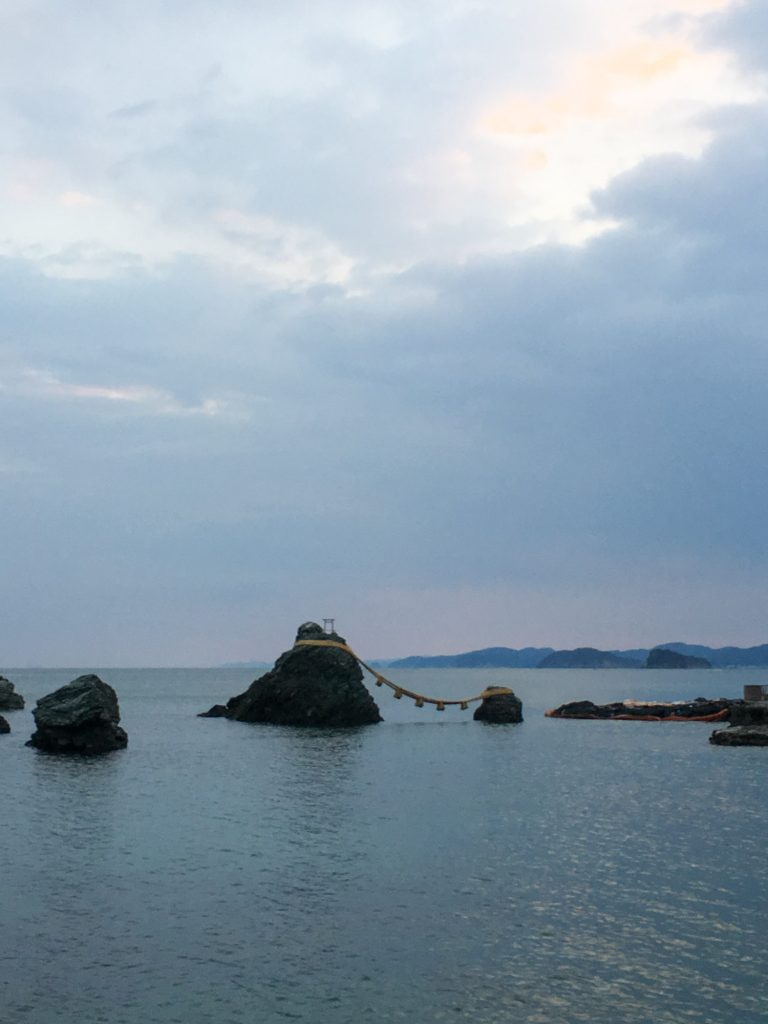
Our three days in Ise had two major components – a stay at a traditional Japanese inn called a ryokan and a visit to the grand shrines. A ryokan is more of an experience than just a place to stay – it has a whole set of traditions around it, and is widely considered a “must-do” while in Japan. We chose a mid-range ryokan called Oishiya right next to the Wedded Rocks (or Meoto Iwa). When you arrive, your room attendant greets you and takes you to your room, typically a spare, furniture-free room with a tatami mat floor and paper-screen walls. You are given a yakuta to change into, and then your room attendant returns to serve you tea. Our room attendant (I wish I could remember her name!) was such a lovely, smiling woman. She had a little note card with all of the English phrases she needed to say tied to her waist, and she giggled a lot and just made us feel so cared for, which is a big part of the ryokan experience. And then after that you… just relax. You’re not really supposed to do much other than visit the baths and wait for dinner.
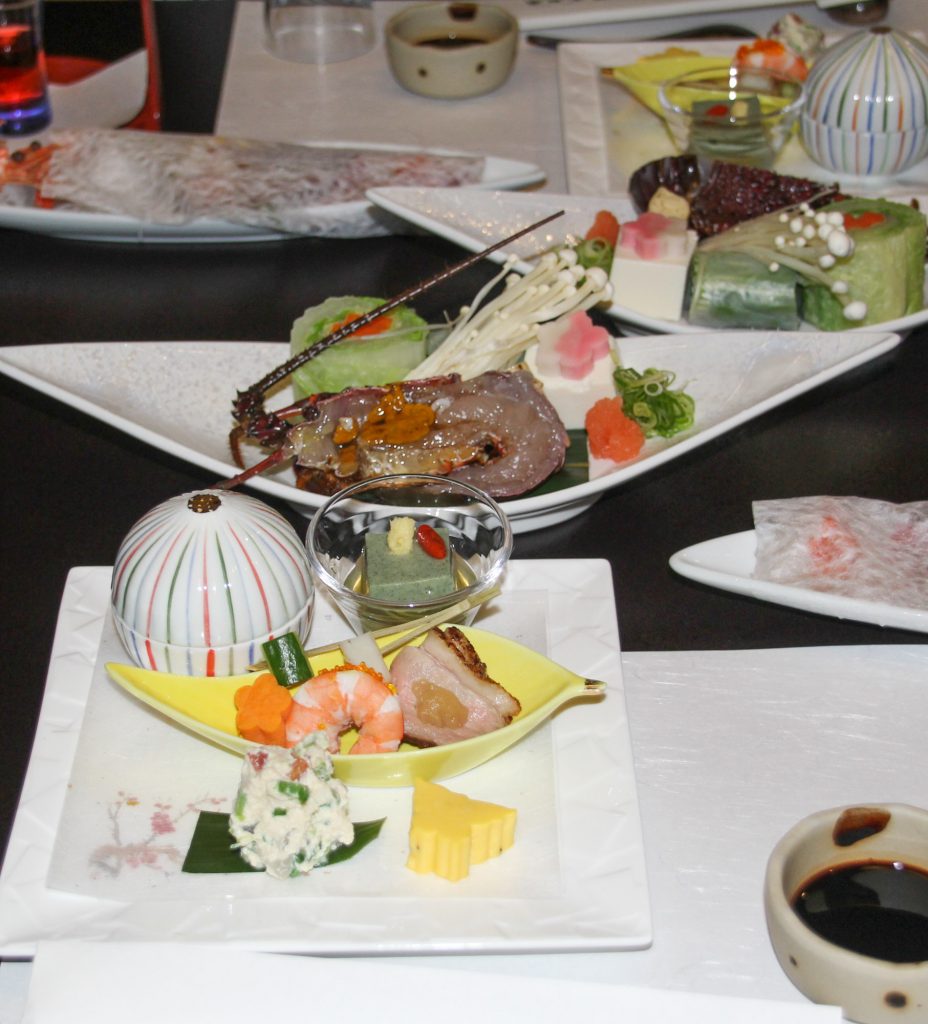
Dinner is served in your room, in a series of tiny, elaborately-plated dishes – ours included raw spiny lobsters that we cooked ourselves in boiling miso, fried fugu (blowfish) that I was too nervous to try, and two bottles of sake, which left us red-faced and giggly, sitting on the floor in our matching yakutas. I really enjoyed the dinner – it was so different and strangely intimate, a cross between a romantic dinner out and dining in, with an added element of discovery as I’d never tried most of the foods we ate that night. After dinner, our attendant pushed the table to the side and pulled out our futons, fluffing the comforters and pillows and practically tucking us in… and then we slept. Soundly.
Ise Grand Shrine
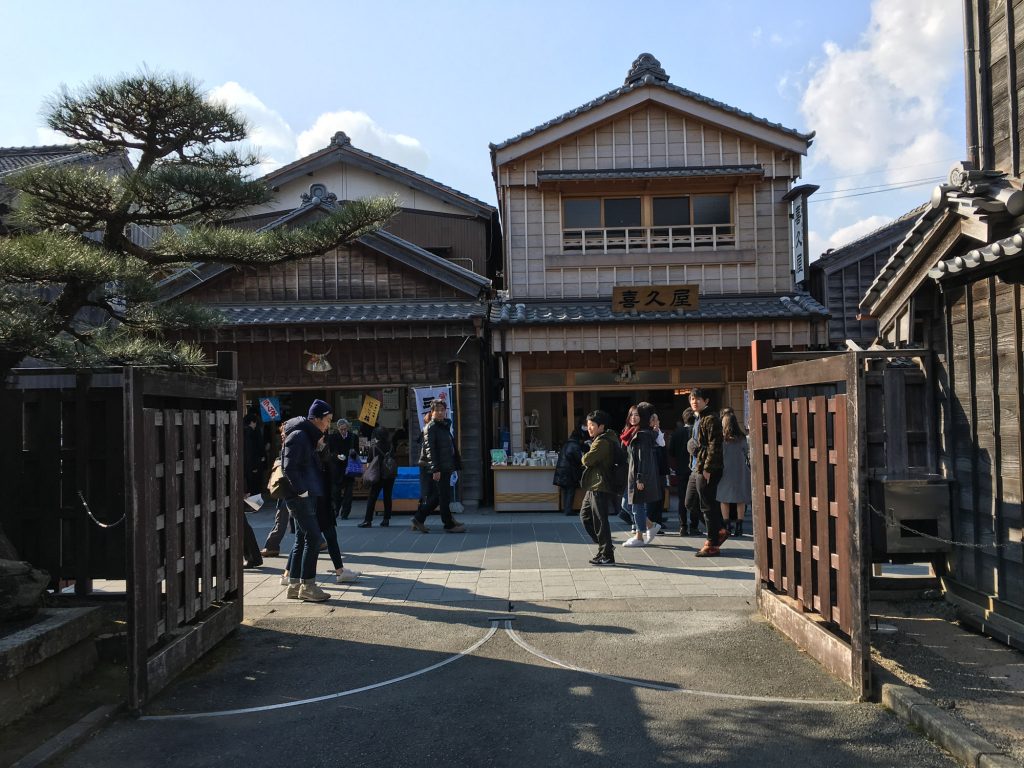
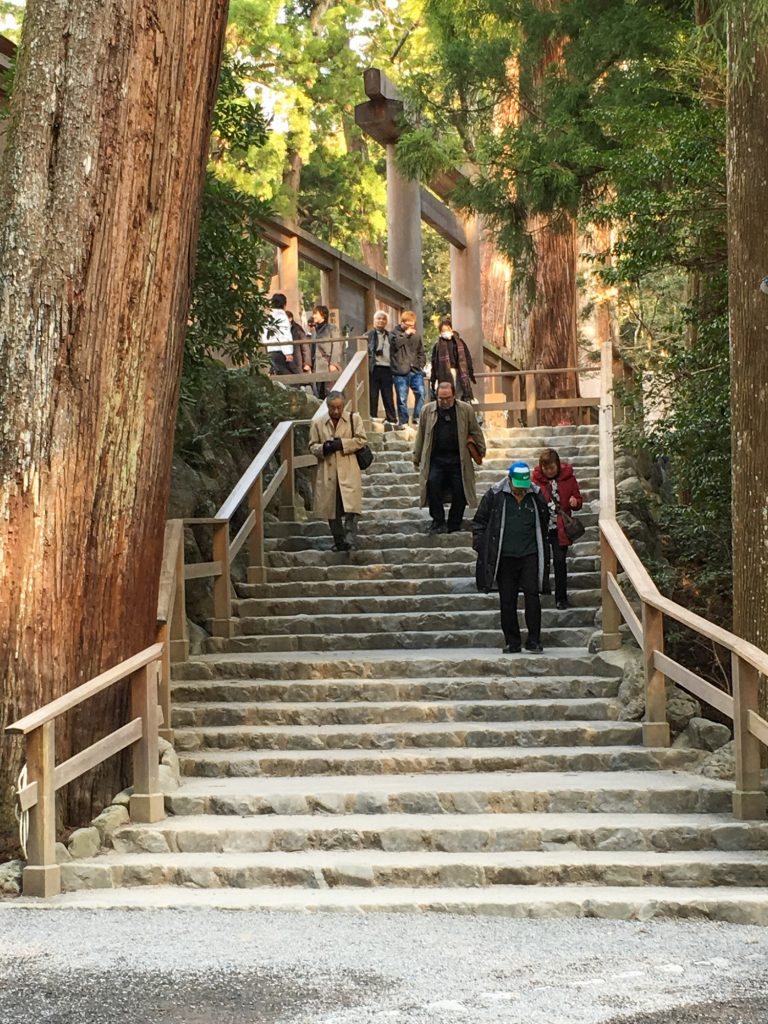
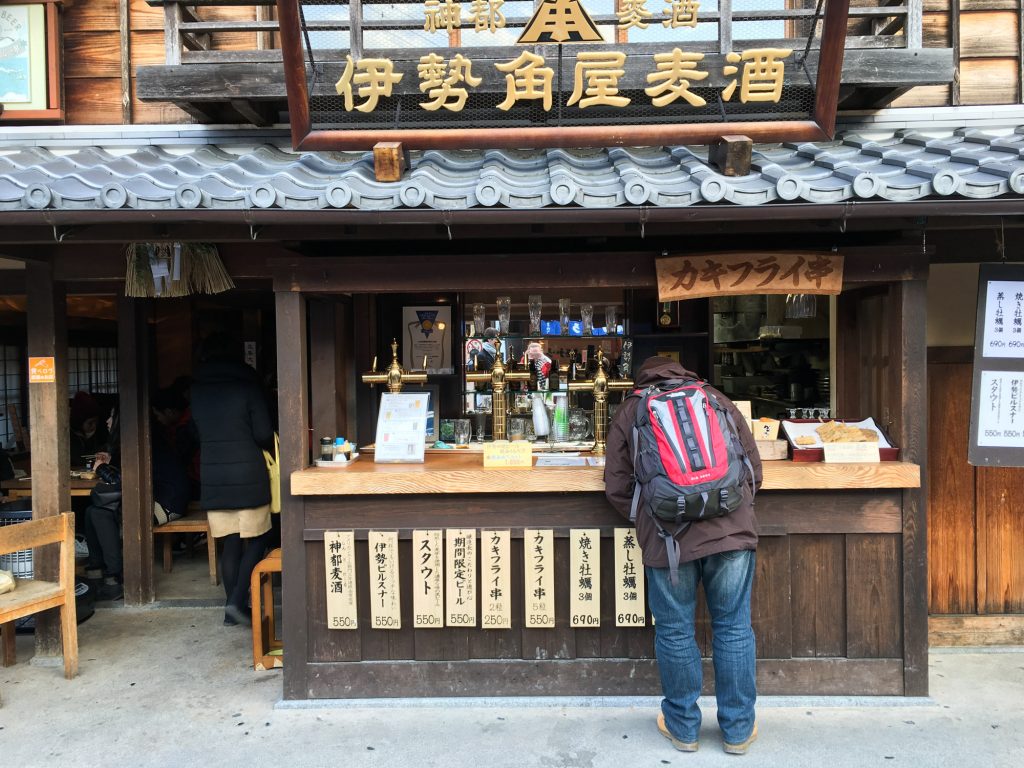
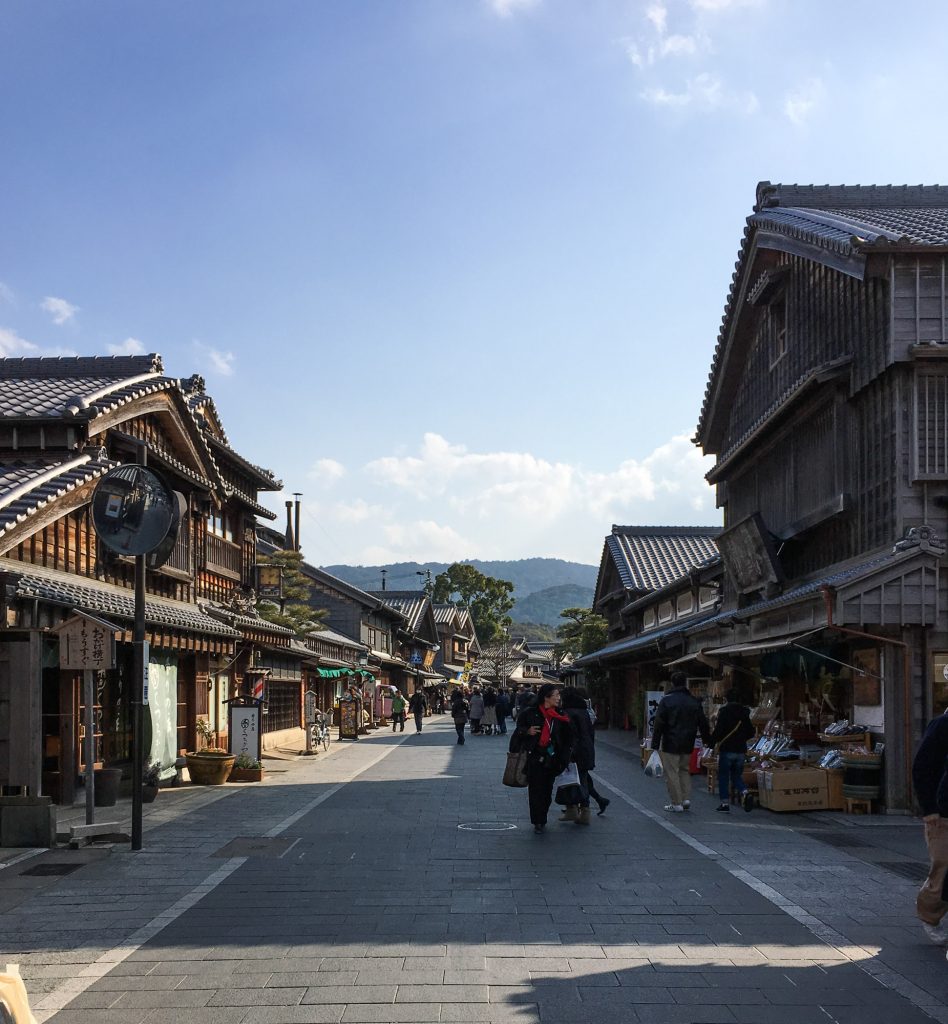
The grand shrines, the reason most people visit this part of Japan, were the center of our full day in Ise. For me, the shrines themselves weren’t the most interesting part of the visit – you actually can’t even see most of the shrine, as only the imperial family and a few select priests are allowed to enter the gates. What I found most fascinating was watching all of the other visitors, who clearly felt a certain reverence being there, and feeling myself to be part of a pilgrimage. It was also a lovely, sunny day, and the shrines are surrounded by forests with ancient trees and a wide and winding river, so I enjoyed the walking as much as anything. Outside the inner shrine, Ise Naiku, there is a small, traditional town called Oharai-machi, which includes a pedestrian street filled with food vendors and shops. It is more a recreation of a traditional shrine town than a contemporary one, but walking down the main drag, sampling fried oysters and local beers and window shopping, was a highlight of the visit for me. We even managed some non-verbal conversation with a group of young Japanese men we were sitting next to who didn’t like their beer and wanted to share it with us. (Key words – “oishii?” “ie oishii” “arigato!”)
Ise Travel Tips
From a practical standpoint, visiting Ise was the most complicated (and frustrating) part of our trip. Getting there required advanced train navigation (JR passes, probably the most popular way to get around Japan for foreigners, only work on Japan Railways lines, which thinned out considerably on the Ise peninsula), we switched between two hotels (perhaps a misguided decision, but we weren’t sure two nights at a Ryokan was worth it for us), and communication became difficult. But looking back, it also provided some of the most memorable and unique experiences. If you’re also headed there, a few tips:
- Bring lots of cash with you. We had a really tough time finding a place to get cash out during our visit to the shrines (if all else fails, try the post office) and we ended up wasting a very frustrating hour looking for it.
- Plan out your train routes and schedules beforehand (we had a JR pass and took the Shinkansen Hikari from Kyoto to Nagoya, then took the JR Rapid Mie line from Nagoya to Iseshi. You do have to pay a small supplement while riding the JR Rapid Mie line, which the conductor collects in cash when you cross into the non-JR part of the track).
- If you’re not staying close to the shrine itself, take the Kintetsu line to Isuzugawa instead of Iseshi/Ujiyamada. While Iseshi/Ujiyamada are the main access points for the outer shrine, it’s an hour long walk or a fairly expensive (500Yen) bus ride to the inner shrine, and the queues for the bus can be really long. Isuzugawa, however, is only a 20 minute walk from the inner shrine (which is the one that most people really come to see, as well as where the fun, touristy villages of Oharaimachi and Yokocho Okage are).
- Take advantage of tourist incentives if they are being offered! Our ryokan had us take a 5 minute survey in exchange for 20,000 yen in “coupons” that could be used throughout the peninsula. I was incredibly skeptical at first but we ended up being able to use the coupons to pay for all sorts of things – they covered one of our nights at the hotel and I bought myself a pair of pearl earrings. So, that was an unexpected perk.
- Here’s a helpful English guide for spending a long weekend in the area.
Miso Ramen
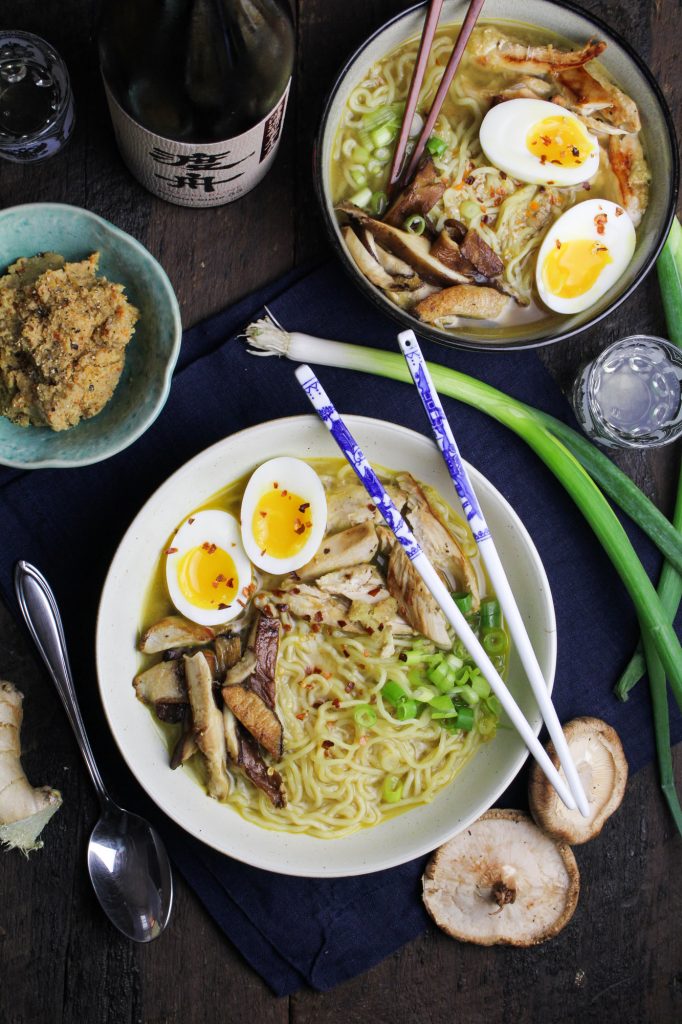
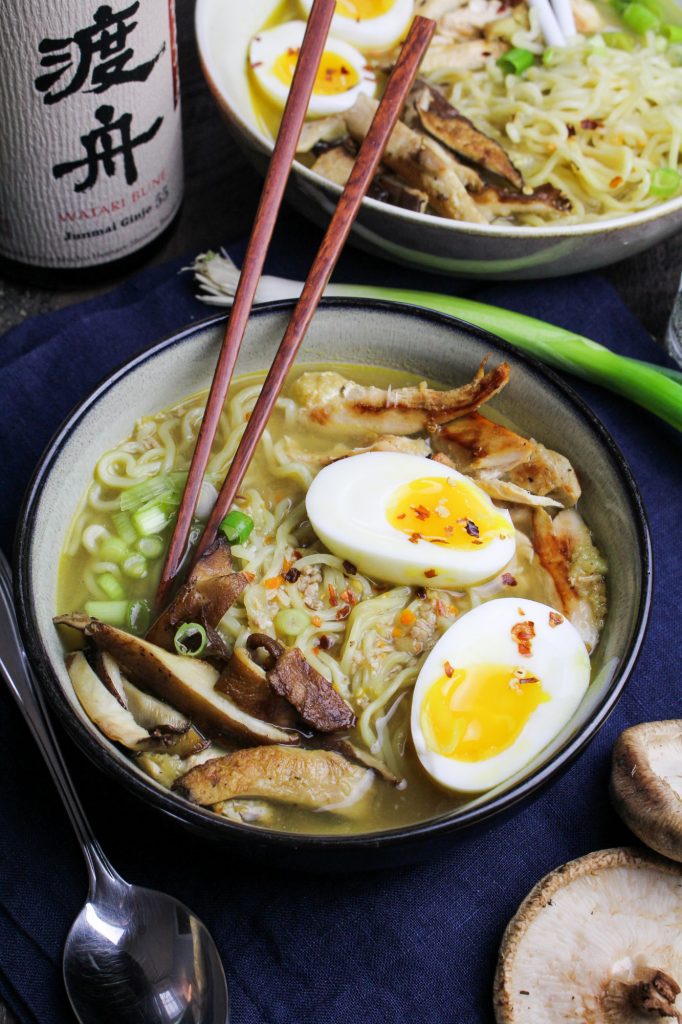
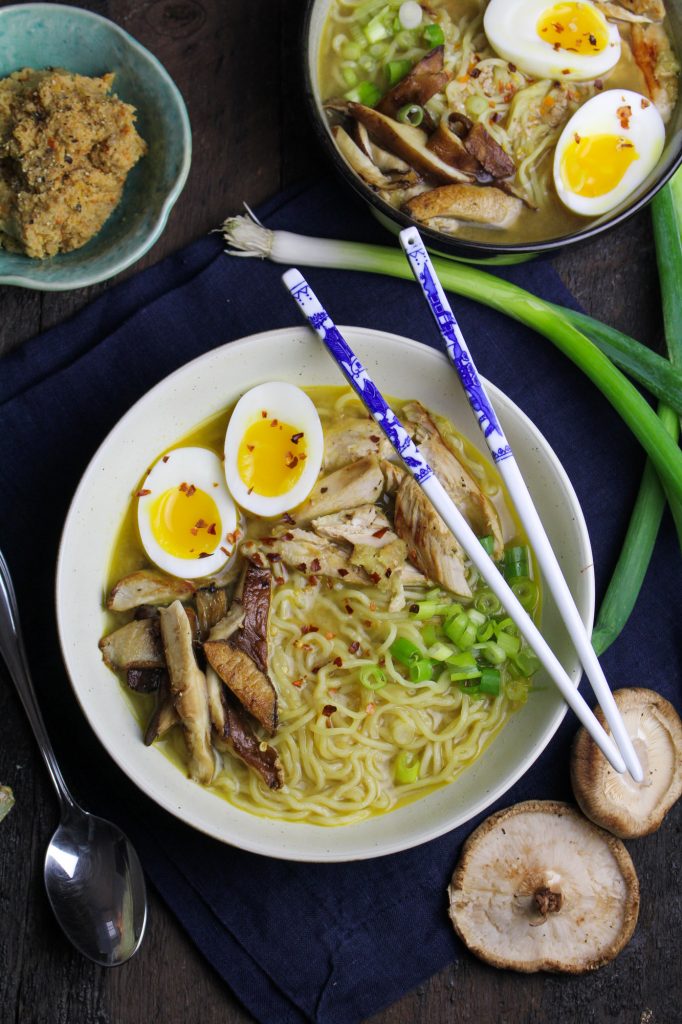
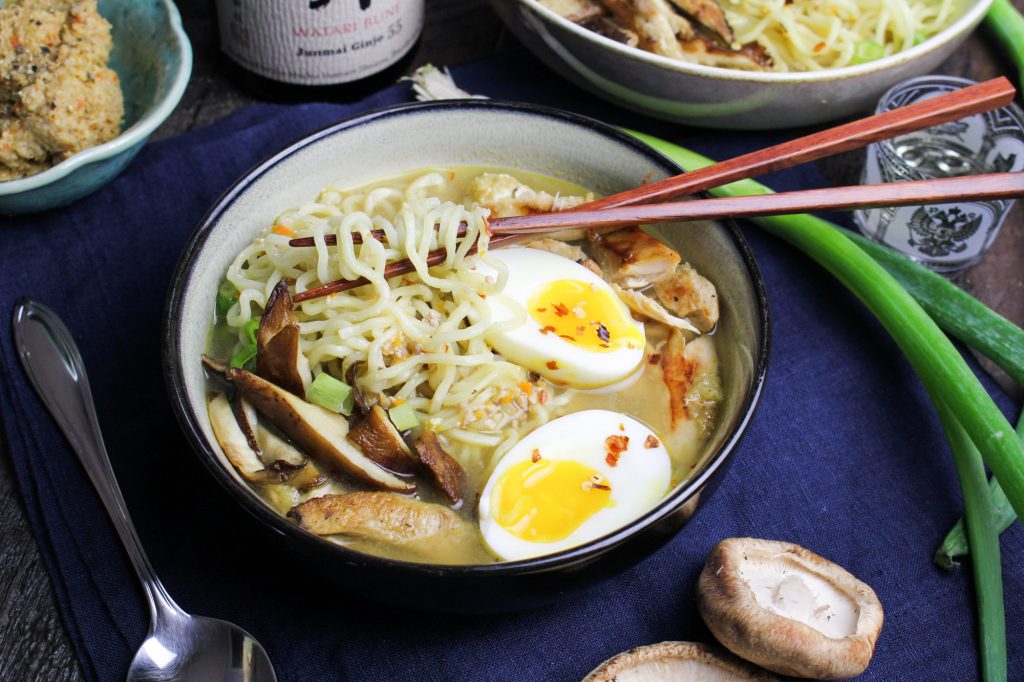
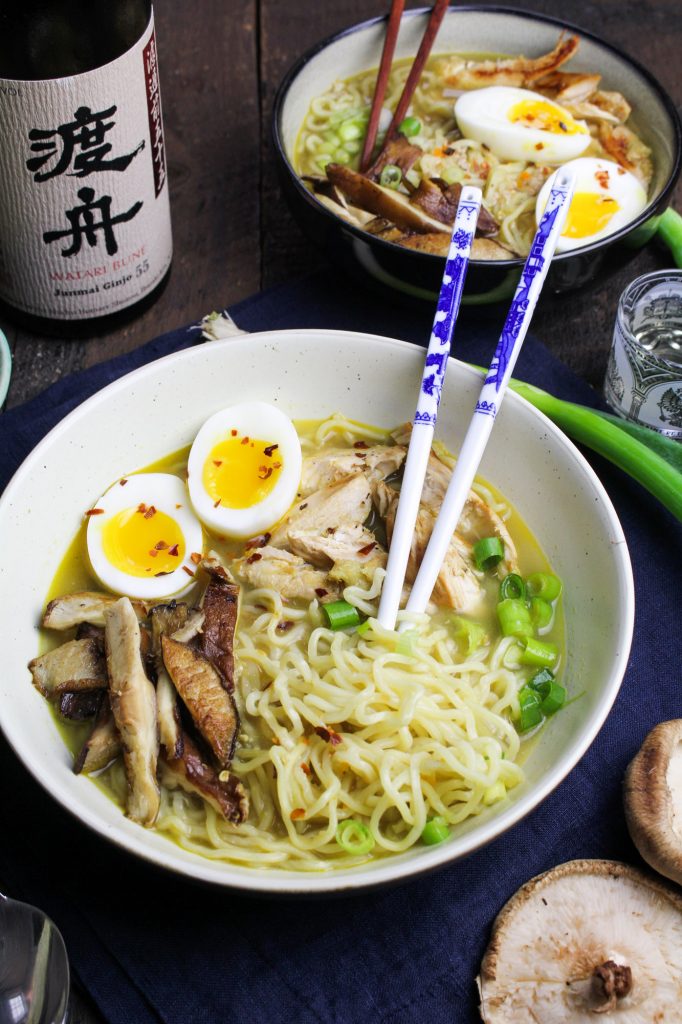
This is the third ramen recipe I’m posting here, and this one, far and away, is the closest to the real deal. The miso base is made by blending together aromatic vegetables, ground pork, a healthy amount of bacon fat, and two kinds of miso paste (the real stuff, not the minute miso that comes in a bottle). The base is simple to make, and once you have it, you have the key to practically instant ramen bliss. A few spoonfuls of the intensely flavored miso base stirred into good chicken broth makes a cloudy, salty, deeply savory ramen soup. Beyond the noodles (essential), you can top it with pretty much whatever you want. For this version, I’ve topped it with Amy’s ginger-and-sake steamed chicken (delicious on its own, as well), a few sauteed shiitake mushrooms, and a soft-boiled egg. It’s one of the most satisfying things I’ve eaten in the past few months. Luckily, having a tupperware full of the miso base stashed away in the freezer means I can experiment with toppings to my heart’s content for the rest of the fall.
More from Japan:
Japan Travelogue Part One: Kyoto; Matcha Cream Puffs
Like what you just read? Subscribe to Katie at the Kitchen Door in the box on the right, on Feedly or Bloglovin‘, or follow along on Facebook, Twitter, Pinterest, and Instagram. Thanks for reading!
Ginger Chicken Miso Ramen
Recipe adapted from Simply Ramen. Serves 2.
- 1 boneless, skinless chicken breast, thinly sliced on the diagonal
- salt and pepper to taste
- 1 TBS freshly grated ginger
- 1/4 cup sake
- 1 TBS olive oil
- 8 shiitake mushrooms, stems removed and caps thinly sliced
- 3 cups chicken broth
- 4 TBS miso ramen base, or more to taste
- 2 soft-boiled eggs, peeled and cut in half
- 2 servings ramen noodles, fresh or frozen, cooked according to package directions and then rinsed in cold water
- To make the chicken, season the sliced breast all over with salt and pepper. Add the sake, grated ginger, and chicken to a small non-stick skillet. Cover with a lid and bring sake to a simmer over medium-low heat. Simmer until chicken is fully cooked and you can no longer see any pink, about 8 minutes. Remove from heat, let chicken cool, and shred into bite-sized pieces.
- To prepare the mushrooms, heat the olive oil in a skillet over medium heat. Add the sliced mushroom caps and cook undisturbed for 3 minutes, then flip to the other side and cook another 2-3 minutes. Mushrooms should be golden brown and crispy. Set aside.
- Place the chicken broth and miso base in a pot and bring to a simmer over medium heat. Stir to fully incorporate the miso into the broth. Simmer for 5 minutes. Divide the cooked and rinsed ramen noodles between two bowls, then pour the hot broth over the noodles. Top each bowl with chicken, mushrooms, and a soft-boiled egg. Serve immediately.
Miso Ramen Base
Recipe adapted slightly from Simply Ramen. Makes enough for 12 servings.
- 1 carrot, peeled and roughly chopped
- 1/2 medium onion, peeled and roughly chopped
- 1 apple, cored, peeled, and roughly chopped
- 1 celery stalk, cut into large pieces
- 3 garlic cloves, peeled
- 1/2 cup bacon fat
- 1 TBS sesame oil
- 1 1/2 cups ground pork
- 1 tsp fresh ground ginger
- 1 tsp sriracha
- 2 TBS soy sauce
- 1 TBS apple cider vinegar
- 1 TBS tahini
- 3/4 cup white miso (such as Shiro miso)
- 3/4 cup red miso (such as Akamiso miso)
- Add the carrot, onion, apple, celery, and garlic to a food processor and process until evenly and very finely chopped. Add the bacon fat and the sesame oil to a large skillet and melt over medium heat, then add the finely chopped vegetables. Saute until veggies are tender, about 6-8 minutes.
- Add the ground pork the the skillet with the veggies and use the back of a wooden spoon to break it into small pieces. Saute until pork is fully cooked, about 8-10 minutes. Add the ginger, sriracha, soy sauce and vinegar to the pork and veggies and stir to incorporate fully.
- Transfer the cooked veggie and pork mixture back to the food processor and process until it is finely ground, almost a paste. You want the miso base to be as paste-like as possible so that it incorporates evenly into the soup. Scrape the paste into a bowl. Add the miso pastes and the tahini and stir until fully incorporated.
- Refrigerate the miso base for up to a week or freeze for up to a month.
1


Leave a Reply