• Skip to primary navigation
  • Skip to content
  • Skip to primary sidebar
  • Home
  • Recipes
  • Features
    • Cookbook Reviews
    • Ingredient of the Week
    • Sunday Dinner
    • Fitness Goals
  • Travel
  • About
    • Privacy Policy
    • Cookie Policy
  • Work With Me

Katie at the Kitchen Door

Globally-inspired, seasonal recipes

Blog Page

Beet Ravioli

4 February 28, 2011 Pasta

Beet Ravioli

Please vote for my entry in the Marx Foods Ridiculously Delicious challenge here!

Remember when I competed (and won 2nd place!) in Duke’s Iron Chef competition and got a fancy pasta machine and went on and on about how I was gonna use it all the time?  Well, if your definition of all the time is approximately once every two months, then I guess you could say I was telling the truth.  And even if I don’t frequently have the opportunity to spend a few luxurious hours rolling out pasta dough, I do really enjoy it when I get the chance.  Kneading, stretching, cranking, folding, and re-cranking the dough is just an activity that really focuses me.  When Trevor and I went to the pasta class with Terrence, we used a food processor to mix and a KitchenAid to roll out the dough, but, while efficient, it really wasn’t the same.  Maybe it’s just that I’m so entranced by the idea of moving to Italy and living in a Tuscan farmhouse and growing my own perfect tomatoes and walking barefoot across the stone floors while singing (in Italian of course) and kneading pasta dough that I feel like practicing the kneading part now will leave me in good stead when I inherit an Italian estate.  Or maybe I was an Italian grandmother in a past life.  Or maybe I’m just trying to snag an Italian lover.  Who knows?

In any case, last weekend Trevor visited and it was a completely rejuvenating 3 days.  It was sunny and 70 degrees every day, I pushed aside all thoughts of work, I slept more than 8 hours each night, we went mushroom picking in the Duke Forest with Justin and Clark, Trevor made his debut at shooters… all in all, pretty good stuff.  And of course, we had to play around in the kitchen just a little bit.  What better to occupy a few hours in the kitchen than fresh pasta?

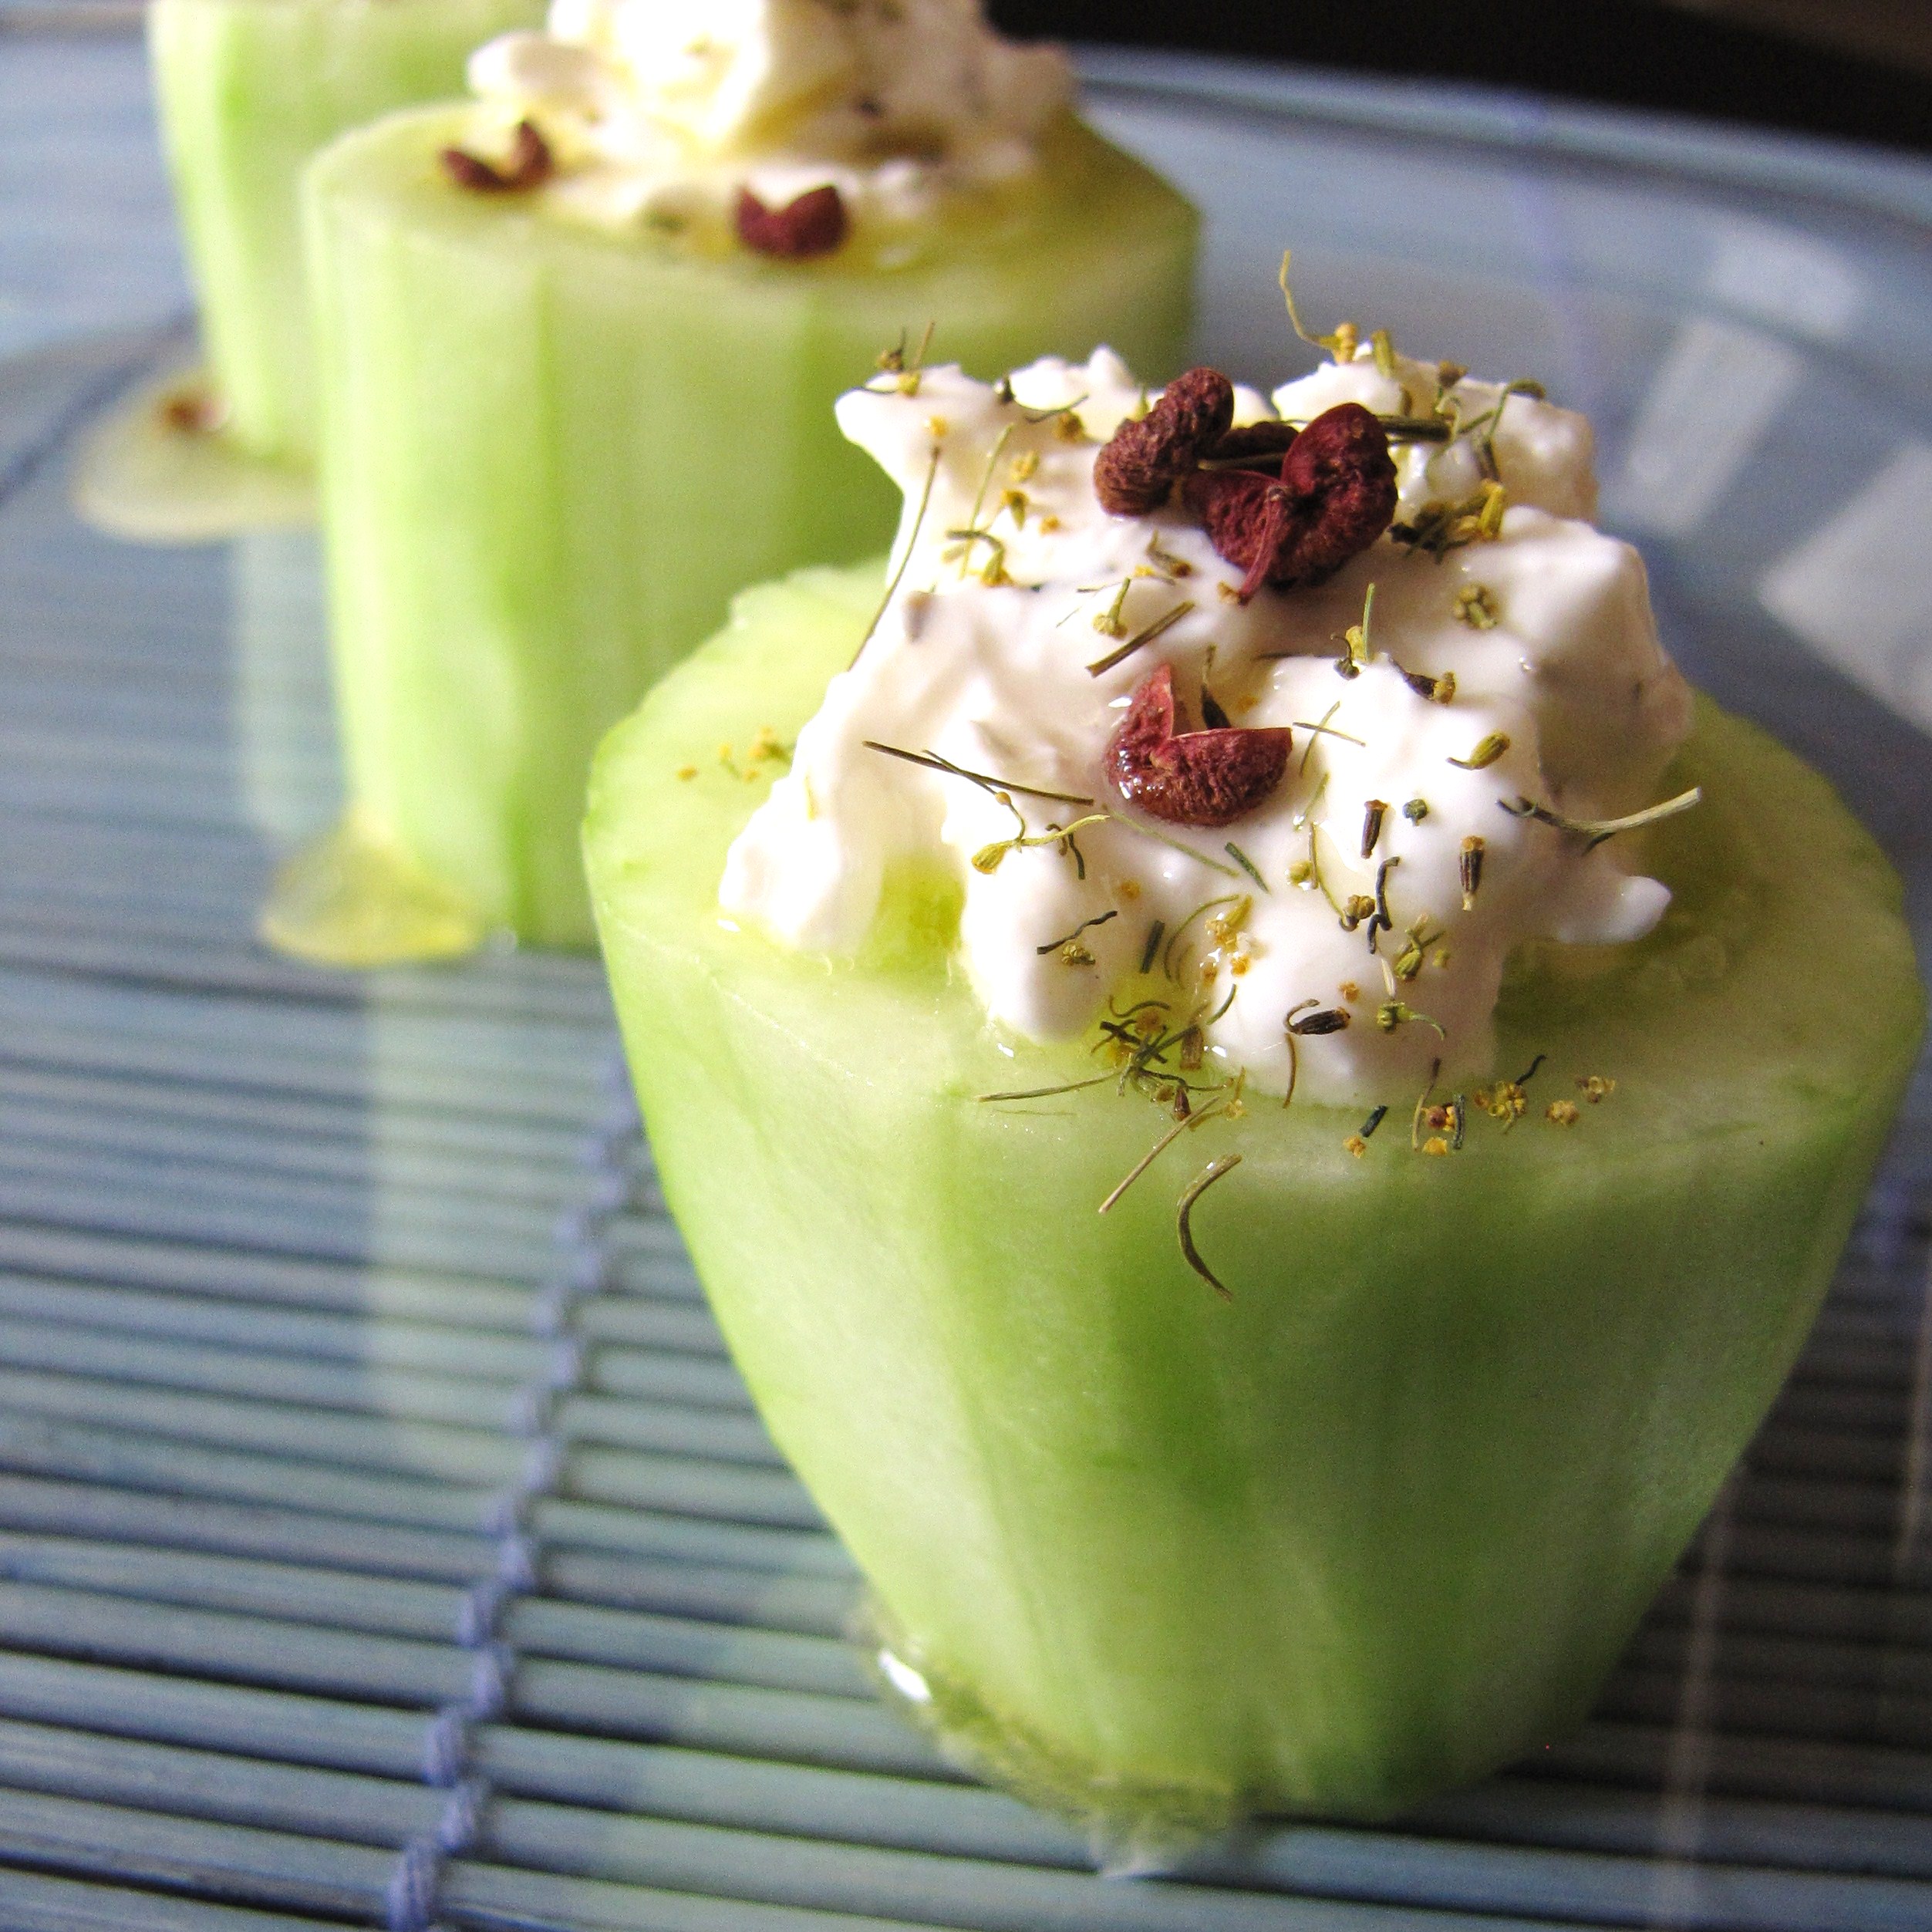
Ever since I had been totally awed by the beautiful color of these beet ravioli they had been in the back of my mind, so I decided to go for it.  They were incredible!  While the beets made the dough a bit more challenging to work with than an egg-based dough, they also lent a wonderful tenderness to the finished pasta.  Stuffed with a goat cheese, ricotta, and parmesan filling that melted out of the ravioli with every bite, they were a total win.  Last weekend we simply served them with some caramelized onions, a bit of melted butter, and grated parmesan cheese, and this weekend, for round 2, I mixed up a blood-orange and fennel butter sauce, based on a combination in The Flavor Bible.  Neither sauce was perfect, although I think I enjoyed the simple crunchy-sweetness of the onions more.  However, the blood orange sauce definitely won out in terms of sophistication and presentation.  If you try either preparation or think of something new, definitely let me know.  Either way, if you feel like spending a little time working with your hands and/or pretending your a five year old with the largest, tastiest quantity of purple play-dough you’ve ever encountered, definitely try this recipe.

Don’t forget to vote for my entry in Marx Food‘s Ridiculously Delicious Challenge, March 1st – March 4th!


Beet and Chevre Ravioli in a Blood-Orange and Fennel Sauce

Beet ravioli recipe adapted from Martha Stewart via Madeline’s Adaptations. Three beets makes about 2 pounds of pasta, probably enough for 80-100 ravioli.  Extra dough can be frozen, wrapped in plastic wrap, for several months.

For the ravioli:

  • 3 beets
  • 1 TBS olive oil
  • 3 eggs
  • 5-8 cups flour
  • 1 tsp. salt

For the filling (makes enough for 3-4 servings of ravioli):

  • 1/3 c. ricotta cheese
  • 1/3 c. goat cheese
  • 1/4 c. grated parmesan cheese
  • 2 tsp. olive oil
  • kosher salt and pepper to taste

For the Blood-Orange and Fennel Sauce (makes enough for 3-4 servings of ravioli):

  • 3 TBS butter
  • 1 tsp. fennel seeds, lightly toasted and coarsely ground (can leave whole if desired)
  • juice of 1-2 medium blood oranges
  • zest of 1 blood orange

For the pasta dough:

  1. Preheat the oven to 400°F.  Chop off beet greens, wash beets, and wrap in foil.  Roast in foil for 45 minutes to 1 hour (beets should be tender).  Allow to cool enough to handle, then peel off skin, and puree beets in blender.
  2. Mix beet puree, eggs, olive oil, and salt in a large bowl.  Add 3 cups of flour, and incorporate fully with a wooden spoon.  Add remaining flour 1 cup at a time, kneading by hand between additions, until the dough is elastic, does not stick to hands, and has been kneaded for at least ten minutes.  I ended up using about 8 cups of flour to balance the amount of liquid that 3 beets added to the dough.
  3. Allow dough to rest for 30 minutes.  Roll out using a pasta machine, or with a rolling pin as thinly as possible.

For the filling and ravioli:

  1. Mix all ingredients together until smooth.  Season to taste.  Place a teaspoon of filling inside a 3 inch square of pasta dough.  Fold one edge over and seal edges, pressing together firmly with fingers.  Trim with a ravioli cutter for presentation.  Boil ravioli for 2-3 minutes in a gently boiling, salted pot of water.

For the sauce:

  1. Melt butter in a small saucepan until beginning to foam.  Add fennel and sautee until fragrant, about 1 minute.  Add blood orange juice and reduce to desired consistency.  Season with salt as necessary.  Serve over ravioli; top with blood orange zest.
http://www.amazon.com/Flavor-Bible-Essential-Creativity-Imaginative/dp/0316118400/ref=sr_1_1?ie=UTF8&qid=1298935093&sr=8-1
Dillicious.

0 February 22, 2011 Recipe

Dillicious.

Vote for me here!

The second stage of the “Ridiculously Delicious Challenge” hosted by Marx Foods consists of developing your own recipe using two ingredients out of a box sent by Marx Foods.  There aren’t many things I like better than receiving a box full of food in the mail, which actually seems to happen to me at a wonderful frequency, so I was a little bit thrilled about this.  Upon opening the box last Tuesday, I was greeted with small samples of many exciting spices – including saffron, dried Tepin chilies, and grains of paradise – but the thing that really got me was the dill pollen.  Mostly because as soon as I opened the top of the box the scent of dill pervaded my entire apartment.  (Thanks to a Christmas gift of lovely glass spice jars from my baby bro, the scent of my apartment has since returned to equilibrium.  Thanks Ryan!)  While sitting and writing out ideas of different recipes that could incorporate two of the spices in a harmonious way, I could not escape the scent of the dill, and so I was having a tough time imagining saffron scented rice or Tepin chile enchiladas or really anything that didn’t scream of the Great White North.

I wanted to come up with a simple but elegant combination that would really show off both the dill and my second chosen ingredient – Szechuan peppercorns.  My solution – cucumber cups stuffed with a feta-dill filling and served with a lemon-Szechuan dressing.  Really, they came together quite nicely, and even though I did my photo shoot 30 minutes after breakfast (such is the life of a very busy college student with limited daylight hours at home – I also did my hot fudge photo shoot at 9:30 in the morning and ended up eating half of it before forcing myself to stash it in the freezer) I ended up eating the whole tray.  These would be lovely as a fresh and bright party appetizer, although the dressing might need to be served on the side for neatness.  You will probably need to tinker with the cucumber-filling-dressing ratio until you find your perfect combo, but what I have listed here is a good base.  Ridiculously dillicious, you might say.  God I love puns.

Voting will take place on the MarxFoods website from March 1st to March 4th.  Vote here!


Cucumber Cups with a Feta-Dill Stuffing and Lemon-Szechuan Dressing

Makes 1 cucumber’s worth (4-5 pieces).  Scale as needed.

  • 1 cucumber
  • 2 oz. crumbled feta cheese
  • 2 TBS sour cream
  • 3/4 tsp. dill pollen
  • 2 TBS lemon juice
  • 1/4 c. olive oil
  • Szechuan peppercorns, ground/grated, to taste
  • Dill pollen, for finishing
  1. Peel the cucumber and cut into 1 inch rounds.  Scoop out the middle from 1 side of each round, so that the cucumber forms a stand-alone cup.
  2. In a small bowl, mix the feta cheese, sour cream, and dill pollen until well combined but not completely smooth.  In another small bowl, vigorously whisk the lemon juice and olive oil together until uniform.  Add the grated peppercorns a pinch at a time, tasting the dressing between additions, until the spiciness is to your liking.
  3. Stuff each cucumber cup with a tablespoon of feta filling.  Sprinkle more dill pollen on the top of each cup, and drizzle with dressing.
Crave.

1 February 9, 2011 Dessert

Crave.

When I get a craving for something, it will not go away until I eat that thing, and exactly that thing.  Actively depriving myself of that thing for a full week does not work.  Eating everything in the fridge but that thing does not work.  Waiting it out does not work.  And so I’ve learned that the only thing to do when a craving hits is bite the bullet and do whatever it takes to get some of it.

Now, when I say craving, I don’t mean the feeling of “yeah, I could totally go for a burrito right now.”  I mean the kind of craving where you’re sitting at your desk completely occupied by something else when suddenly your mind lights up and the only thing in the world you want is a glass of grapefruit juice.  Or a hunk of parmesan cheese.  Or dark chocolate truffles with a cherry center.  The cravings I get are very intense and very specific.  And no, I am not pregnant, but thank you for your concern.  The worst kind of craving is the very specific kind where you can’t figure out exactly what it is you’re wanting, and so the only thing left to do is work your way through the fridge by process of elimination.  Life is hard.

In December my major craving was for hot fudge.  Bad one, right?  At first, as usual, I tried to ignore it.  Then I gave in and did an emergency Kroger run late on a Friday night, leaving with only a bottle of fudge and some whipped cream.  The cashier gave me a pity smile and told me I would feel better soon and that she would join me but that she had a wedding dress to fit in to soon.  Thanks.  Thanks a lot.  Anyway, this hot fudge I bought only half cut it, so while it de-intensified (I’m pretty sure there’s an actual word for that…) my craving, it didn’t kill it.  And that’s when I realized that it wasn’t just any hot fudge I was craving, it was homemade Ben&Jerry’s hot fudge.  See?  I told you they were specific.

This hot fudge is the epitome of hot fudge.  There is nothing fudgier except maybe actual fudge, but even then I think this might win.  I eat it out of the fridge on a spoon when we have it at home.  Which, thankfully, is infrequently.  I also have some particularly positive associations with it.  (But let’s be real, how could you have anything but positive associations with hot fudge?  You had a traumatic experience with it as a child?  You were eating it out of the fridge when your boyfriend came home and dumped you for being a glutton?  Nope, you would still like it.  But back to the story.)  When we were young and innocent and unusually chatty (read: in high school), there was a winter semi-formal every year.  And every year the 8 of us girls would get all dressed up and spend 2 hours awkwardly dancing with boys and then we’d all go back to my house where my parents would have set up the living room with a pile of futons and blankets in front of a blazing fire.  And on the table there would be a silver pitcher of Castillian hot chocolate, ice cream, bowls, and this hot fudge.  Then we would stay up all night talking and giggling and eating chocolate until we fell asleep in a pile at 4 in the morning in what we referred to as our “nest.”  And in the morning, my mom would make us all waffles with strawberry sauce and whipped cream.  No, I am not part princess.  Yes, I had a really incredible childhood.

Anyway, now that I’ve finished the crappy store bought fudge (I know, I know, I’m so dedicated) and it’s February, it’s time to break out the big guns.  I mean, let’s be honest, February is like everyone’s least favorite month: it’s still too cold to look forward to spring, everyone’s sick all the time, and the only holiday is Valentine’s day.  What I’m trying to say is, everybody deserves a little Ben & Jerry’s lovin’ in February.  Your January diet won’t hate you that much.  Dig in.

Ben&Jerry’s Hot Fudge

Accessed via FamilyFun.  Makes about 2 cups.

  • 2 oz. unsweetened chocolate
  • 1/4 c. butter
  • 6 TBS unsweetened cocoa powder
  • 1 c. sugar
  • 1/4 c. heavy cream
  • 1/4 c. milk
  1. In a double boiler, melt the chocolate and butter, stirring, until smooth.  Gradually whisk in the cocoa powder, whisking until it dissolves.  Gradually stir in the sugar (consistency will be that of wet sand).  Cook over simmering water for 20 minutes, stirring every 2 to 3 minutes.  Gradually stir in the milk and cream.  Cook over double boiler for about an hour, stirring occasionally.  Fudge is done when the sugar has dissolved completely.  Keeps in refrigerator for at least as long as it will take you to eat it.
Out of Commission/Ridiculously Delicious Challenge #1

0 February 2, 2011 Uncategorized

Out of Commission/Ridiculously Delicious Challenge #1

*Please forgive the gratuitous duck picture.  I couldn’t bare looking at a completely colorless post.  Also I think I’m really funny.

Due to an unfortunate accident involving a faulty tupperware container, this soup, and my computer, I will be unable to share beautiful photos and recipes with you for the next 5 to 10 business days.  Well, I could share recipes, but they wouldn’t have any pictures and would therefore be super boring.  Severely disappointing, I know, especially given that I was all set to show off one of my favorite healthy breakfasts and my favorite completely unhealthy hot fudge recipe.  Luckily, I was recently informed that February is the the kick-off month of Marx Foods’ “Ridiculously Delicious Challenge,” a 4 stage competition which I am allowed to participate in because I’m awesome.  Or maybe because I’m talented.  Or maybe because I’m just the best.  Oh wait… I’m actually only included because I was lucky enough to win something else from Marx Foods courtesy of a random number generator that just so happened to fall on my random number.  So we’ll just stick with “I’m lucky.”

The first part of the challenge is to choose 3 items from a list of Marx Food products and create an imaginary recipe from them.  Thankfully, creating imaginary recipes is very conducive to owning soup-soaked electronics.  The list of 21 foods includes 10 kinds of meat, 7 pastry staples, and 4 fruits/vegetables.  While it would be totally excellent to win 9 pounds of boar ribs, 10 pounds of venison/bison/llama/yak burgers, AND 9 pounds of specialty sausages with names like “Wild Boar Sausage with Cranberries and Shiraz,” a. I would be the biggest walking heart attack on the planet, and b. it would be very hard to create an interesting dish made solely of 27 pounds of meat.  So I was faced with some serious decisions.

The meat was the easiest – first of all, I could rule out salmon, oysters, and “live geoducks,” which, to my great disappointment, are not actually live ducks that are somehow related to geology or geodes or something else awesome, but repulsive looking shellfish-y things.  No offense geoducks, you just aren’t my style, seeing as how you come from the sea and all.  Deciding between the quail and the burgers and the sausages and the ribs and the duck was a little harder… but I really love duck.  I order it every chance I get, but I’ve never tried cooking it.  I’ve always been too afraid that I’ll mess it up.  But with 24 breasts?  I could even totally butcher 2 or 3 and really have duck down by the 24th try.  Very appealing.

So duck.  And because duck and fruit are a must, and they are already frozen and so have  little risk of not being eaten before going bad by little old me, huckleberries.  Lastly, vanilla beans, because I’m finding the idea of a huckleberry, wine, and ginger sauce ever so slightly scented of vanilla very intriguing.

And there you have it, that’s my entry: pekin duck breasts, frozen huckleberries, and madagascar vanilla beans.  The recipe: a pan-seared duck with a vanilla-scented huckleberry wine sauce, served over a creamy polenta, or perhaps a savory polenta cake.  I’m kind of getting hungry just imagining it.

Pasta with Terrence

0 January 23, 2011 Pasta

Pasta with Terrence

I totally made out at Christmas this year.  Really, it was a banner year.  I mean, there was a camera in my stocking – a very good omen.  Not that Christmas is about the presents… but thank you, Santa, I appreciated them.  As might be expected, food was a strong theme among the gifts I received.  My kitchen is now the proud owner of a stunningly designed box grater, a garlic press that doubles as a weapon due to it’s heftiness, and 16 spice bottles to (finally) contain the wonderful scents of India that have been emanating from my cupboard all year.  A true surprise, however, was Trevor’s gift – a 3.5 hour pasta cooking class for the two of us in Boston.

Walking up to the door of the classically Bostonian brick townhouse on a cold Tuesday night, I was a little bit nervous.  Would there be a lot of other people?  Would we get to cook ourselves?  Would he like us?  We rang the doorbell and Terrence, our teacher, gruffly welcomed us in and led us downstairs to his kitchen, where we sat behind two desks facing the island.  He poured us each a glass of wine, and then started talking.  Still a little nervous, even though I was thrilled that it would just be the two of us and that it would clearly be hands on, I strove to be the most attentive student possible.  Terrence lectured us a little on olive oils, how to properly cut an onion, and what we would be making.  I listened and took notes while also actively envying his kitchen – not huge or shiny or modern, but filled with beautiful old copper pots hanging from the walls, dozens of tiny mise en place bowls, and two ranges.  I can’t wait to have my own kitchen.

As everyone warmed up to each other, I began to relax, and then, we started cooking.  We were making four dishes – a mushroom ragu, a shrimp ragu, a soppresatta and ricotta penne, and a baked olive and ricotta rotini.  I immediately delegated the shrimp to Trevor, not being a seafood eater – although I did try the final dish! – and called the mushroom ragu and the soppresatta dish.  We followed the recipes Terrence had given us while he corrected our chopping, measuring, and seasoning techniques.  I think I benefited most from the knife skills tips – I’ve never been taught them before and it took me a while to get the hang of the motion, but once I did, I really saw the advantage.  The first three hours flew by, and when all four of our dishes were done, we brought them into the dining room, opened another bottle of wine, and sat down to eat and talk with Terrence.  The whole experience was such a lovely treat, especially because of its intimacy, and I would love to do something like it again.

My favorite dish of the evening was this baked kalamata and ricotta rotini.  Trevor and I brought all of the leftovers back home to his apartment where they were actually the only food and we subsisted on them and Ben and Jerry’s for 3 days.  So the fact that I didn’t get tired of eating this for 3 days in a row?  Means it was really good.  Try not to be tempted to tinker with the recipe because of its simpleness.  I always find myself writing off recipes without enough “interesting” ingredients or with too few seasonings and adding my own twist.  Sometimes my twist is good, but sometimes it overpowers the dish and I find myself missing out on whatever was originally there.  This dish is one where the simplicity is why it works – it’s well-balanced and flavorful with only a few ingredients that really enhance each other.  Just what I’ve decided to strive for this year.  In fact, the starting combination of ricotta, olive oil, and sea salt is so wonderful that I would probably eat a bowl of just those three ingredients if it didn’t sound like the least healthy idea in the history of unhealthy ideas.

If you’re in the Boston (or Blue Hill in the summer!) area and interested in taking a class with Terrence, his class information can be found here.

Baked Ricotta and Kalamata Olive Rotini

Learned at Terrence Janericco’s cooking school.  Serves 4.

  • 3/4 lb. rotini
  • 1/4-1/2 c. reserved cooking water
  • 1 c. ricotta (part skim works fine)
  • 1/4 c. olive oil
  • sea salt to taste
  • 6 oz. fresh mozarella, cubed
  • 3/4 c. pitted, chopped kalamata olives
  • 1/4 c. grated fresh parmesan cheese
  1. Preheat oven to 400°F.  Bring large pot of salted water to a boil.  Cook rotini according to package directions.
  2. While rotini cooks, whisk together ricotta, olive oil, and sea salt until smooth.
  3. Drain rotini, reserving 1/2 cup of the cooking water.  Add the cooking water to the ricotta mixture a little at a time until ricotta is no longer grainy and the mixture is a thick liquid.  Add mozarella, kalamata olives, and cooked rotini and stir to combine.
  4. Place pasta and ricotta mixture in baking dish.  Sprinkle 1/4 c. grated parmesan over the top.  Bake for 15 minutes, until parmesan is golden brown.
Sugar is Dangerous

0 January 17, 2011 Recipe

Sugar is Dangerous

And no, I don’t mean to your waistline.

The other day I cut myself on a piece of brown sugar.  As in, the sugar itself caused me to bleed.  I mean, I expect to occasionally slice through my finger with my terrible $3 knives, or burn my hands when I try to eat bacon straight from the pan.  But sugar?  Total surprise.  I guess I’m going to have to reconsider all of my assumptions about life.

Anyway, this soup uses molasses, the safer, liquid alternative to brown sugar.  So I feel comfortable making it.  You probably will too, unless you were in Boston for the Great Molasses Flood of 1919, in which case you might want to avoid all sugar products.  But I hope you weren’t, because this soup is delicious.  Although, I might only feel like that because it is a vehicle for blue cheese and bacon.  I’m not sure how I would feel about it if it didn’t have those two components.  So let me rephrase that: this soup is a delicious vehicle for blue cheese and bacon.  And if you’ve had a leftover can of pumpkin in your cupboard since the great iron chef duke pumpkin challenge, and you also have 15 minutes to spare, why not make it?

Pumpkin Soup with Bacon and Blue Cheese

Adapted from allrecipes via Framed Cooks.  Serves 2.

  • 1 can 100% pumpkin puree
  • 2 c. chicken stock
  • 1/2 c. half and half
  • 3 TBS molasses
  • 1/2 tsp. cinnamon
  • 1/4 tsp. nutmeg
  • 1/4 tsp. allspice
  • 1/4 tsp. ginger
  • 1/8 tsp. cayenne pepper
  • salt to taste
  • 2 slices bacon, diced
  • 1 shallot, minced
  • 1/3 c. blue cheese crumbles
  1. In a medium pot, heat pumpkin, chicken stock, half and half, molasses, and spices until simmering gently.  Allow to cook for around 10 minutes.  Season with salt to taste.
  2. In a large frying pan, fry bacon pieces until beginning to brown.  Add minced shallot and cook until both bacon and shallot are browned.
  3. Serve soup hot, topped with the bacon shallot mixture and blue cheese crumbles.
Simplicity and a New Year

0 January 15, 2011 Pasta

Simplicity and a New Year

One year ago today, I wrote my first blog post.  It was a recipe for an omelette, which, lets be honest, no one really needs a recipe for. It did not include any pictures, which, lets be honest again, is 70% of the reason most people visit food blogs.  And it has this sad undertone that’s so characteristic of the way I used to feel at Duke pretty much all the time – this underlying longing to be home.

Fast forward one year.  I can honestly say I’m happy at Duke – I’ve dealt with the reasons I felt so lonely, decided to stop worrying so much about friends and parties and things, and hit my groove.  Yes, I still have sad days.  Yes, I still feel lonely sometimes.  But I have wonderful friends, a lovely place to live, and new opportunities almost every day.  This year has easily been the best one yet, and while I can’t say that I’ll be sad to graduate (I am so excited to graduate!), I’m not going to leave Duke resentful.

And this blog – I am much better at it then I was a year ago.  Sometimes I find blogging so fulfilling – like when friends approach me to say they tried and liked a recipe.  And sometimes I find it kind of a chore – like when I’m feeling uninspired and guilty about not posting.  But fulfilling definitely wins out over the chore part, so I’m gonna stick with it.  Over the past year I’ve learned a ton about both food and the culture surrounding it, and I’ve tried dozens of new foods.  When I first started cooking I always wanted to try the most complicated, ingredient-laden recipes I could find, for the challenge of it.  Lately, though, I’ve been the most intrigued by simple recipes.  Recipes with only a few ingredients that enhance each other perfectly.  How to cook mushrooms so that they taste even more like mushrooms.  Recipes that are so simple they could actually be considered techniques.  So this year, I want to explore simplicity.

This pasta recipe is a perfect example of ingredients combining to enhance one another without losing their integrity.  The sauce is simple – butter, shallots, lemon, cream, and salt.  Together, the cream tastes sweeter than it would on its own, the lemon brighter and more savory, the shallots just releasing their pungency.  The kale and peas are cooked just long enough that they begin to mellow in the sauce.  Pour over pasta and voila, the perfection of simplicity.  Really, it’s so good.

Lemon Cream Sauce with Kale and Peas

Serves 2-3.

  • 1 TBS butter
  • 1 shallot, finely diced
  • 1/4 c. heavy cream
  • juice from 1 lemon
  • 2 c. chopped kale
  • 1 c. frozen peas
  • sea salt to taste
  • 1/2 lb. angel hair pasta
  1. Bring a large pot of salted water to a boil.
  2. In a large pan, melt butter, and sautee shallot for 2-3 minutes.  Add cream and lemon juice and stir to incorporate.  Add chopped kale and frozen peas and cook for 3-4 minutes, until kale has begun to soften and peas are heated through.  Add salt to taste.  Lower heat to very low.  (Note: I add lemon until it’s on the verge of being too lemony, and then add salt to bring the flavors together.  It works perfectly and is addictively flavorful.)
  3. Cook angel hair according to package directions.  Drain.  Pour sauce over pasta and serve hot.
Epic Feats of Civil Engineering

0 December 30, 2010 Uncategorized

Epic Feats of Civil Engineering

What else are two civil engineering degrees good for?

Gingerbread House Recipe

From my mother.

  • 2 ½ C packed dark brown sugar
  • 1 ½ C heavy or whipping cream
  • 1 ¼ C molasses
  • 9 ½ C flour
  • 2 T baking soda
  • 1 T ground ginger

1. In a very large bowl, with wire whisk beat brown sugar, cream and molasses until sugar lumps dissolve and mixture is smooth. In medium bowl, combined flour, soda and ginger. With spoon, stir flour mixture into cream mixture in 3 additions until dough is smooth.
2. Divide dough into 4 equal portions; flatten each into a rectangle to speed chilling.  Wrap each piece well with plastic wrap and refrigerate at least 4 hours or overnight, until dough is firm enough to roll.

Roll dough
1. Grease and flour large cookie sheets. Roll out dough, 1 rectangle at a time, on each cookie sheet to about 1/8 inch thickness (put damp paper towels under cookie sheets to keep them from shifting while you roll).  If dough is too crumbly, add water a tablespoon at a time until it is elastic.
2. Trim excess dough from sheet; wrap and reserve in refrigerator. Chill rolled dough on cookie sheet for 10 minutes.
3. Place floured cardboard patterns on dough and cut pieces making sure to leave 1 ¼ inches between pieces for expansion. Combine and reroll as necessary.

Bake dough
1. Preheat oven to 350°F.
2. Brush pieces lightly with water before baking. Bake 25 to 30 minutes or until pieces are firm to the touch – don’t overbake.
3. While gingerbread is warm, place pattern pieces on top and re-trim if necessary.

Momma’s note: I basically ignore the “Roll dough” section and just roll it out on a counter (cold soapstone helps here), cut the pieces, transfer and reshape on the sheet and bake. I think the key is to let them harden for a day before constructing.


Royal Icing

  • 1 leeb confectioner’s sugar
  • ½ tsp. cream of tartar
  • 3 egg whites

In bowl of electric mixer mix all ingredients until combined. Set speed on high and beat at least 7 minutes. Store in airtight container.

Make-believe.

0 December 18, 2010 Pasta

Make-believe.

So here’s the deal.  It’s the tail end of finals week.  I’ve been cooped up in my apartment for the better part of ten days.  It’s barely gotten above 30° since I got back from Thanksgiving break.  We had an ice storm on Thursday.  And it’s snowing, again.  I thought I lived in the South.  I was under the impression that it wasn’t supposed to snow here.  Ever.  Or maybe once in a while in a fluke extreme weather event.  I know I used to live in the South, because during finals week of fall semester freshman year I didn’t study because I was tanning.  Tanning.  In a sundress.  On the lawn.  In December.  And now I am not studying because I’m staring out the window at the snow trying to keep full-on depression from setting in.

The solution?  Pretending.  Pretending that it is not December.  Pretending that it is not finals week.  Pretending that it is summer, and I am on a picnic at the Eno, and I have no commitments, and I am eating lovely, summery, picnic food.  And watching the deer graze and the turtles bask.  And finding relief from the intense heat under a beautiful, freezing cold waterfall.

That day, which I am pretending now but which really happened once upon a time, was really wonderful.  Finding the Eno was something of a turning point for me.  I’d gone through the past three years not exactly hating Durham, but pretty convinced that it couldn’t offer me anything that I really wanted.  Like nature, and peace, and quiet, and beauty, and the exhilaration of being in a perfect place.  I tried the quarry – it was a bit warm and mucky and overcrowded for me.  The Duke golf course is like almost being in nature but being constantly reminded that you aren’t really.  And then I found the Eno.  It’s pristine.  The water is fresh and cold.  After months of either sweating outside or being bombarded with stale, air conditioned air inside, the feeling of being both cool and in fresh air was incredible.  There were actually herds of deer grazing nearby.  Trails meandered along the river.  Families swam in the amazingly cold water and laughed and the sun was warm and people like us had picnics and salamanders skittered about on the rocks and trout lurked in shadowy pools.  I stepped on a crayfish.  I played with the clay.  I relaxed.  I was so happy there.

Back to reality.  There is one part of that day that I can more than just imagine – the food.  On our picnic, we brought homemade baguettes and cannelini dip and camembert and poached pears and cookies and this wonderful pea and edamame bruschetta spread.  It was all delicious.  But the pea and edamame spread was especially delicious.  It’s the loveliest shade of green, it’s fresh and bright and creamy, and it screams “I am summery!  I am delicious!”  So I made some.  While it snowed.  And just the color made me feel a little better.  Instead of serving it on a baguette I like to have it like pesto, mixed in with some angel hair pasta and sprinkled with chickpeas and grated parmesan cheese.  It’s lovely.  I feel better.  Please come over if you would also like to pretend it’s not December.

Pea and Edamame Pesto

Adapted from Inspired Taste.  Makes about 2 cups of pesto.

  • 1-1/2 c. frozen edamame
  • 1/2 c. frozen peas
  • 4 oz. parmesan cheese, roughly cubed
  • 4 cloves garlic, peeled
  • 2 scallions, ends removed
  • 1/8-1/4 c. olive oil
  • 2 tsp. lemon juice
  • salt and pepper to taste
  1. Cook edamame and peas according to package directions, or boil edamame in salted water for 4 minutes, adding peas for last minute.
  2. In a food processor, pulse parmesan, garlic, scallions, and 2 TBS olive oil until smooth.  Add edamame, peas, and lemon juice and pulse to combine.  Taste.  Add salt, pepper, or more cheese to adjust seasonings to your liking.  Add olive oil until you reach the consistency desired.  Serve on pasta, on toasted bread, or stirred into eggs.
Good foodie.

0 December 15, 2010 Recipe

Good foodie.

So, the friendly people over at Marx Foods recently asked the internet-at-large “What have you done to be a good foodie this year?”  And, being a member of the internet-at-large, I felt compelled to answer them.  It would’ve been rude not to, right?

And so I began pondering.  Pondering and musing.  This was my first year blogging, and I’m getting the hang of it.  My second year cooking for myself, and people seem to think I’m alright at that.  My 21st year eating, and I consider myself a master at that.  So I have some experience with food.  But what about this year made it different?  Seeing as how it’s finals week and I’m a senior in college and I’ve been having all sorts of deep thoughts about the value of a good education and how college has changed me and what on earth I am going to do in the real world, the answer came to me pretty quickly.

Learning.  This year, in the realm of food and in pretty much all the other realms of my life, the thing that has been most significant throughout my experiences has been learning.  In terms of food and blogging and eating, I’ve learned a ton.  Big things and little things.  Big things like how to take a decent food photo, how huge the difference is between high quality and cheap ingredients, and how much work (but oh how rewarding too!) blogging can be.  Little things like how to like mushrooms and tomatoes, two foods I was convinced I hated a year ago, how incredible slices of fresh avocado can taste, that cardamom is what makes danish pastries taste like danish pastries and not just any other baked good, and how to consistently make good pasta dough.  I’ve tried countless new recipes, ordered meals I wouldn’t have touched as a kid, and discovered incredible websites.  On any given day I probably spend a good hour or two thinking about food and recipes and menus – sometimes actively, but sometimes passively, like when I’m sitting in class and realize that half of my notebook is filled with flavor combinations rather than steel code stipulations like it should be.  And I like it.  I hope I can find a way to make this learning continue and deepen.

In the non-food portion of my life I’ve learned a lot too.  Probably too much to say.  So I’ll just touch on the big stuff… like how to take care of my own finances.  How to dress and talk and smile for job interviews.  How to be rejected from said job interviews.  How much I truly love to dance.  How to stop crying and pull yourself together when you’ve been dumped and your world feels shattered.  How frustrating research is.  How good independence feels.  How important being with other human beings on a daily basis is.  How little I know about what I want in my life.  How much time I have to figure it out.  How to save your last tailgate.  And on and on.

And there you have it.  That’s what’s made me a good foodie, and a good student, and good at being myself this year.  And since I couldn’t leave you without a recipe, in the spirit of learning to like new things and those friendly people over at Marx Foods, I decided to try their Hungarian Mushroom Soup.  They posted it a few weeks ago, and although they aren’t flavors I usually work with, the recipe really intrigued me.  Maybe it’s the time of year.  Maybe it’s my recent mushroom kick – now that I know I like them, I want to eat them!  Maybe it’s my inner Eastern European.  Who knows.  But I made it, and although I was apprehensive beforehand, I liked it more with every bite.  It tastes very authentic (although you should know that my only authority in that matter comes from one week in Hungary last year), and rich and the dill really comes through in a great way.  It also took 30 minutes to come together, including 20 minutes of time soaking the mushrooms, so that was a nice surprise.  Everyone loves a 10 minute meal.  The only thing that put me off about it was the chewiness of the reconstituted mushrooms – next time I would either chop them up into smaller pieces pre-soak, or blend the soup when it was finished.

One last thing… Since they asked, the gift I would most like to receive if a stocking full of edible goodies happened to arrive on my doorstep from Marx Foods would be saffron threads.  Why?  Honestly, because they are way out of my weekly food budget range, and they have such a lovely flavor and I keep having to not make recipes where they are a key ingredient.

Hungarian Mushroom Soup

Reposted from Marx Foods, scaled down to serve 2.

  • 1/2 oz. dried mushooms
  • 1 TBS butter
  • 1/2 c. diced onion
  • 1 TBS flour
  • 1 c. milk
  • 1 tsp. paprika
  • 1/2 c. stock or water
  • 2 TBS sour cream
  • 1 tsp lemon juice
  • 1/2 tsp. dill
  • 1/2 tsp. salt
  • 1 tsp. vinegar
  1. Pour boiling water over mushrooms to cover.  Let stand 20 minutes.
  2. In a medium saucepan, sautee onions in butter until translucent.  Add flour and cook for another 2 minutes, stirring constantly.
  3. Add mushrooms and their soaking water and stir until thickened.  Add milk and paprika and cook 2-3 minutes.
  4. Add 1/2 c. stock, sour cream, lemon juice, dill, salt, and vinegar and stir until all incorporated.  Cook 2-3 minutes more to let flavors combine.  Serve hot with a dollop of sour cream.
  • « Previous Page
  • Page 1
  • …
  • Page 49
  • Page 50
  • Page 51
  • Page 52
  • Page 53
  • …
  • Page 57
  • Next Page »

Primary Sidebar

Subscribe!

Get creative recipes and menu ideas delivered straight to your inbox.

Most Popular

A House // Sweet Potato and Coconut Milk Soup with Brown Rice and Lentils

Monthly Fitness Goals: July // Homemade Spinach Wraps with Chopped Greek Salad

A New Job // Classic Seven-Layer Bars

Butternut Squash Carbonara with Fried Sage and Caramelized Onions

Happy Birthday, Trevor! // Peanut Butter Fudge

Cookbook Review and Giveaway: Home Made Winter

Drizly

Please note!

Full disclosure: if you purchase anything at Amazon using the above links or any other links to Amazon on this site, I will receive a small commission. Just so you know!

Copyright© 2018 · Cookd Pro Theme by Shay Bocks

View Mobile Site
This site uses cookies: Find out more.