• Skip to primary navigation
  • Skip to content
  • Skip to primary sidebar
  • Home
  • Recipes
  • Features
    • Cookbook Reviews
    • Ingredient of the Week
    • Sunday Dinner
    • Fitness Goals
  • Travel
  • About
    • Privacy Policy
    • Cookie Policy
  • Work With Me

Katie at the Kitchen Door

Globally-inspired, seasonal recipes

Blog Page

Chocolate Almond Granola Bites

May 28, 2015 Breakfast

Chocolate Almond Granola Bites

Chocolate Almond Granola Bites {Katie at the Kitchen Door}

Chocolate Almond Granola Bites {Katie at the Kitchen Door}

I’ve learned by now that there’s really no way around my post-lunch chocolate cravings. I’ve tried ignoring them, or substituting something healthier, and sometimes that works for a few days, but it inevitably ends in a huge chocolatey binge at some point.  I’m just a person who needs chocolate, and that’s that. But since I’m determined to rein in the travel-driven overeating of the last few months, I’m currently searching for less-bad-for-you, more-portion-controlled chocolate treats.

Chocolate Almond Granola Bites {Katie at the Kitchen Door}

For the past few months my chocolate fix has been to go down to the lobby shop and fill a bag with chocolate covered almonds, chocolate covered raisins, and white chocolate pretzels. This is a bad, bad habit, because even if I tell myself a lot of times that the bag of chocolate-covered goodies will last me all week, I always eat it in one sitting, staring at my computer screen, during that 3pm work slump. (Is that a universal thing? It seems to be at my office). And then I usually feel sick, because I usually overfill the bag.

Chocolate Almond Granola Bites {Katie at the Kitchen Door}

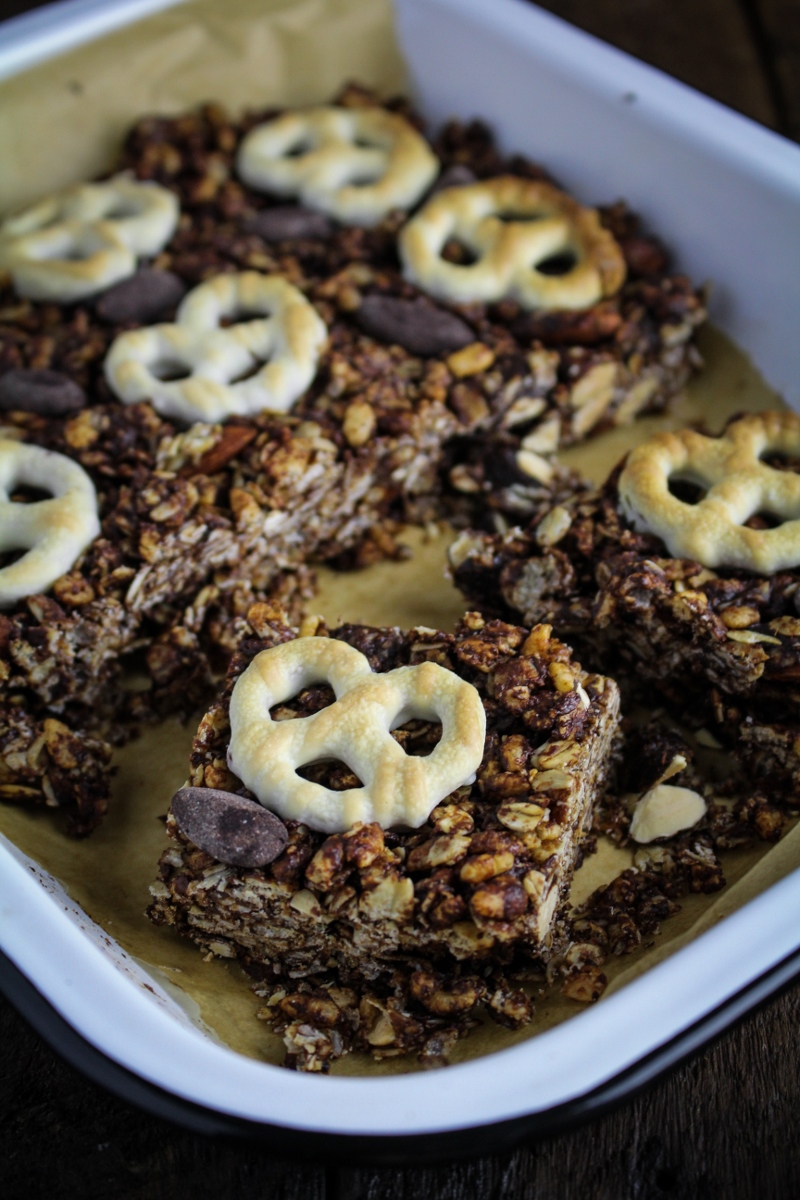
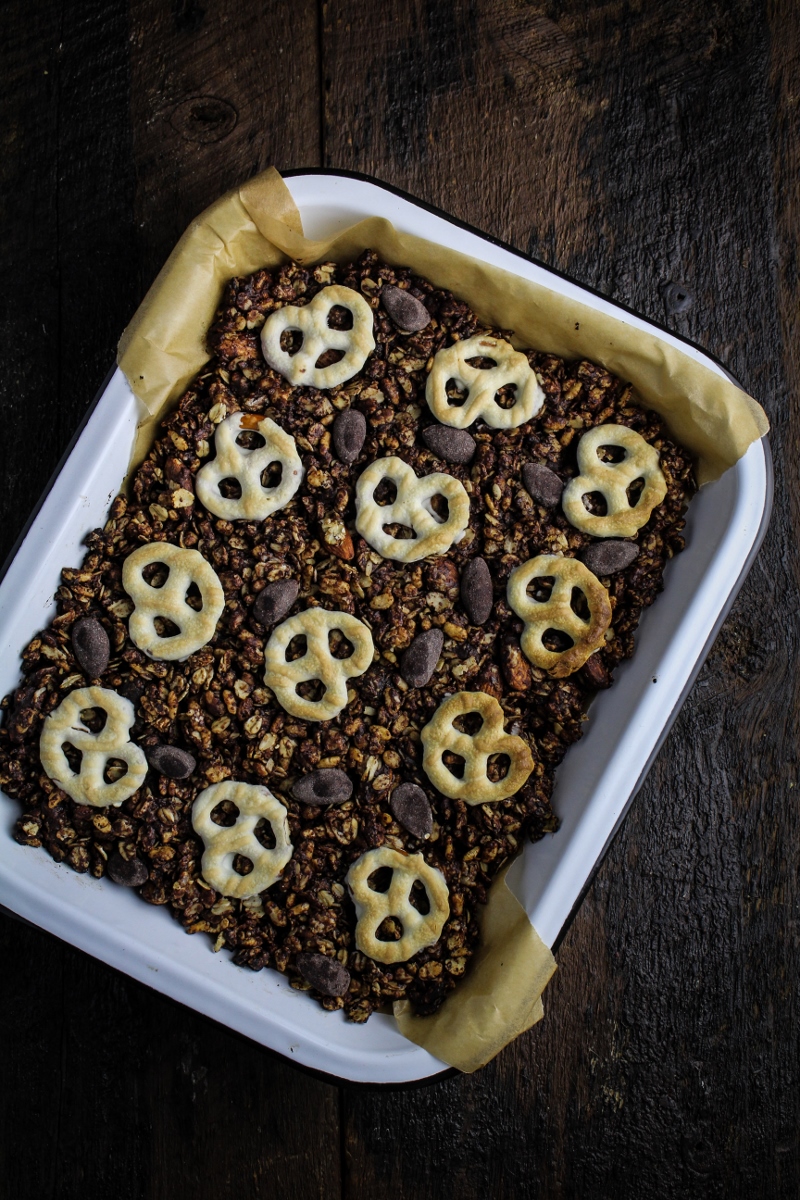
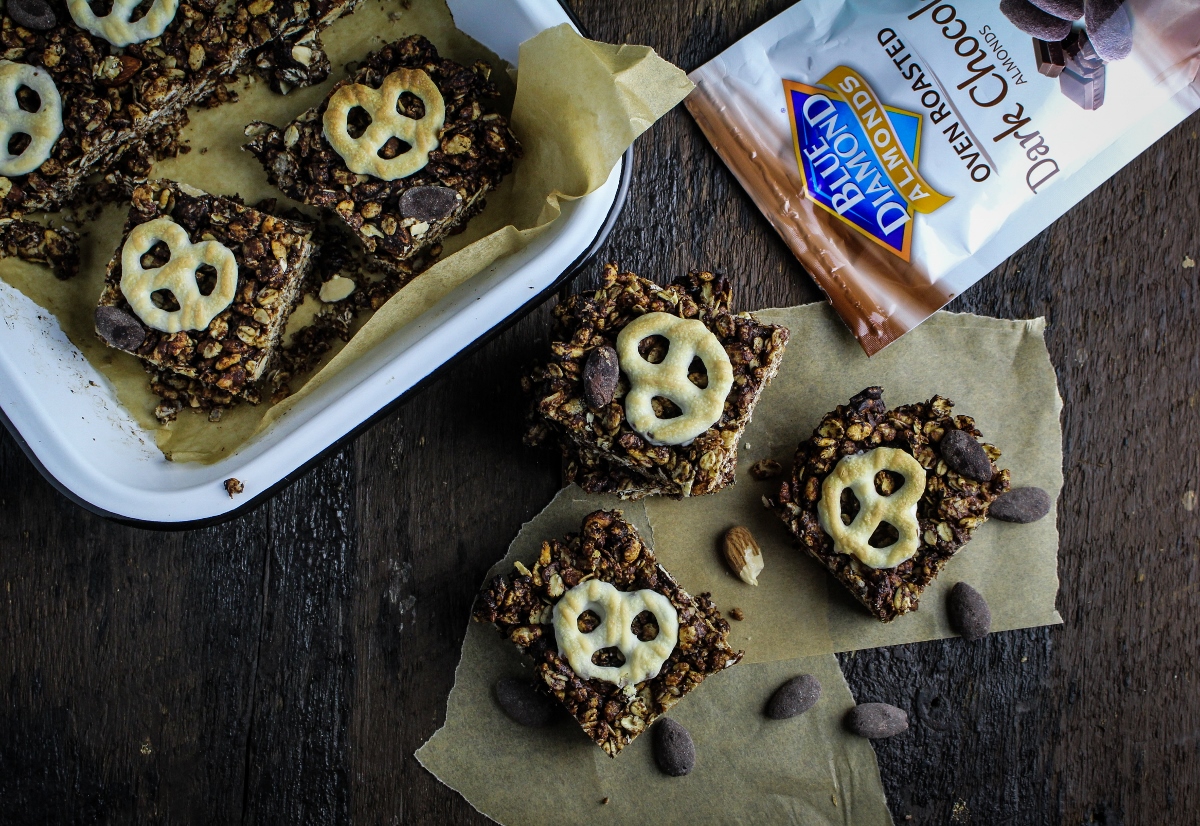
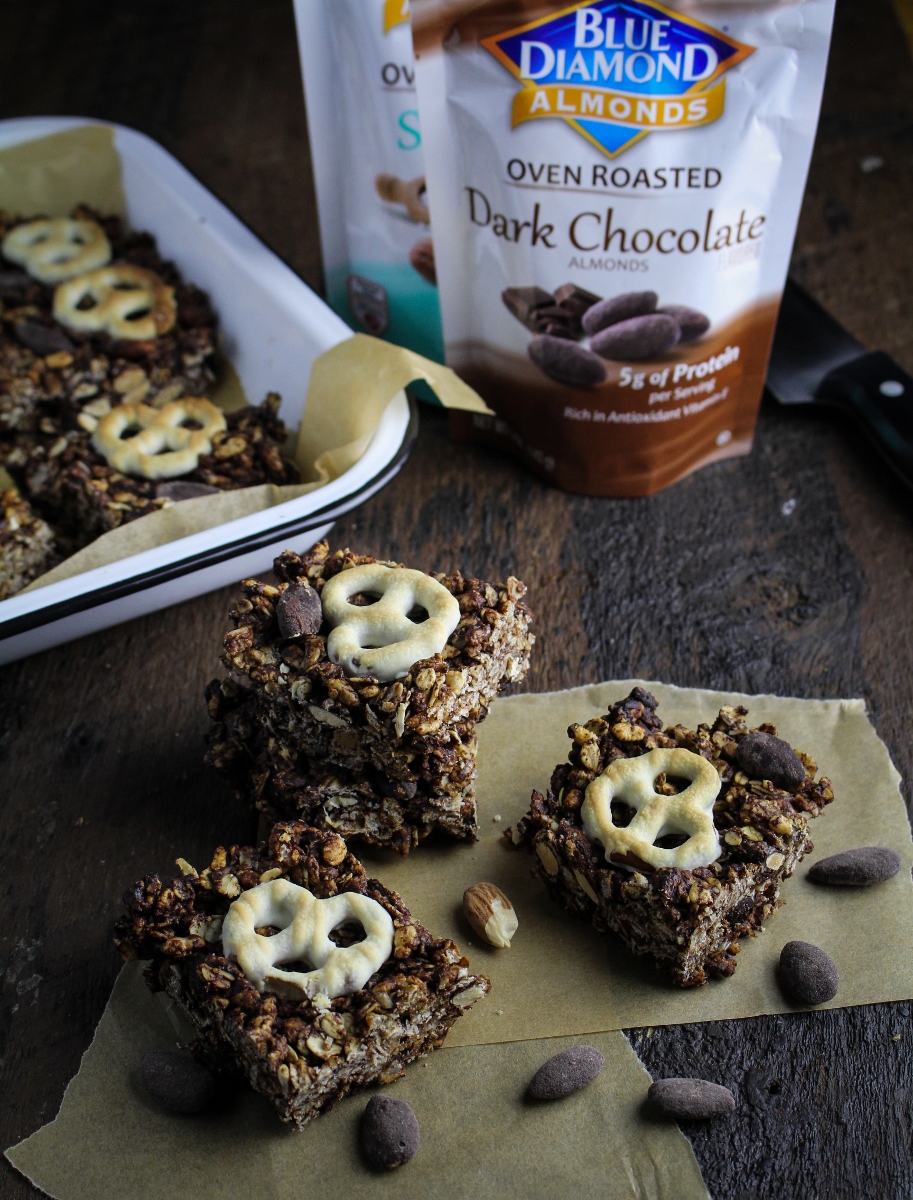
So taking inspiration from this habit, I came up with a recipe that hits the same notes but is a bit less indulgent: Chocolate Almond Granola Bites. Using oats, rice cereal, a mix of Blue Diamond Dark Chocolate and Sea Salt Almonds, almond butter, honey, and of course, chocolate, I whipped up a batch of these bars, and then cut them into very manageable pieces. They are still chocolatey and satisfying but the almonds, almond butter, and oats give them more staying power and nutritional value. I also used unsweetened chocolate, which made me feel extra virtuous. I’m not saying that eating one of these is the same as eating a bag of chocolate covered pretzels… but it does the trick!

This post is sponsored by Blue Diamond Almonds. All opinions are honest and my own.

Like what you just read? Subscribe to Katie at the Kitchen Door in the box on the right, on Feedly or Bloglovin‘, or follow along on Facebook, Twitter, Pinterest, Instagram, or Google+. Thanks for reading!

Chocolate Almond Granola Bites {Katie at the Kitchen Door}

Chocolate Almond Granola Bites

Makes 16 bars.

  • 1/4 c. almond butter
  • 1/2 c. honey
  • 3 oz. unsweetened chocolate
  • 1 1/2 c. rolled oats
  • 1 1/2 c. puffed rice cereal
  • 1/2 c. Blue Diamond Sea Salt Almonds
  • 1/2 c. Blue Diamond Dark Chocolate Almonds
  • 16 white-chocolate covered pretzels
  1. Preheat the oven to 350°F. Line an 8×8 inch baking pan with parchment paper and set aside.
  2. In a small saucepan, combine the almond butter, honey, and chocolate. Stirring, melt the liquids over low heat until the mixture is smooth and even in color. Remove from the heat
  3. Add the oats, rice cereal, and almonds to a large bowl and stir to combine. Pour the chocolate-honey mixture over the cereal and stir to thoroughly coat the cereal with the chocolate. Let cool to room temperature, then press the mixture firmly into the prepared pan. Press the white-chocolate covered pretzels on top of the mixture, spacing them evenly.
  4. Bake the granola bites for 15 minutes, then remove from the oven. Let cool completely before slicing and serving.
Ecuadorian Locro – Creamy Potato, Cheese and Fava Bean Soup

May 21, 2015 Food

Ecuadorian Locro – Creamy Potato, Cheese and Fava Bean Soup

Ecuadorian Locro - Creamy Potato, Cheese, and Fava Bean Soup {Katie at the Kitchen Door}

It will come as no surprise to most of you that one of my favorite things about my frequently overwhelming travel schedule is all of the opportunities it affords me to eat delicious food. In the past 14 months I have been on 12 international trips, mostly for work, visiting Hong Kong, Ecuador, Canada, Italy, Malaysia, Ireland, Colombia, and Chile. Although right now thinking about it is sort of exhausting (particularly since I just got off a plane from Chile and I get back on one to Colombia in less than 2 weeks), I know how lucky I am to have these experiences.

Ecuadorian Locro - Creamy Potato, Cheese, and Fava Bean Soup {Katie at the Kitchen Door}

I can tell you with certainty that none of these things are good for my waistline, but the three things I love the most about eating in Latin America are:

  1. The juices (yes, please, I would like fresh passionfruit juice with every meal)
  2. Enormous avocados served with everything
  3. The soups

The third one was a little bit of a surprise to me – while I’d eaten plenty of Mexican food and Latin street food before I first traveled to Latin America, I had never even heard of all the incredible Latin soups out there before my first trip to Ecuador. I generally think of Latin America is a place with a pretty warm climate, which is why I never used to connect soup to Latin cuisine. Now that I’ve spent so much time in Ecuador, Colombia, and Chile, though, I can tell you that those high altitude nights can be seriously chilly… and a bowl of hearty, potato-based soup is exactly what you want to eat.

Ecuadorian Locro - Creamy Potato, Cheese, and Fava Bean Soup {Katie at the Kitchen Door}

Ecuadorian Locro - Creamy Potato, Cheese, and Fava Bean Soup {Katie at the Kitchen Door}

A while back I posted my favorite Colombian soup, Ajiaco Bogotano, a thick chicken and potato stew served with generous amounts of avocado and capers. Now, since there are finally fresh fava beans in the markets, it’s time for my favorite Ecuadorian soup: Locro. Locro de papa is an Ecuadorian soup based on the combination of potatoes and cheese – pretty much my two favorite food groups. I’ve had different variations of it in different parts of the country, but my favorite bowl was served in a tiny town outside the quilotoa lagoon, a gorgeous aquamarine lake in a volcanic crater in the Andes. I was actually miserable during my hike down into and back up from the lagoon, the only time I really suffered from altitude sickness, but I think that’s what made the bowl of soup waiting for me at the top so memorable. After two hours of counting my steps in sets of 50, holding back tears and barely able to breathe, sitting down at the long wooden bench and holding a steaming bowl of soup in my frozen hands was heaven. This bowl of locro incorporated lots of fresh fava beans into the usual potato-cheese combination, and now that’s how I like it best. Make it when you need a little bit of comfort on a spring evening.

Like what you just read? Subscribe to Katie at the Kitchen Door in the box on the right, on Feedly or Bloglovin‘, or follow along on Facebook, Twitter, Pinterest, Instagram, or Google+. Thanks for reading!

Ecuadorian Locro - Creamy Potato, Cheese, and Fava Bean Soup {Katie at the Kitchen Door}

Ecuadorian Locro – Creamy Potato, Cheese, and Fava Bean Soup

Serves 4-6. Adapted from Laylita’s Recipes and The Kitchn. Serves 4-6.

  • 2 TBS olive oil
  • 1 small onion, peeled and diced
  • 2 garlic cloves, peeled and minced
  • 2 tsp dried oregano
  • 1 tsp achiote powder
  • 2 large russet potatoes, peeled and cut into 1/4 inch dice
  • 4 c. chicken stock
  • 2 c. water
  • 2 lbs. fava beans in their pods
  • 1 c. whole milk or 1/2 c. heavy cream
  • salt and pepper to taste
  • 6 oz. crumbled feta or queso fresco
  • 2 avocados, peeled and sliced, for serving
  1. In a large saucepan, heat the olive oil over medium heat. Add the onion and saute until soft and translucent, about 5 minutes. Add the garlic, oregano, and achiote powder and saute until fragrant, another 2 minutes. Add the diced potato and saute, stirring frequently, for 5 minutes. Add the chicken stock and water, bring to a boil, then reduce to a simmer. Let soup simmer, uncovered, until potatoes are very soft, about 30 minutes.
  2. While the soup is cooking, blanch the fava beans. Bring a large pot of salted water to a boil. Remove the fava beans from their pods and blanch in the boiling water for 2-3 minutes, then remove with a slotted spoon and run under cold water. As soon as the beans are cool enough to handle, use your thumbnail to split the outer, pale green skin from the bean and pop the inner, bright green beans into a bowl. Set the peeled beans aside.
  3. When the potatoes in the soup are tender, use a potato masher to roughly mash the potatoes in the soup until soup is thick with just a few chunks of potato. Add the peeled fava beans and cook for 2 more minutes, then remove from the heat. Stir in the milk or cream, the crumbled cheese, and season to taste with salt and pepper. Cheese will not fully melt into the soup but should remain slightly chewy. Serve with the sliced avocado.
Full English Breakfast Sandwich with CBC English Muffins

May 18, 2015 Breakfast

Full English Breakfast Sandwich with CBC English Muffins

Full English Breakfast Sandwich with Cobblestone English Muffins {Katie at the Kitchen Door} #sponsored

Full English Breakfast Sandwich with Cobblestone English Muffins {Katie at the Kitchen Door} #sponsored

I think we all have breakfast phases. Personally, I tend to go through a cycle – yogurt and berries; peanut butter and banana oatmeal; kale and mango smoothie; egg, ham and cheese breakfast sandwich; bran muffin and a latte. Repeat. Which phase I’m in (and for how long) is a little bit weather dependent (green smoothies for the summer, oatmeal for the fall) and a little bit schedule dependent (bran muffin and a latte from the cafe downstairs tends to come up a lot when I’m totally slammed at work and need to be in the office early) Because breakfast is part of a morning routine that, for many of us, is executed on auto-pilot, it’s easy to fall into a breakfast rut. But breakfast has such wonderful possibilities as a meal, that I think it’s worth thinking outside the box a little to avoid breakfast boredom.

Full English Breakfast Sandwich with Cobblestone English Muffins {Katie at the Kitchen Door} #sponsored

Full English Breakfast Sandwich with Cobblestone English Muffins {Katie at the Kitchen Door} #sponsored

Cobblestone Bread Co. recently asked us to try out their newest line of English muffins and bagels, which I took as a welcome invitation to come up with a few new ideas for our breakfast routine. English muffins aren’t on my normal grocery list, but perhaps they should be. They’re incredibly convenient, and are a bit of a blank canvas as far as preparing interesting breakfasts goes. The first CBC muffin I sampled I prepared simply, reminding myself of the pleasure of a good, soft, English muffin, faintly toasted with a pat of salted butter and some homemade strawberry jam.

Full English Breakfast Sandwich with Cobblestone English Muffins {Katie at the Kitchen Door} #sponsored

Full English Breakfast Sandwich with Cobblestone English Muffins {Katie at the Kitchen Door} #sponsored

As Trevor and I continued sampling buttered CBC English muffins (for “research purposes,” of course), we chatted about what recipe we might be able to contribute to the already rich collection of breakfast sandwich recipes out there. We wanted something new and a little different to shake up our breakfast routine, but that was still quick to make and filling on a busy weekday morning. I was toying with the idea of a Mexican-inspired breakfast sandwich, when Trevor pointed out that it is, after all, an English muffin… why not make an English sandwich? The most typical (or at least the most famed) English breakfast is a “full English breakfast” or a “fry up” – a plate consisting of eggs, bacon, sausage, black pudding, fried tomato, fried mushrooms, and baked beans. To convert this classic meal into a sandwich easy enough for a weekday, portable enough to take on the go, and that was less likely to give you a heart attack if eaten more than once a week, we opted for just one form of meat, and to keep the tomato raw for just a little freshness. Our sandwich, which was a huge success in our eyes, is prepared with one toasted Cobblestone Bread Co. English muffin, a handful of sautéed mushrooms, a fried egg, a few slices of fried black pudding, a slice of Cheddar cheese, and a juicy slice of fresh tomato to top it off. Not exactly light, but certainly filling for a busy day, and definitely not boring.

Full English Breakfast Sandwich with Cobblestone English Muffins {Katie at the Kitchen Door} #sponsored

Full English Breakfast Sandwich with Cobblestone English Muffins {Katie at the Kitchen Door} #sponsored

A quick note about blood sausage: it might sound a little off-putting (which is perhaps why they call it black pudding), but it’s really mild and delicious – and it totally makes this sandwich. Soft and slightly crumbly, with a hint of allspice flavor faintly reminiscent of Christmas festivities, it’s far less salty than other breakfast sausages, and much more tender. I’m lucky enough to have a good butcher around the corner from my house, but if you can’t find it near you, feel free to replace it with a smaller amount of another sausage or a slice of bacon.

Check out more ways to make breakfast exciting again here!

Like what you just read? Subscribe to Katie at the Kitchen Door in the box on the right, on Feedly or Bloglovin‘, or follow along on Facebook, Twitter, Pinterest, Instagram, or Google+. Thanks for reading!

Compensation for this post was provided by Cobblestone Bread Co. via AOL Media.  The opinions expressed herein are those of the author and are not indicative of the opinions or positions of Cobblestone Bread Co. or AOL.

Full English Breakfast Sandwich with Cobblestone English Muffins {Katie at the Kitchen Door} #sponsored

Full English Breakfast Sandwich

Makes 1 sandwich.

  • 2 TBS salted butter
  • 1 Cobblestone Bread Co. English muffin, sliced in half lengthwise
  • 4 button mushrooms, thickly sliced
  • sea salt and pepper
  • 2 inch piece of black pudding, sliced into 4 pieces, skin removed
  • 1 large egg
  • 1 slice of cheddar cheese
  • 1 slice of fresh tomato
  1. Melt 1 TBS of the butter in a small frying pan over medium heat. Place the CBC English muffin halves sliced side down in the melted butter and toast until golden brown, about 2 minutes. Remove from the heat and set aside.
  2. Add the sliced mushrooms to the pan and saute until golden brown all over, about 5 minutes. Season generously with salt and pepper and place the cooked mushrooms on top of the bottom half of the English muffin.
  3. Add the sliced black pudding to the pan and cook until dark black all the way through, about 2 minutes on each side. Place the slices on top of the mushrooms.
  4. Melt the remaining 1 TBS of butter in the pan and crack the egg into it. Fry the egg to your liking, season with salt and pepper, and then place on top of the black pudding. Top with the cheddar cheese, the tomato slice, and the top of the English muffin. Compress slightly and eat immediately.

La Crema Pork and Pinot #1 // Prosciutto, Mozzarella, and Sage Pesto Stuffed Pork Tenderloin

May 16, 2015 Italian

La Crema Pork and Pinot #1 // Prosciutto, Mozzarella, and Sage Pesto Stuffed Pork Tenderloin

Mozzarella, Prosciutto, and Sage Pesto Stuffed Pork Tenderloin {Katie at the Kitchen Door}

Mozzarella, Prosciutto, and Sage Pesto Stuffed Pork Tenderloin {Katie at the Kitchen Door}

I’m back in Latin America this week, and headed out now to enjoy a day of wine tasting in Chile (work travel isn’t so bad…). But before I go, I wanted to share some other wine-related news: this summer, I’ll be developing four recipes for La Crema Wines featuring pairings of pork and Pinot Noir. Since I’ve been traveling so much and am always discovering new flavors and cooking styles, the series is going to have a global theme. The first stop on our Pork and Pinot tour – Italy.

Mozzarella, Prosciutto, and Sage Pesto Stuffed Pork Tenderloin {Katie at the Kitchen Door}

Mozzarella, Prosciutto, and Sage Pesto Stuffed Pork Tenderloin {Katie at the Kitchen Door}

This stuffed and rolled pork tenderloin may not be strictly traditional, but it takes all of its inspiration from Italian cuisine. The tenderloin is butterflied and filled with layers of sage and rosemary pesto, fresh mozzarella cheese and prosciutto, then rolled up and roasted to juicy perfection. Slicing into the finished tenderloin reveals a beautiful pink, white, and green spiral, and the herbal, salty flavors of the filling permeate each bite of pork. It’s an entrée that looks and tastes “fancy,” but really requires very little effort – the perfect dish for impressing dinner guests. Serve it alongside a bottle of La Crema Sonoma Coast Pinot Noir, and perhaps a platter of simply roasted vegetables, and your next dinner party menu is taken care of.

Stay tuned for more Pork and Pinot! Next up, Vietnam …

Find the recipe for the Prosciutto, Mozzarella, and Sage Pesto Stuffed Pork Tenderloin over on the La Crema blog!

Disclaimer: This post is sponsored by La Crema. All opinions are honest and my own.

Like what you just read? Subscribe to Katie at the Kitchen Door on Feedly or Bloglovin‘, or follow along on Facebook, Twitter, Pinterest, Instagram, or Google+. Thanks for reading!

Peanut Butter Croquembouche

May 14, 2015 Dessert

Peanut Butter Croquembouche

Peanut Butter Croquembouche {Katie at the Kitchen Door}

Peanut Butter Croquembouche {Katie at the Kitchen Door}

Tuesday was Trevor’s 26th birthday. To celebrate, we made a croquembouche, partly because croquembouche is fun to say, partly because it’s elaborate and over-the-top and oh-so-French, all things that Trevor likes, and partly because peanut-butter pastry cream stuffed cream puffs stacked in a tower and stuck together with caramel sauce is a really delicious prospect. It really wasn’t so hard – pate a choux is easy to make (and it’s extremely satisfying to watch the dough puff up in the oven) and pastry cream is simple as long as you are attentive and patient while tempering your eggs. The assembly is a bit tedious, but I’d recommend getting a birthday boyfriend with extreme attention to detail (and no regard for his fingertips / high willingness to touch hot caramel) to do that for you.

Peanut Butter Croquembouche {Katie at the Kitchen Door}

Peanut Butter Croquembouche {Katie at the Kitchen Door}

Trevor, I am so happy that we have spent our last 7 birthdays together. I can’t think of anyone else that I’d rather celebrate. I love you and I think this year will bring even more great things for us – our first house (!!), more travels, and who knows what other goodness. I’m keeping this short and sweet since, as per usual, I have to get on another plane, but really. I love you. Happy Birthday. Rock on.

Like what you just read? Subscribe to Katie at the Kitchen Door in the box on the right, on Feedly or Bloglovin‘, or follow along on Facebook, Twitter, Pinterest, Instagram, or Google+. Thanks for reading!

Peanut Butter Croquembouche {Katie at the Kitchen Door}

Peanut Butter Croquembouche

Pastry cream recipe from How Sweet Eats. Cream puff recipe from Food Network.

For the pastry cream:

  • 1/2 c. granulated sugar
  • 1/4 c. cake flour
  • 1/2 tsp salt
  • 4 large egg yolks
  • 1 1/2 c. whole milk
  • 1/4 c. smooth peanut butter
  • 1 tsp vanilla extract
  • 1 c. heavy cream
  1. In a medium bowl, whisk together the sugar, flour, and salt until evenly combined. In a separate bowl, whisk together the eggs. Add the sugar mixture to the eggs a bit a time, whisking until smooth between additions. When you have finished adding the sugar mixture, the eggs should be pale yellow and smooth.
  2. Heat the milk over medium heat in a medium saucepan, just until small bubbles begin to appear at the edges of the pan. Do not bring the milk to a boil. Remove the milk from the heat and very slowly drizzle the milk into the eggs, whisking the eggs vigorously as you do so. Pour the tempered custard back into the saucepan and return to medium-low heat. Cook the custard until thickened, about 3-5 minutes, whisking vigorously the whole time. Remove the custard from the heat. Immediately stir in the peanut butter until it is melted, then whisk in the vanilla. Transfer to a bowl, cover with plastic wrap so that the plastic wrap touches the surface of the pastry cream, and refrigerate until fully chilled, at least 2 hours.
  3. Just before filling the cream puffs, whip the heavy cream into soft peaks. Fold the whipped cream into the pastry cream until it is evenly mixed.

For the cream puffs:

  • 1 stick salted butter
  • 1 c. water
  • ½ tsp salt
  • 1 1/2 tsp sugar
  • 1 c. flour
  • 4 eggs
  1. Preheat the oven to 425°F. Place the butter, water, salt, and sugar in a medium saucepan. Bring to a boil over medium heat. As soon as it boils, remove from the heat and add the flour all at once, stirring vigorously to incorporate. Stir until the flour is fully incorporated, then return the pot to the heat and cook for 60-90 seconds, beating hard the whole time, until the water has evaporated from the dough to the point that the dough leaves a thin film on the bottom of the pot. Remove from the heat and transfer the dough to a bowl.
  2. Beat the egg yolks into the dough one at a time, thoroughly mixing between additions. When you have added the last egg yolk, the dough should be smooth and shiny, and drip slowly from the spoon when lifted out of the bowl. Line two baking sheets with parchment paper. Use a tablespoon to scoop rounds of dough onto the parchment paper, leaving at least 2 inches between them. Use your finger to flatten any points as they will burn. Alternatively, you can spoon the dough into a pastry bag fitted with a large tip and pipe rounds onto the baking trays, but I found this more difficult than simply scooping them.
  3. Bake the cream puffs for 15 minutes at 425°F, then reduce the heat to 375°F and bake for another 20 minutes, until puffed up and lightly browned all over. Remove from the oven and let cool on a cooling rack.

To assemble:

  1. Spoon the pastry cream into a pastry bag fitted with a medium, straight tip. Fill the cream puffs by inserting the tip of the pastry bag into the bottom of each cream puff (use a knife to cut a small hole if necessary) and filling until the cream puff is heavy and you can’t add any more cream without it coming back out. Set the filled cream puffs aside.
  2. Prepare a caramel sauce for assembling the croquembouche: pour a thin, even layer of sugar (you will use between ¾ and 1 ½ cups, depending on the size of your pan) into a non-stick frying pan. Heat over medium-low heat (do not stir). When the sugar begins to melt and brown in places, use a spatula to carefully push the melted sugar into the unmelted sugar a bit at a time, until the whole pan is melted. Bring to a medium brown color, then immediately remove from the heat.
  3. Have a bowl of ice water at the ready in case of burns from the hot caramel. Very carefully dip the bottom and sides of the filled cream puffs into the caramel (or use the spatula to dab it on) and immediately place the cream puffs on a cake stand or other serving vessels (the caramel will harden quickly so move fast). Place the first layer of cream puffs in a circle, using about 6 cream puffs to complete the circle. The second layer should have 5 cream puffs, then 4, etc., until you have used up all the cream puffs and completed the tower. If the caramel hardens while you are assembling, you can gently reheat it until it is molten again. Drizzle any extra caramel on top of the croquembouche. Serve within 4 hours of assembling.
That Pale Green Moment // Asparagus, Leek, and Goat Cheese Souffles

May 9, 2015 Breakfast

That Pale Green Moment // Asparagus, Leek, and Goat Cheese Souffles

Asparagus, Leek, and Goat Cheese Souffles {Katie at the Kitchen Door}

Asparagus, Leek, and Goat Cheese Souffles {Katie at the Kitchen Door}

When this time of year arrives – that first week when the trees have those few, glorious days of pale greenness, and all of the spring flowers that have been patiently waiting their turn through the cold spring bloom at the same time; when we shed our layers and revel in the feeling of fresh air on our bare legs and everyone lights their grills for their first time in months so that whole neighborhoods smell of smoky charcoal – I feel as though something that I’ve been waiting for, without even realizing how desperately I was waiting, has finally arrived. It feels as though things should change, routines should fly out the window, evenings should be reserved exclusively for long conversations on the porch with old friends and cold beers, and the biggest decision to be made during the day should be whether to spend it at the beach, hiking somewhere densely green, or simply sipping lemonade in the backyard. Of course, for most of us, routines don’t change just because it’s almost summer, as much as years and years of summer vacations may have conditioned us to feel like they should. But we can certainly try to do a little more to embrace the season, and let some of our responsibilities slide, just for a while.

Asparagus, Leek, and Goat Cheese Souffles {Katie at the Kitchen Door}

Asparagus, Leek, and Goat Cheese Souffles {Katie at the Kitchen Door}

I took yesterday off, partly to get my life organized between trips, and partly just to savor the day. I woke up early to long morning shadows, a cool breeze on my face, cool clean sheets, and the first chirps of birds. Waking up early is such a pleasure when it’s a choice and not a necessity. I spent the day doing a mix of chores and treating myself to small breaks, like a trip to the bookstore to pick up a stack of new paperbacks for the summer and an invigorating workout. I walked everywhere. Something about the day kickstarted my creativity again. By the end of the day I’d jotted 5 or 6 new recipe ideas in my notebook, something I haven’t done in months. It’s a good reminder of how important it is to rest – and that even days with chores and errands can be restful if you approach them with the right mindset. After a winter spent in a melancholy fog and a hectic spring, I need more days like this. Days that open me up to hope and possibility and peace again. Almost summer days.

Asparagus, Leek, and Goat Cheese Souffles {Katie at the Kitchen Door}

Asparagus, Leek, and Goat Cheese Souffles {Katie at the Kitchen Door}

I wanted to make something to celebrate this time – something light and effervescent, that would capture this fleeting, pale green moment. Perhaps it’s a bit literal, but asparagus souffles – pale green, quickly deflating – are what came to mind. With blanched asparagus, butter-sauteed leeks, and fresh tangy goat cheese pureed into the batter, these souffles are light, savory, and just slightly vegetal. They would be the perfect addition to a brunch or as a light lunch all on their own. Souffles can be intimidating but really, does it matter if they fall? They will still be just as airy and delicious. I promise you no one will complain.

Like what you just read? Subscribe to Katie at the Kitchen Door in the box on the right, on Feedly or Bloglovin‘, or follow along on Facebook, Twitter, Pinterest, Instagram, or Google+. Thanks for reading!

Asparagus, Leek, and Goat Cheese Souffles {Katie at the Kitchen Door}

Asparagus, Leek, and Goat Cheese Souffles

Makes 8-10 souffles. Adapted from Simply Recipes and All Recipes. 

  • 1/2 lb. asparagus, tough ends trimmed, cut into 2 inch pieces
  • 1 small leek, washed and sliced into half-moons
  • 4 TBS butter, divided, plus more for buttering the ramekins
  • 3 TBS cake flour (AP flour is a fine substitute)
  • 1 1/4 c. whole milk
  • sea salt and freshly ground black pepper
  • 1/4 tsp nutmeg
  • 4 egg yolks
  • 4 oz. soft goat cheese, crumbled
  • 6 egg whites
  1. Preheat the oven to 375°F. Generously butter eight 6-0z. ramekins and set aside on a baking tray.
  2. Bring a small pot of salted water to a boil. Add the asparagus pieces and cook for 2-3 minutes, until bright green and just tender. Drain immediately and rinse with cold water two to three times, until asparagus is room temperature. Drain thoroughly and place in a blender.
  3. Return the small pot to the stove, over medium-low heat. Melt 1 TBS of the butter in the pot and add the leeks. Saute leeks until soft, about 3-5 minutes. Add to the blender with the asparagus.
  4. In a large pot, melt the remaining 3 TBS of butter over medium heat. Add the cake flour and stir into the butter, cooking until golden brown and nutty smelling, about 1-2 minutes. Slowly pour in the milk, whisking to make a smooth batter between additions. Once all the milk is added and the batter is smooth, season with salt, pepper, and nutmeg. Cook for 2-3 minutes longer over medium-low heat, then remove from the heat. Pour into the blender with the asparagus. Blend the mixture on high until smooth, then add the egg yolks and blend again. Pour the batter back into the pot (no longer over the heat), and stir the goat cheese into the warm batter until melted. Set batter aside.
  5. In a large bowl, beat the egg whites until soft peaks form. Fold 1/2 of the egg whites into the batter until incorporated. Very lightly fold the second 1/2 of the egg whites into the batter. Spoon the batter into the prepared ramekins, filling 3/4 of the way to the top. Bake the souffles for 15-20 minutes, until puffed and lightly browned on top. Remove from the oven and serve immediately.

Book Club: A Bird in the Hand // Rye Chicken Schnitzel

May 6, 2015 Cookbook

Book Club: A Bird in the Hand // Rye Chicken Schnitzel

A Bird in the Hand

The Book: Although I know that for a lot of Americans, chicken is the mainstay of the family dinner table, I actually don’t cook it very often. My parents might find this ironic, as the only form of protein I consumed up to age 14 was basically chicken fingers. (And I suppose the occasional hot dog.) Perhaps the reason it doesn’t make it into my cart all that often is childhood overexposure, but more likely, it’s because I find chicken a little ho-hum. Diana Henry’s new book, A Bird in the Hand, is written for precisely that reason – to remind you of all the exciting, flavorful ways you can use that package of chicken sitting in the fridge. You know, that one you picked up because it was on sale and it seemed like a practical thing to buy.

Rye Chicken Schnitzel with Mustard Sauce {Katie at the Kitchen Door}

I’m a huge fan of Diana Henry’s work. A Change of Appetite, one of her more recent books, is the book I’m cooking from the most these days, and Roast Figs Sugar Snow was one of the first cookbooks I purchased for myself. So despite my lack of enthusiasm for chicken in general, I was excited to see what magic Diana could work with the ubiquitous bird – I was not disappointed. She brings a great deal of variety – in flavor and technique – to the humble chicken. Recipes are divided into sections based loosely on how much effort they will need from you, ranging from simple suppers prepared in 15 minutes after a long day at work, to feast dishes meant to be the crowning glory of a celebratory table. There’s lots of international spin here, with inspiration coming from every corner of the globe. It’s evident just by looking at the “recipe shortlist” I’ve included below… almost every recipe on there has a distinct and easily identifiable global origin. Every part of the bird, too, is represented, although I will say that boneless, skinless thighs seem to be the favorite. And of course, the book is graced by the bright, inviting food photography and clean design I’ve come to expect from all of Diana’s books. Of all the books I’ve reviewed recently, this one is probably the safest bet for your average cook – the one that loves to eat and doesn’t mind dedicating a short amount of time to a great home-cooked dinner, but who doesn’t go in for complicated techniques or impossible to find ingredients.

Rye Chicken Schnitzel with Mustard Sauce {Katie at the Kitchen Door}

The Food: I had a short but concentrated Eastern European food kick last weekend. Friday night I dragged Trevor out for beer and brats and pretzels dipped in super-spicy mustard at Bronwyn. Then, flipping through this book trying to decide what to make for lunch on Saturday, I went straight for the rye chicken schnitzel. The chicken recipe itself was fairly standard – pound the chicken thin; dip in flour, egg, and rye breadcrumbs; shallow fry and serve immediately – but turned out beautifully. The slightly decadent mustard cream sauce served with it was the perfect mix of rich and tangy. And Diana’s recommendations for side dishes of tiny boiled new potatoes and braised cabbage were essential elements for the final plate. With a frosty glass of Belgian beer it made for a very satisfying Saturday lunch… and an even more satisfying post-bar-hopping midnight snack that evening.

Recipe Shortlist:  Cumin and Turmeric Roast Chicken with Smashed Avocado and Corn Cakes; Thai Chicken Burgers with Asian Slaw; Puerto Rican Chicken and Rice; Chicken Forestiere; Jamaican Chicken Curry with Sweet Love Apples and Rum; Indonesian Roast Spiced Chicken with Mango and Tomato Salad; West African Chicken and Peanut Stew; Chicken Legs in Pinot Noir with Sour Cherries and Parsnip Puree; Chicken, Aspragus, Fava Bean, and Radish Salad with Dill and Mint Dressing; Chicken, Leek, and Hard Cider Pie with Sharp Cheddar and Hazelnut Crisp

Like what you just read? Subscribe to Katie at the Kitchen Door in the box on the right, on Feedly or Bloglovin‘, or follow along on Facebook, Twitter, Pinterest, Instagram, or Google+. Thanks for reading!

Disclaimer: I received a review copy of A Bird in the Hand from Mitchell Beazley, but I was not otherwise compensated and all thought and opinions are my own.

Rye Chicken Schnitzel with Mustard Sauce {Katie at the Kitchen Door}

Rye Chicken Schnitzel with Mustard Sauce

Recipe from A Bird in the Hand. Serves 4.

  • 8 skinless, boneless chicken thights
  • flour
  • sea salt and pepper
  • 3 eggs, lightly beaten
  • 1 3/4 c. rye bread crumbs
  • 2 TBS peanut or canola oil
  • 1/2 lemon
  • 1 TBS butter
  • 4 shallots, peeled and minced
  • 3 1/2 TBS white wine vinegar
  • 2/3 c. dry white wine
  • 3/4 c. heavy cream
  • 2 TBS Dijon mustard
  1. Put the chicken thighs between 2 sheets of parchment paper or saran wrap and use a rolling pin or meat mallet to pound them until they have an even thickness of about 1/2 inch. Place some flour in a large shallow bowl and season liberally with salt and pepper. Place the beaten eggs in a second bowl, and the bread crumbs in a third bowl. Dredge the chicken first in the flour, then in the egg, then into the rye crumbs. Set them on a nonstick cookie sheet as they are ready.
  2. Heat the peanut or canola oil in a large frying pan over medium heat. Let the oil heat up for at least 1 minute before adding the chicken. Add the chicken to the pan and cook for 4 minutes on each side, until the coating is golden brown and the chicken is fully cooked through (juices run clear when sliced in the center). Immediately upon removing from the heat, season with salt and pepper and a squeeze of lemon.
  3. While you are frying the chicken, make the mustard sauce. In a medium pan, melt the butter over medium heat. Add the shallots and saute until soft, about 2-3 minutes. Add the vinegar, turn up the heat, and reduce the liquid to about 1 TBS. Add the white wine and simmer to reduce by half, then add the cream, mustard, and salt and pepper and heat through. Remove from the heat.
  4. Serve the chicken immediately with the sauce on the side. Good accompaniments are braised red cabbage, pickles, and boiled new potatoes.
Mother’s Day Picnic // Mushroom Savory Squares, Lemon Curd Trifles, and Chardonnay

May 1, 2015 Dessert

Mother’s Day Picnic // Mushroom Savory Squares, Lemon Curd Trifles, and Chardonnay

Mother's Day Picnic {Katie at the Kitchen Door}

Mini Lemon Curd Trifles - Mother's Day Picnic {Katie at the Kitchen Door}

It’s a bit impossible for me to believe that it’s already May. I was having this debate with my manager yesterday – whether time moves more slowly or more quickly when you’re incredibly busy. I say quickly. With all the planes and coming and going, I feel as if I’m in a constant state of transit, never quite settled. It’s not my favorite feeling, but I’ll admit that being a frequent traveler has a certain glamour to it. Anyway, between airports and planes and a never-ending Boston winter and buying a house, the last 5 months seems to have slipped right by, and now it’s the first of May. It was unreasonably chilly outside today, but I still woke up this morning excited about spring and summer and hopefully carving out some time to really enjoy this season. May is really a lovely, happy month. It has Trevor’s birthday, cinco de mayo, the season’s first BBQs, Memorial Day Weekend… and Mother’s Day.

Mushroom and Goat Cheese Savory Squares - Mother's Day Picnic {Katie at the Kitchen Door}


Mother's Day Picnic {Katie at the Kitchen Door}

My first picnic of the year was in honor of my mom, although she wasn’t actually there, which I’m sure she will mention to me as soon as she sees this post. (Don’t worry, mom, I will give you your own picnic when it is actually Mother’s Day — this picnic was just in preparation so that the real one can be as good as possible. And so that other people could read this and plan picnics for their moms. Also, I will bring you a trifle on Sunday.) Mothers are wonderful, special people who pour a whole lot of energy and love and heart into ensuring that we, their children, are safe and well-fed and happy and that ultimately we turn out alright. They are worth celebrating, probably a lot more frequently than once a year, but let’s start there. Brunch is perhaps the most typical way to celebrate Mother’s Day, but I think that a picnic is an equally lovely way to treat mom to something special. If the weather cooperates, it’s a great way to linger over a meal, enjoying the outdoors, each other’s company, and some light and spring-like dishes.

Mother's Day Picnic {Katie at the Kitchen Door}

Mushroom and Goat Cheese Savory Squares - Mother's Day Picnic {Katie at the Kitchen Door}

The savory part of this picnic is Mushroom and Goat Cheese Savory Squares, which is just a fancy name for “puff pastry tarts.” These are super simple to prepare: the mushrooms are sliced and sautéed with butter, garlic, Chardonnay, and thyme, then baked along with goat cheese on store-bought puff pastry. Despite being easy to make, they look and taste super elegant, thanks to the wonderful amount of butter in puff pastry. For dessert, there are Mini Lemon Curd Trifles. Trifle, because it reminds me of my mother; mini, because packing things in mason jars is trendy and perfect for picnics; and lemon curd, because I love it and it screams springtime. The trifle layers are lemon shortbread, lemon curd, whipped cream, and fresh raspberries. I could have eaten about 6 of these little trifle mason jars on my own, they were so good. And of course, the wine! A bottle of Cambria’s Bench Break 2012 Chardonnay is the perfect thing to bring along, because it’s a lovely match for the mushrooms, goat cheese, lemons, and buttery pastry and shortbread.

Find the recipes for the Mushroom and Goat Cheese Savory Squares and the Mini Lemon Curd Trifles over on the Cambria Wines blog!

Disclaimer: This post is sponsored by Cambria Wines. All opinions are honest and my own.

Like what you just read? Subscribe to Katie at the Kitchen Door on Feedly or Bloglovin‘, or follow along on Facebook, Twitter, Pinterest, Instagram, or Google+. Thanks for reading!

Another Year, Another Birthday // Key Lime and Meyer Lemon Swirl Pie

April 22, 2015 Dessert

Another Year, Another Birthday // Key Lime and Meyer Lemon Swirl Pie

Key Lime and Meyer Lemon Swirl Pie {Katie at the Kitchen Door}

I have been craving a really good slice of key lime pie since January. It’s clearly not a particularly intense craving, or I would have found a way to get some pie long ago, but it’s there, in the background, every time I think about dessert (which is relatively often). The craving started when we unexpectedly got stuck in Miami during the first blizzard of this epic winter. I had a really incredible slice of key lime pie at a whole in the wall BBQ place during a work trip to Miami about a year ago, and now when I think of Miami, I think of that pie. A two day layover in Miami should have meant that getting some good pie was pretty easy, but it just didn’t happen (I did have a great Medianoche, though, so there’s that).

Key Lime and Meyer Lemon Swirl Pie {Katie at the Kitchen Door}

Key Lime and Meyer Lemon Swirl Pie {Katie at the Kitchen Door}

So, what better time to make something just for yourself than your birthday? I originally meant to make this the day before my birthday, as I was taking the day off to pamper myself, but I ended up spending most of the day out with my mom, and after a late lunch, making pie didn’t feel like the right choice. Saturday, after spending the morning at our house inspection (if that doesn’t make you feel old, I’m not sure what will), Trevor threw me a great birthday party – he did a really delicious BBQ pulled pork in the smoker, accompanied by mac’n’cheese, grilled sweet potatoes, and a towering homemade angel food cake with blueberry jam. Greatest boyfriend in the world, end of story. Sunday, somewhere between recovering from the night before (primarily by eating leftover mac’n’cheese for every meal) and beginning to worry about my trip to Colombia the next day, I decided that it was time for my birthday pie. So I whipped it up, and it was everything I wanted it to be. In the end, it’s probably good that I only had the chance to eat two slices before leaving.

Key Lime and Meyer Lemon Swirl Pie {Katie at the Kitchen Door}

Key lime pie is incredibly simple to make. The only thing it requires is the patience to squeeze 2 dozen tiny key limes by hand (or access to good quality fresh key lime juice). After that, all you do is mix up sweetened condensed milk with a few egg yolks (conveniently left over from the 24 egg whites required for the angel food cake your boyfriend makes for your birthday), stir in the lime juice, pour into a basic graham cracker crust, and bake. The condensed milk does most of the work of making key lime pie, well, key lime pie. I made a slight twist to the recipe by reserving some of the filling and mixing it with Meyer lemon juice, then using a few drops of food coloring to color the lime mixture green and the lemon part yellow, then swirling the two together. The result is mostly aesthetic, but if you don’t mind the extra step, I think it gives the pie a fun ’50s look.

Like what you just read? Subscribe to Katie at the Kitchen Door in the box on the right, on Feedly or Bloglovin‘, or follow along on Facebook, Twitter, Pinterest, Instagram, or Google+. Thanks for reading!

Key Lime and Meyer Lemon Swirl Pie {Katie at the Kitchen Door}

Key Lime and Meyer Lemon Swirl Pie

Key lime pie recipe adapted from Epicurious. Serves 8-10.

  • 9 graham crackers
  • 1/4 c. sugar
  • 5 TBS butter, melted
  • 1/4 tsp sea salt
  • 1 (14 oz) can of sweetened condensed milk
  • 5 egg yolks
  • 9 TBS key lime juice, freshly squeezed (from about 20 key limes)
  • 3 TBS Meyer lemon juice (from 1 lemon)
  • yellow and green food coloring
  • 1 c. heavy cream or whipping cream
  1. Preheat the oven to 350°F, Place the graham crackers in a food processor or blender and process until finely crushed. Mix the crumbs with the sugar, melted butter, and sea salt, then press into a 9-inch round pie pan. Press the crust firmly into the bottom and up the sides using your fingertips. Bake the crust for 10 minutes, then remove from the oven and set aside.
  2. In a large bowl, beat together the sweetened condensed milk and the egg yolks until fully combined. Scoop half a cup of the mixture into a separate bowl and set aside. Mix the lime juice with the batter in the first bowl (the larger amount) until evenly combined. Mix the lemon juice with the batter in the second bowl (the smaller amount) until evenly combined. Stir 2 drops of green food coloring into the lime batter and 4 drops of yellow food coloring into the lemon batter.
  3. Pour the lime batter into the pre-baked pie crust. Carefully spoon the lemon batter into concentric circles on top of the lime batter. Use a knife to cut swirling patterns into the batter by running the knife from the center of the pie to the edge and back in again. Bake the pie for 15 minutes, then remove from the oven and let cool completely. Chill for at least 2 hours.
  4. Before serving the pie, whip the cream into soft peaks. Decorate the pie with the whipped cream or spread a thick layer on top. Serve chilled.
Rhubarb Bourbon Sour

April 17, 2015 Drink

Rhubarb Bourbon Sour

Rhubarb Bourbon Sour {Katie at the Kitchen Door}

Rhubarb Bourbon Sour {Katie at the Kitchen Door}

This week has my head spinning. I don’t want to jinx it by writing about it but we may have found our first house. Saturday night I arrived home from Chile, Sunday we went out for a round of open house visits like we’ve done almost every weekend since the beginning of February, Monday we went back to one of the houses for a second visit, and Tuesday we made an offer… which was accepted! Now we’re gearing up for several weeks of legalities and formalities – the inspection, purchase agreement, appraisal, and so on. It’s all new to me and completely overwhelming. I’m stressed to the point of exhaustion but also really excited (although I’m trying to keep my excitement somewhat in check until it’s a sure thing). It doesn’t help that I fly back to Colombia for a week on Monday morning. There’s so much going on! But before then, I’m going to do my best to enjoy the long weekend and celebrate my 26th birthday (tomorrow!) in style, starting with this springy pink cocktail.

Rhubarb Bourbon Sour {Katie at the Kitchen Door}

This cocktail is inspired by our long weekend in New York this winter. The trip was Trevor’s Christmas present to me, and it was wonderful – we spent the first night in a beautiful old inn in Newport, where we had a superbly elegant French dinner and slept in a room that made me feel like a complete princess. The next morning we continued the drive into the city, arriving in time for the matinee of Les Miserables, which was incredible – I was in tears basically every time Val Jean opened his mouth. We spent the evening restaurant hopping, sampling big soft pretzels and candied pork belly at Pony Bar, incredible pizza at BSide Brick Oven Pizza, and a series of whiskeys at  On The Rocks. I’m not a huge whiskey drinker and actually had sort of a difficult time convincing the bartender there to make me a cocktail (“it’s a whiskey bar, not a cocktail bar”), but once I did, I very much enjoyed the Bourbon Sour he made me. Although I know a Whiskey Sour is about as classic as it gets, it was new to me and I felt a bit more grown-up then I usually do at bars, since there was no fruit, champagne, or sugar rim to be found in my cocktail for once. I’ve made my own spring version here, adding rhubarb and a dash of vanilla to the sour mix for color and a hint of sweetness. This drink is super easy to make and will liven up any spring gathering, so give it a go.

Like what you just read? Subscribe to Katie at the Kitchen Door in the box on the right, on Feedly or Bloglovin‘, or follow along on Facebook, Twitter, Pinterest, Instagram, or Google+. Thanks for reading!

Rhubarb Bourbon Sour {Katie at the Kitchen Door}

Print

Rhubarb Bourbon Sour

A refreshing spring cocktail made from fresh rhubarb syrup and bourbon, with a hint of vanilla.

  • Author: Katie at the Kitchen Door
  • Yield: 4-6

Ingredients

  • 1 1/2 c. chopped fresh rhubarb
  • 1 c. sugar
  • 3/4 c. freshly squeezed lemon juice
  • 1/2 c. water
  • 1/2 tsp vanilla extract
  • Bourbon
  • few drops bitters

Instructions

  1. Combine the rhubarb, sugar, lemon juice, and water in a medium saucepan. Bring to a simmer over low heat and simmer gently until the rhubarb is completely soft and the mixture is syrupy, about 8-10 minutes. Keep an eye on it to make sure it doesn’t boil over. Strain the liquid into a bowl or glass jar. Stir the vanilla extract into the rhubarb syrup. Keep the stewed rhubarb for another use.
  2. For each cocktail, add ice, 1 part rhubarb syrup, 1 part Bourbon, and a few drops of bitters to a cocktail shaker. Shake vigorously for 20-30 seconds, until foamy, then strain into a chilled glass. Garnish with extra rhubarb stalks if desired, and serve immediately.
  • « Previous Page
  • Page 1
  • …
  • Page 10
  • Page 11
  • Page 12
  • Page 13
  • Page 14
  • …
  • Page 57
  • Next Page »

Primary Sidebar

Subscribe!

Get creative recipes and menu ideas delivered straight to your inbox.

Most Popular

A House // Sweet Potato and Coconut Milk Soup with Brown Rice and Lentils

Monthly Fitness Goals: July // Homemade Spinach Wraps with Chopped Greek Salad

A New Job // Classic Seven-Layer Bars

Butternut Squash Carbonara with Fried Sage and Caramelized Onions

Happy Birthday, Trevor! // Peanut Butter Fudge

Cookbook Review and Giveaway: Home Made Winter

Drizly

Please note!

Full disclosure: if you purchase anything at Amazon using the above links or any other links to Amazon on this site, I will receive a small commission. Just so you know!

Copyright© 2018 · Cookd Pro Theme by Shay Bocks

This site uses cookies: Find out more.